Pumpkin Coasters- A Fun and Festive Fall Tutorial
Happy Fall!!!
Even though it’s still 90 degrees outside, it is officially fall and I’m excited because this is my favorite season of the year! I love everything about fall…the cooler(ish) weather, the fall colors, the décor, the smells and flavors of the season and all the feelings that go with it! Fall makes me so happy!
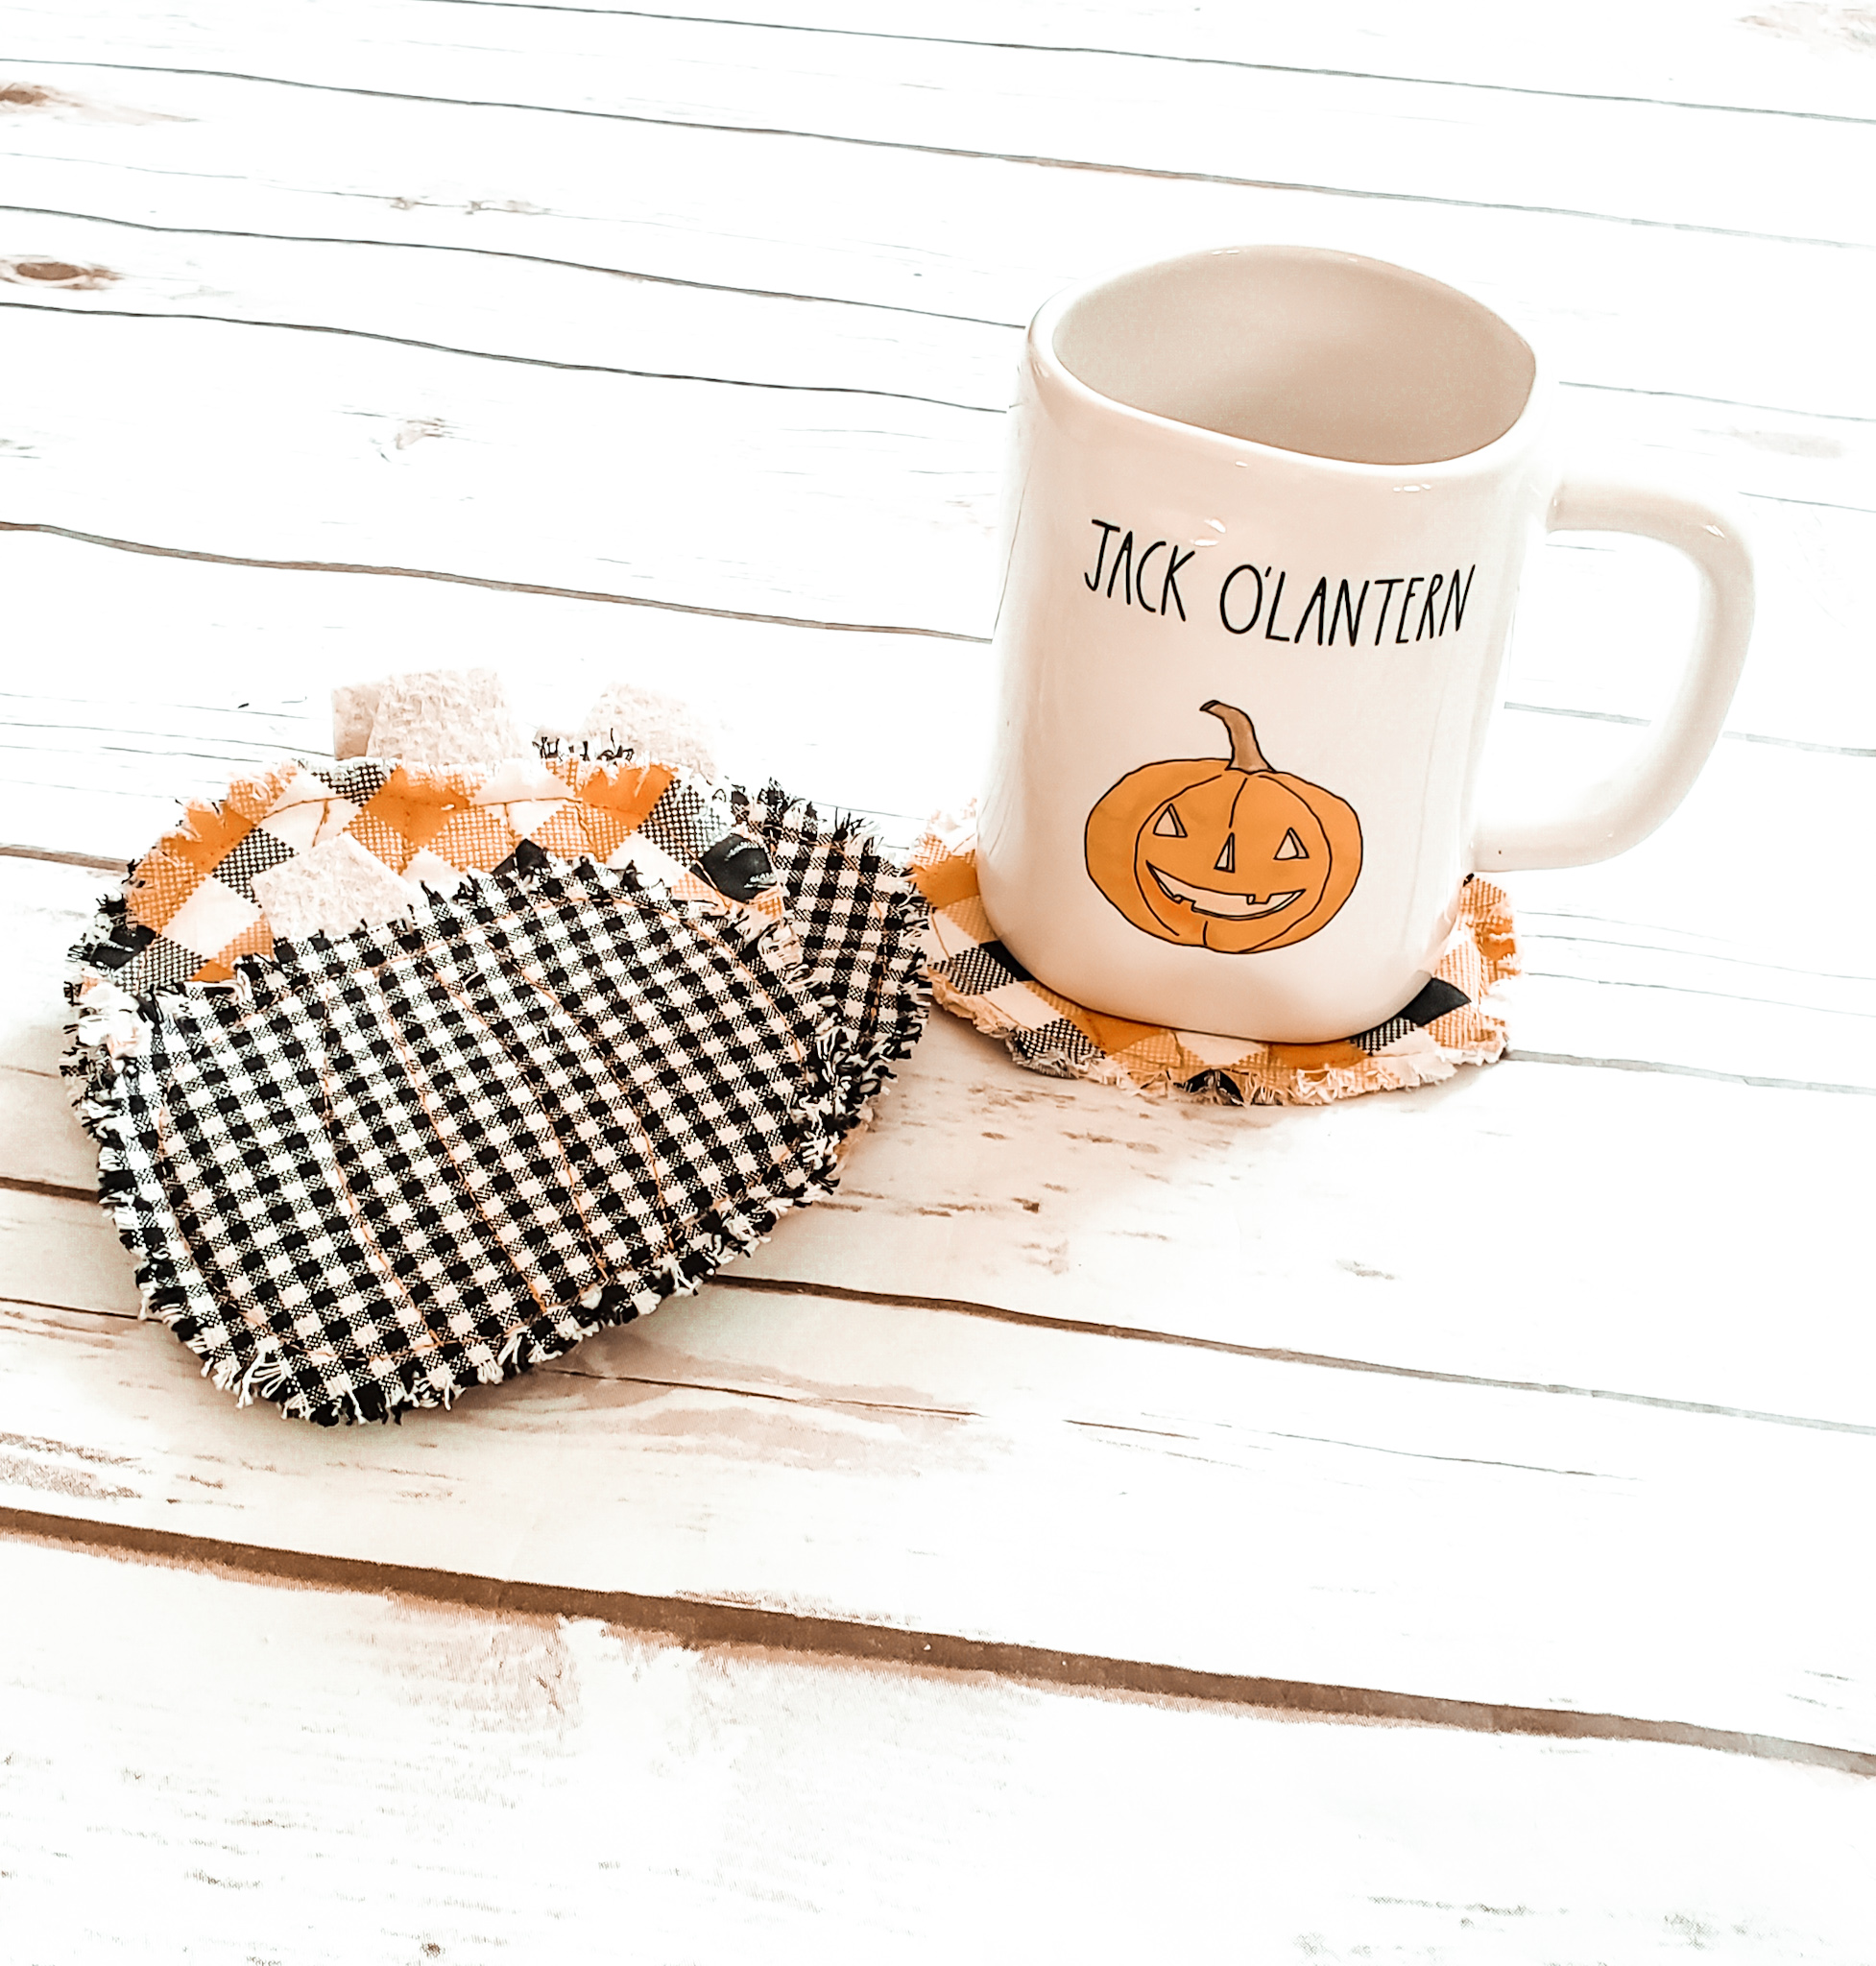
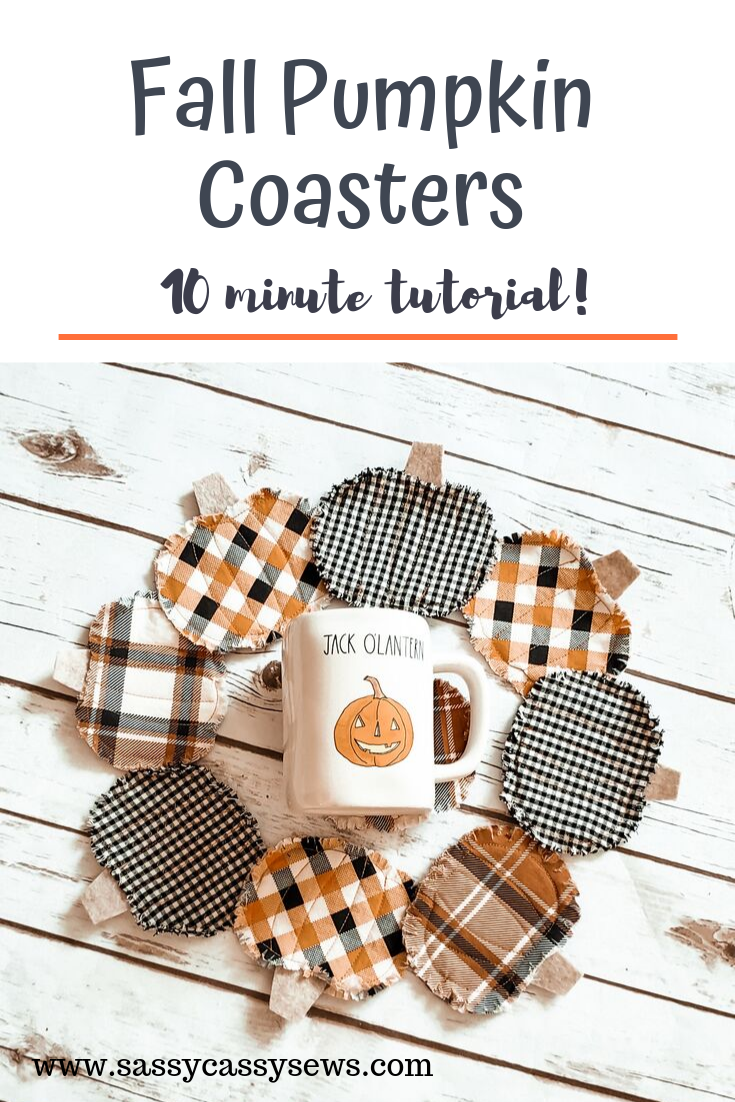
At the start of my sewing classes a couple of weeks ago, I was looking for a cute, easy idea of something my intermediate sewing class could make for the first day of class. While browsing Pinterest, I came across these adorable pumpkin coasters and I just knew we had to make them! They were the perfect project with fall right around the corner and it was something they could easily accomplish and take home that day. I only planned to make one as a sample for my class, but I fell in love with them and needed a set for myself. Are these not totally adorable??
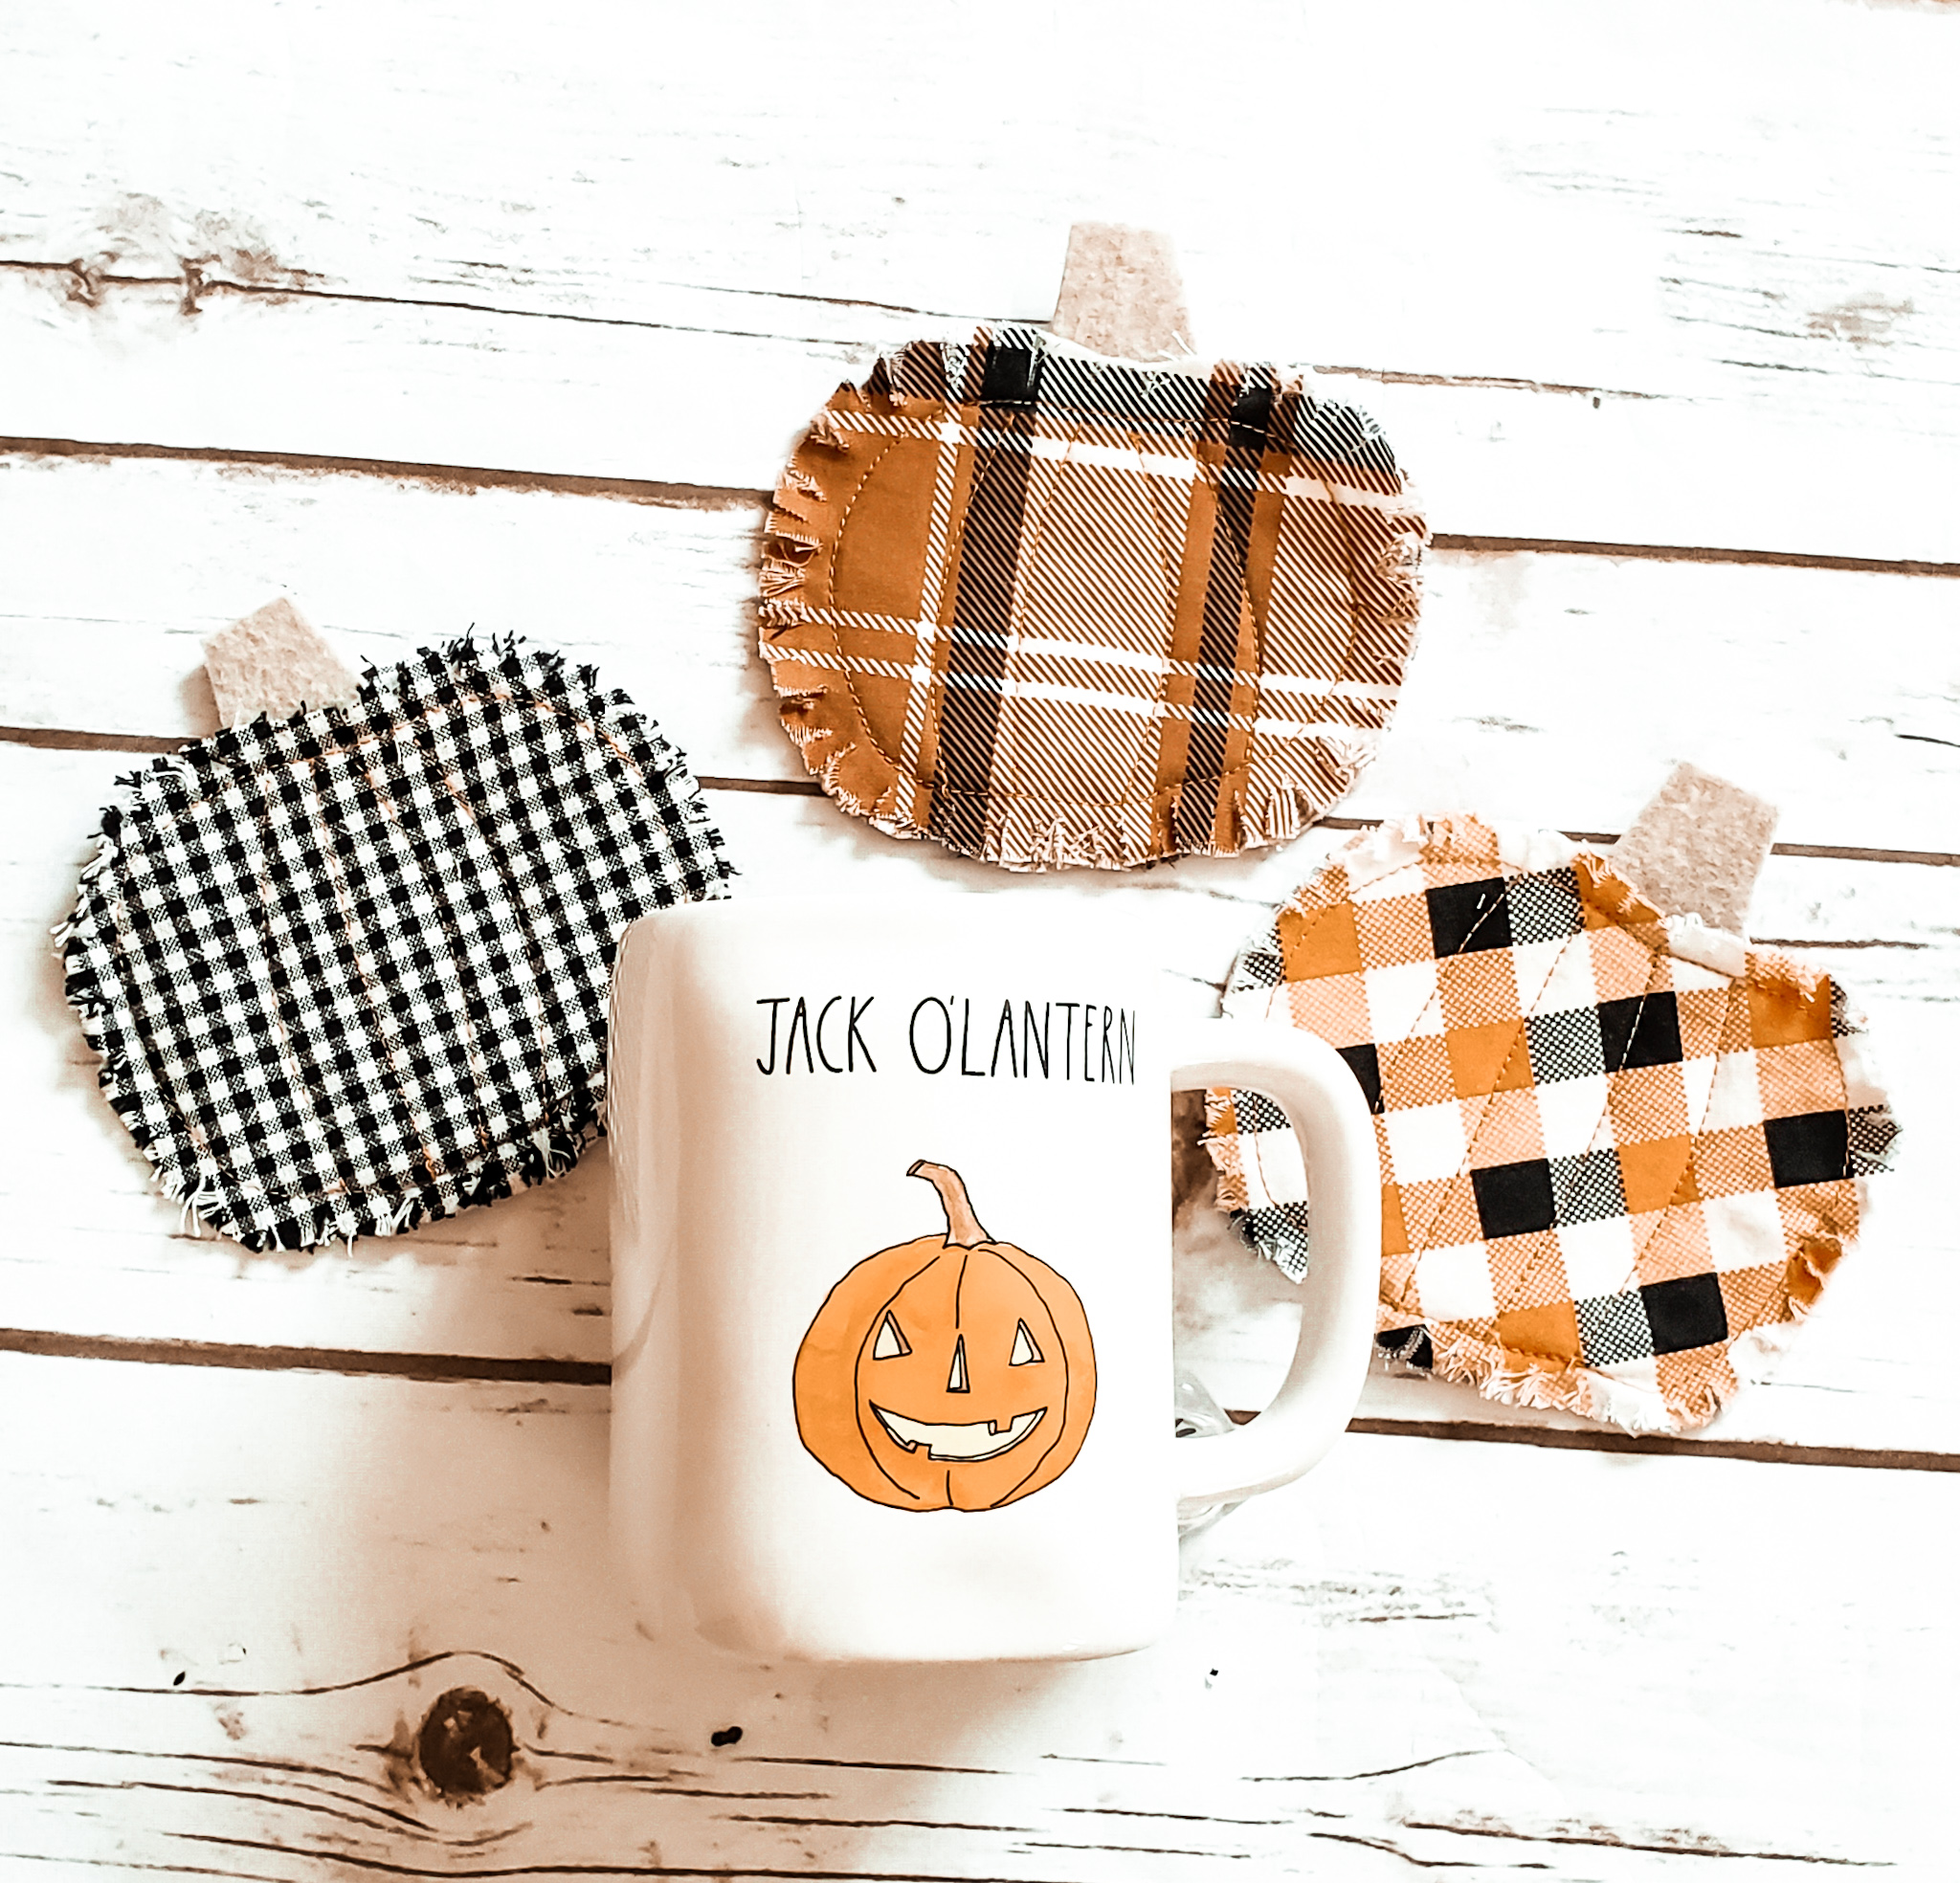
Of course I had throw my super cute Rae Dunn mug in the picture; I mean, how could I resist?
Needless to say, my students LOVED making these pumpkin coasters. One sweet girl in my class made them as a gift for her mom, whose birthday was a few days away. These really do make the perfect fall gift! I promised my students I would link the tutorial on my website so that they could easily recreate them at home. I thought about making my own step-by-step tutorial, but 1. I didn’t want to steal someone else’s work and 2. Why reinvent the wheel? The lady I got this idea from did a fabulous tutorial and you can find that tutorial here.
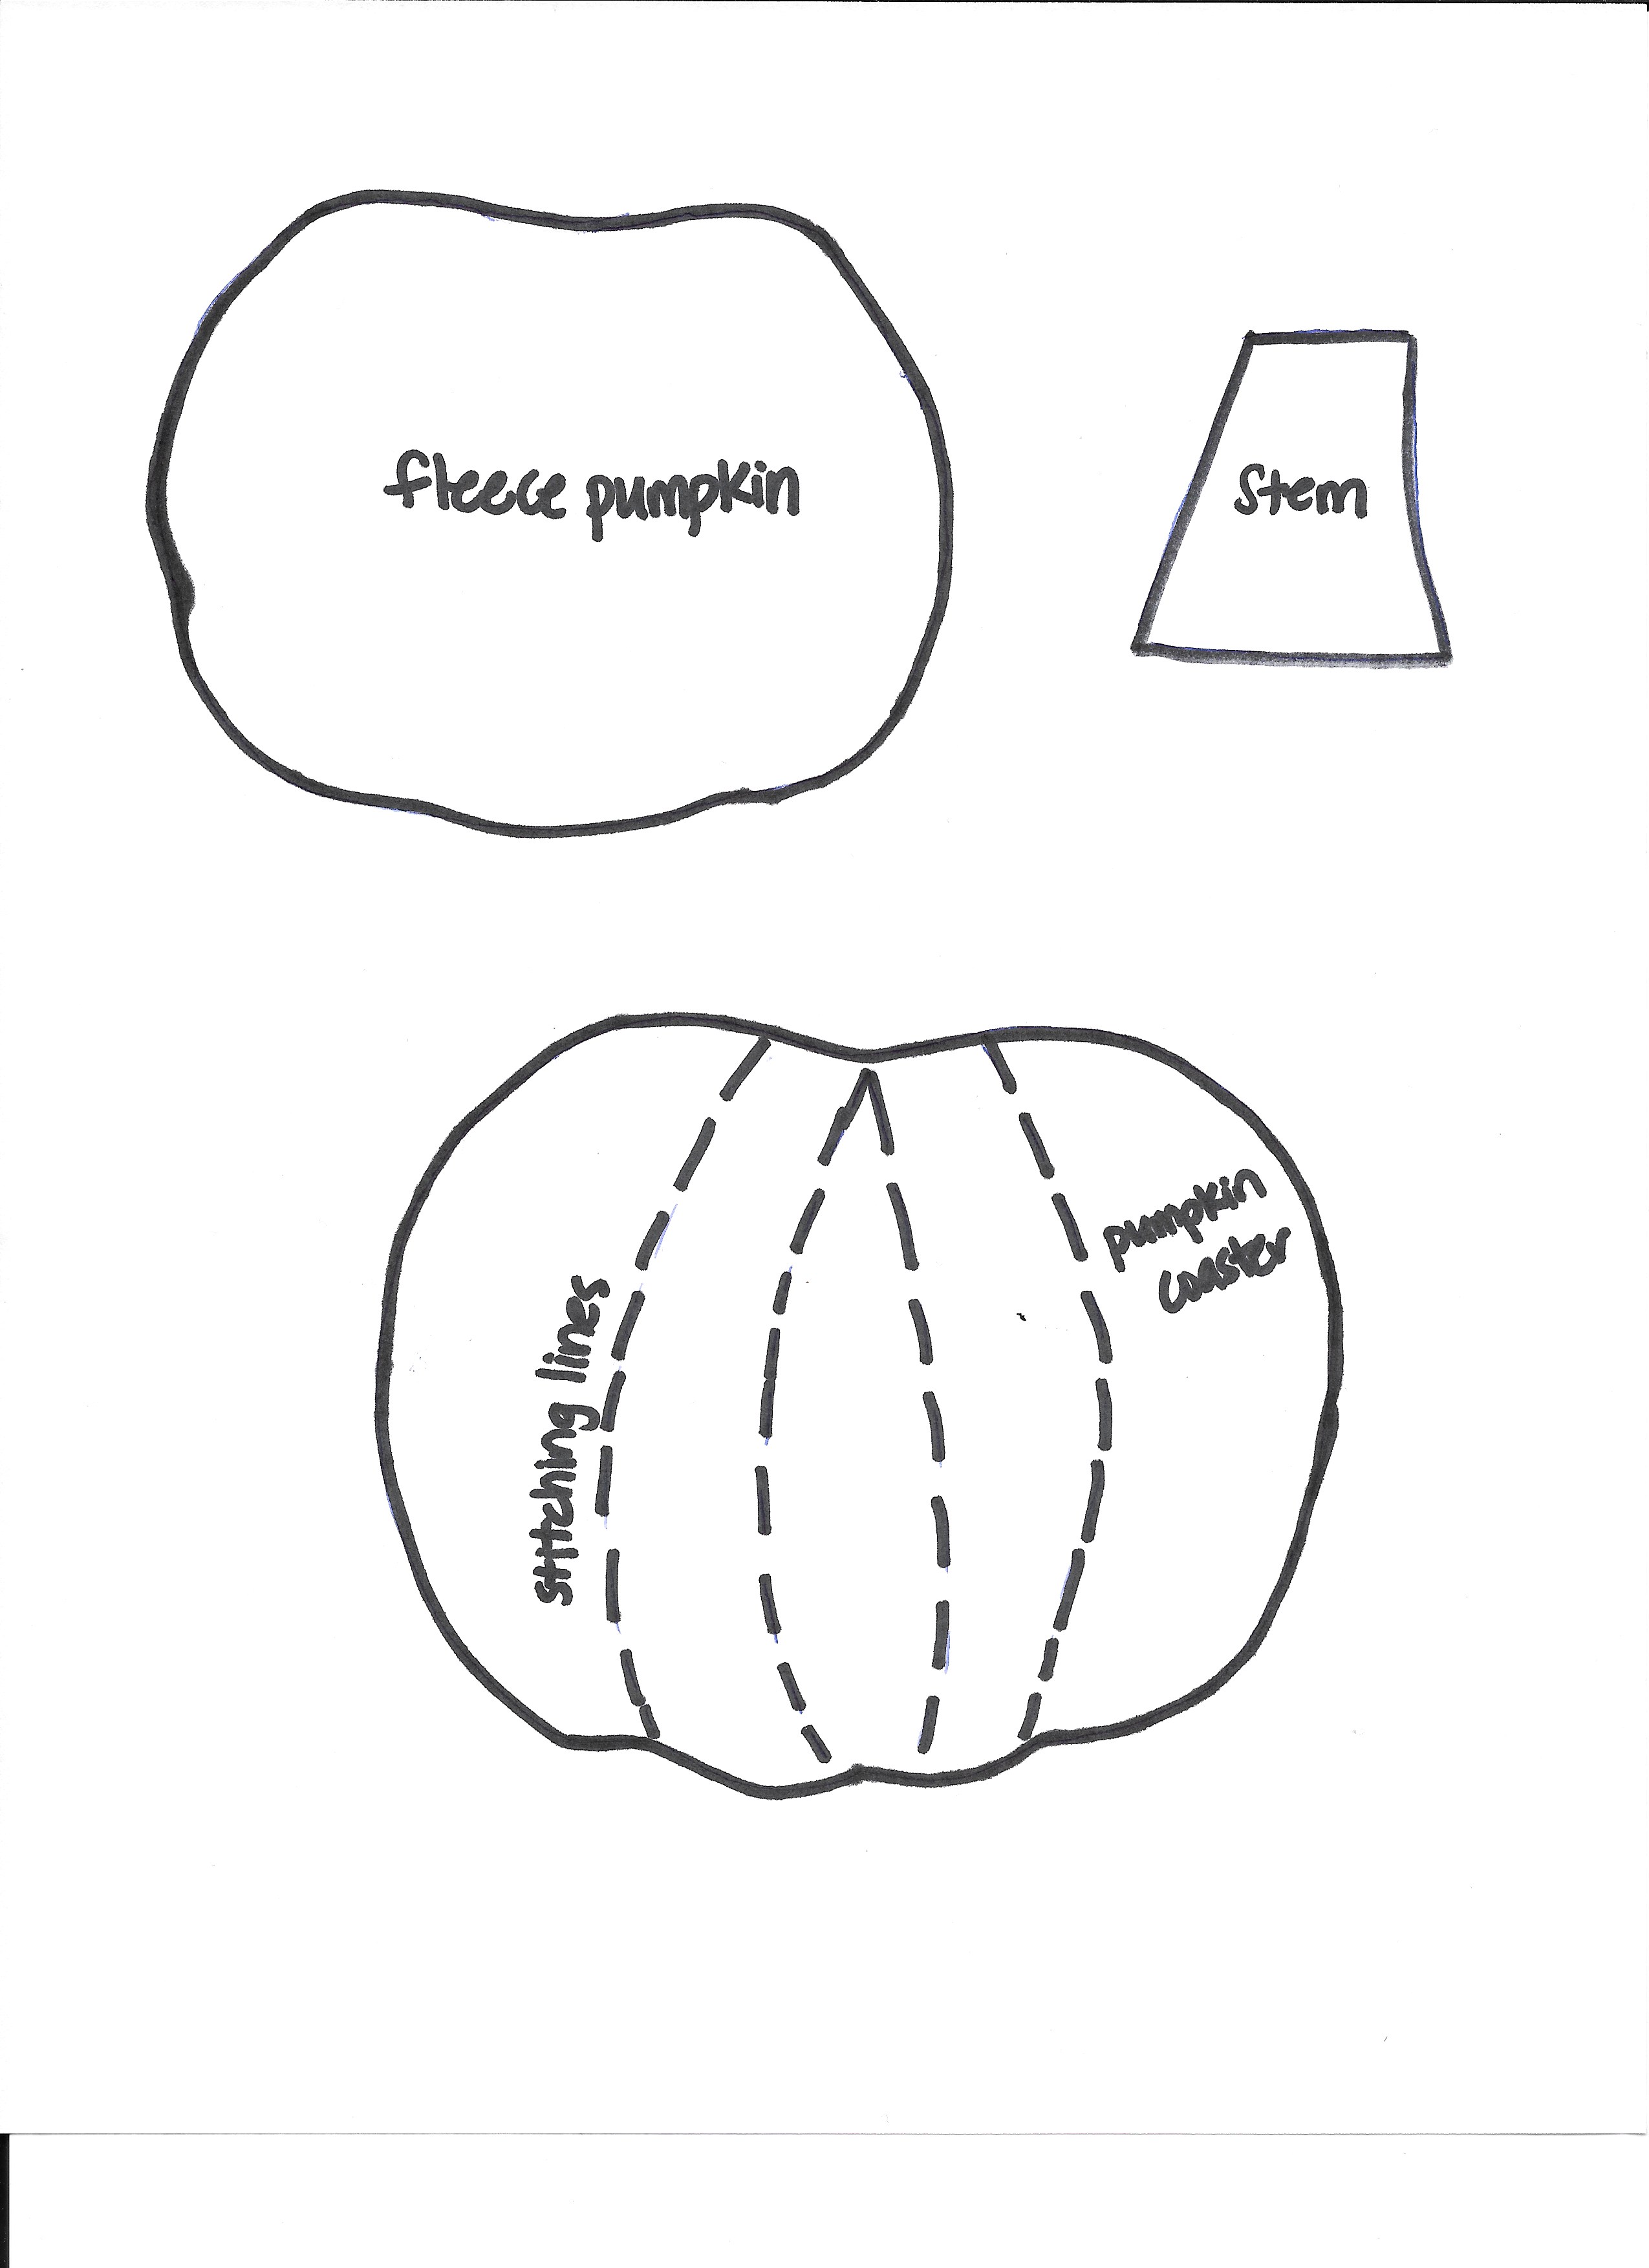
The one thing that was missing was the pattern for the coaster. It said to save the picture, but there was no way to save it and download it, so I traced it off my computer screen and then modified it to my liking (I wanted it a little bigger). You can totally freehand this pattern yourself, but for your convenience I created a pattern page for you for all of the pieces you need! I even labeled the pieces for you 🙂 It is a jpeg document, so make sure you change your printer setting to “full page” before you print.
You may notice that her pumpkin coasters are a little more frayed than mine. I was so excited to pick out fabric that I bought the fabric before I read her notes about using homespun fabric. Whoops. I just used quilter’s cotton. I think they still turned out totally cute. After I clipped the perimeter of the coaster, I kind of picked out the threads to give it a frayed look. And then, after this lovely photo shoot, I put them through the washer and dryer and that helped to fray them up quite a bit. So, if you use quilter’s cotton, they’ll still look great. Make sure to run them through the washer and dryer.
Happy fall sewing! I would love to hear how you did sewing your pumpkin coasters!
Pin this idea for later!

I was wondering if I can purchase this item instead of sewing it.
I’m sorry, but I’m currently not doing any custom orders 🙁