
Sew A Pocket Apron in 9 Easy Steps!
I love aprons. There are so many fun styles of aprons to make and so many cute fabrics to work with. When selecting my projects for my sewing classes this semester, I wanted to choose a project that taught my students how to gather. I have 11 students in the class that I was choosing this project for, which is kind of a lot when working with beginning sewers (mostly elementary school age). I needed something that wasn’t overly complicated but something that they would be excited about making. What better project than a half apron?
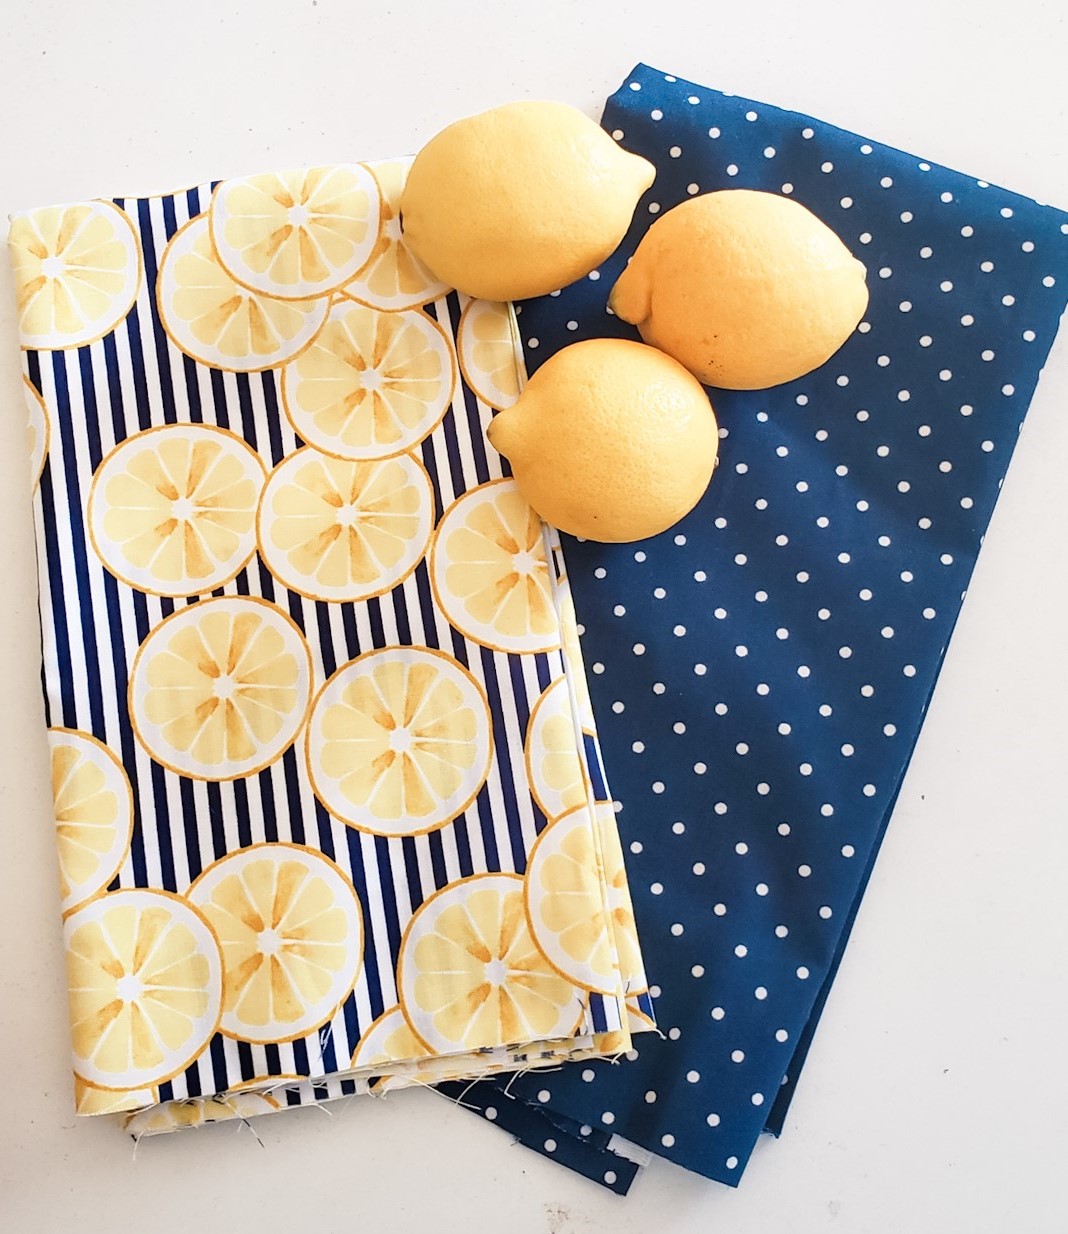
Coming up with a pattern was simple enough; it’s really just rectangle and square cuts. I didn’t have a sample made up at the start of this project, but I promised my girls I’d make one with them to show them step-by-step how it is done, and also so that I could put this tutorial up for them to refer back to later! It was so much fun seeing all of the different fabrics that the girls brought in. I think that’s my favorite part; the fabric selection. I love mixing and matching different fabrics. One student brought in a lemon fabric that she got at Hobby Lobby. If you don’t know this about me already, I am obsessed with anything lemon! I fell in love with her fabric so the very next day, I marched right down to Hobby Lobby to buy myself that fabric. I needed fabric for my tutorial anyway, so it was totally justified 😉 How cute is this??
So let’s get started on our aprons! I did draw the pattern out on tissue paper first so that it would be easier for them to cut out in class, rather than free-cutting or rotary cutting. If it helps for you to draw it out on paper first, then by all means, do it! Otherwise, you can cut out the pieces.
You will need:
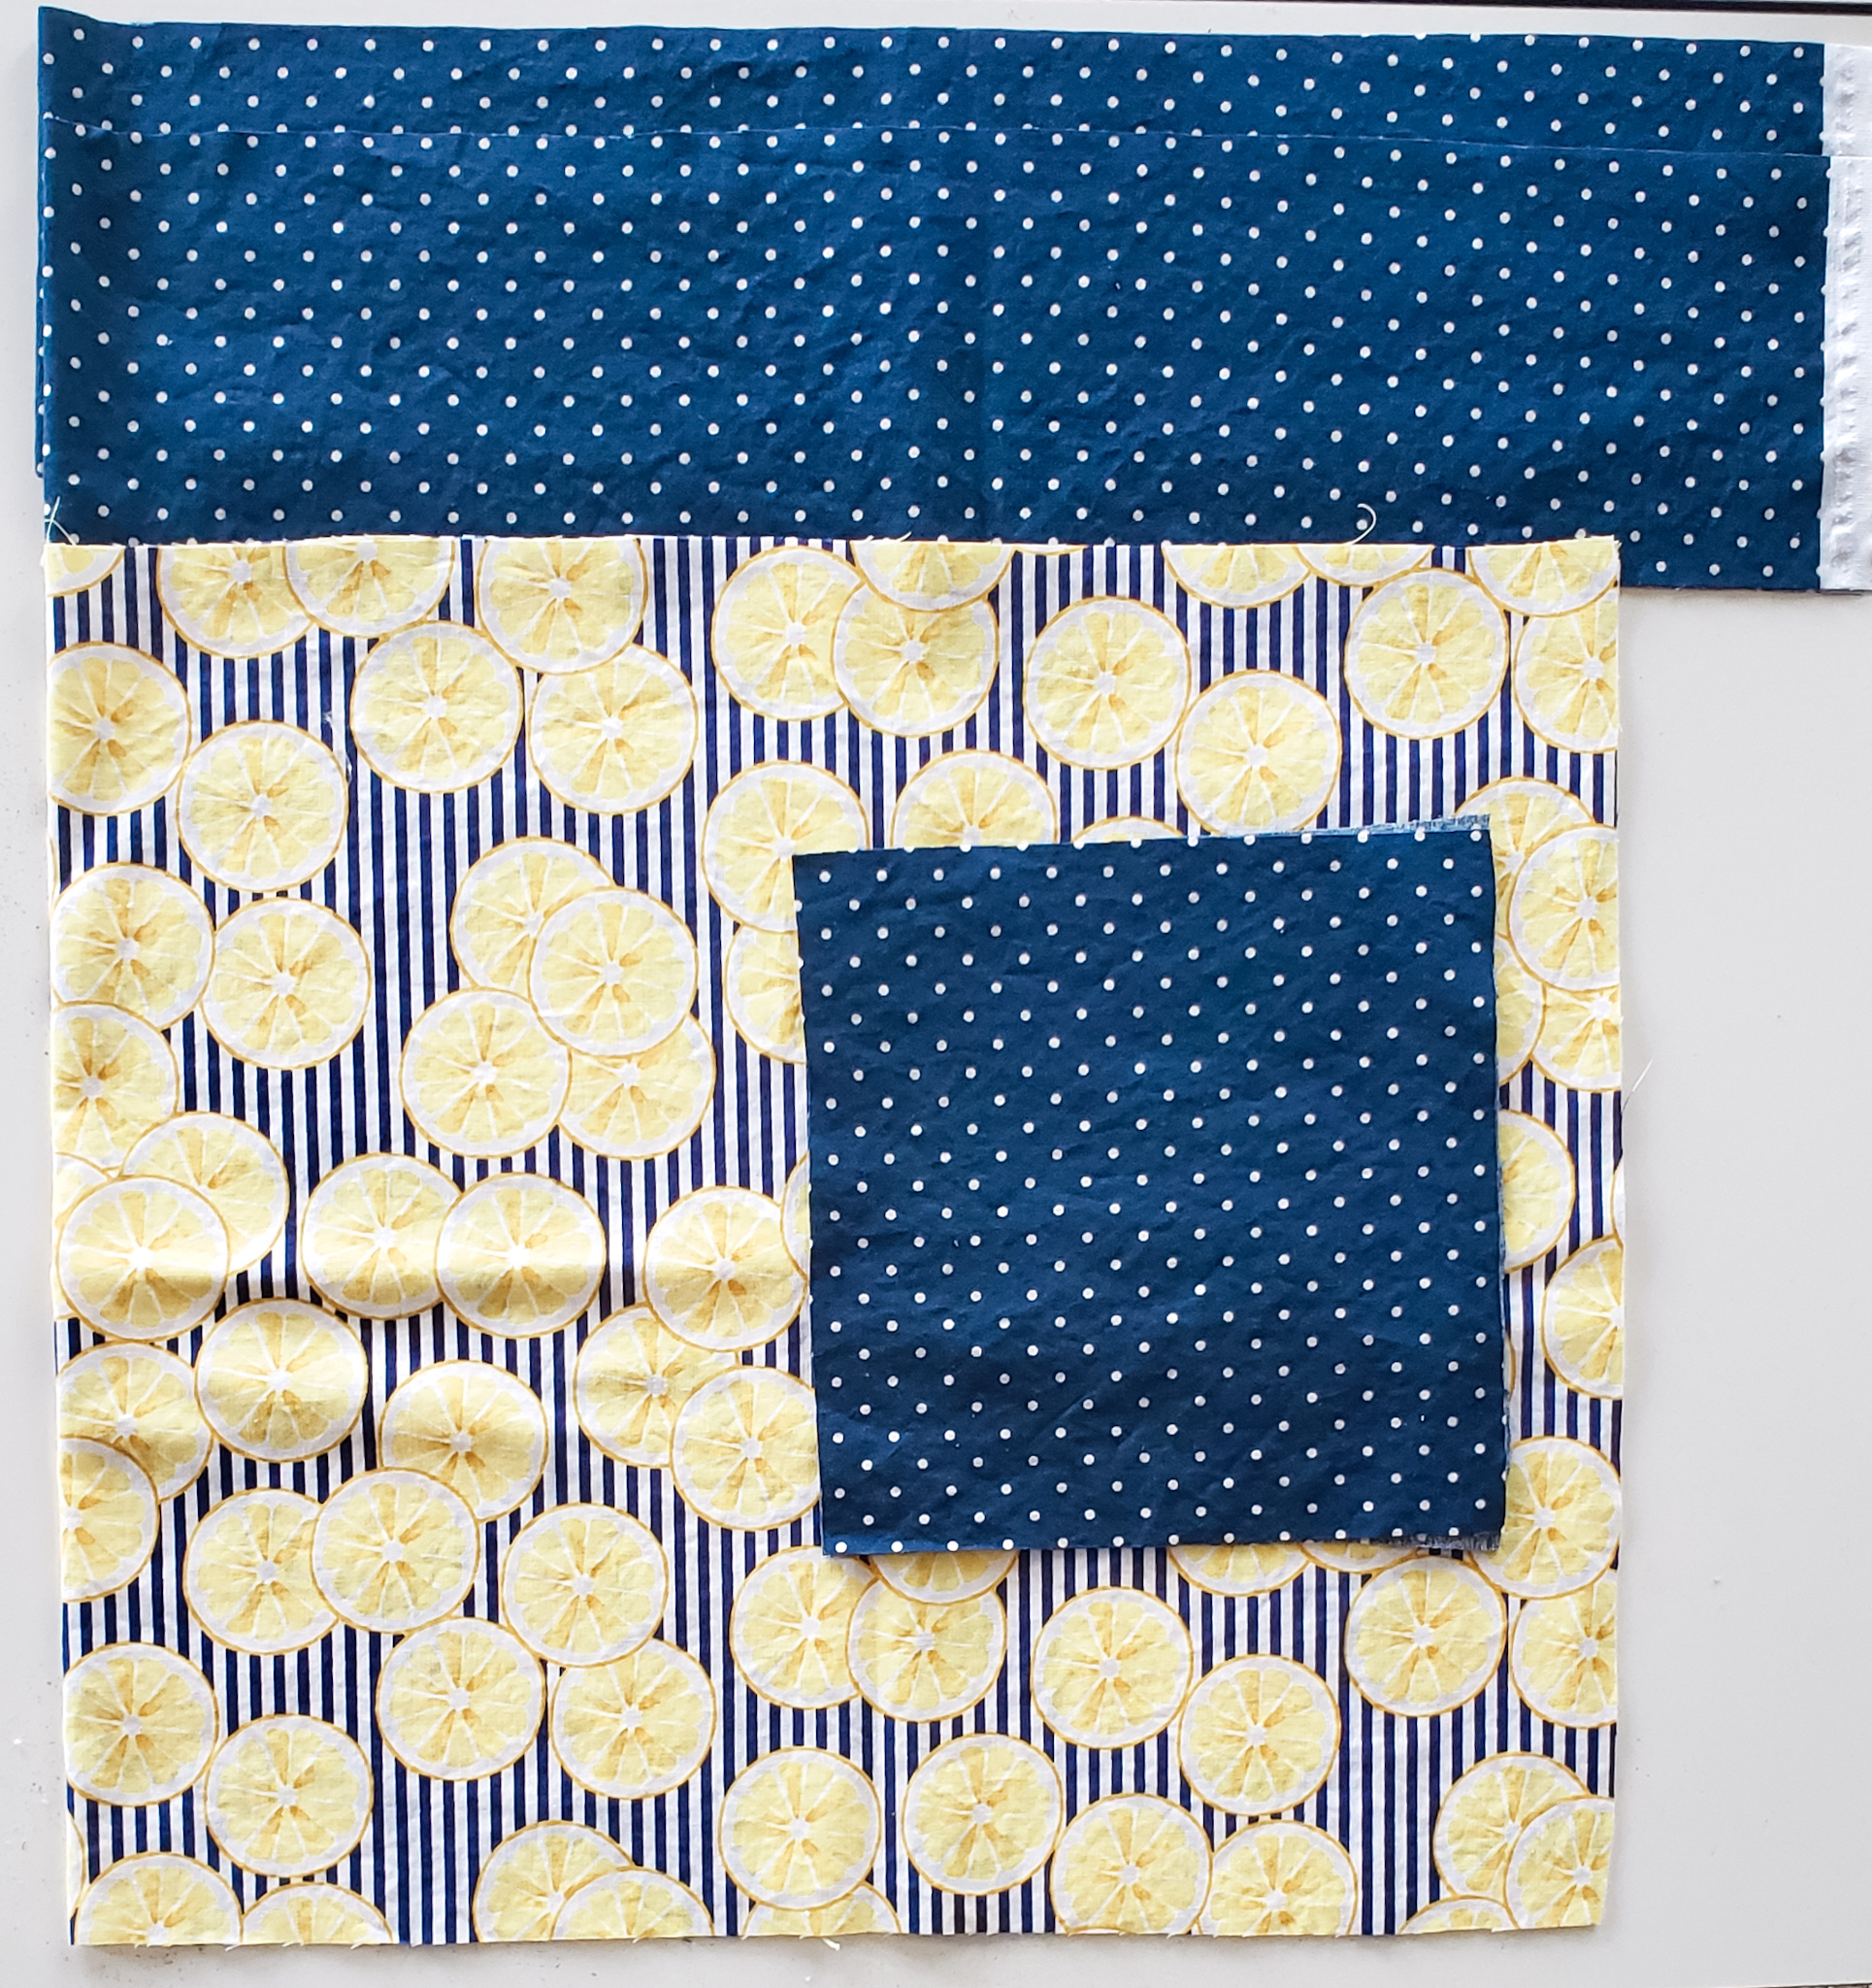
- Main apron fabric: 45″ by 16″ (you can make it longer than 16″ if you want)
- Tie: cut two 5″ x 45″ strips
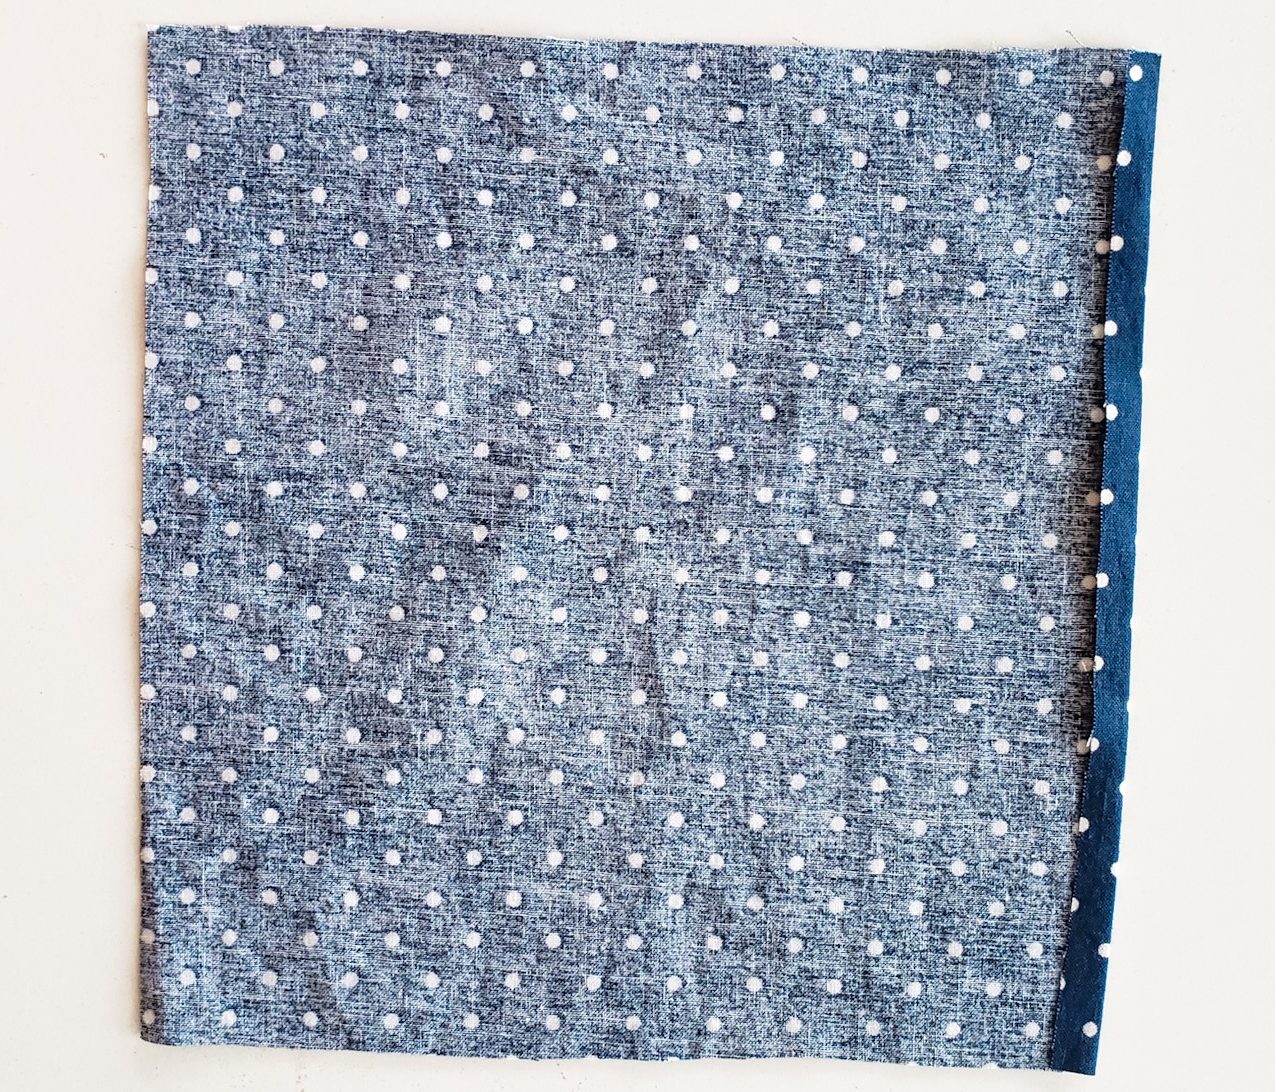
- Pockets: cut two 9″x9″ squares
For the apron and ties, fold your fabrics in half lengthwise, selvage ends together. Then, measure down for your length (16″ for your apron, 5″ for your ties) and cut across the whole width of the fabric. That will give you your 45″ measurement (if you are using 45″ wide fabric).
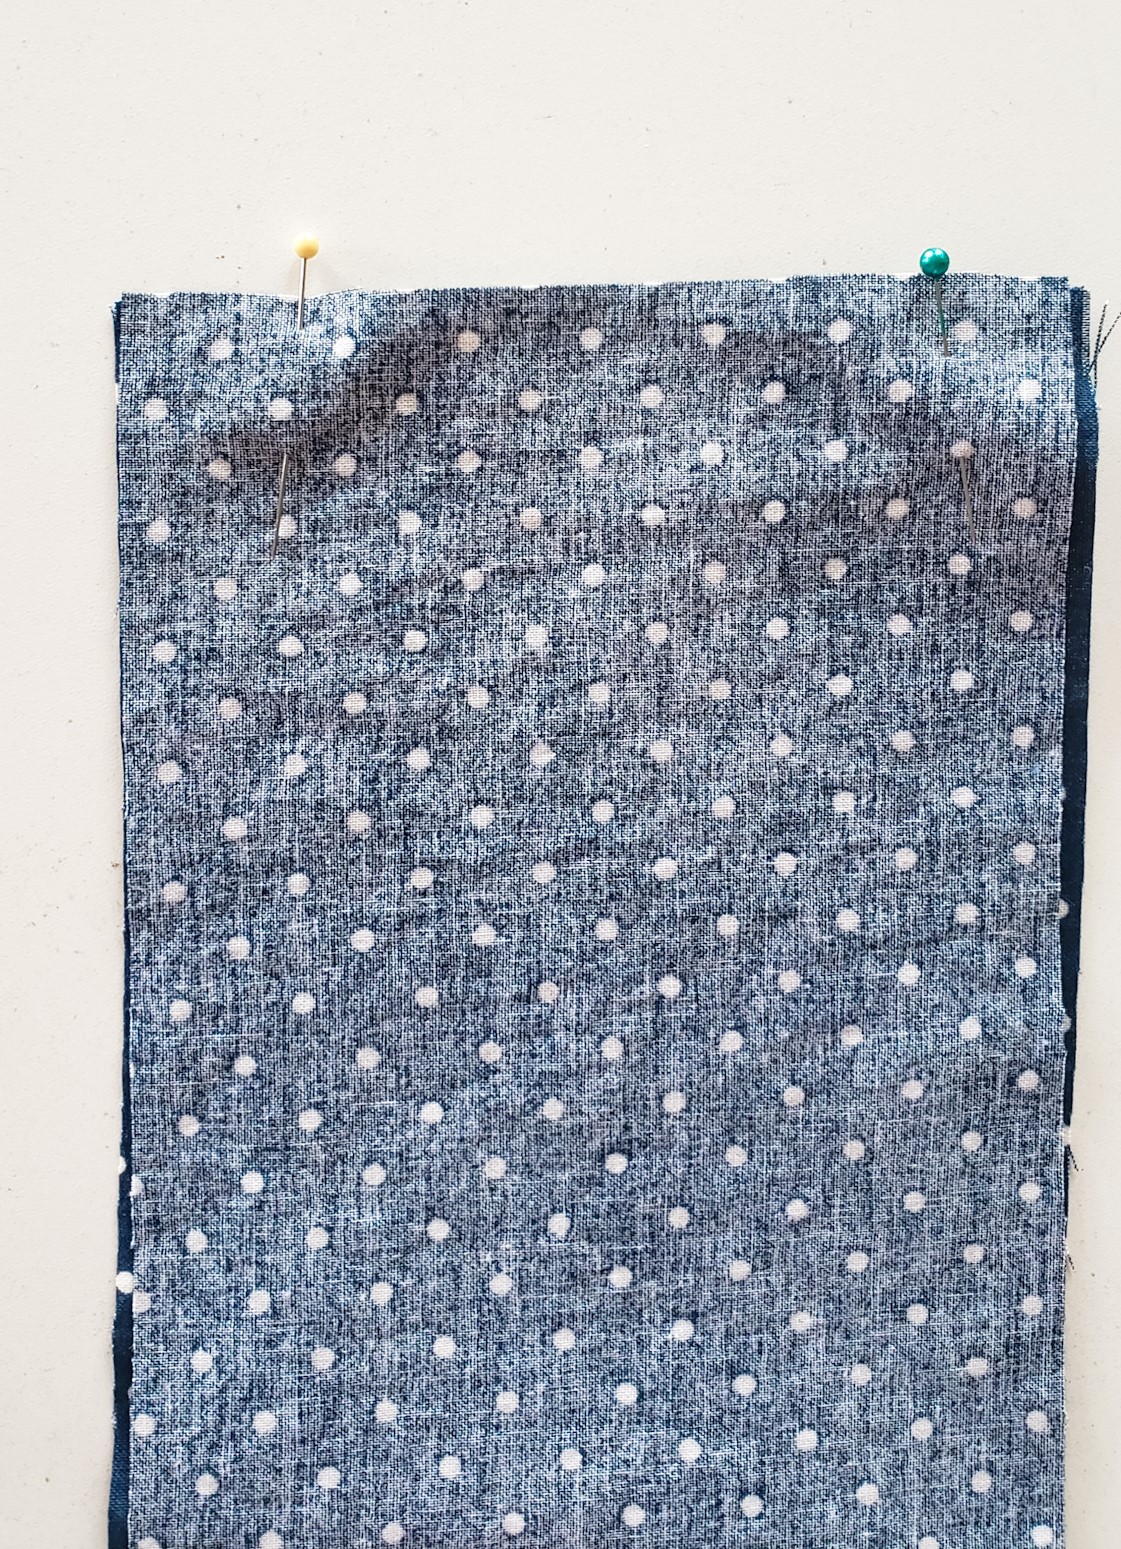
Step 1:
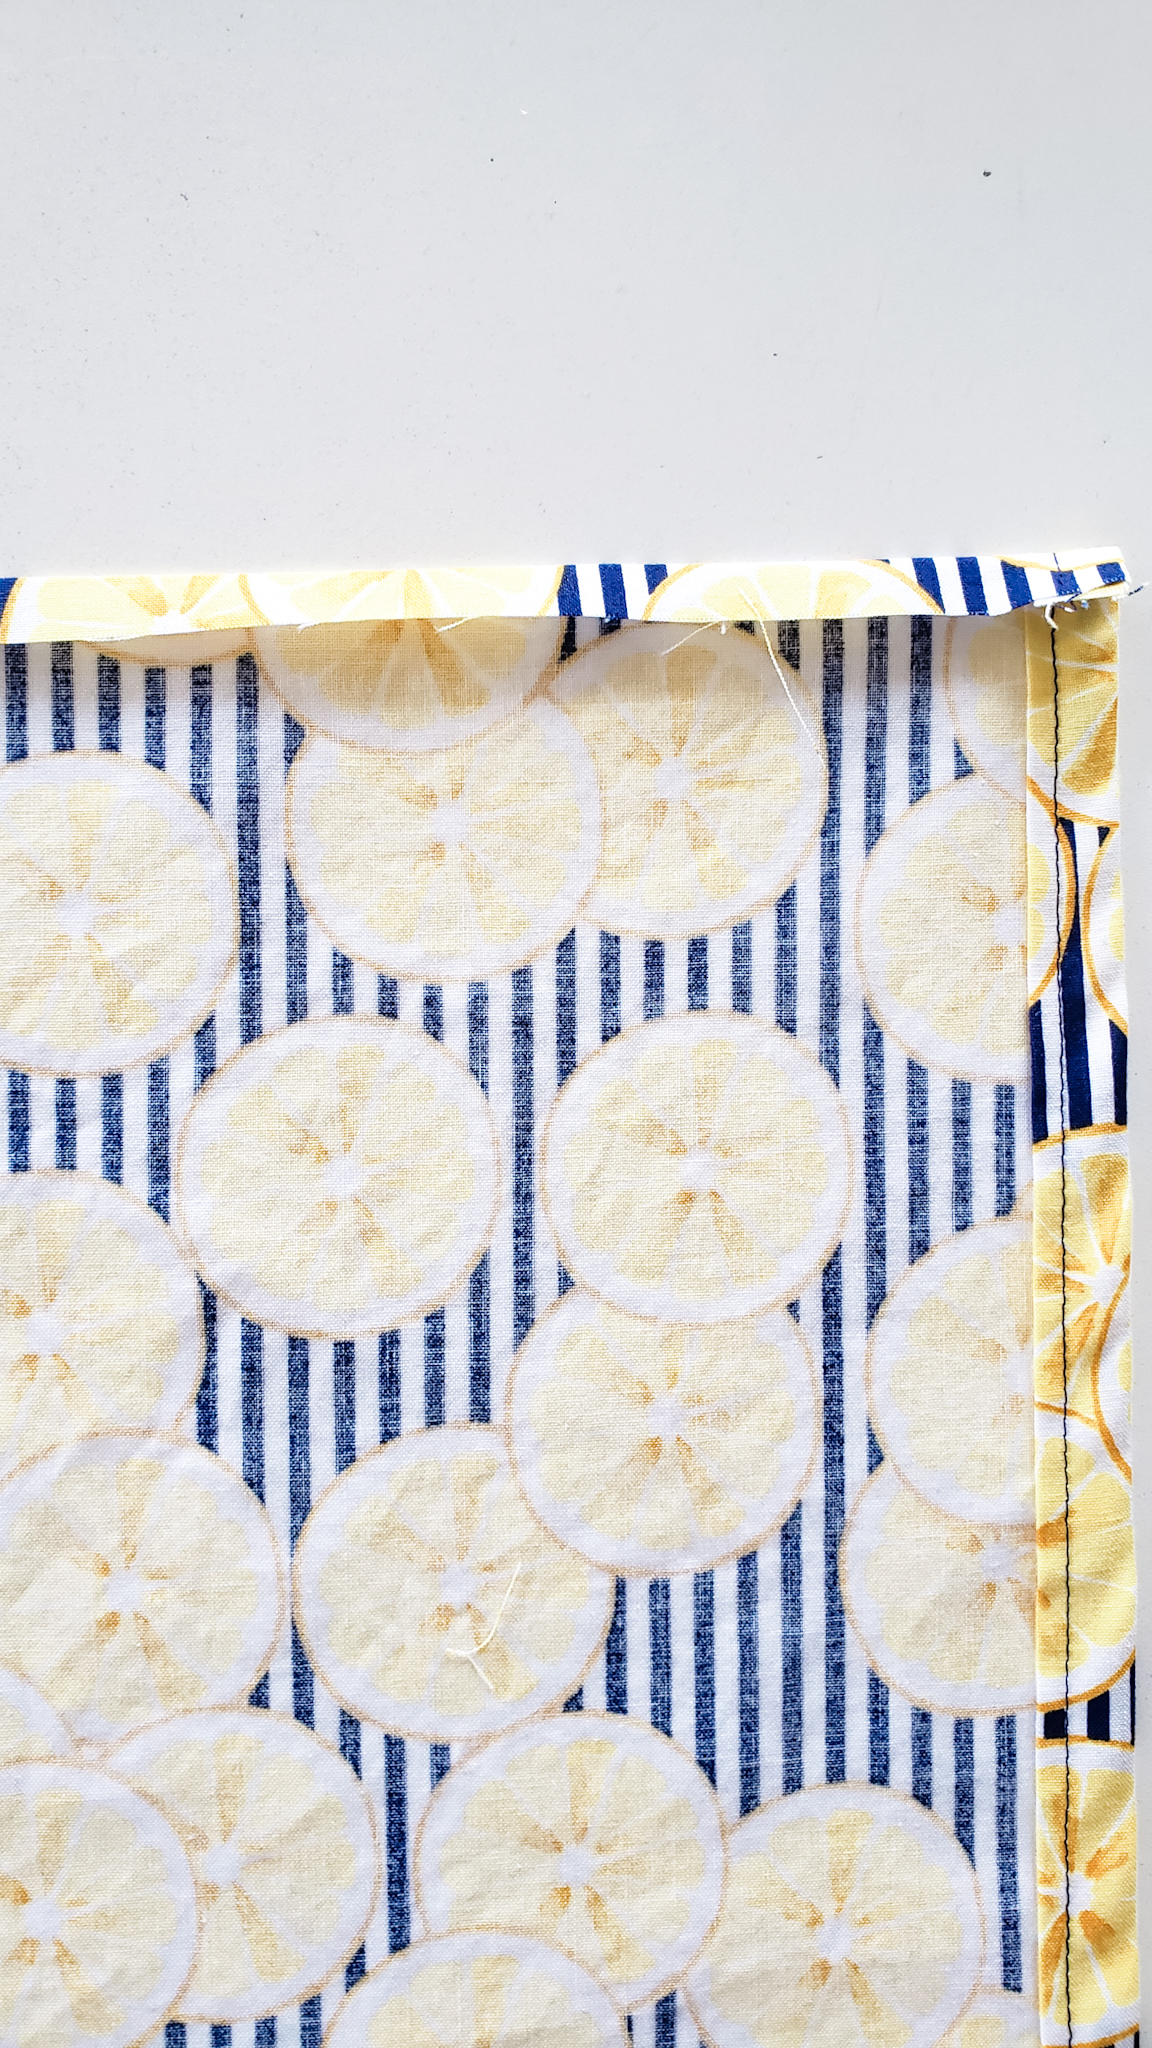
First, you will hem the sides of your apron. Fold over the raw edge 1/2″, iron, then fold over another 1/2″ and iron again. Stitch very close to the folded edge.

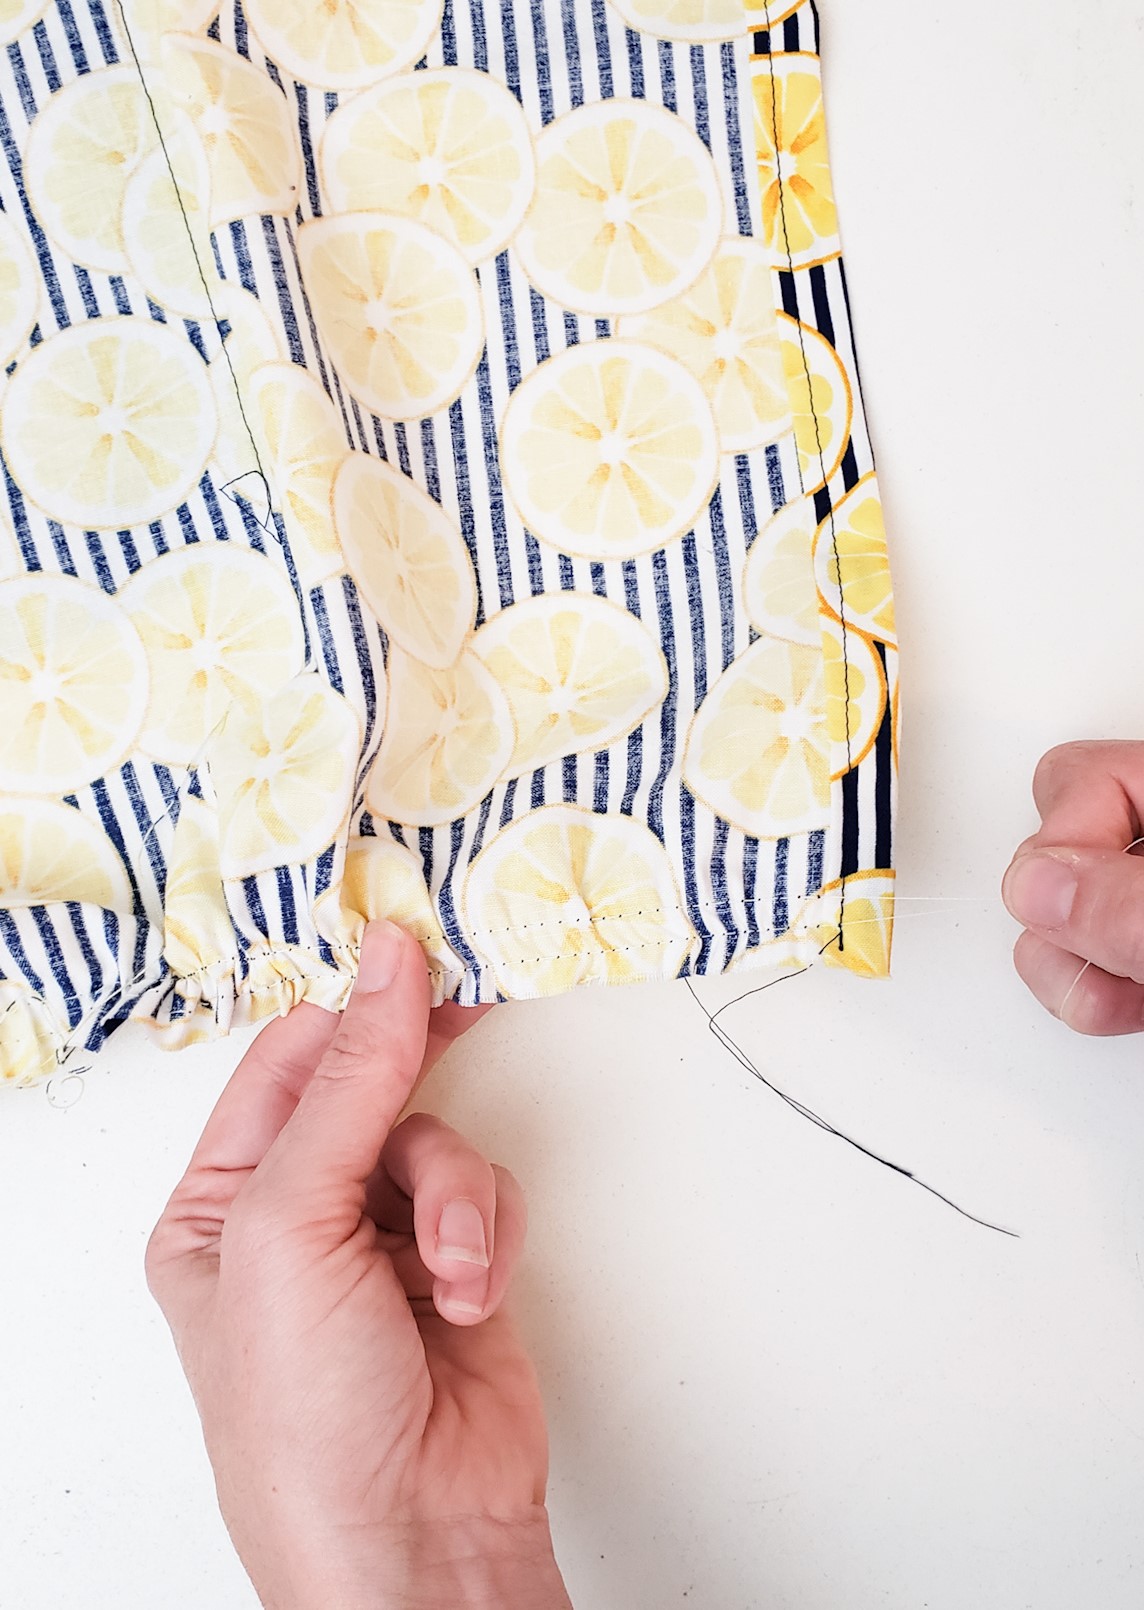
Step 2:
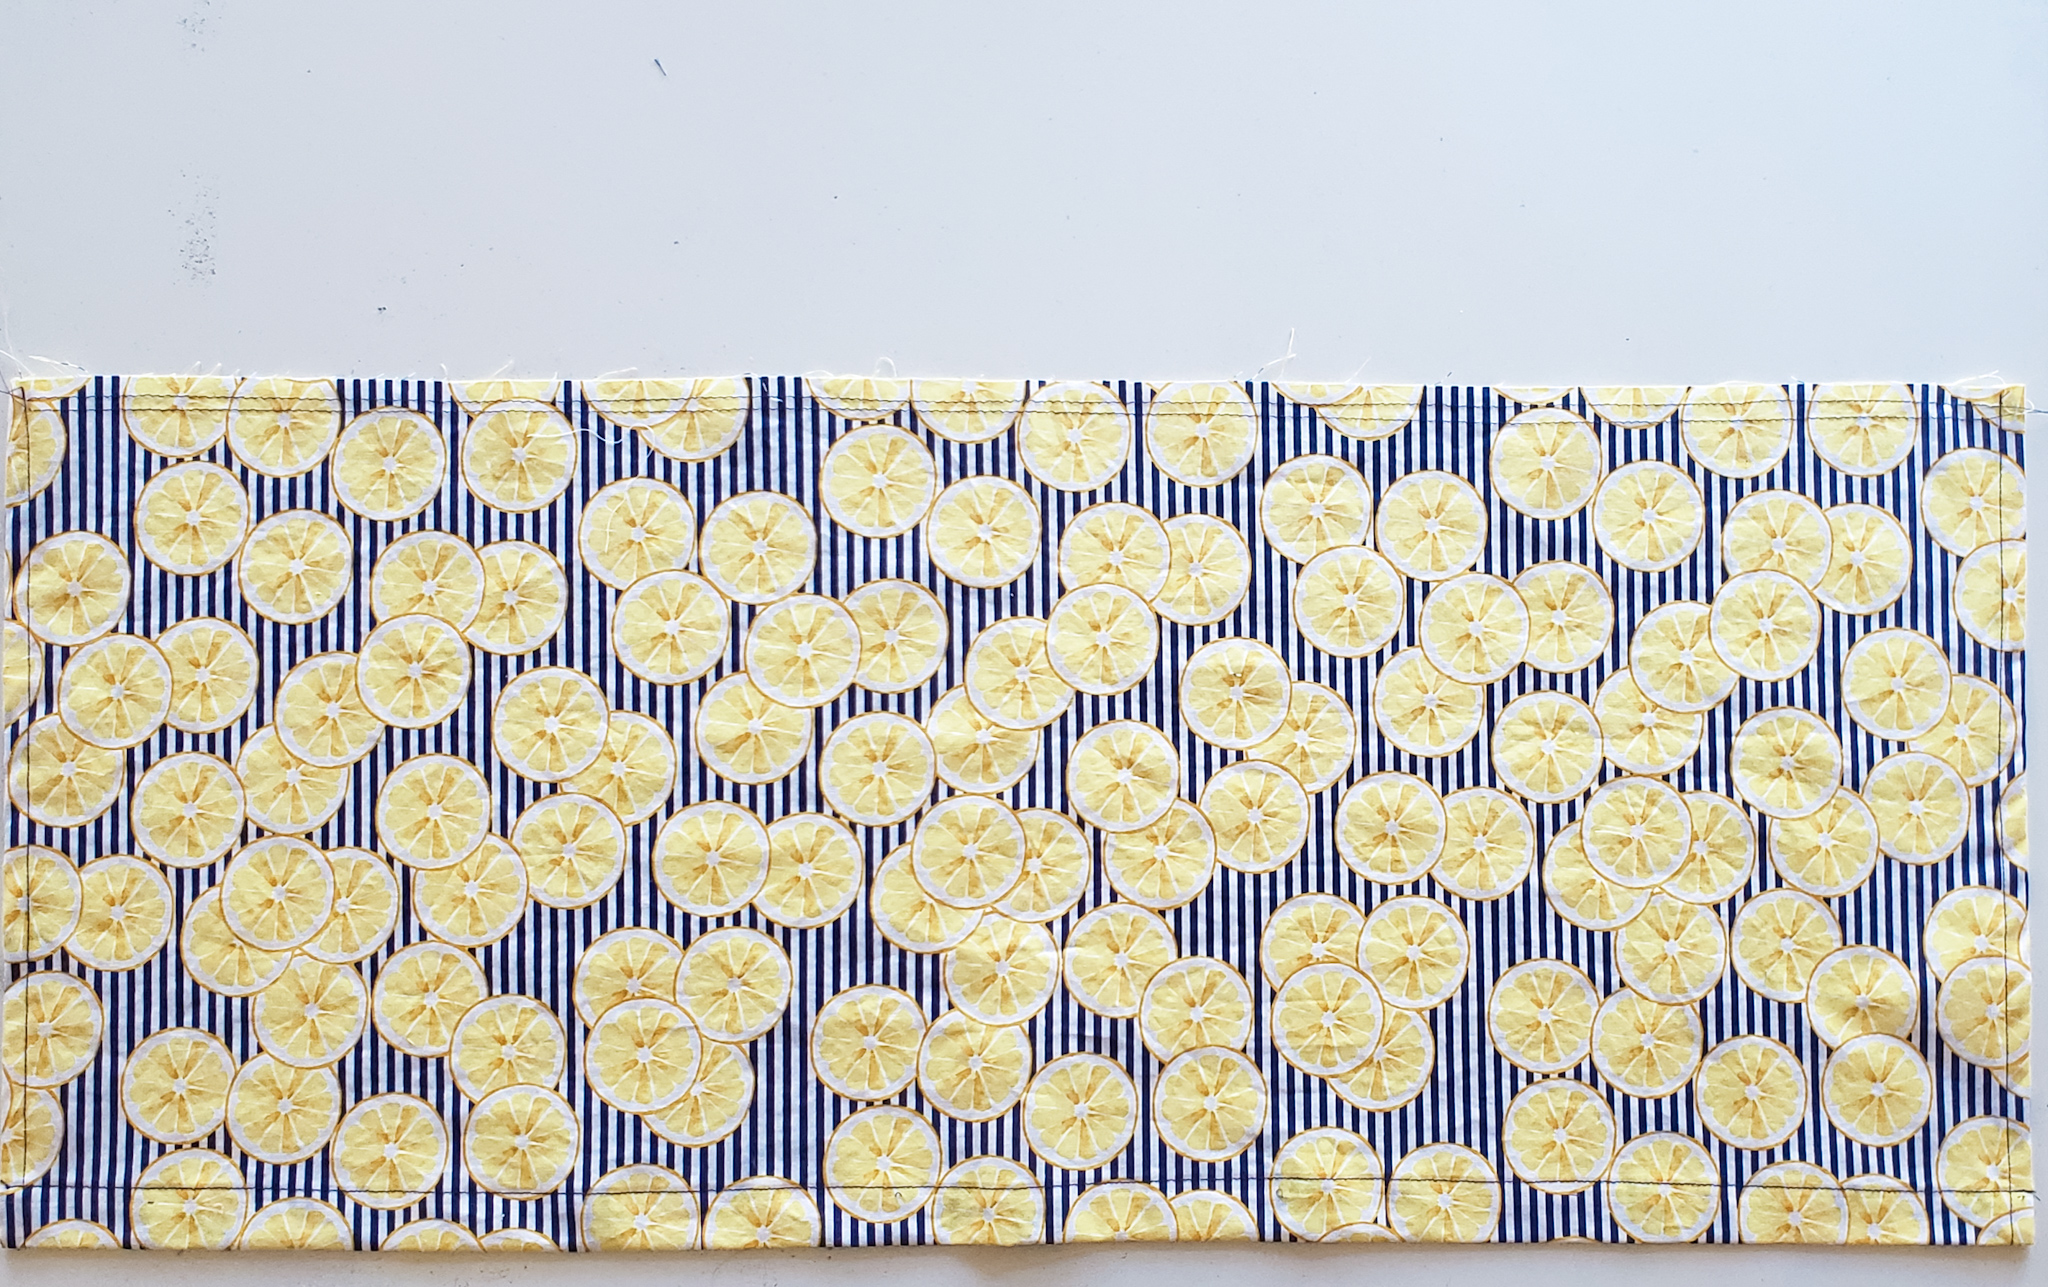
Put in your hem on the bottom edge of the apron by folding up 1/2″, ironing, then folding up another 1″. Press close to the folded edge.
Step 3:
With a long basting stitch, sew 2 lines across the top edge of the apron, using a 3/8″ seam line and a 5/8″ seam line. Remember that a basting stich means to increase the stitch length to the longest setting and NO backstitching! Make sure that your lines never cross, or you will not be able to pull up your stitch for a gather later on.
Step 4:
Making the pocket: First, you will hem the 2 sides by folding under 1/2″. Press. Then, fold up the bottom edge 1/2″ and press. Last, fold over the top edge 1/2″ and press, then another 5/8″ and press. Stitch close to the folded edge of the top hem only! The rest of the edges will be sewn down on top of the apron.
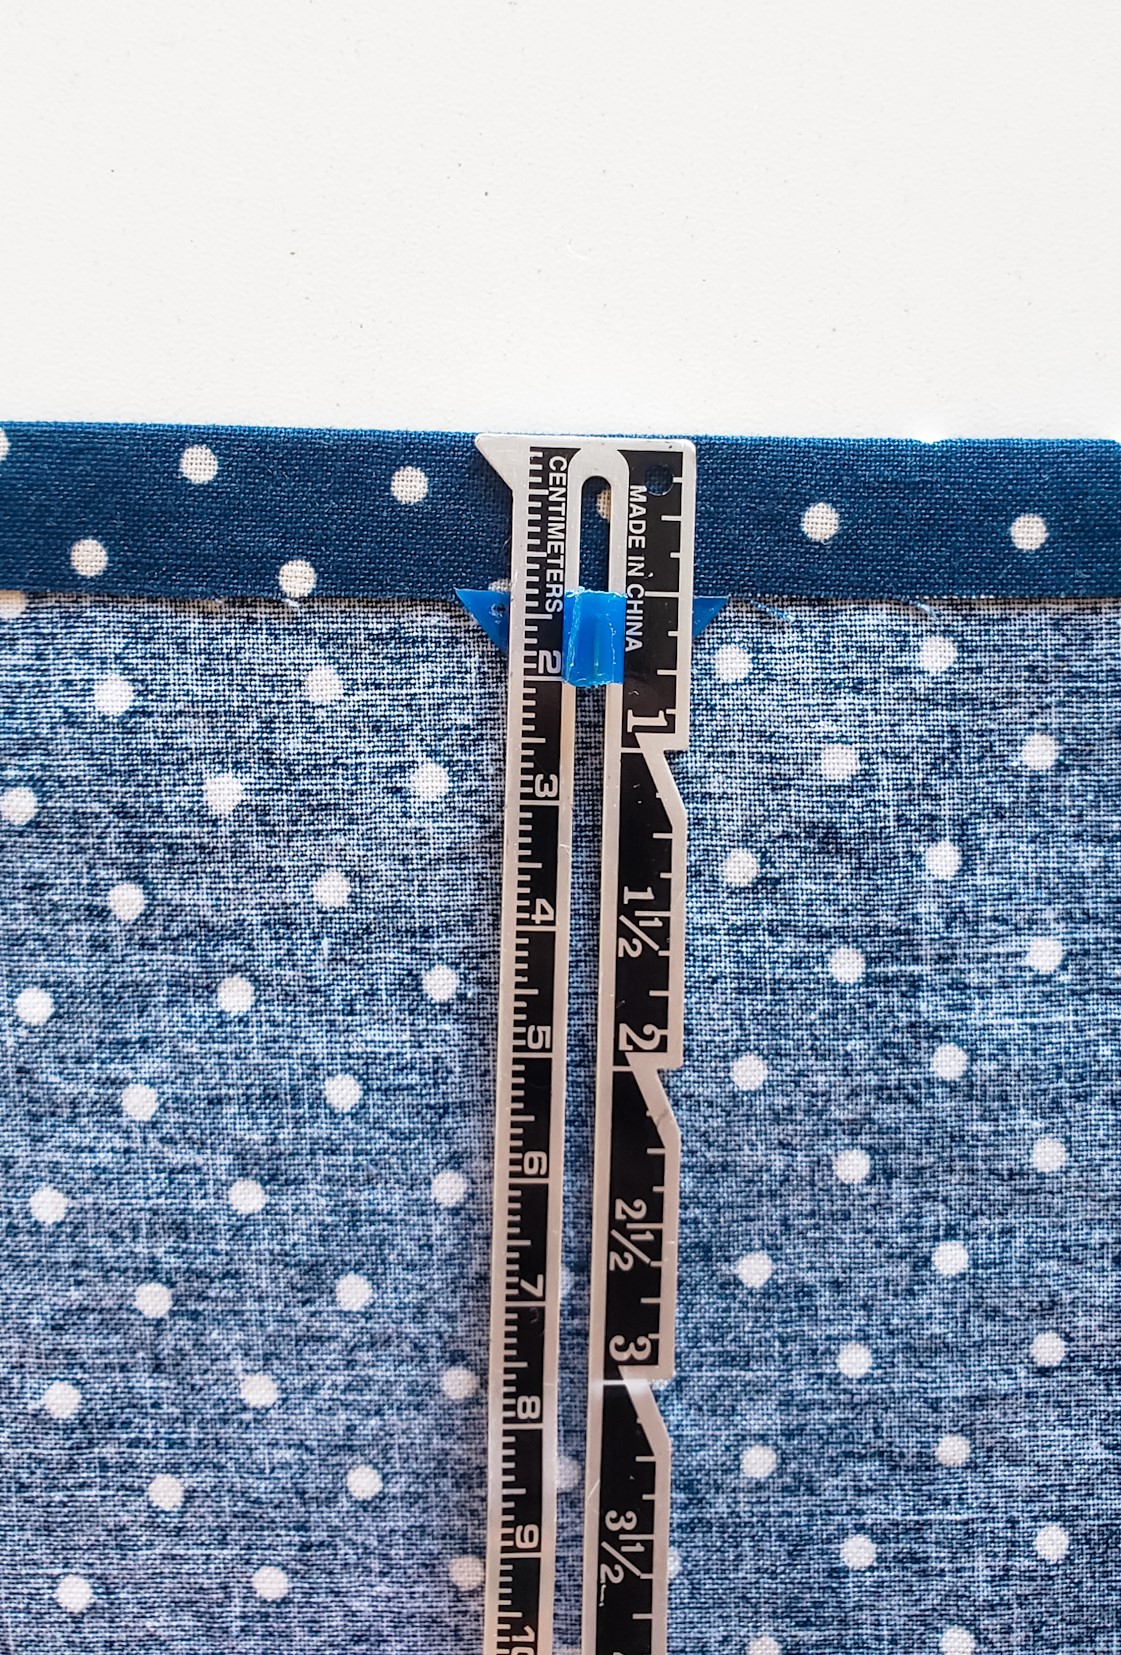
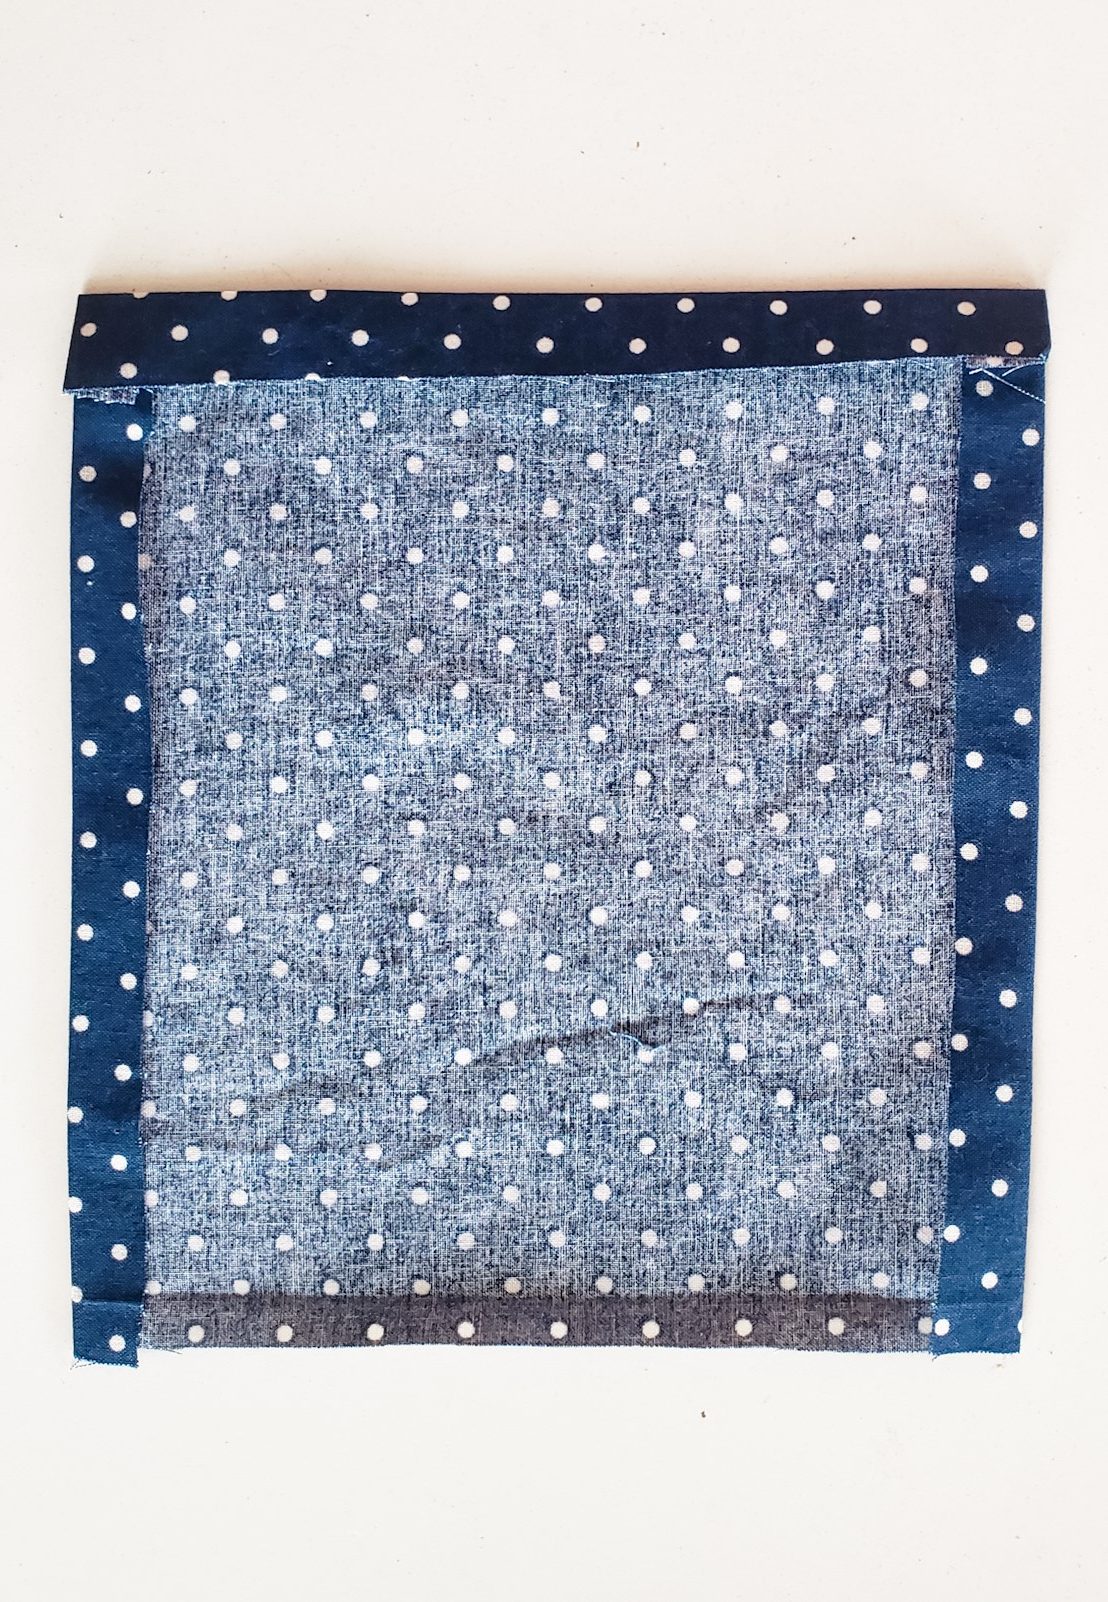
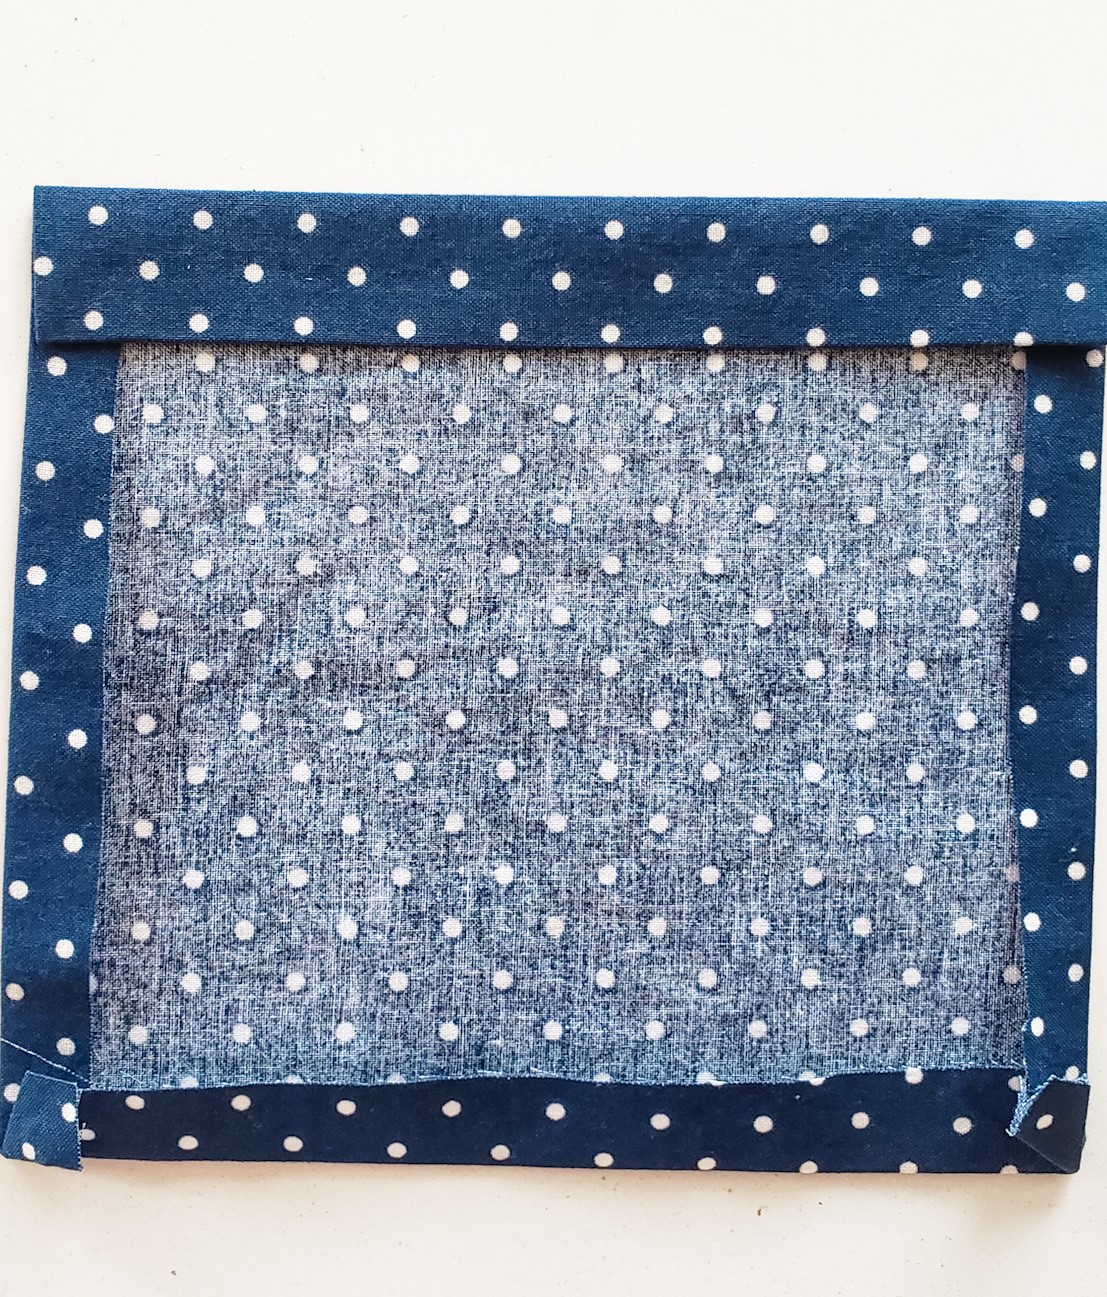
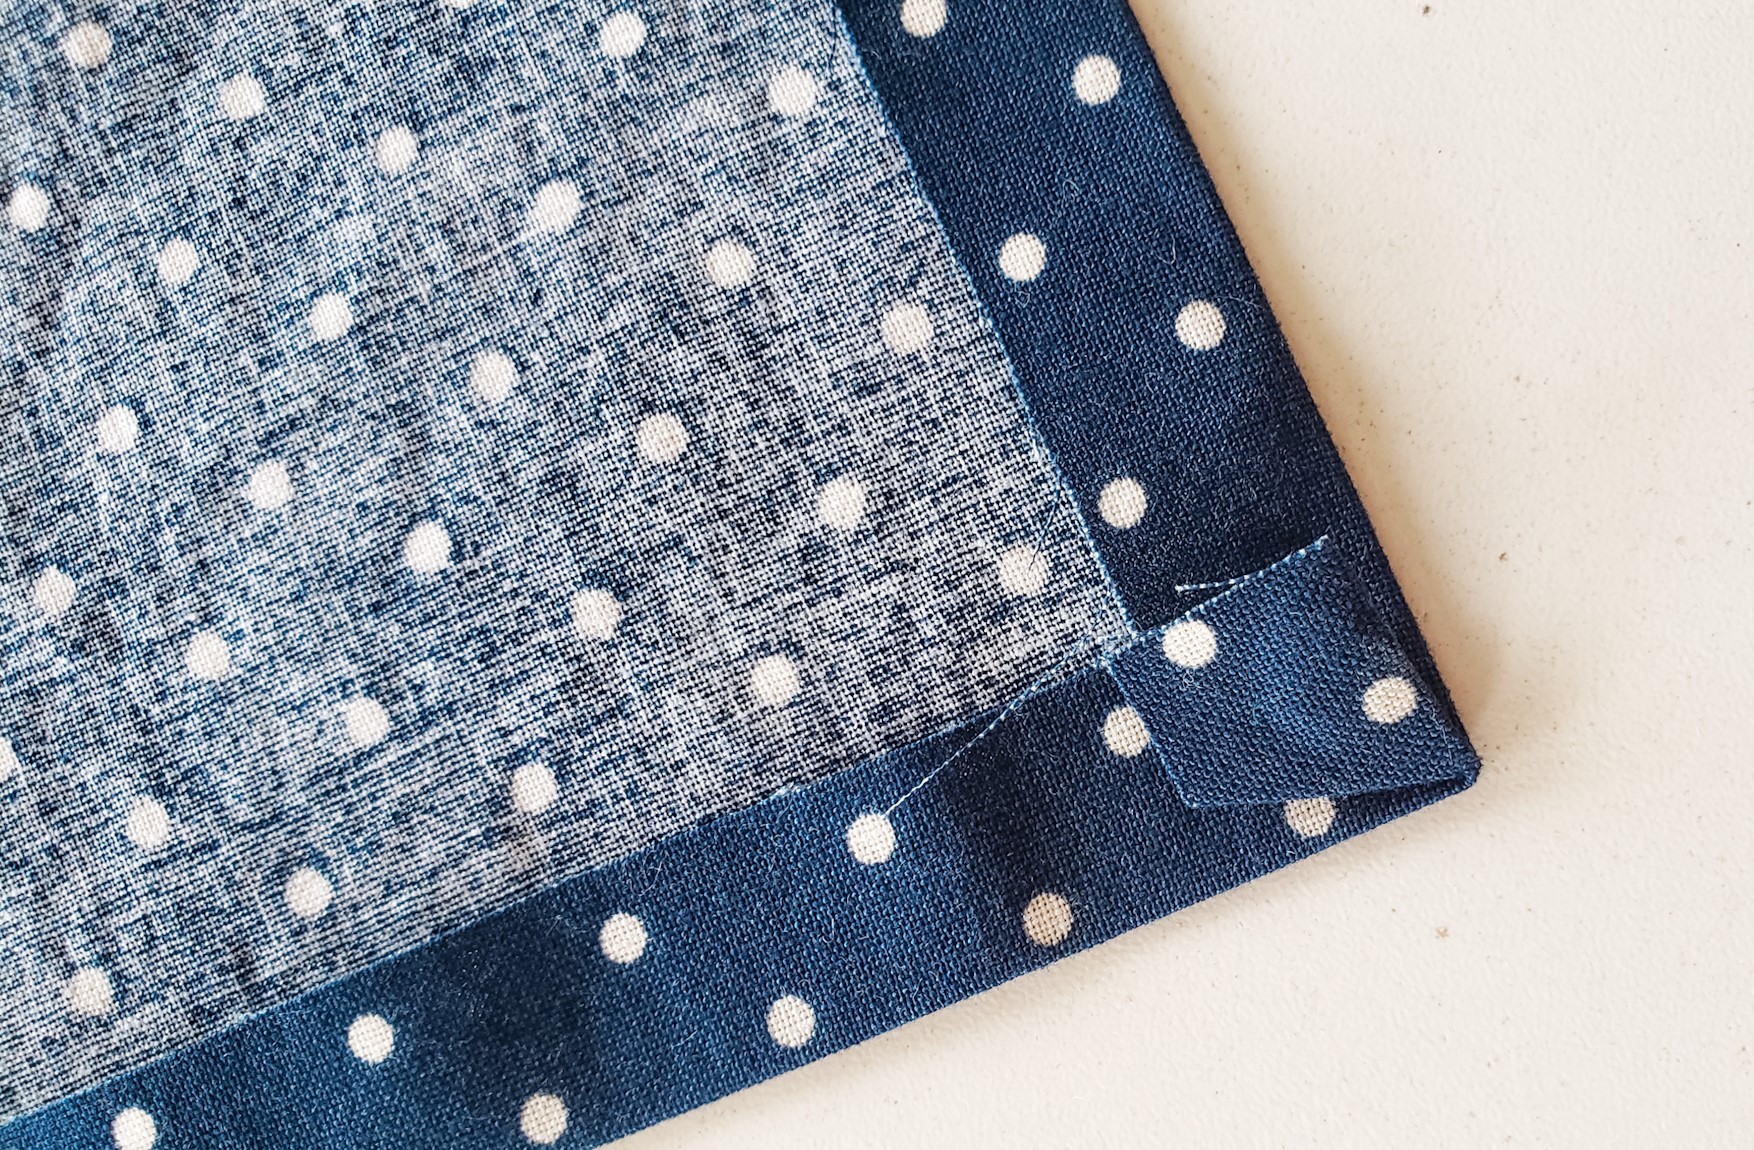
For the corners of your pocket: if you want to make sure that the folded edges don’t stick out when you are sewing the pockets onto the apron, you can do a mitered edge. There are a few different ways to do that, but this is how I do it and it’s really easy (although tricky to explain!) After you’ve ironed your 1/2″ edges, take the corner and kind of pinch in the corner, pushing up the corner fabric. Press the fabric down at a diagonal first with your finger, then with your iron. If you can’t figure it out, just keep it folded down regularly.

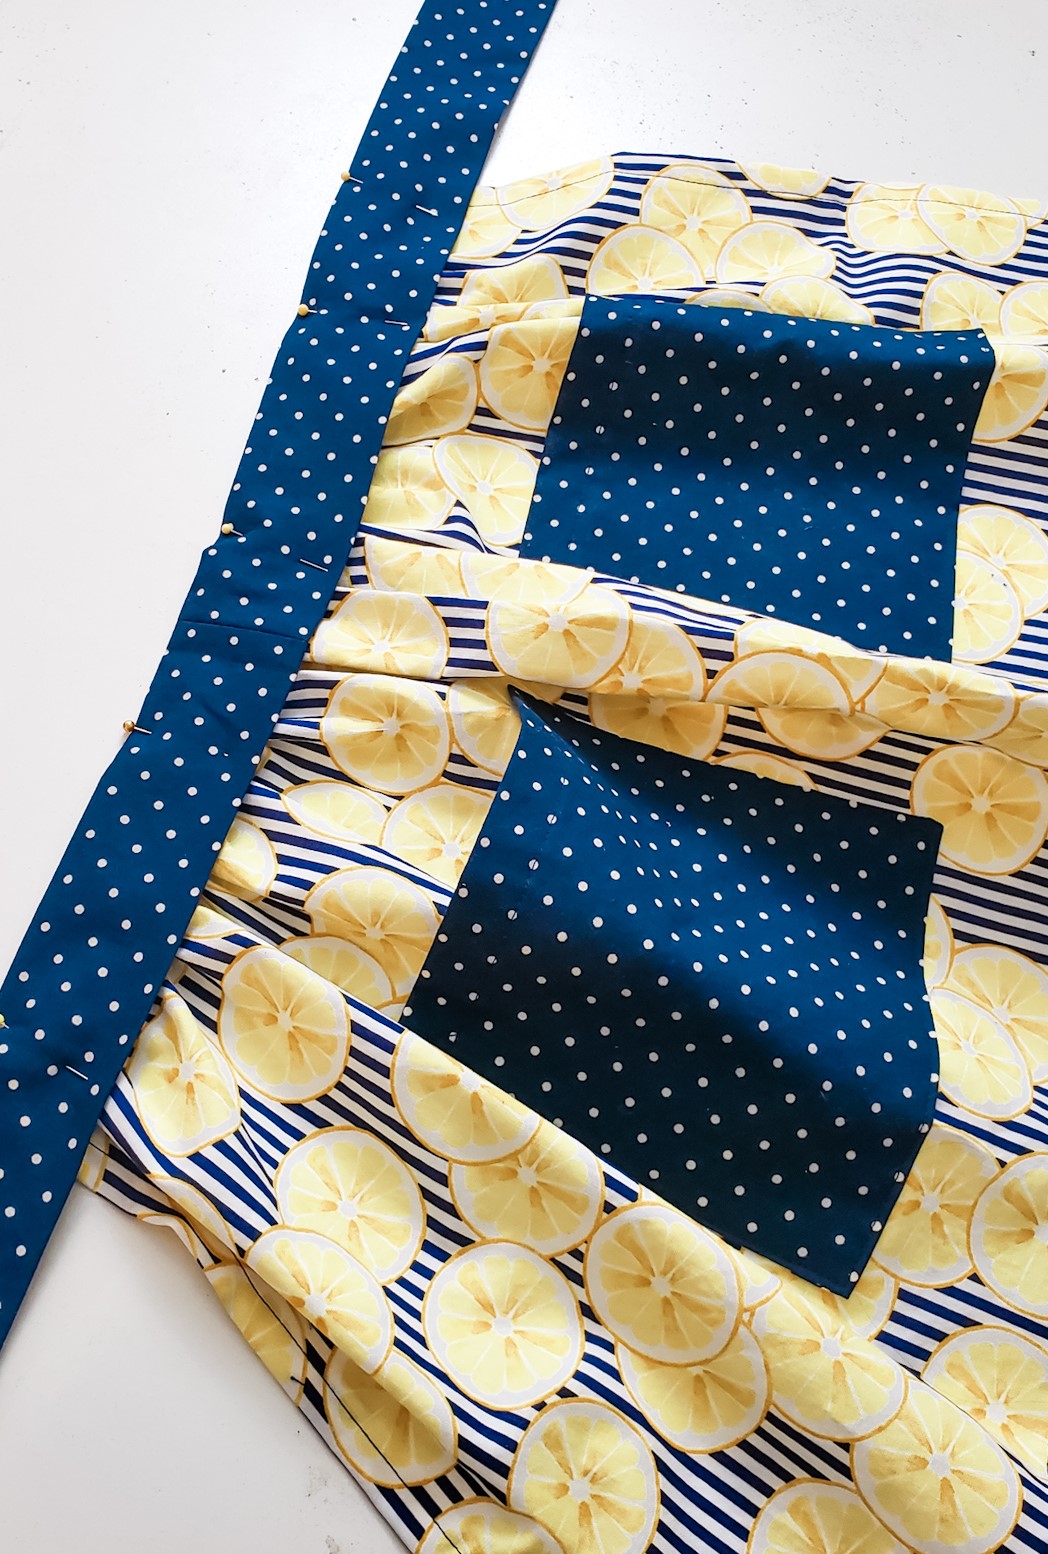
Step 5:
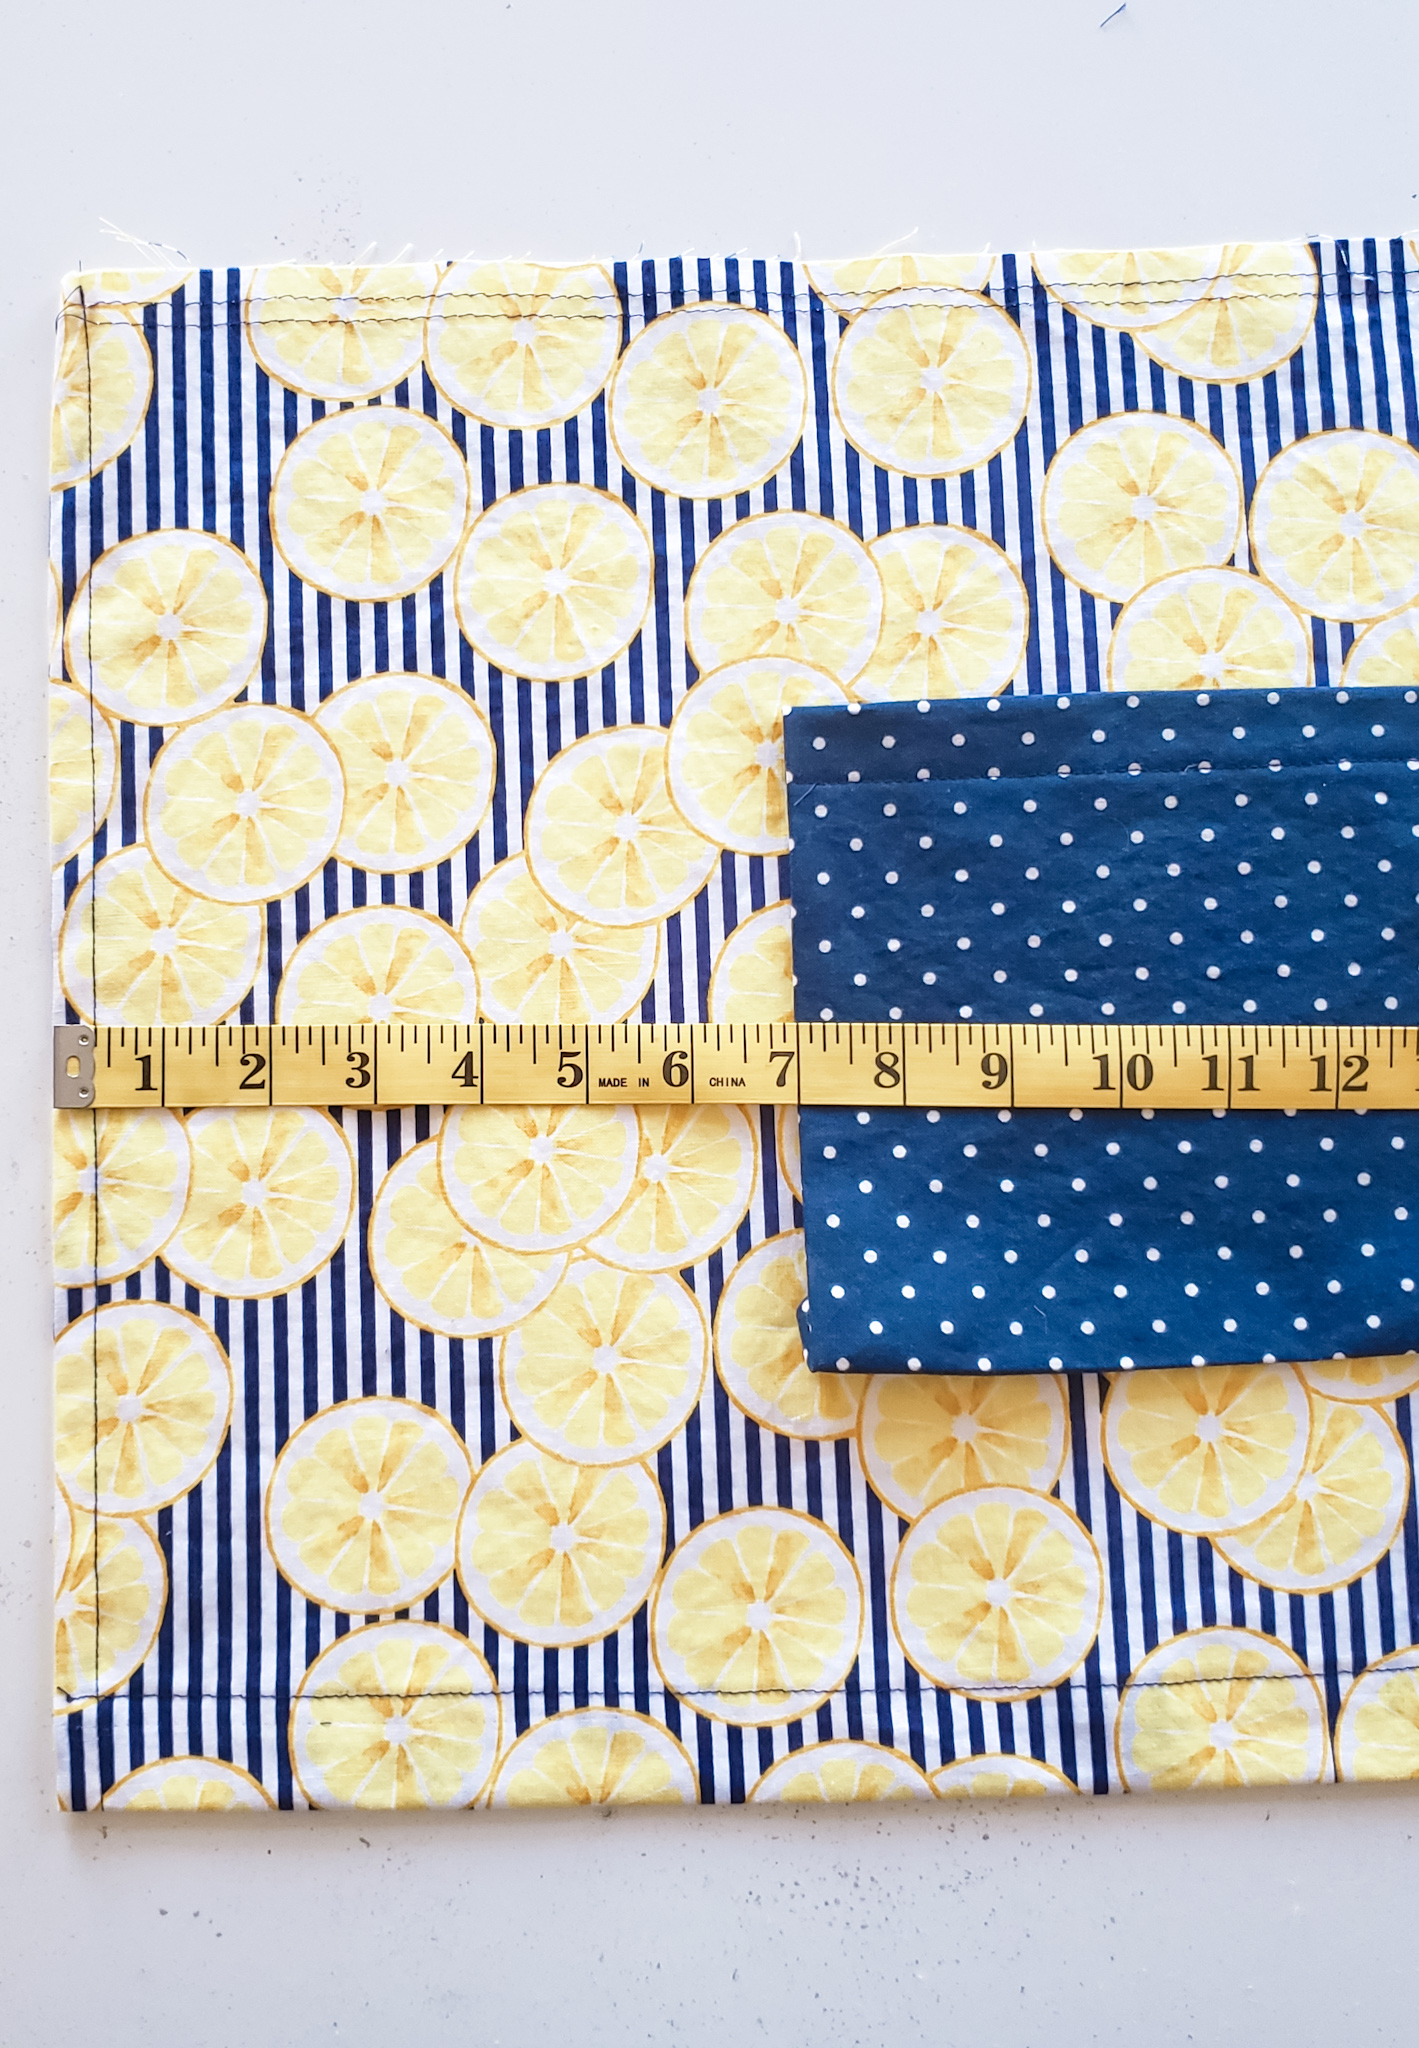
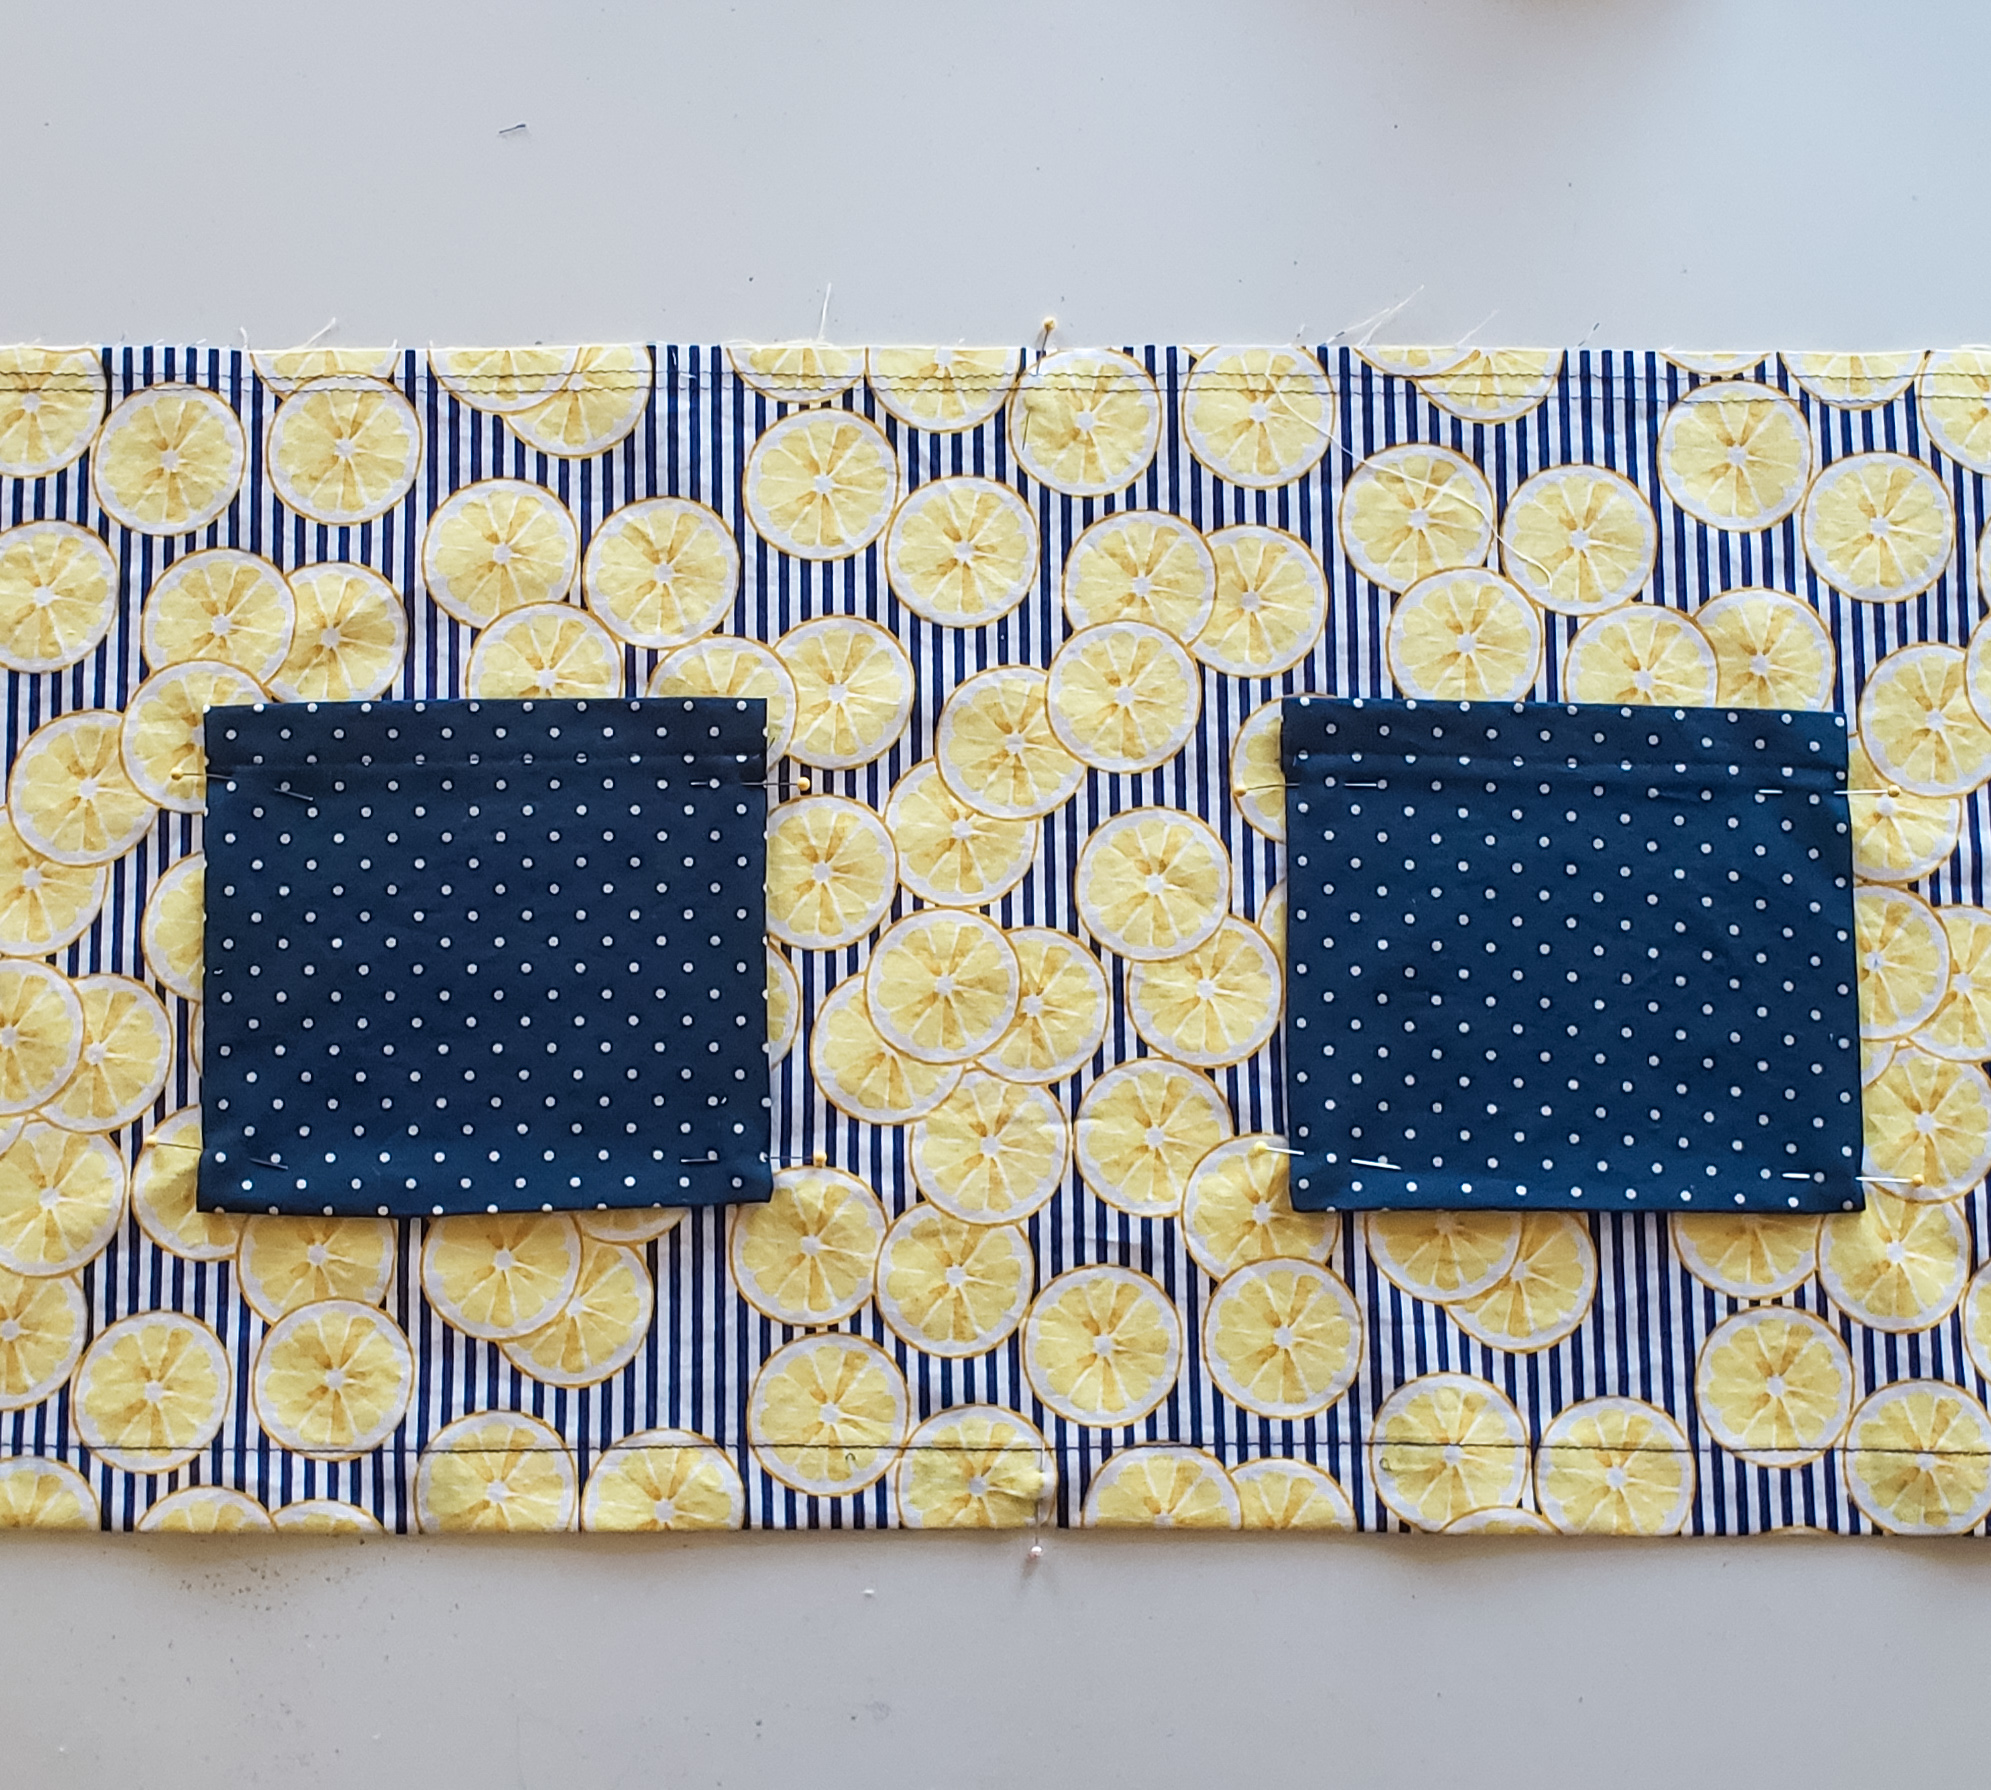
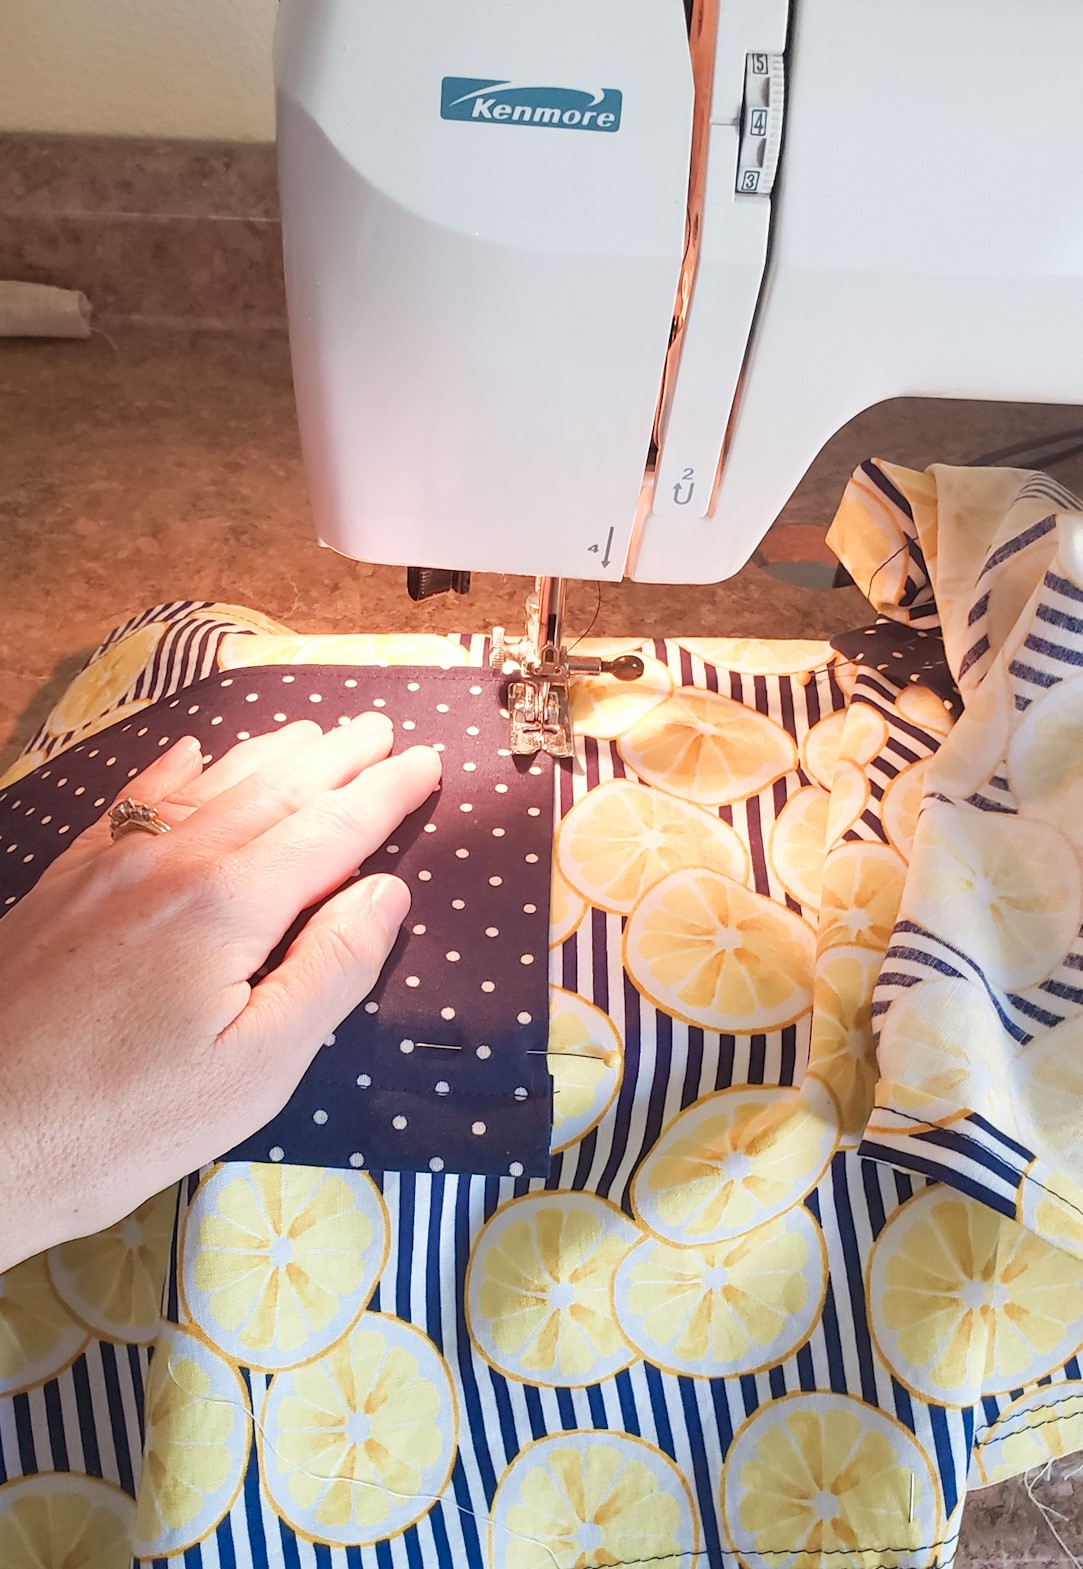
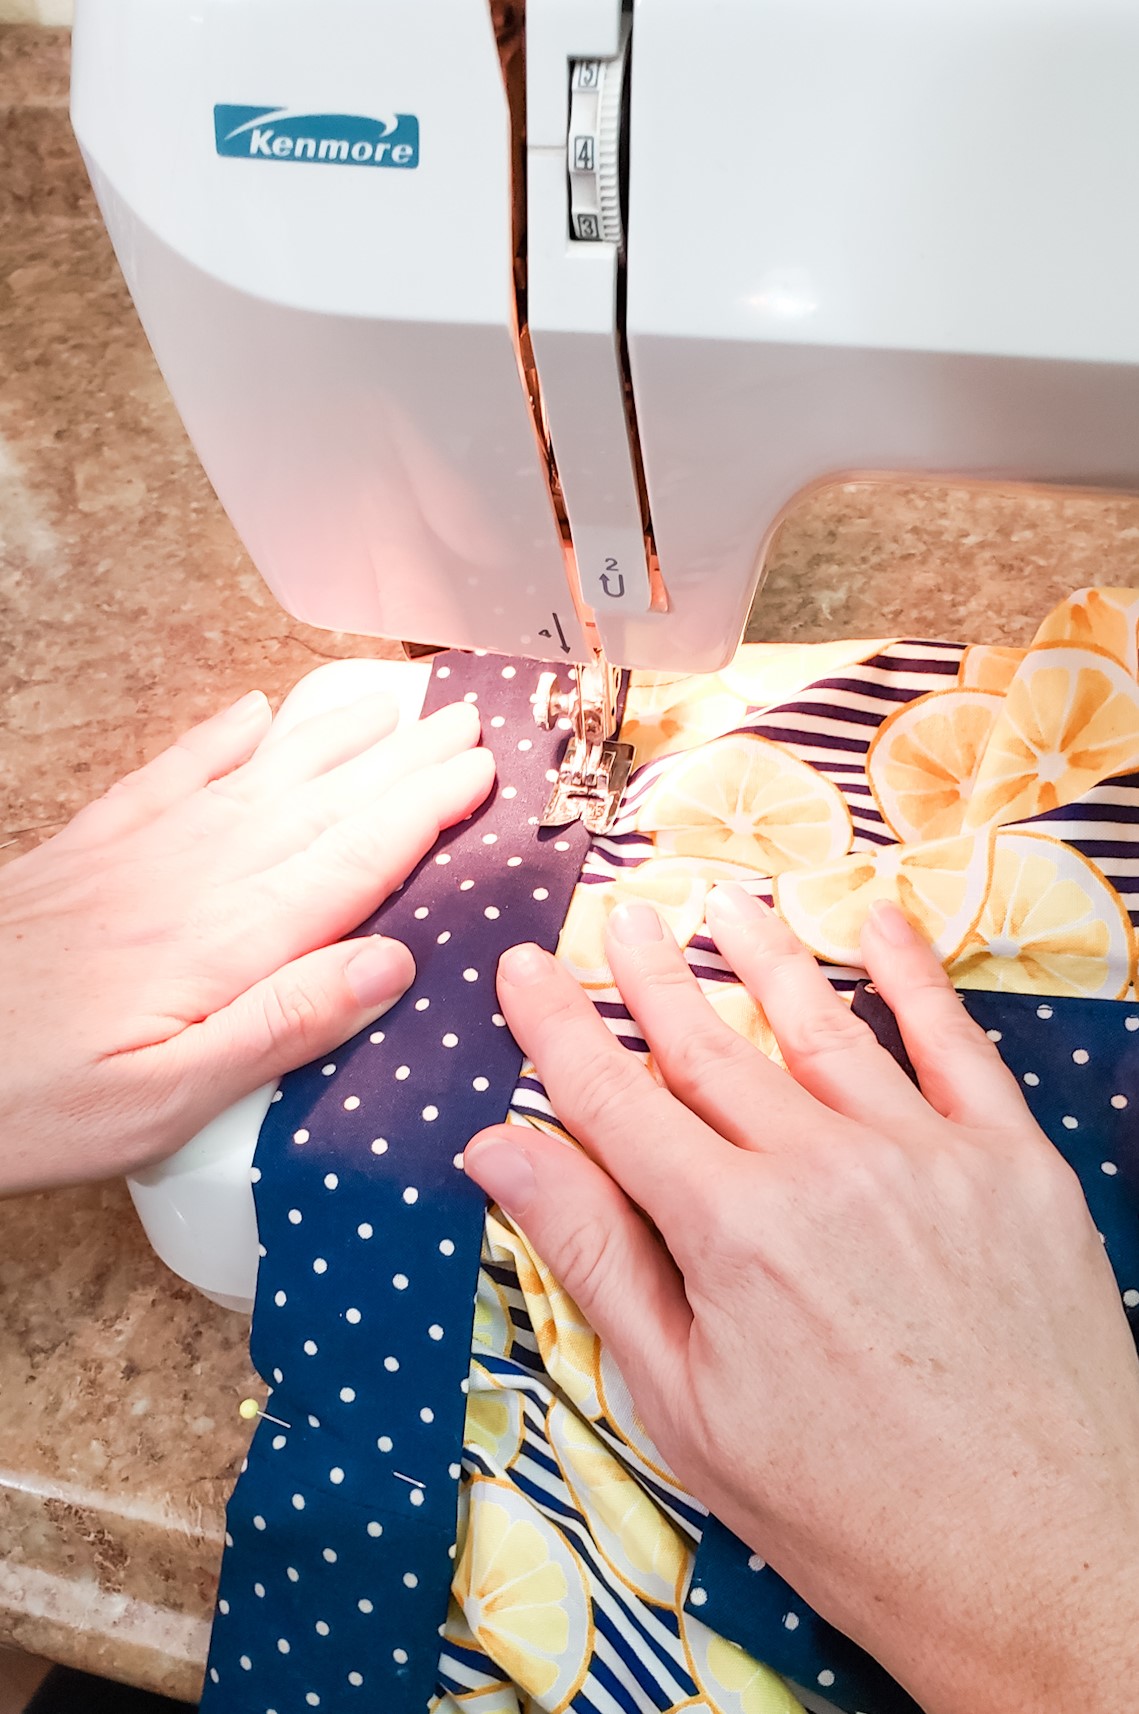
Place the pockets on top of the apron wherever you like them, pinning the sides down. I pinned mine 7″ away from the sides, and 4″ down from the top. You can do whatever you think looks good. There’s no right or wrong answer! Beginning at the top side of each pocket, stitch down the side, close to the edge. When you reach the bottom of the pocket, pivot and sew down the bottom edge. Pivot again when you get to the next side and continue stitching down that side. Remember you are not sewing down the top of the pocket, otherwise you have no pocket!
Step 6:
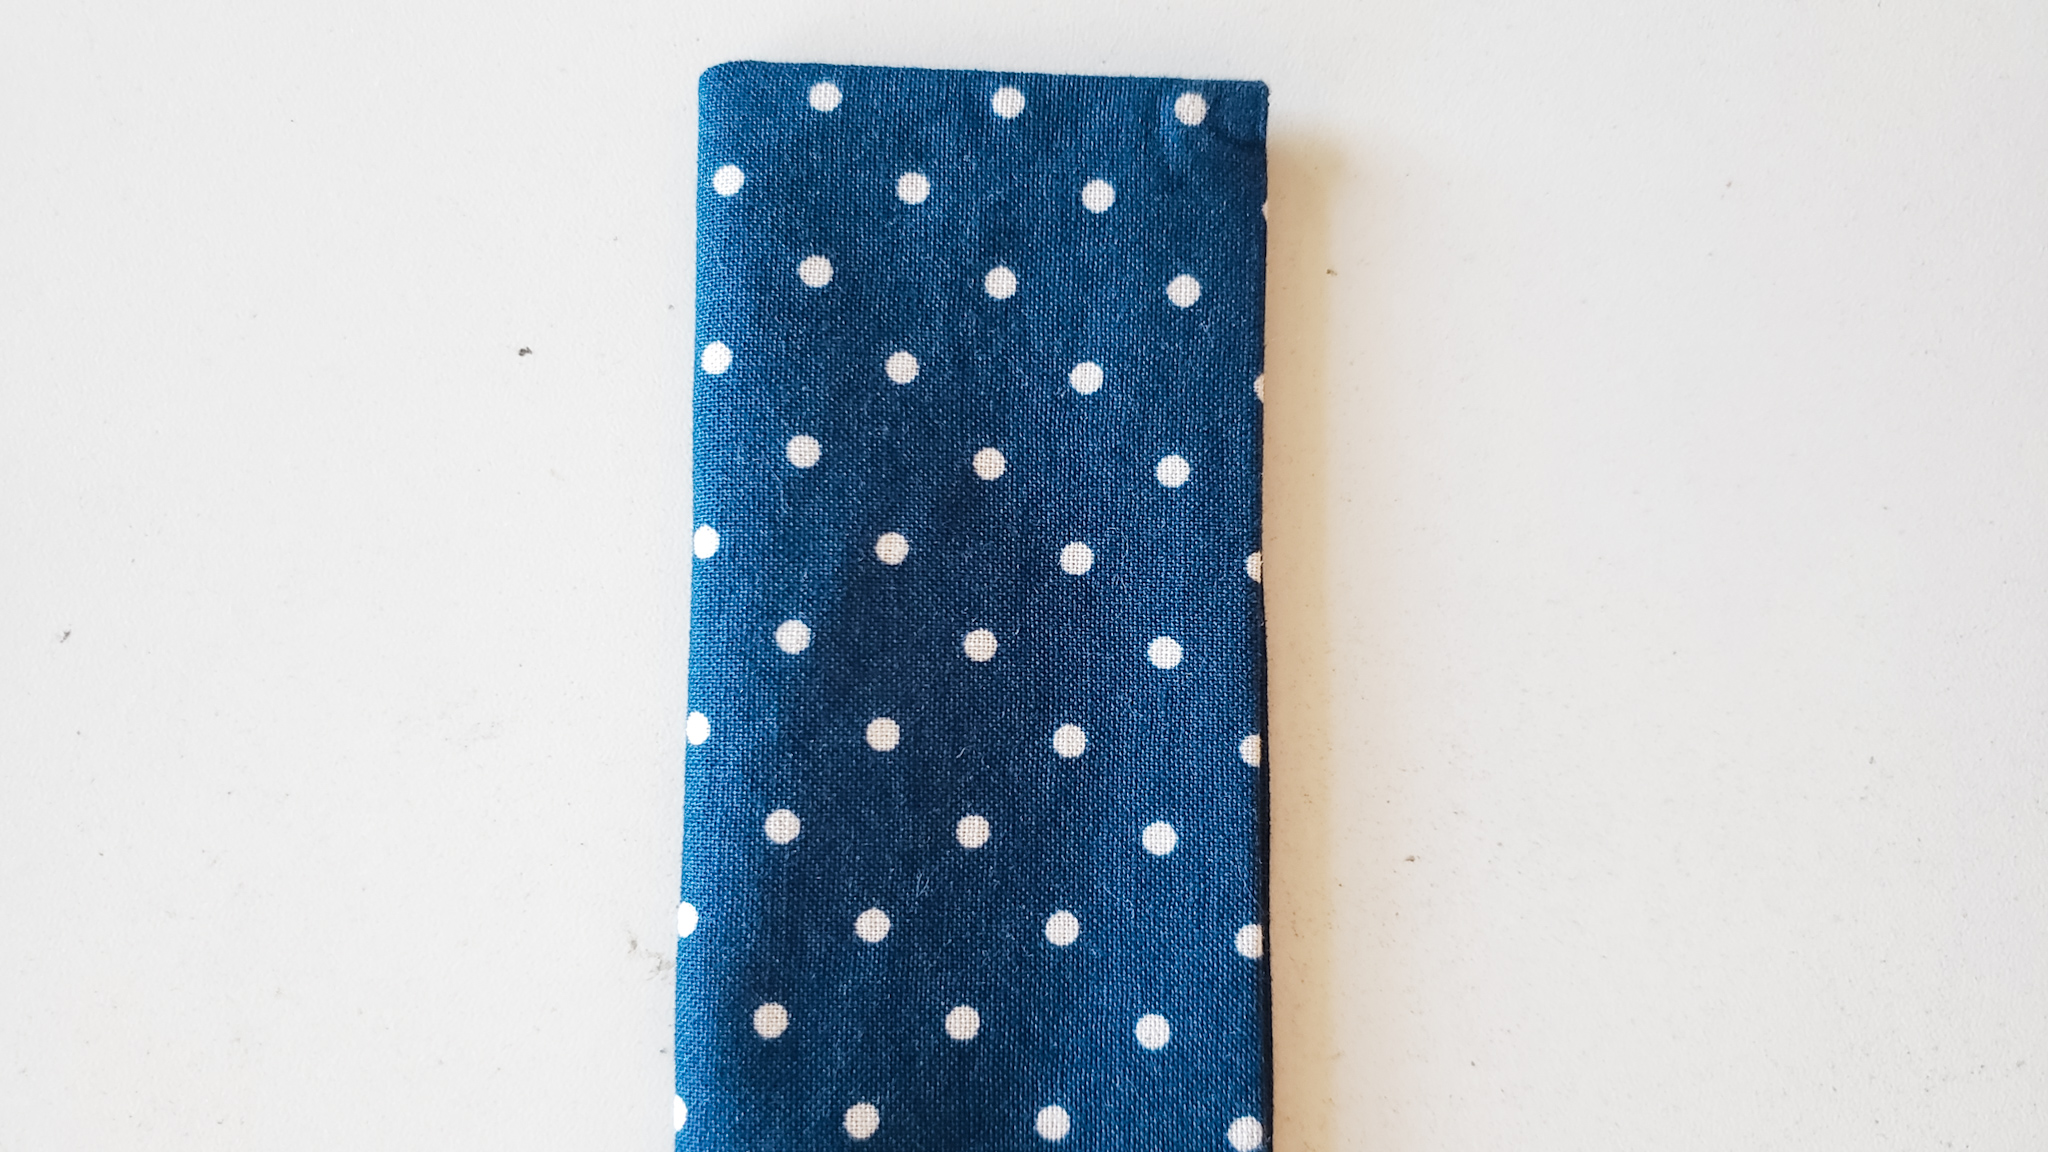
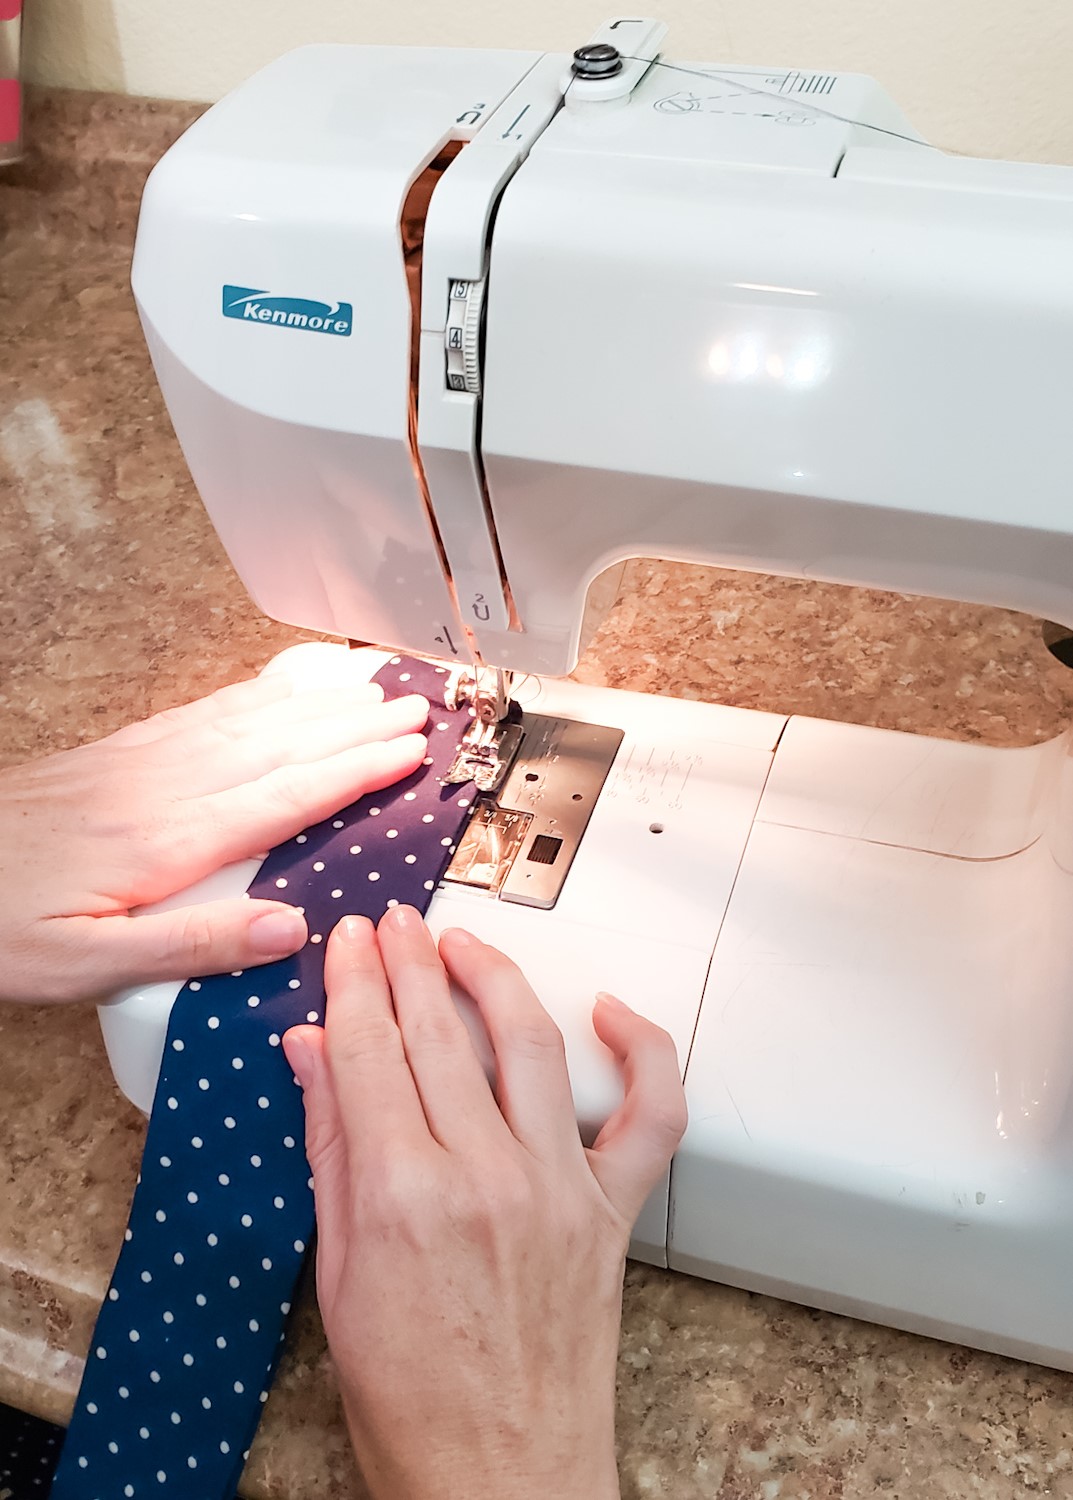
To make the tie: First, sew your two tie pieces together by pinning the two short ends, right sides together, and stitching across with a 1/2″ seam allowance. Iron your seam open. Now you have one long tie.
Next, fold over both long edges (top and bottom) 1/2″ and press.
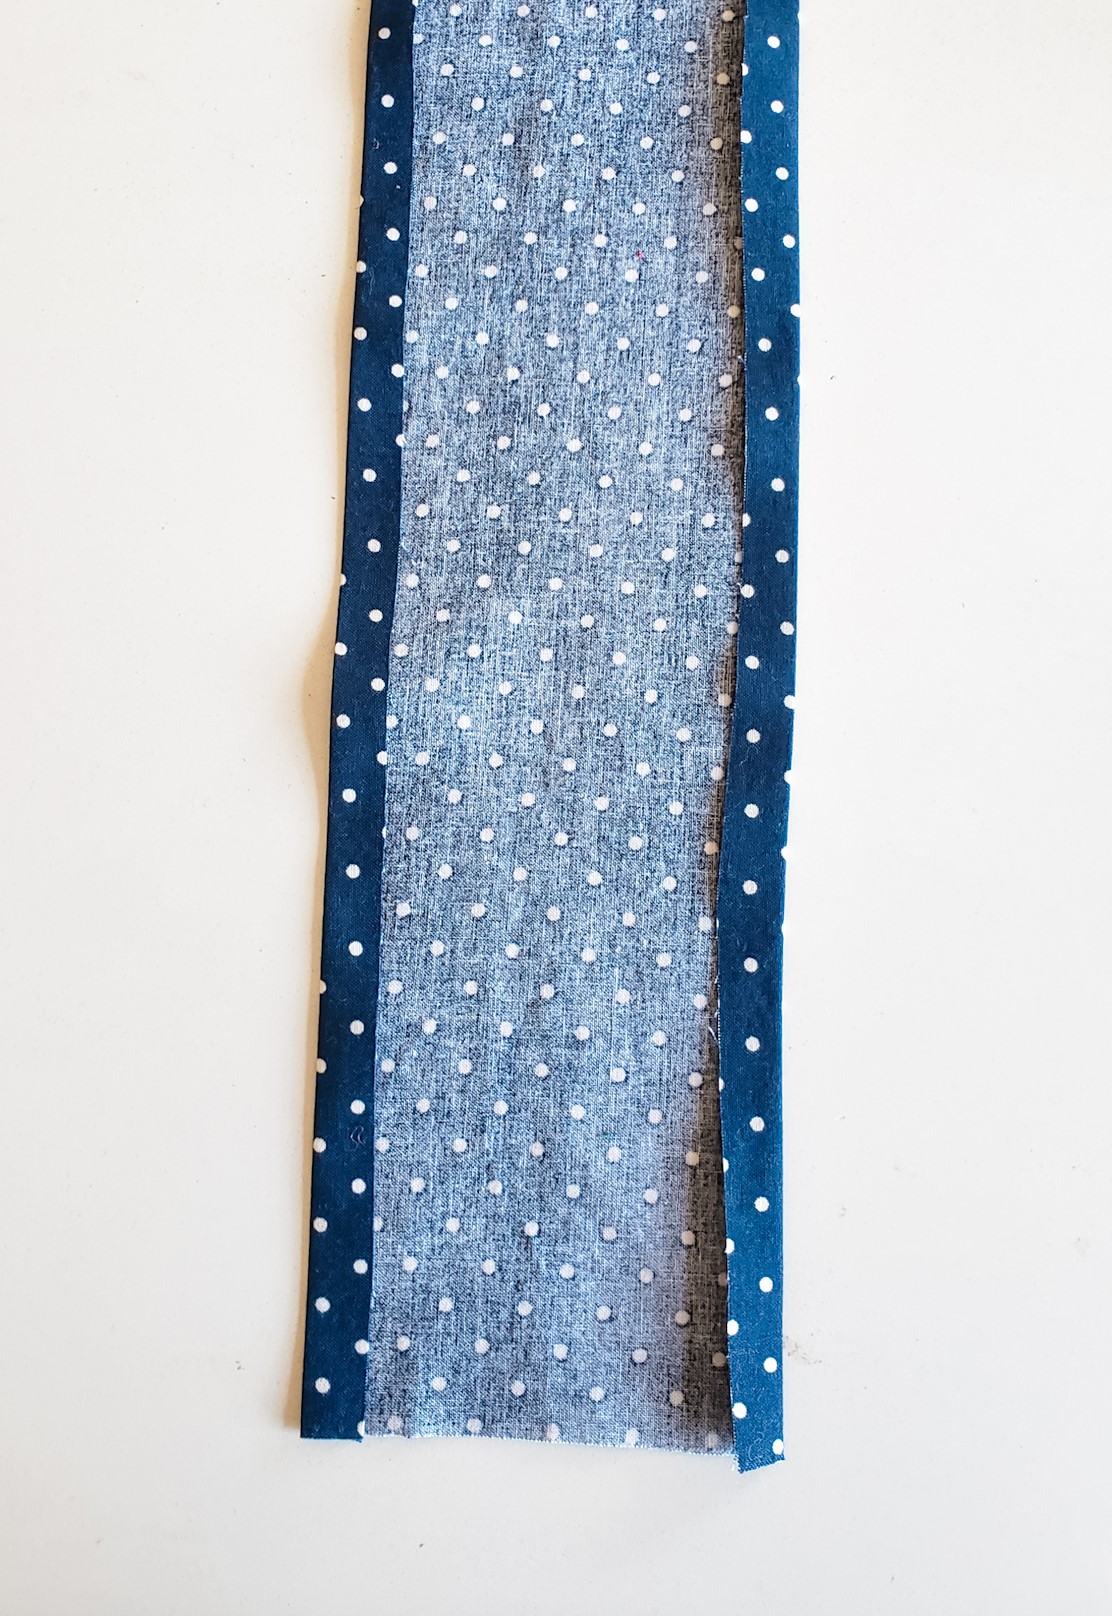
Fold your two tie ends in half, right sides together and stitch both short ends, using a 1/2″ seam allowance. Notice that your long edges have already been pressed and you will keep them pressed when you sew the short ends of the ties.
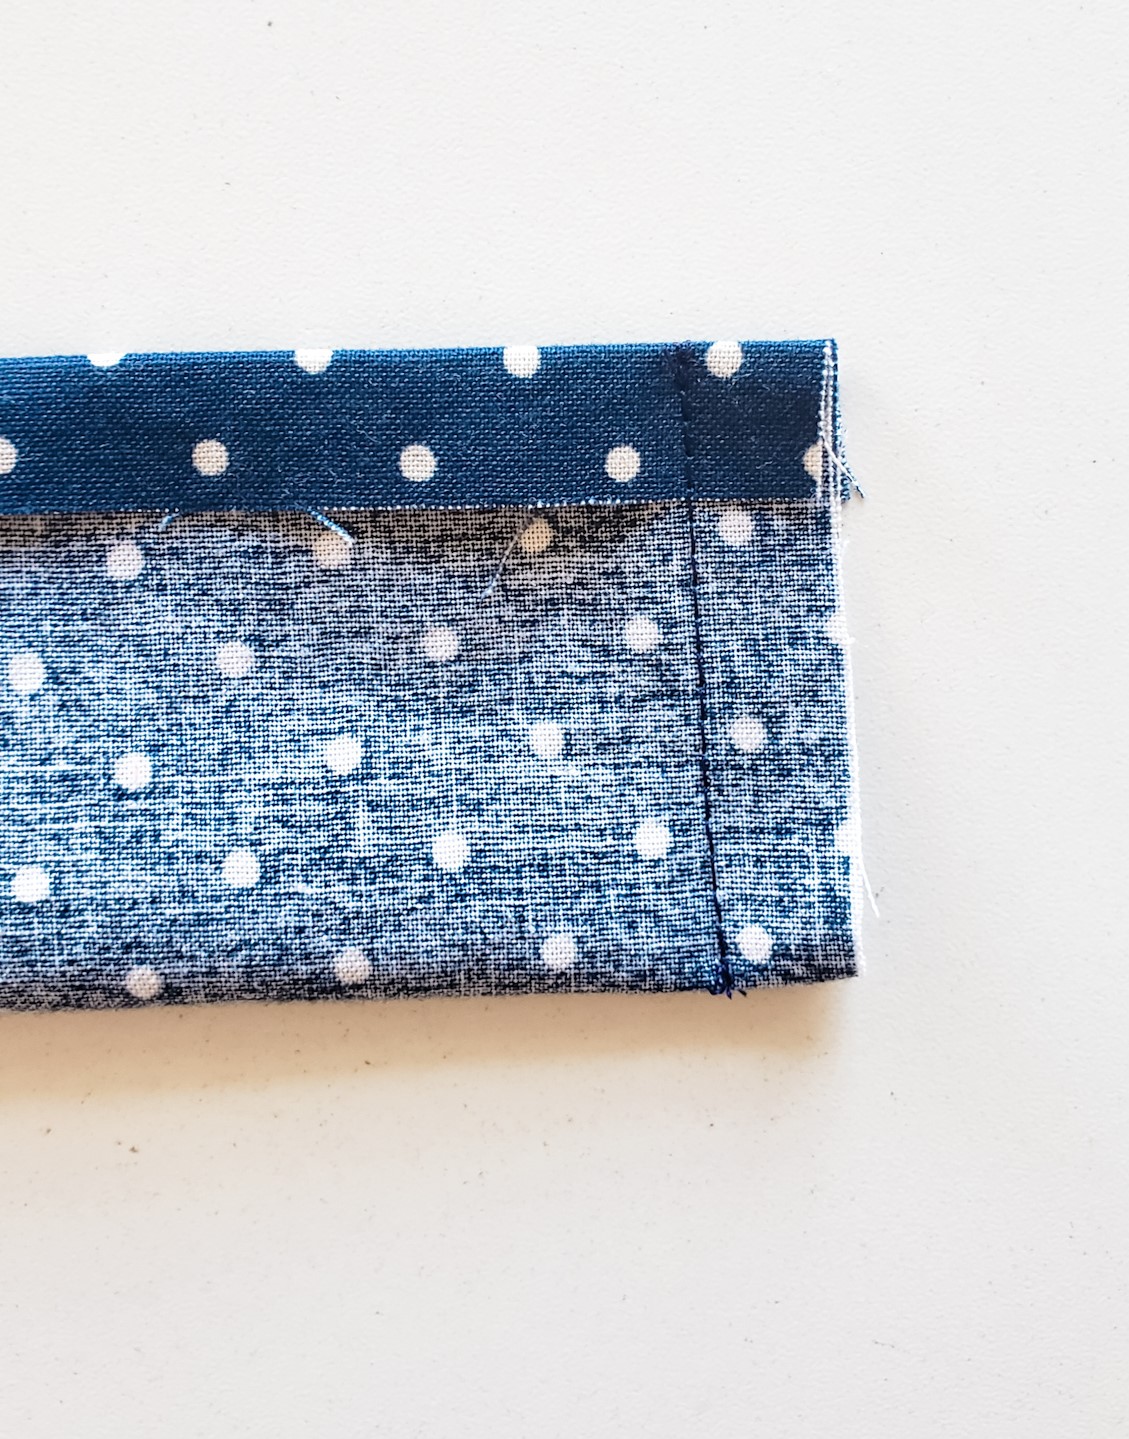
Trim your corners and turn the tie right side out. Your tie will now be folded in half, WRONG sides together. Make sure your edges are even and press your folded edge down.
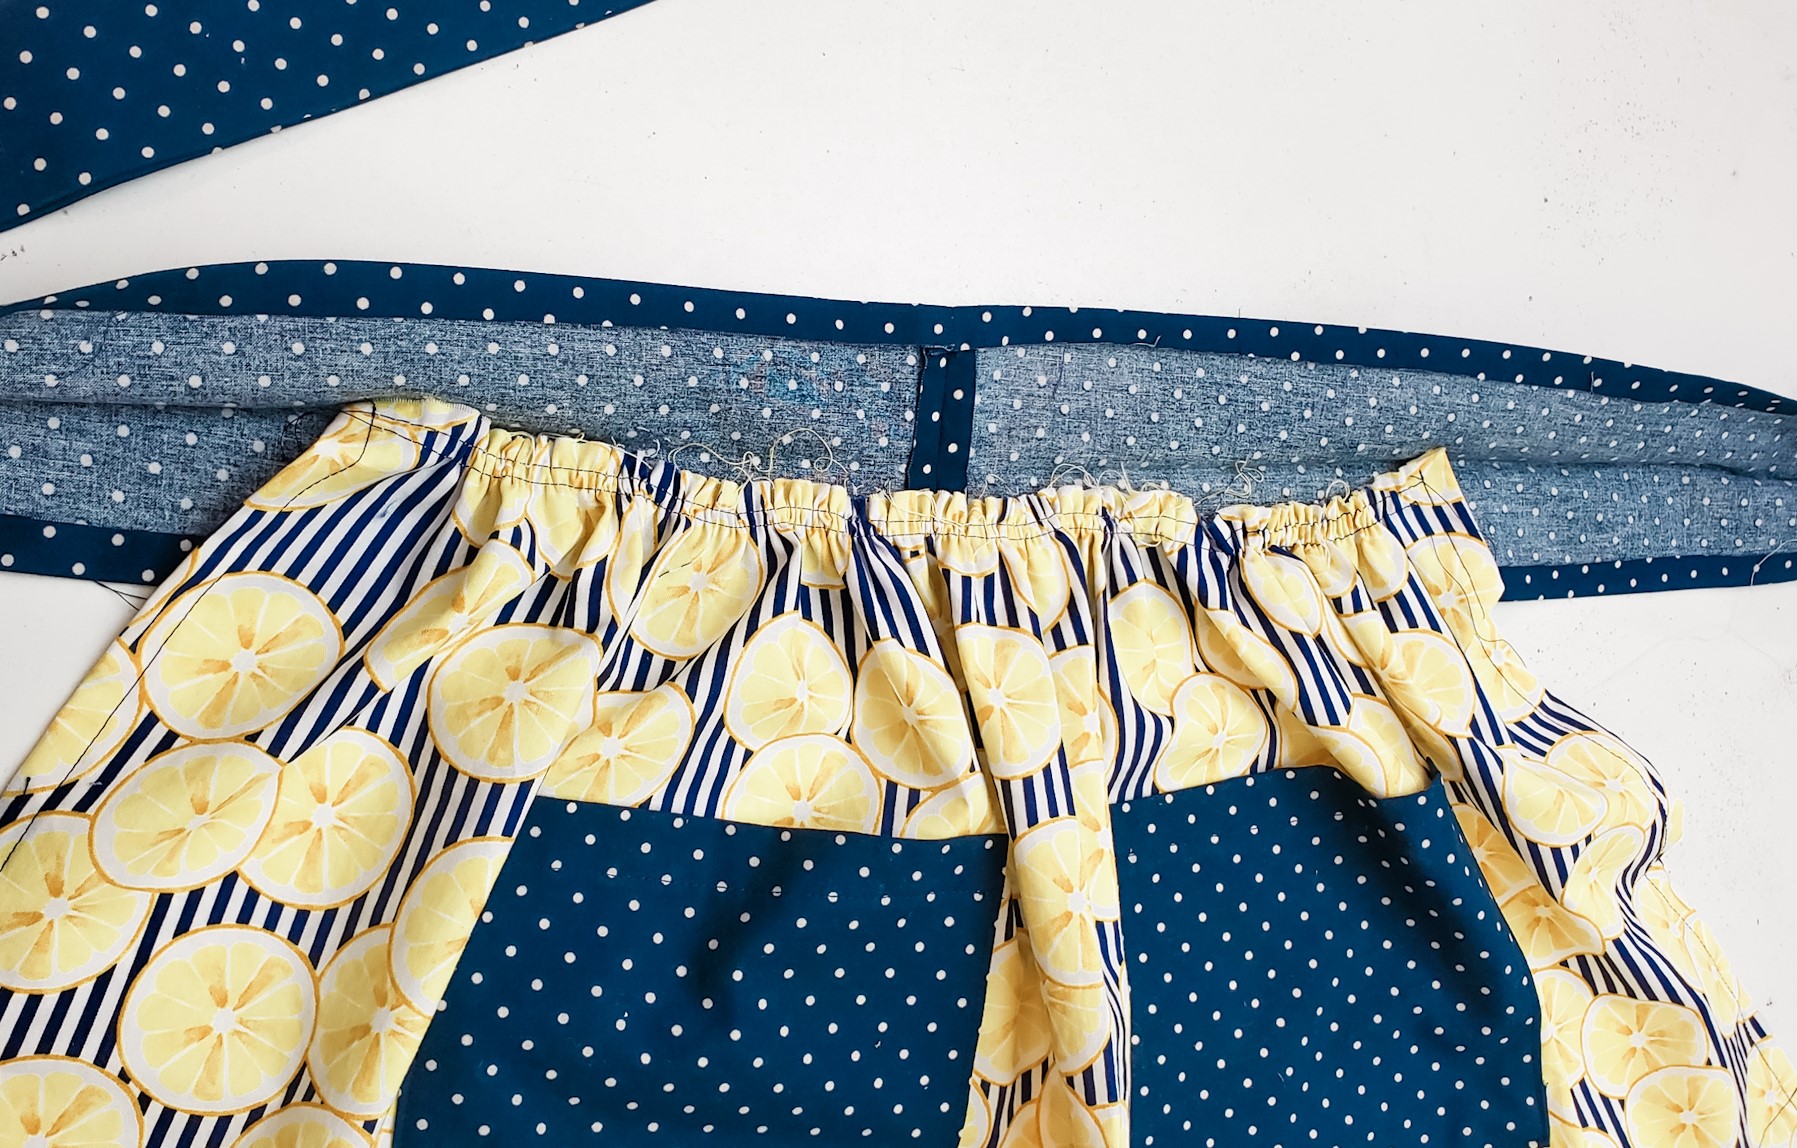
Step 7:
Before you start gathering, fold your apron in half and mark the center of the apron (with a fabric marking pencil) at the top edge (just underneath the gathering line). Very carefully, pull up your 2 bobbin threads on the top edge of your apron to create your gathers. Gently pull your gathers to the middle of the skirt. I usually start on both ends of the apron and meet in the middle. You want to gather until the front of the apron fits between your hips. For me, the finished width of my apron was about 17″ once I pulled all the gathers tight. For a smaller child, you might want to gather a little bit more. There’s no right or wrong, it’s all preference. Once your gathers are in, hold the apron up to you and decide what width feels best to you.
Step 8:
Now, you are going to open up your tie and lay your apron down on top, matching the raw edge of the apron (the gathered edge) into the fold of the tie. Match the center edge of your apron to the center seam on the tie. You will then fold down your tie, sandwiching the apron in-between the tie and pinning the sandwiched portion together, like so.
Step 9:
You are now going to sew your tie in one piece, sewing the apron as well, when you get to that point. Starting at one end of the tie, stitch very close to the folded edges. Continue sewing until you reach your apron and keep on going, staying close to your folded edges. Make sure that you catch both layers of the tie in your stitch. Continue stitching until you are all the way down to the end of the tie.
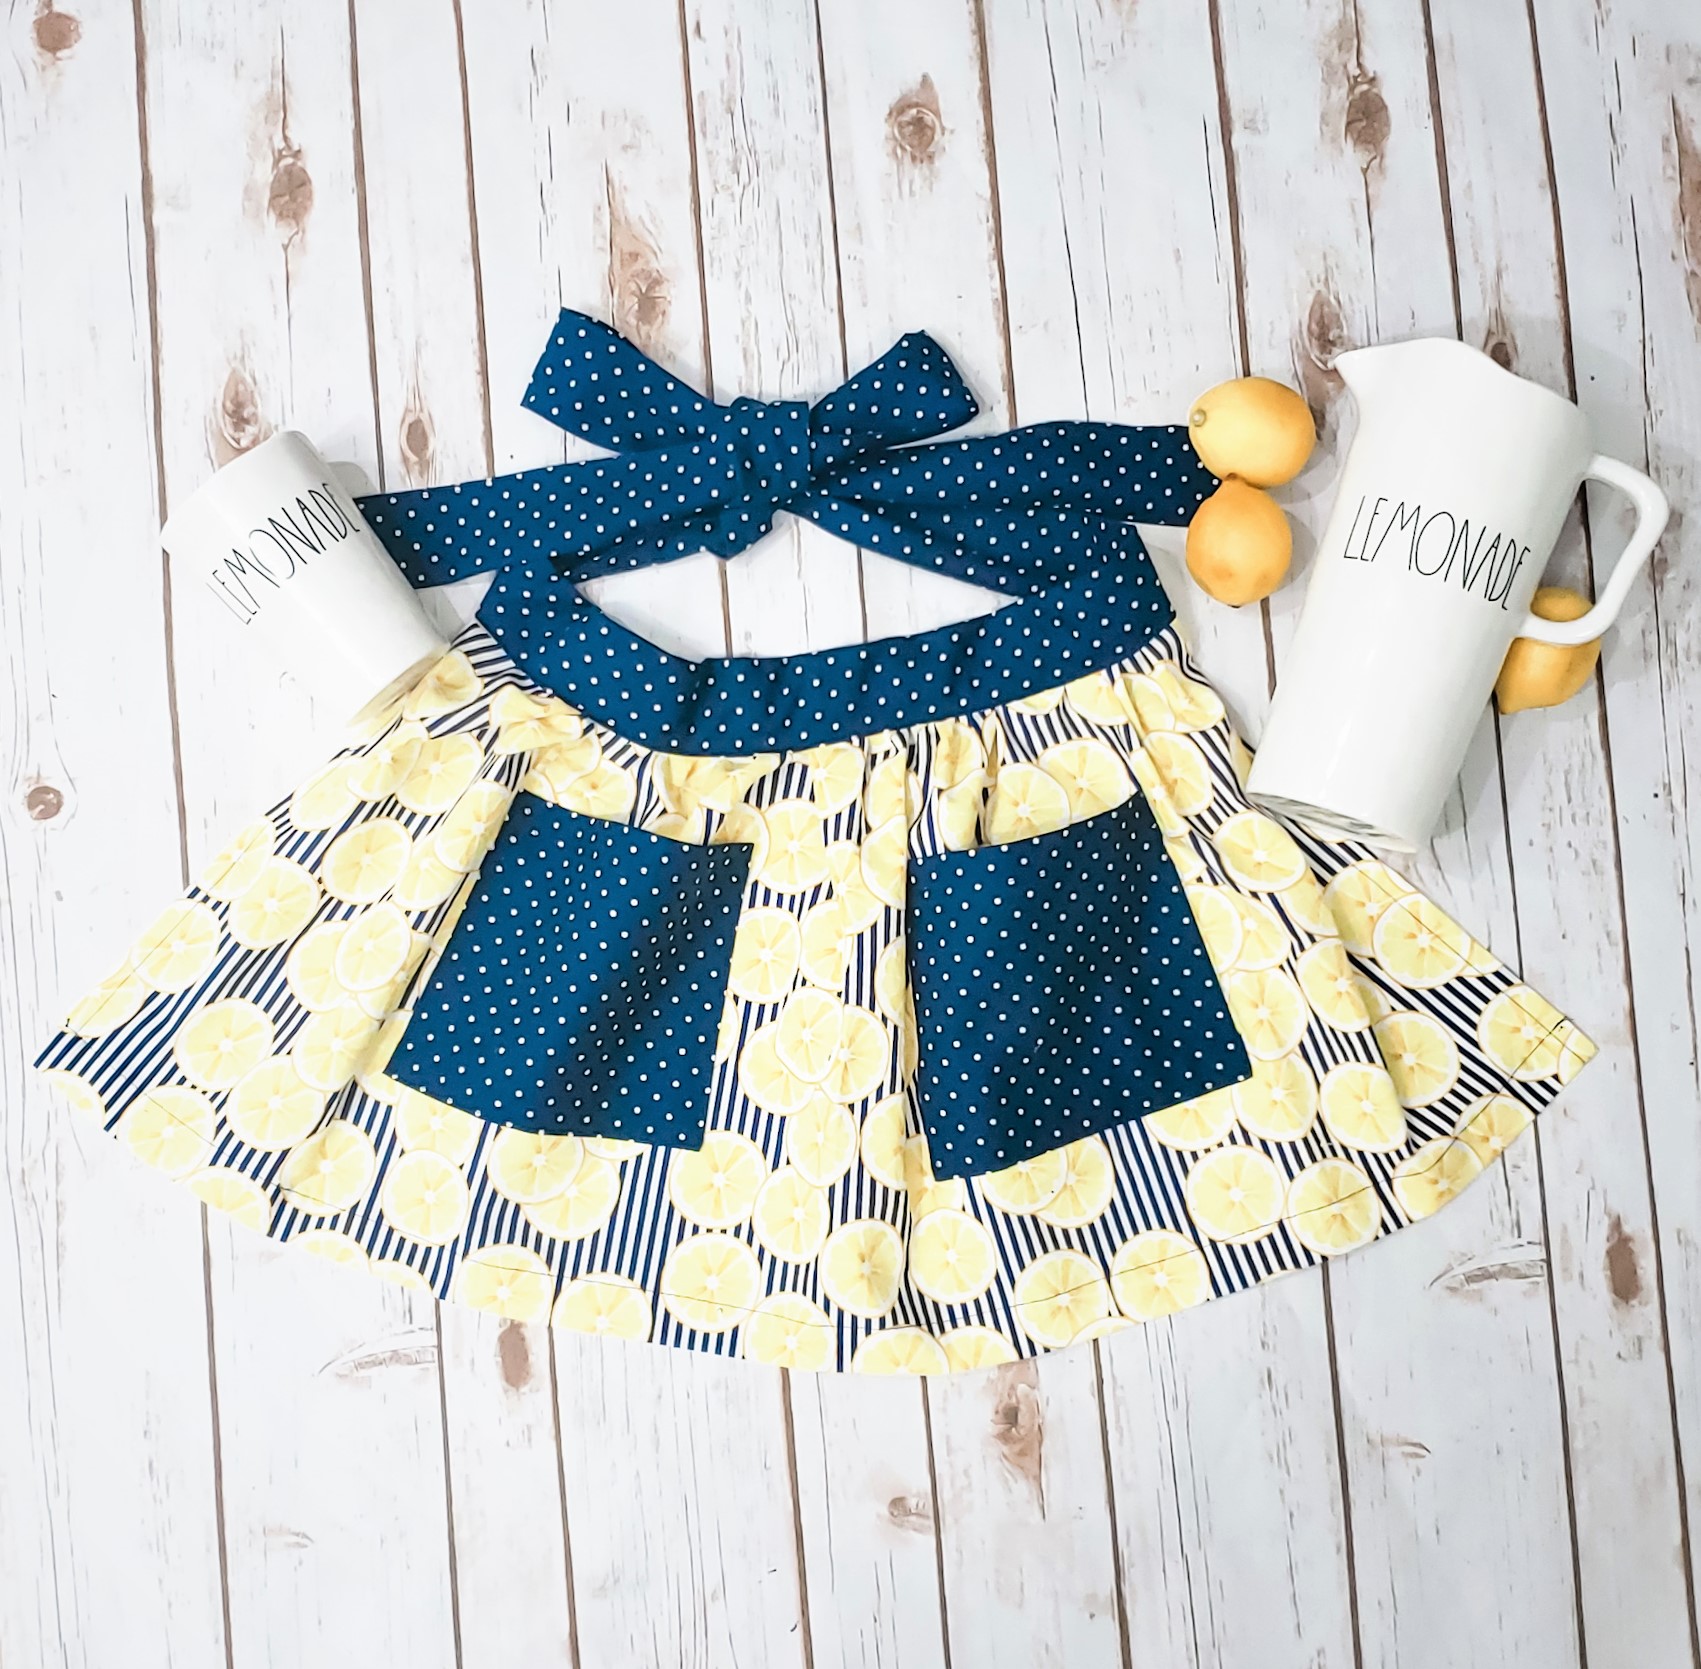
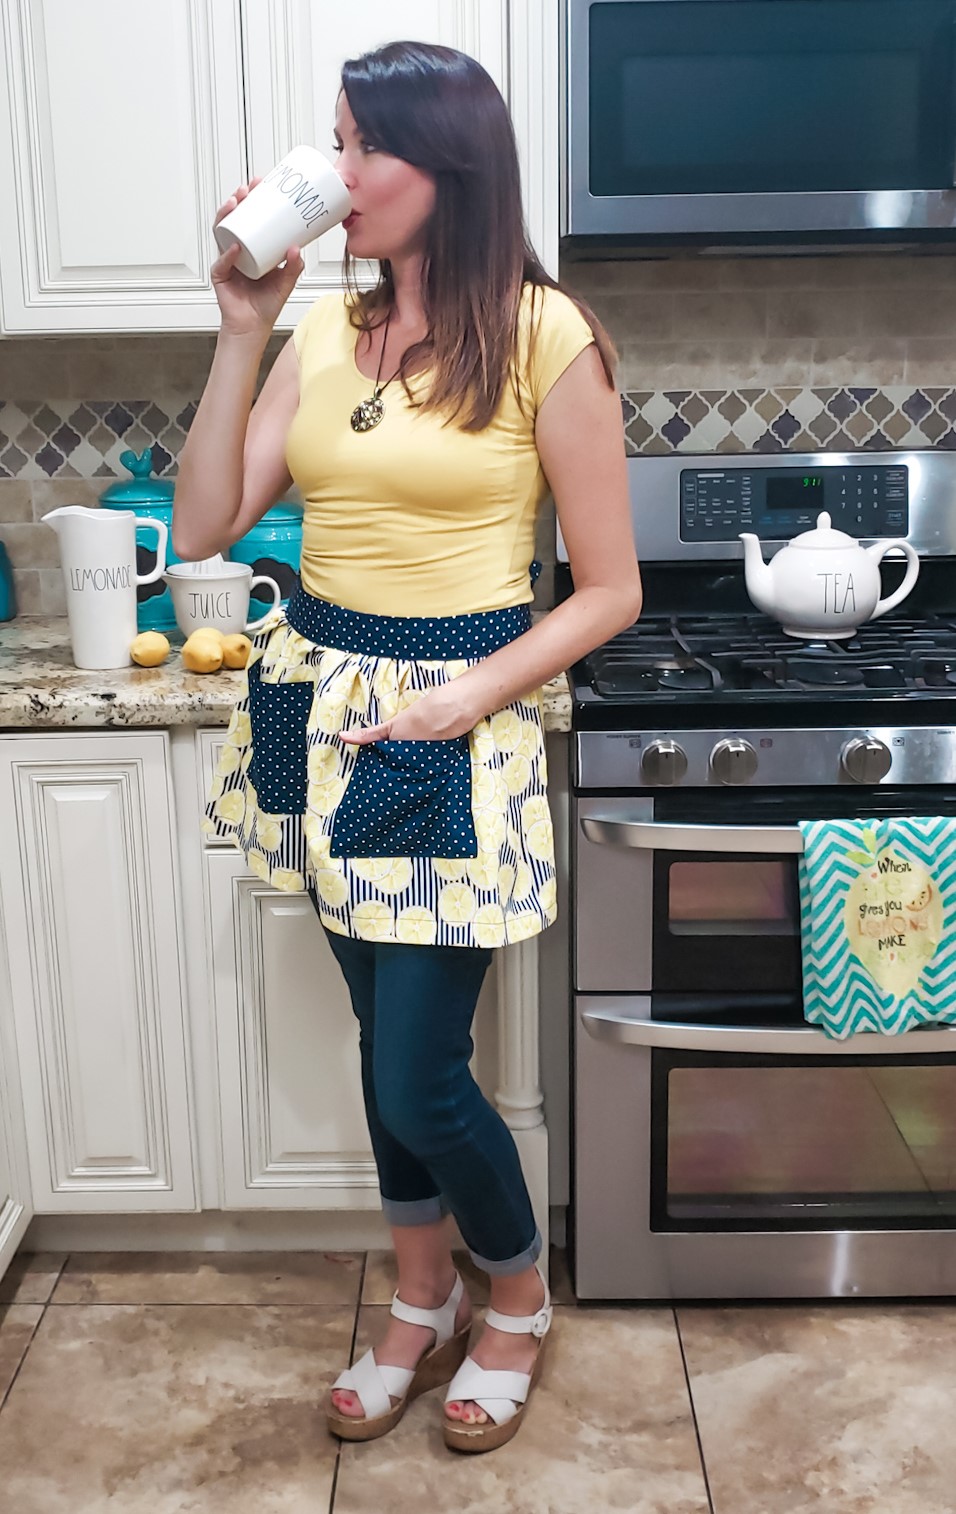
That’s all there is to it! How adorable is this apron??
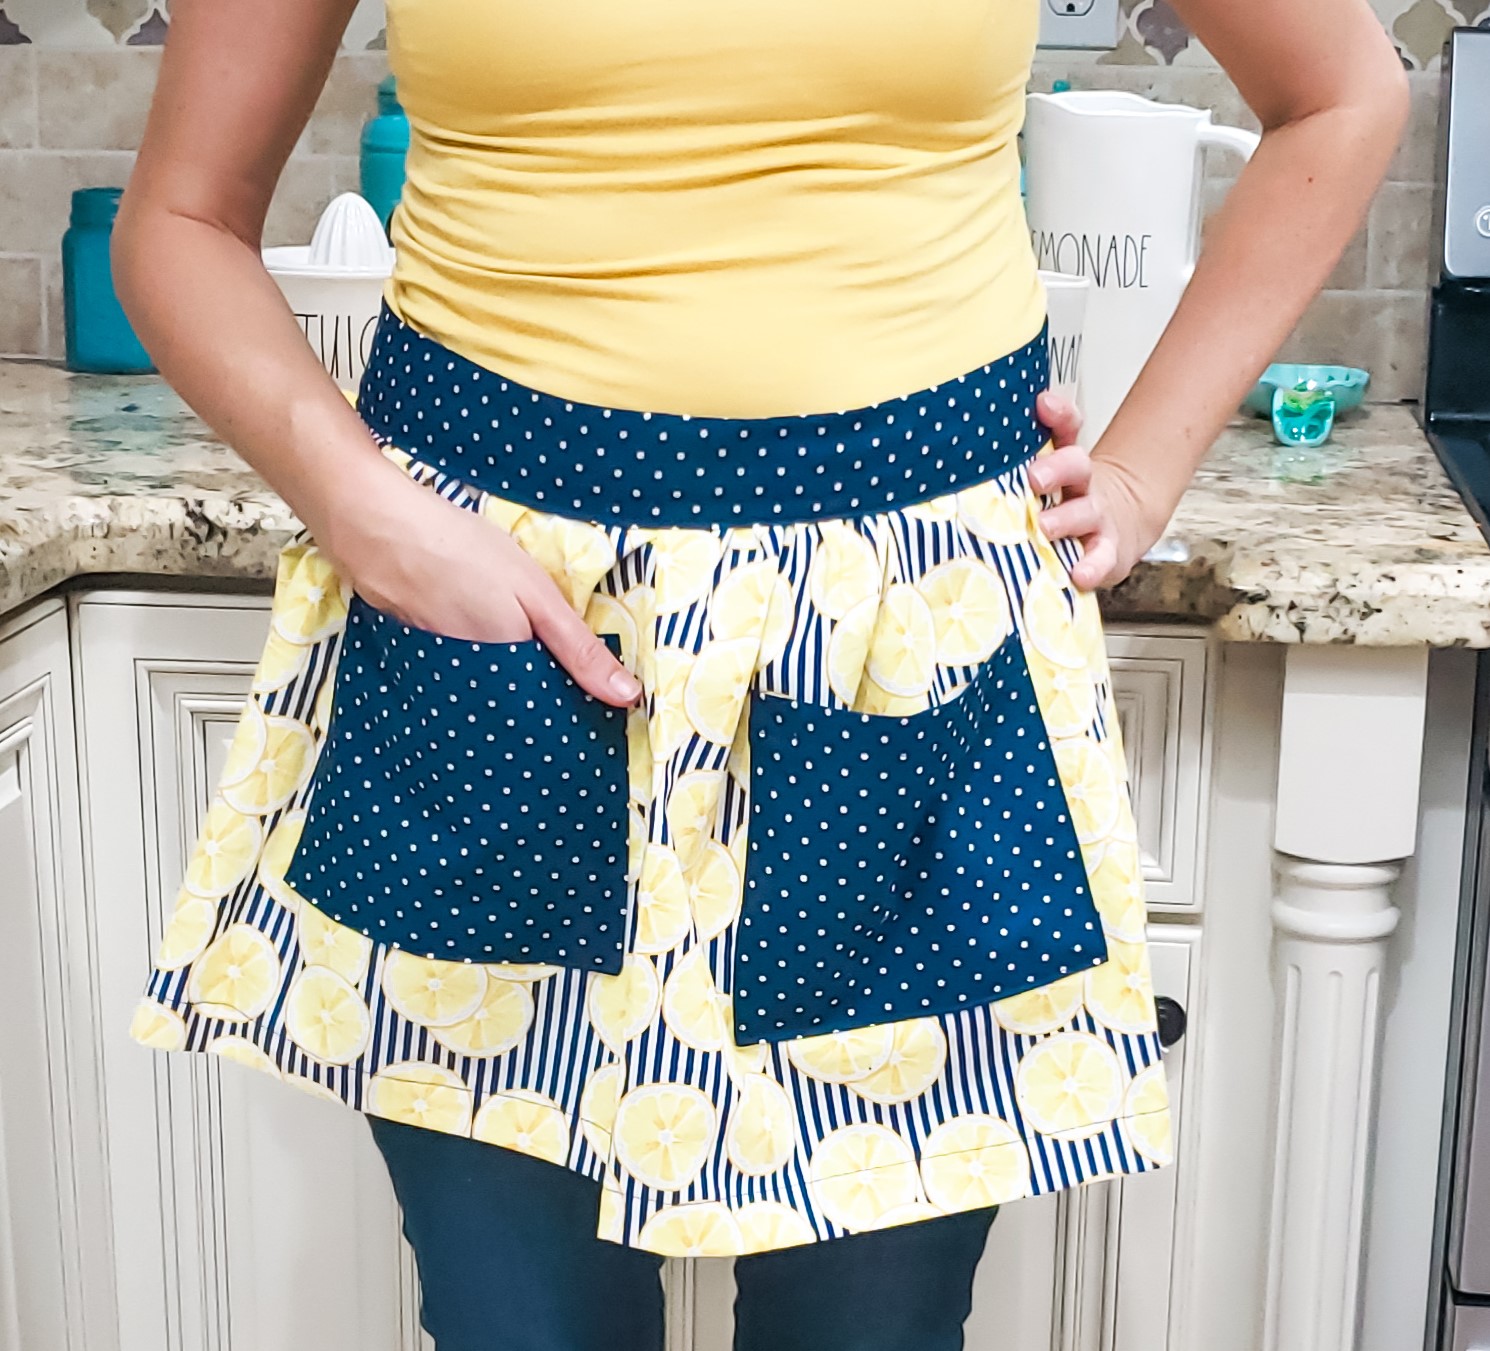
Paired with my Rae Dunn lemonade dishes, I’d say this was a pretty adorable photo shoot!
It wasn’t too complicated, was it? Let me know how my instructions were by leaving me a comment 🙂
*Sassy Cassy’s is part of the Amazon Affiliate Program, which means that if you purchase Amazon items from this website, a small commission will be earned, at no extra cost to you.

Hi-needed something to do saw the Apron n it had instructions so I tried it . Easy instructions especially the pictures. Made a few changes a little longer n from the top to the pockets longer.. Made for my daughter, grand daughter- half the instructions n made one for my great grand daughter. Thank you so much will start my Christmas sewing. Great idea . MAHALO, aunty anna
Awesome! I’m so glad you enjoyed this tutorial. Homemade gifts are the best! Happy sewing! 🙂
Adorable apron & I love how you showed us how to make it with photos- love it!
Thank you! I’m glad you enjoyed the tutorial! <3
I’m a self taught sewer that learned on my grandma’s old Singer treadle machine before I could afford the new computerized embroidery machine I have now, before the days of You Tube and Google, I just figured it out. I made pillows, stuffed animals, curtains, dust ruffles, everything when fabric was cheaper than buying these things. I just finished an apron exactly like this by just making what I wanted. But, you showed me something I could have used, doing the basting stitch to gather the material. I gathered by “skoochingl a little fabric under the needle a little at a time. Thanks for showing an old dog a new trick! And I love your fabric. I’m a big fan of lemons and blue with yellow, so cheery!
I love lemons too! I’m glad that my tutorial helped you! <3
Good morning,
This apron is sooo cute! I’m planning on making a few. I have started my own homemade goods and crafts store in my hometown and I wanted to cover my basis with copyright and trademark so I wanted to ask you if I could sell my aprons inspired by your tutorial in my online store?
Thank you for checking in with me about that! <3 I don't mind at all. It's a pretty generic pattern and not one that I sell, so go for it! Good luck with your new venture! 🙂
Nice little morning project!! Good instructions!!!
Thank you!