
Disclaimer: This post contains affiliate links.
You know what I love? Well, there’s a lot of things I love. But today specifically I want to tell you about how much I love a good zippered pouch. I use zippered bags for everything: for my make-up, for my sewing tools, for my toiletries, for my money, for my feminine items (ha ha). There are seriously so many different uses for zippered bags; you can never have too many!
It’s also a good learning project for my students. For some reason, people are really intimidated by zippers. This is probably the easiest zipper project I’ve done, so it’s a good starting point for beginners and for those who are scared to try a zipper.
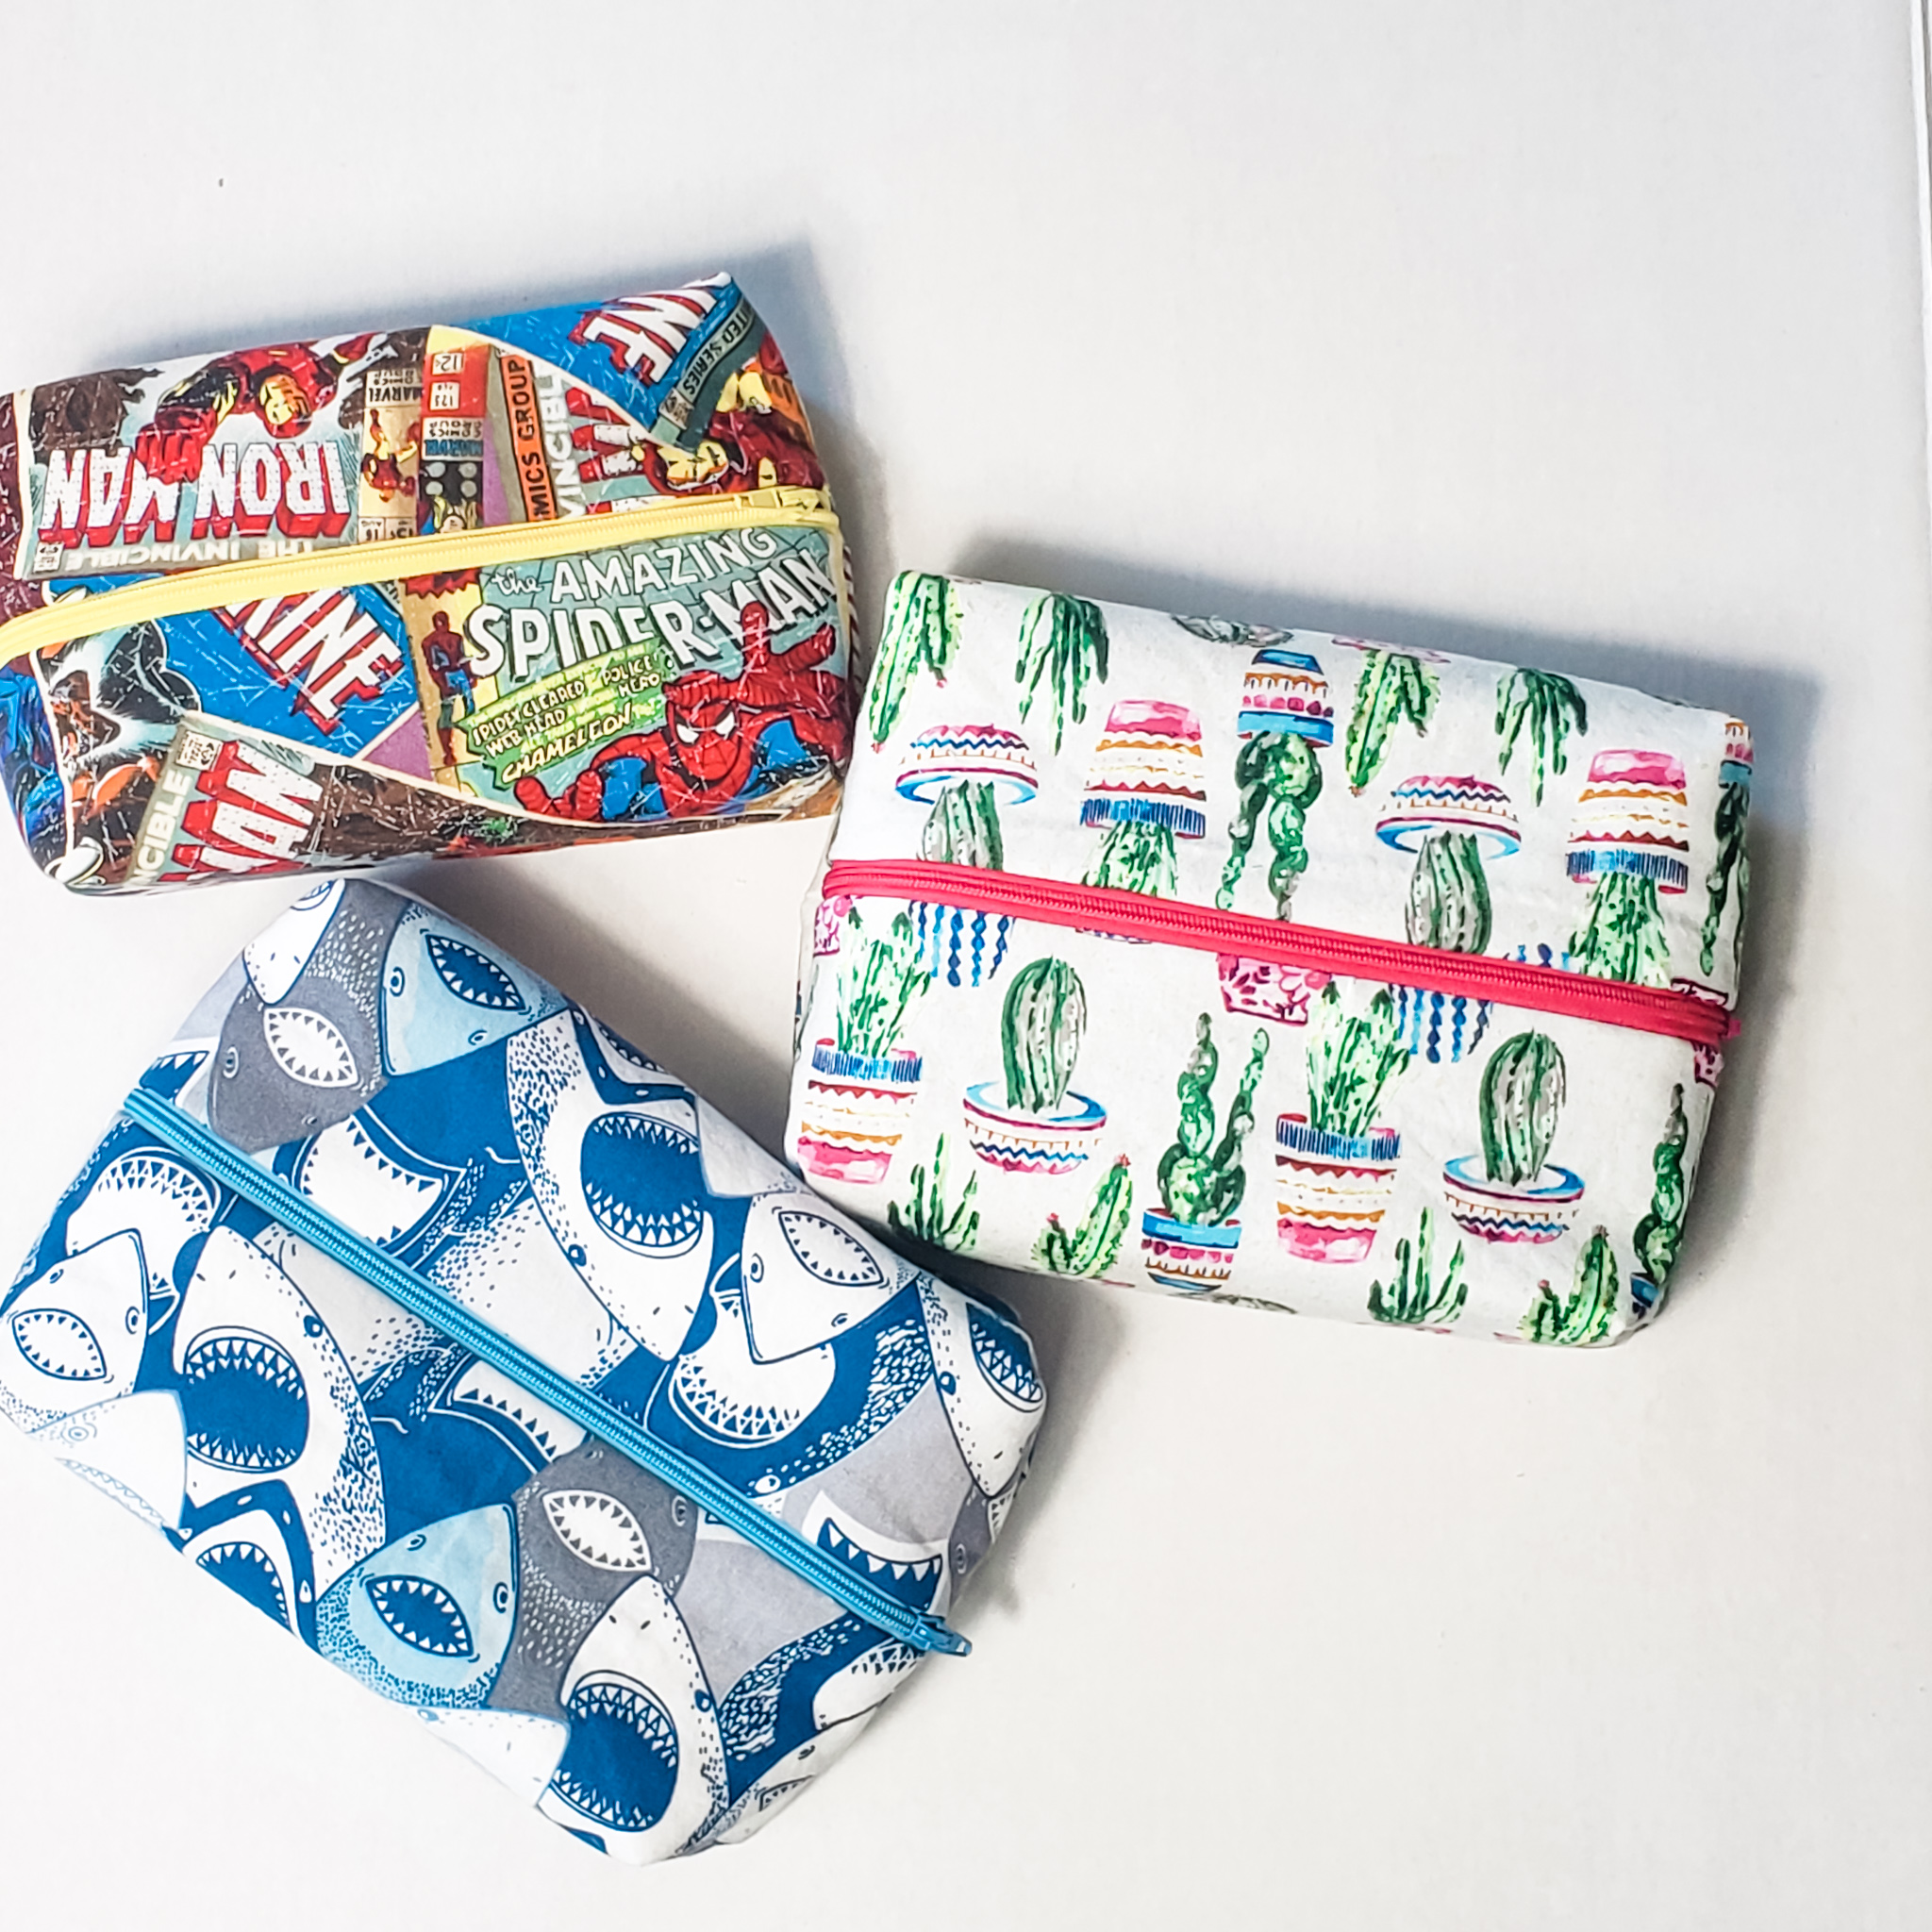
They also make great gifts! They’re a fun thing to give away to friends and like I said, anyone can use them! I’ve even made them for my boys!I love making them on my embroidery machine with different designs, and I also love sewing them out of fabrics that inspire me. So, today I am going to teach you how to make them for yourselves! Or for someone else. The holidays are right around the corner…time to get sewing! 😉
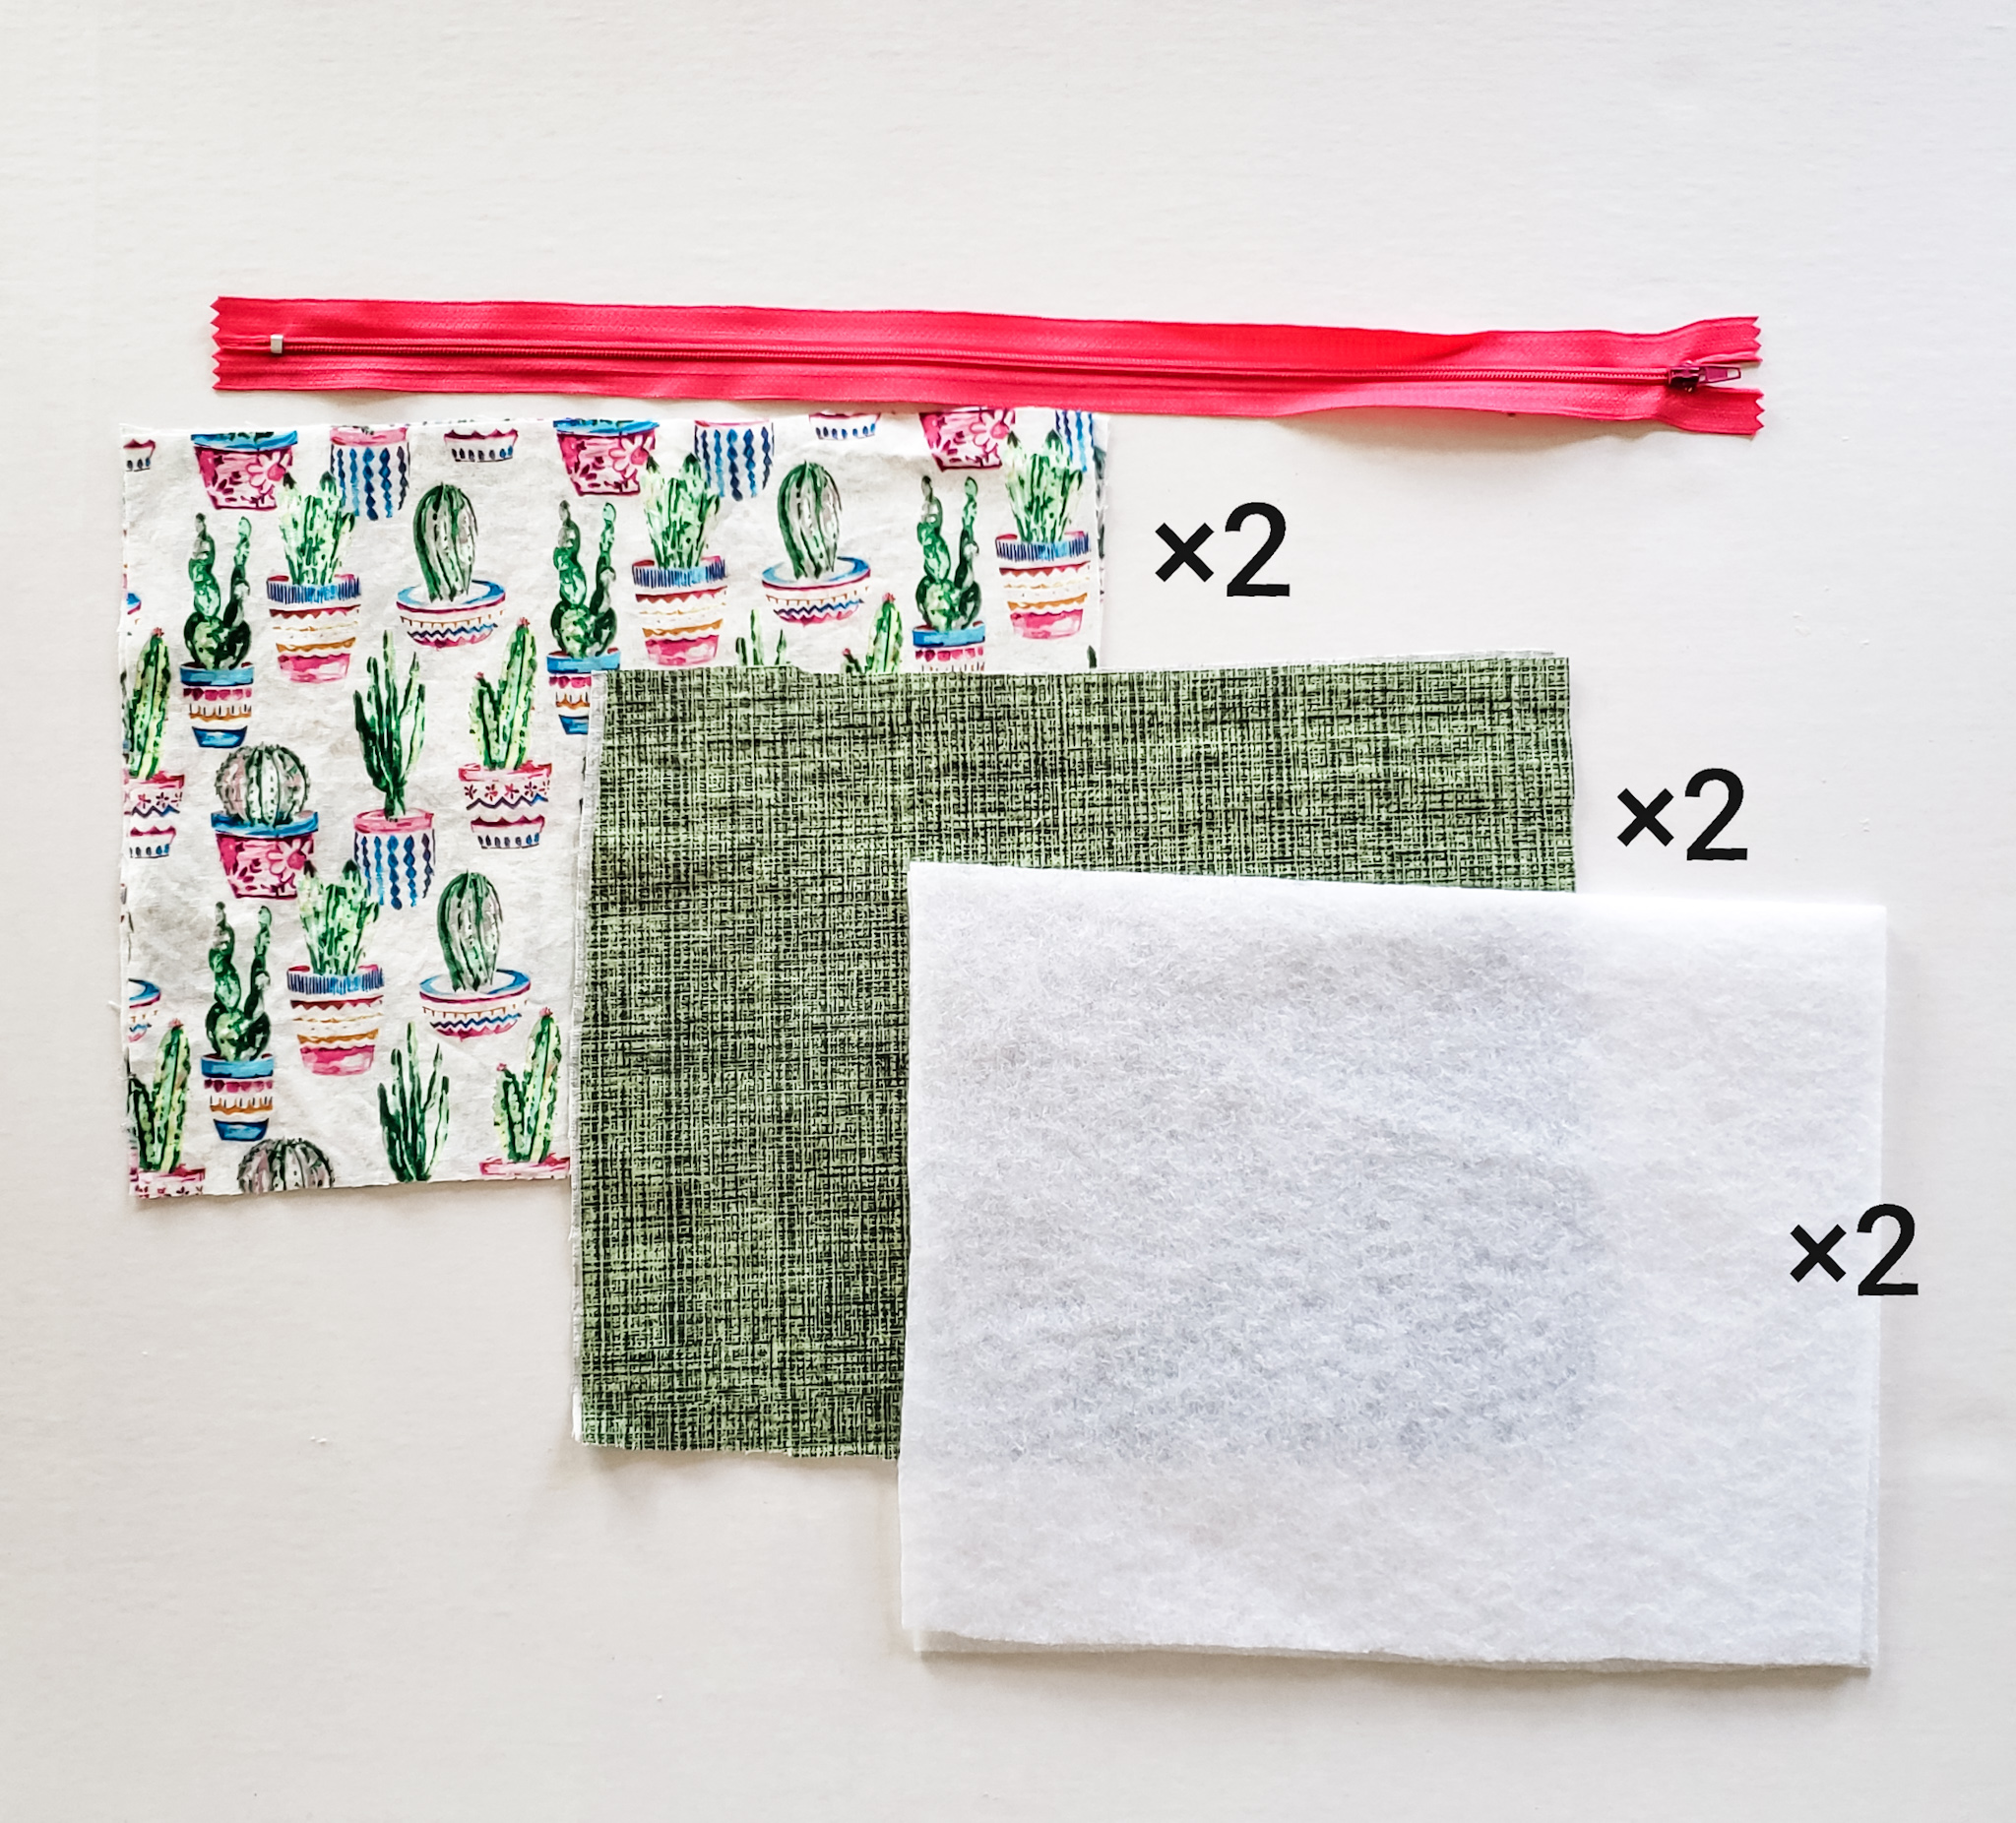
What you need:
- 2 rectangles for outer pouch (I did mine 8″x10″)
- 2 rectangles for inside lining (same size as outer fabric)
- 2 pieces of fusible interfacing (same size as above)
- 1 zipper (14″ or longer)
Just a few notes before beginning:
- I used a 1/2″ seam allowance on all seams!
- You can make these pouches any size. The one in this tutorial is 8″x 10″. You can cut them skinnier for pencil pouches (6″ x 9″) or make them a square; there’s no right or wrong size to make a pouch! Just make sure that the zipper is longer than the fabric.
- Zippers can be pricey. I buy mine online because I can get 80 of them for $17. That sure beats $3-$4 a piece in the store, so if you plan to make a few of these, buy them online! I’ve linked them for you HERE.
- You can use any kind of interfacing. Fusible is the easiest to work with (as opposed to sew-in) and I prefer the fleece interfacing for this project because it’s thick and makes the bag feel sturdier.
I’ve done this tutorial 2 ways for you: I have done a step-by-step photo tutorials and I’ve done a video tutorial. Do what works for you! Here is the video, and you can find the photo tutorial underneath.
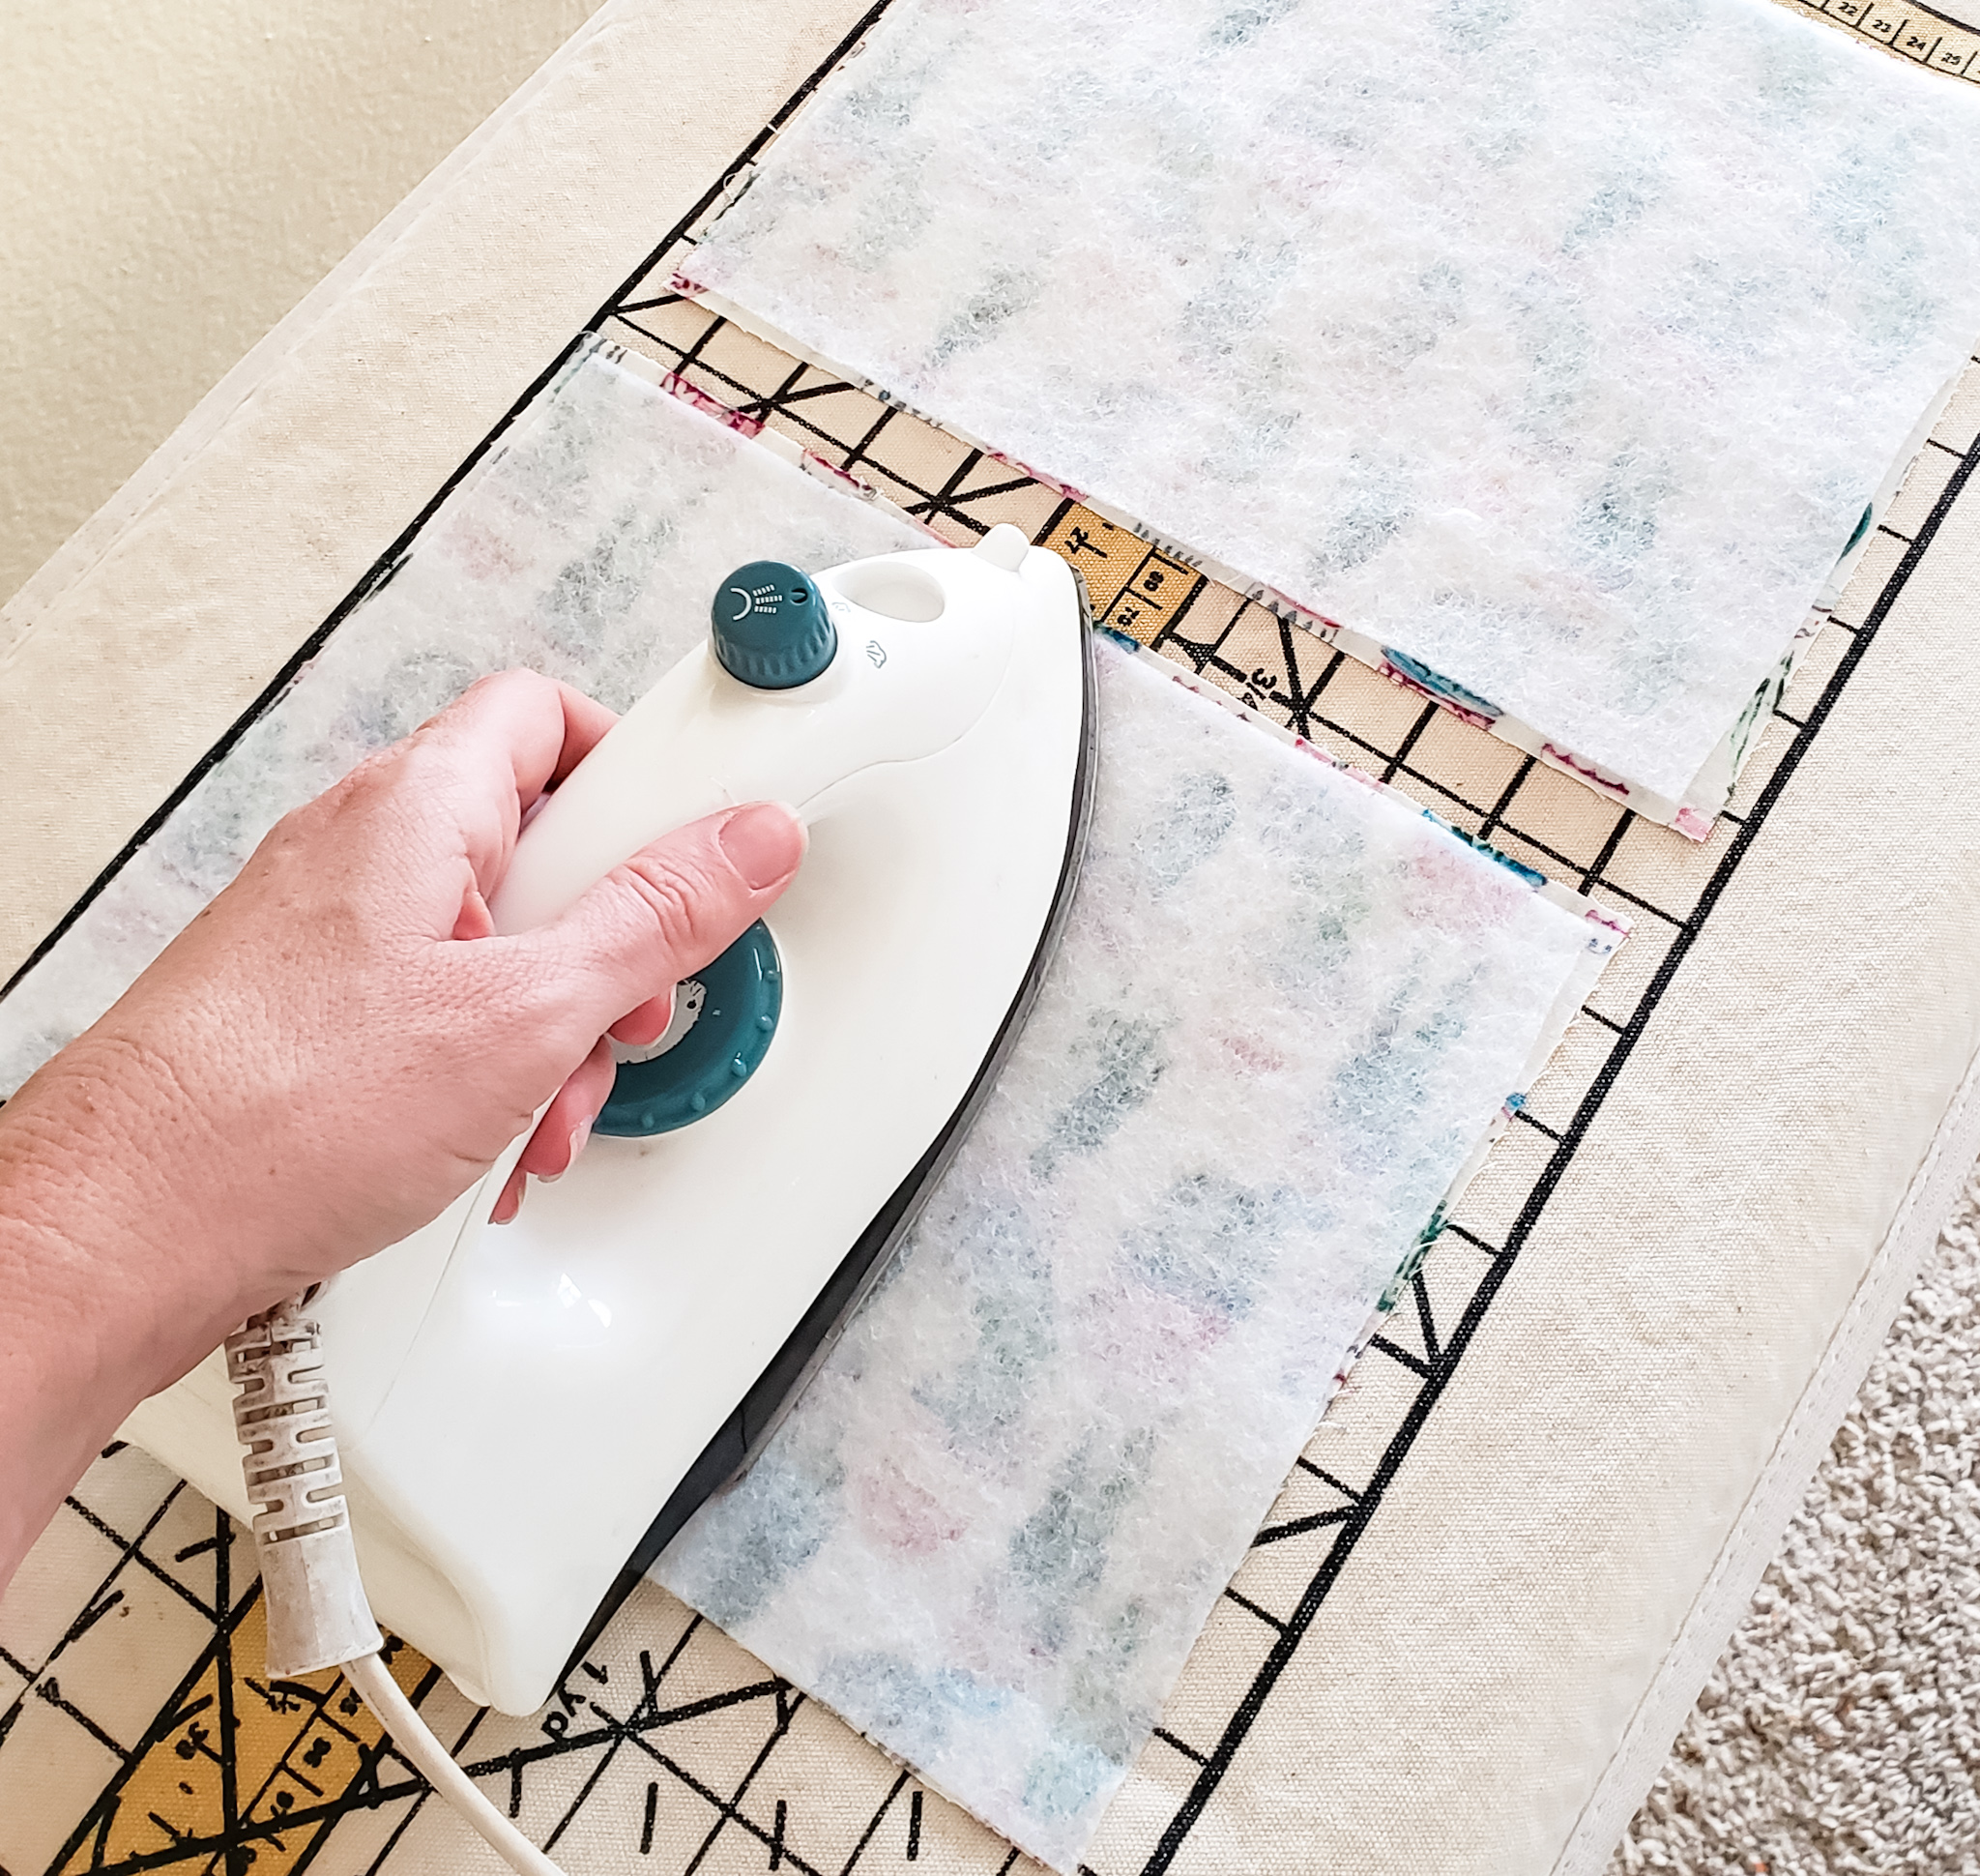
To get started, iron your fusible interfacing to the wrong side of your outer fabric.
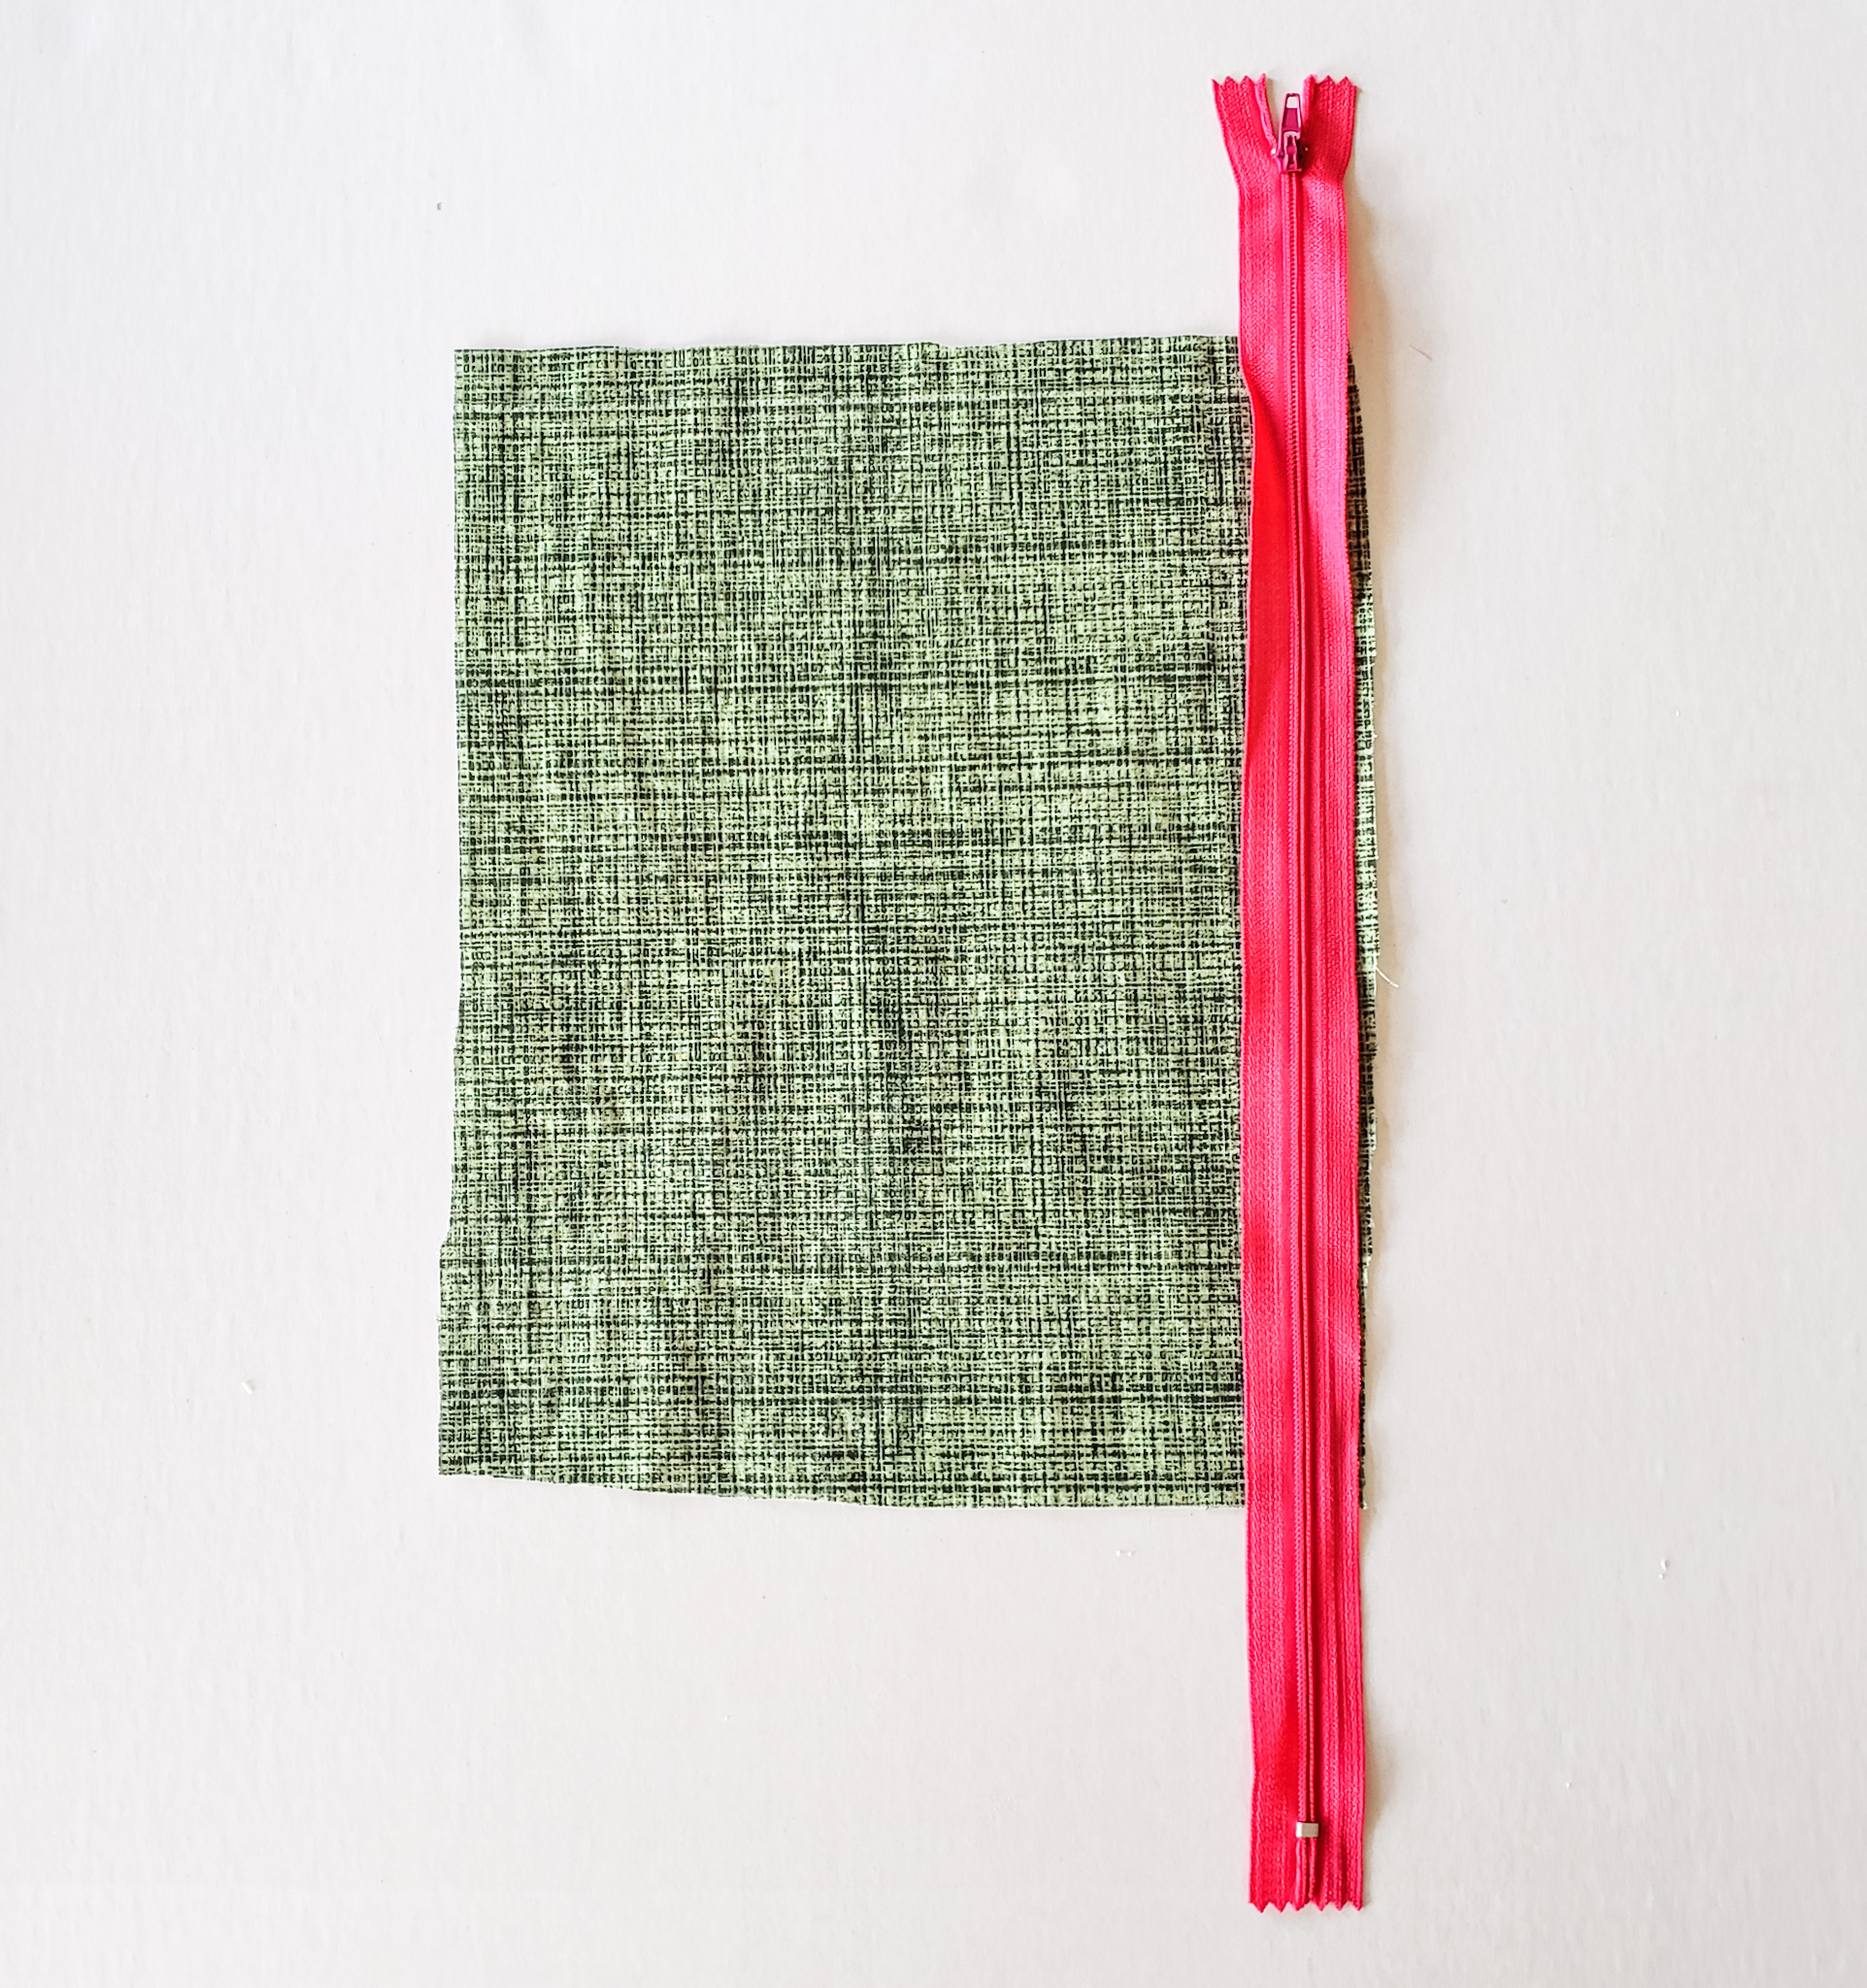
Lay one of your lining pieces down on your table, right side facing up. Place your zipper on top, lining up the edge of the zipper tape with the raw edge of one longer side of fabric.
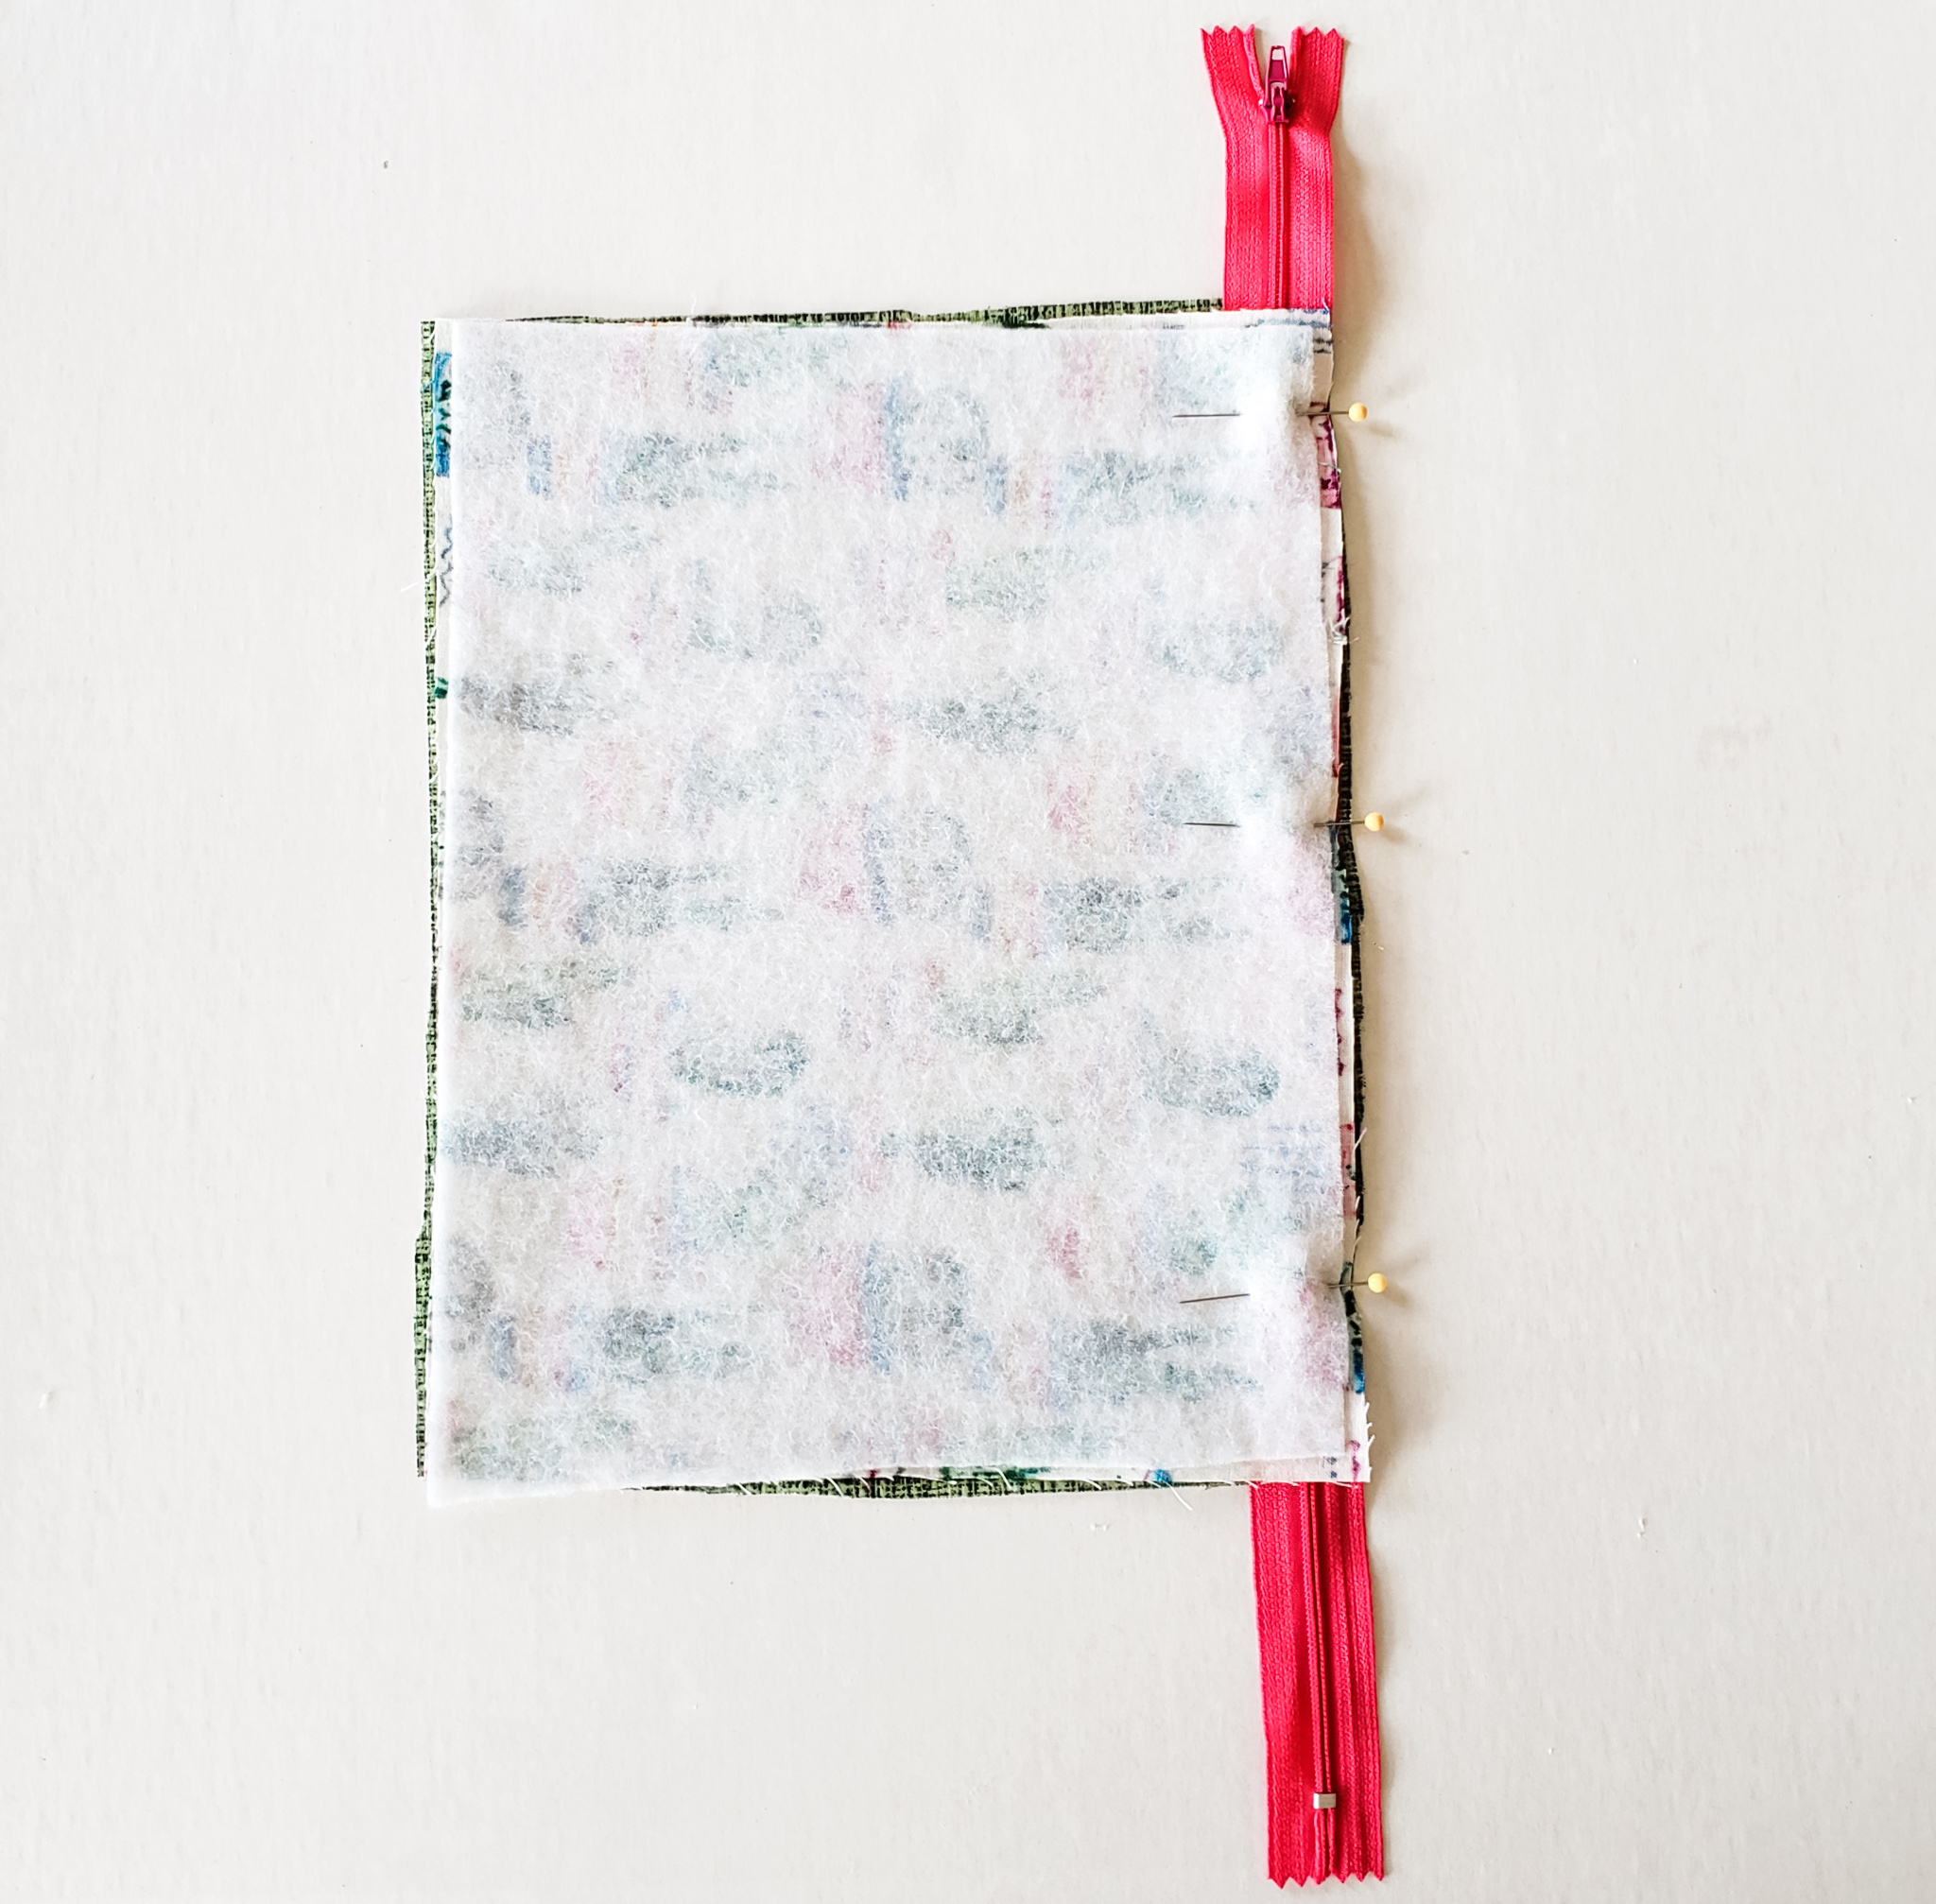
Then, place one of your outer fabrics (the interfaced piece) on top of that, right side down, lining up all edges and sandwiching the zipper in the middle. Place a few pins along the zipper to hold it in place.
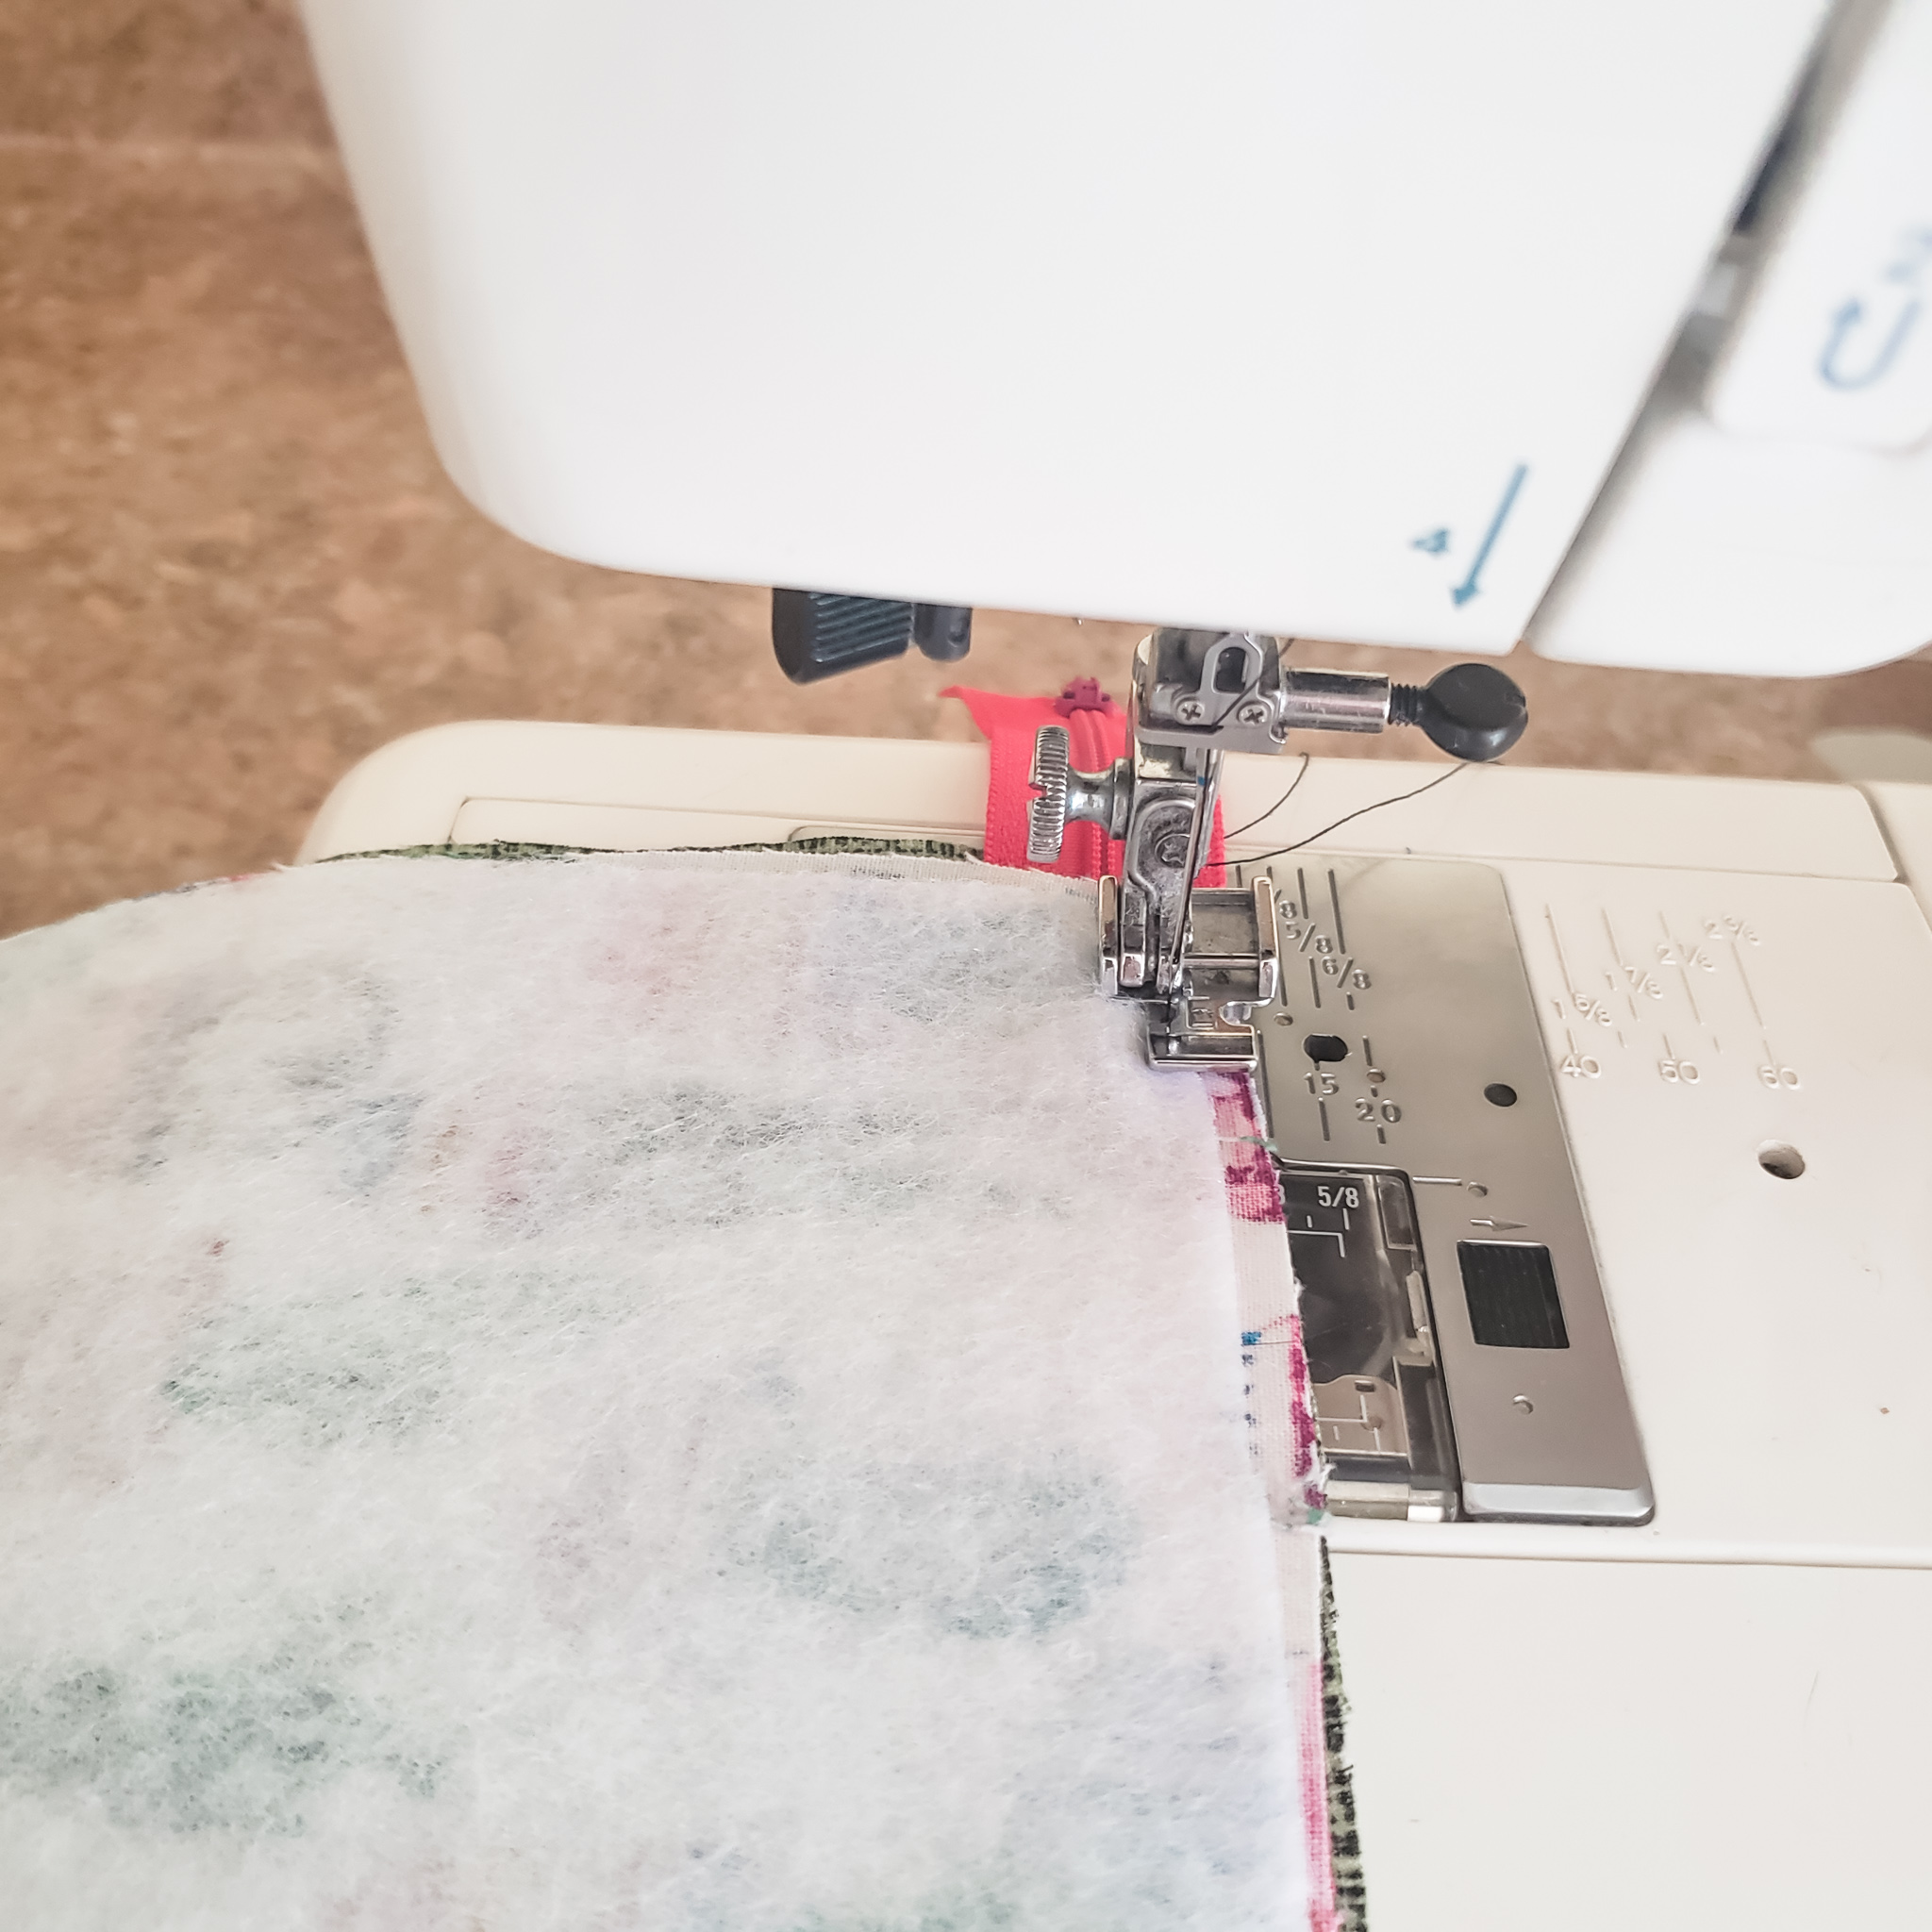
With your zipper foot, stitch close to the teeth of the zipper.
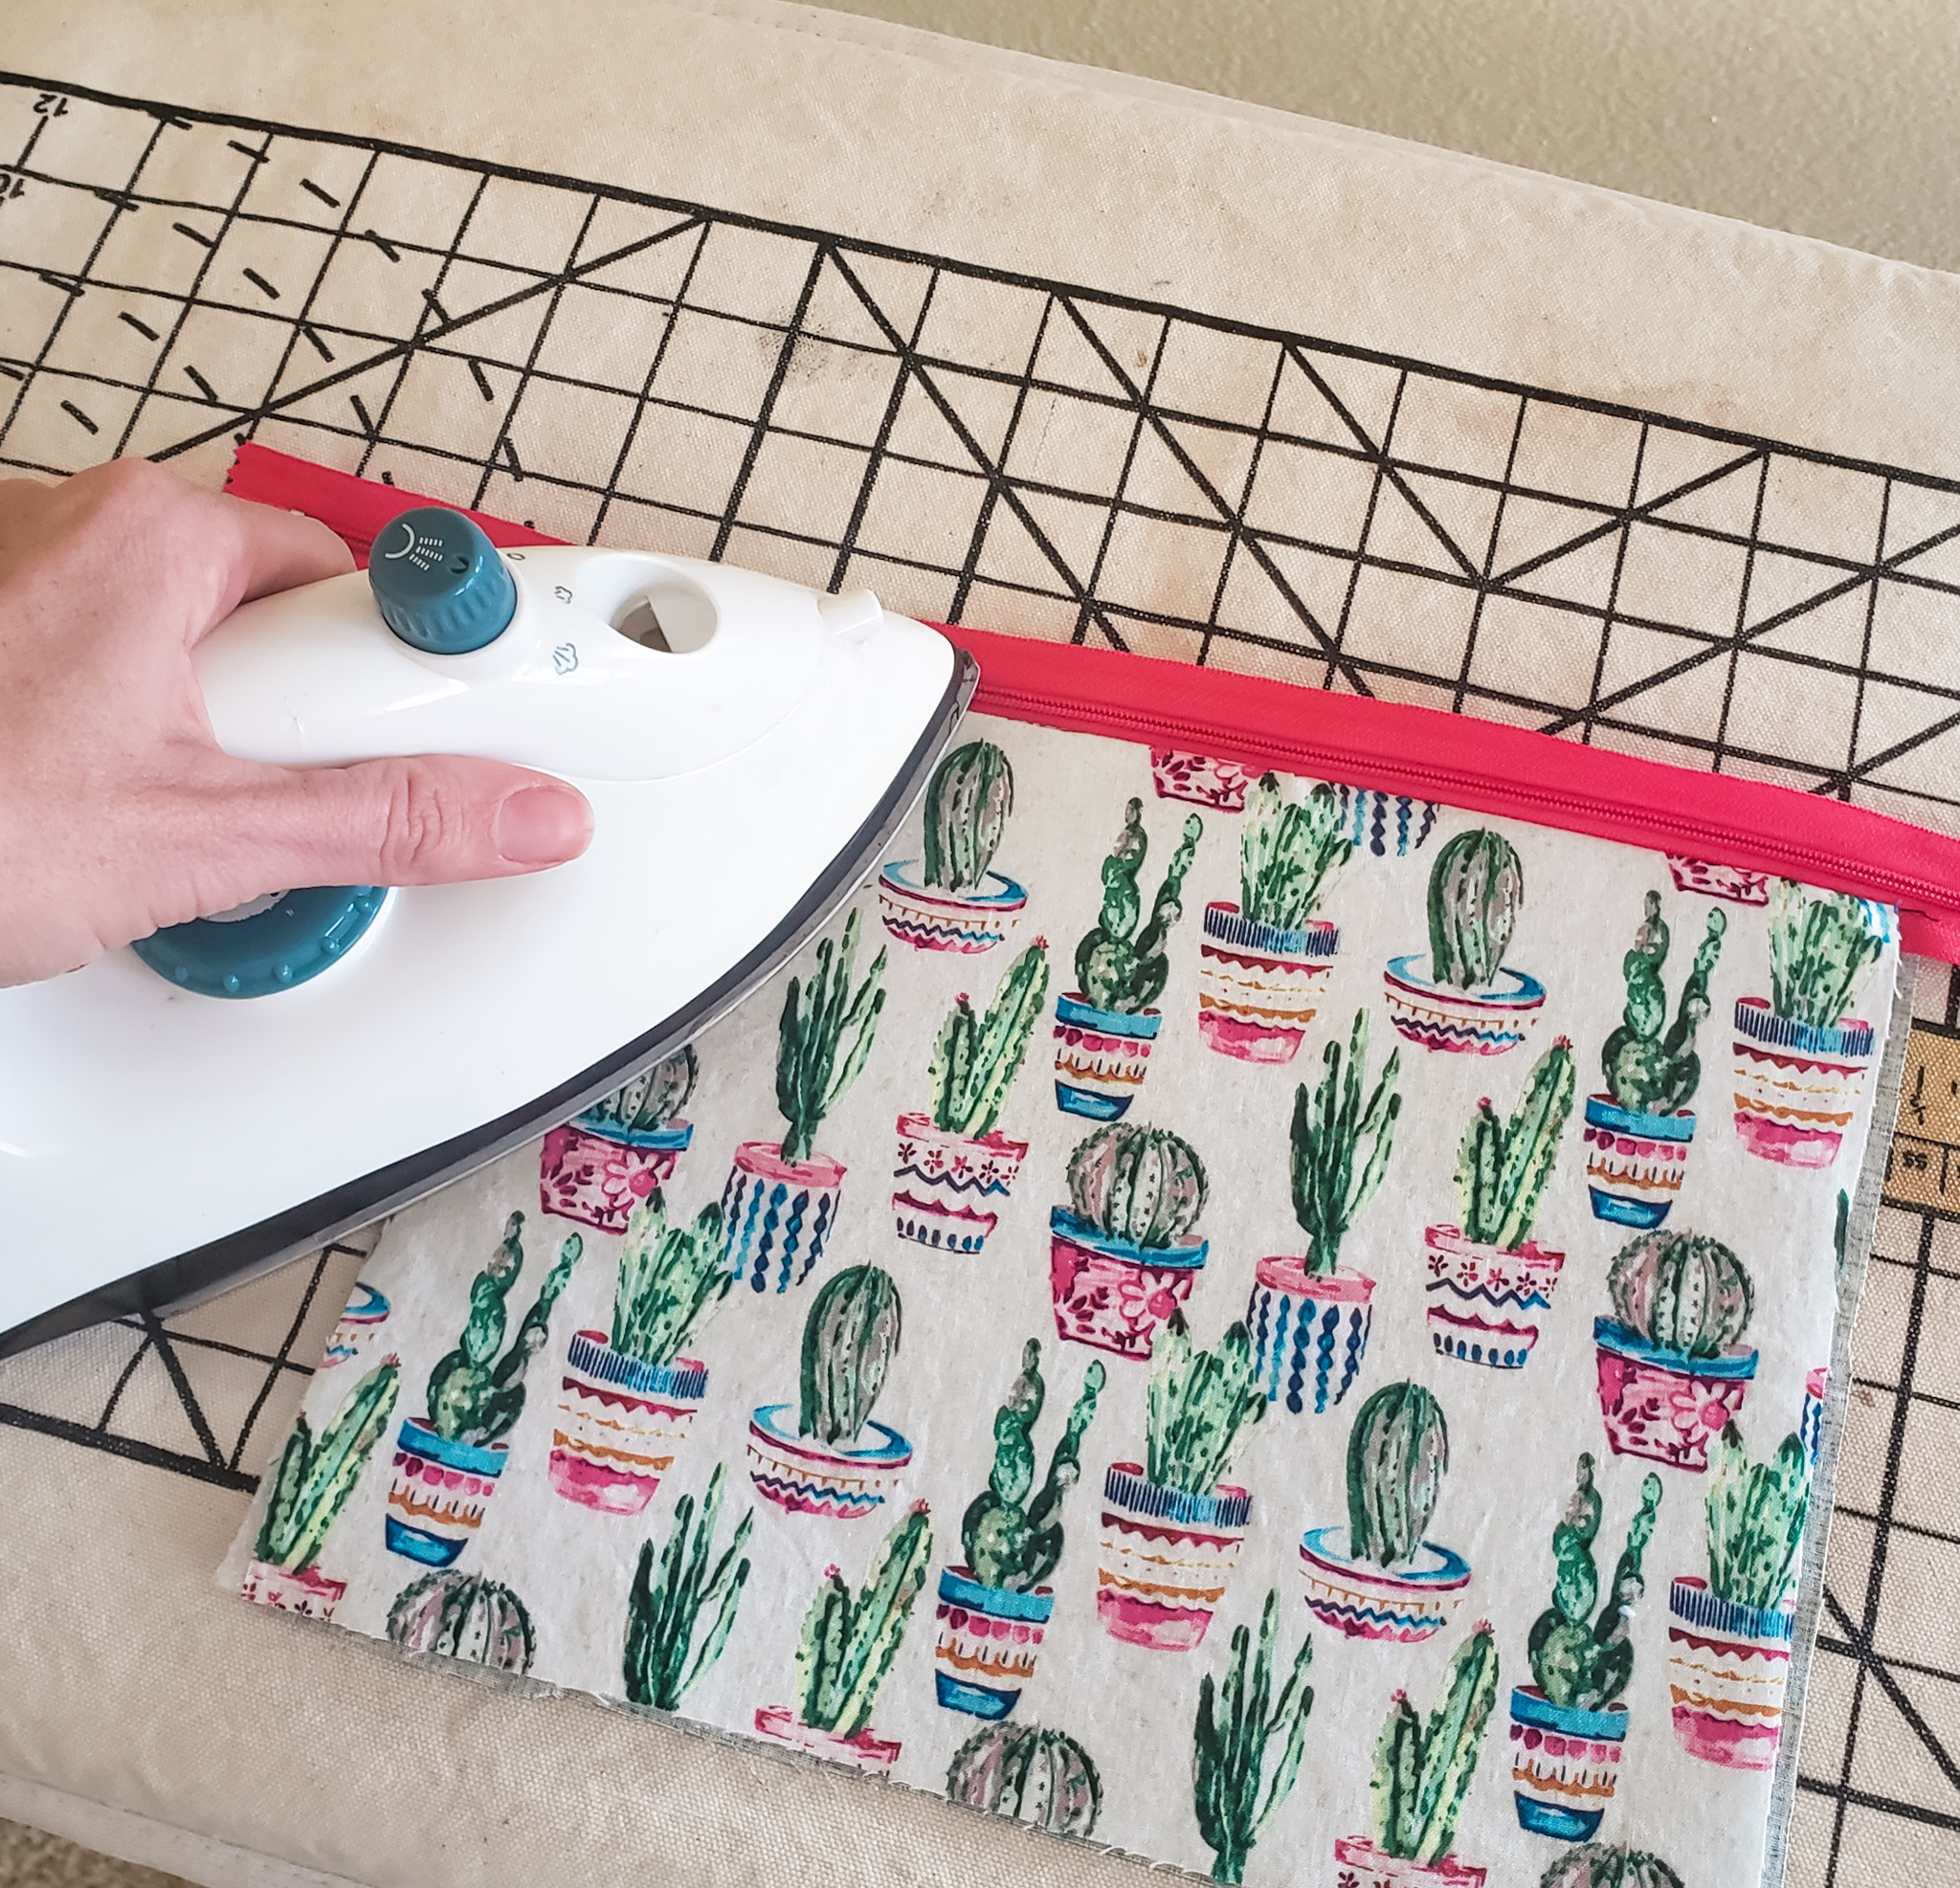
Flip your fabric right side out (exposing the zipper) and press the fabric, pulling it away from the fabric as you iron so that it doesn’t get caught in the teeth.
Now, you are going to repeat the same process for the other side of the zipper. Lay out your lining piece and then put the zipper tape along the edge with the outer fabric piece (that you’ve already sewn) facing up. Make sure that the short ends of the bag match as well or it will end up being uneven. The other long side won’t match quite yet, so don’t worry about that.
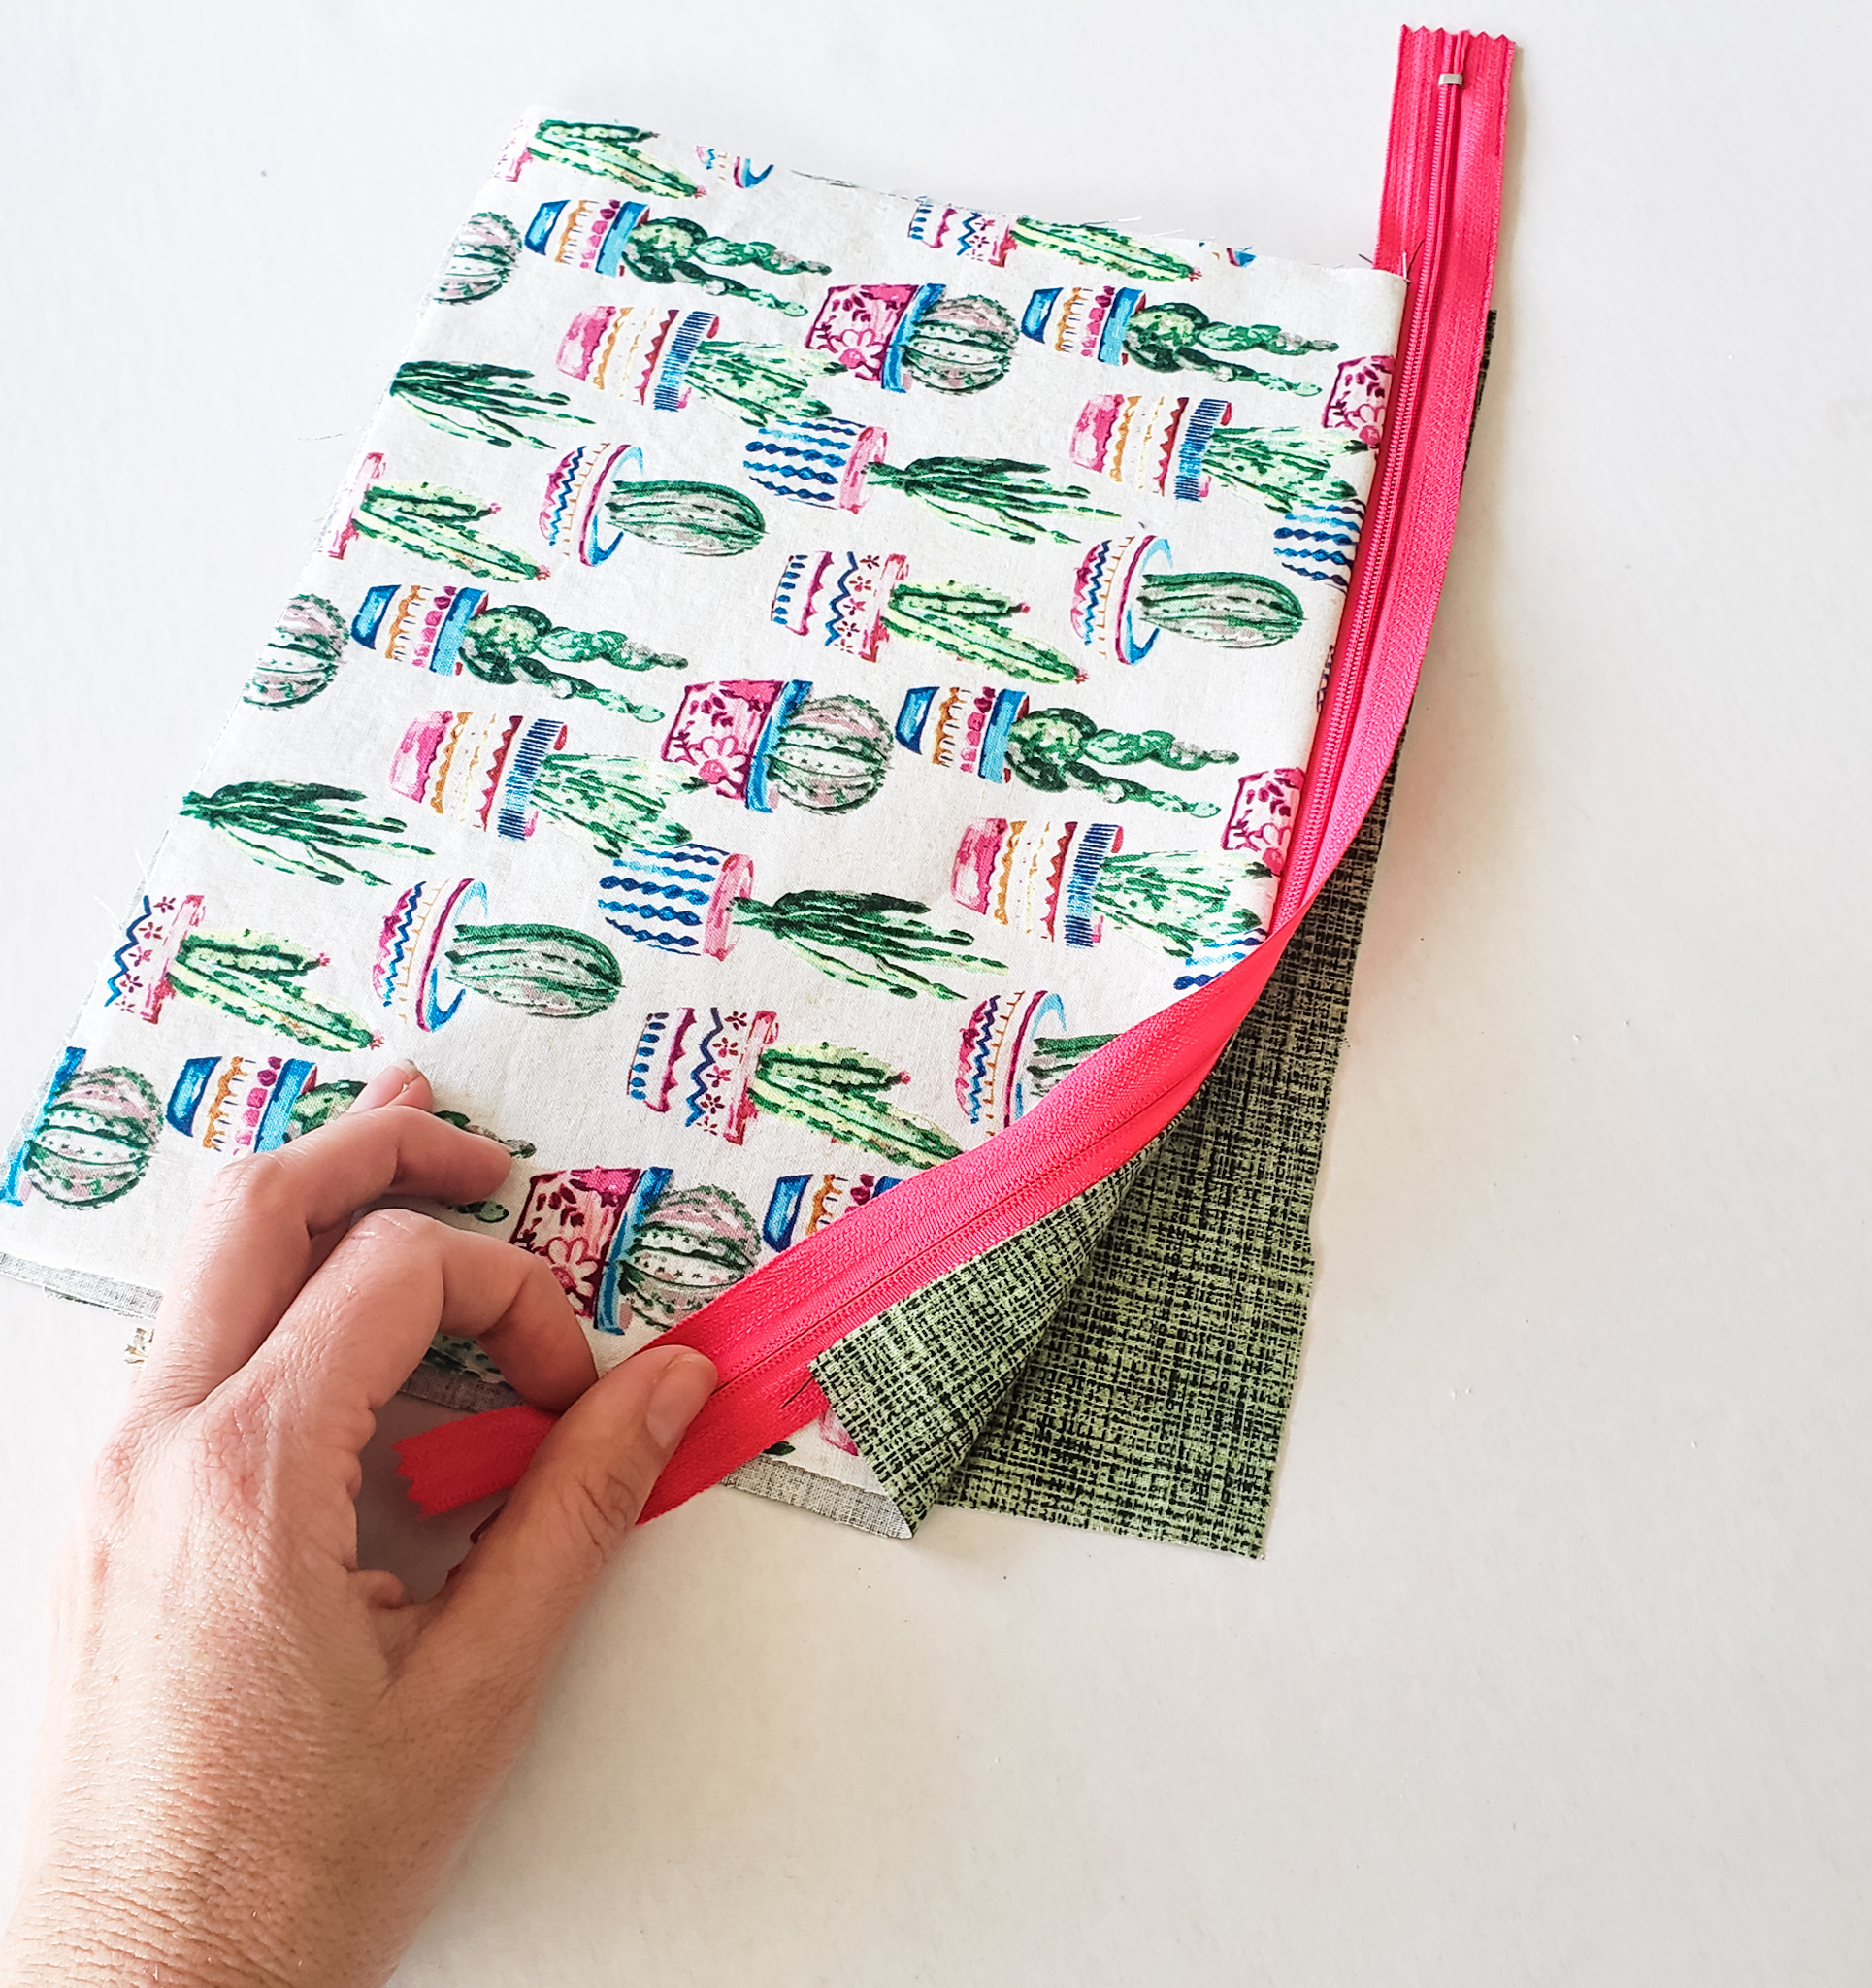
Place your other outer fabric rectangle on top (right side down) and pin. Stitch again along the zipper teeth. Repeat the process of ironing.
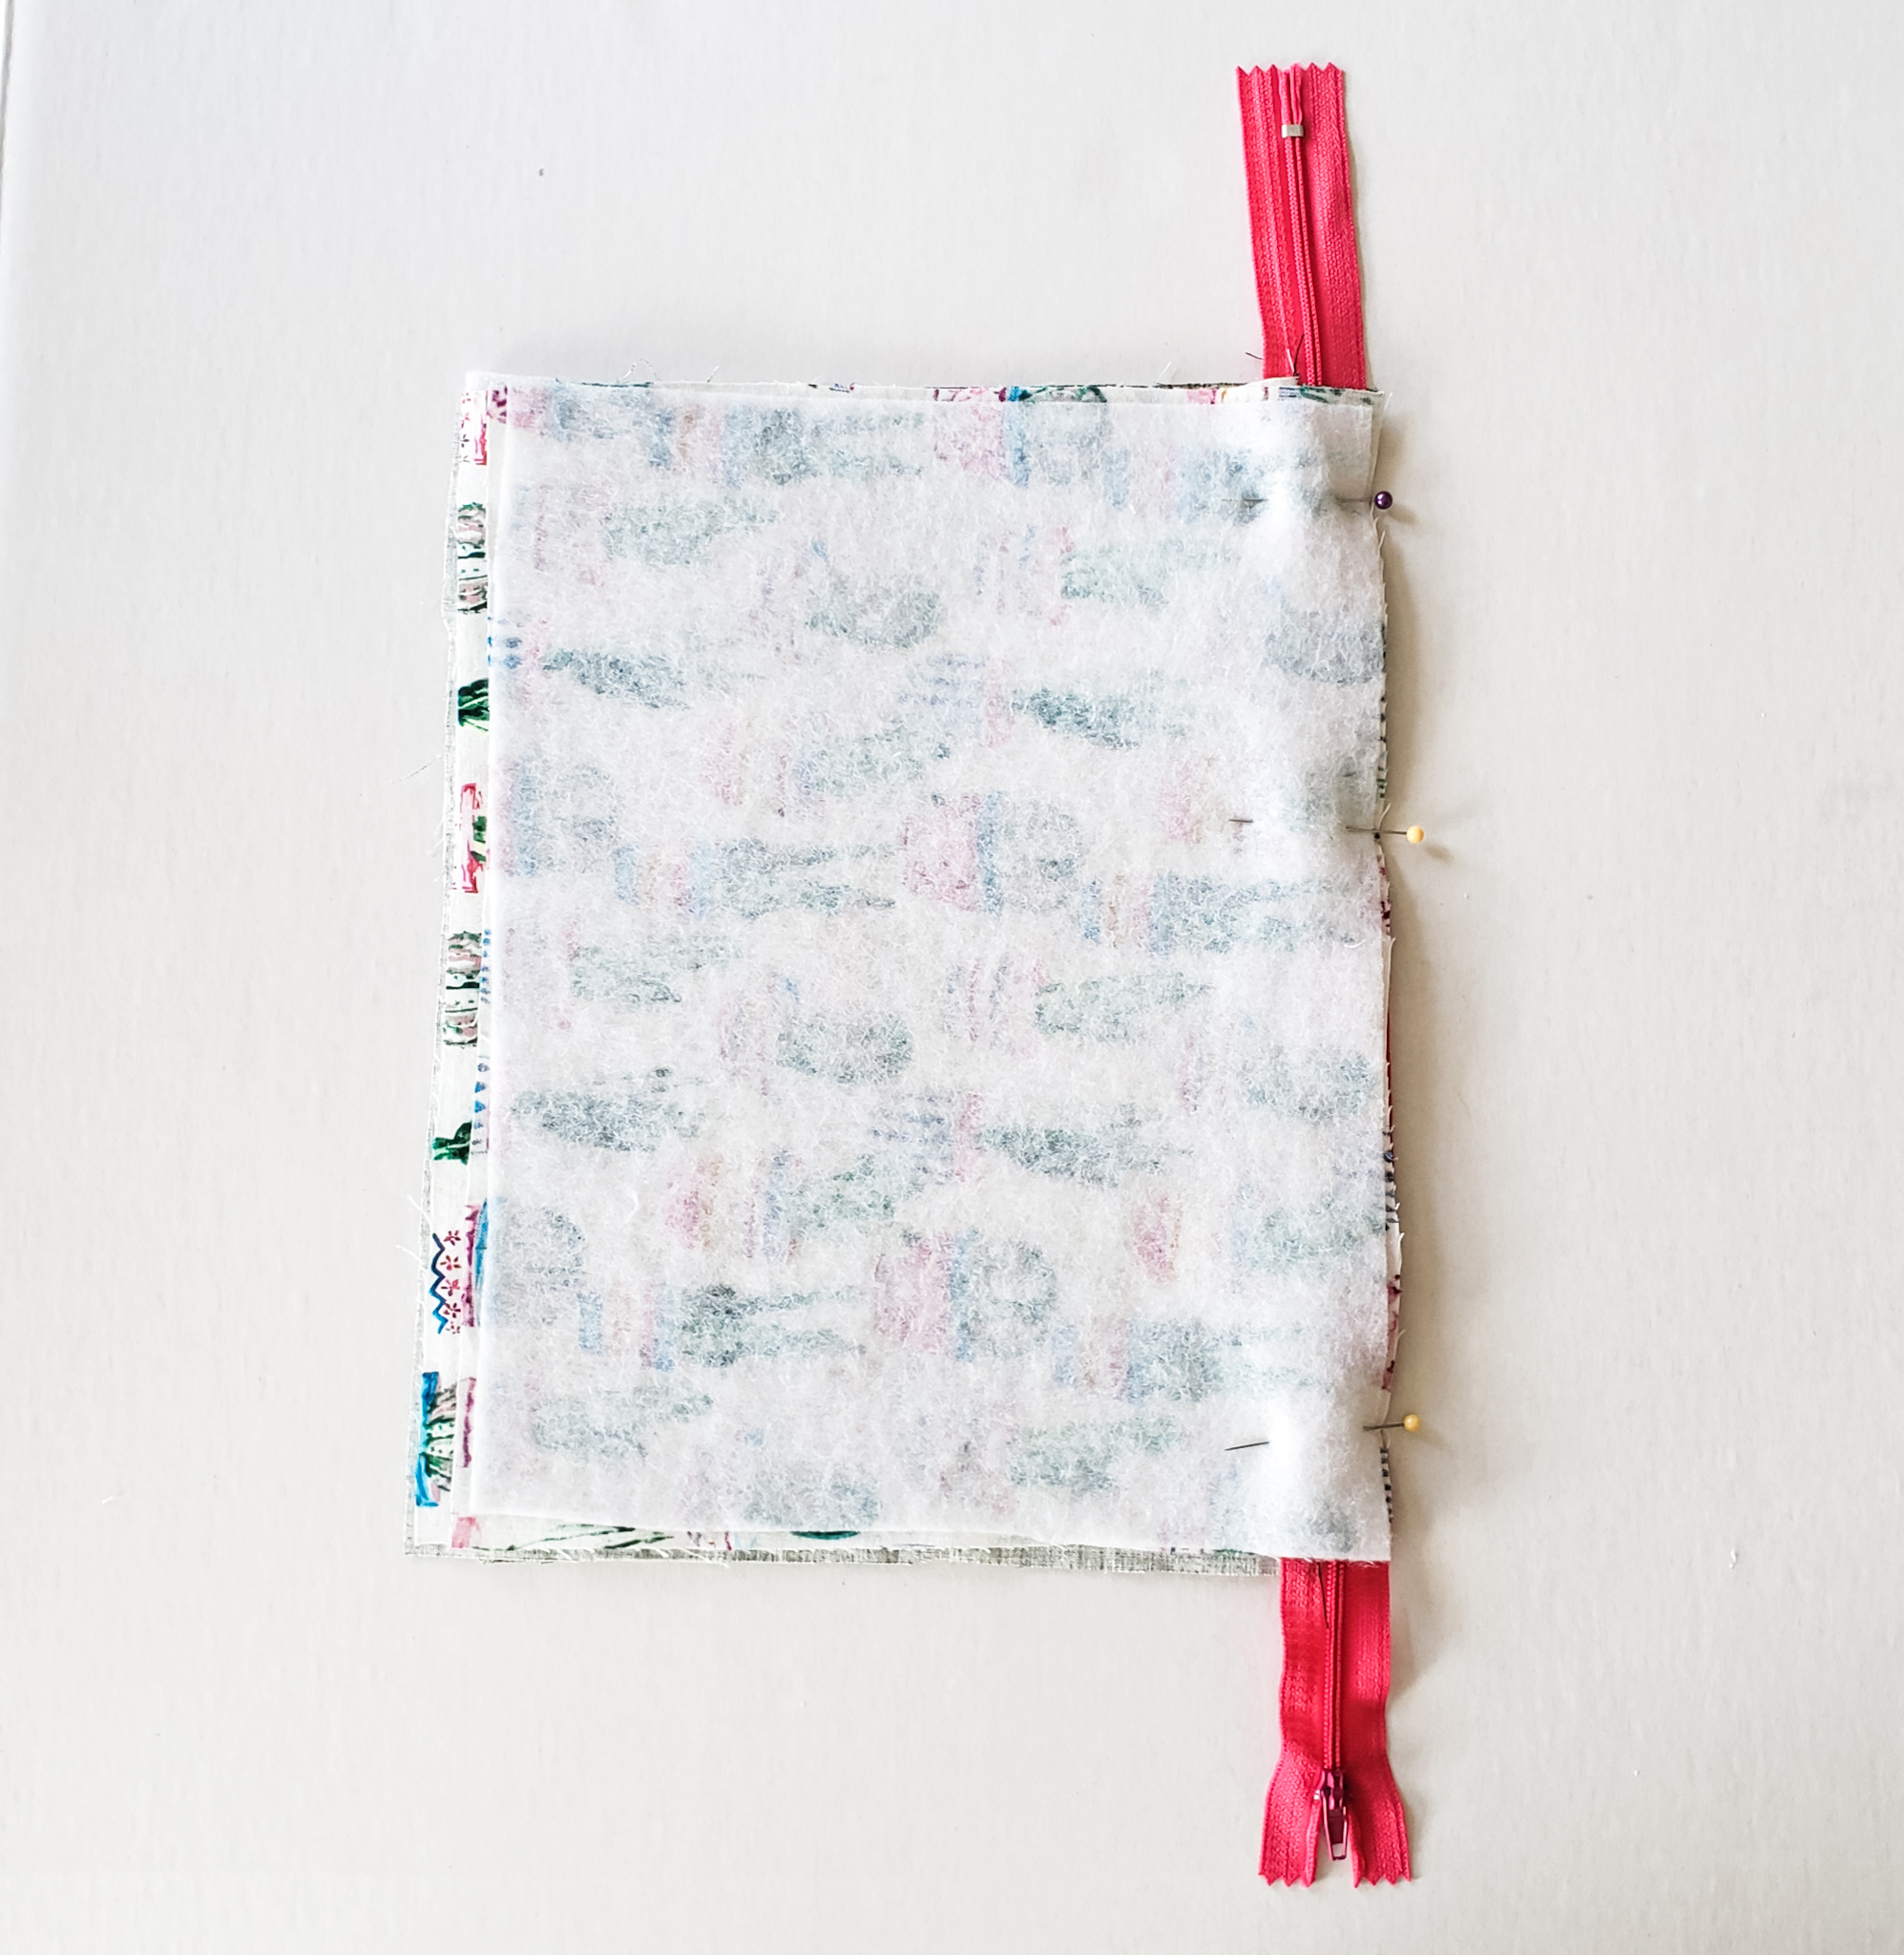
Face both outer pieces together, pinning along the other long edge. Your lining fabric will be on the outside right now; you are essentially sewing your bag inside out. Stitch that long edge.
I like to finish my seams to minimize the fraying. I have a serger and usually use that, but I wanted to show you another method in case you don’t have a serger. I used pinking shears for this tutorial, but you can zigzag the edges as well. You can also leave them plain, but as you wash and use the bag, the seam allowances may fray quite a bit on you. If you don’t own pinking shears, I highly recommend them! It’s a quick and easy way to finish seams. The zigzag blade prevents the fabric from fraying. I’ll put a link for you at the end of this post.
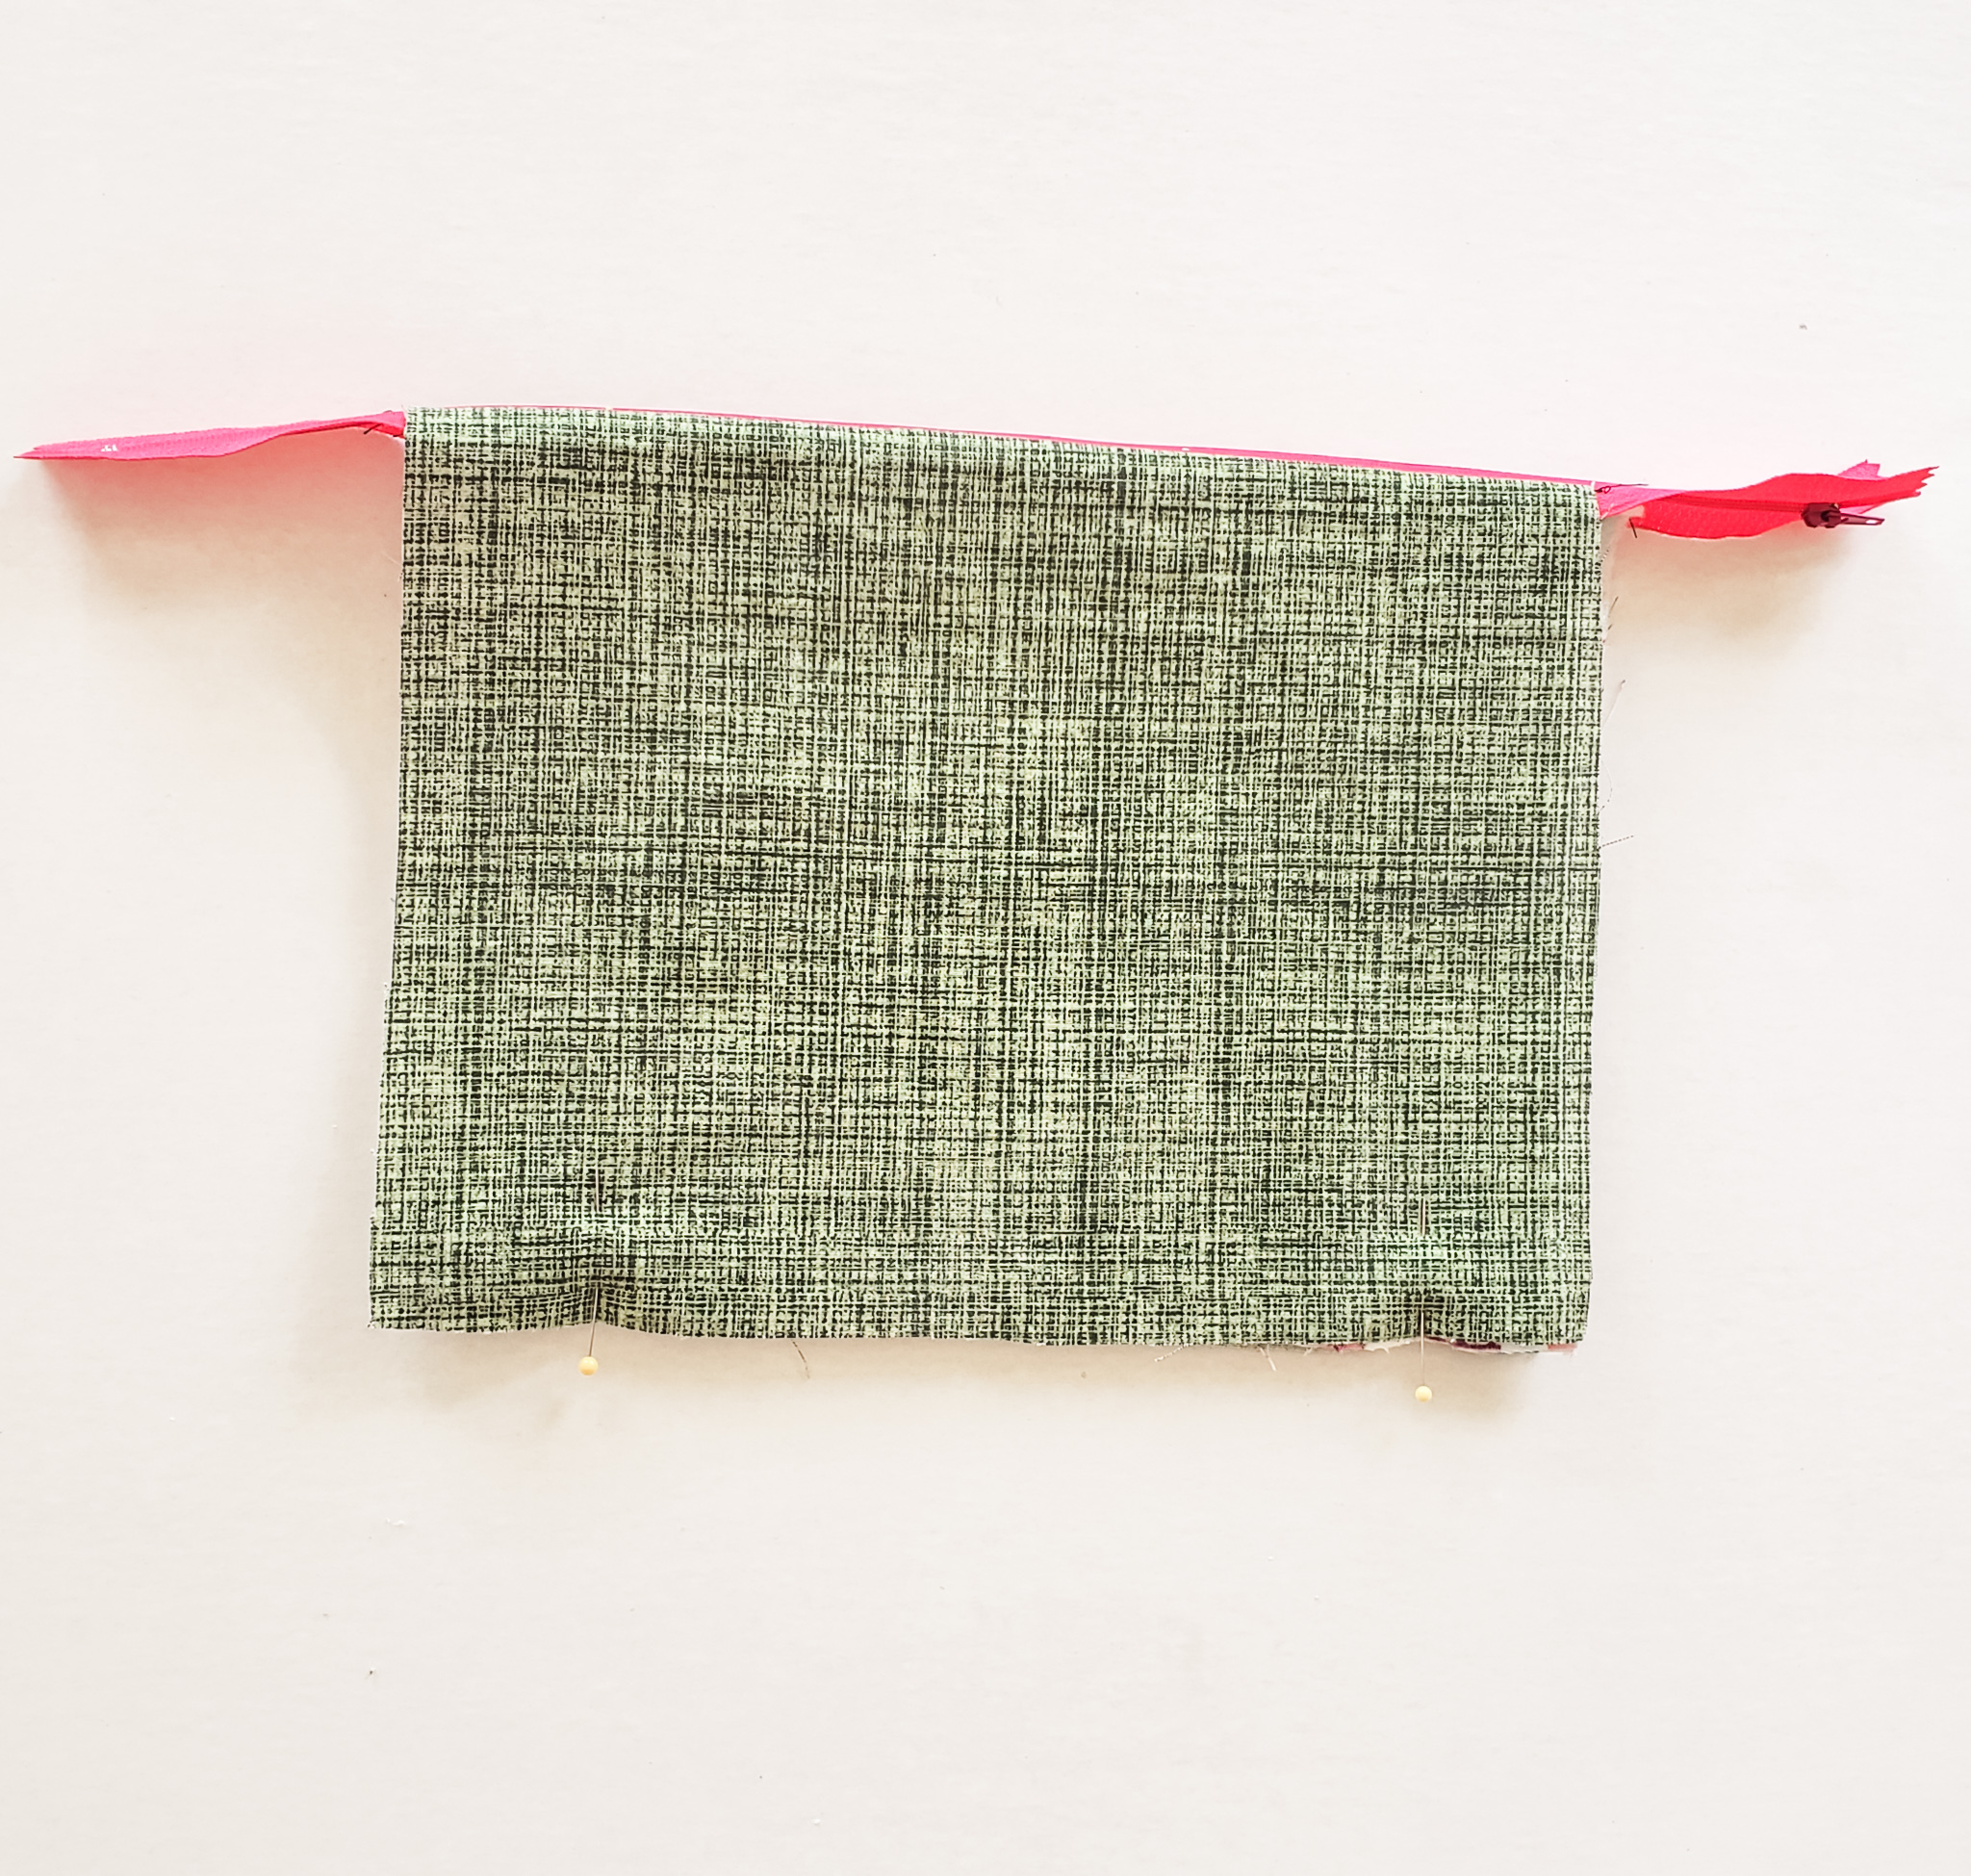
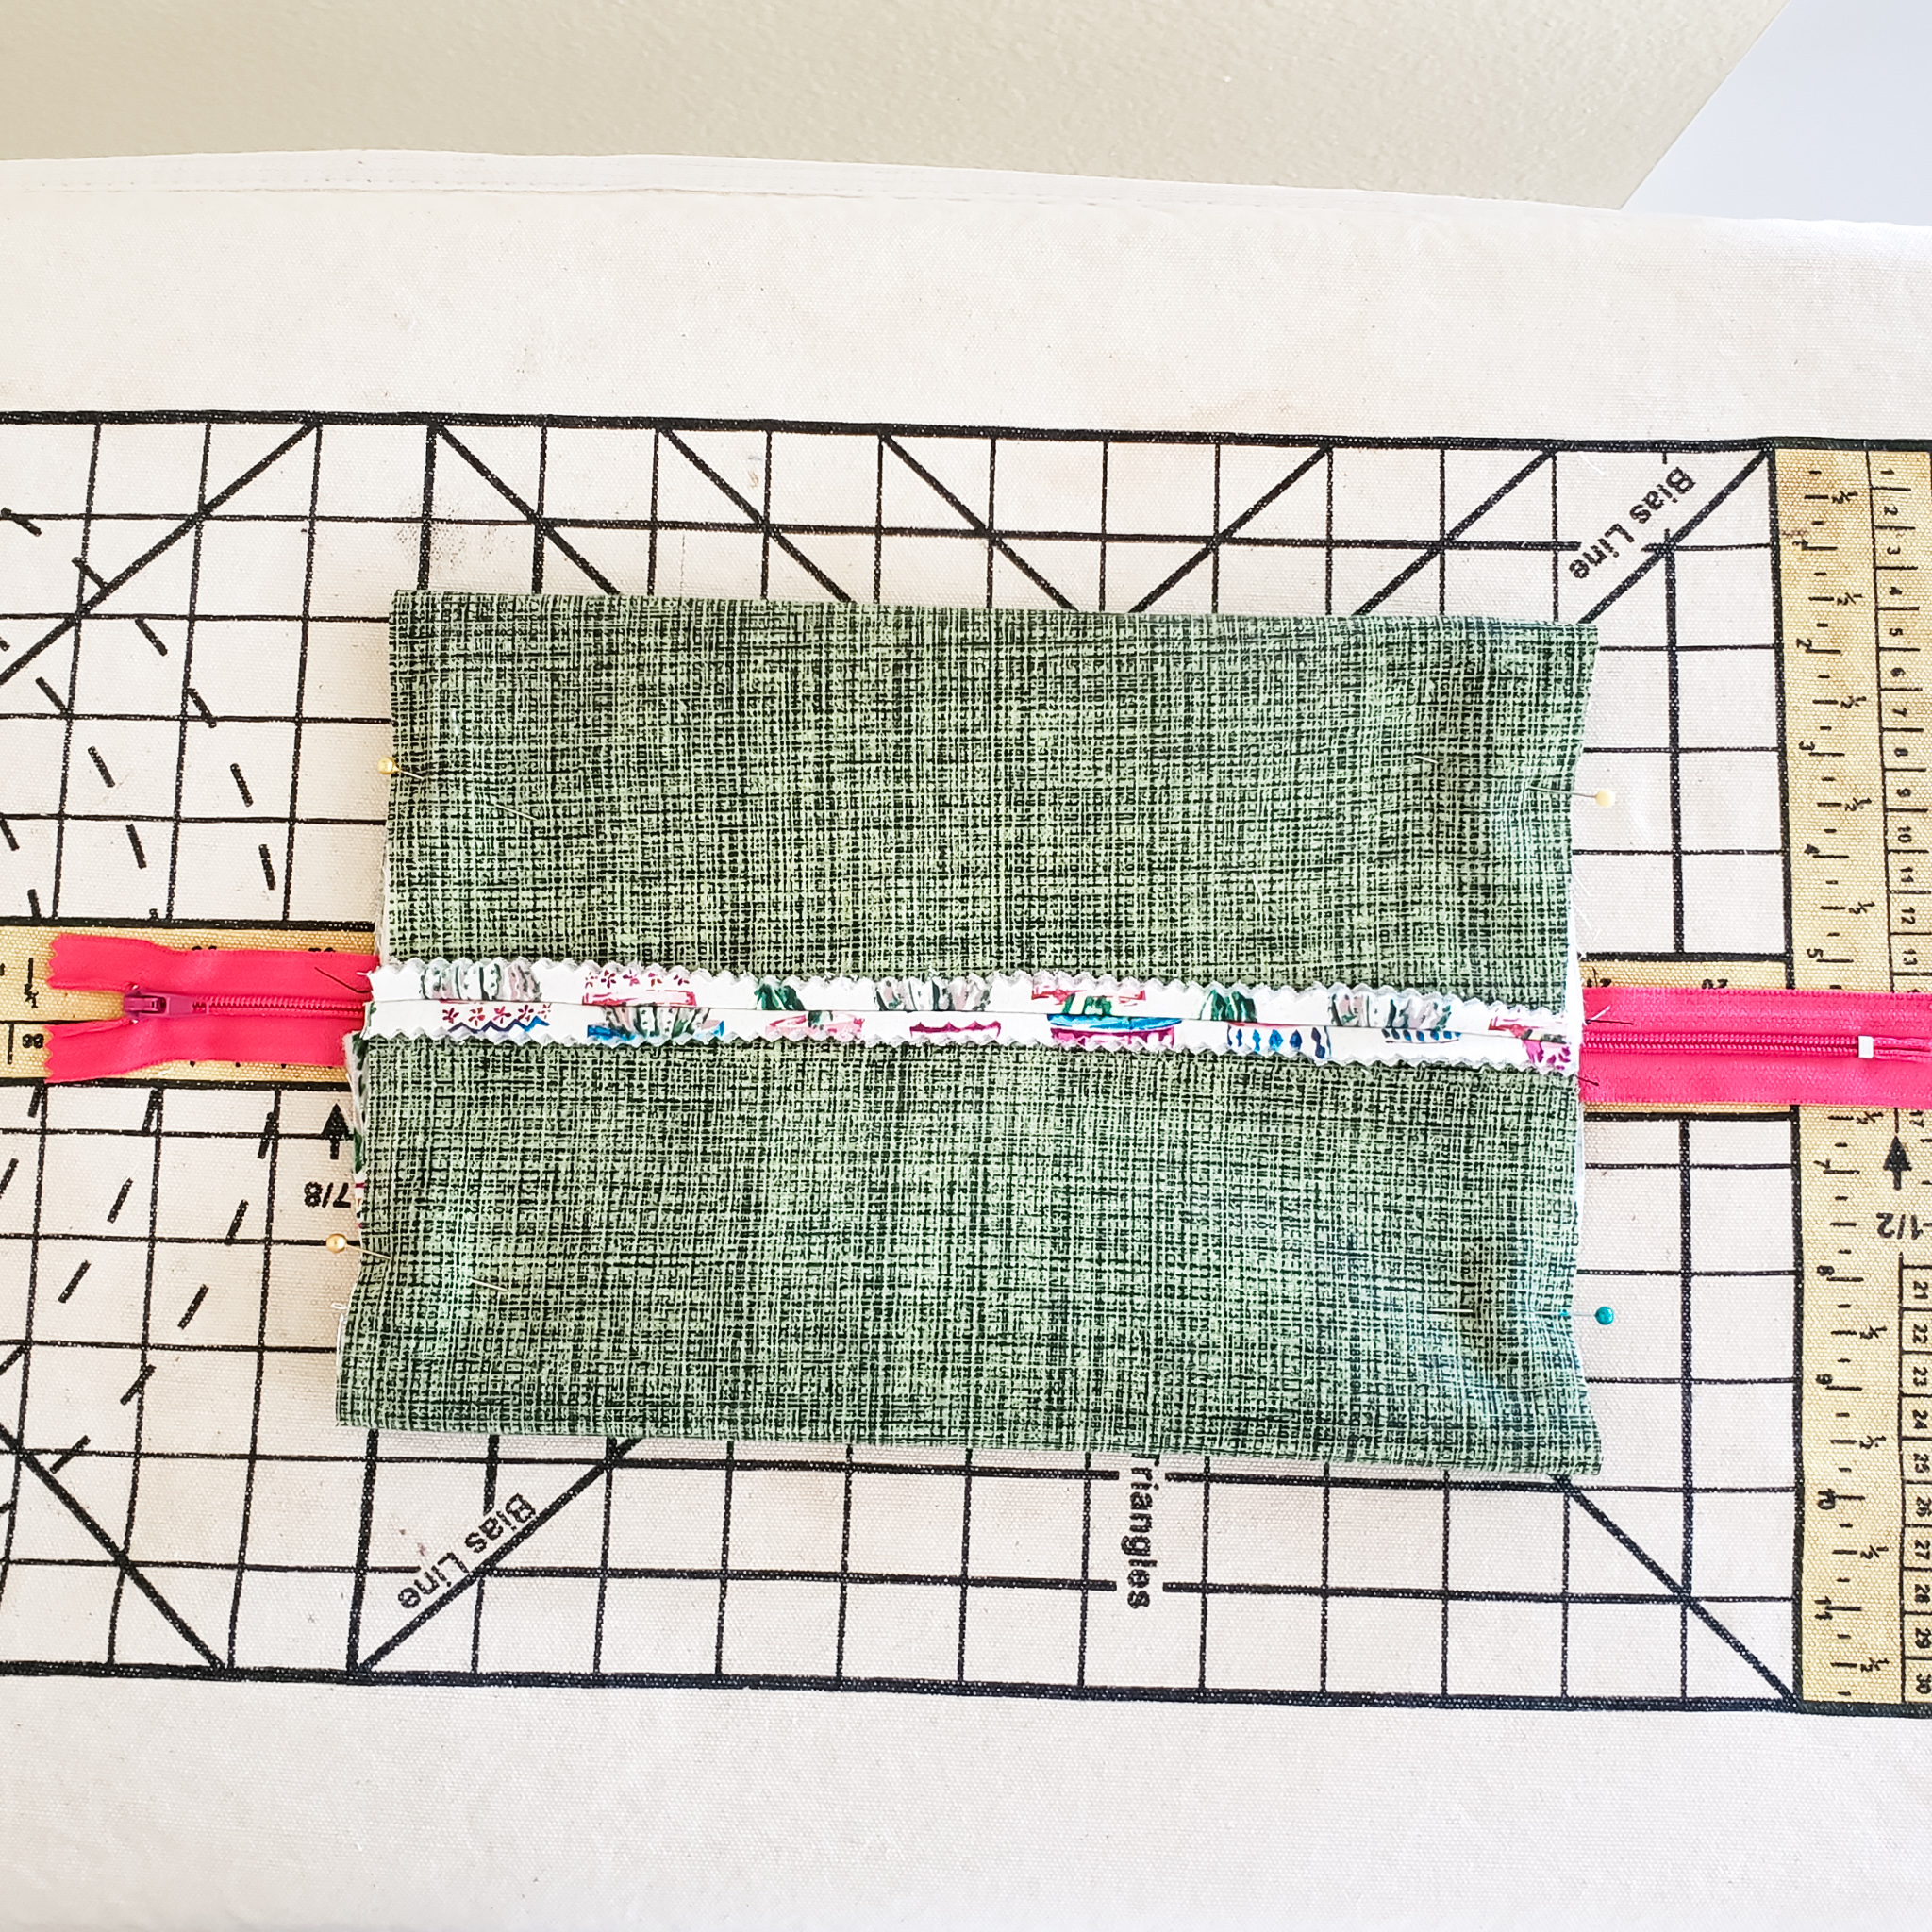
Now, fold your bag in half so that the seam allowance is laying on top of the zipper (as pictured). Iron open your seam allowance.
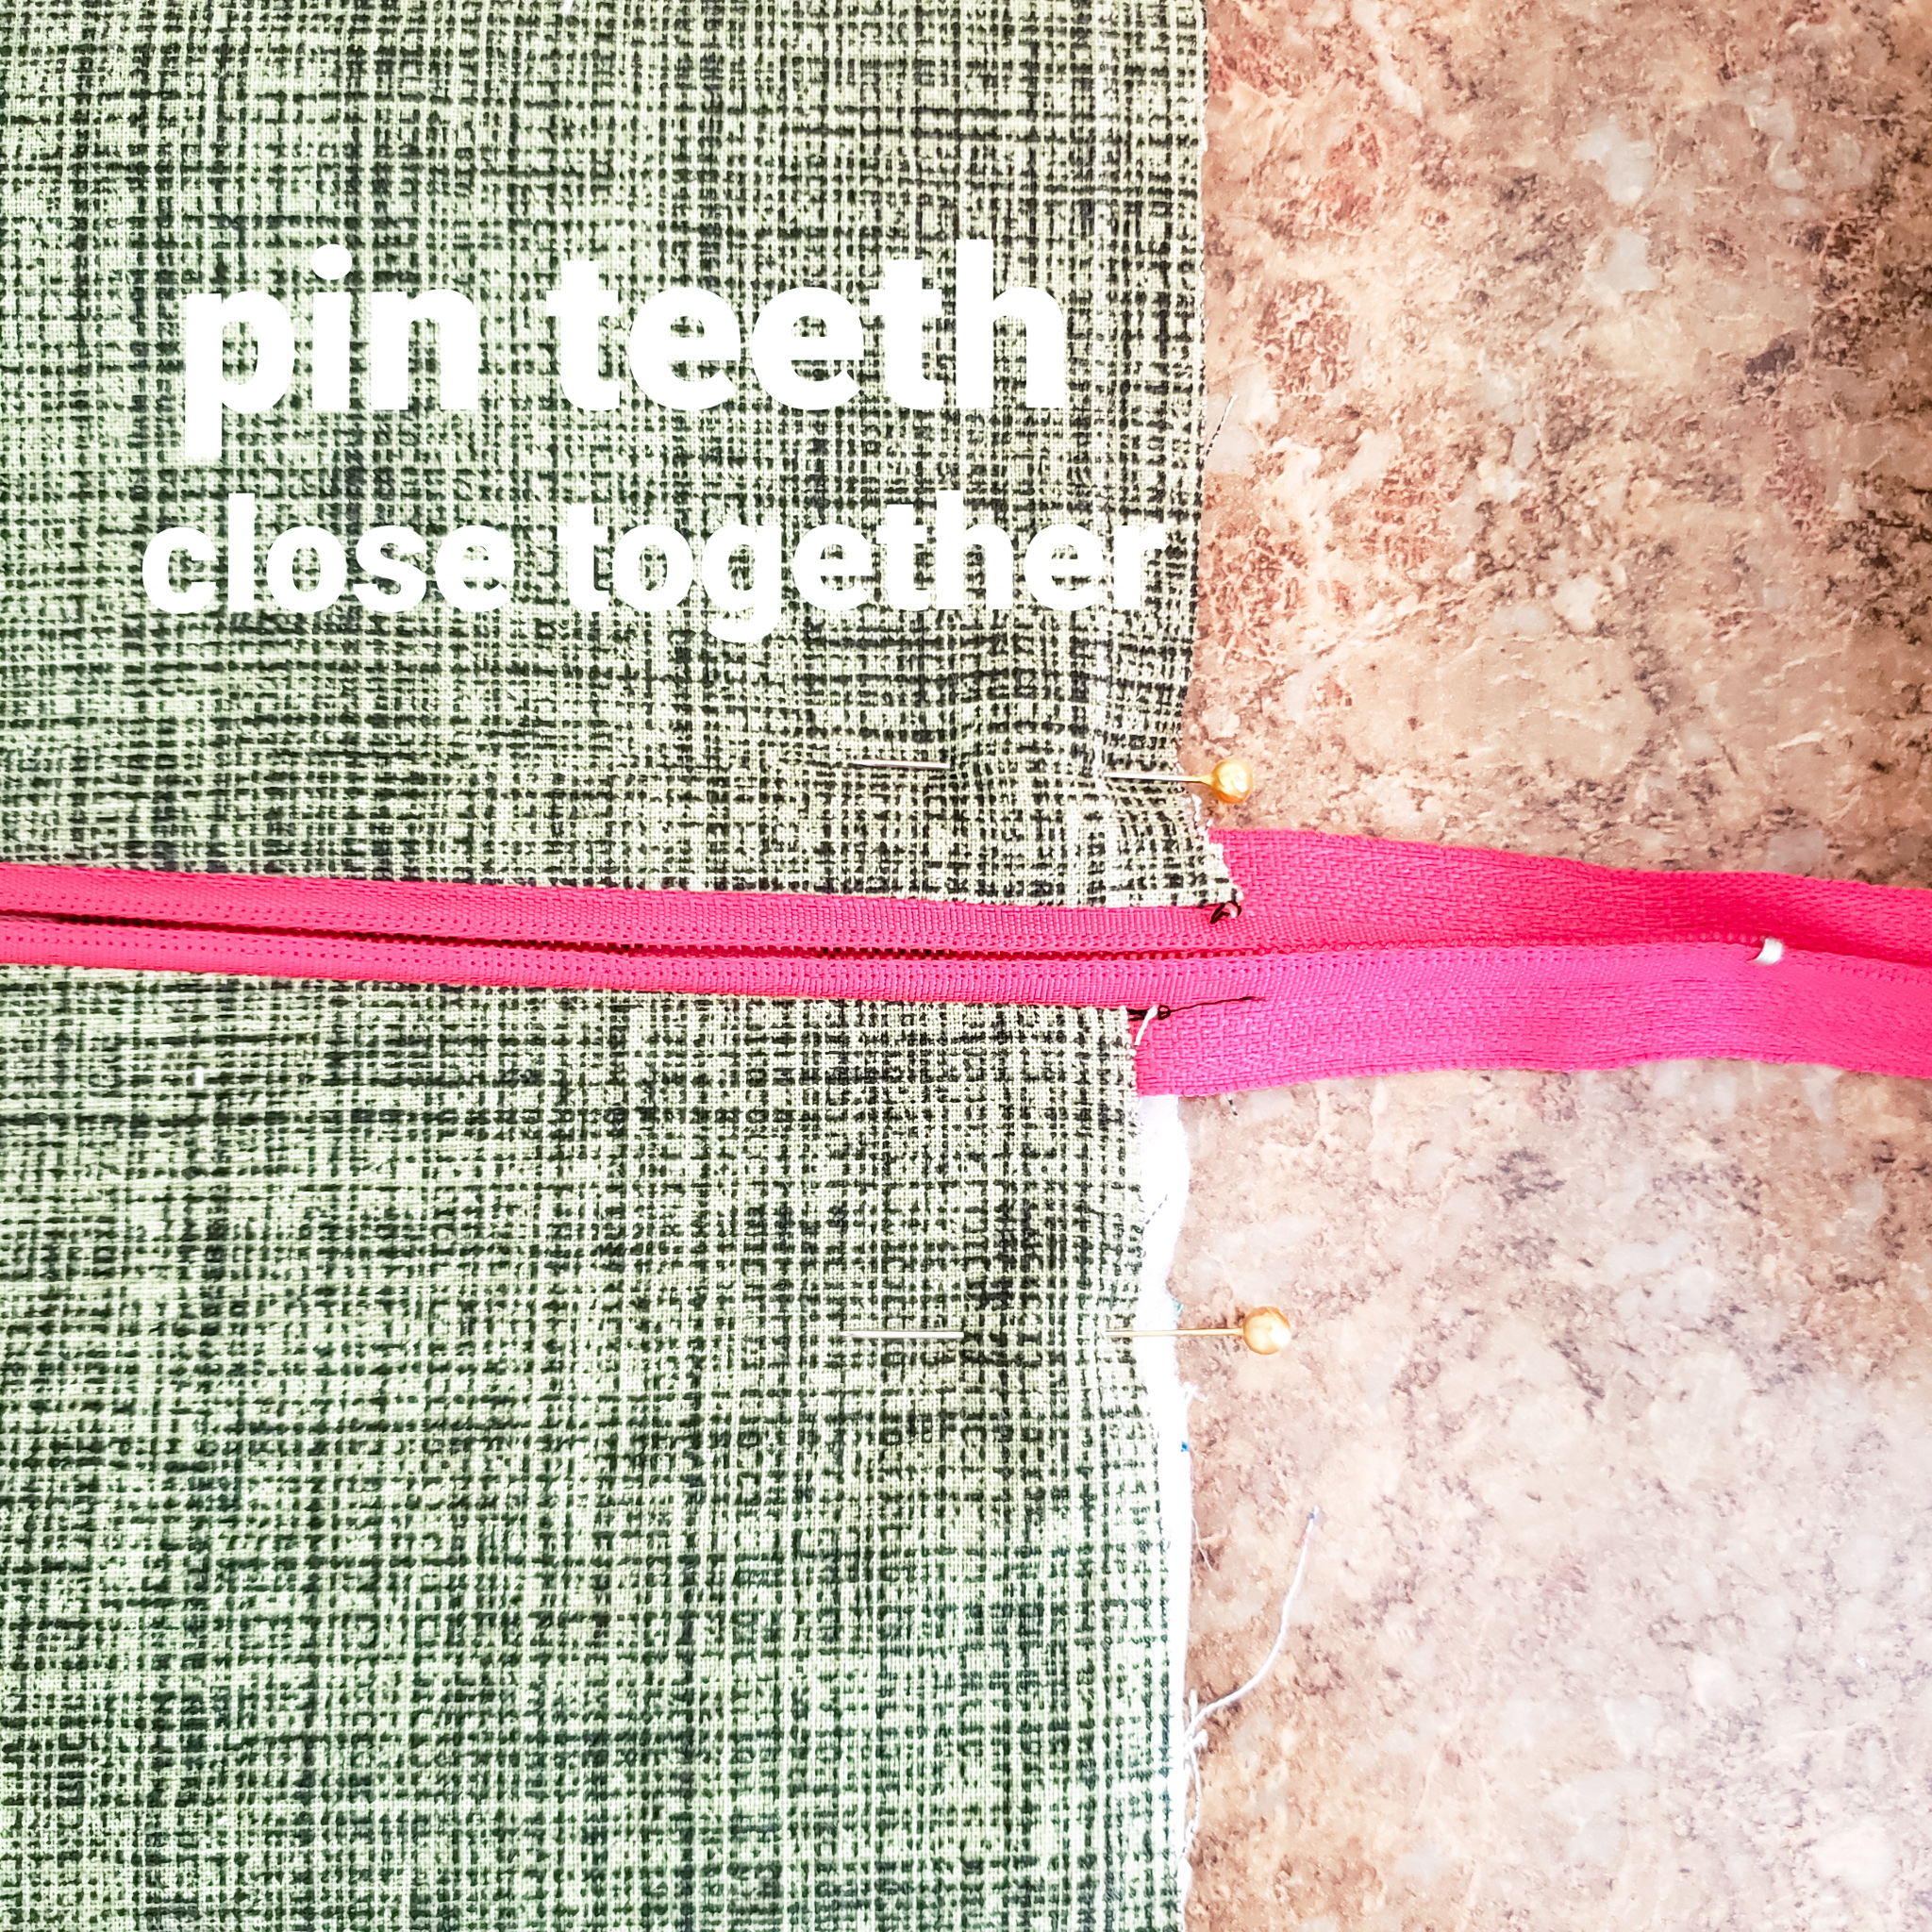
Pin the short ends of the bag. You have to unzip the bag halfway before pinning the side with the zipper pull! If you miss this step, you will not be able to turn your bag right side out! Make sure that after you move the zipper down that the teeth line up close together so you don’t have a gap when you zip up your finished bag. I pinned close to the zipper teeth to make sure they stayed close together while I sewed.
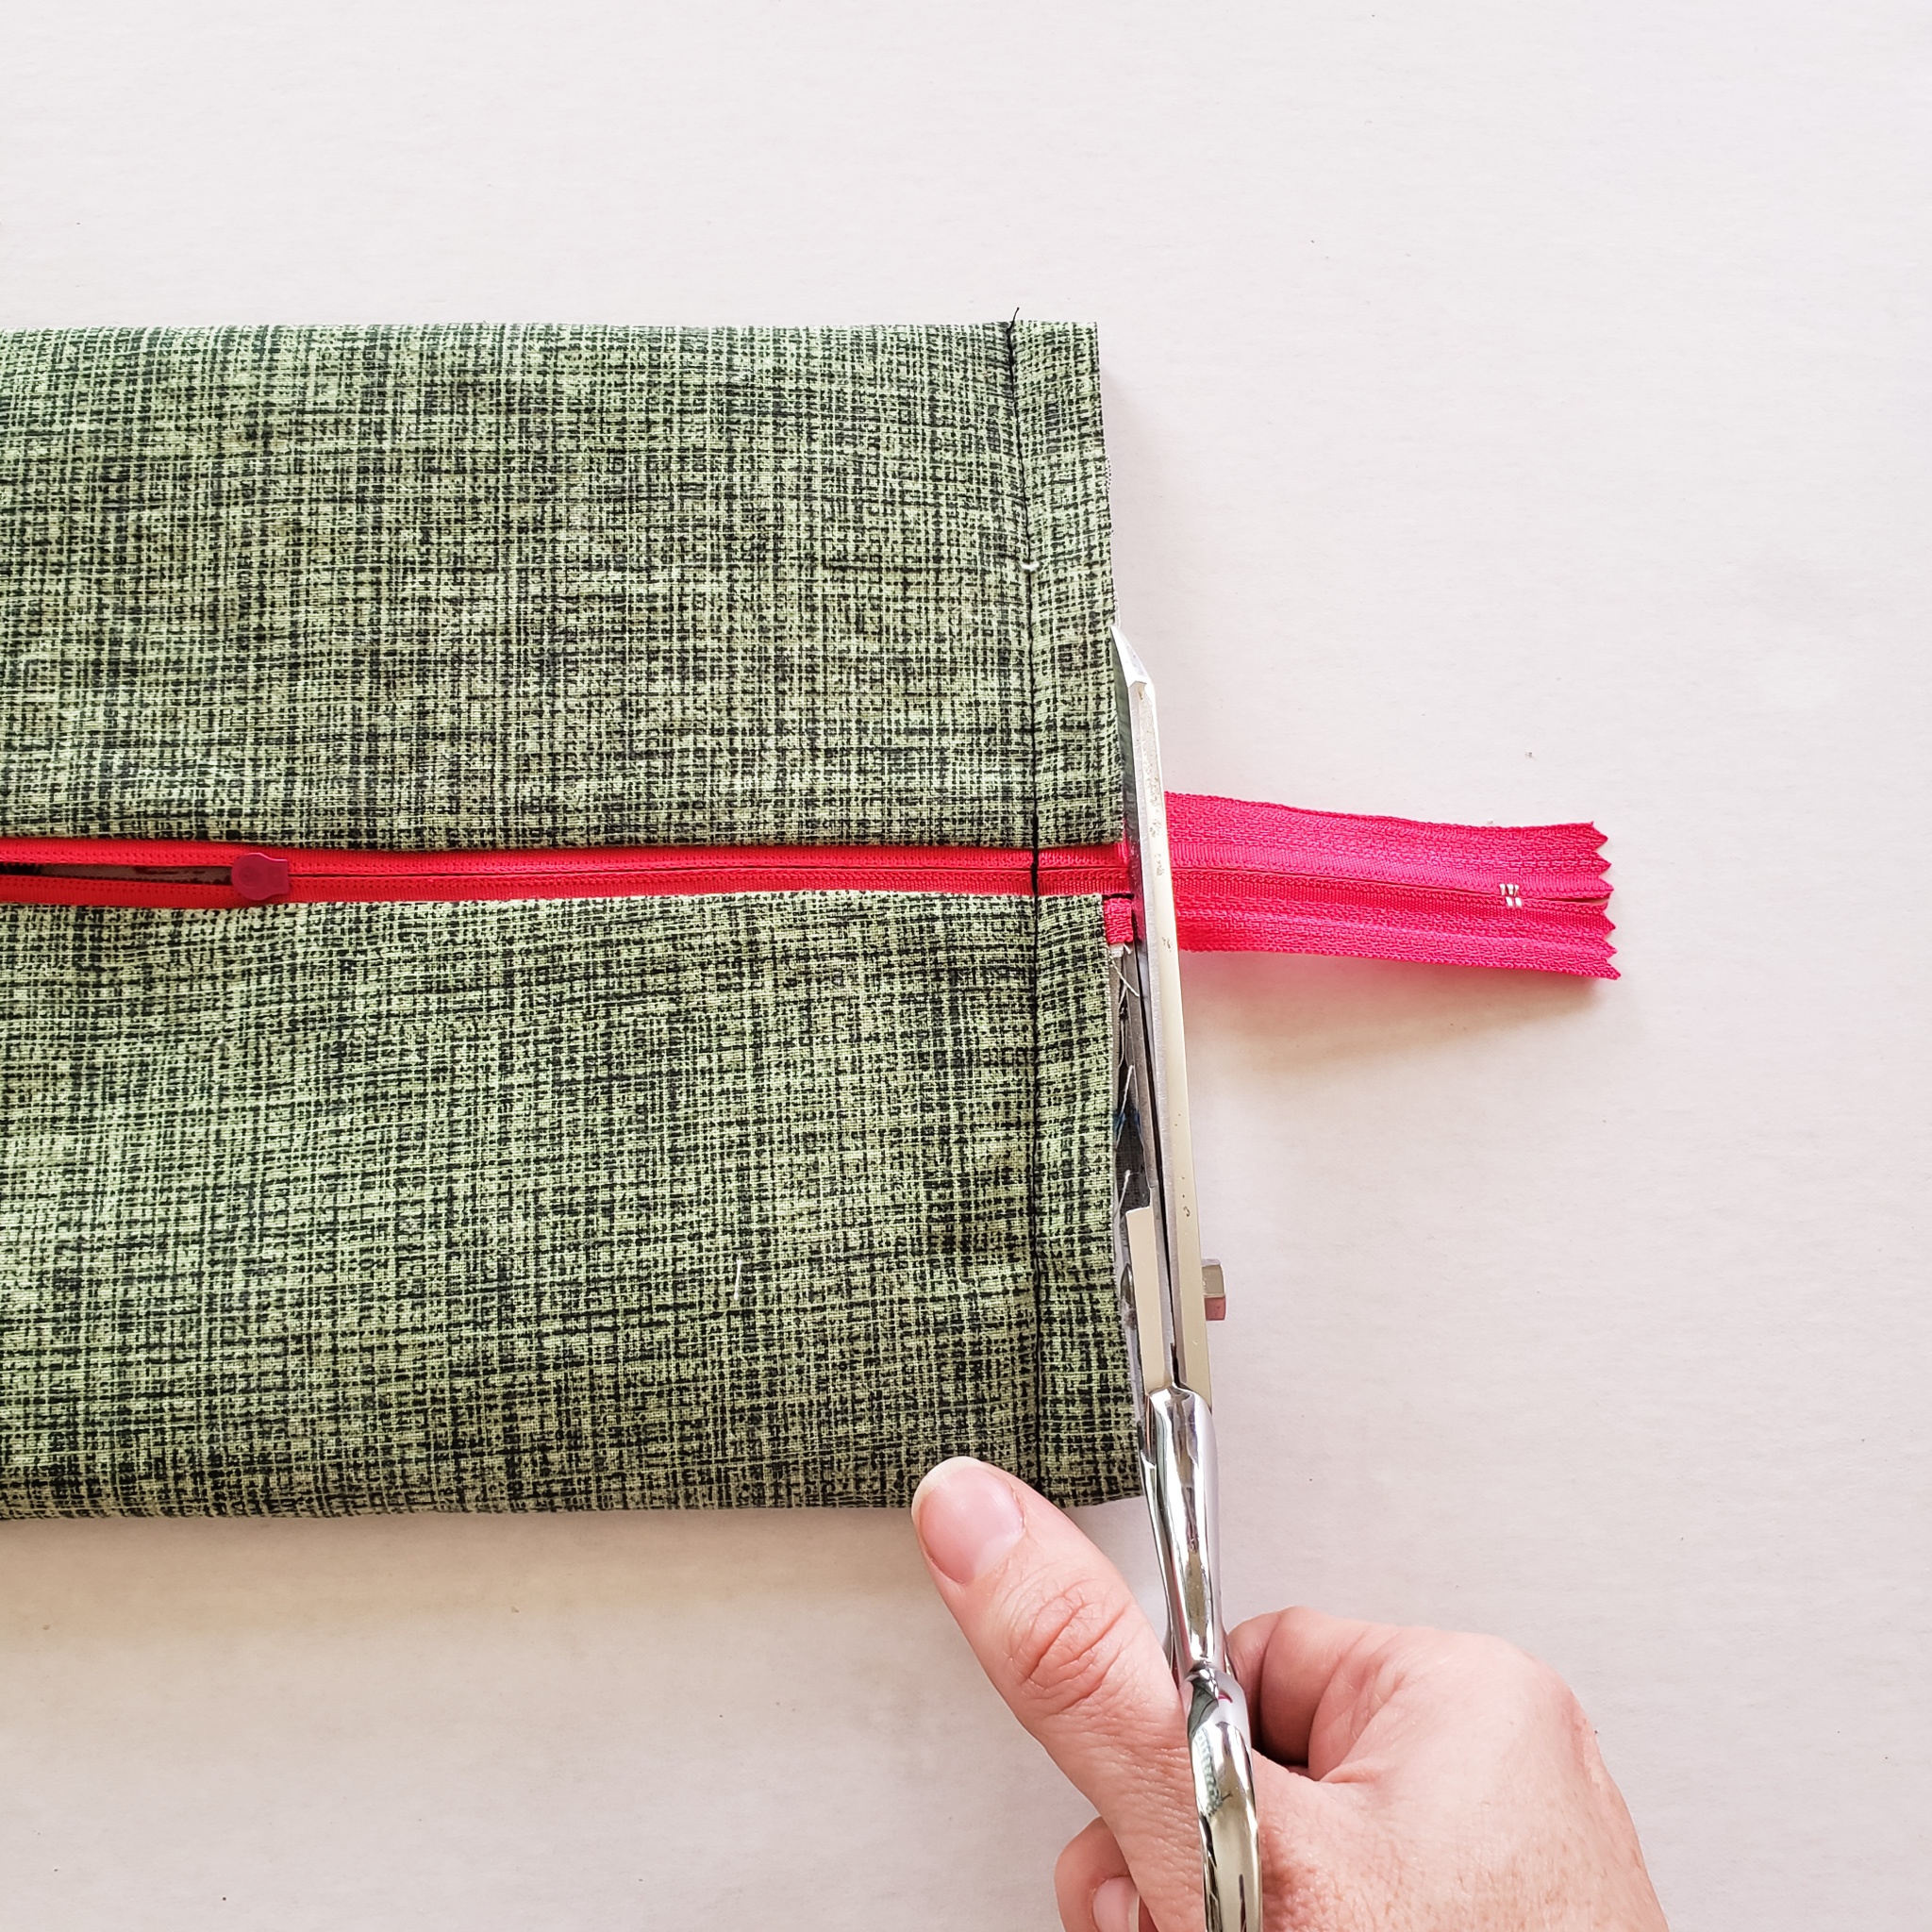
Stitch across the short ends of the bag. Go slowly over the zipper so that you don’t break your needle. I also did a careful backstitch over the zipper, just to reinforce that end since you will be cutting your zipper.
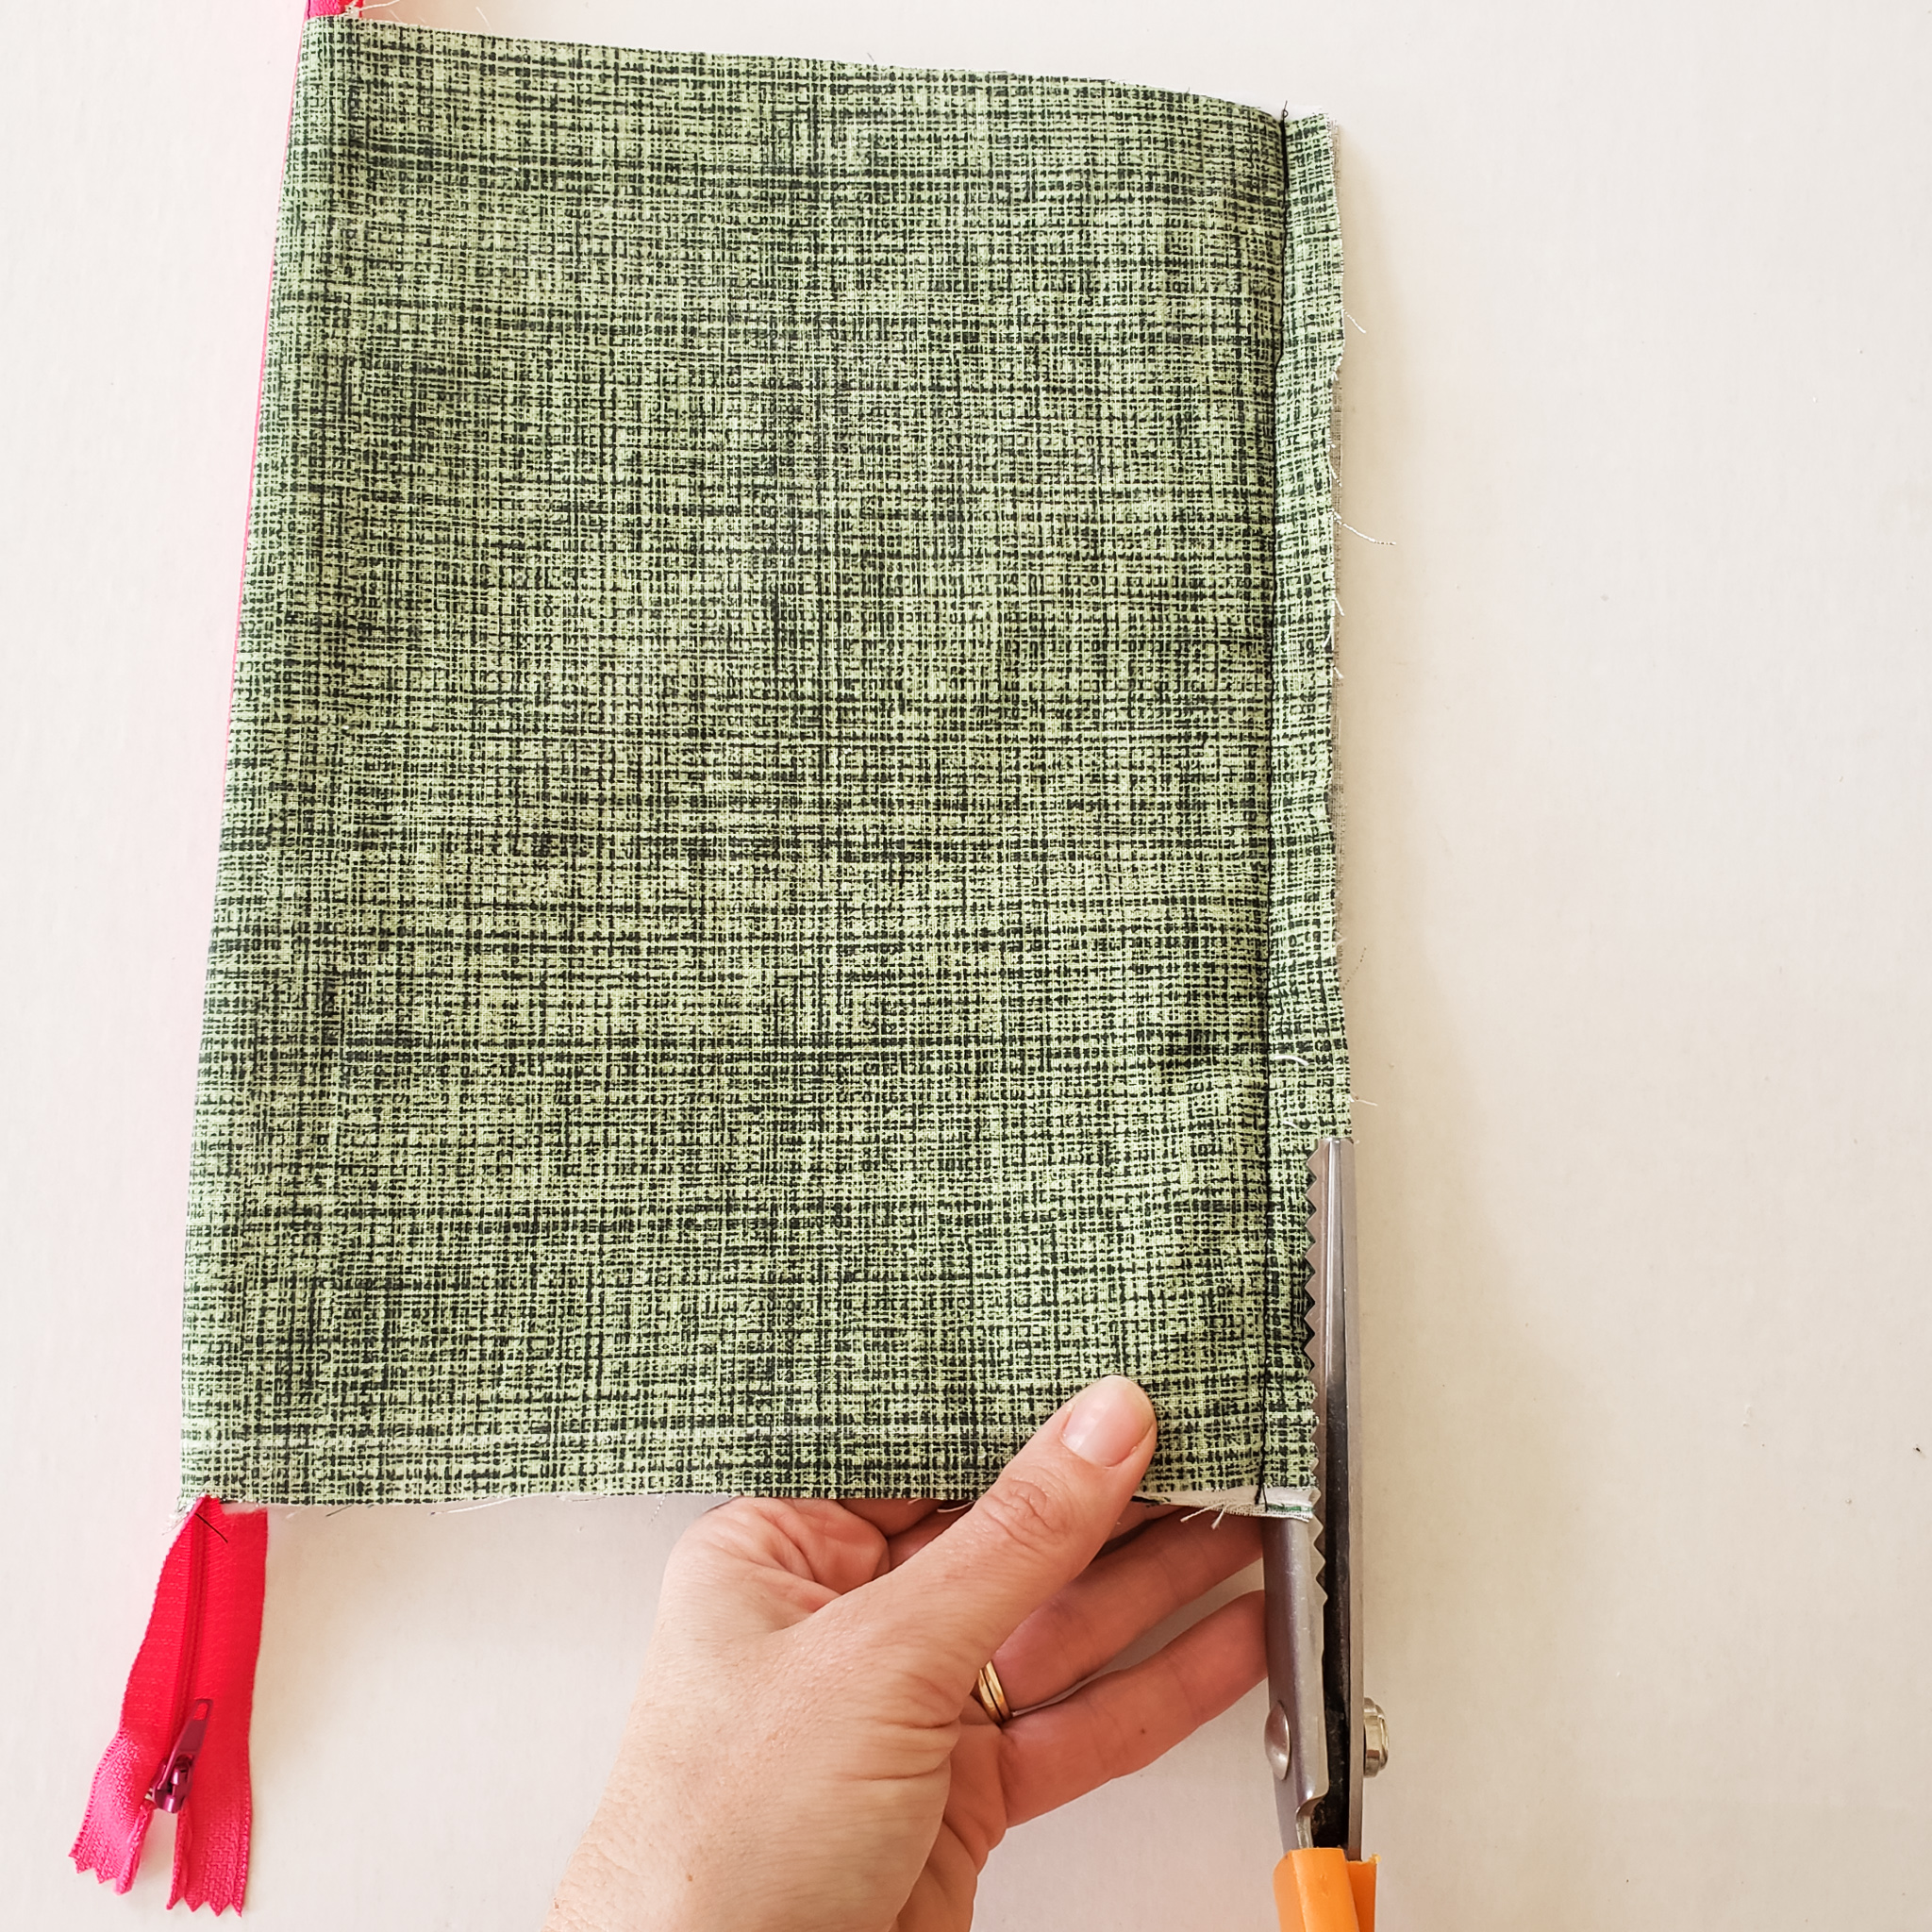
After your ends are sewn, cut the excess zipper so that it’s even with your edges. Pink (or finish) your edges.
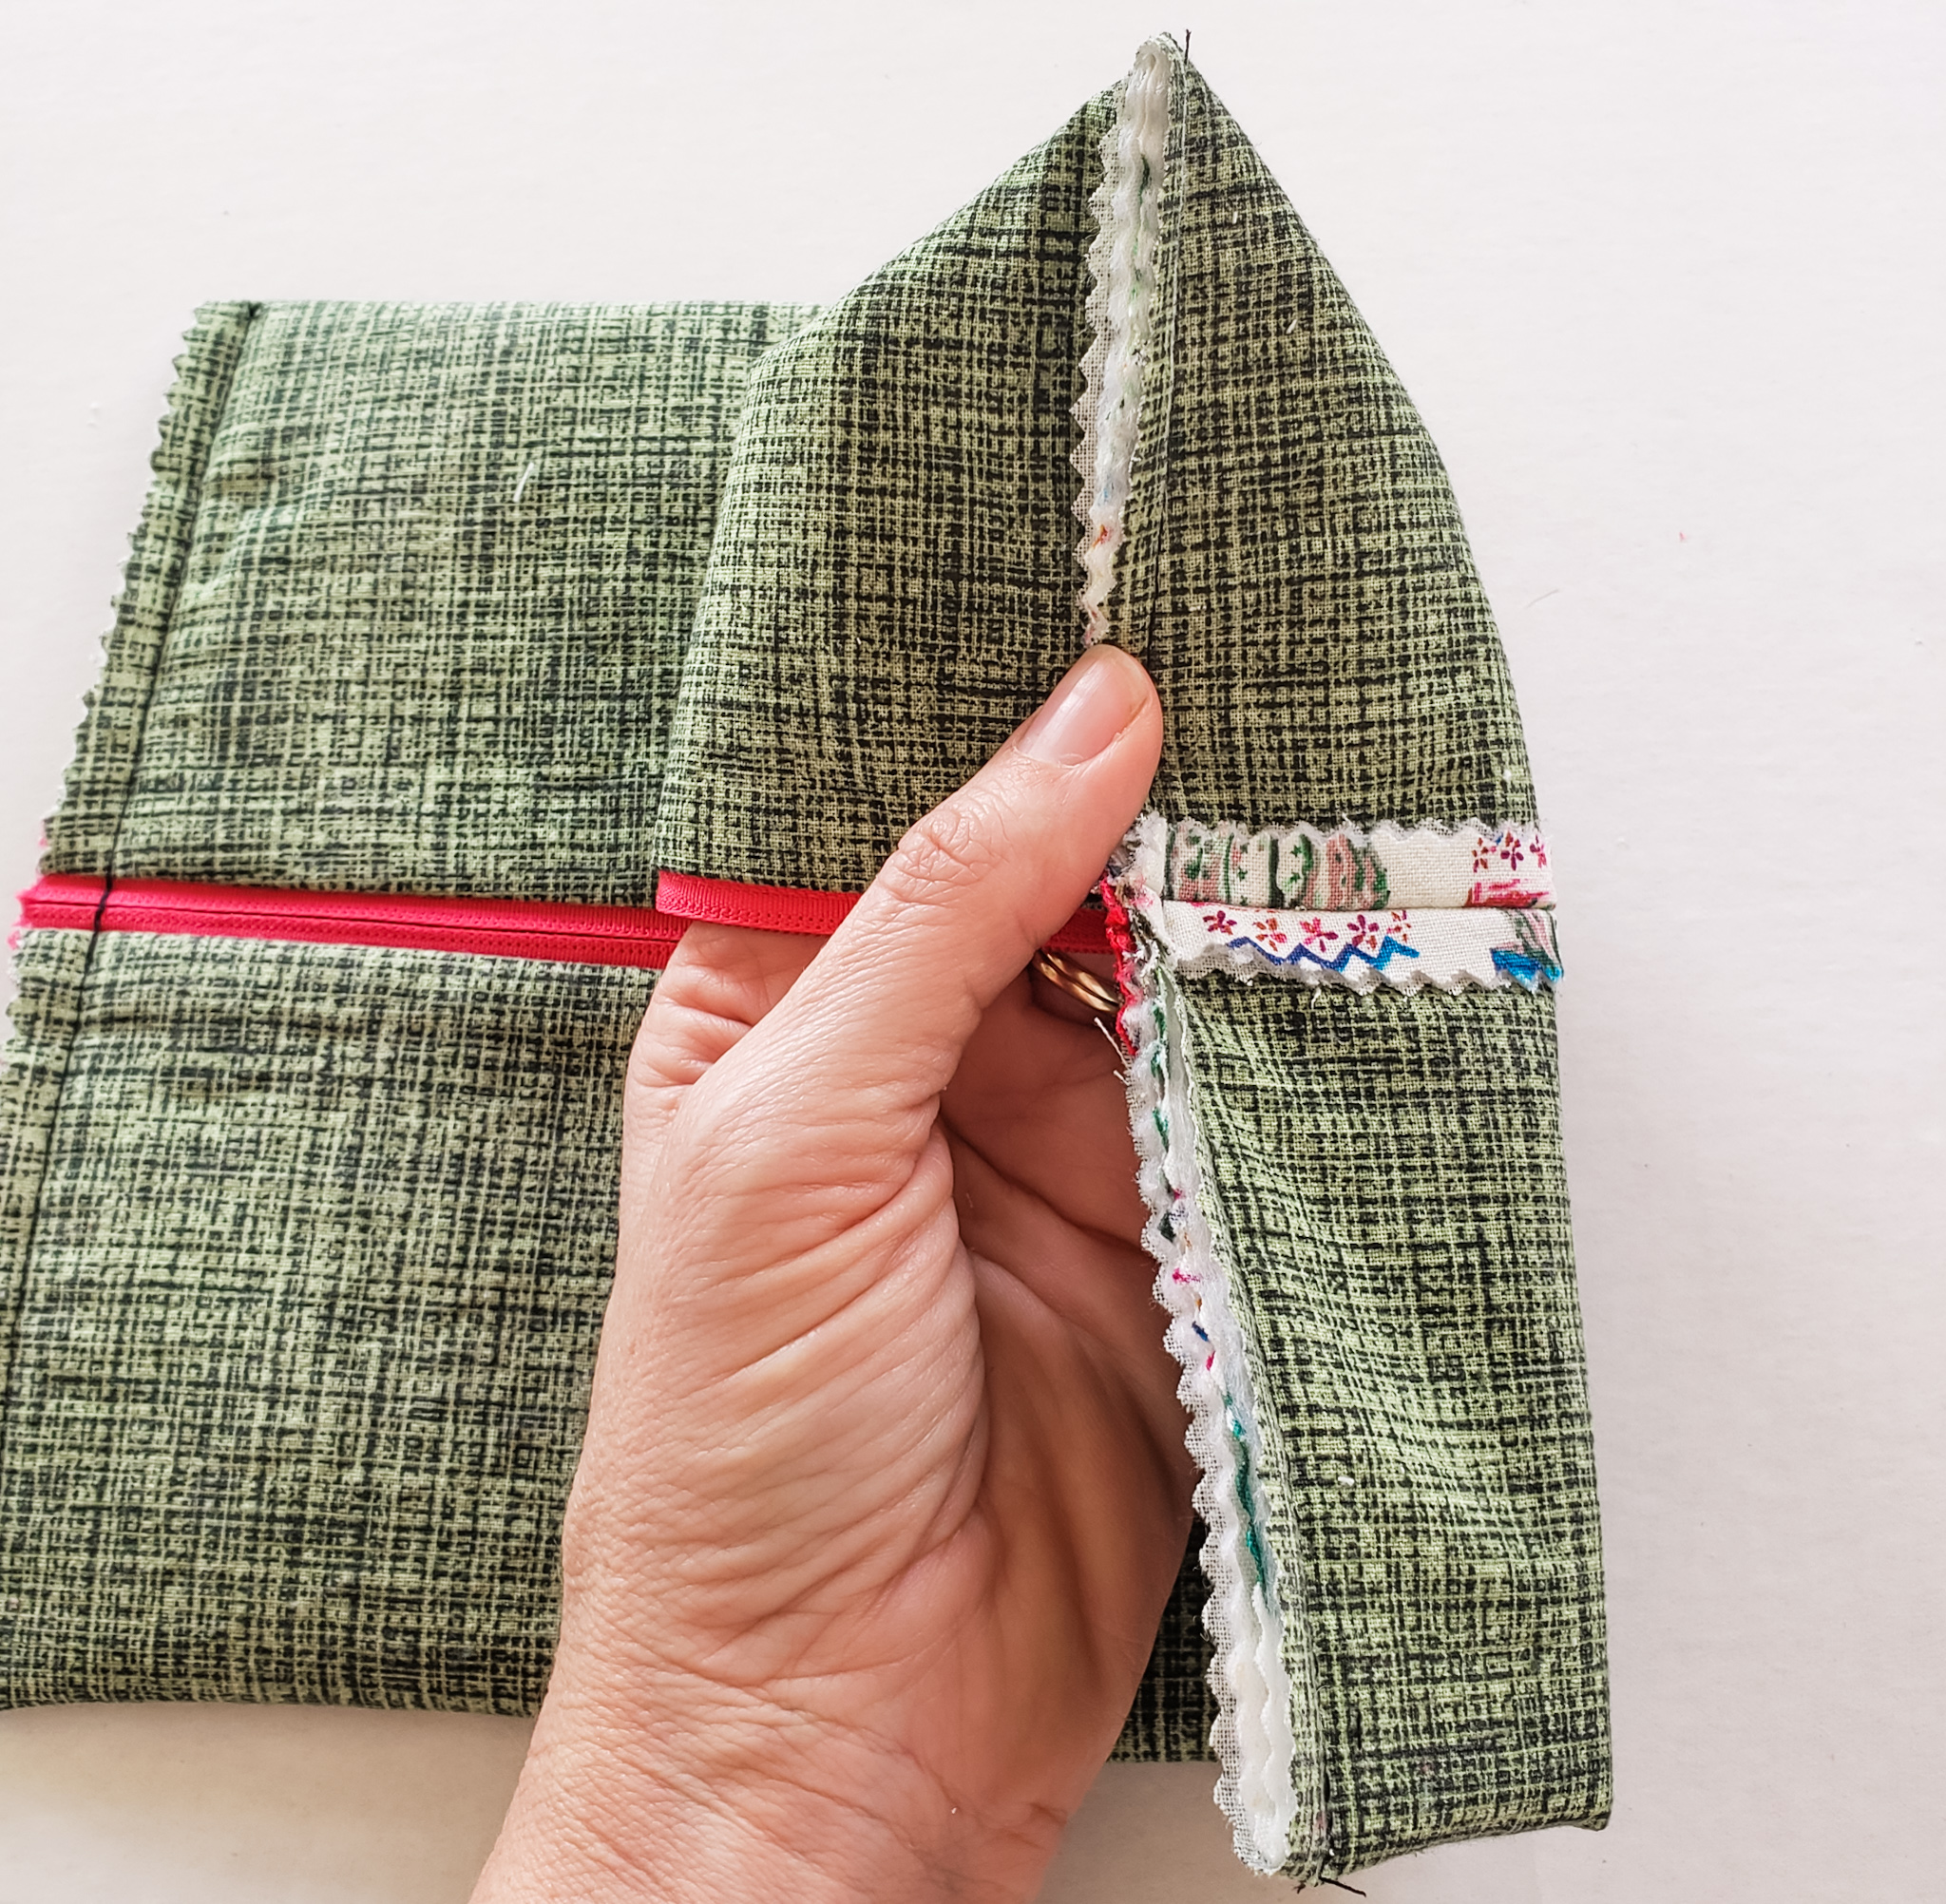
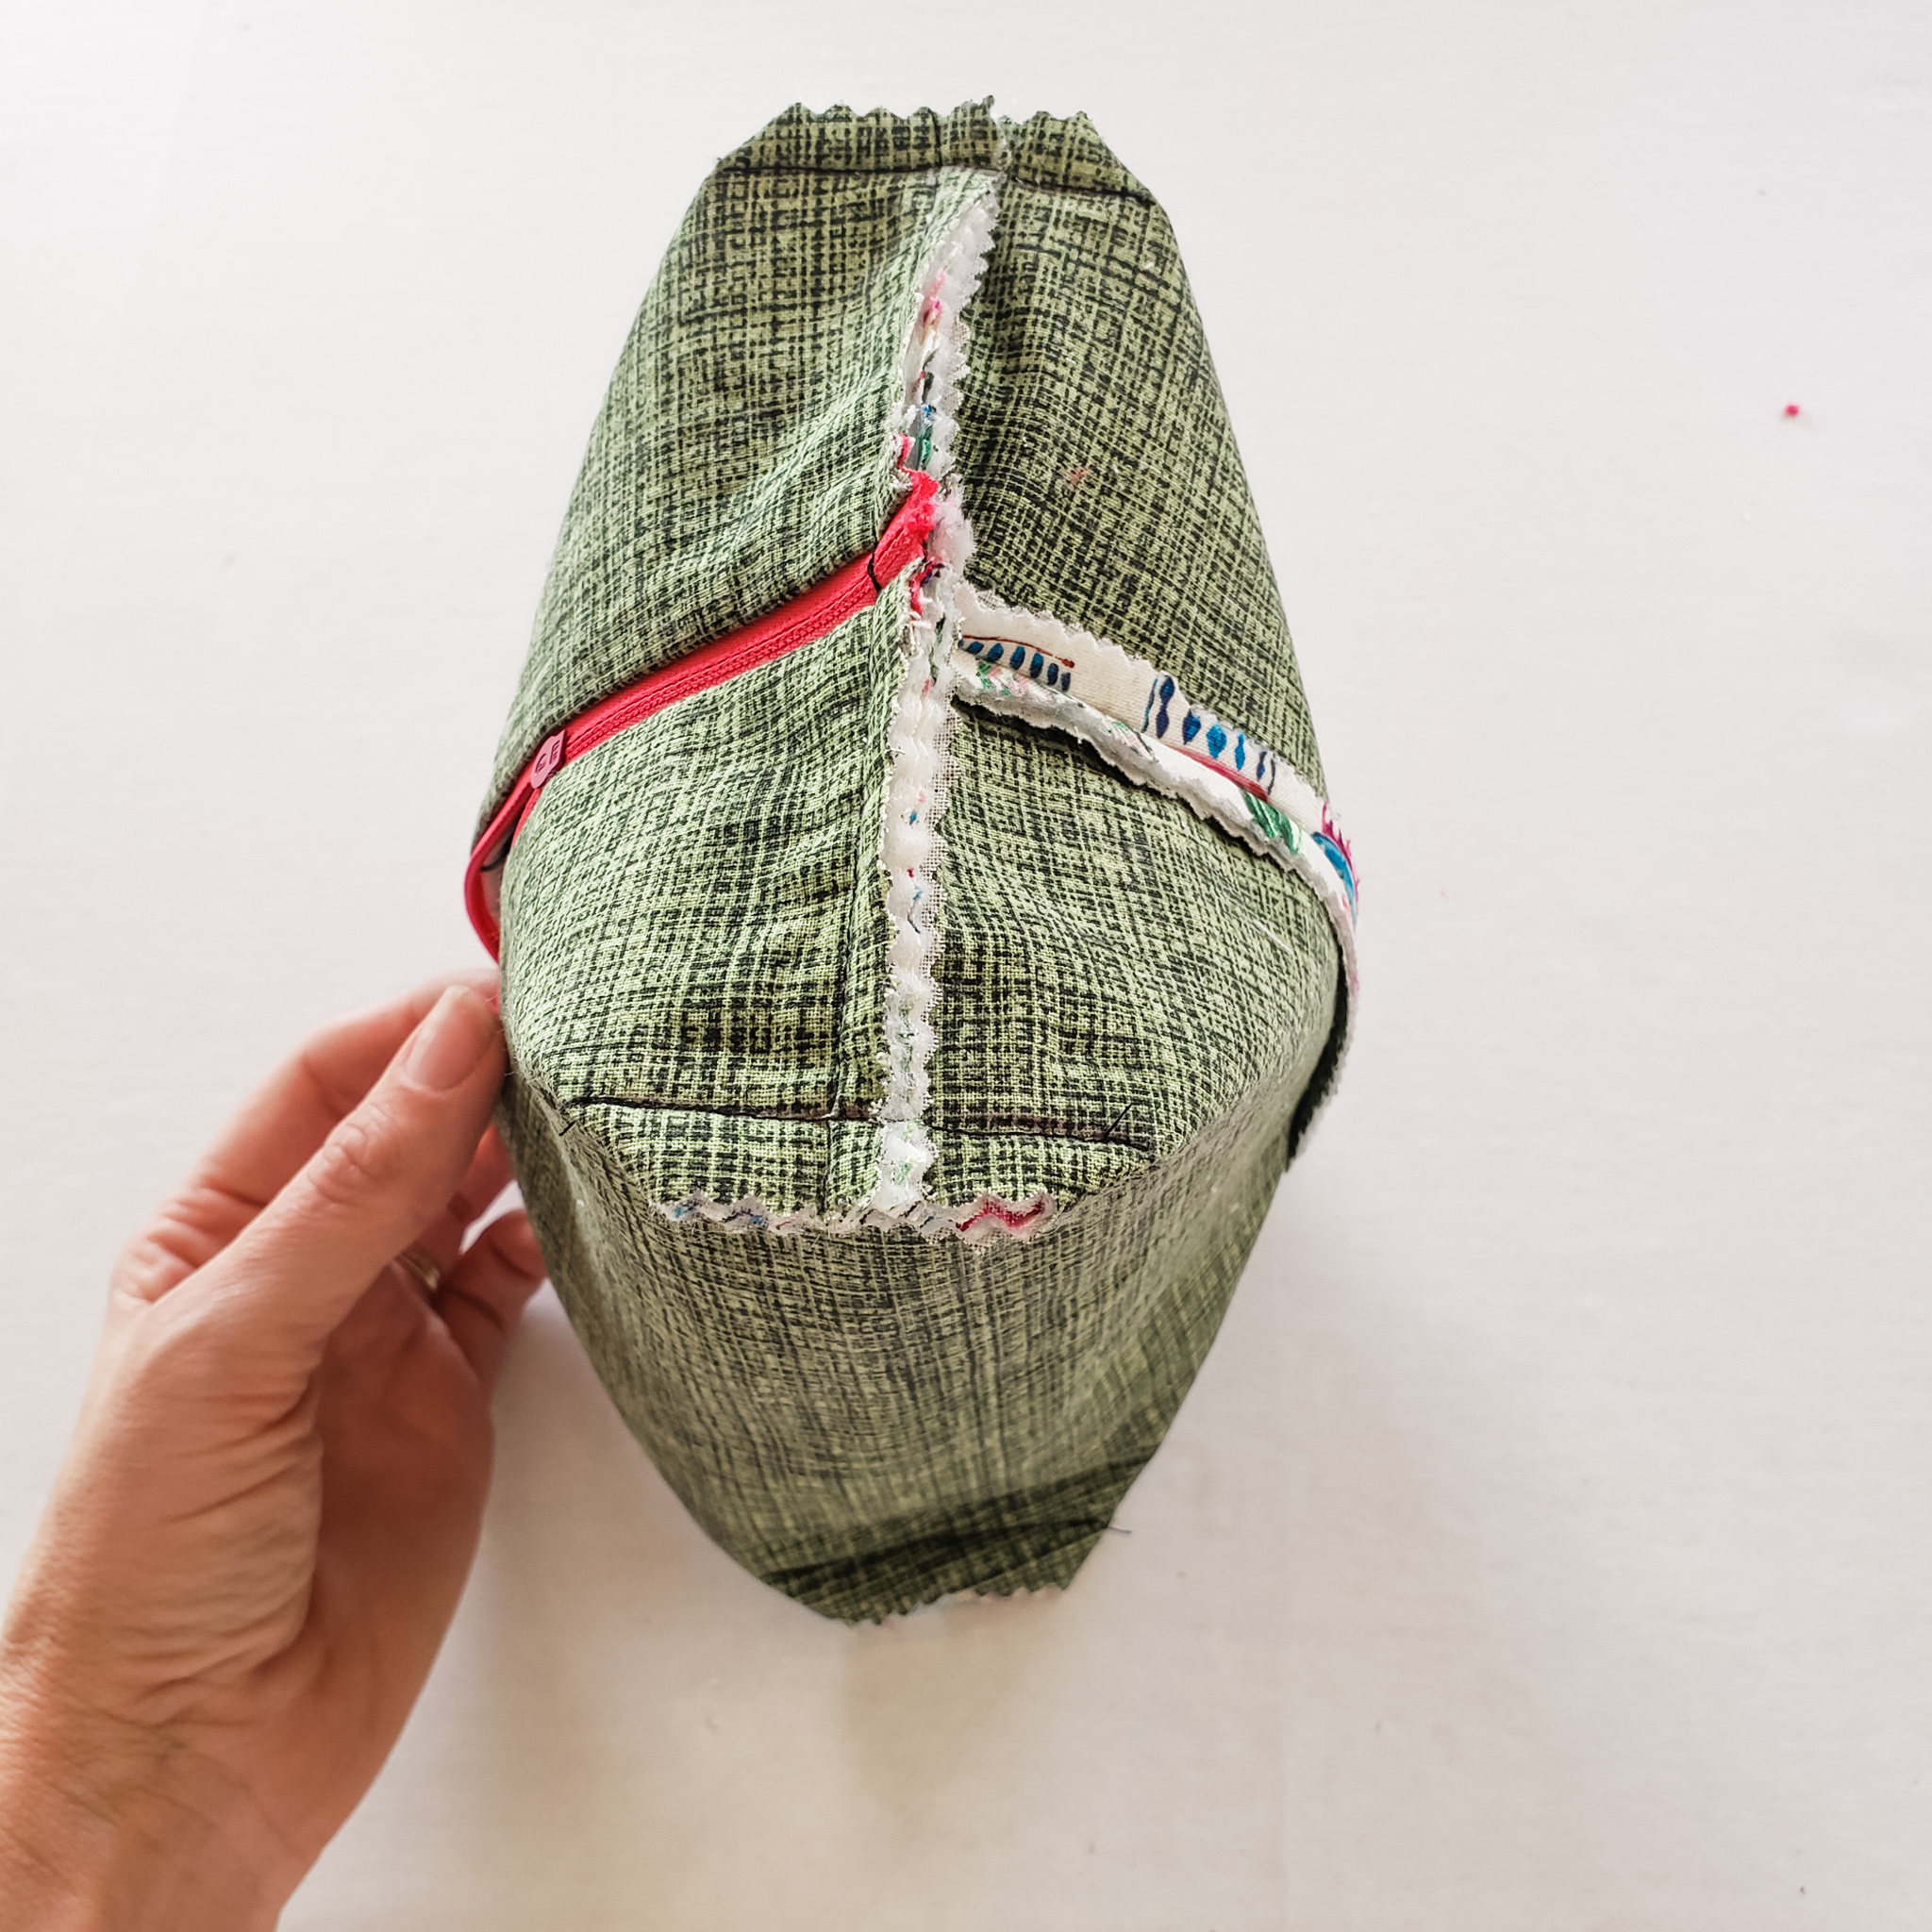
Now for the boxed seam. If you have trouble understanding this, hop onto my YouTube video for more of a visual. Basically, you put your finger up into the corners (one at a time) and pinch the top so that the corner makes a triangle.
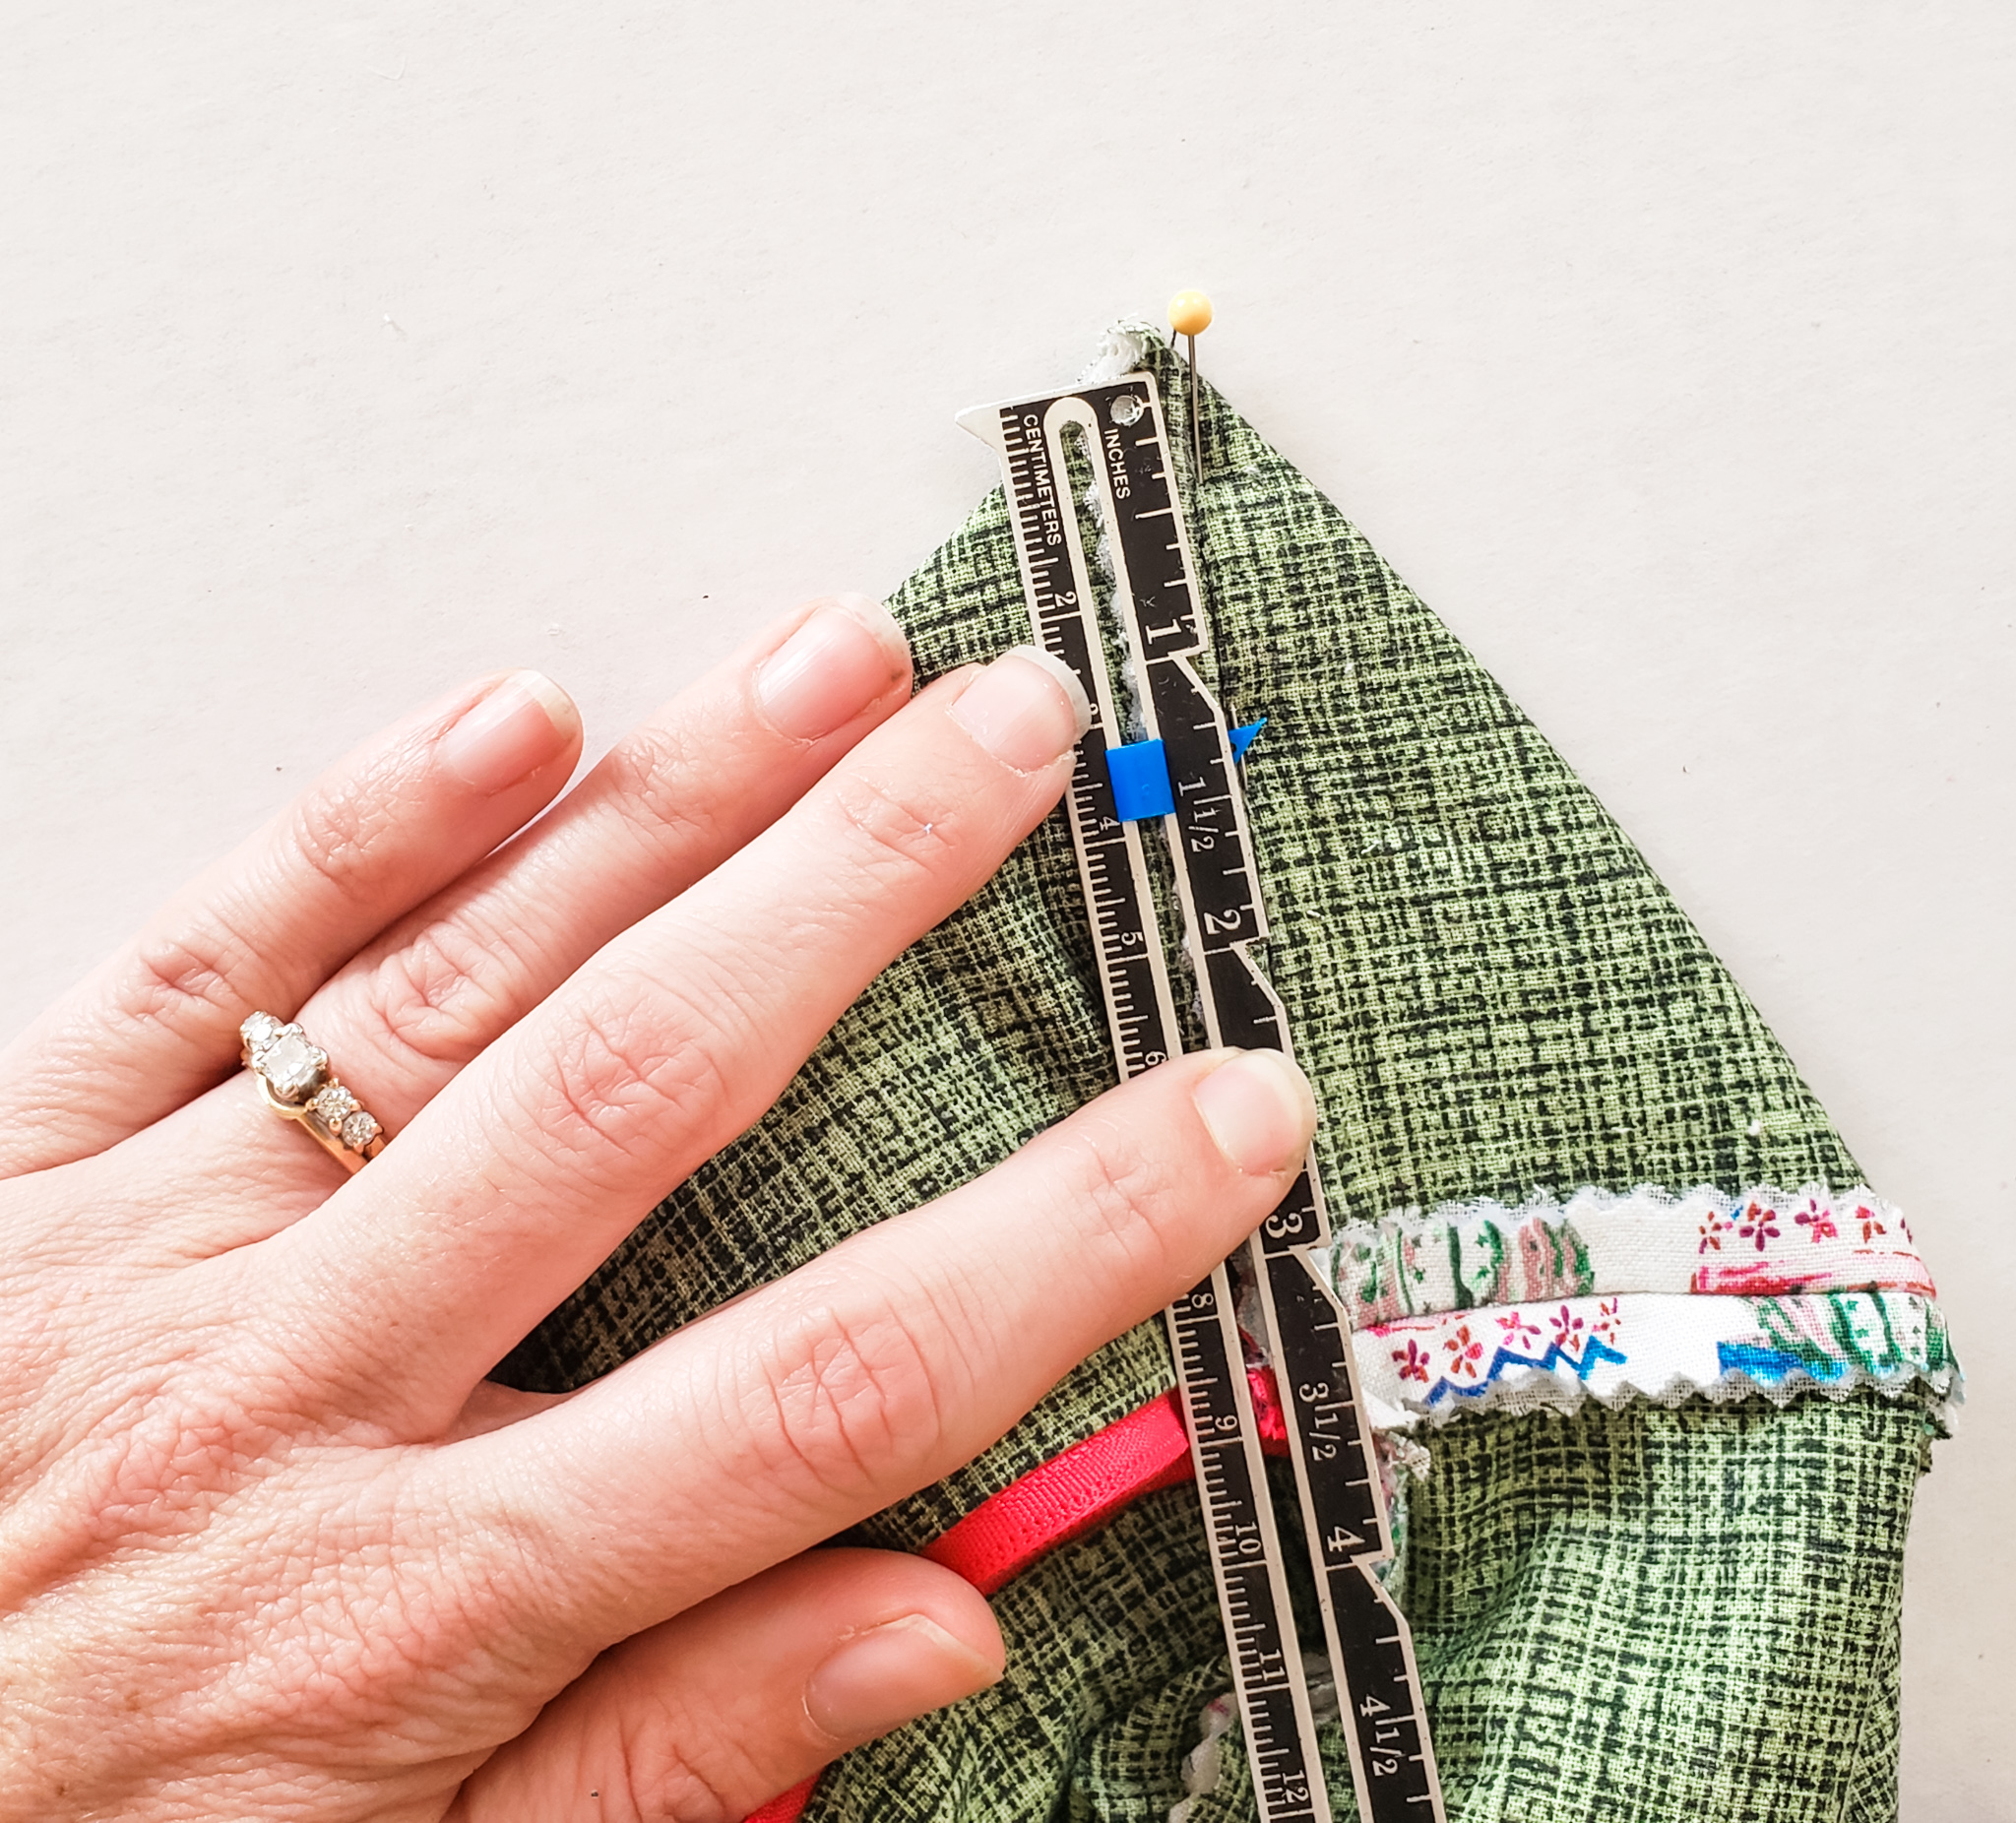
Flatten the triangular corner down and measure 1″ down from the point. Mark it with a dot (with your marking pen) and then draw a line across one edge to the other.
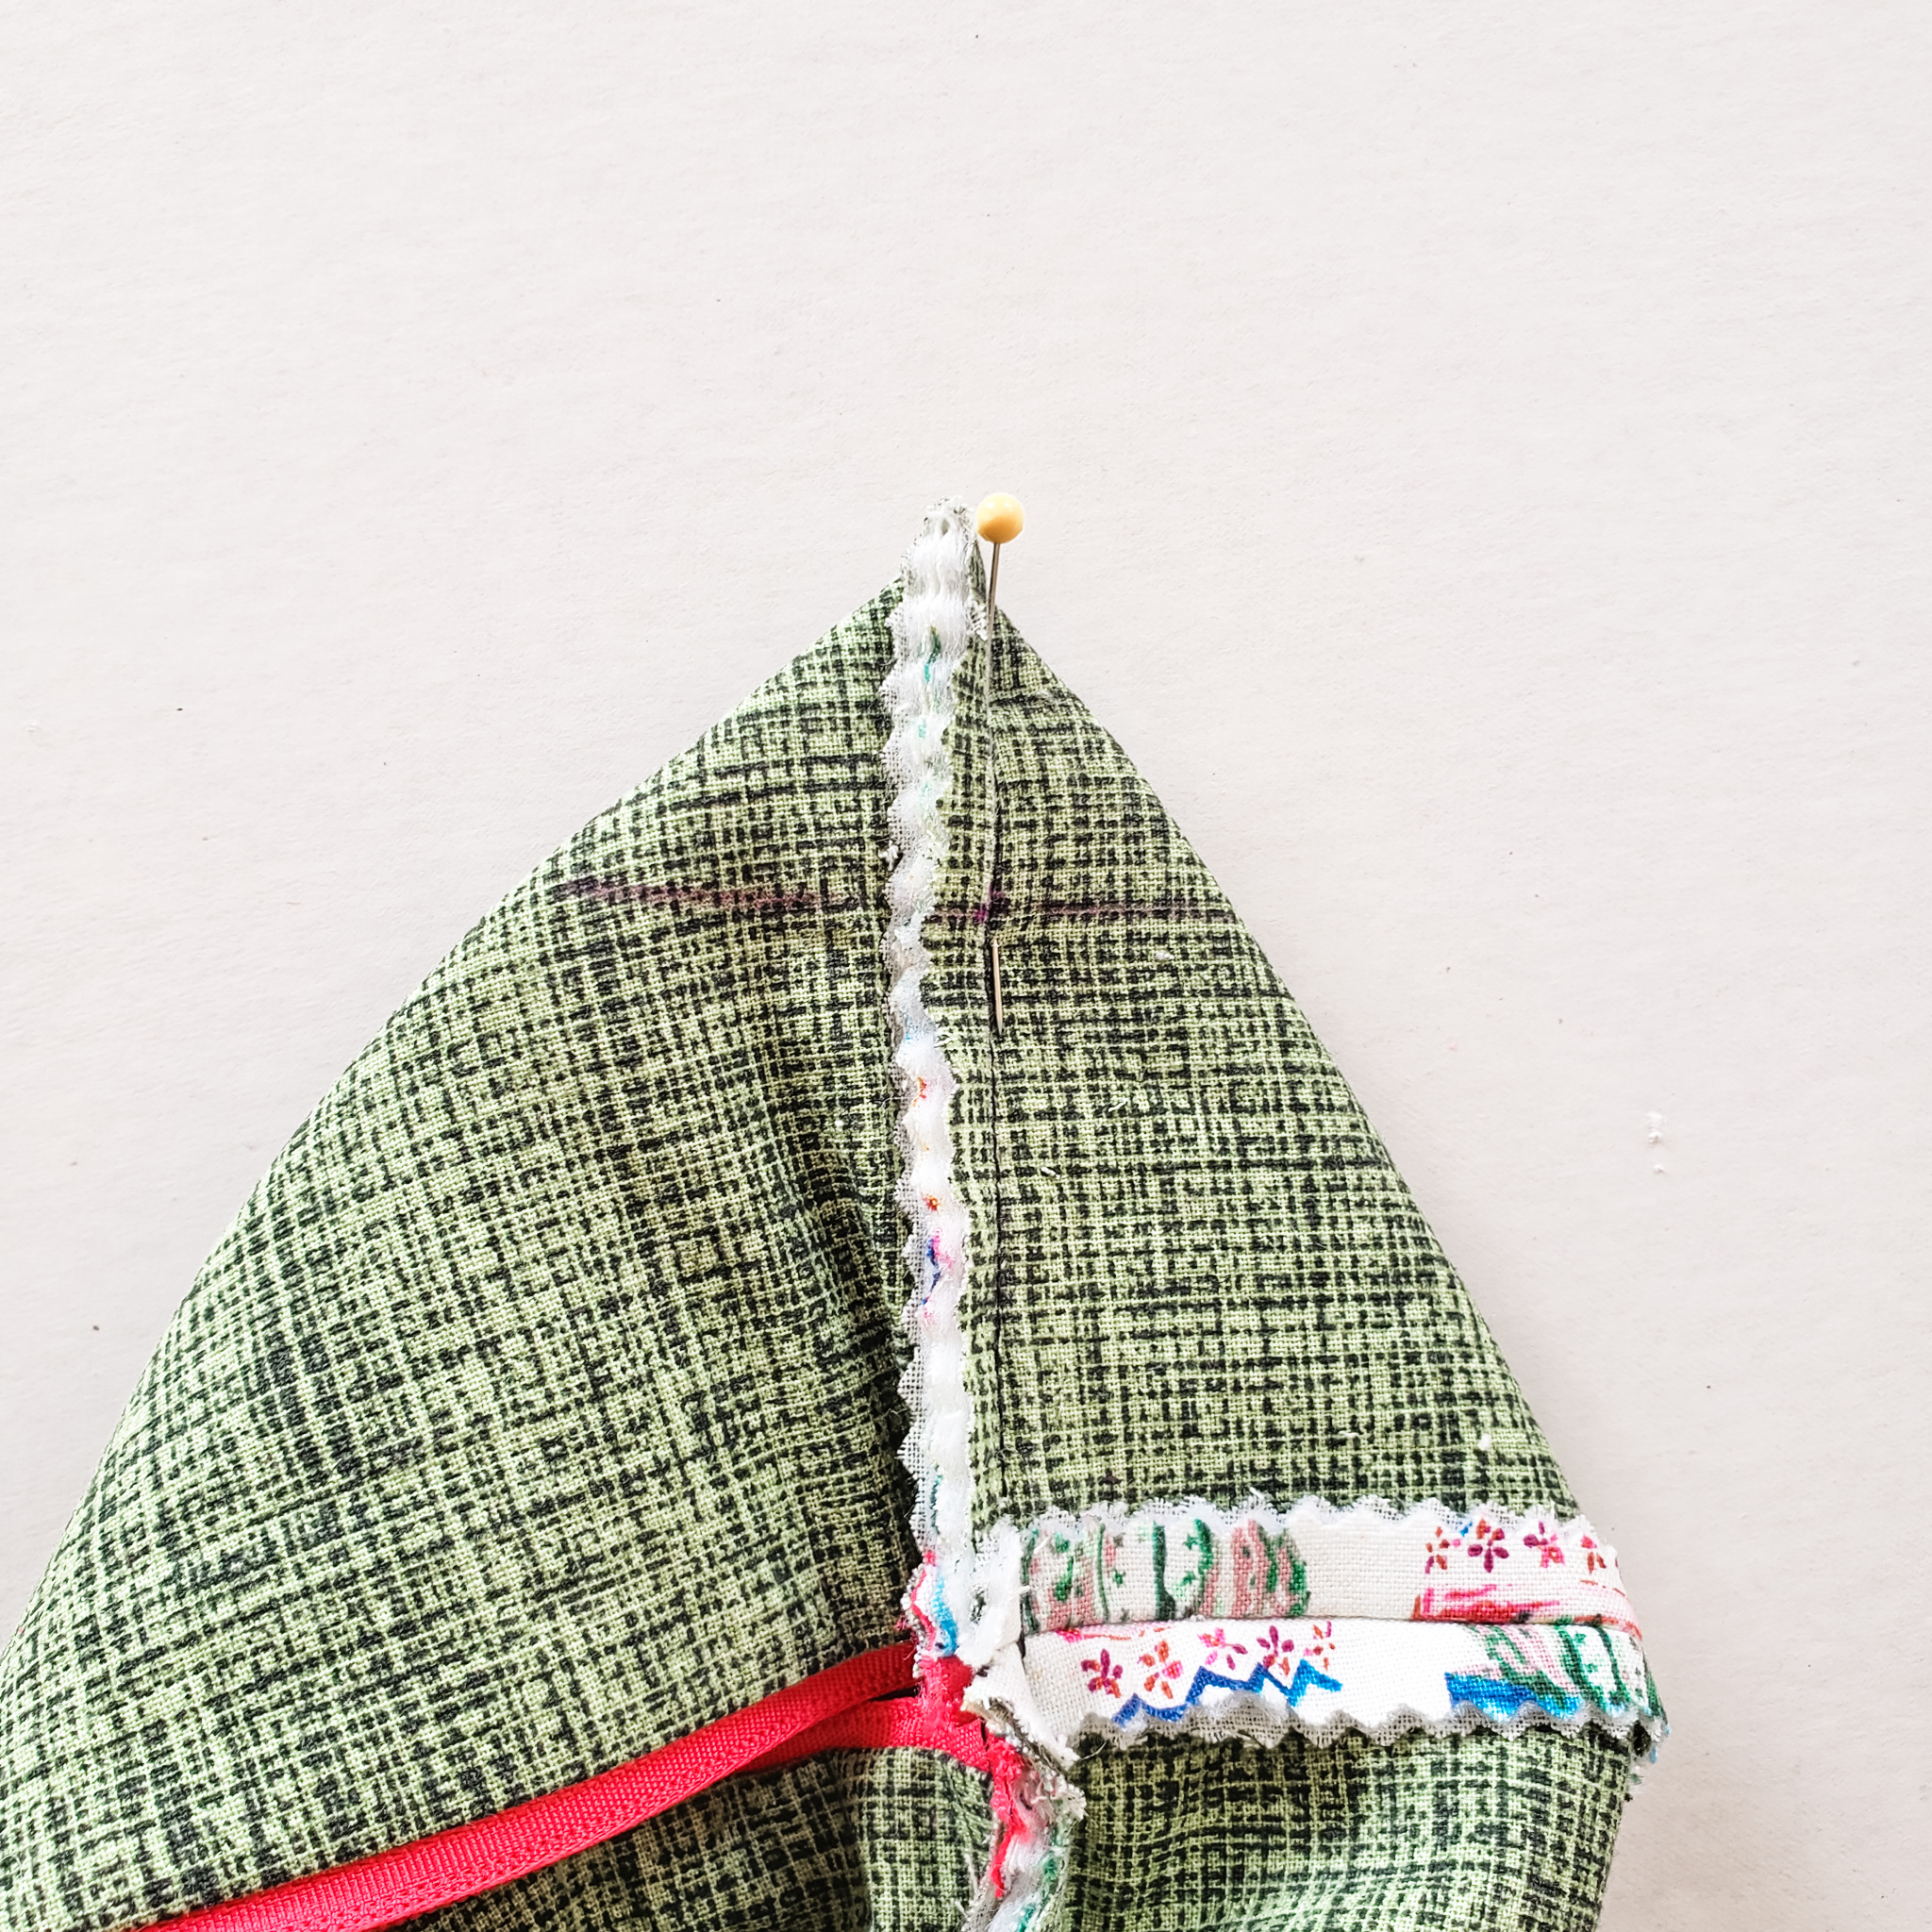
Stitch across that line and then cut off the corner (I cut with my pinking shears).
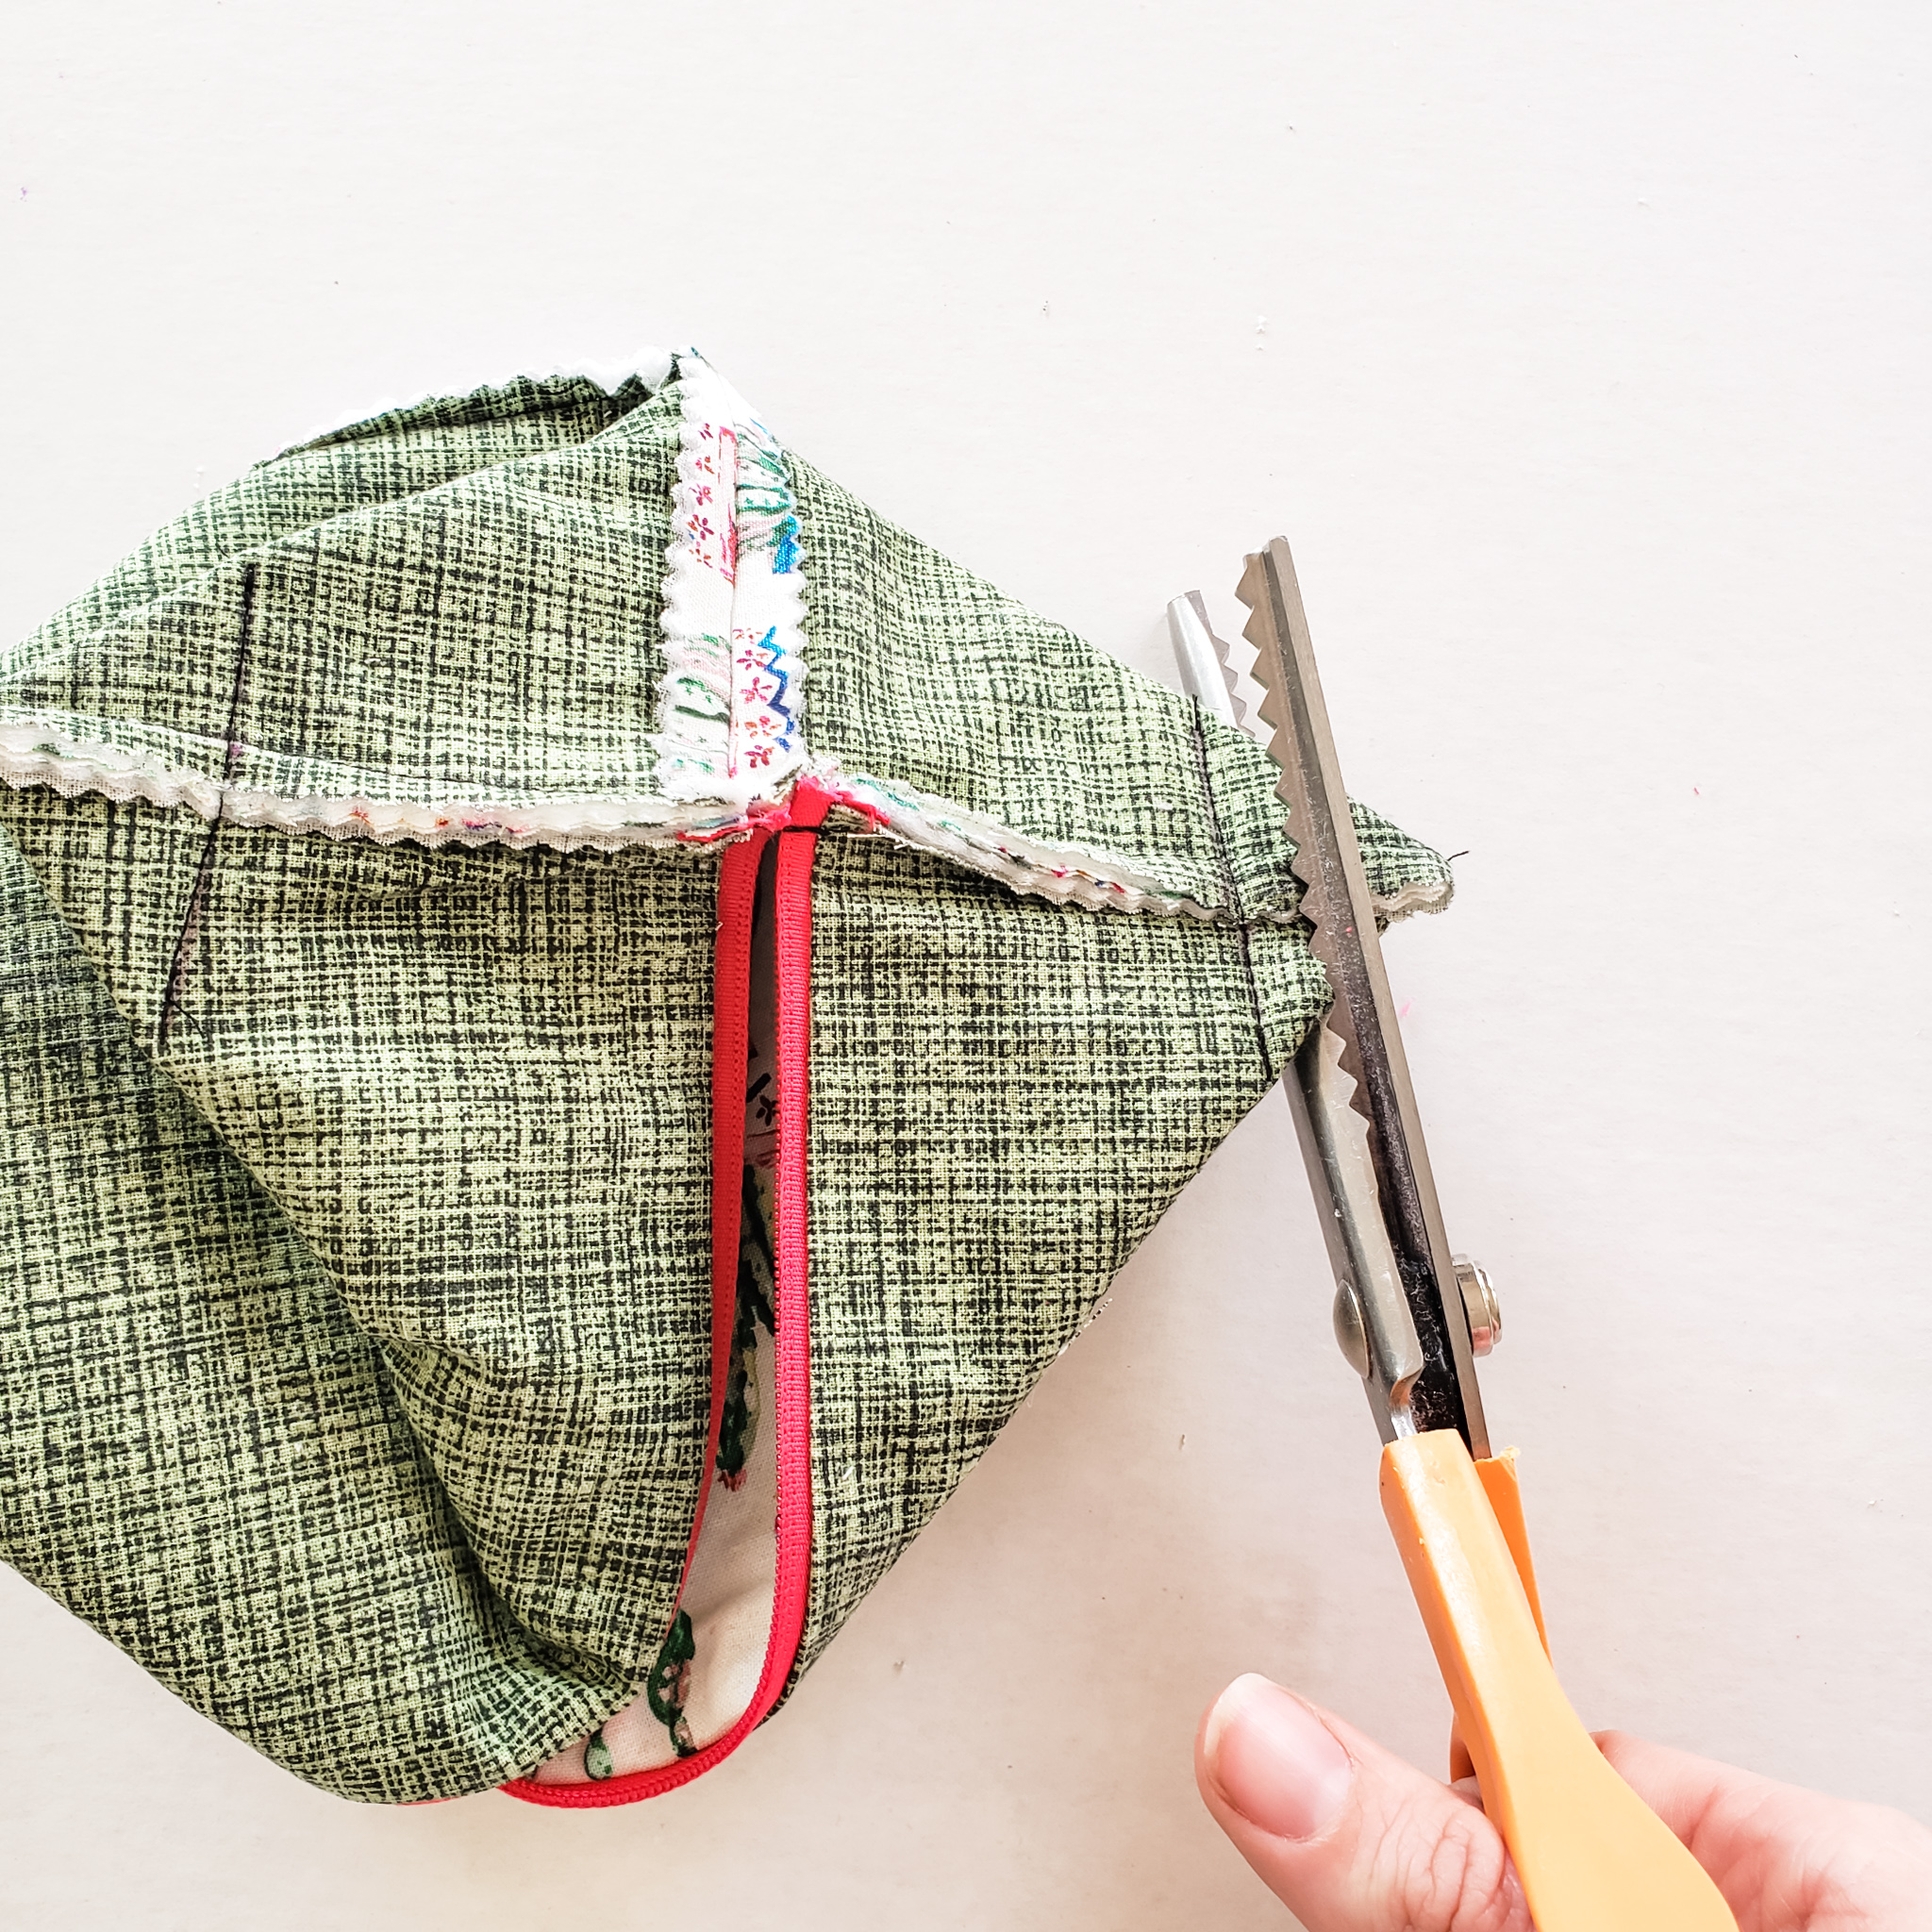
Repeat this process with all 4 corners.
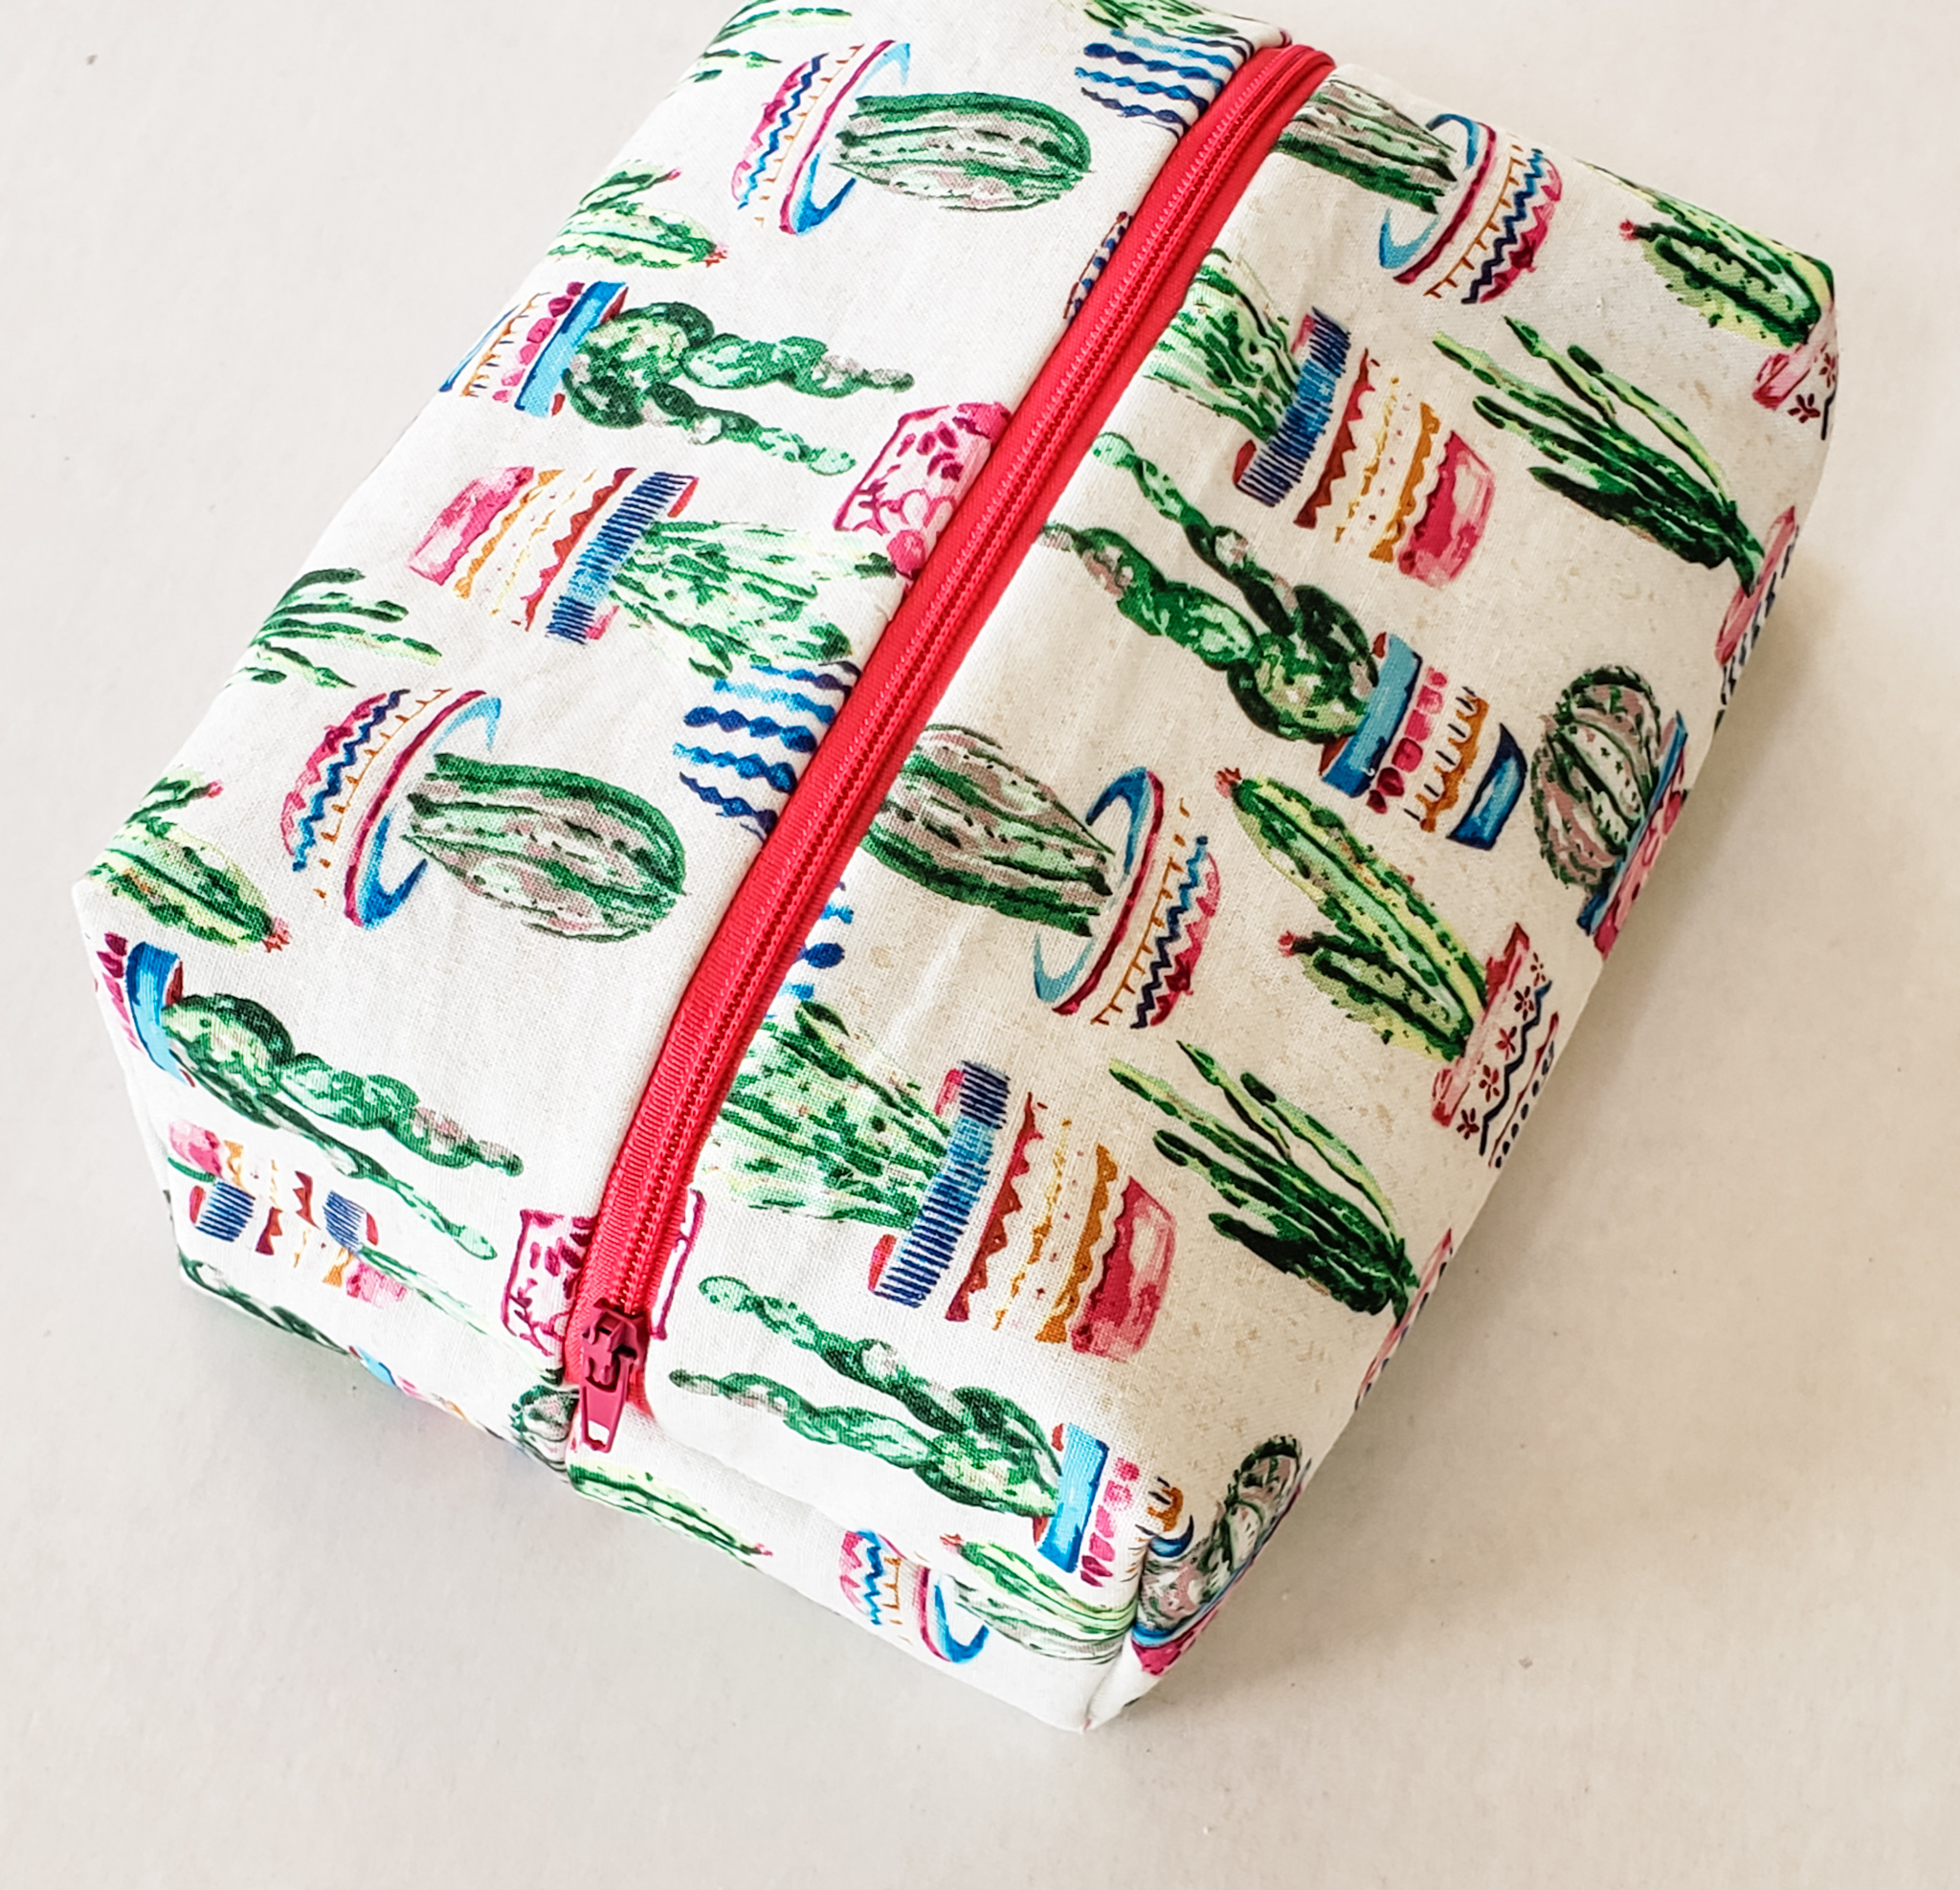
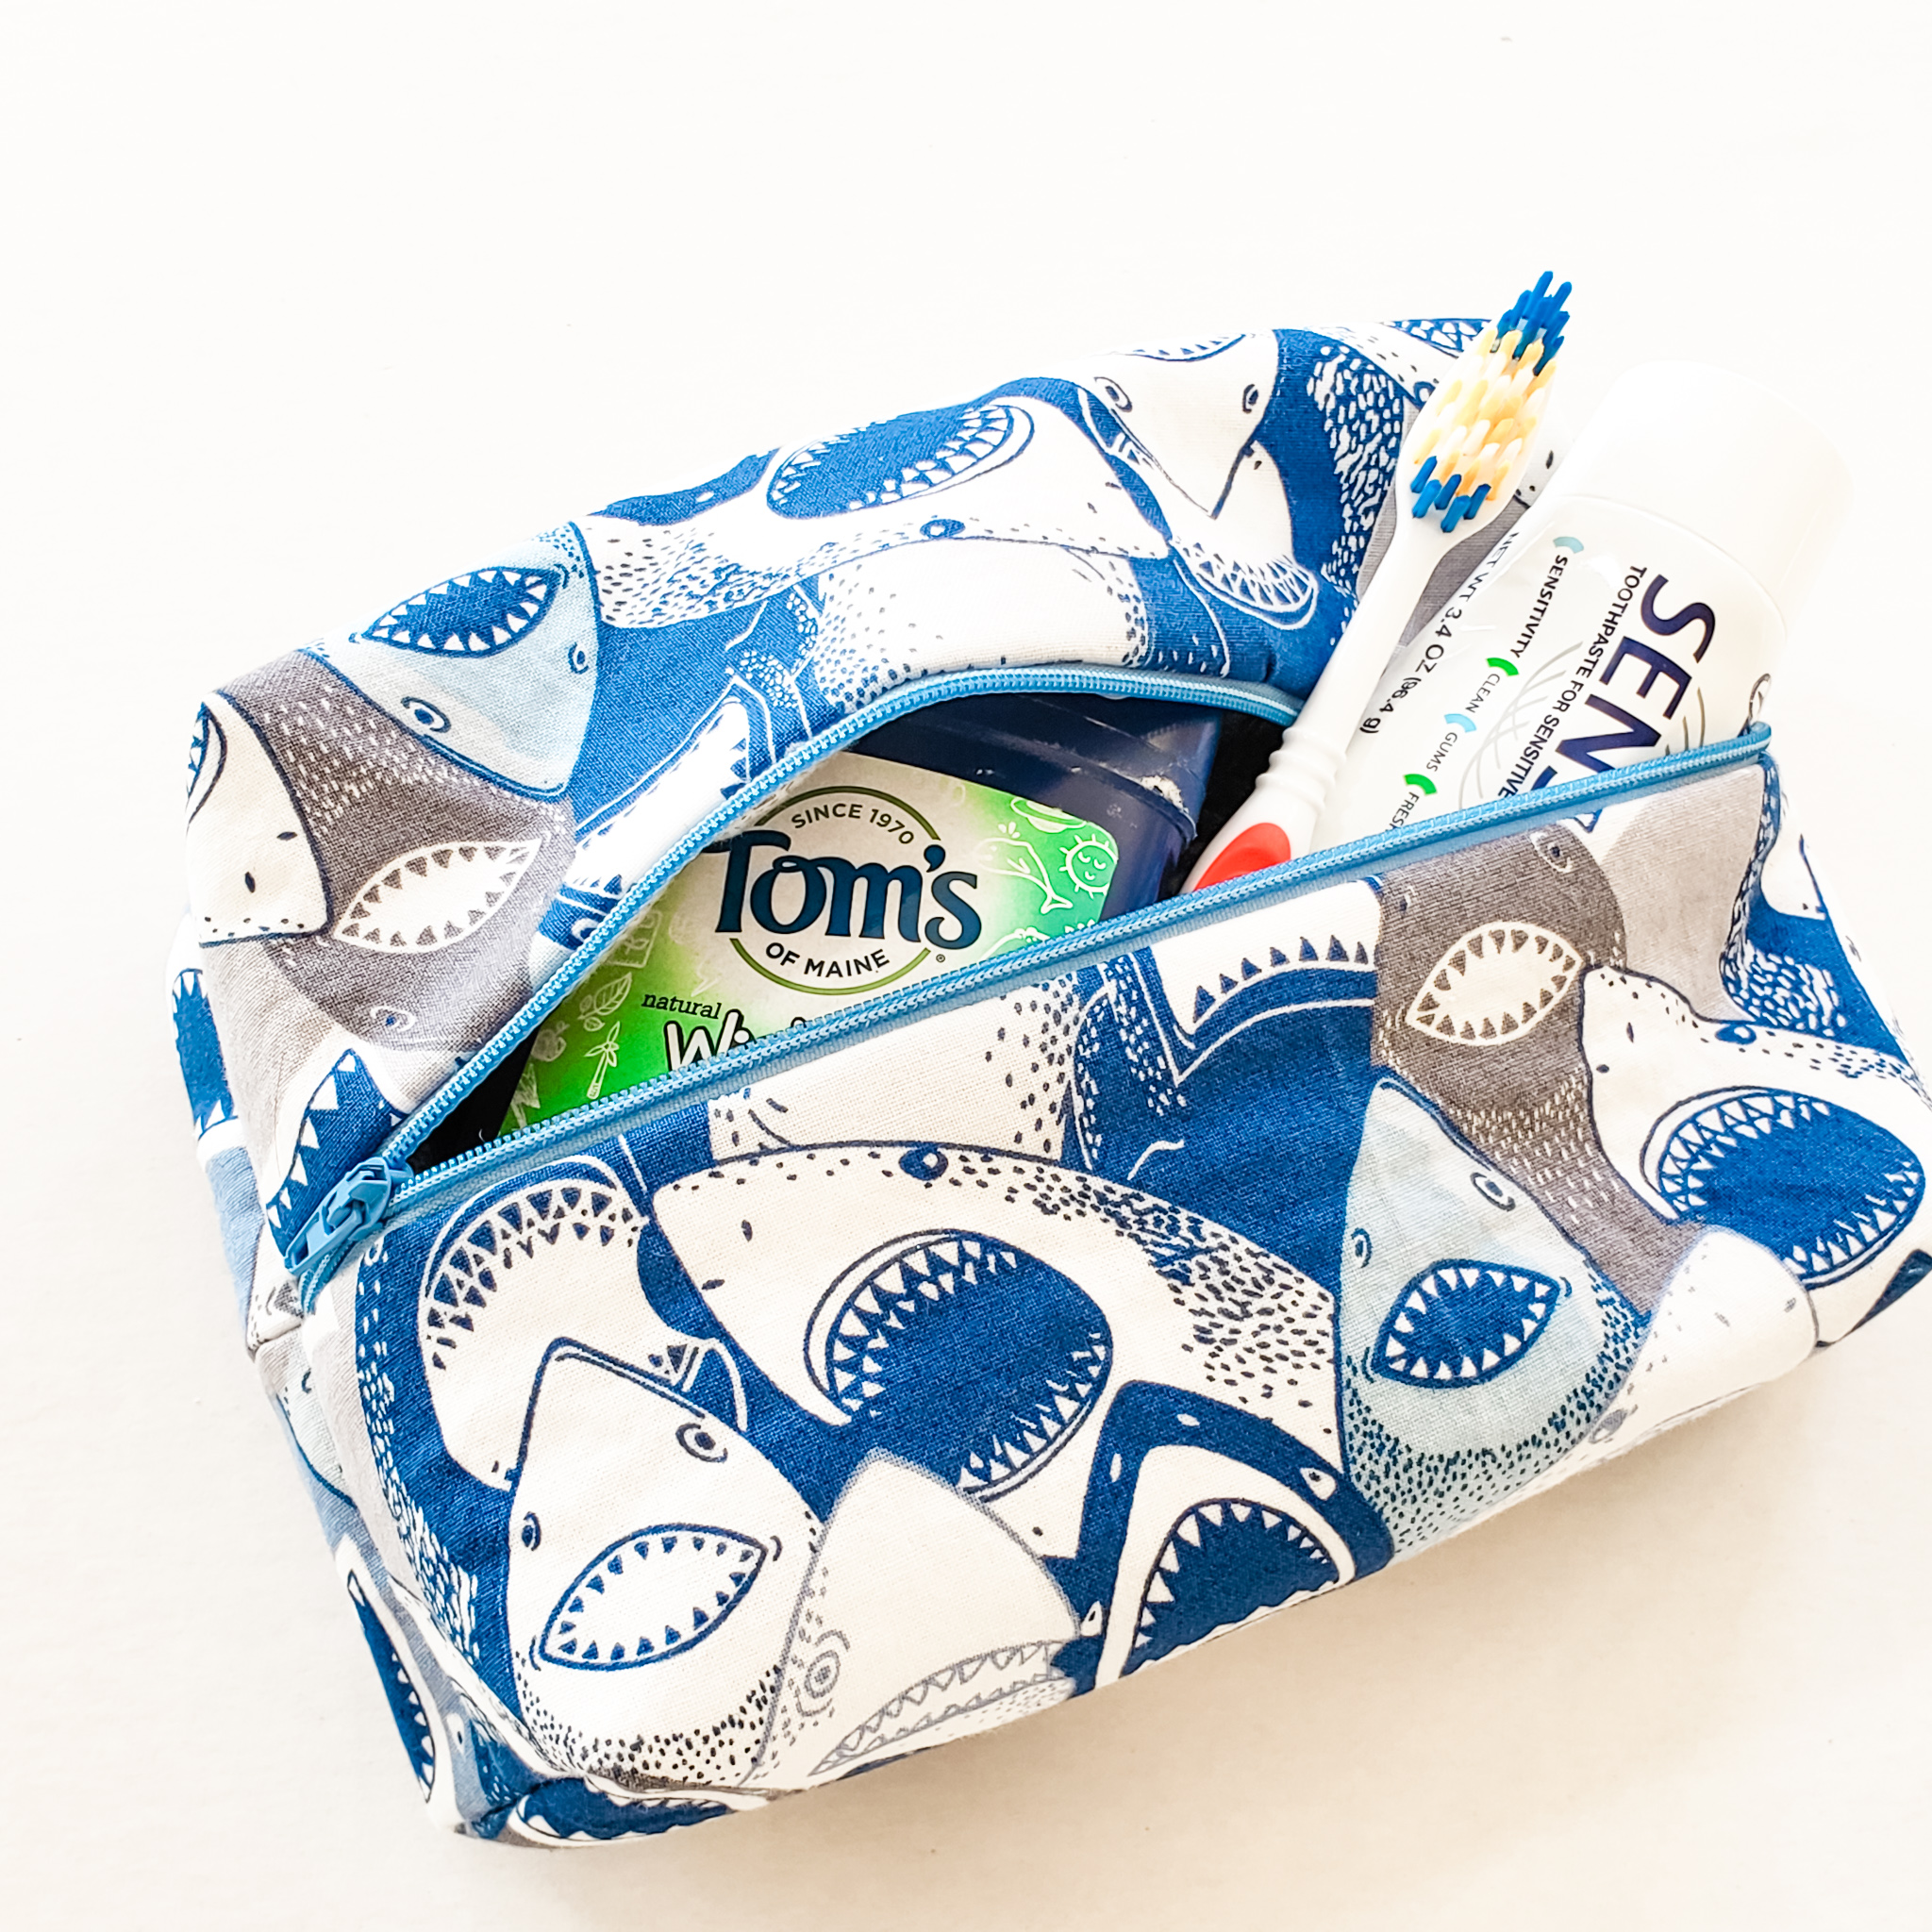
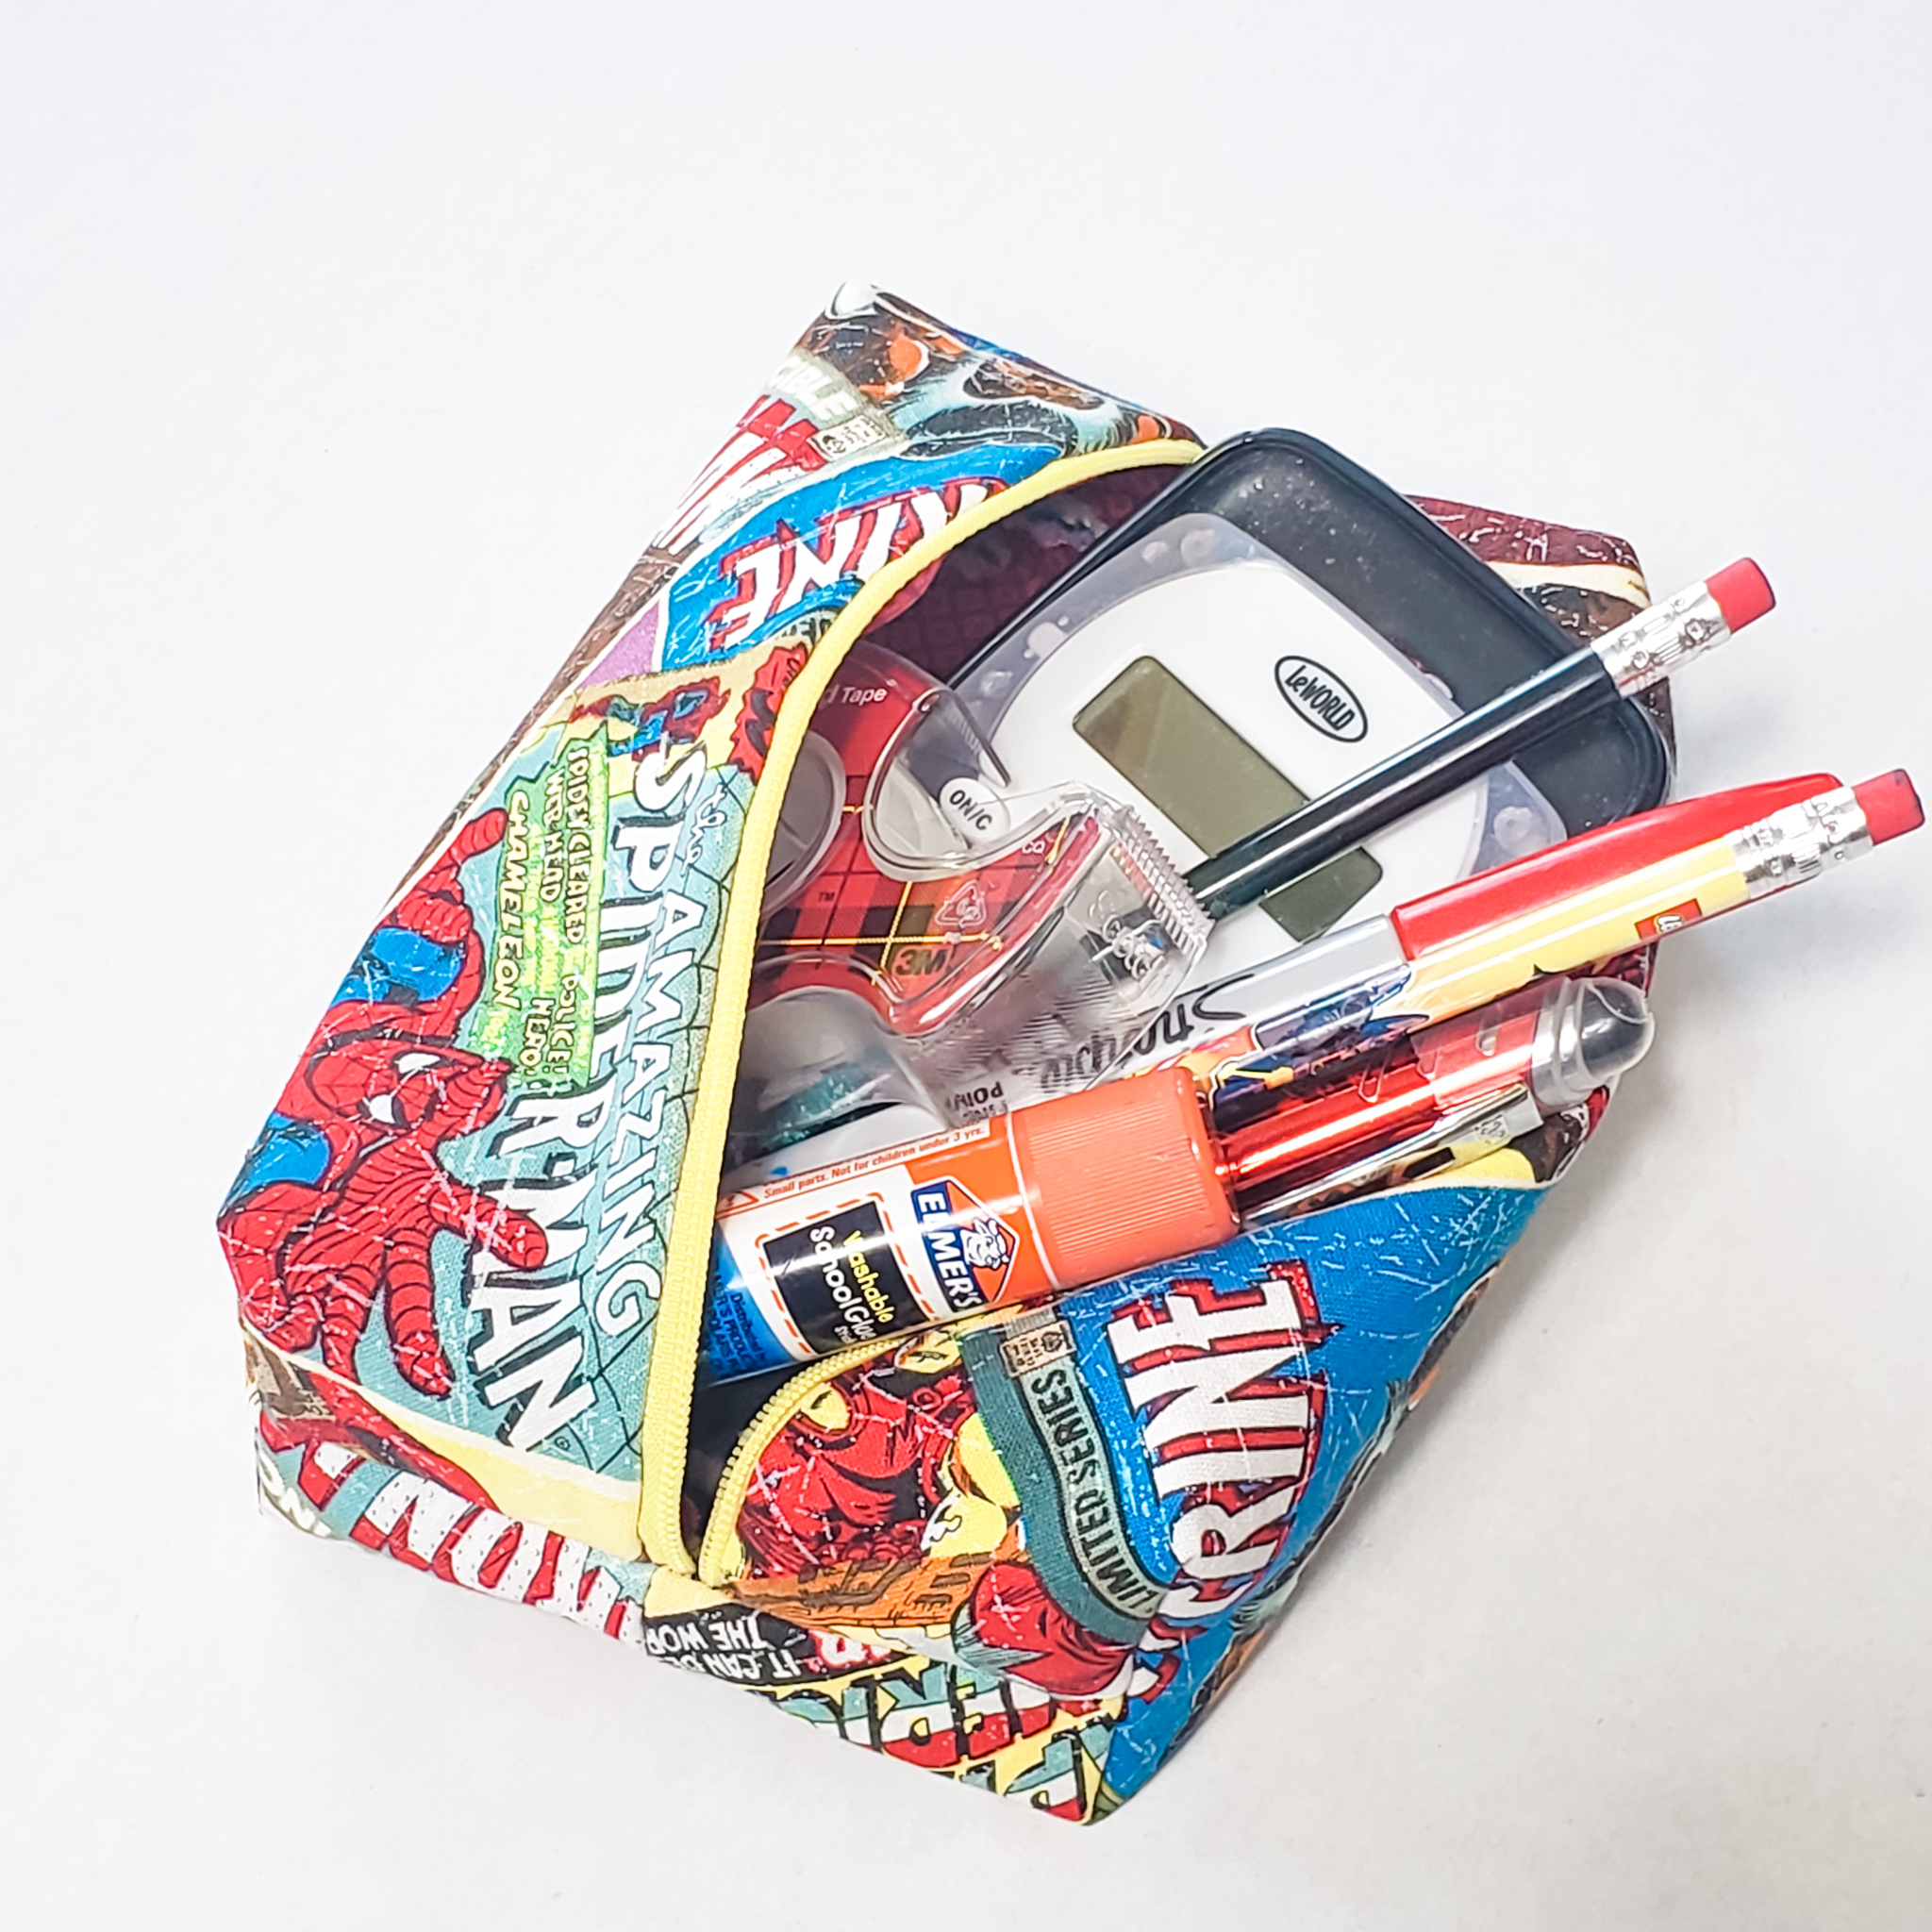
Turn your bag and you are finished!! You have a 3D, boxed pouch!
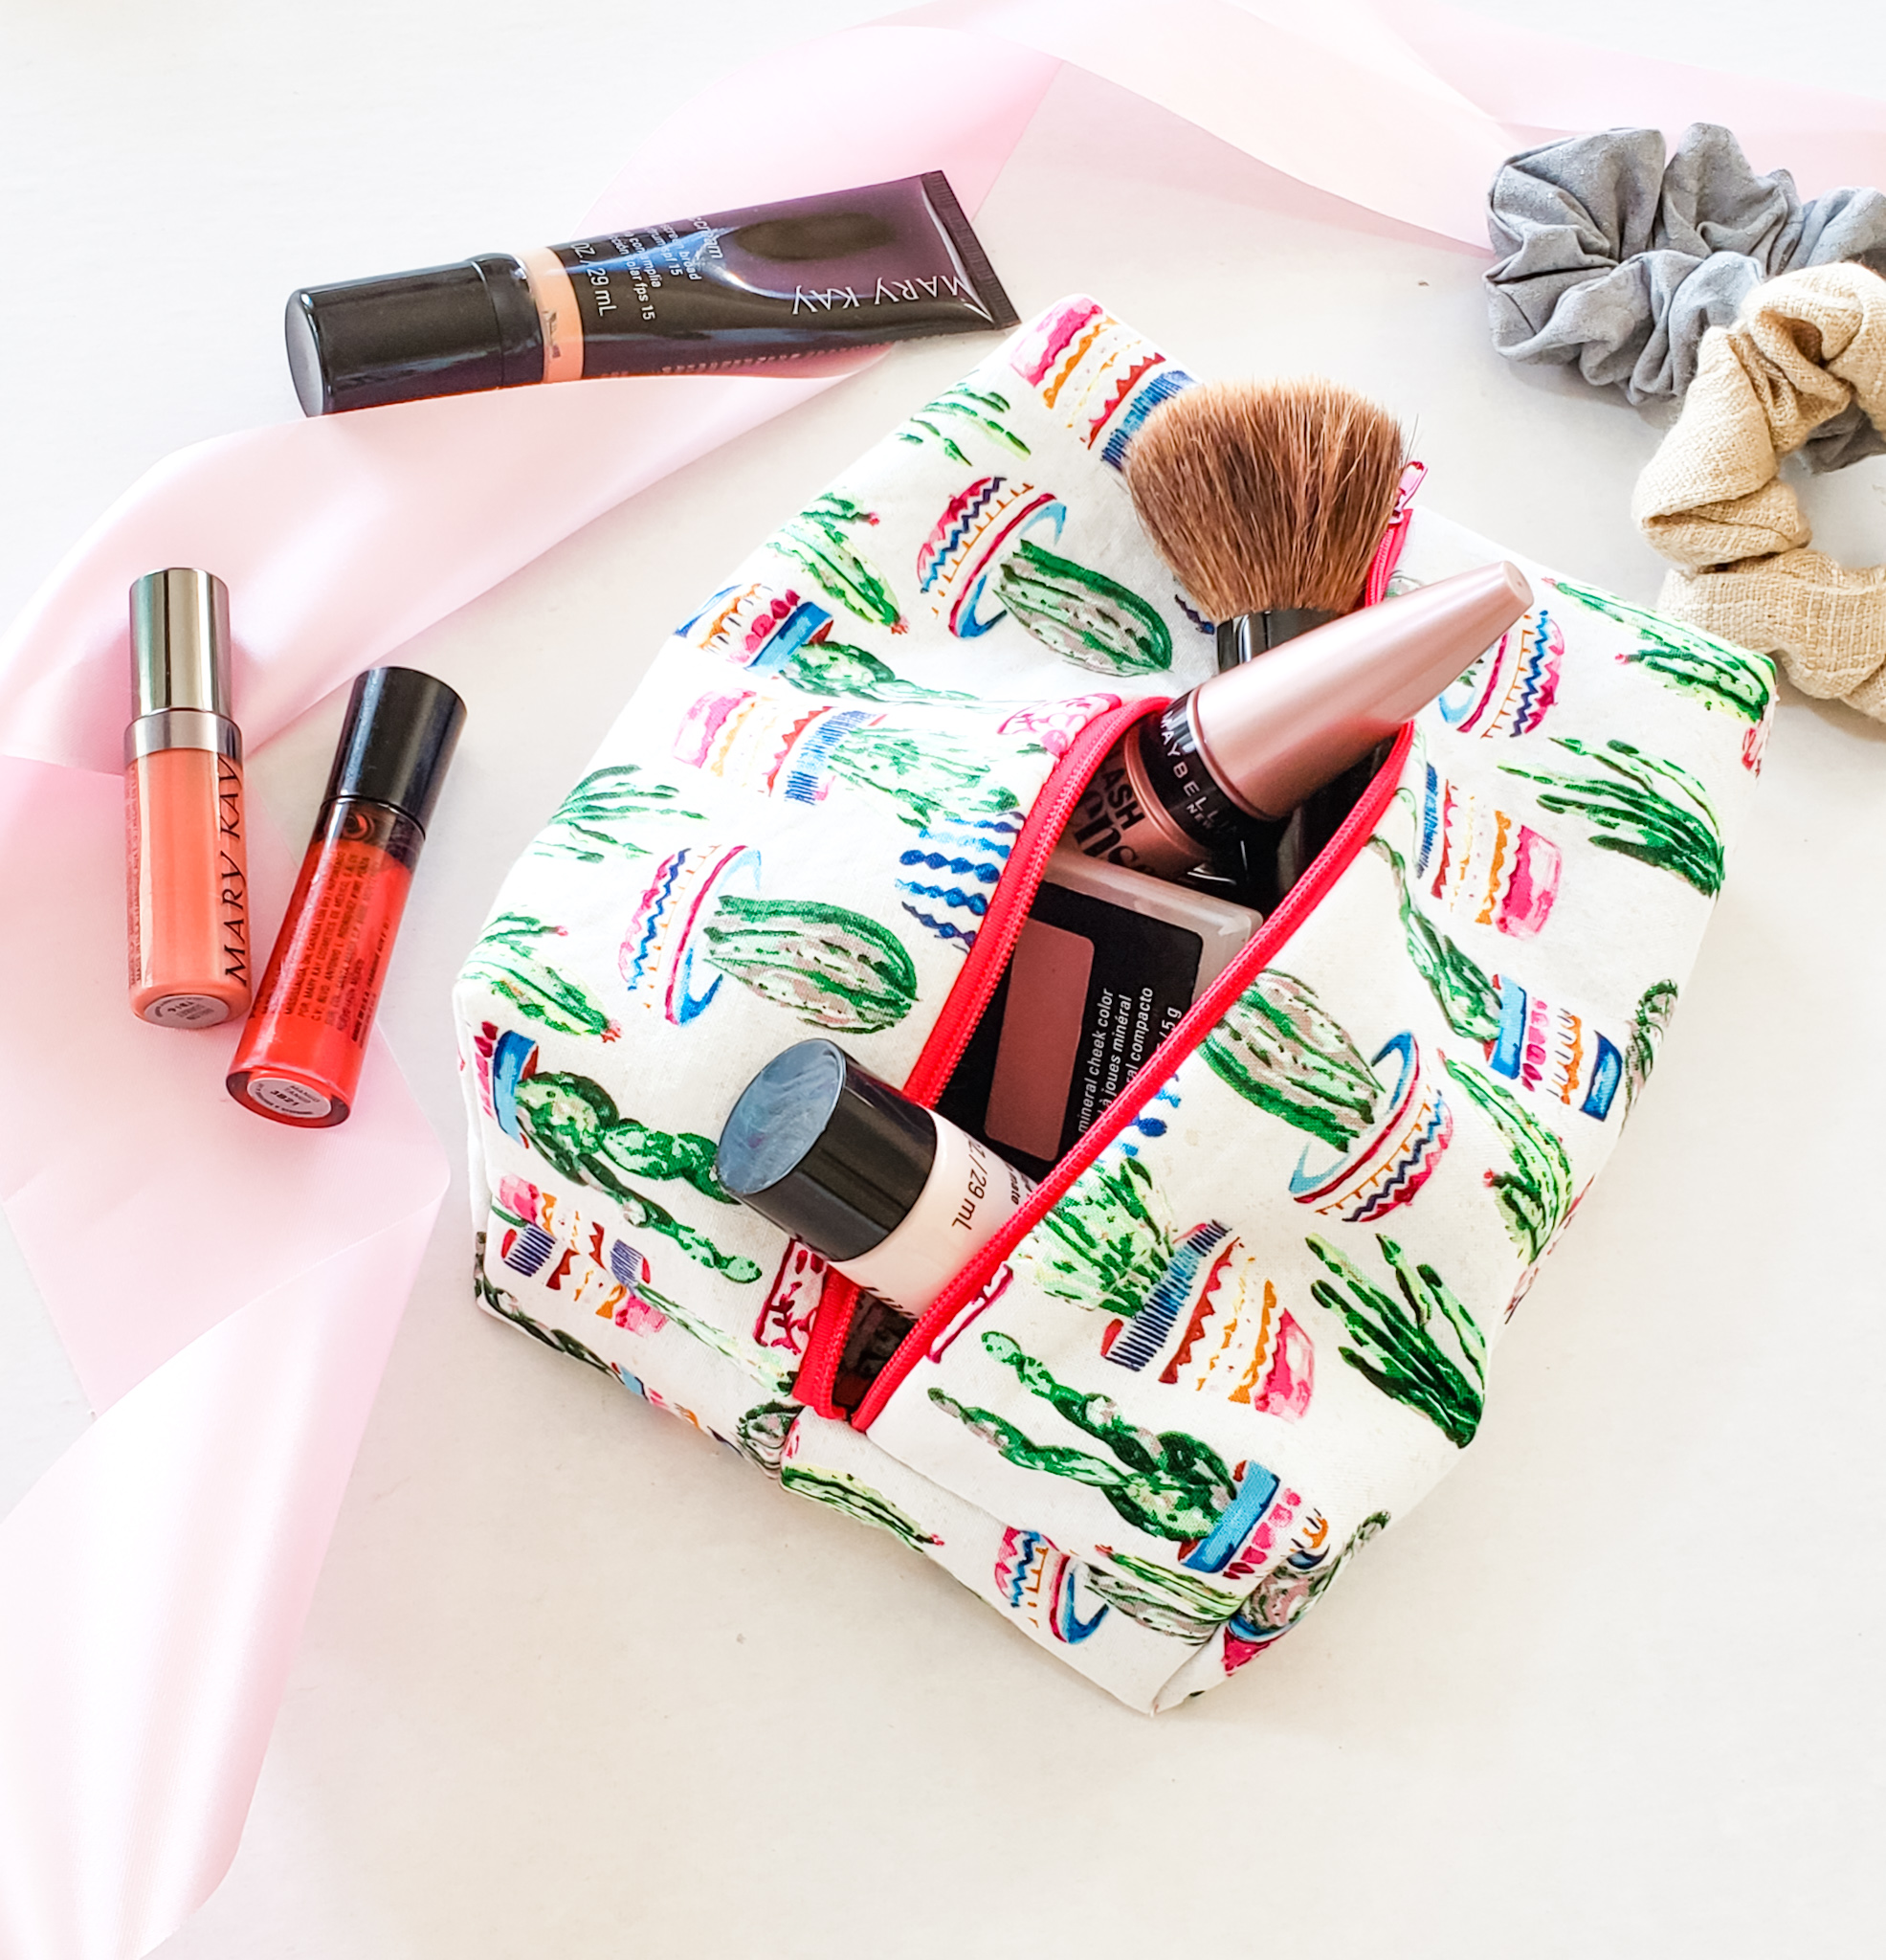
You can use it for cosmetics, as a toiletry bag, or even a school supply bag! And remember, you can change the size to customize this however you like!
What you you think? Was this easy enough to understand? Let me know how I did! Better yet, let me know how YOU did!
*Sassy Cassy’s is part of the Amazon Affiliate Program, which means that if you purchase Amazon items from this website, a small commission will be earned, at no extra cost to you.
