
A few weeks ago, we spent our spring break vacationing in Hawaii! I know, life’s rough 😊 Our daughter is actually spending her freshmen year of college in Hawaii and our boys have never been, so we figured it was the perfect trip to plan, especially since their spring breaks lined up! We were able to do a lot of fun things as family; things my starving student hasn’t been able to do on her own. It was an amazing week!
One of the experiences we wanted our kids to have was a luau. Even though my daughter has been living on the island, she hasn’t ever been to a real luau, and neither have my boys. We thought it would be a great cultural experience for them to see some of the traditions and dances of the islands. They absolutely LOVED the luau, but that’s another story and not quite the point of the post.
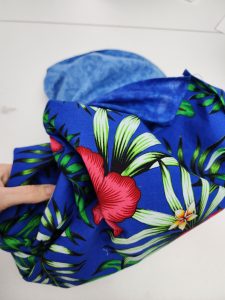
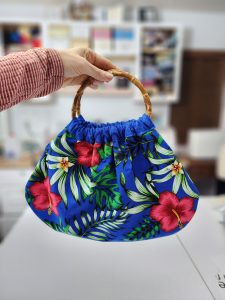
The point of this post is to share with you how to sew a handbag with bamboo handles. I’ll get there-I promise! I just needed to share a little backstory first, because it was the luau that inspired this handbag! I decided that if we were going to a luau, we were going in style. I made a trip to LA (fashion district) and bought a beautiful hibiscus printed cotton fabric from a store called Island Fabrics. True to its name, they sell printed fabrics that you would find in the islands! I decided to sew my entire family matching outfits. I know a lot of kids might protest about this, but my kids were so gracious and happy to humor me in our luau wear (what can I say, they are used to my antics by now). Don’t we look so cute? And now I have a lovely picture for my Christmas card.

I’m not much a purse-person. I prefer to carry a mini backpack or my fanny pack for outings, but when I get dressed up to go out somewhere nice, I like to have a little purse or handbag to take with me. I didn’t have the right kind of bag for this occasion; I had a vision in my mind of what kind of purse I wanted to take with me, and this handbag is exactly that! Of course, I had to sew one out of the same fabric as my dress, so that it would match!
Initially, I searched Pinterest, as I often do, but I couldn’t find the exact bag I had in mind. I finally found a similar pattern, only it was way too big. So, I drafted up my own pattern and whipped up this bag to match my dress. I love how it turned out!!
I share the majority of my patterns and tutorials for free, but I think it’s fair to charge a small fee every once in a while for a pattern that I’ve taken time to create, test, and perfect. We’ve all got to make a living, am I right? You are welcome to find a free pattern if you like, or draft your own. Or you can save yourself the trouble and purchase my pattern for a few bucks. I’ll even give you a discount code, just for being a reader! Enter the code BAMBOO20 and you’ll save 20% on my already low priced pattern.
Let’s get sewing!!
Materials Needed:
- Pattern (found here)
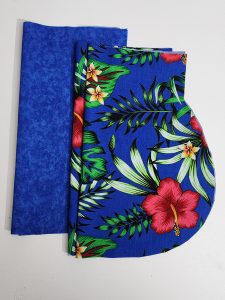
- Cotton fabric- 1/2 yard for outer and 1/2 yard for lining
- Fusible interfacing
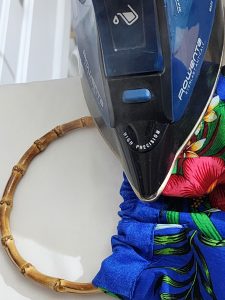
- Bamboo handles
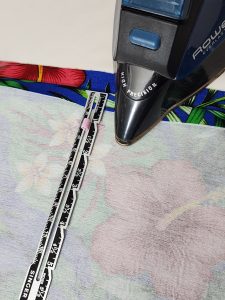
Bamboo Bag HandleFlat pattern ruler


How To Sew Your Handbag
**This pattern uses a ½” seam allowance**
First, print out your pattern, taping your pieces at the guidelines on the pattern. Make sure that you print your pattern at “actual size” and NOT “fit to scale”.
From your pattern, cut out 2 pieces of your outer bag, 2 pieces for your lining, and 2 pieces of fusible interfacing.
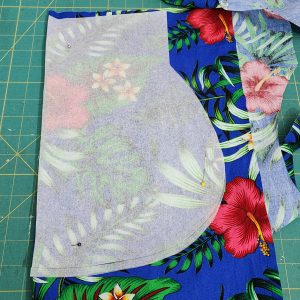
Fuse the interfacing to the wrong side of the outer purse pieces.
Then, either place your pattern back on top of the interfaced pieces and mark the dots as indicated on the pattern, or measure 2 1/2” down from the side of the bag and mark your dots. Whatever is easier for you. You will do this on both outer bag pieces.
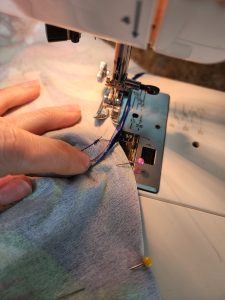
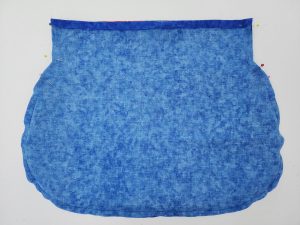
Pin your bag pieces right sides together.
Beginning at one dot, stitch around the bottom portion of the bag, ending at the dot on the other side. Be sure to backstitch at both dots.
Turn your top edges to the wrong side of the fabric ½” and press.
Repeat these same steps for your lining pieces (minus the interfacing): Mark your dots, pin right sides together, stitch between dots, and press the top edge under ½”.
Now, you are going to put your lining and outer bag pieces together. Line up your top and side edges, right sides together, and pin from the top edge down to the dot.

From the top edge, begin stitching down to the dot. Backstitch at the dot. Repeat on remaining three sides.
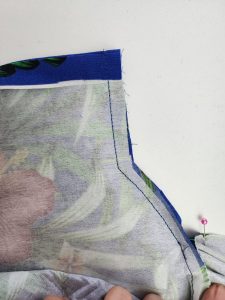
Clip into the corner, right under the straight edge of the bag. This will make it easier for flipping later.
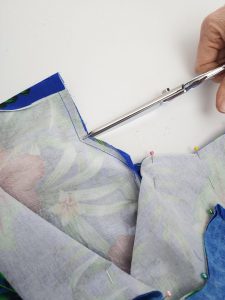
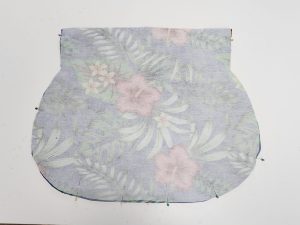
As you can see, the top edge is still open. Turn your bag right side out through that opening.
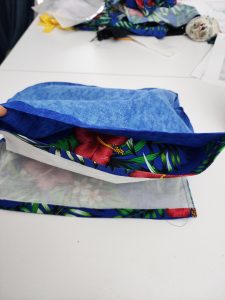
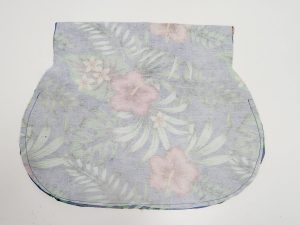
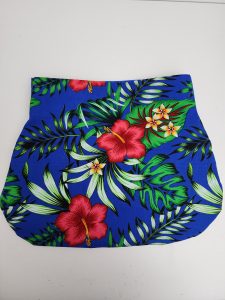
This is what your bag now looks like.
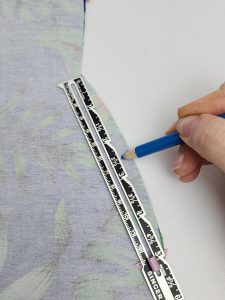
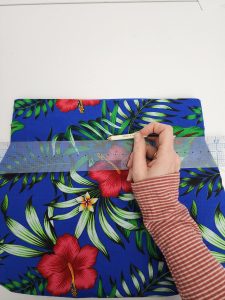
With a ruler, draw a line (with a fabric marking pencil, of course) across the top of your outer bag, a few inches down from the top (from corner to corner, as shown in the picture).
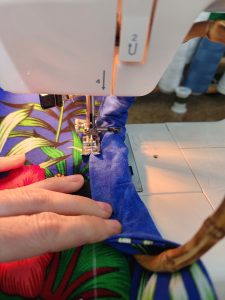
On one end of your bag, place the bamboo handle just under the top edge of the bag and fold the top edge down over onto the outside of the bag, so that lining side is showing, and pin the edge along the line that you’ve just drawn. You will only be pinning a few inches right now.
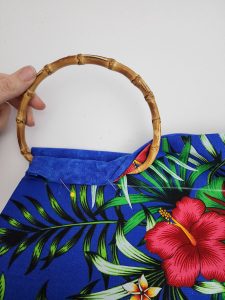
You are going to sew along that bottom edge little bits at a time, adjusting your handle as you go. So, stitch the first few inches.
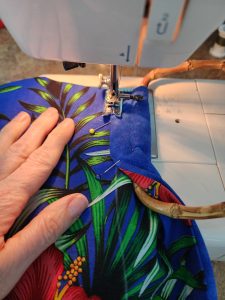
Then, push your handle back and bring the edge, once again, down to the line drawn on your fabric and continue stitching a few more inches. Repeat this process until you are to the end of the line! And, of course, repeat on the other side of the bag.

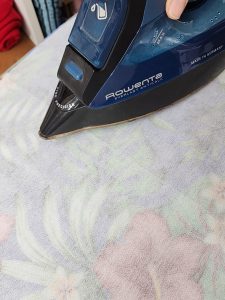
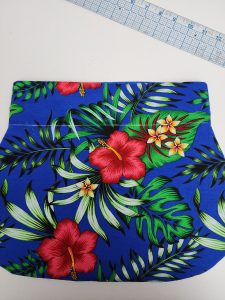
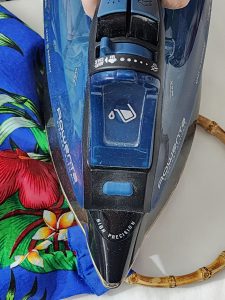
I gave my handle casing a light press, just to help calm down the gathers. This is totally optional.
That’s all there is to sewing a handbag with bamboo handles. Not too hard, right?
Tell me how you did!!
*Sassy Cassy’s is part of the Amazon Affiliate Program, which means that if you purchase Amazon items from this website, a small commission will be earned, at no extra cost to you.
