
I don’t know about you, but I am somewhat of a fabric hoarder. I’m almost embarrassed to admit to you that I save everything! Well, almost everything. It’s hard for me to throw away pieces of fabric because I always think “I can use that.” Fabric scraps are great for quilting, for applique embroidery and other small, scrappy projects! It really feels that no fabric piece is too small to use (insert laugh-crying emoji here).
So, if you too are a fabric hoarder, you have come to the right place! Today I will share with you how to make Christmas ornaments out of all those little scrappy pieces of fabric! I am making these scrappy Christmas ornaments with my students, and I’ve made several as gifts for Christmas as well. And now I am sharing this easy, quick tutorial with you! Let me know if you decide to make some!
What You Need For Scrappy Ornaments:
- cotton fabric scraps of any color
- scraps of batting (I’ll link what kind I use below)
- ribbon
- template for ornaments (link below)
How To Sew Your Scrappy Ornaments:
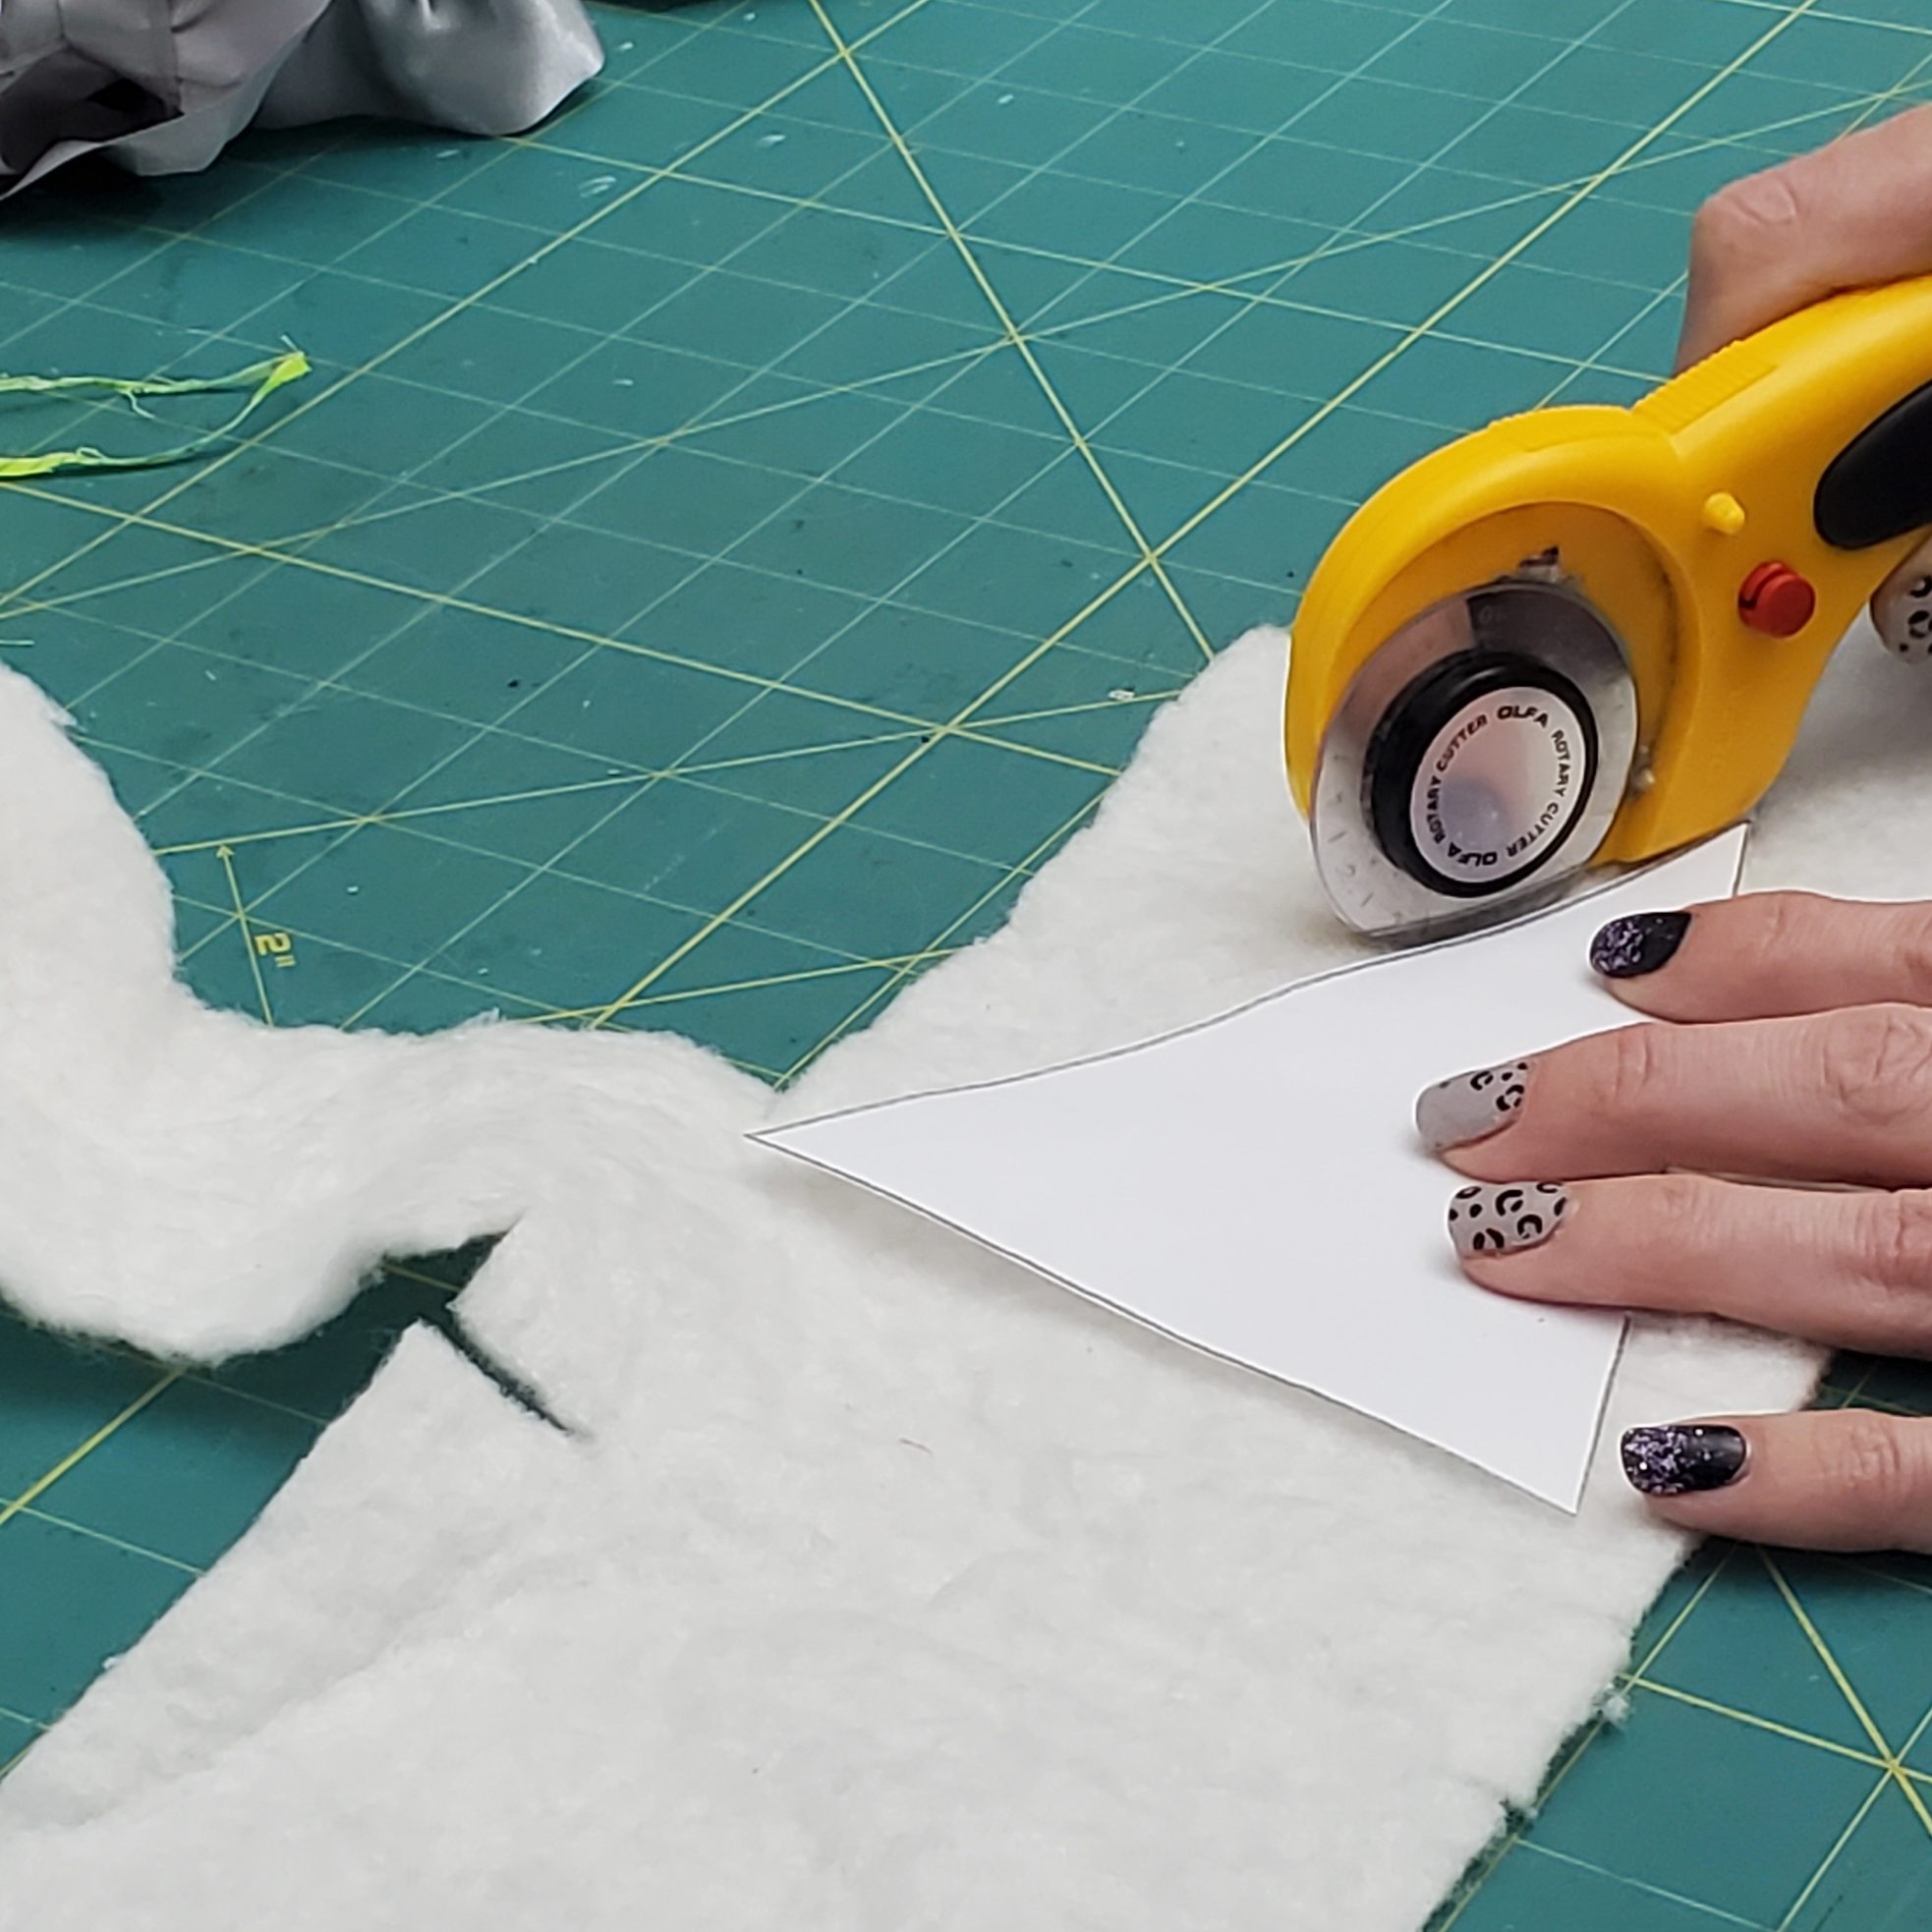
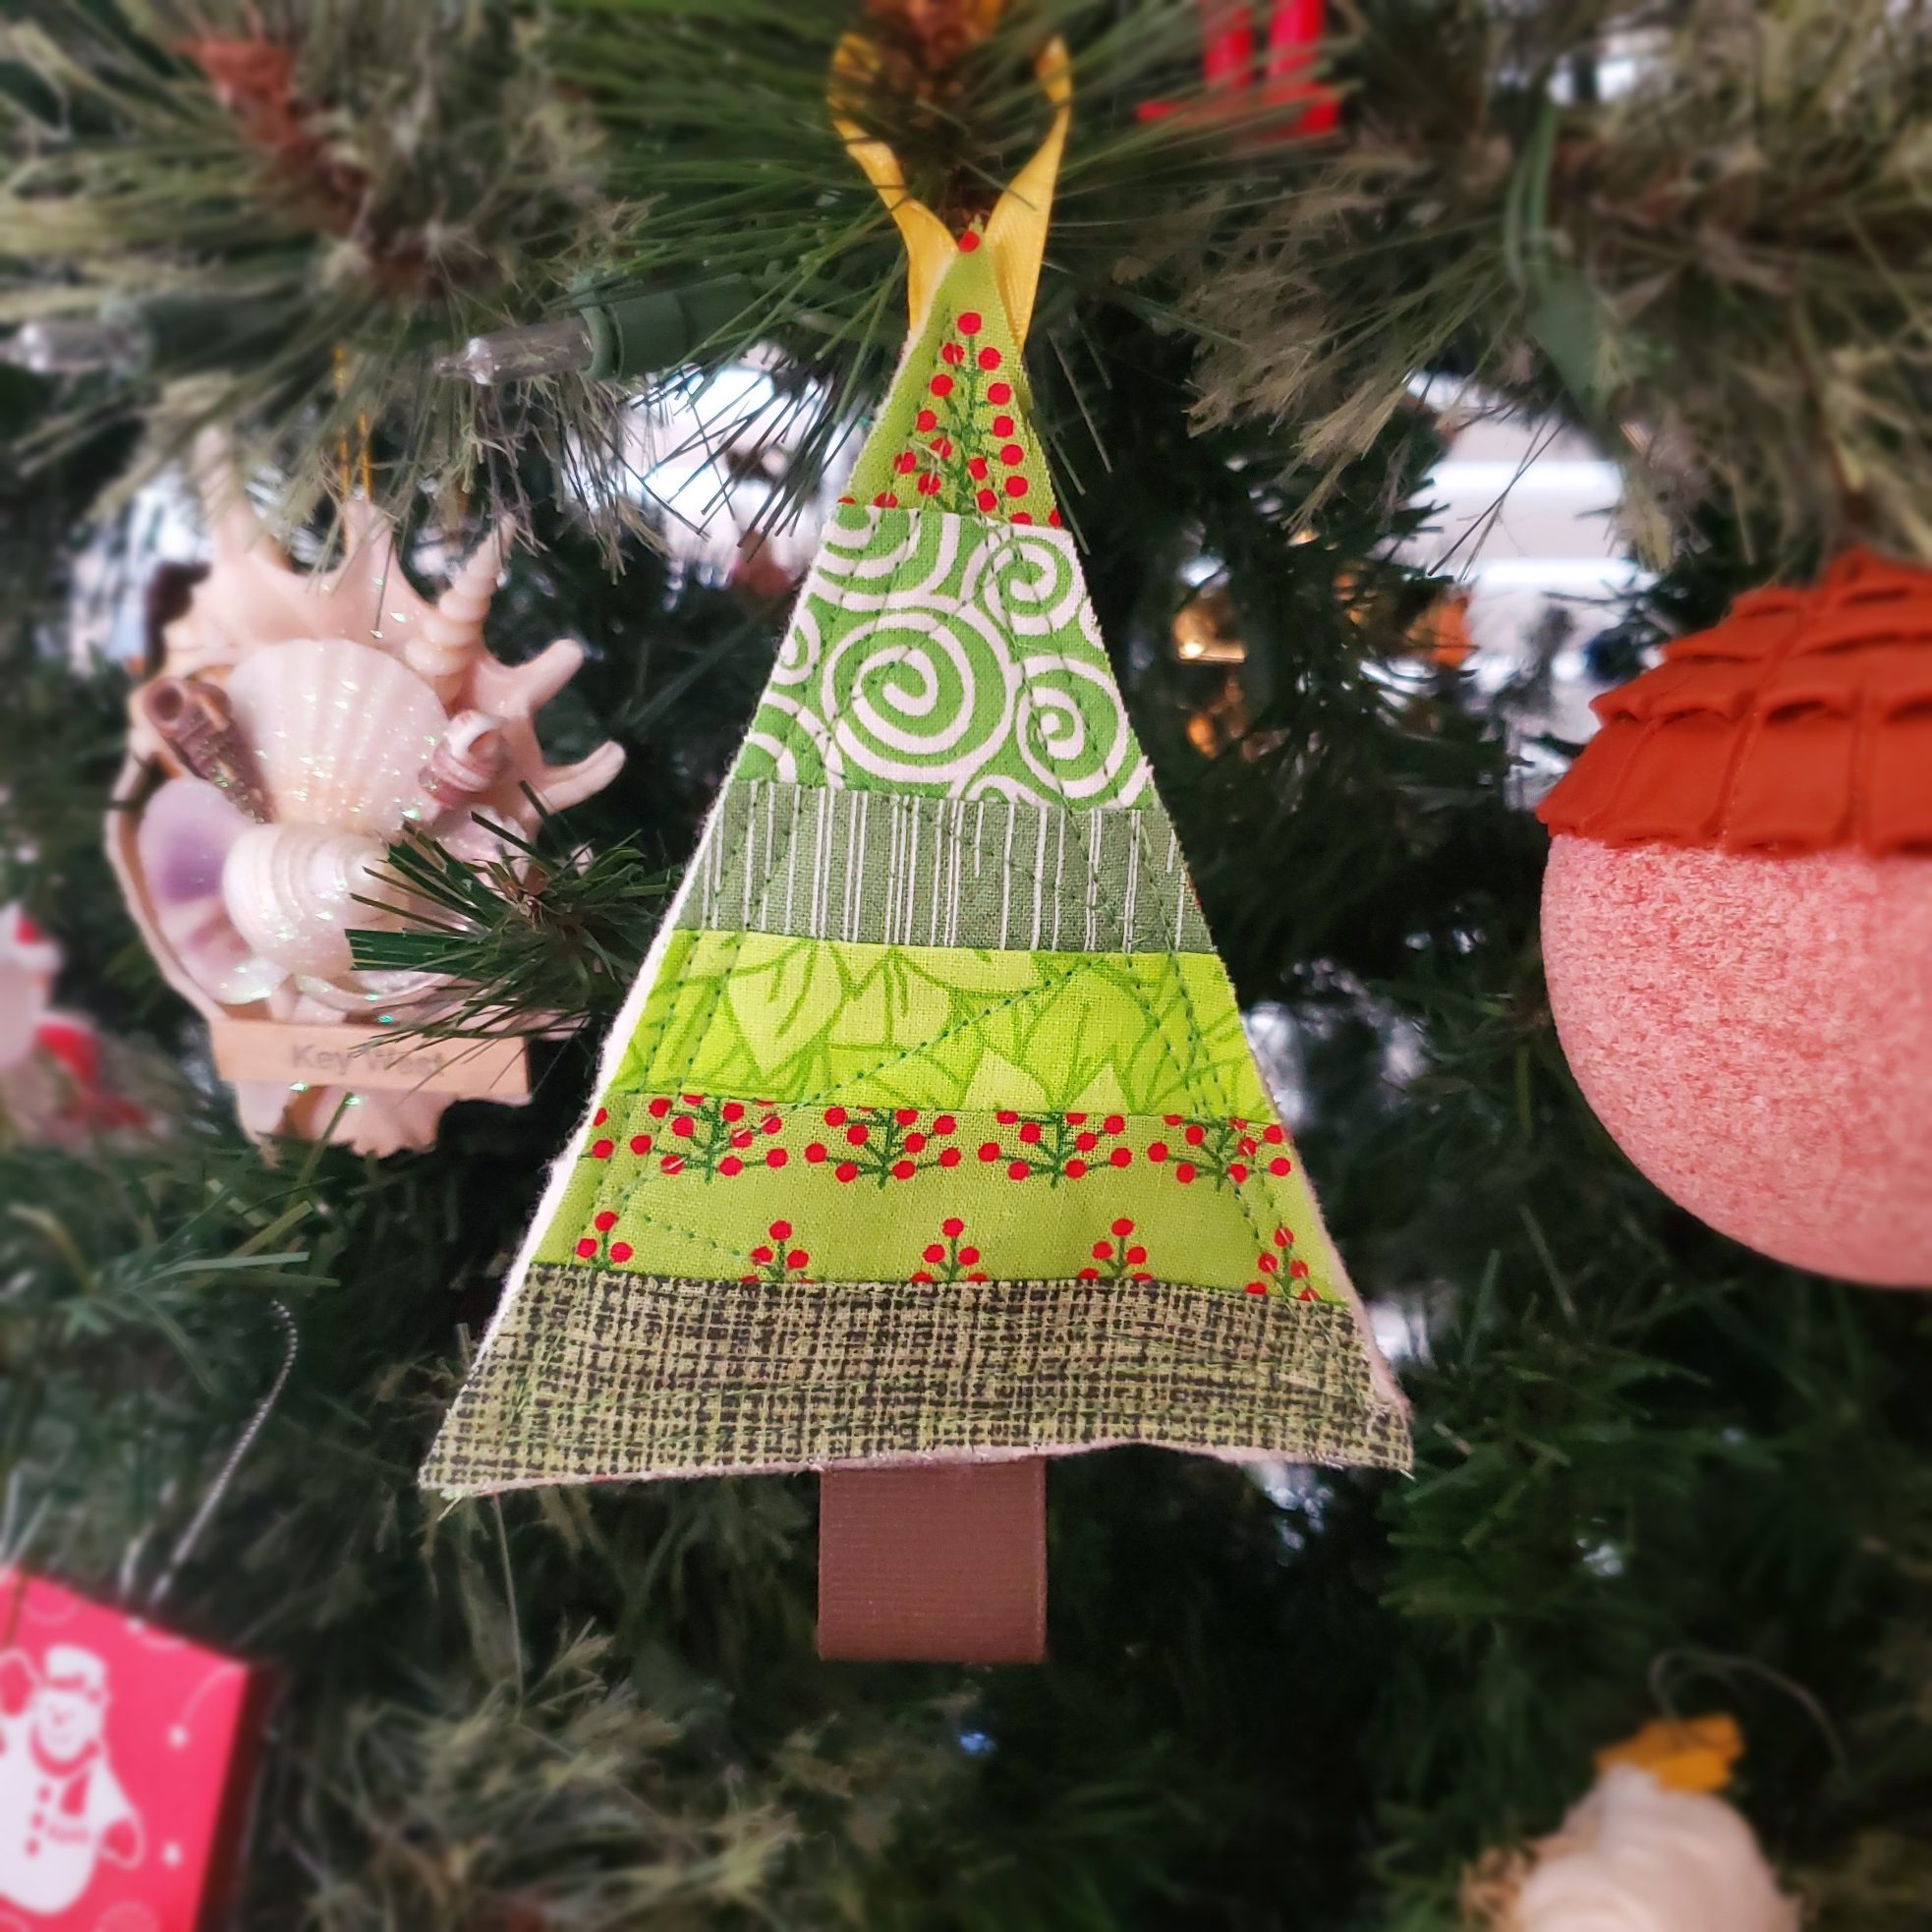
First, cut out whatever template (shape) you want your ornament(s) to be. You can really do whatever you like; the sky is the limit! For my classes, I provided 3 basic shapes: a round ornament, a Christmas tree, and a stocking. I’ve provided the pdf for you to download and print, but you can use whatever template you like!
CLICK HERE TO PRINT OUT MY TEMPLATE PIECES
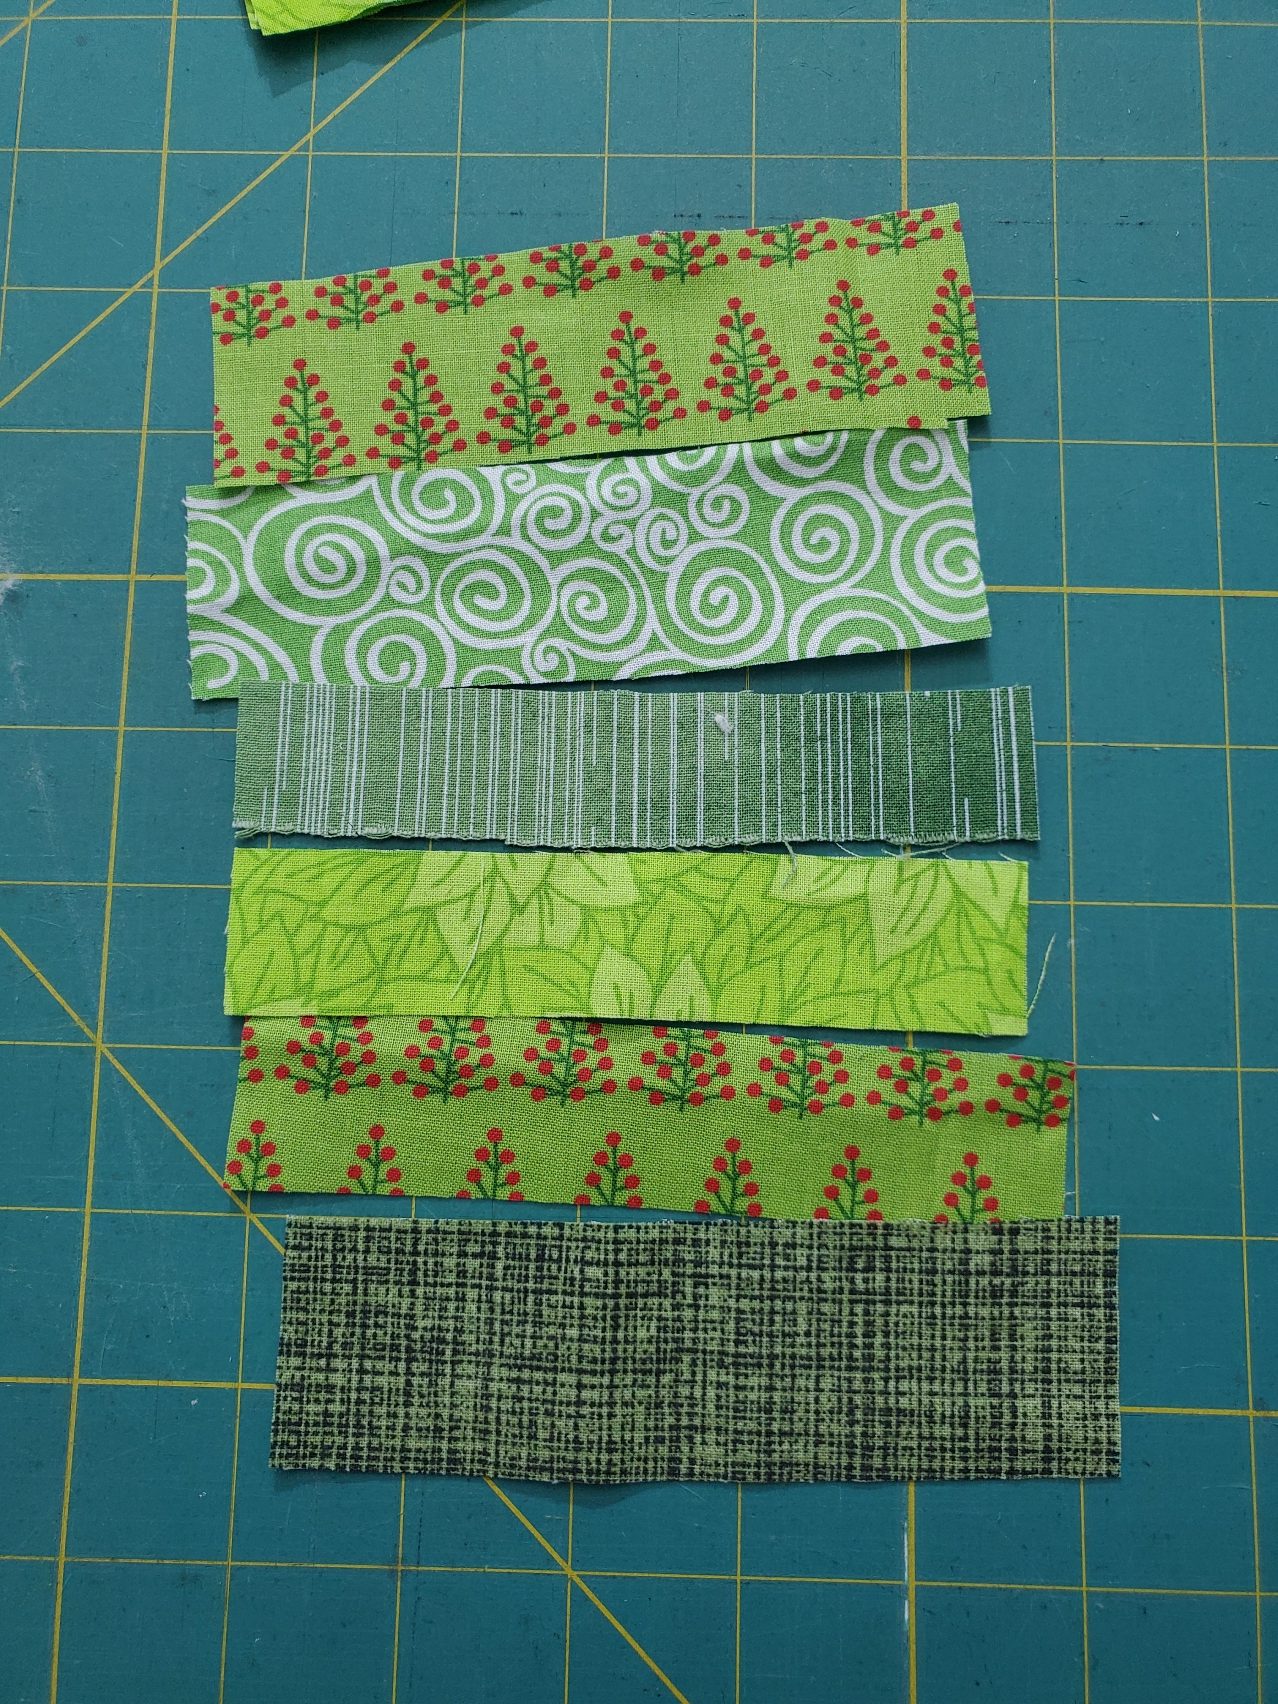
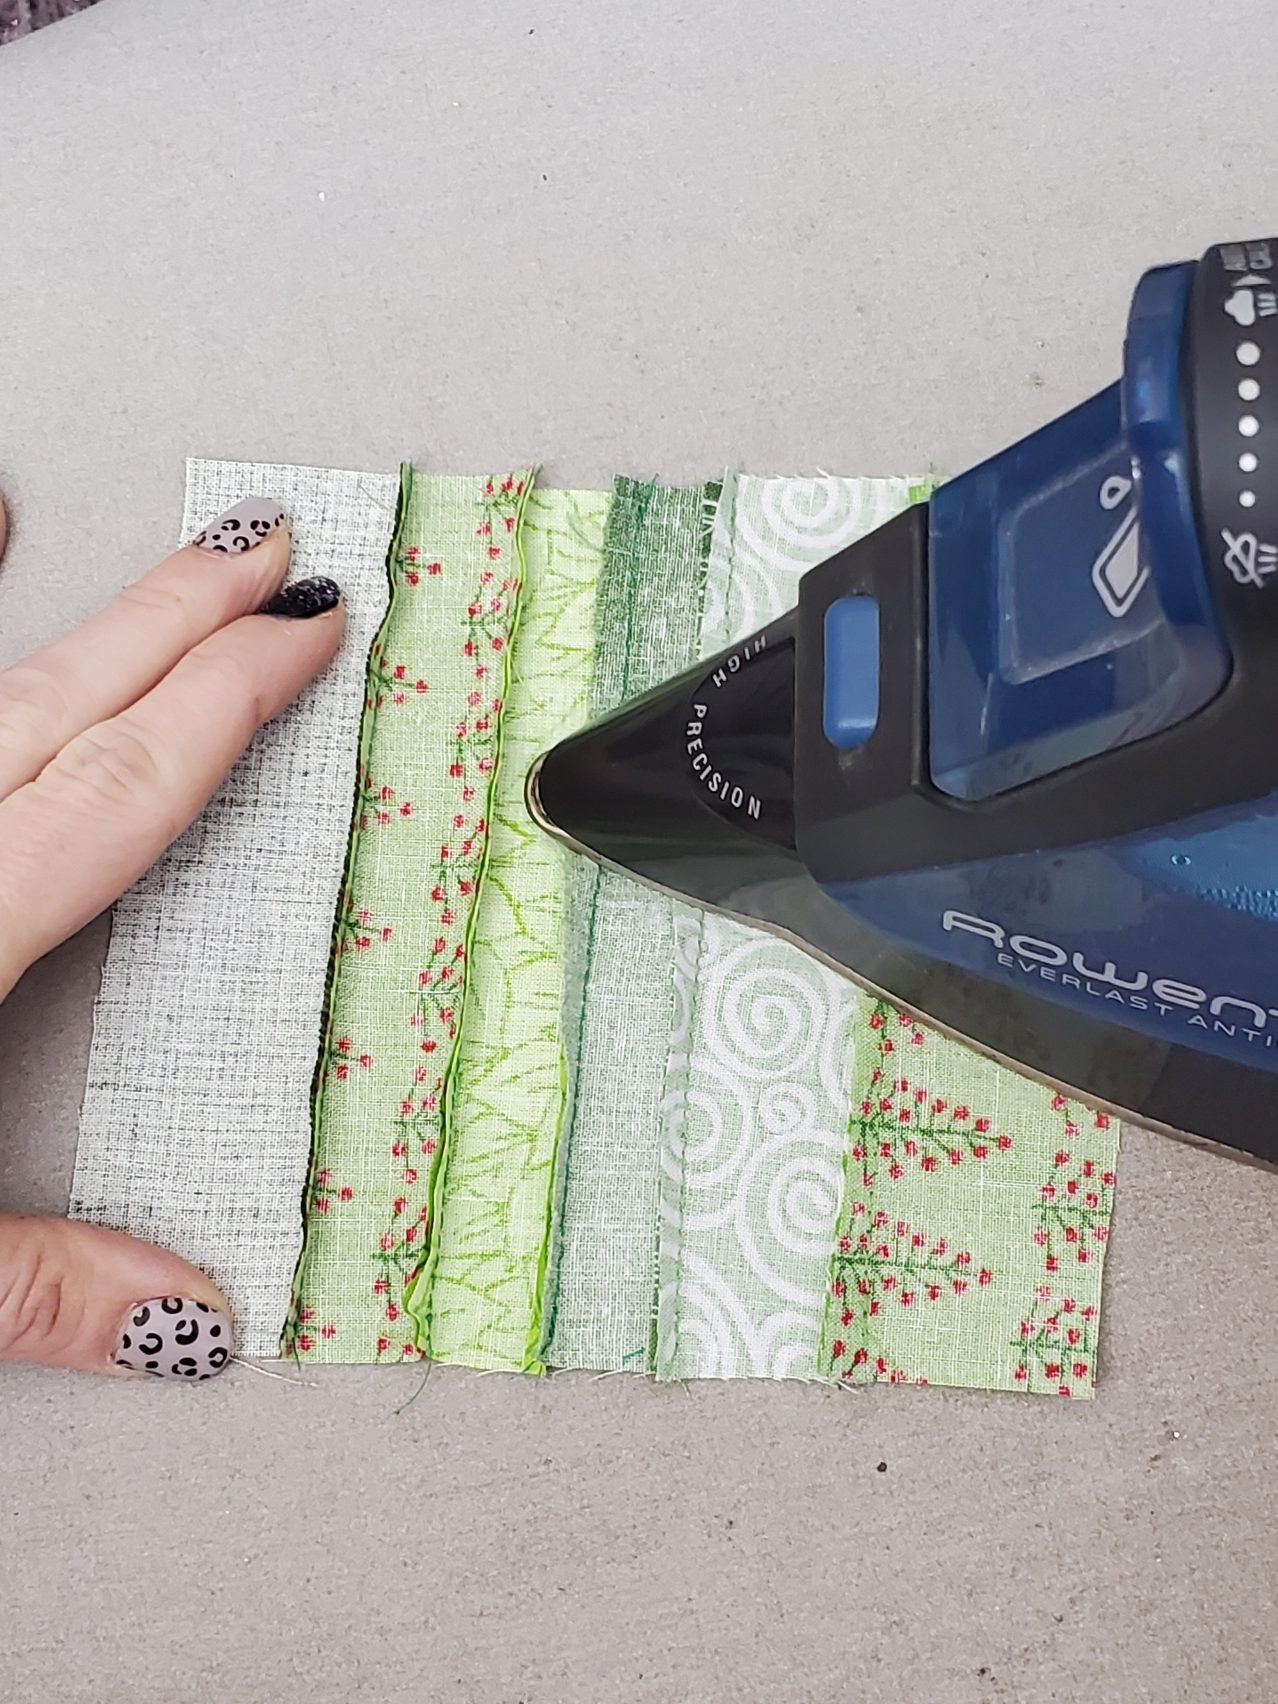
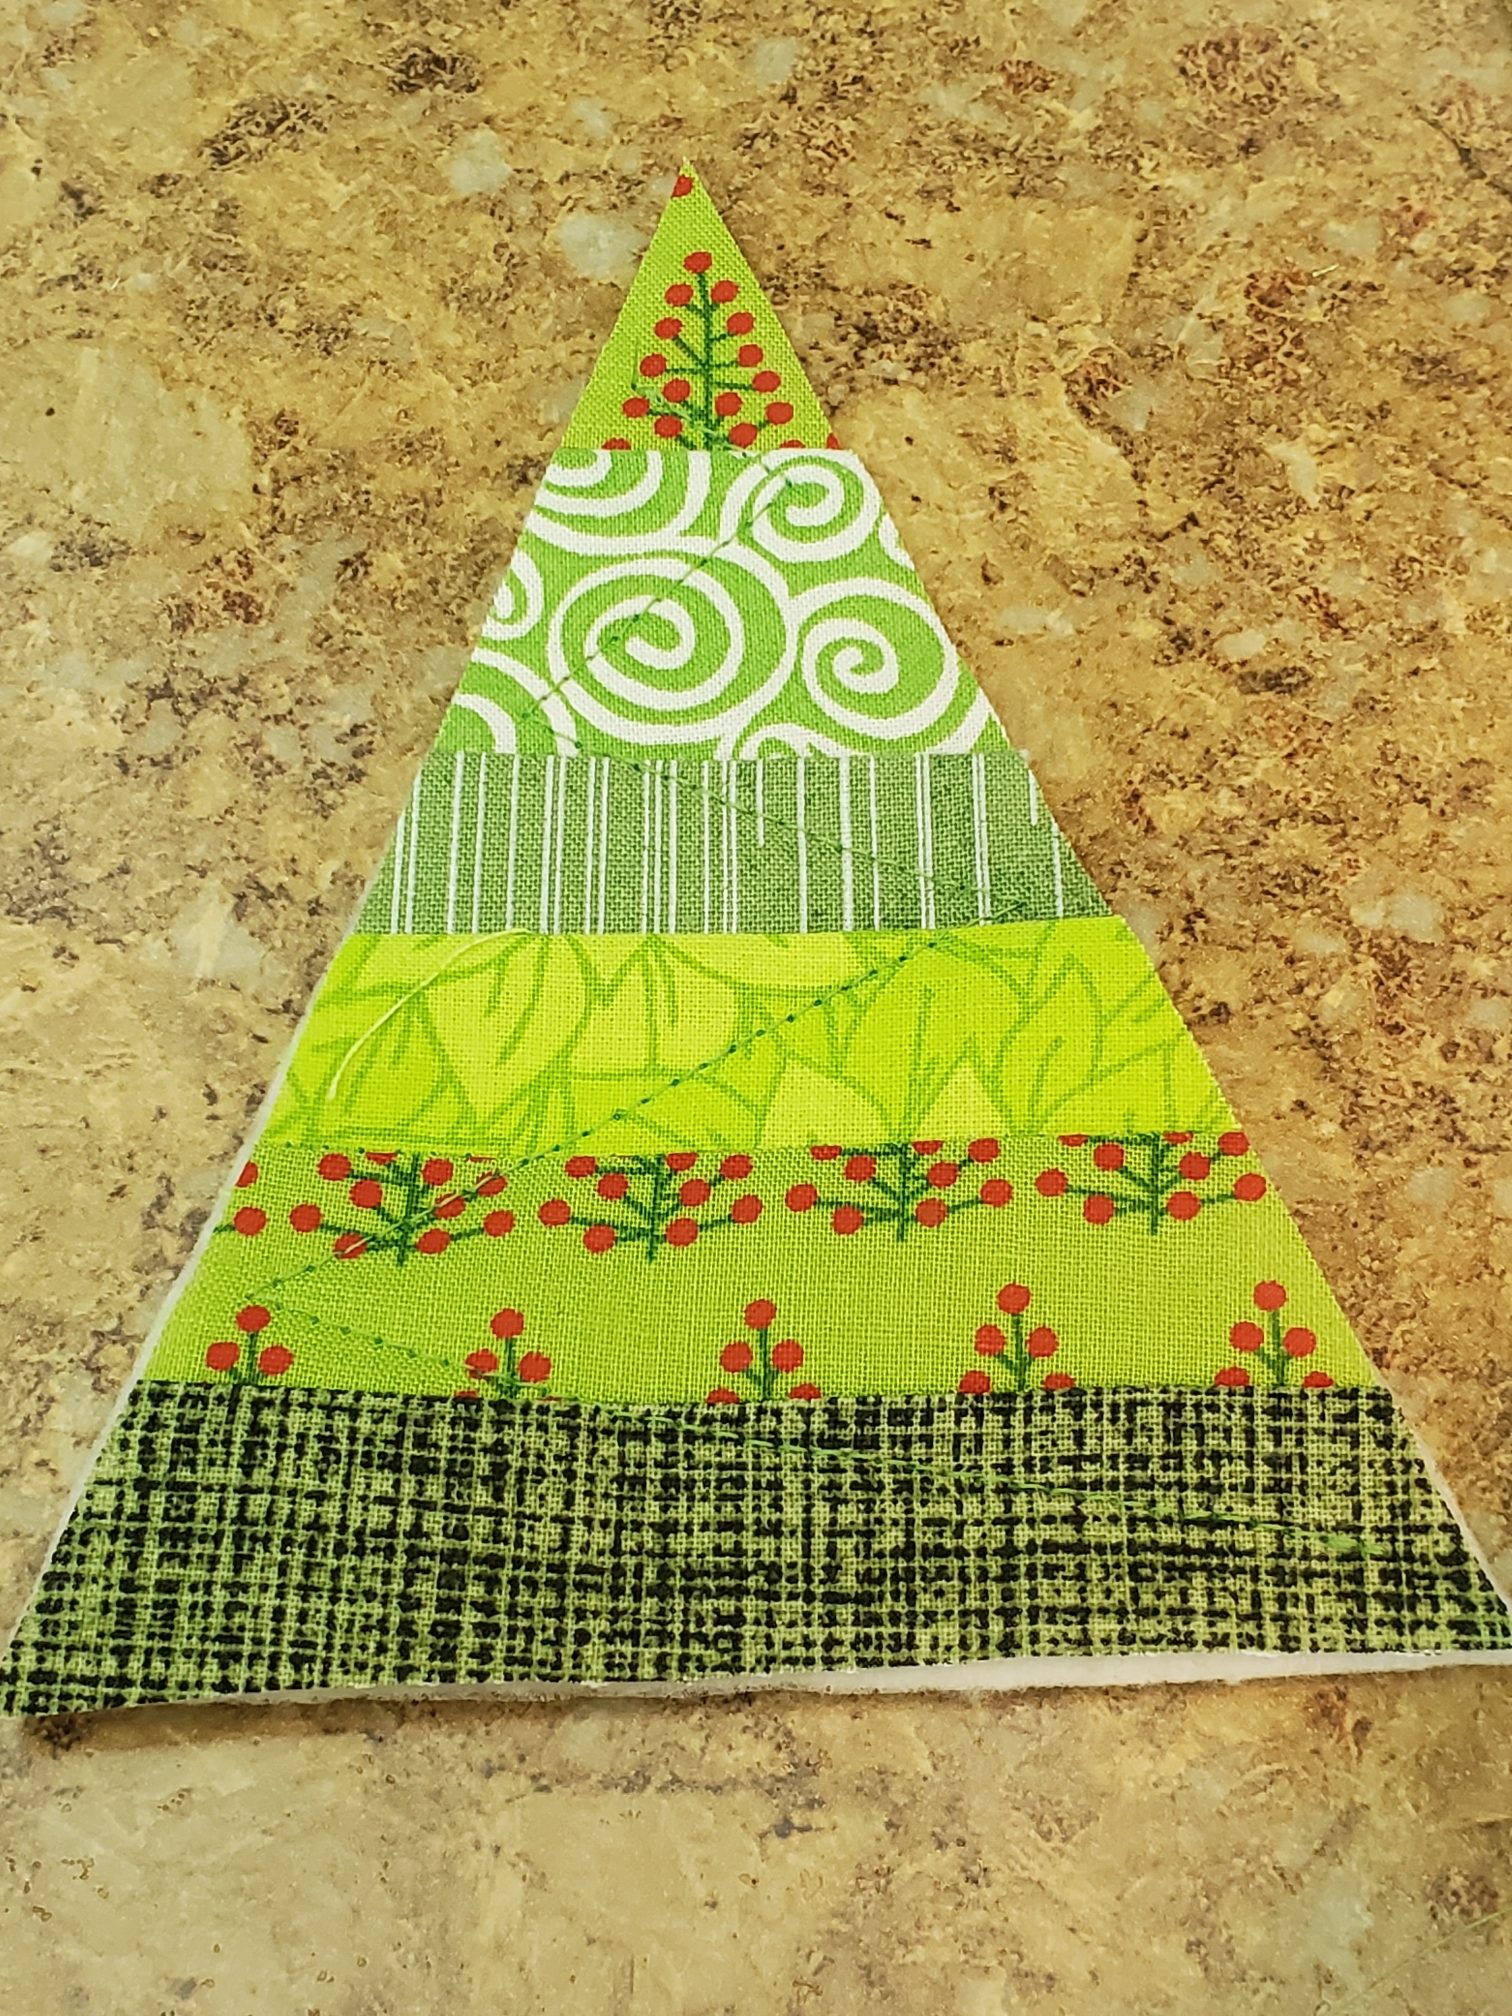
Next, cut your fabric scraps into rectangle strips. I cut all of mine to be 5″ wide, but I vary on the height. Some strips are 1″ tall, some are 1 1/2″. I like to have some chunkier strips and some thinner strips, so do what you like! I find it easier to keep the same width across, just for lining up the pieces and sewing them together later.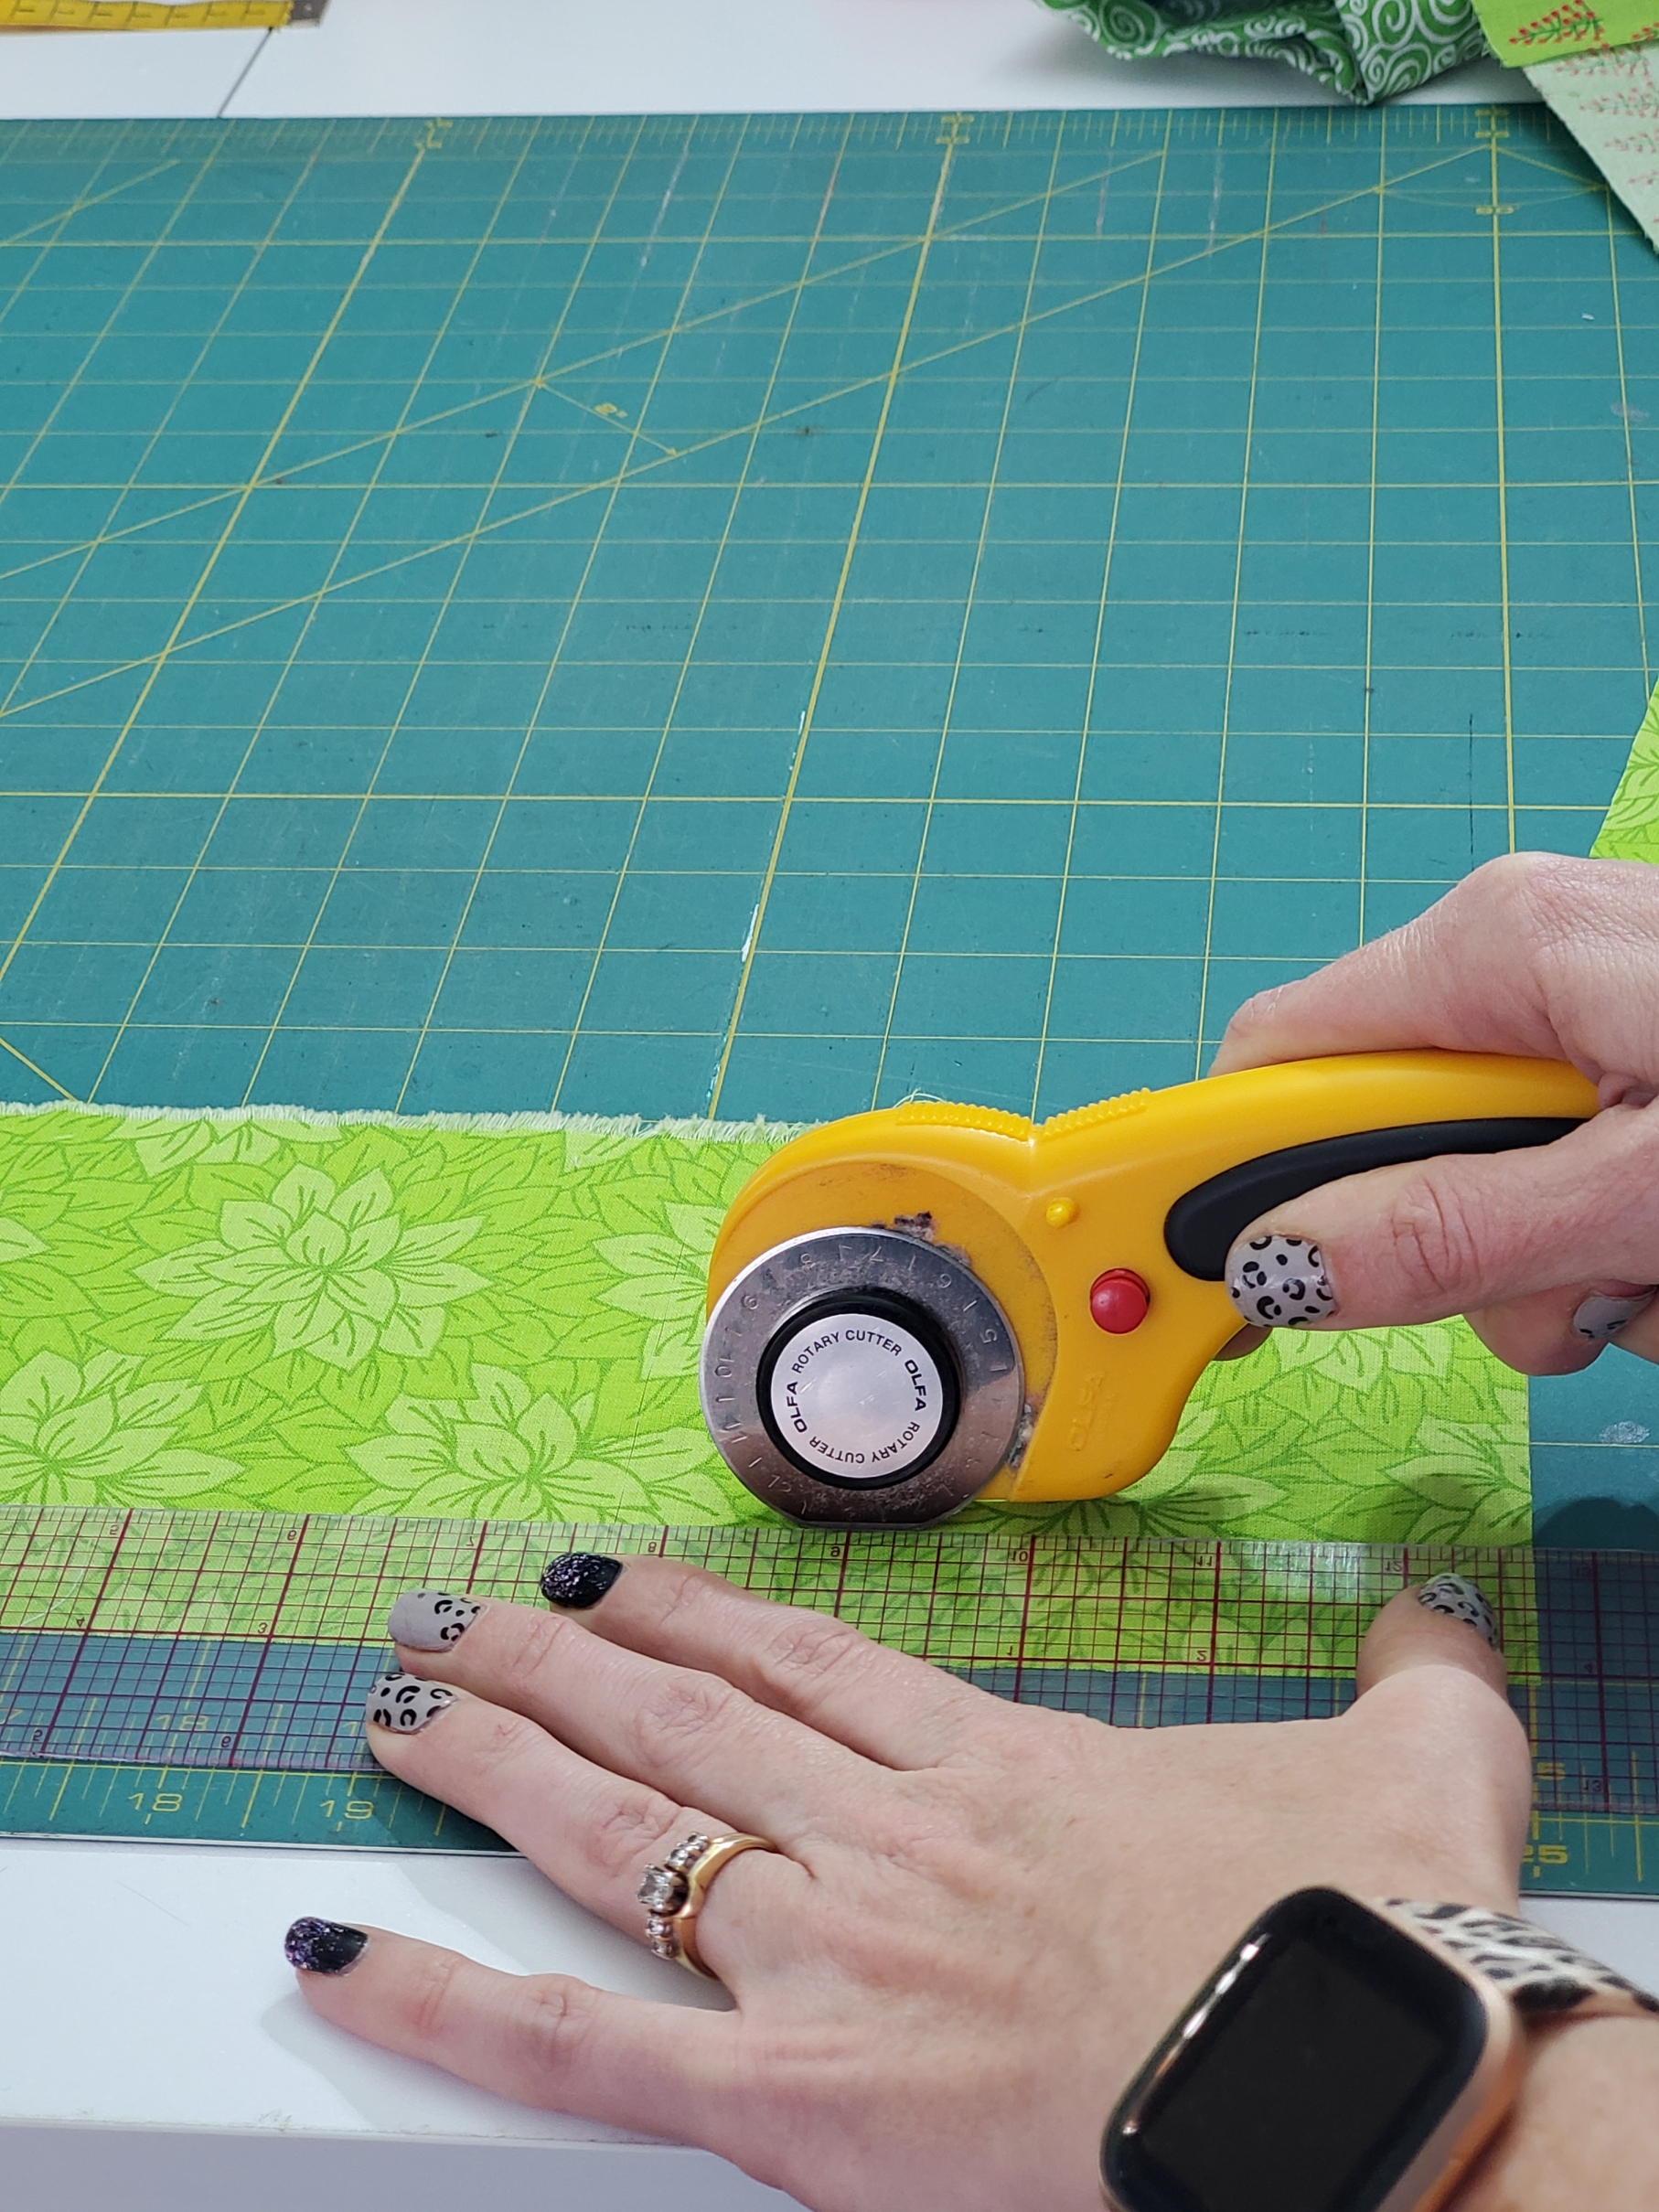
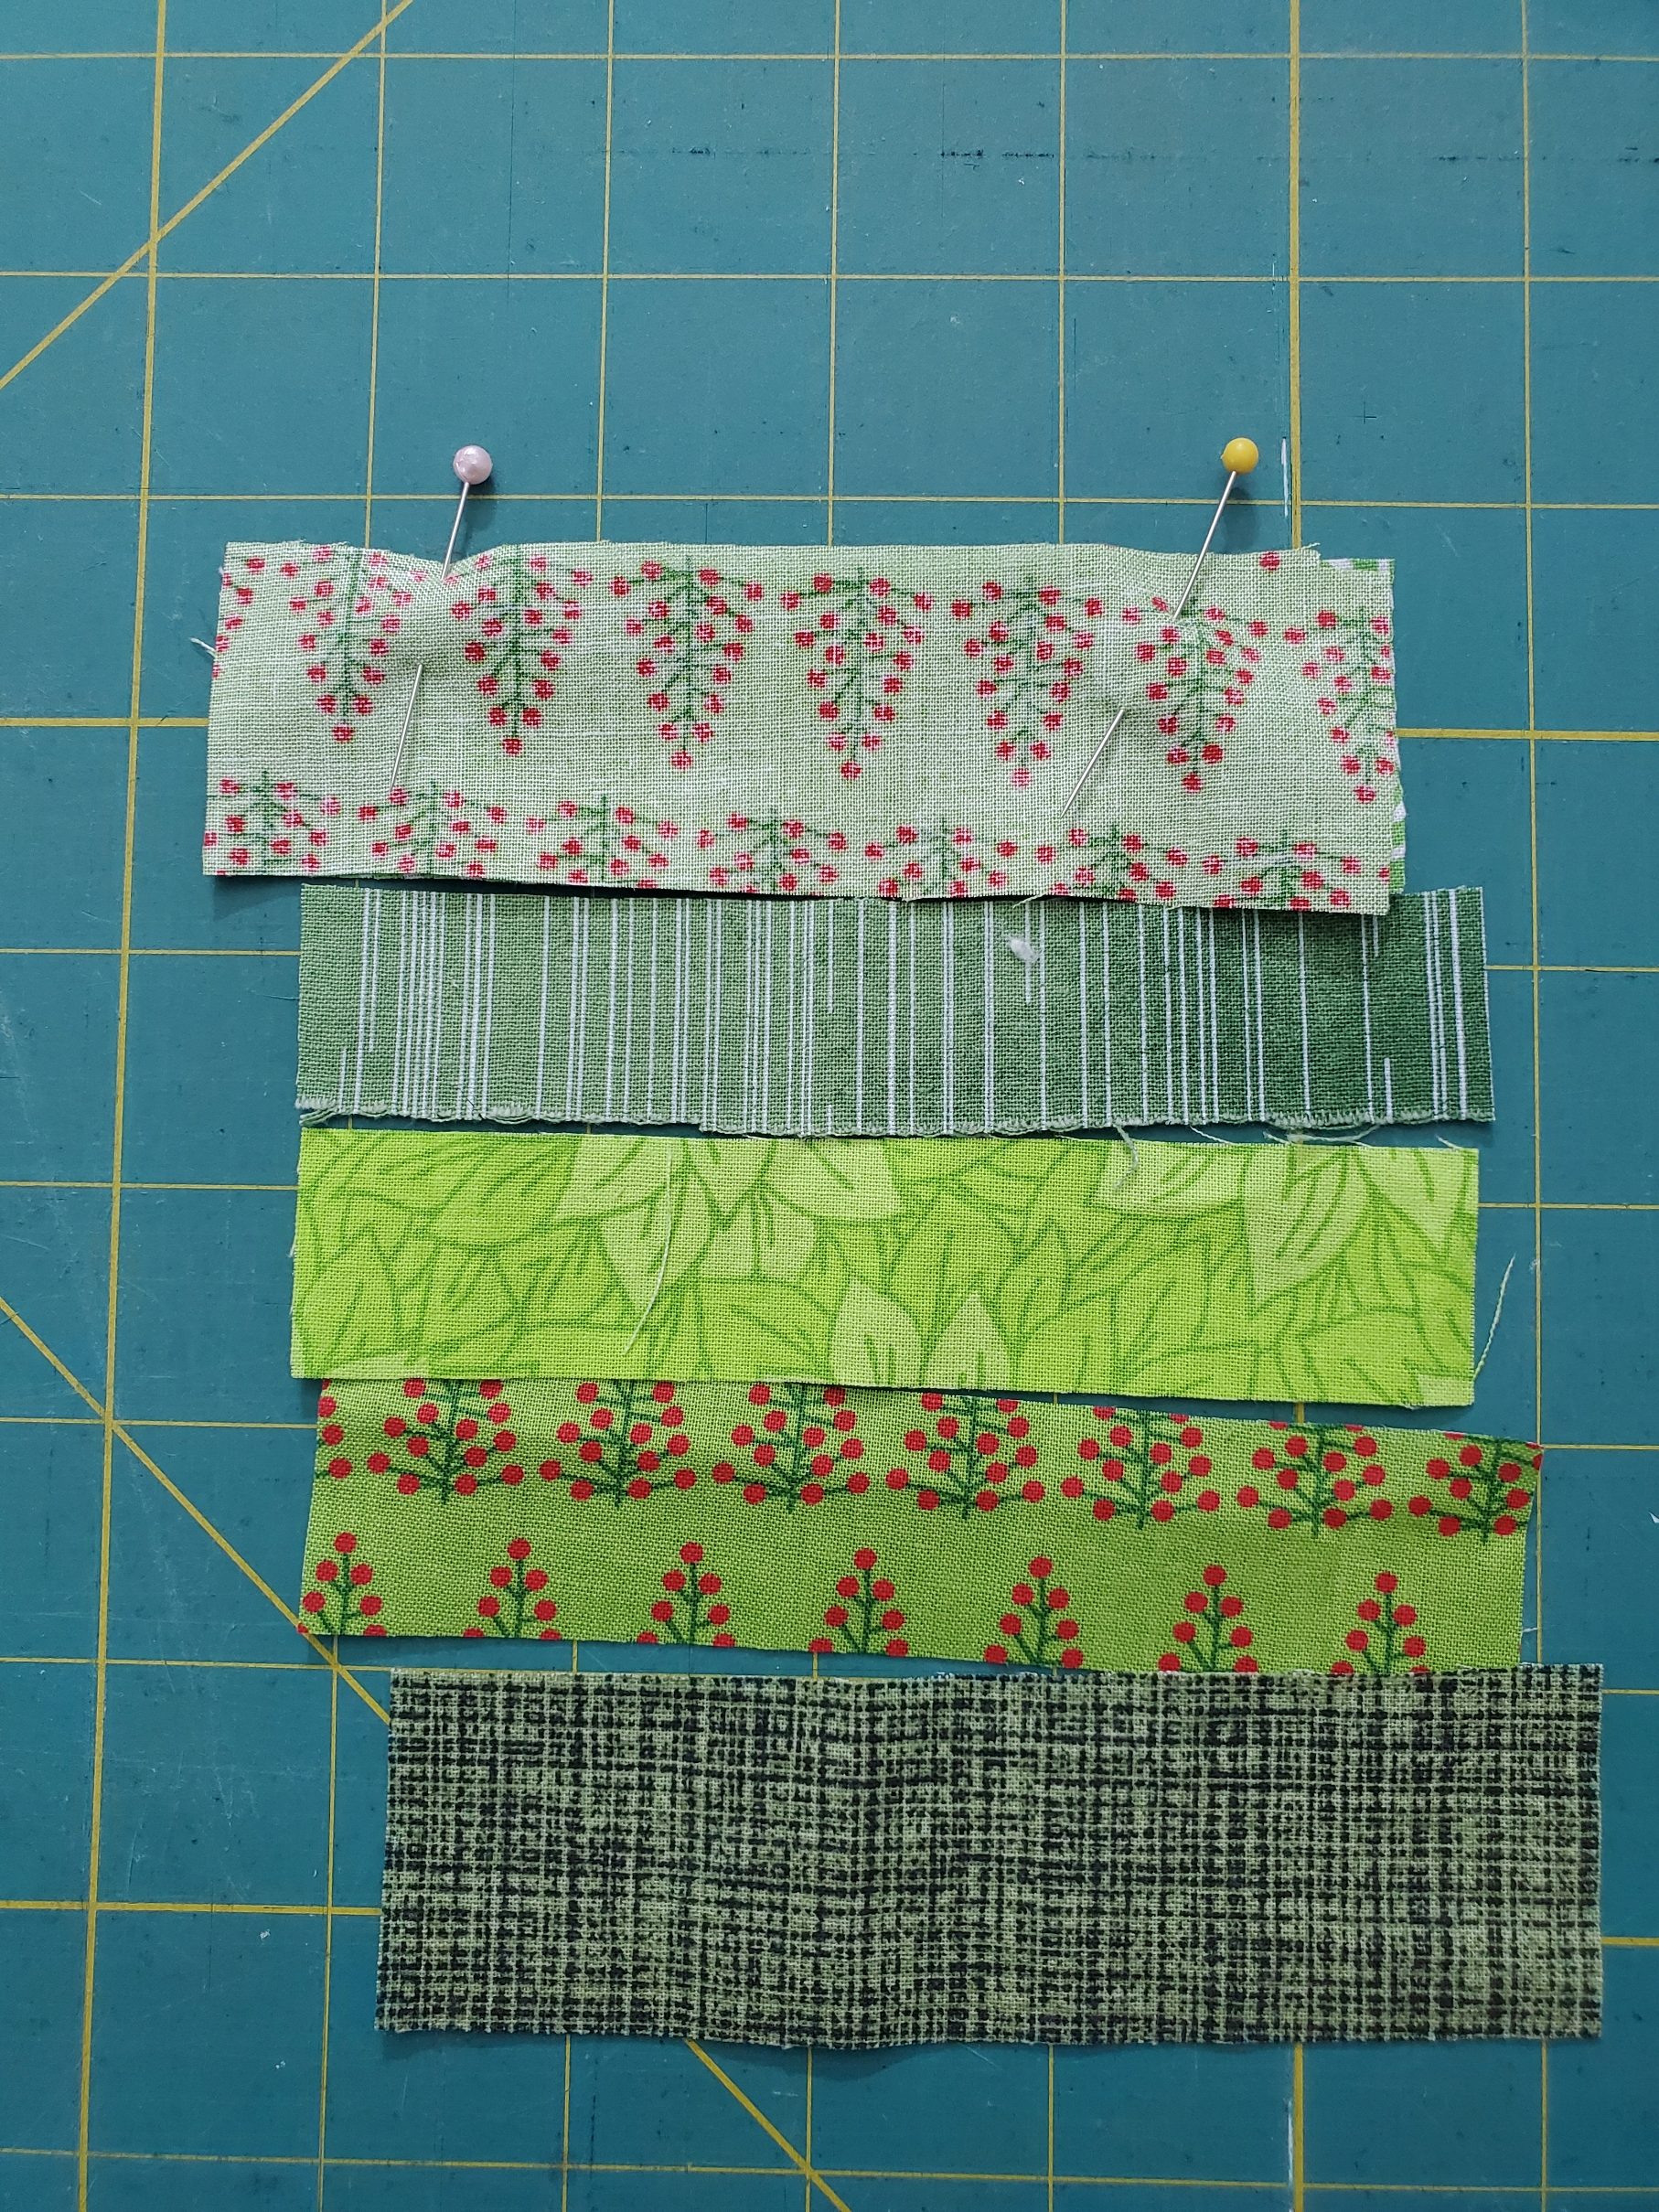
Once you have several strips cut out, lay them out in the order you want them to be sewn together. It typically takes between 6-8 strips for one ornament (depending on how tall you make your strips). You can make several ornaments at a time by sewing together more strips!
Now you are ready to sew your strips together. Simply take one strip and flip it over to meet the strip underneath it with right sides together, lining up your top edges. Put a couple of pins in to hold in place.
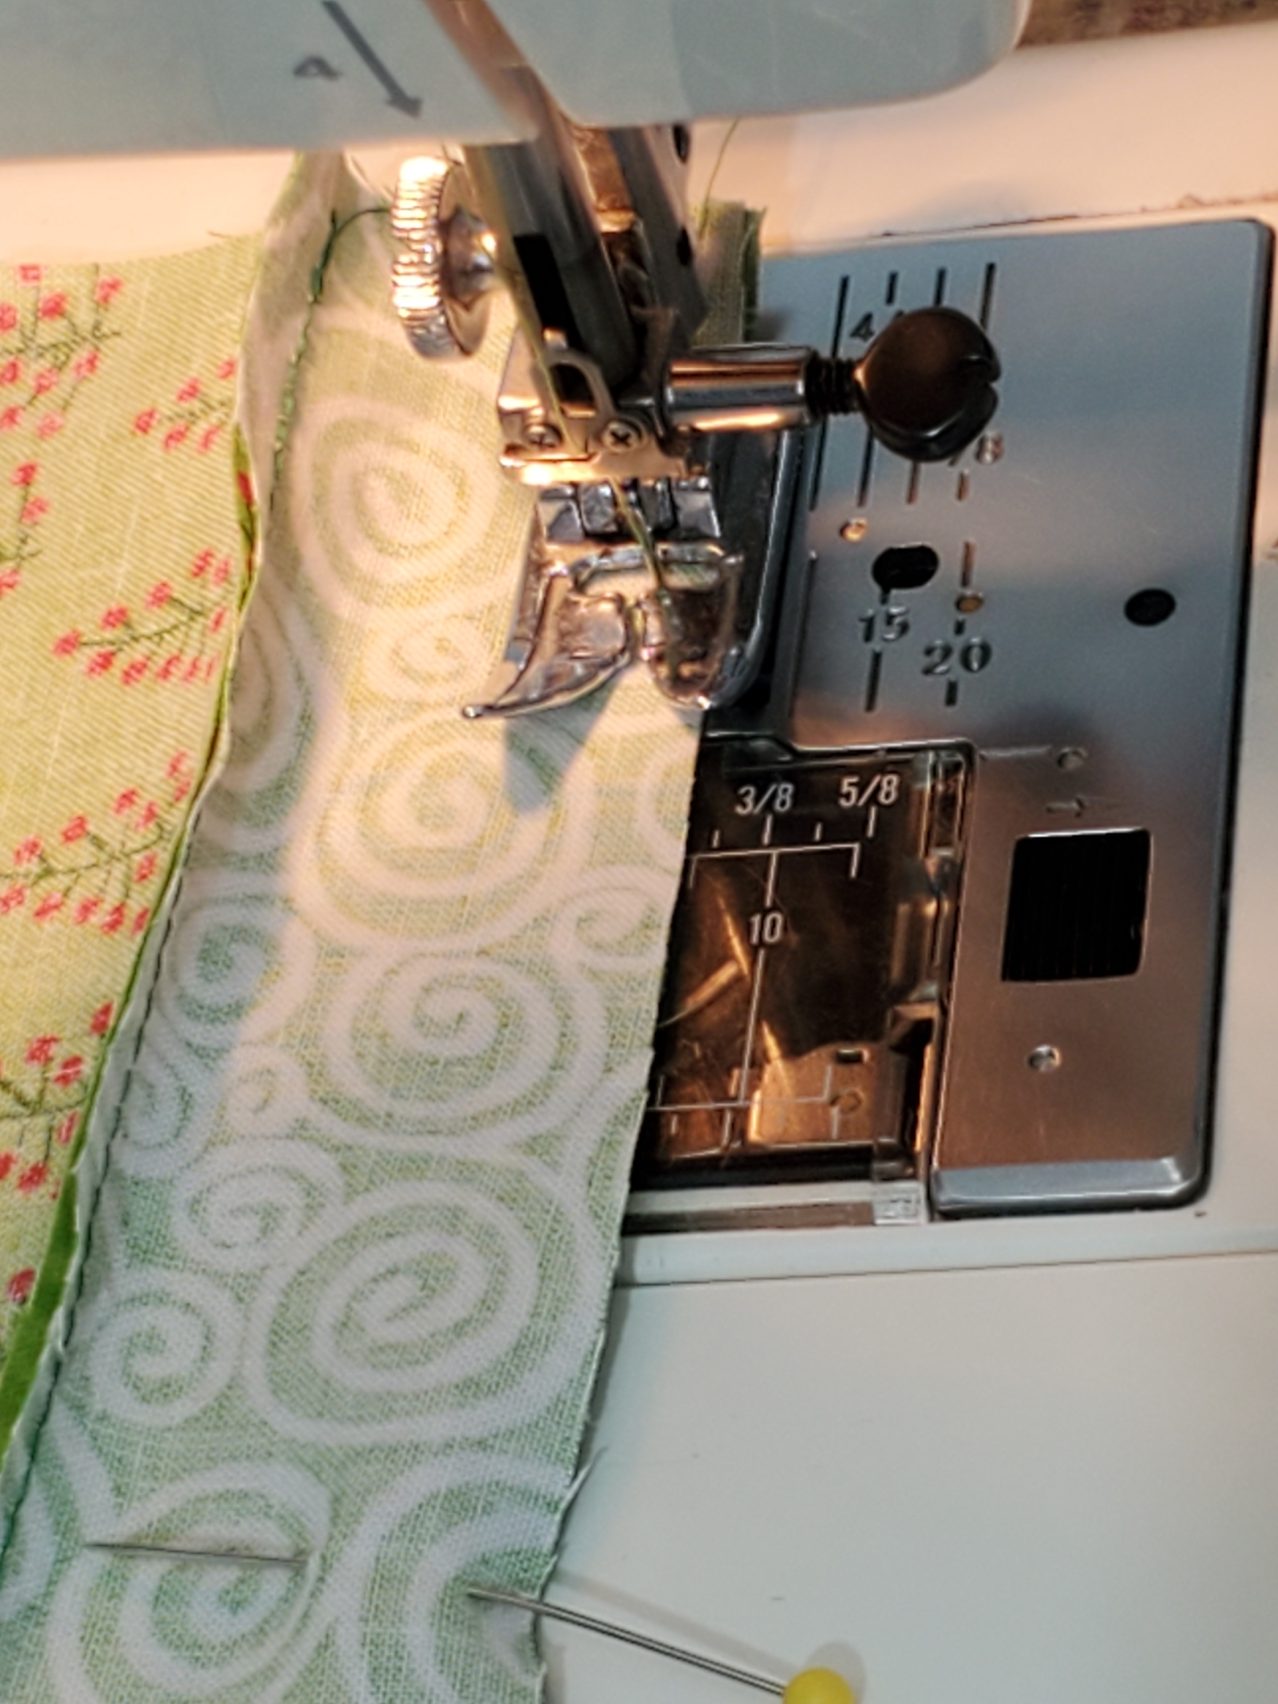
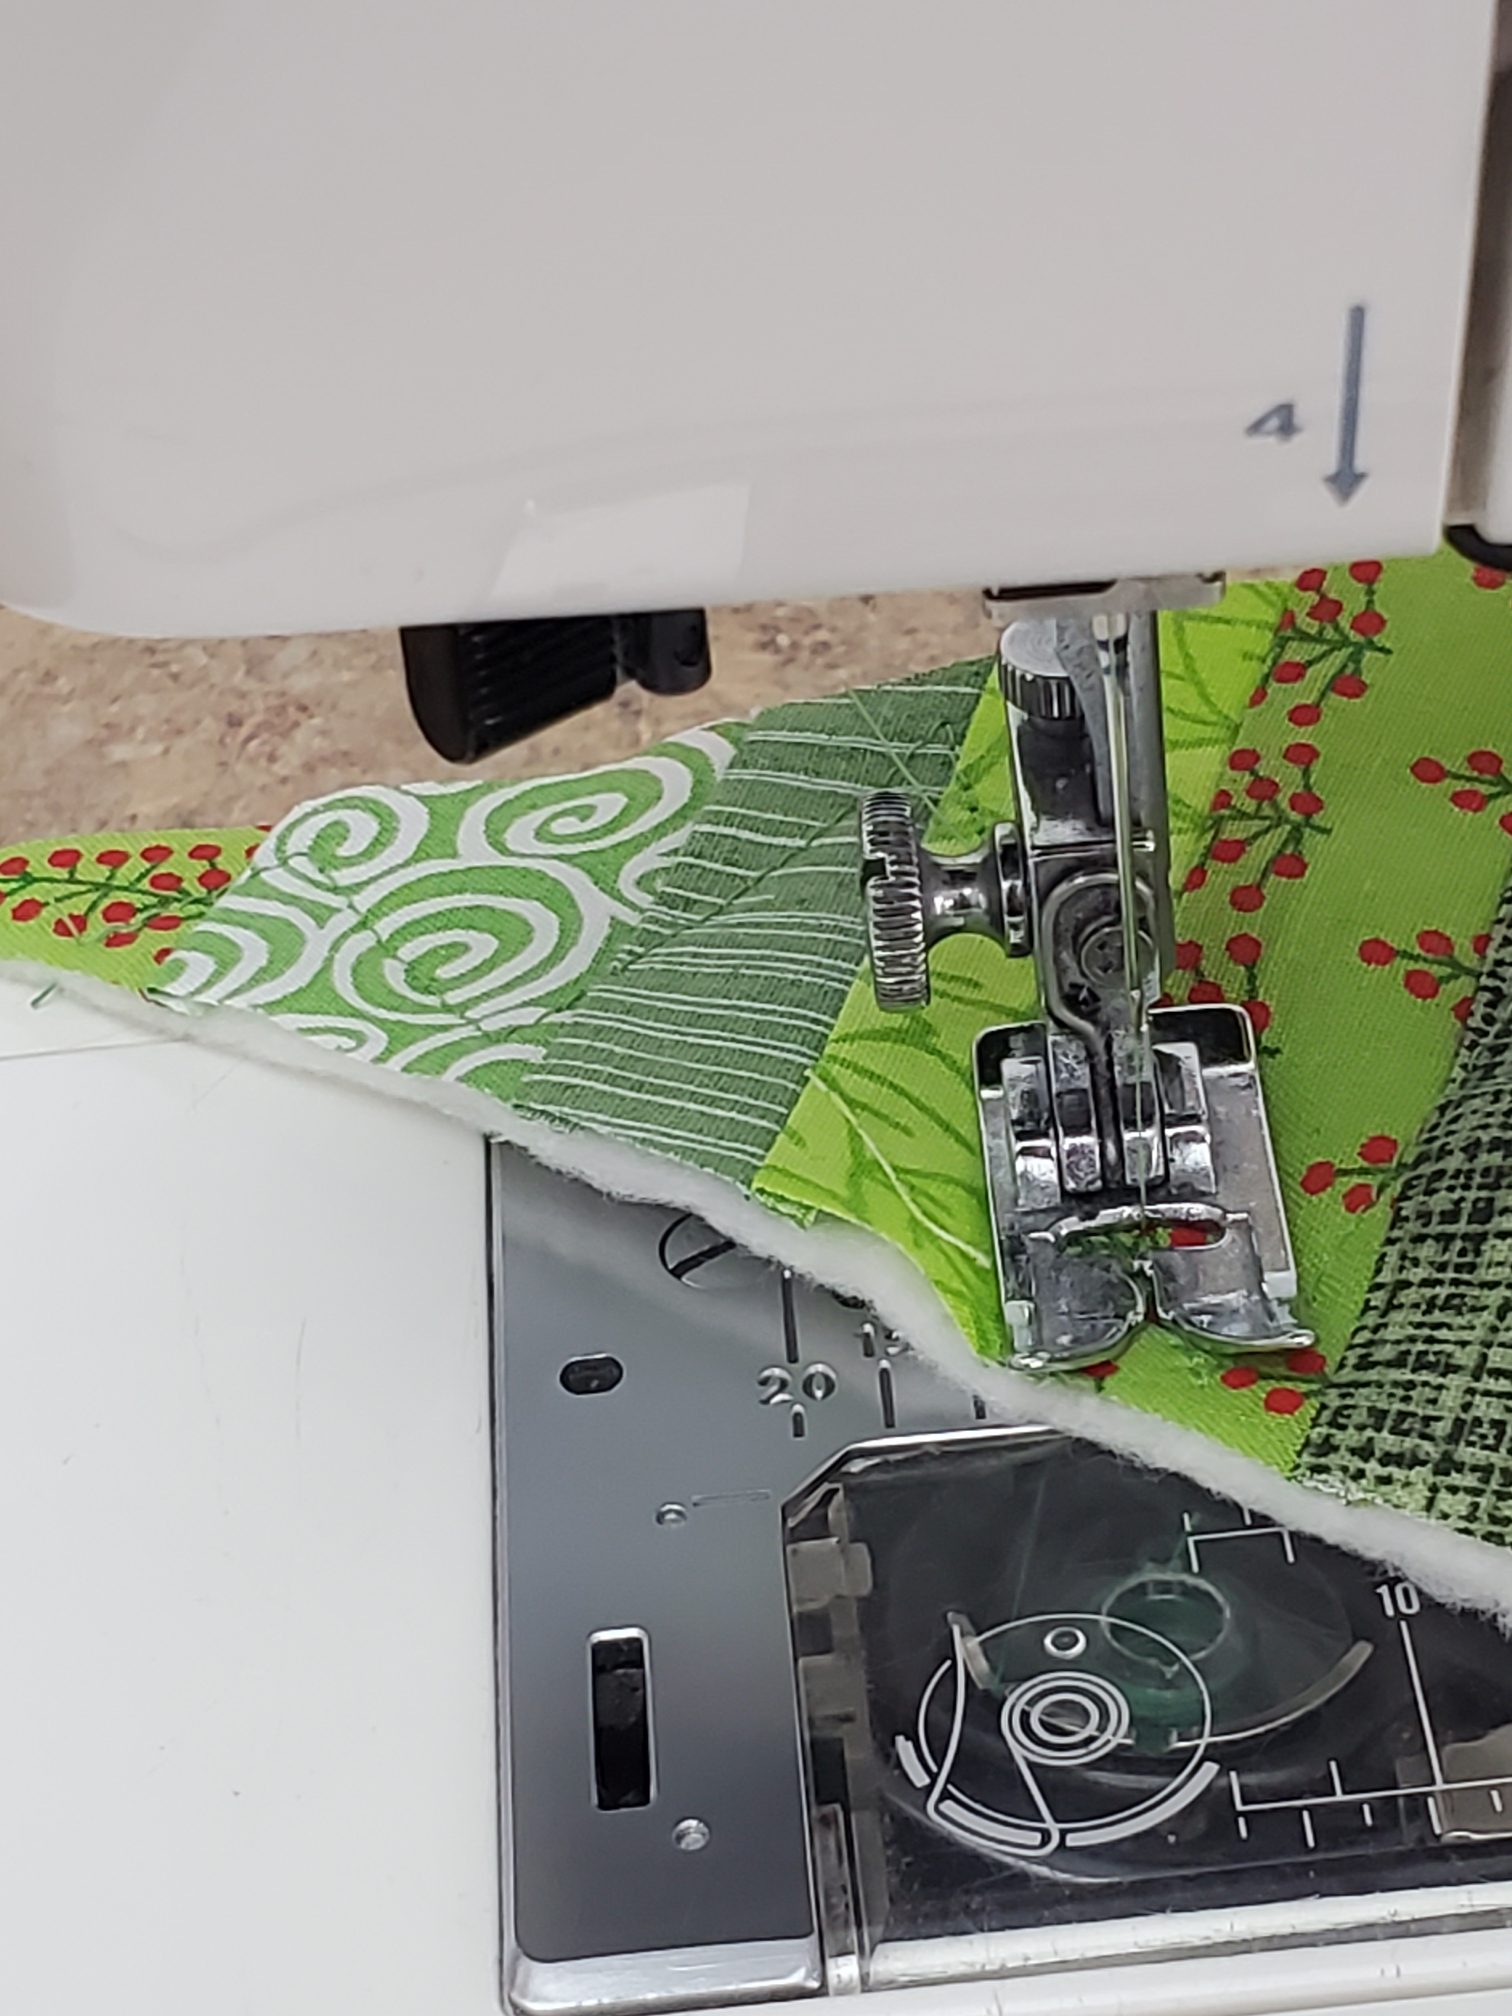
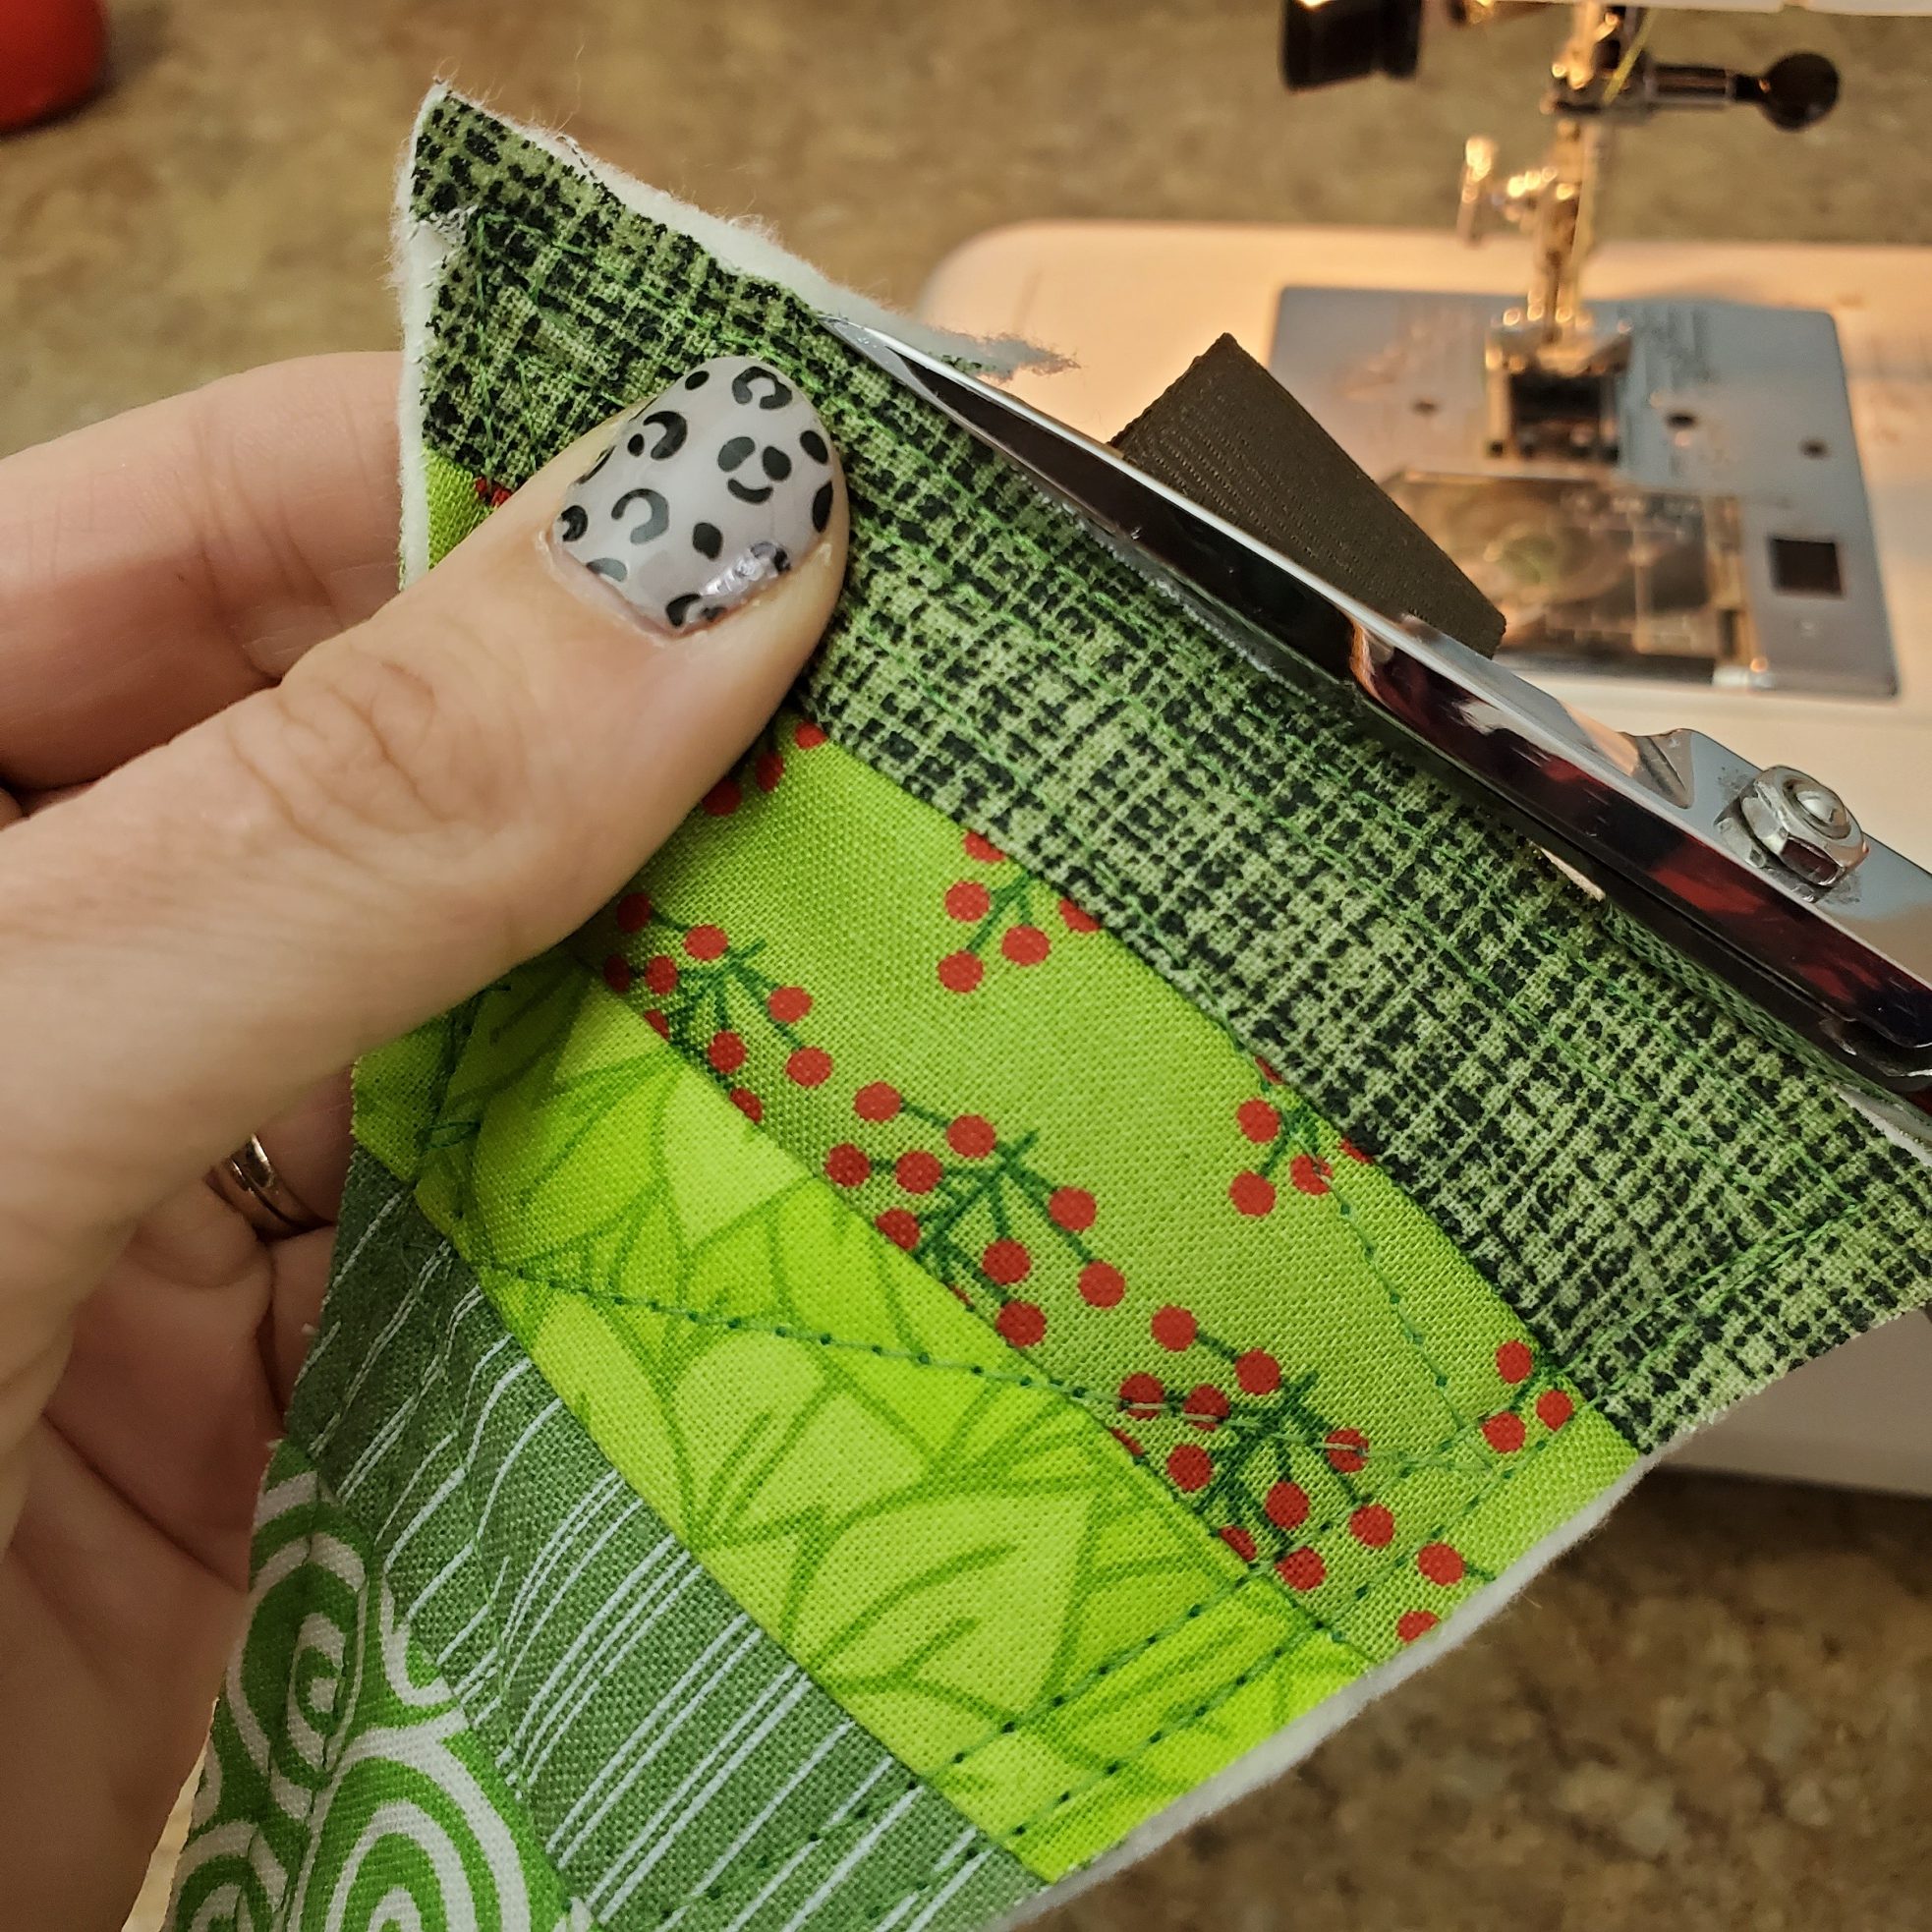
Sew, using 1/4″ seam allowance. Remember that the 1/4″ seam allowance is the same as the 2/8″ line (a reminder to my students and other new sewers!) I’ve taken a close-up picture so you can see where the edge of my fabric is on my seam allowance lines.
Continue sewing all of your strips together, about 6-8 or until it is tall enough to fit your template/pattern on top. Make sure to iron your seams. Normally we iron with seam allowances open, but since these seams are so small, that may be a bit tricky. In this case, it will be perfectly fine to press your seam allowance to one side. Whatever you do, don’t skip this step!! Ironing is so important; it’s what gives your project a crisp, finished look!
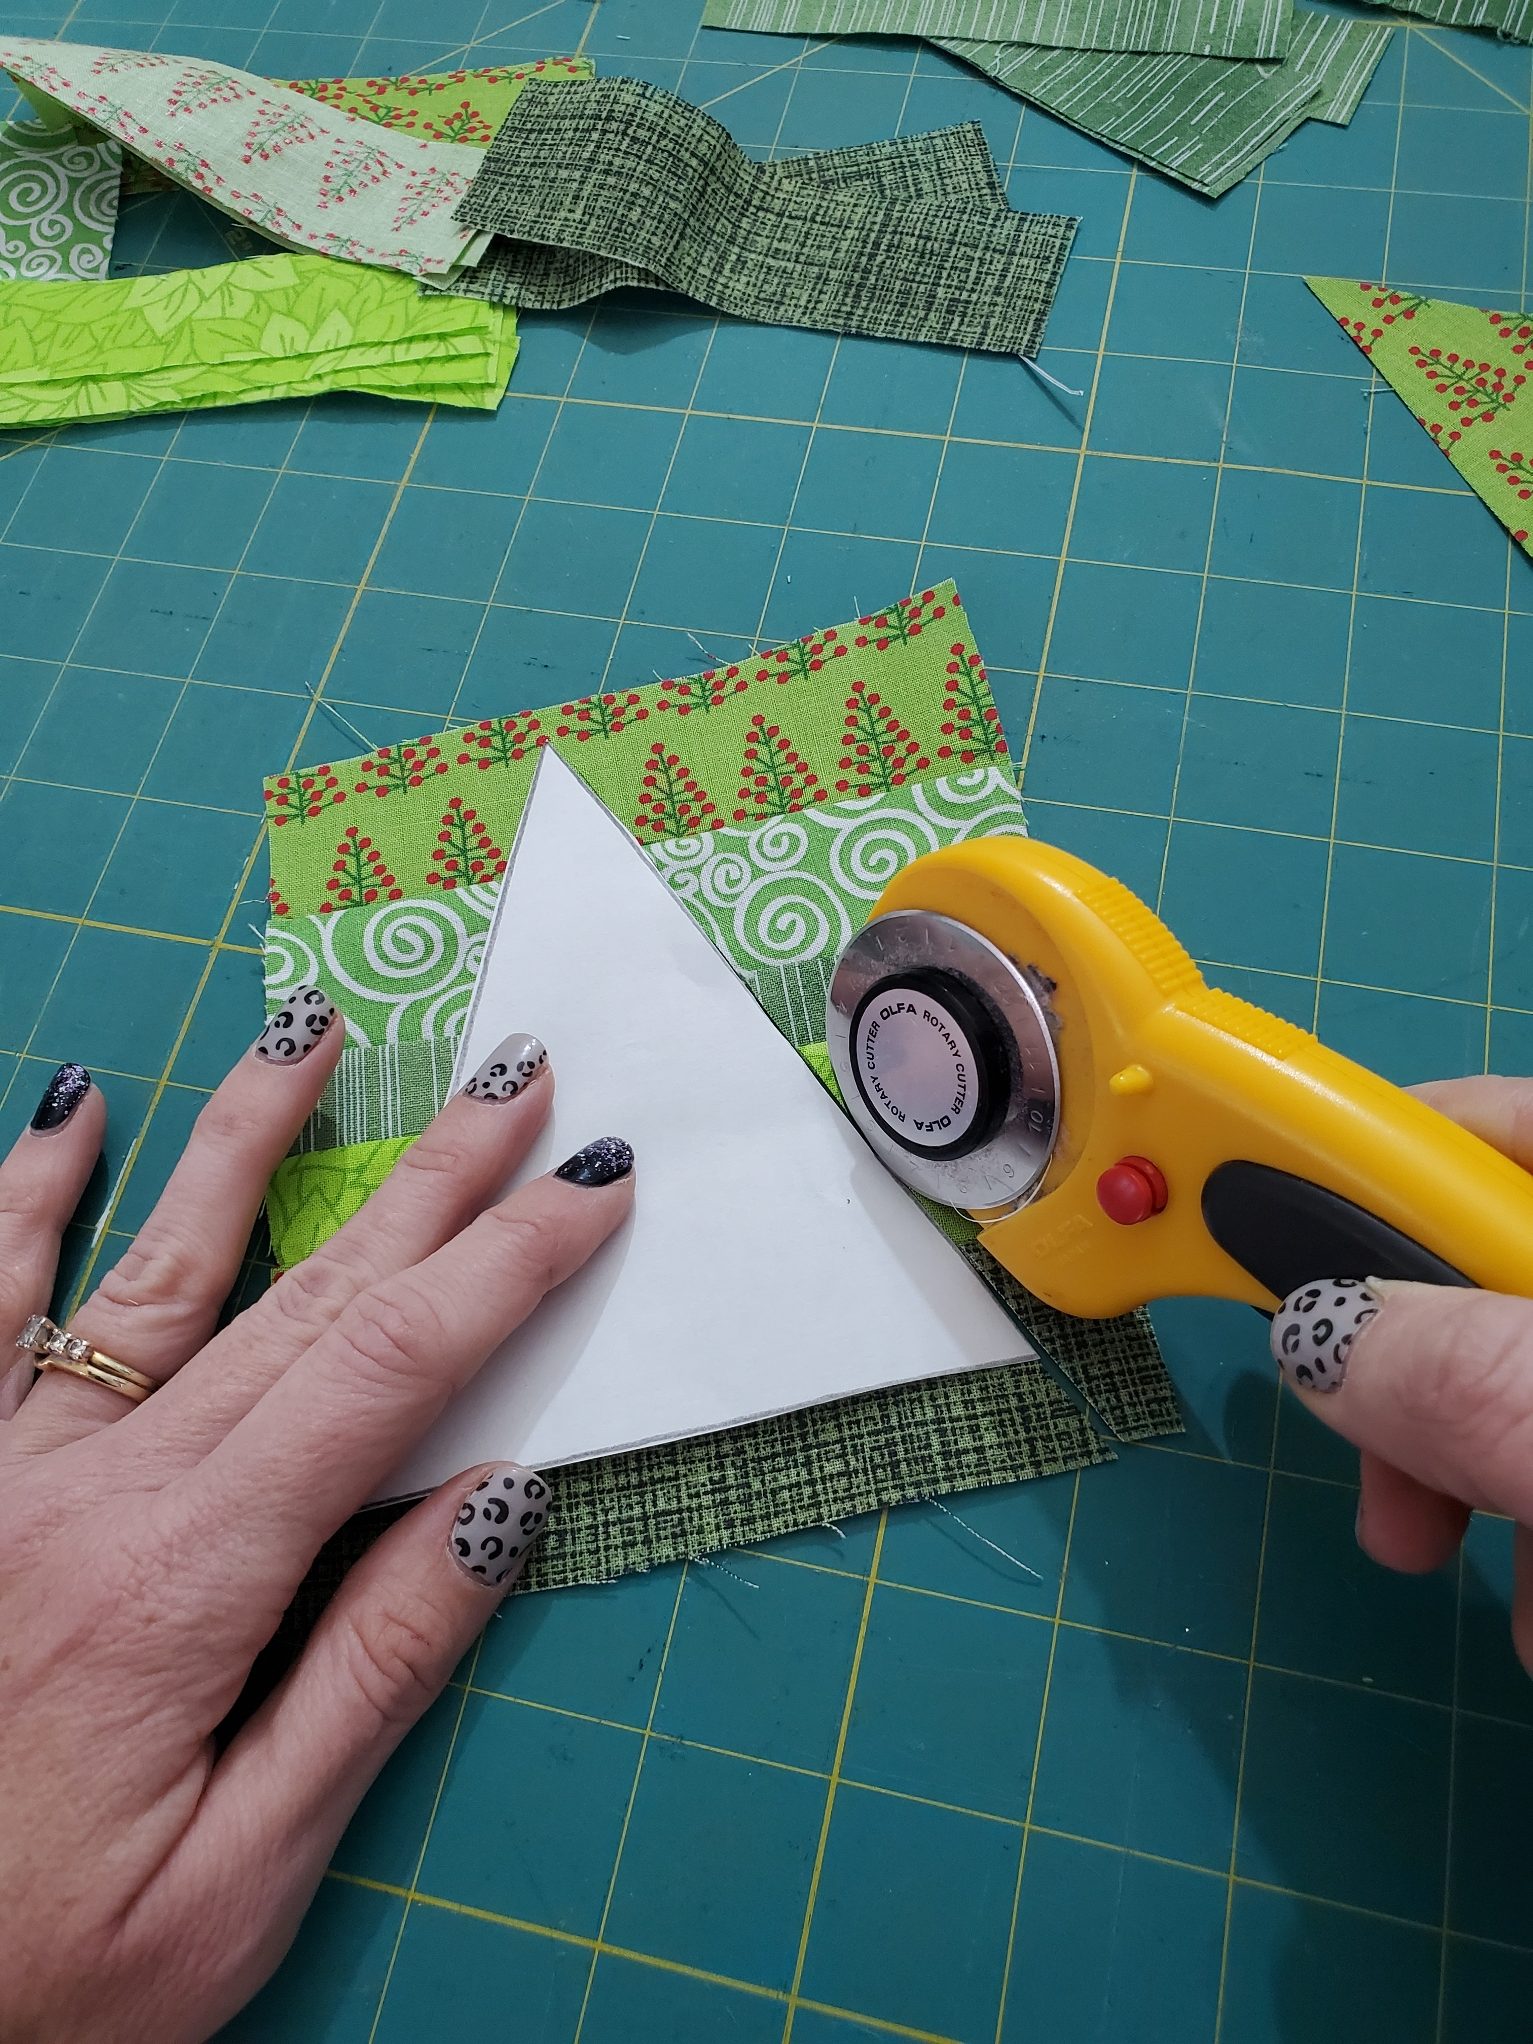
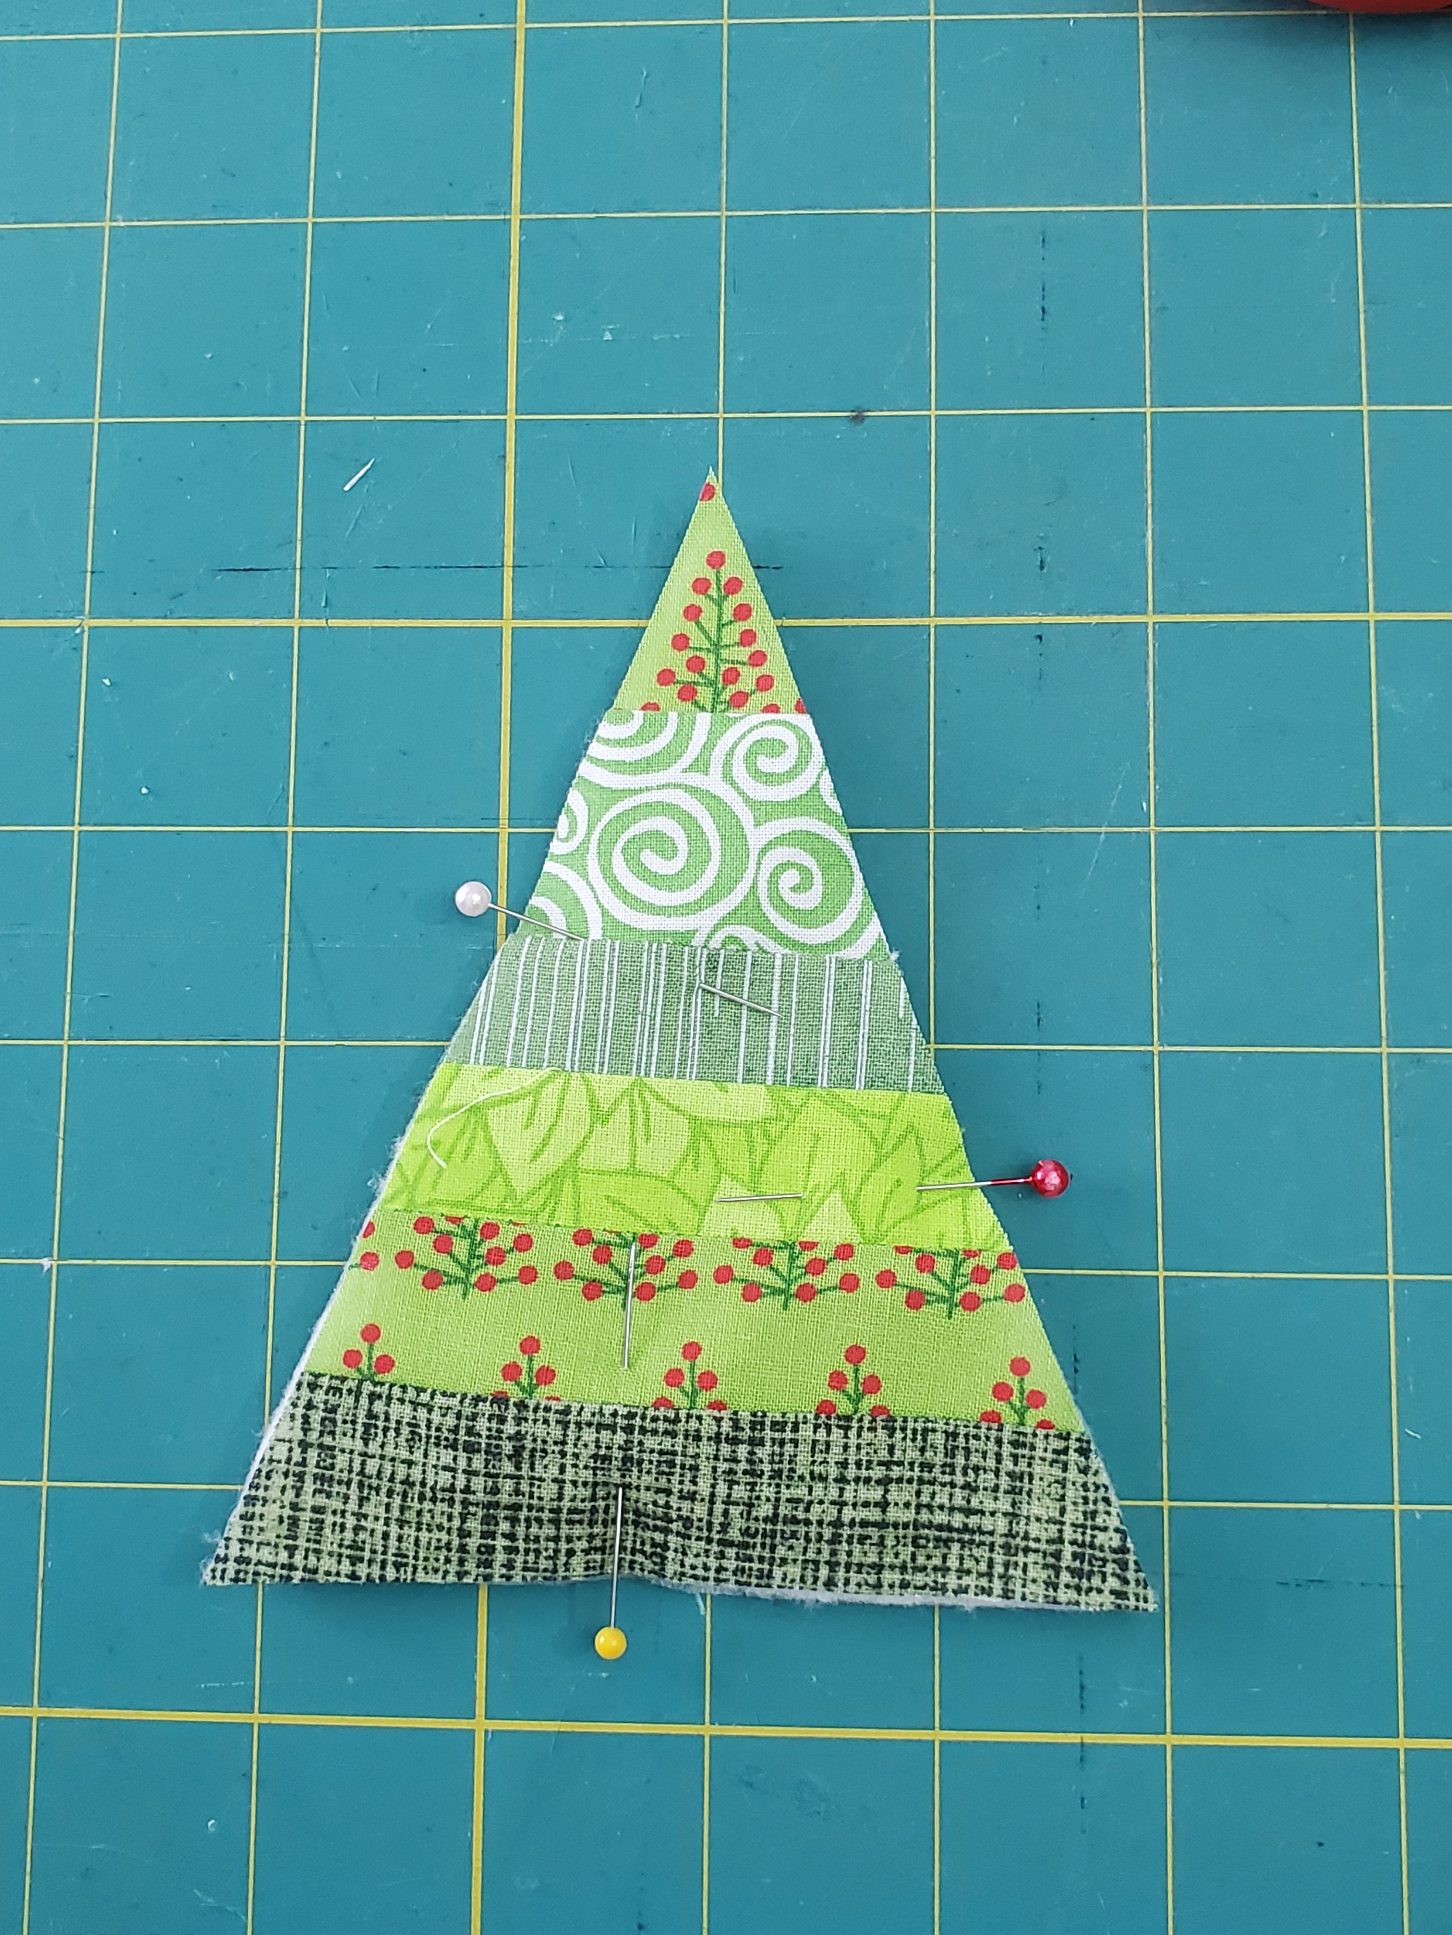
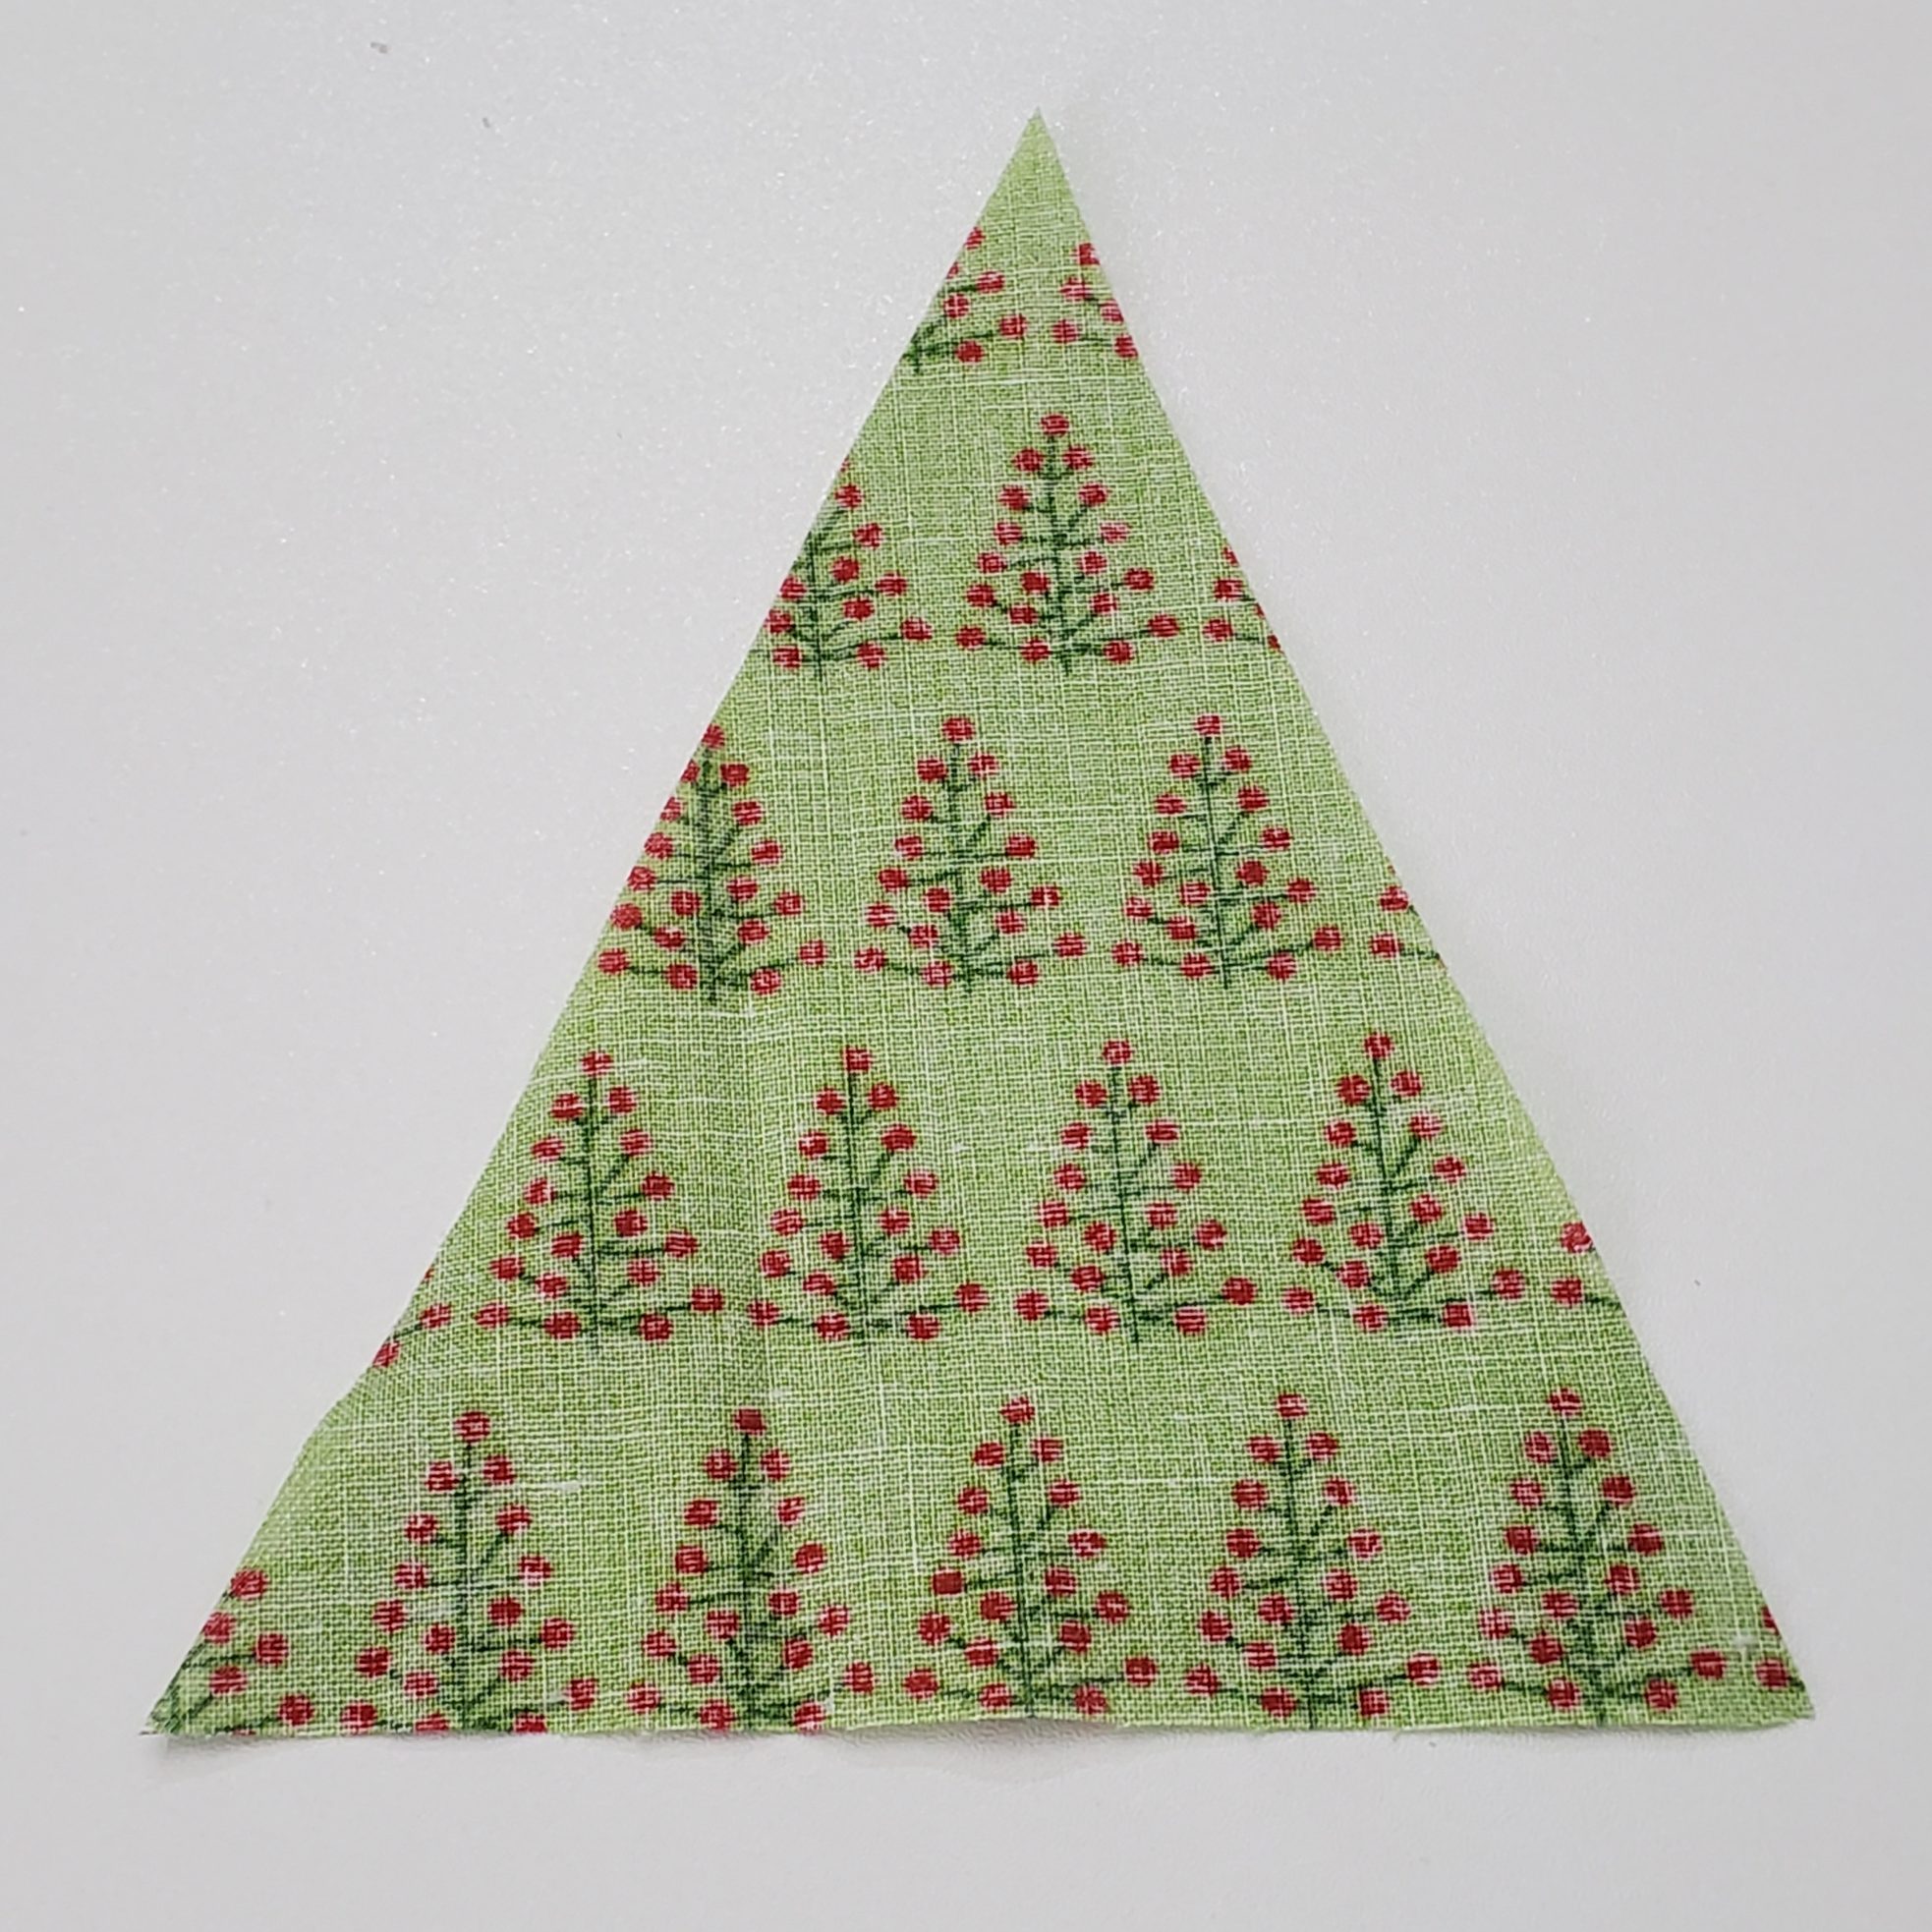
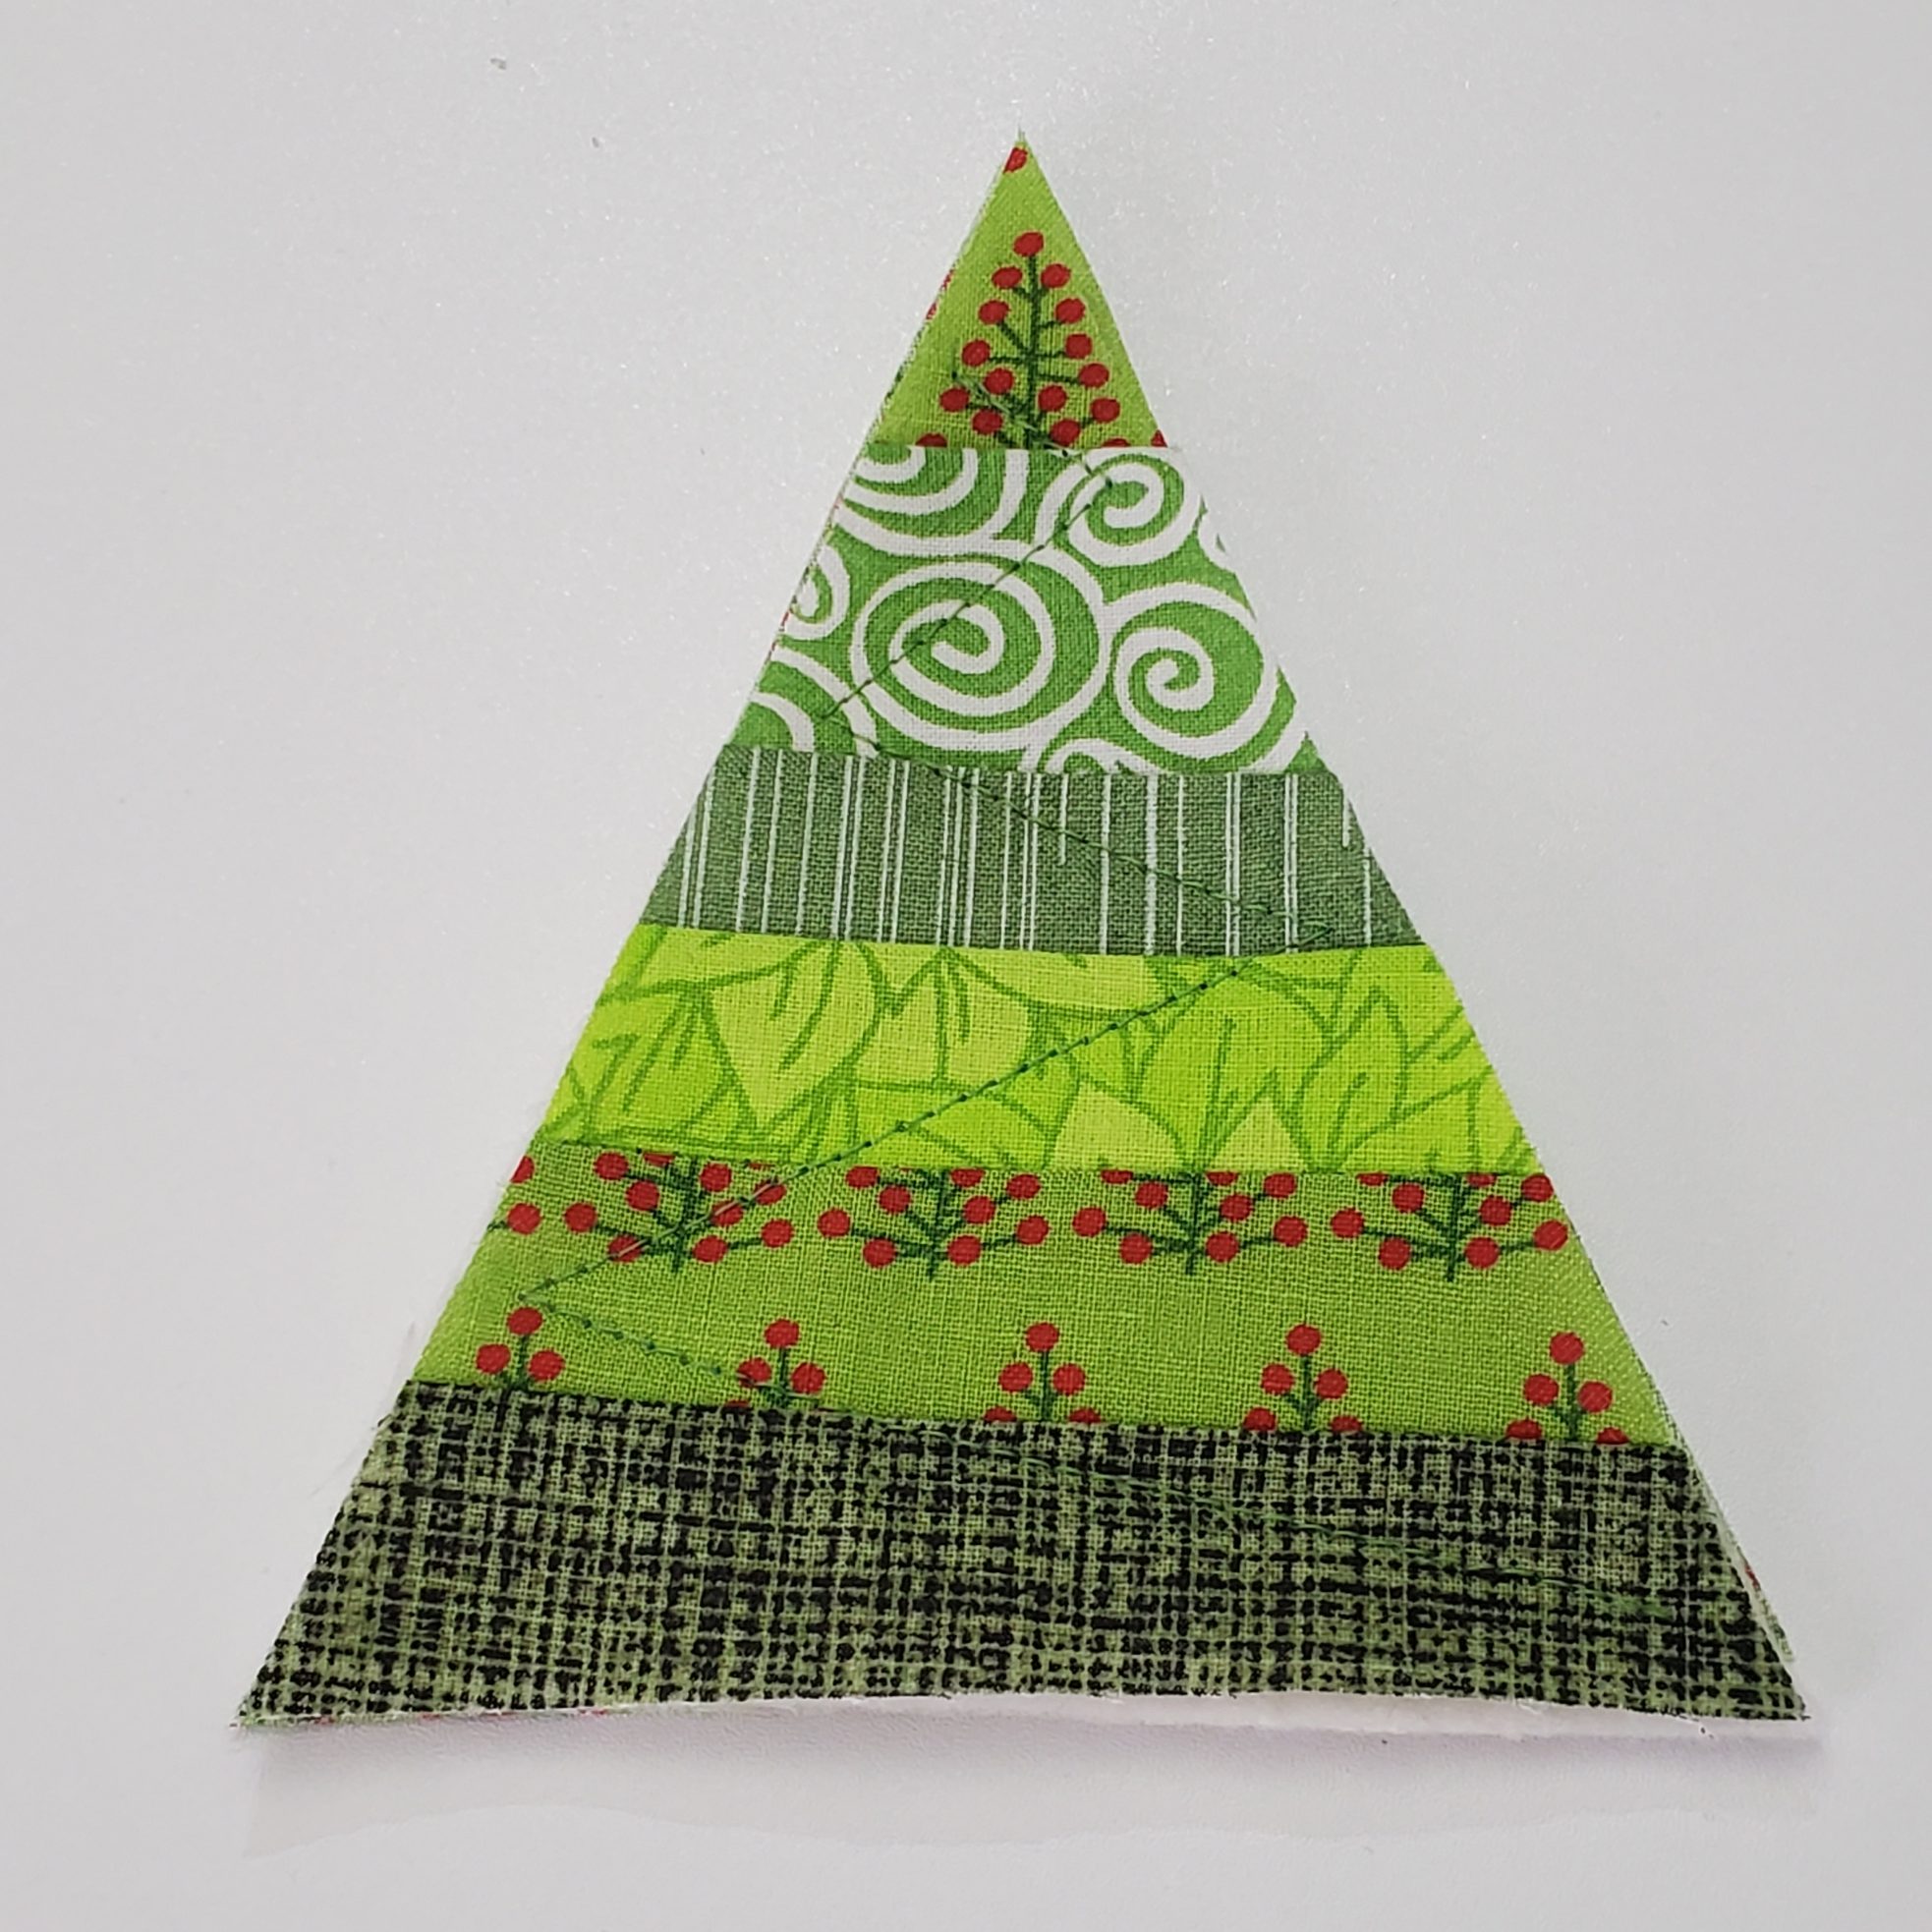
Now that your scraps are sewn and ironed, lay one of your pattern (template) pieces on top of that block of fabric and cut it out.
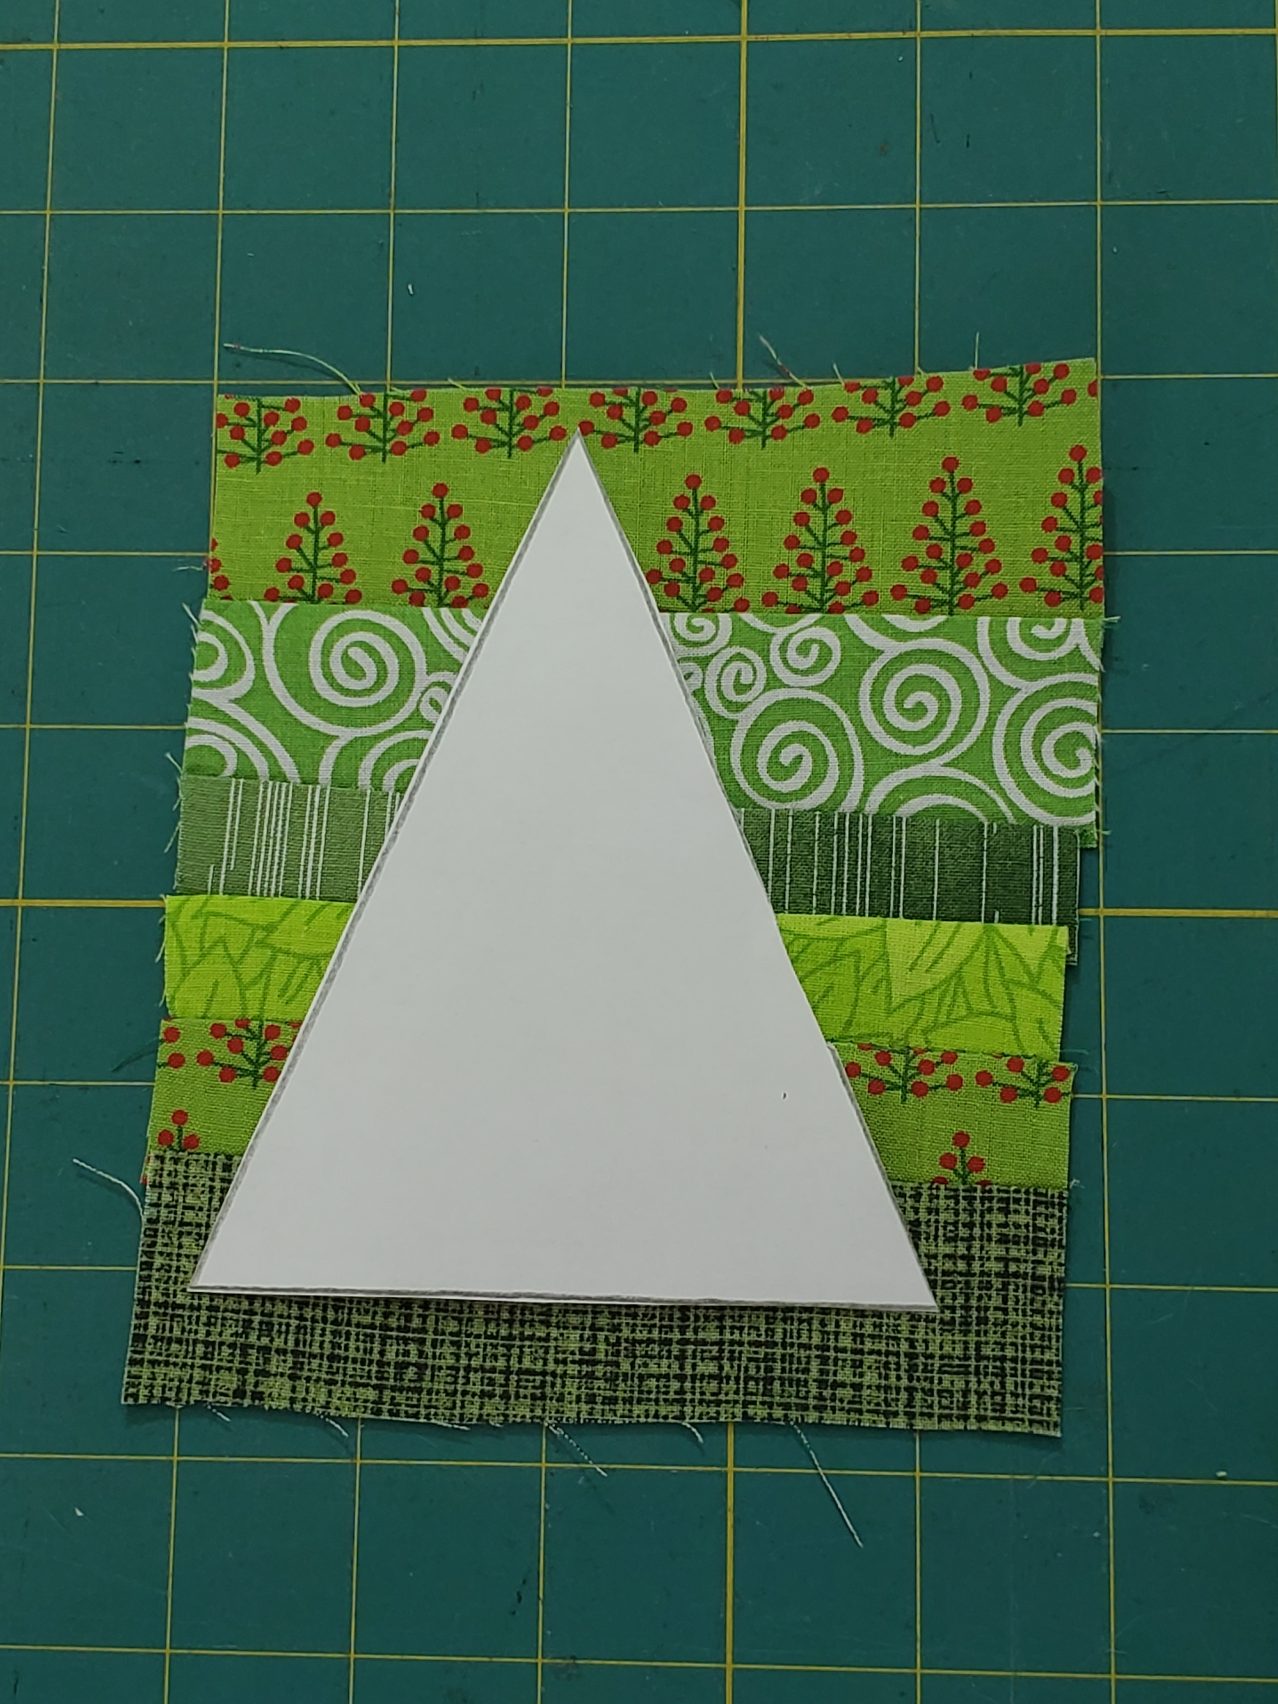
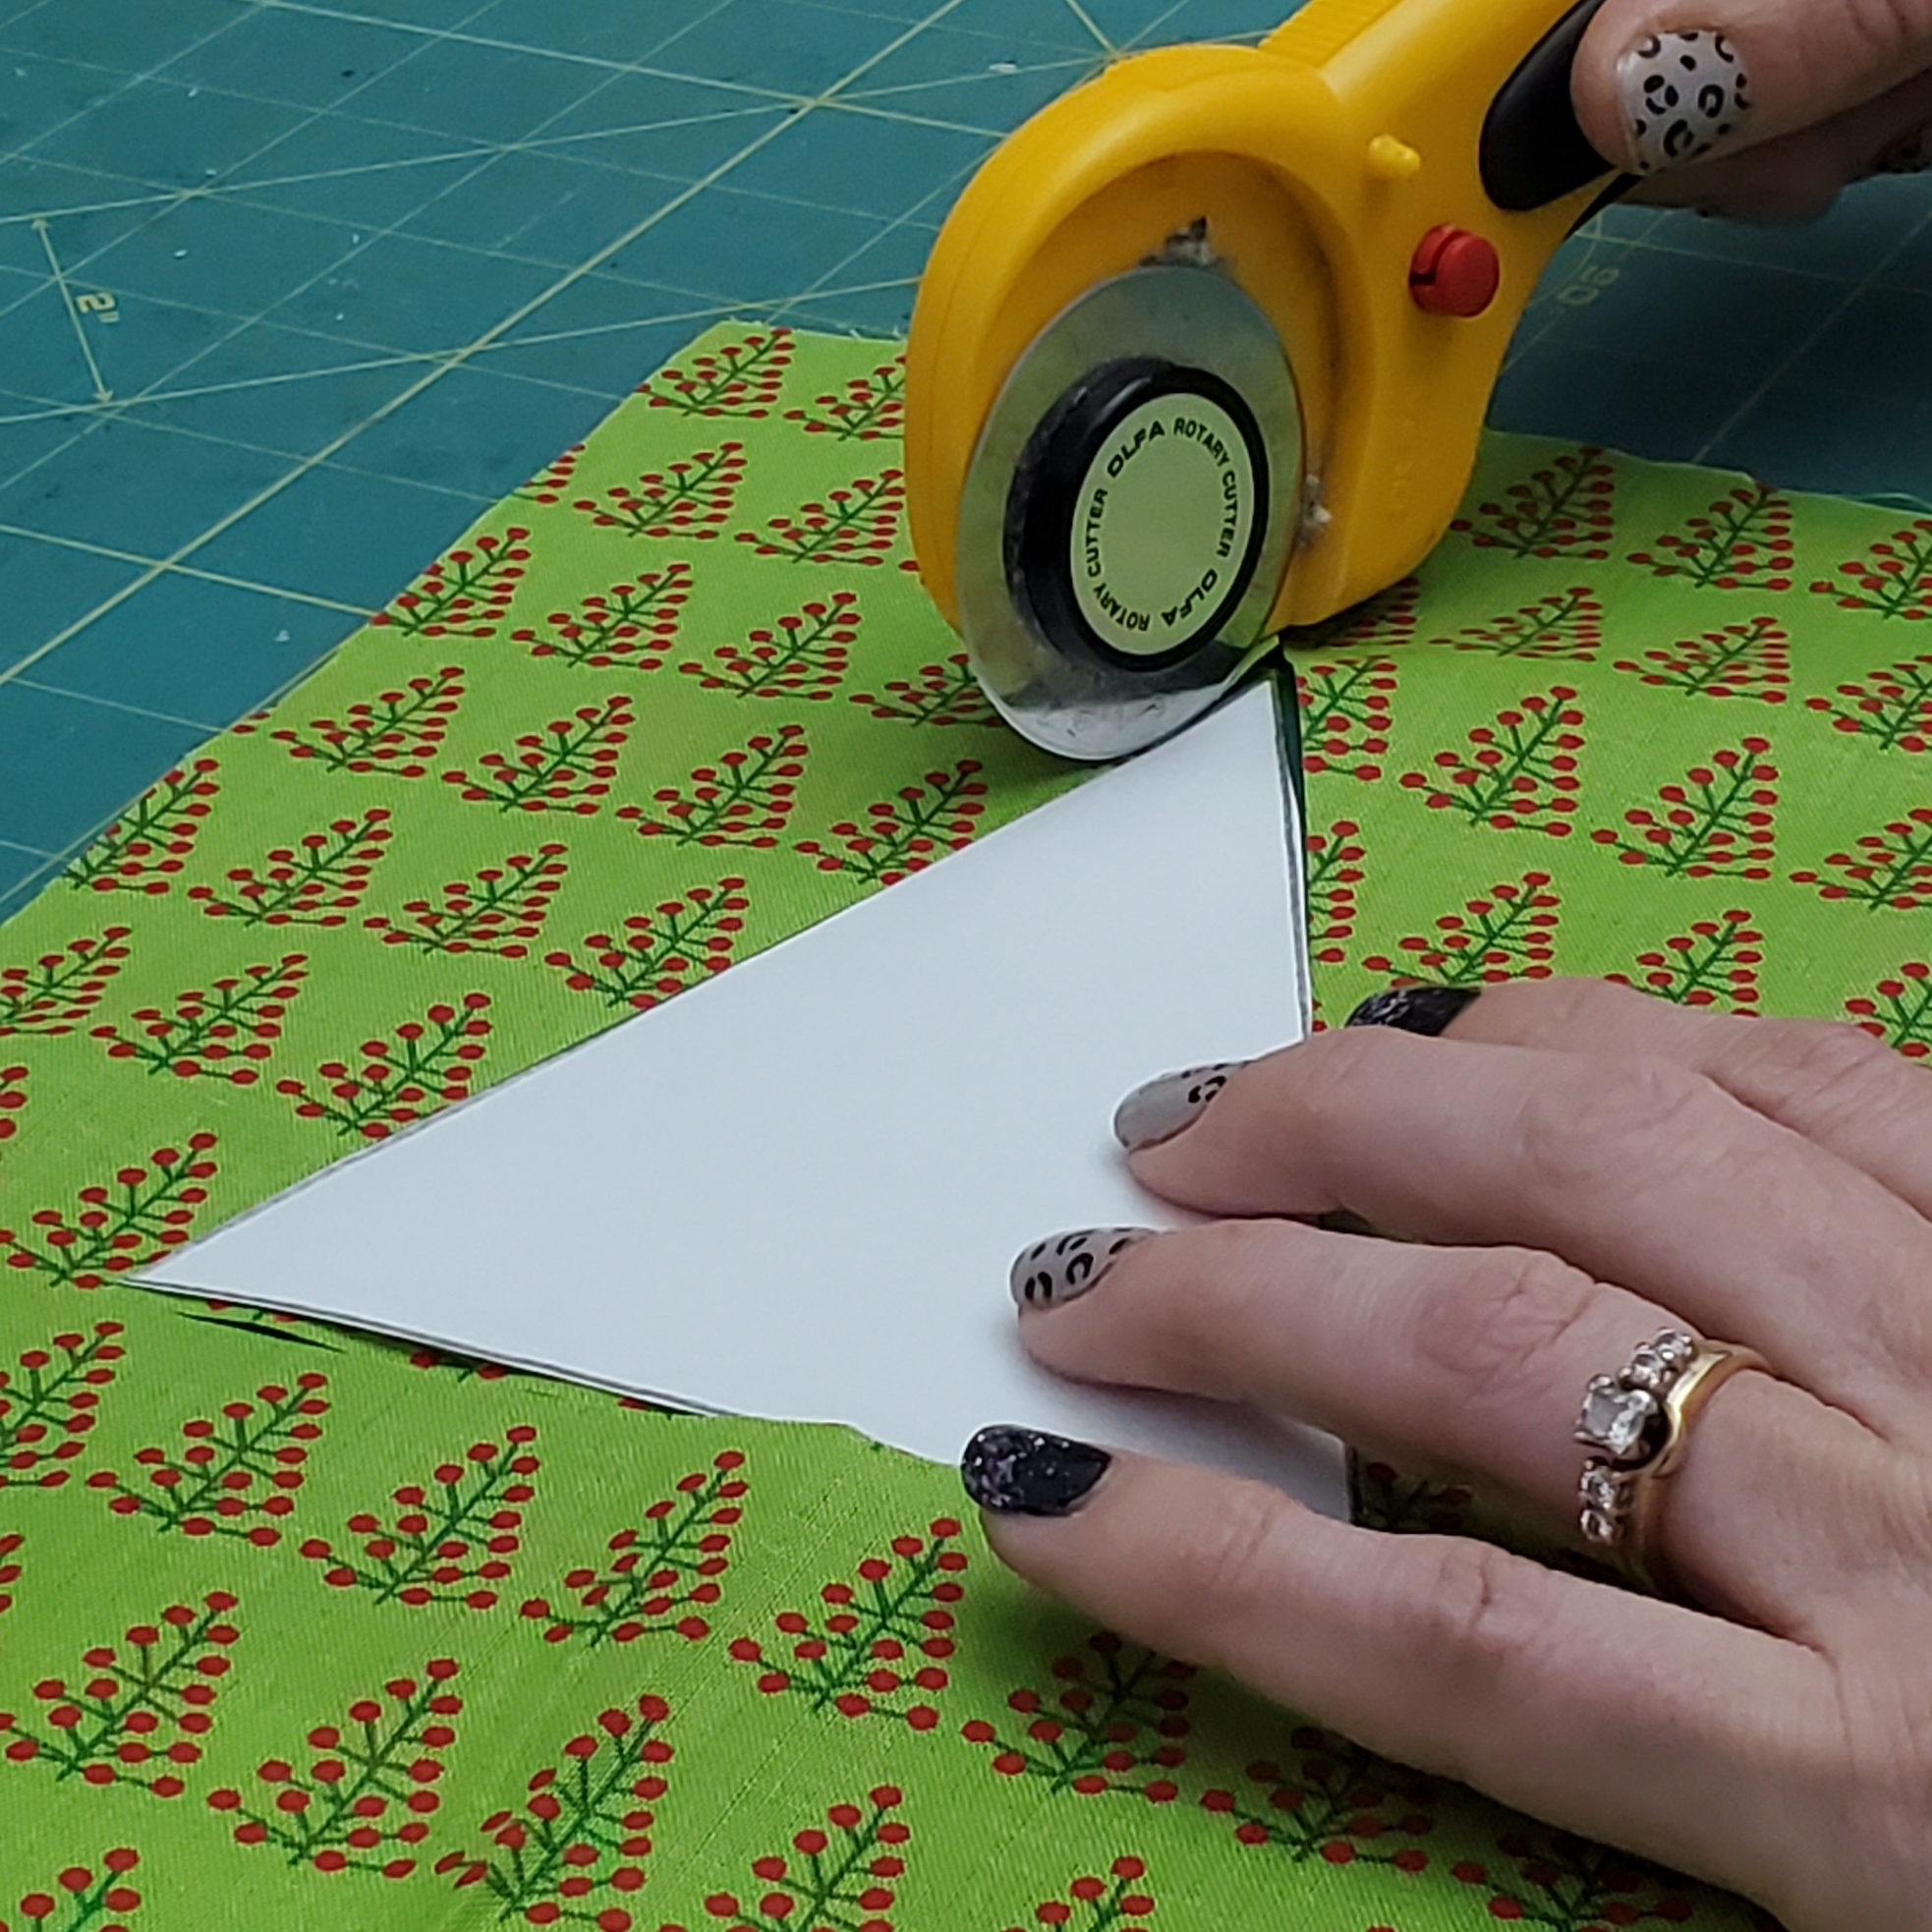
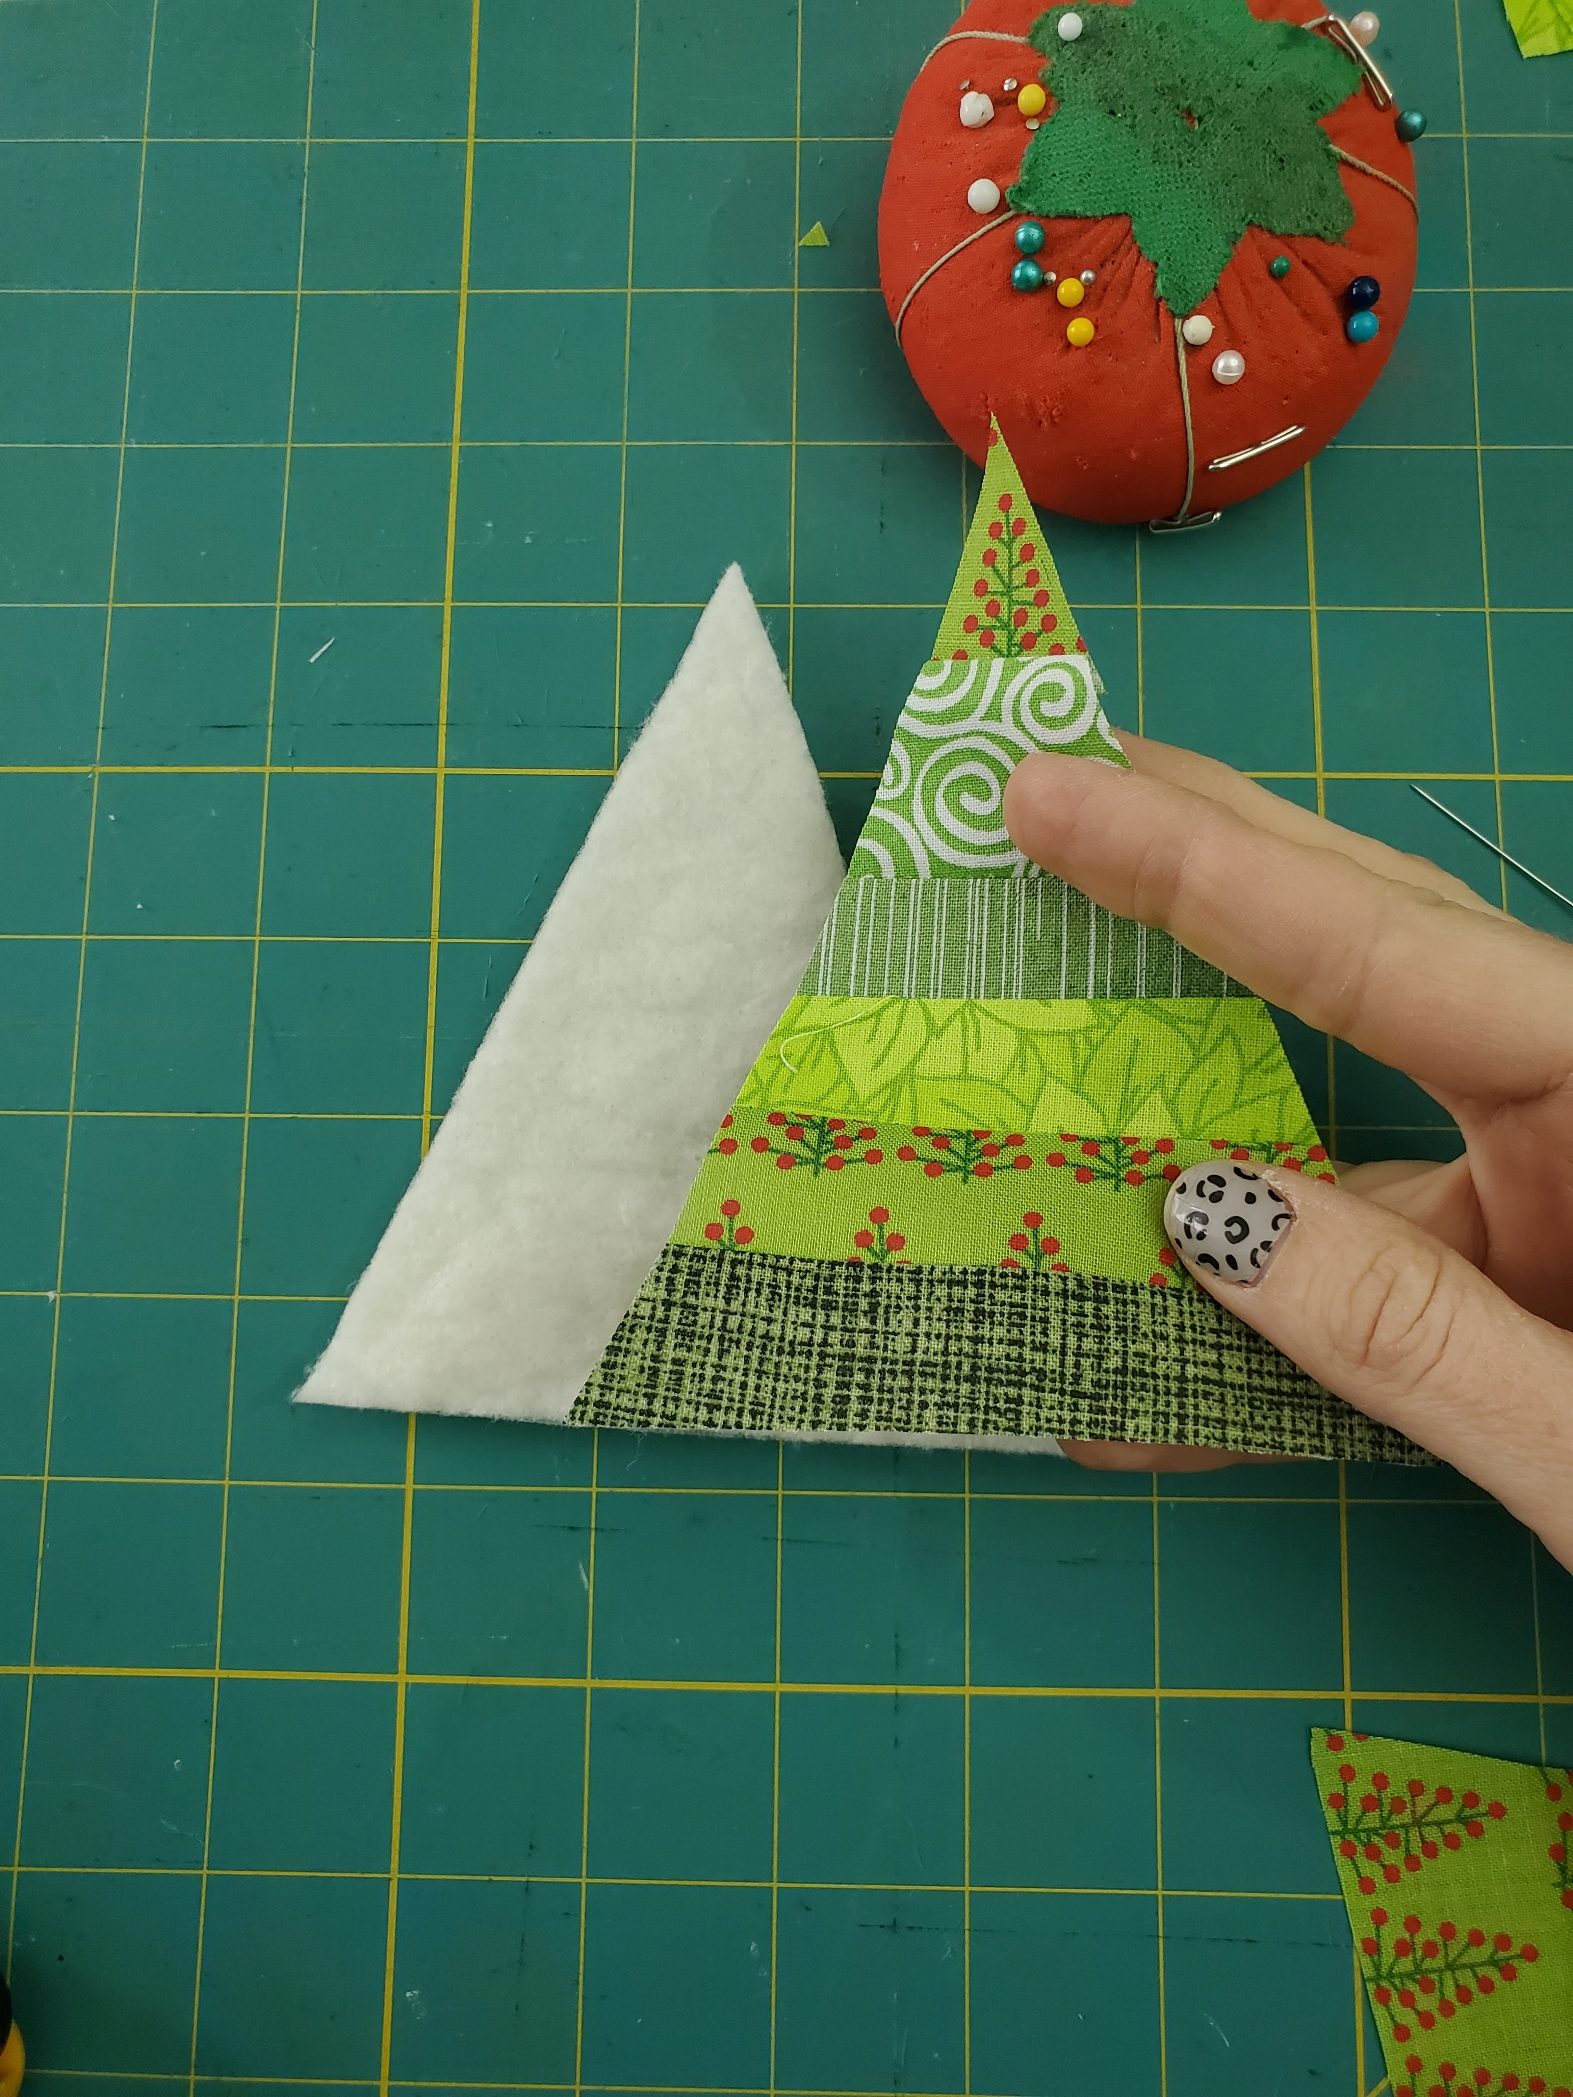
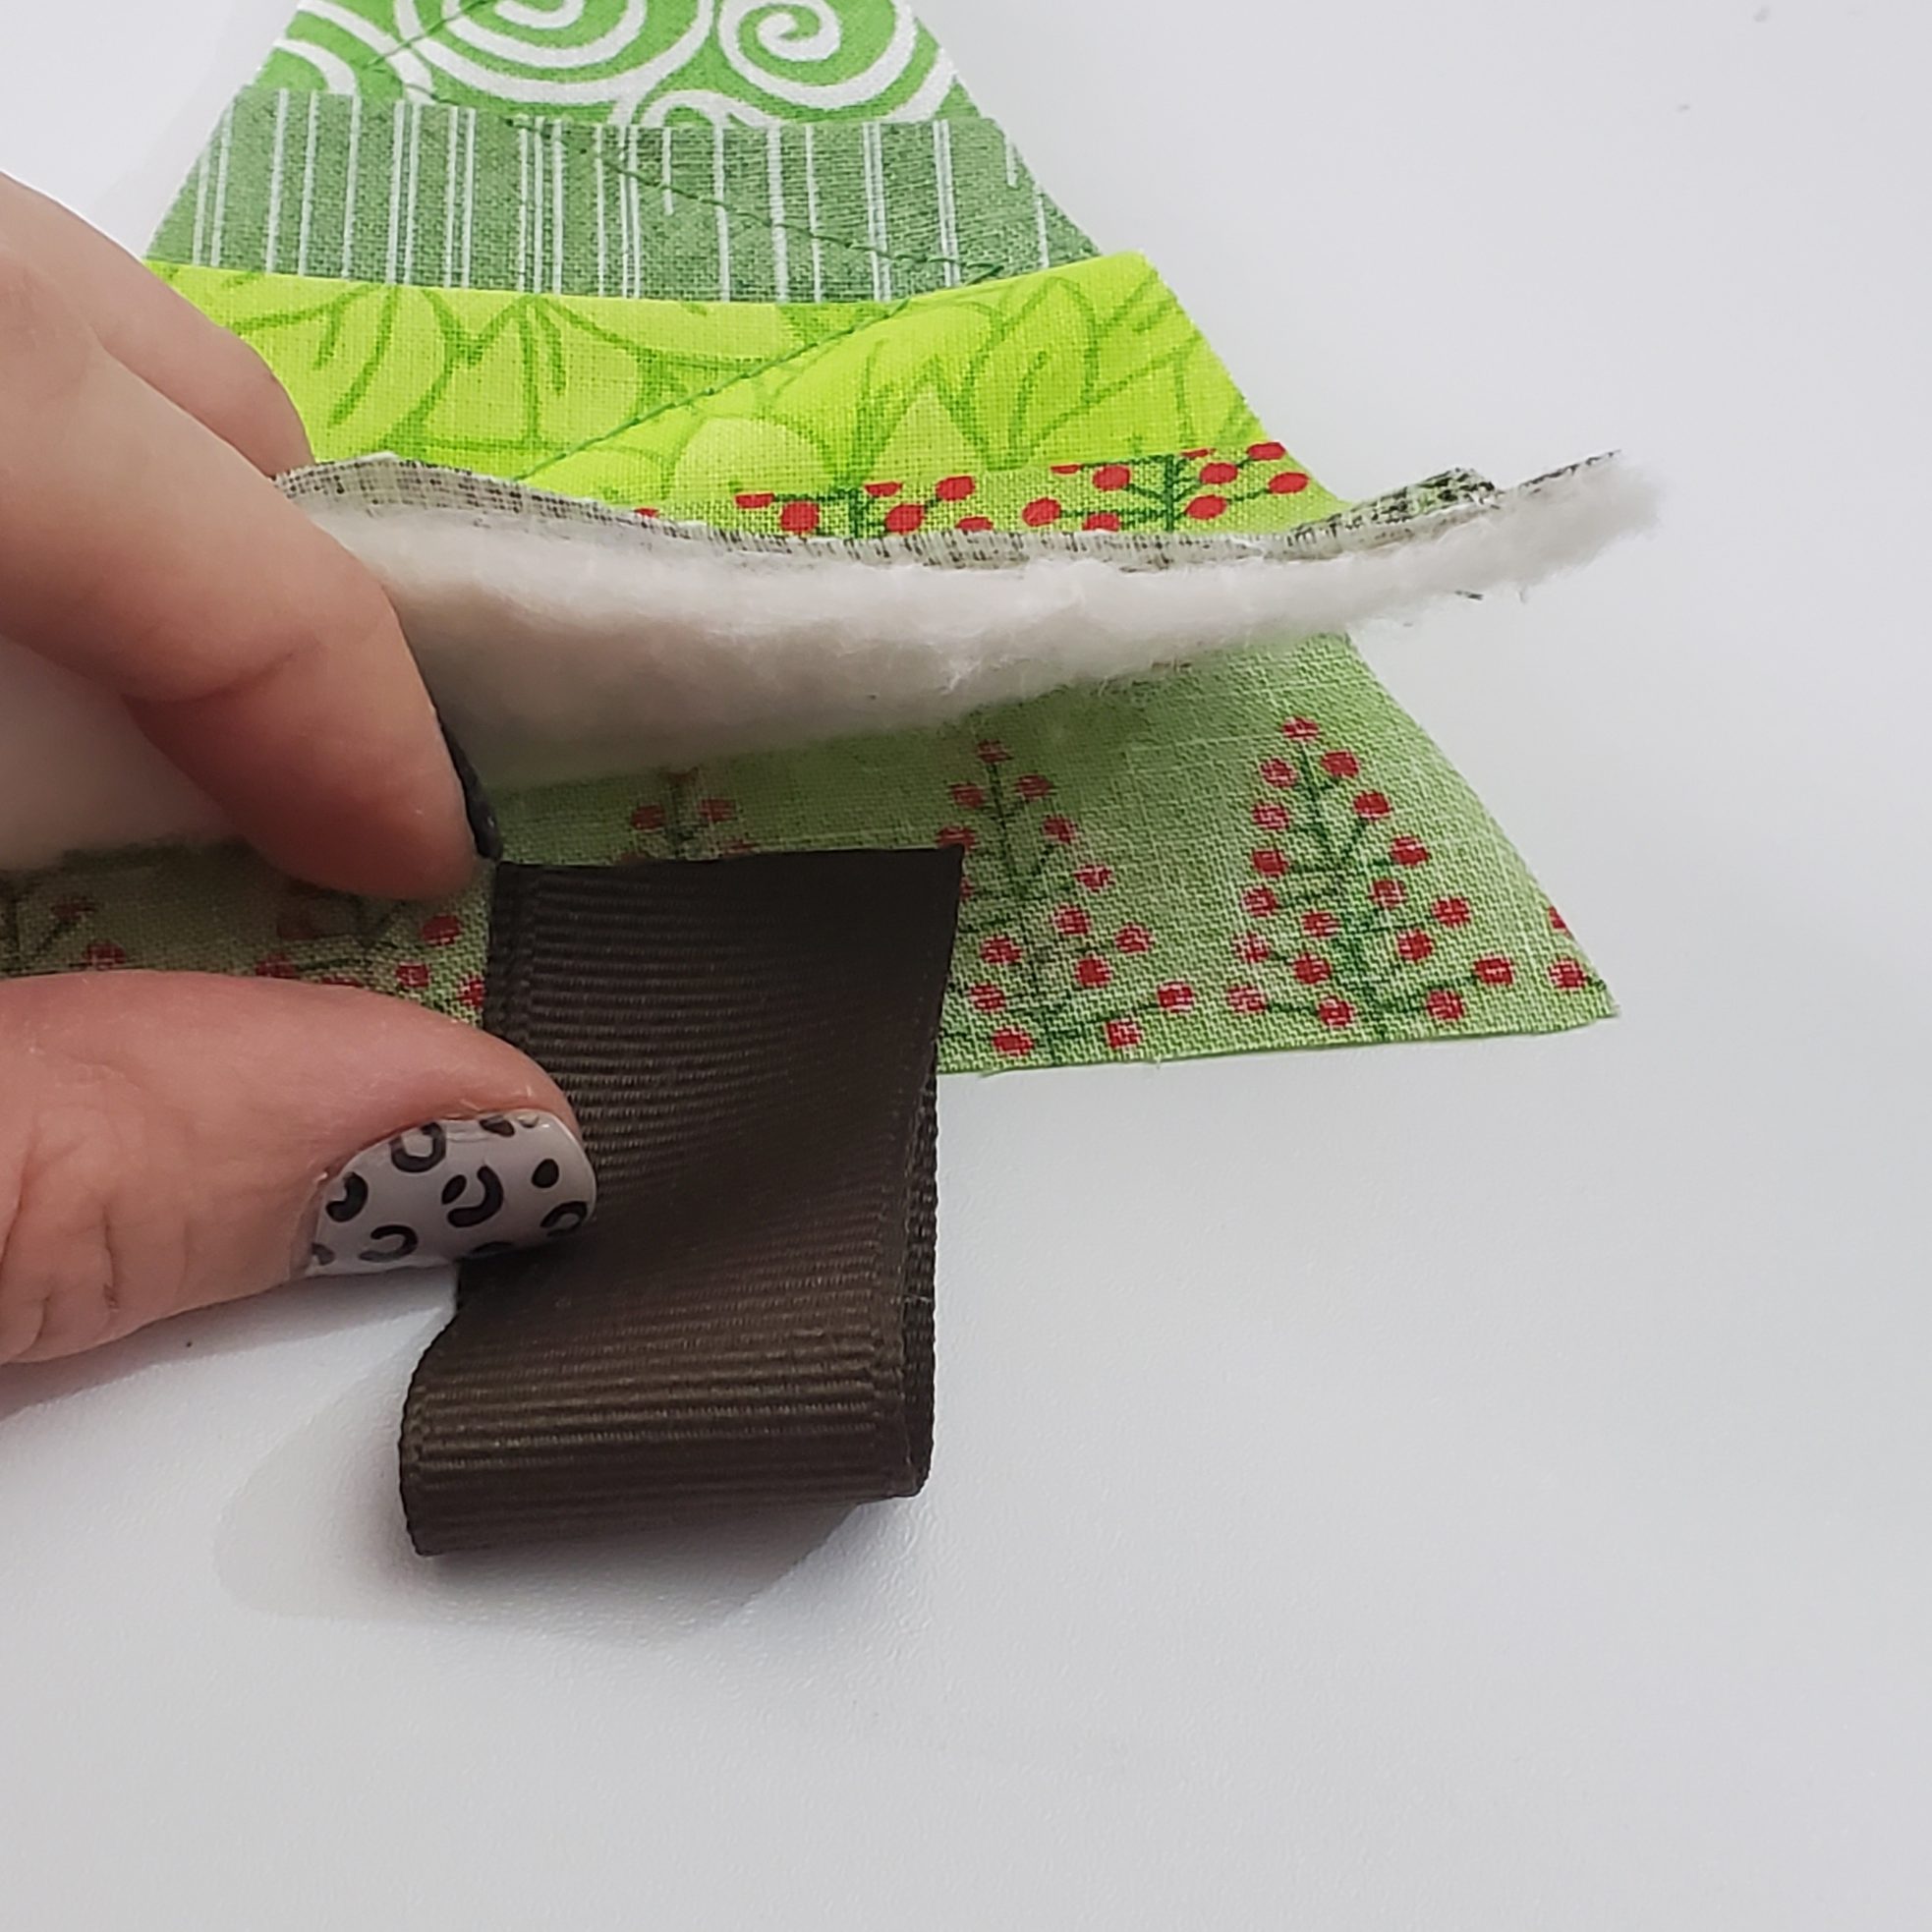
You also need to cut out a backside for your ornament and a batting piece (this is what makes your ornament quilted!) The backside will be a solid block of fabric, not strips. Unless you want to make it strips. You are the designer!
For batting, you can use your traditional batting or whatever thick leftover scraps you have. I like to use this batting here.
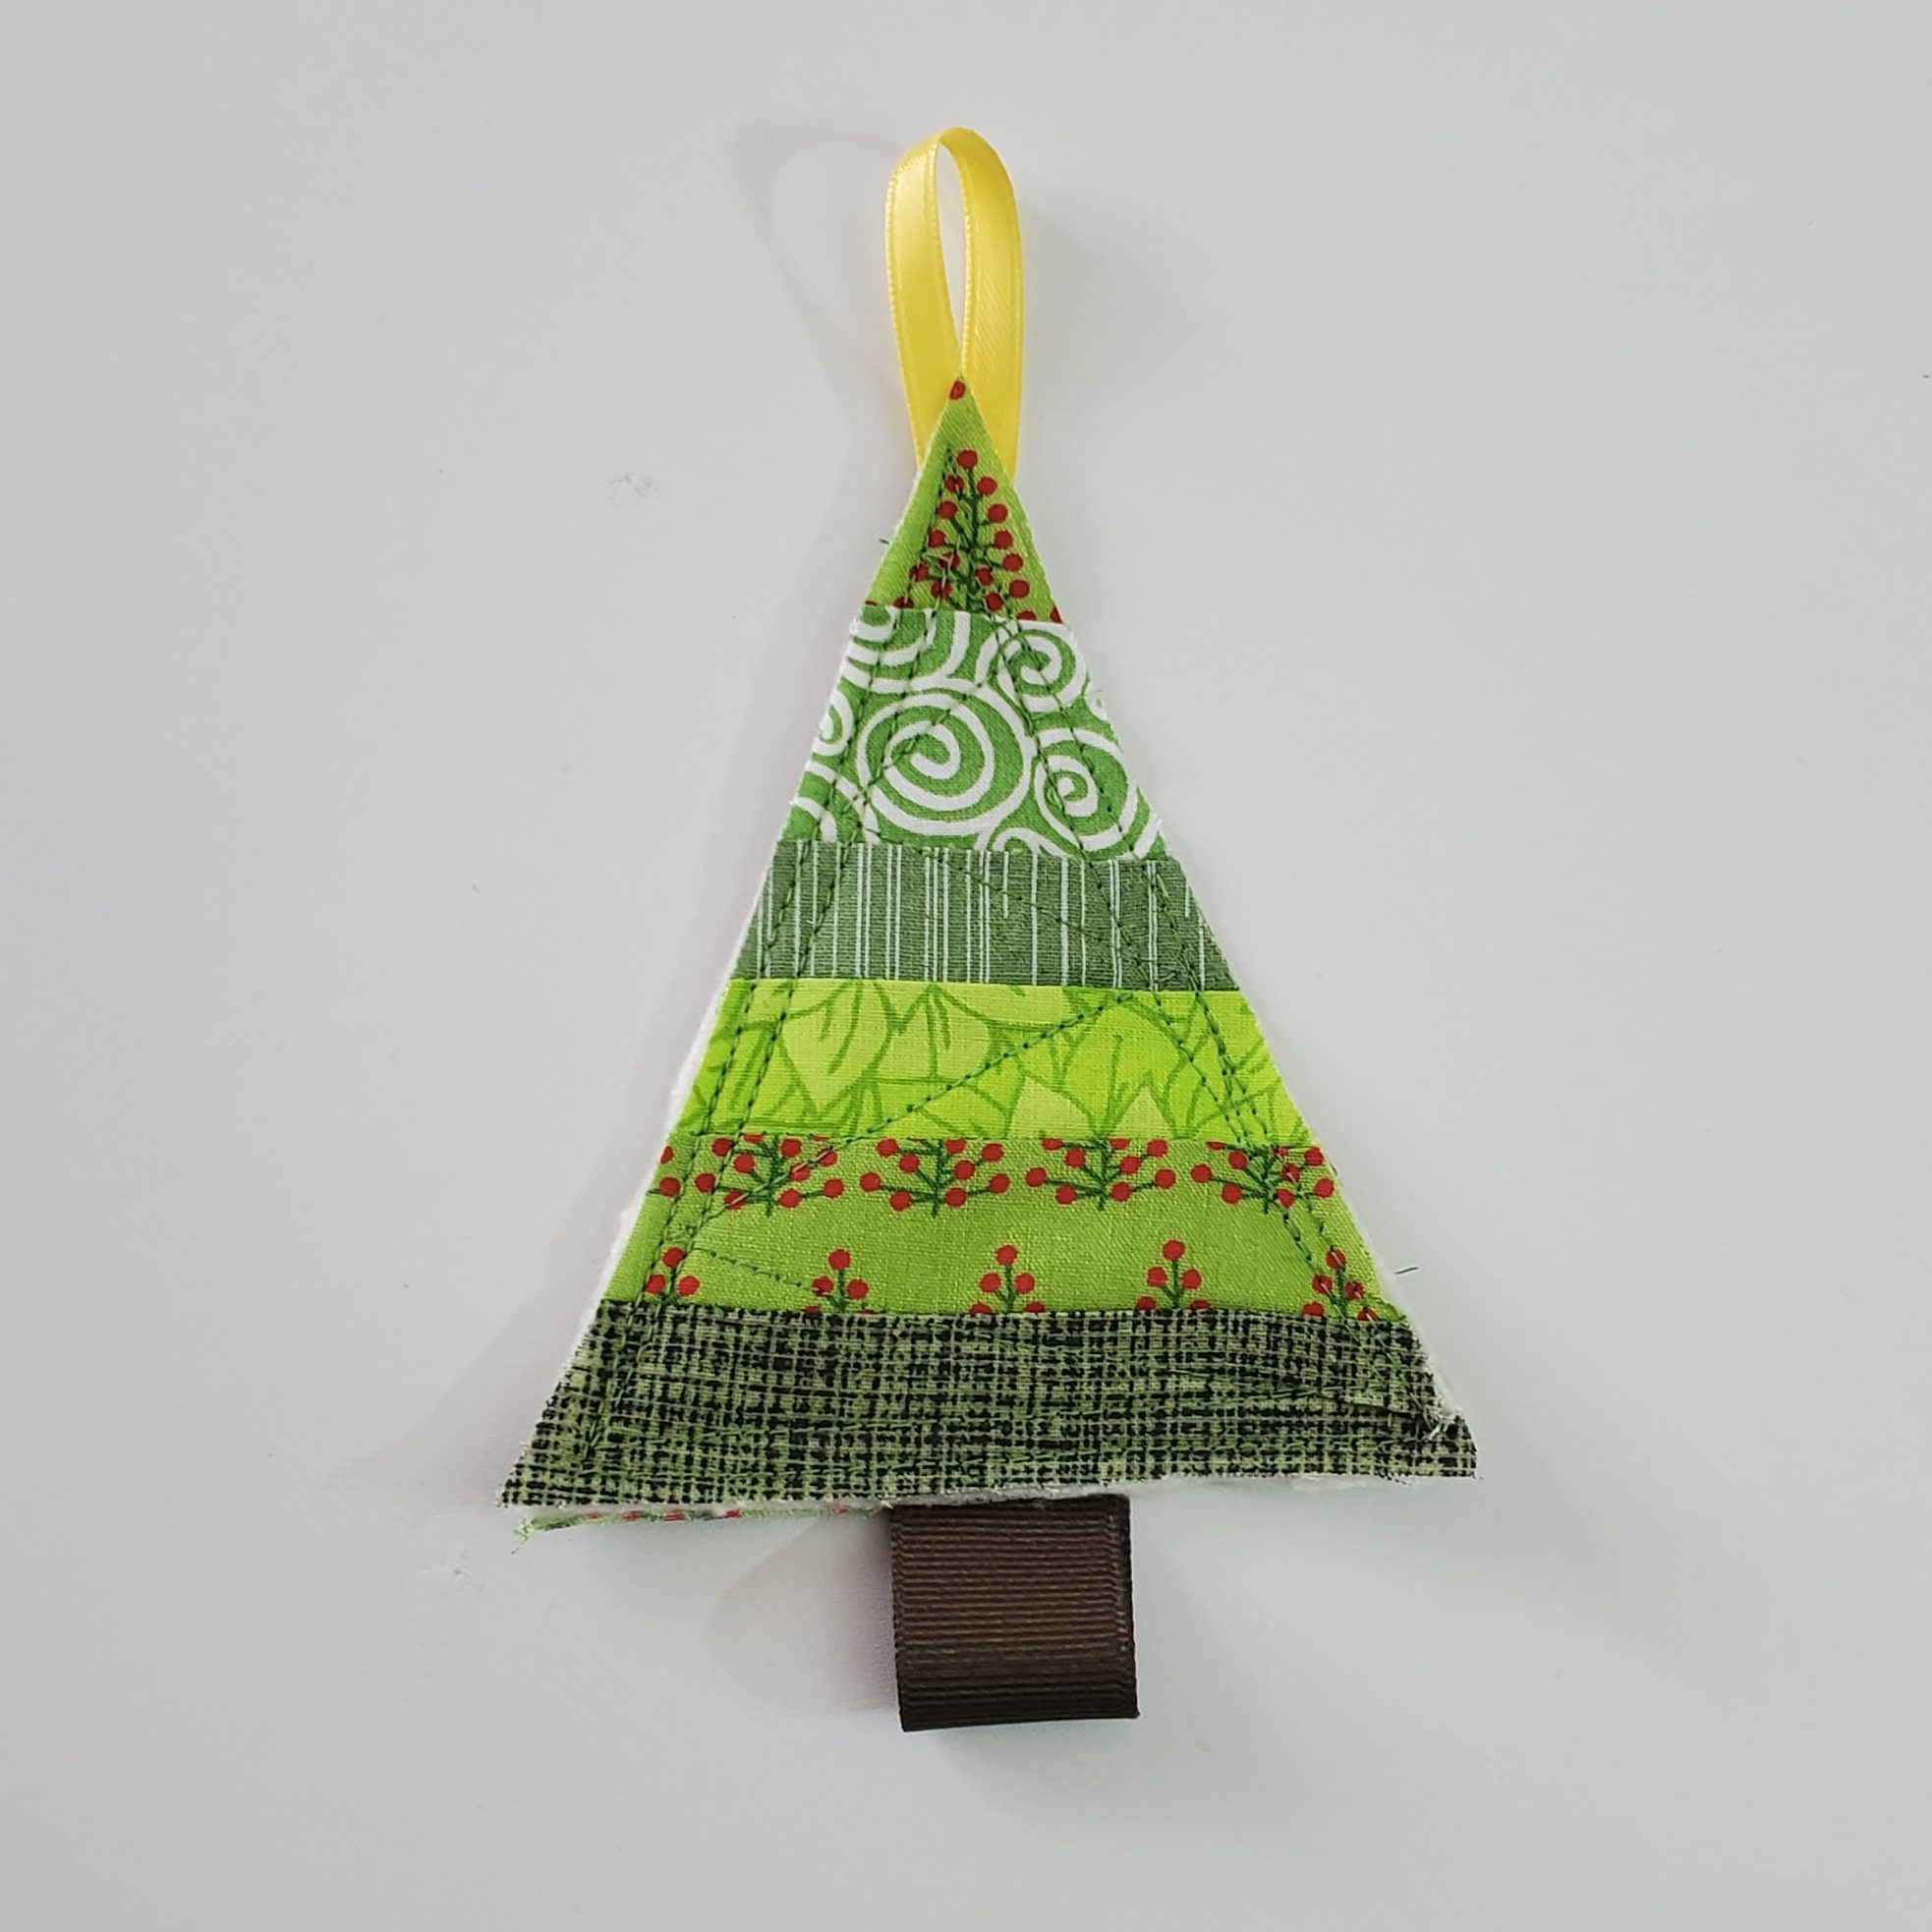
Put your back side piece aside for now and place your scrappy piece on top of your batting piece. This is the step where you will quilt the two pieces together. Place a few pins to hold the top and batting together and then sew some quilting lines on top of your scrappy piece. There’s no right or wrong way to do this. You can stitch-in-the-ditch (which means stitch right inside those seam lines that you created when sewing your scraps together), or you could stitch right next to it, or stitch randomly. I chose to stitch in a sort of zigzag pattern, as you can see in the picture.
Cut small pieces of ribbon for the tops of your ornaments (either for hanging or to put an ornament hook through). There’s no set measurement, just do what looks good. You can see the picture at the bottom of my page for the different ornament variations (and ribbons), but for the tree I used a thick, 1″ wide, brown ribbon, cut at about 5″ and folded in half. I used a yellow ribbon at the top and that one is about 6″-7″ long.
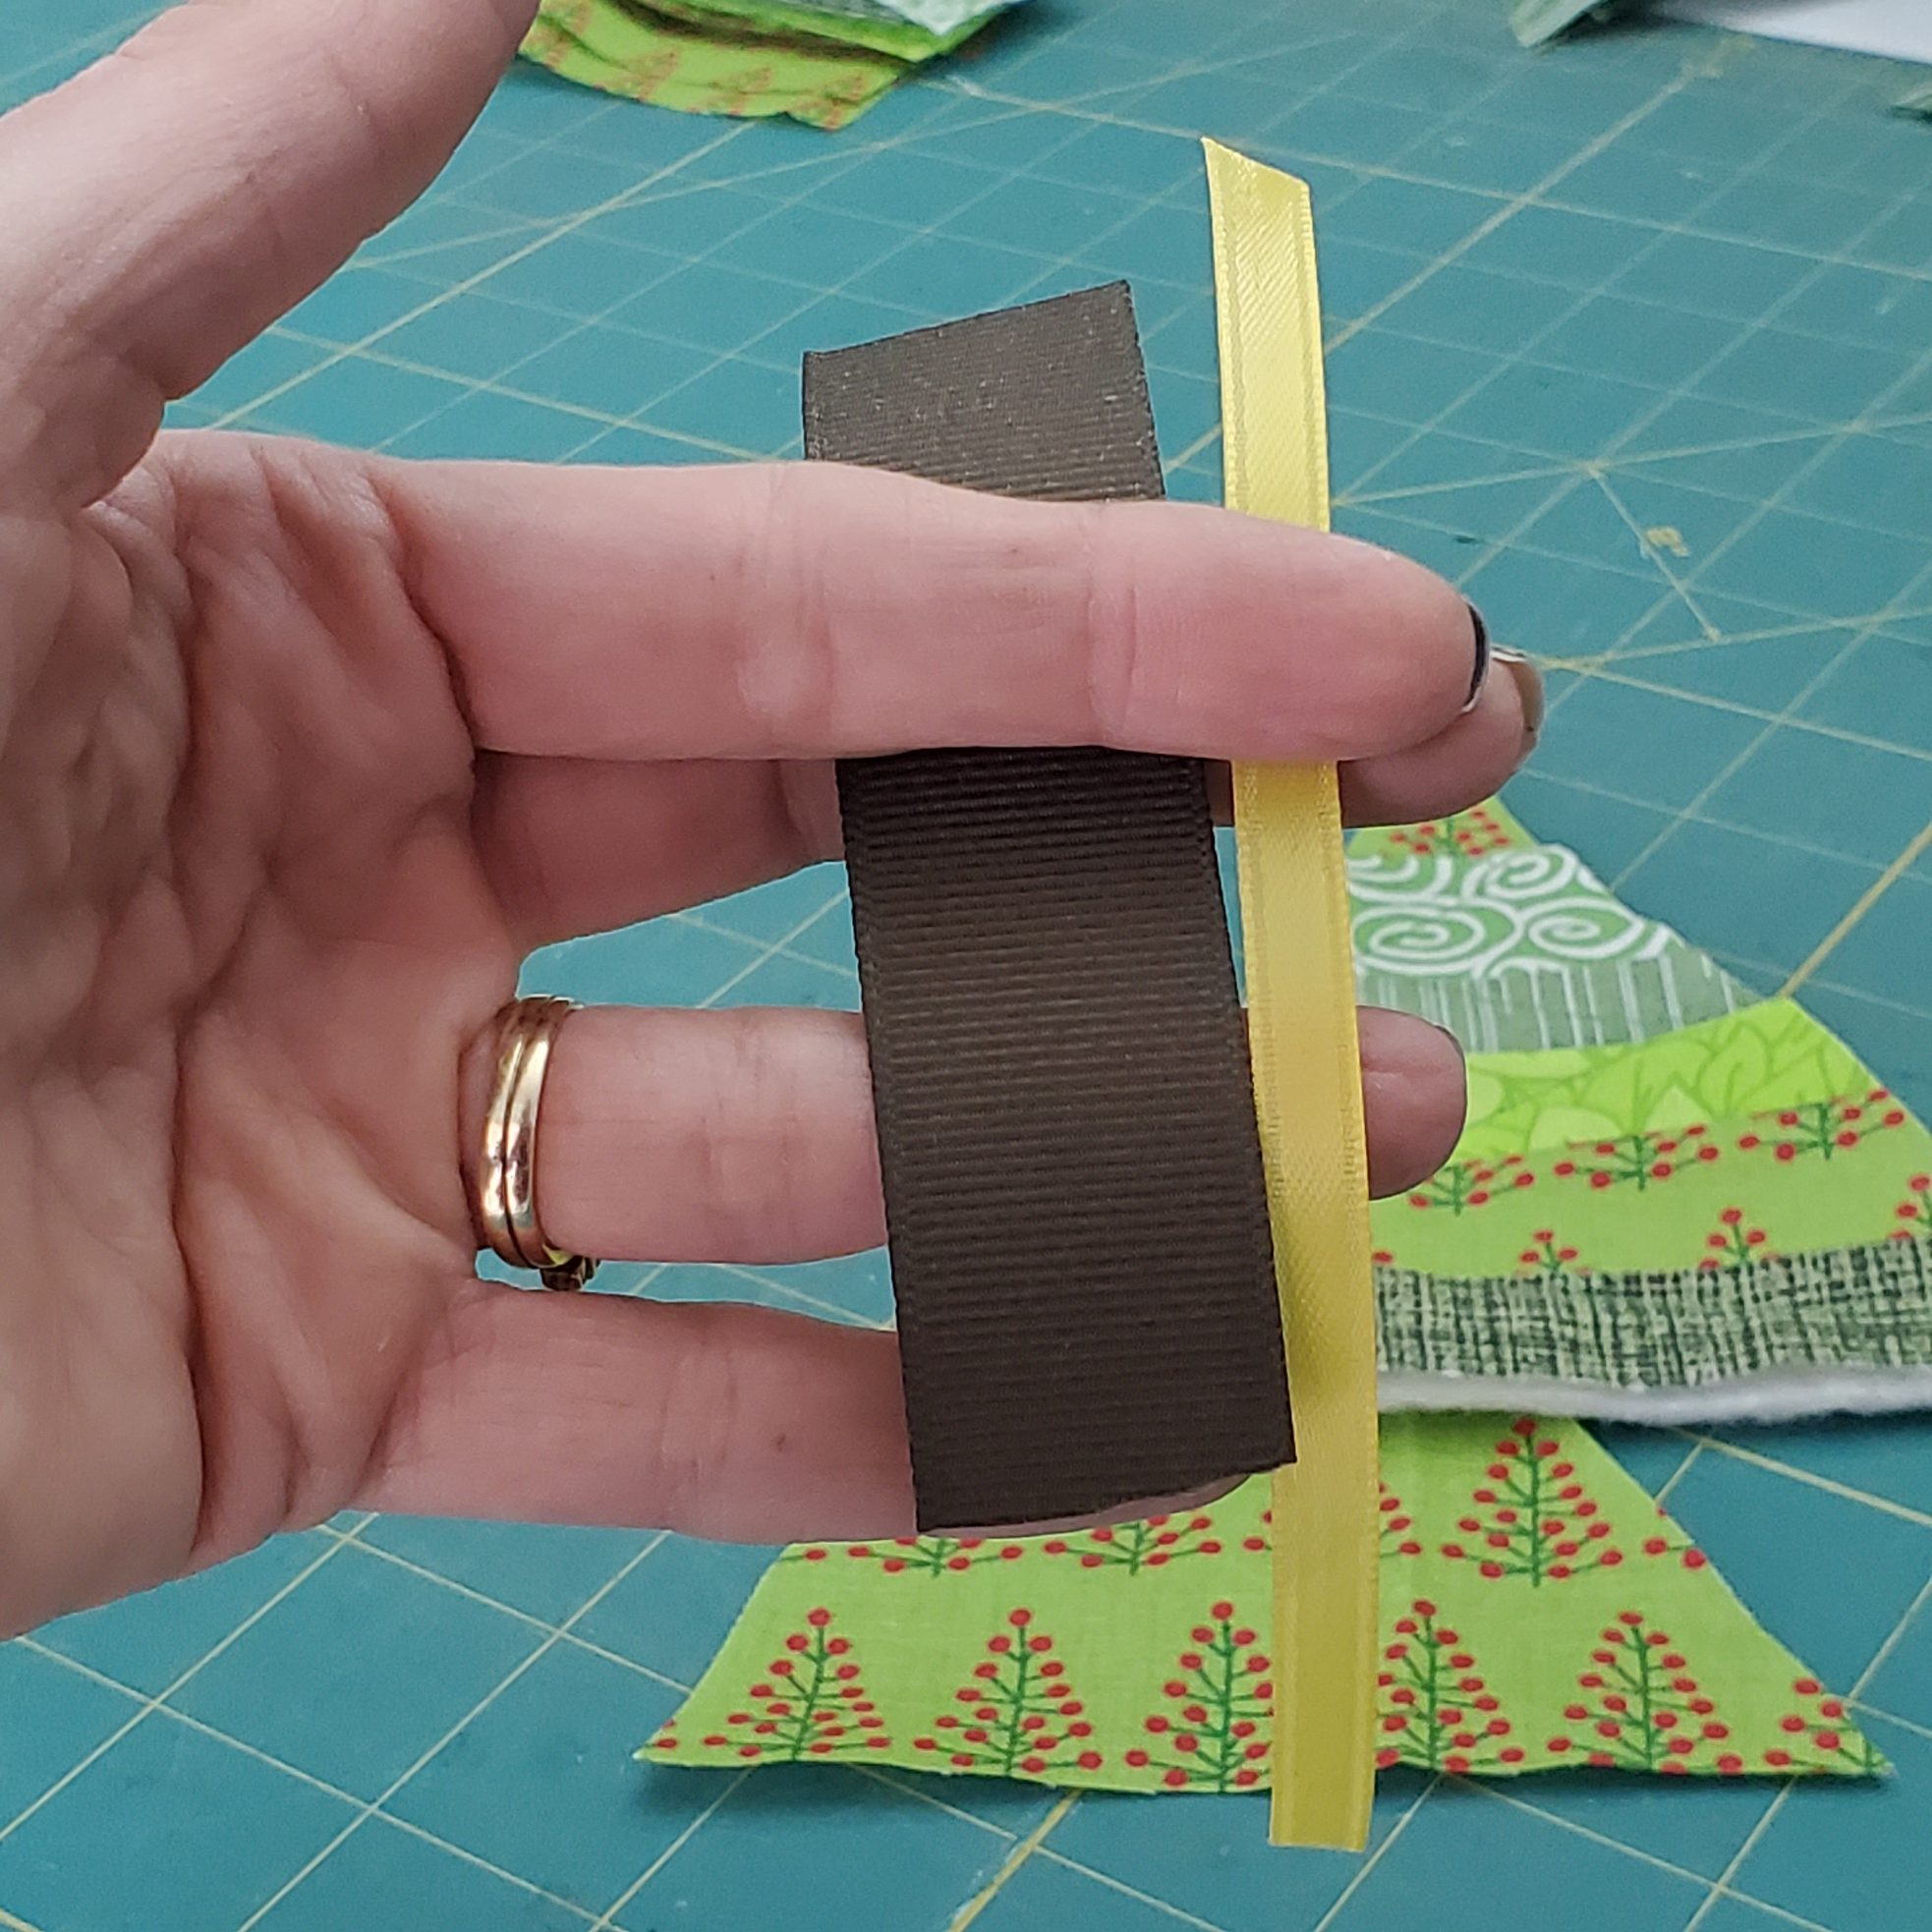
Lay down your backside piece of fabric, right side down. Then put the quilted piece on top and sandwich your folded piece of ribbon in between the 2 pieces in the place you want it to be (tree stump at the bottom, hanging ribbon on top). Make sure that the raw edges of the ribbon are sandwiched inside at least 3/4″ -1″ to make sure it gets sewn in. Pin the ribbon pieces in place.
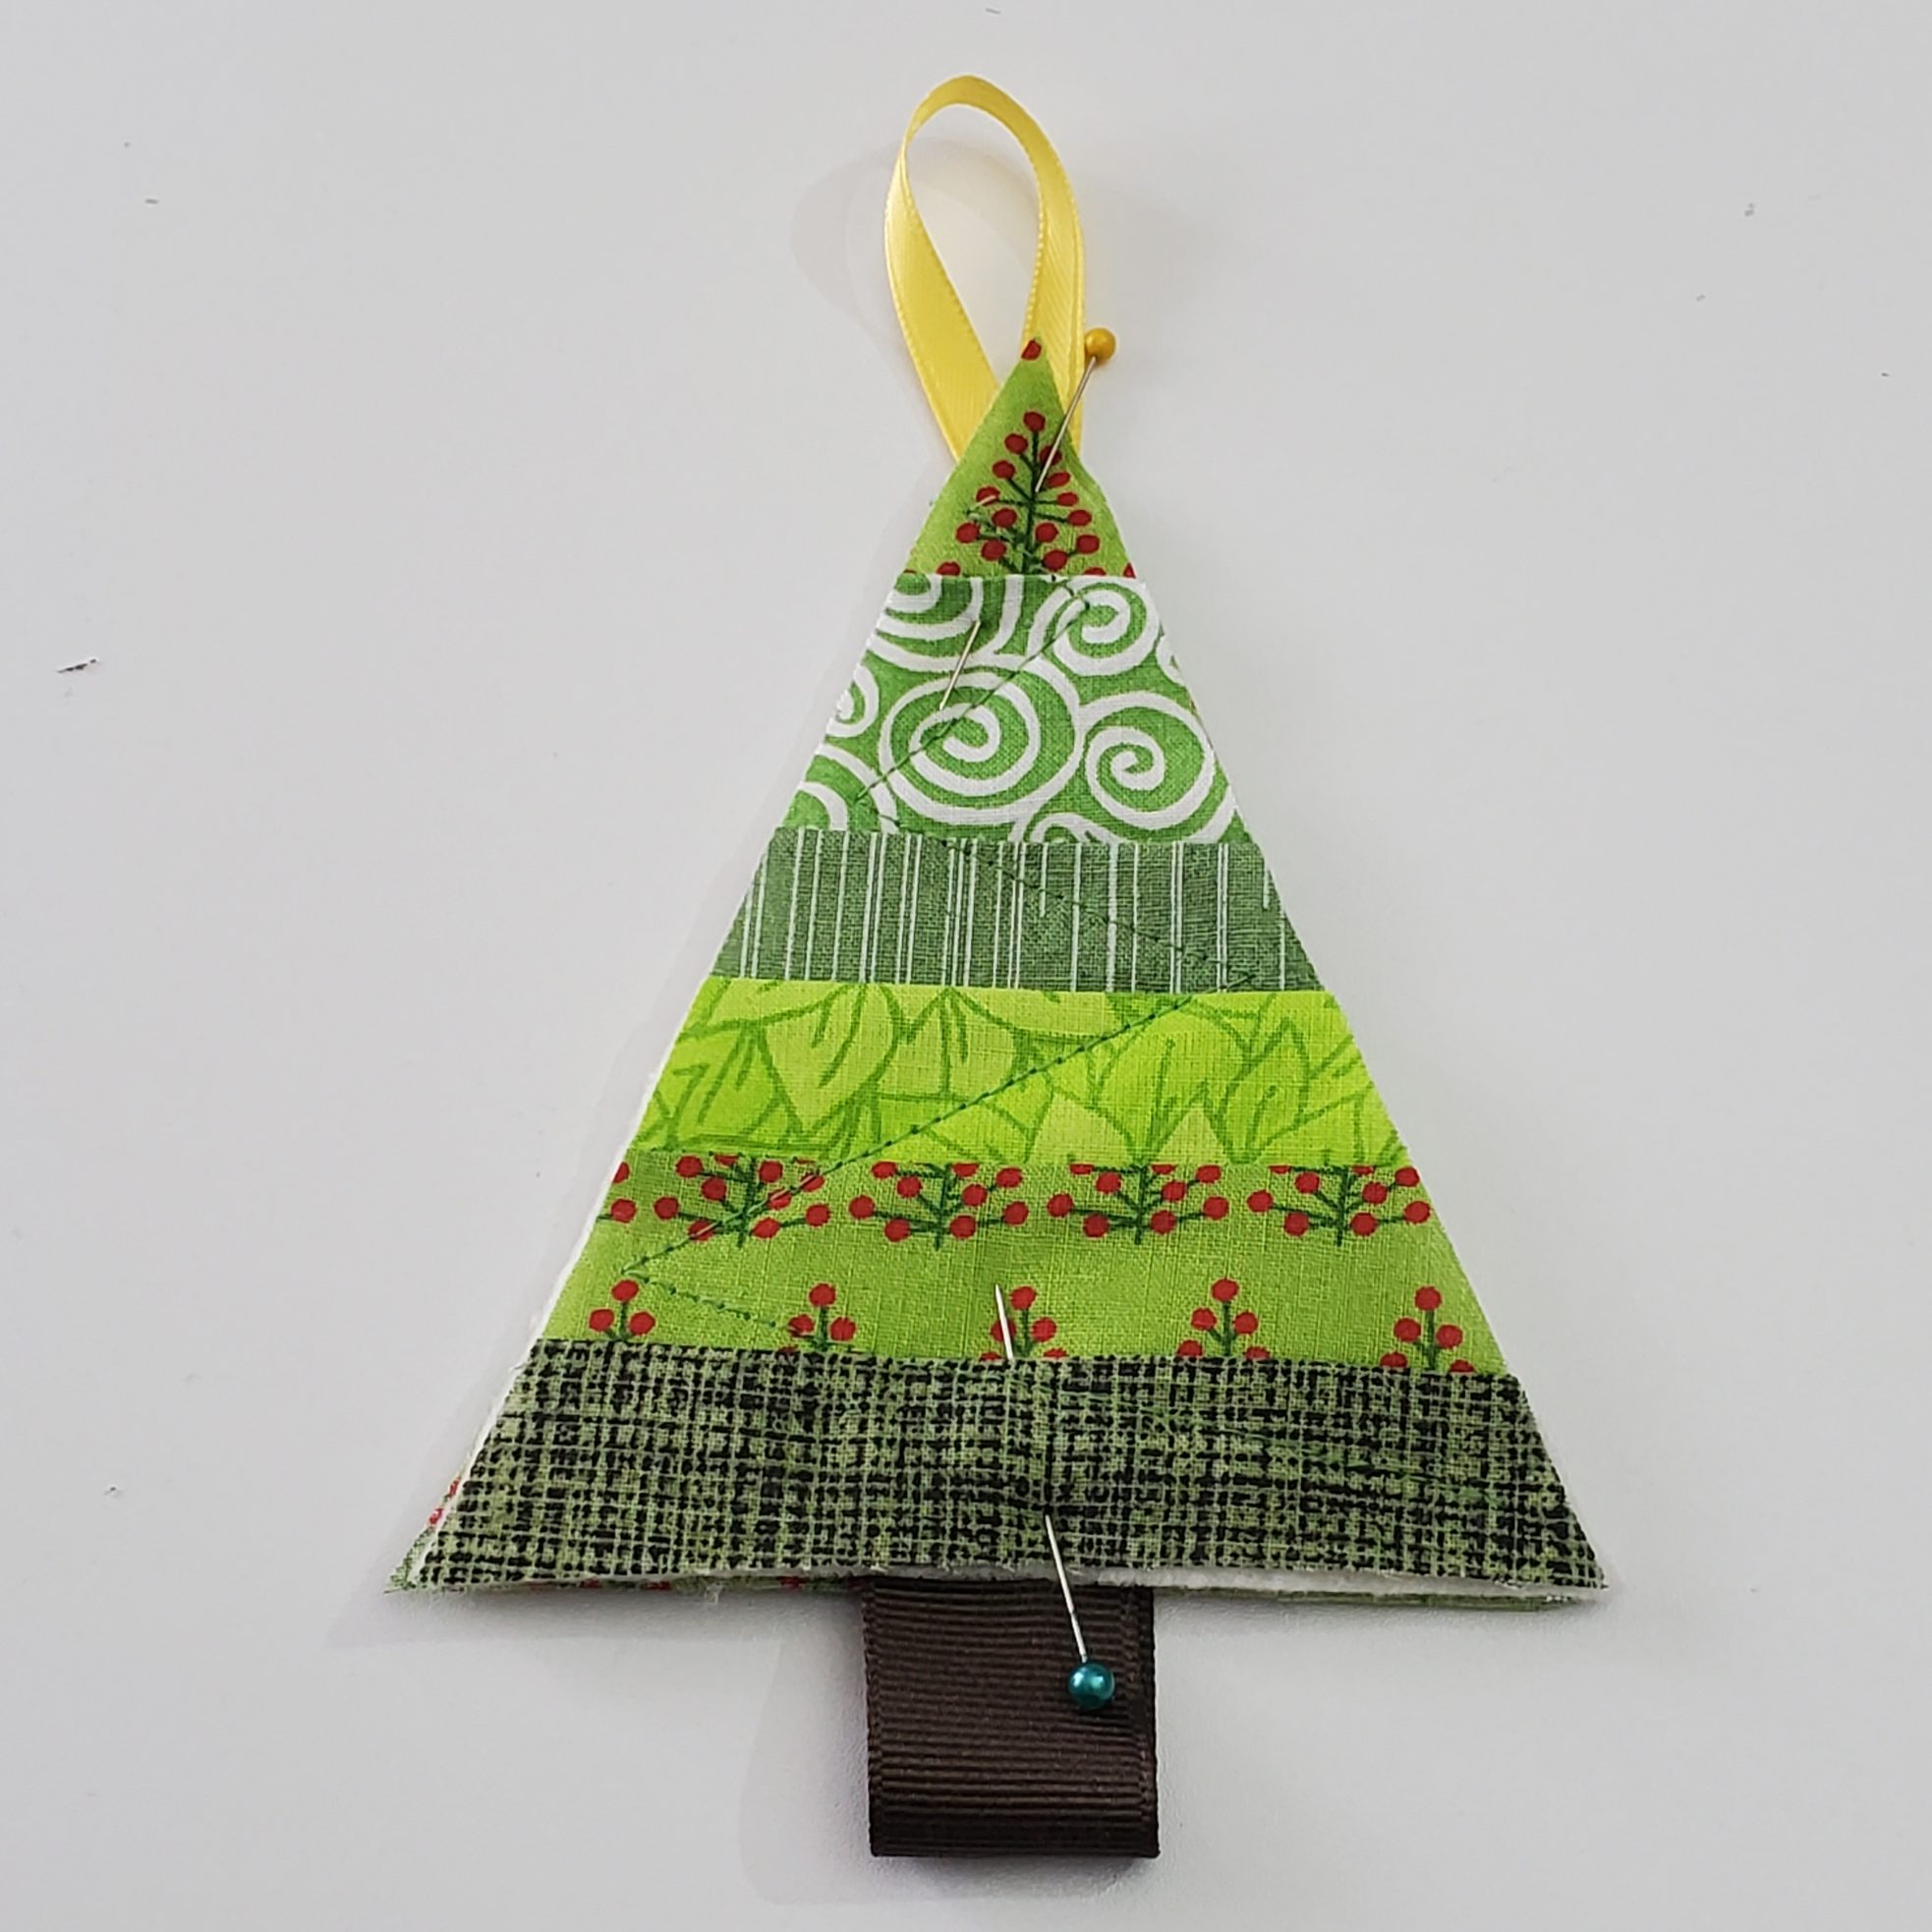
Now you will sew the front and back pieces together, with your ribbons tucked inside, by sewing around the entire perimeter of the ornament. I sewed mine around twice for extra strength, and also because I like how it looks! I used a 1/4″ seam allowance for the first stitch line and 3/8″ for the second.

Trim any excess batting, if you want.
And that’s it! That’s all there is to it!
Don’t be afraid to play around with different fabric colors; it doesn’t have to be only Christmas colors and fabrics! Use whatever scraps you have! I will update this post after Christmas with more pictures of ornaments I’ve made (which are gifts…I don’t want to spoil the surprise by posting it here too soon 😉 ).
Speaking of gifts, these make great gifts!! Most of my students were excited to be sewing these scrappy ornaments as Christmas gifts for their family members. Who doesn’t like homemade gifts?!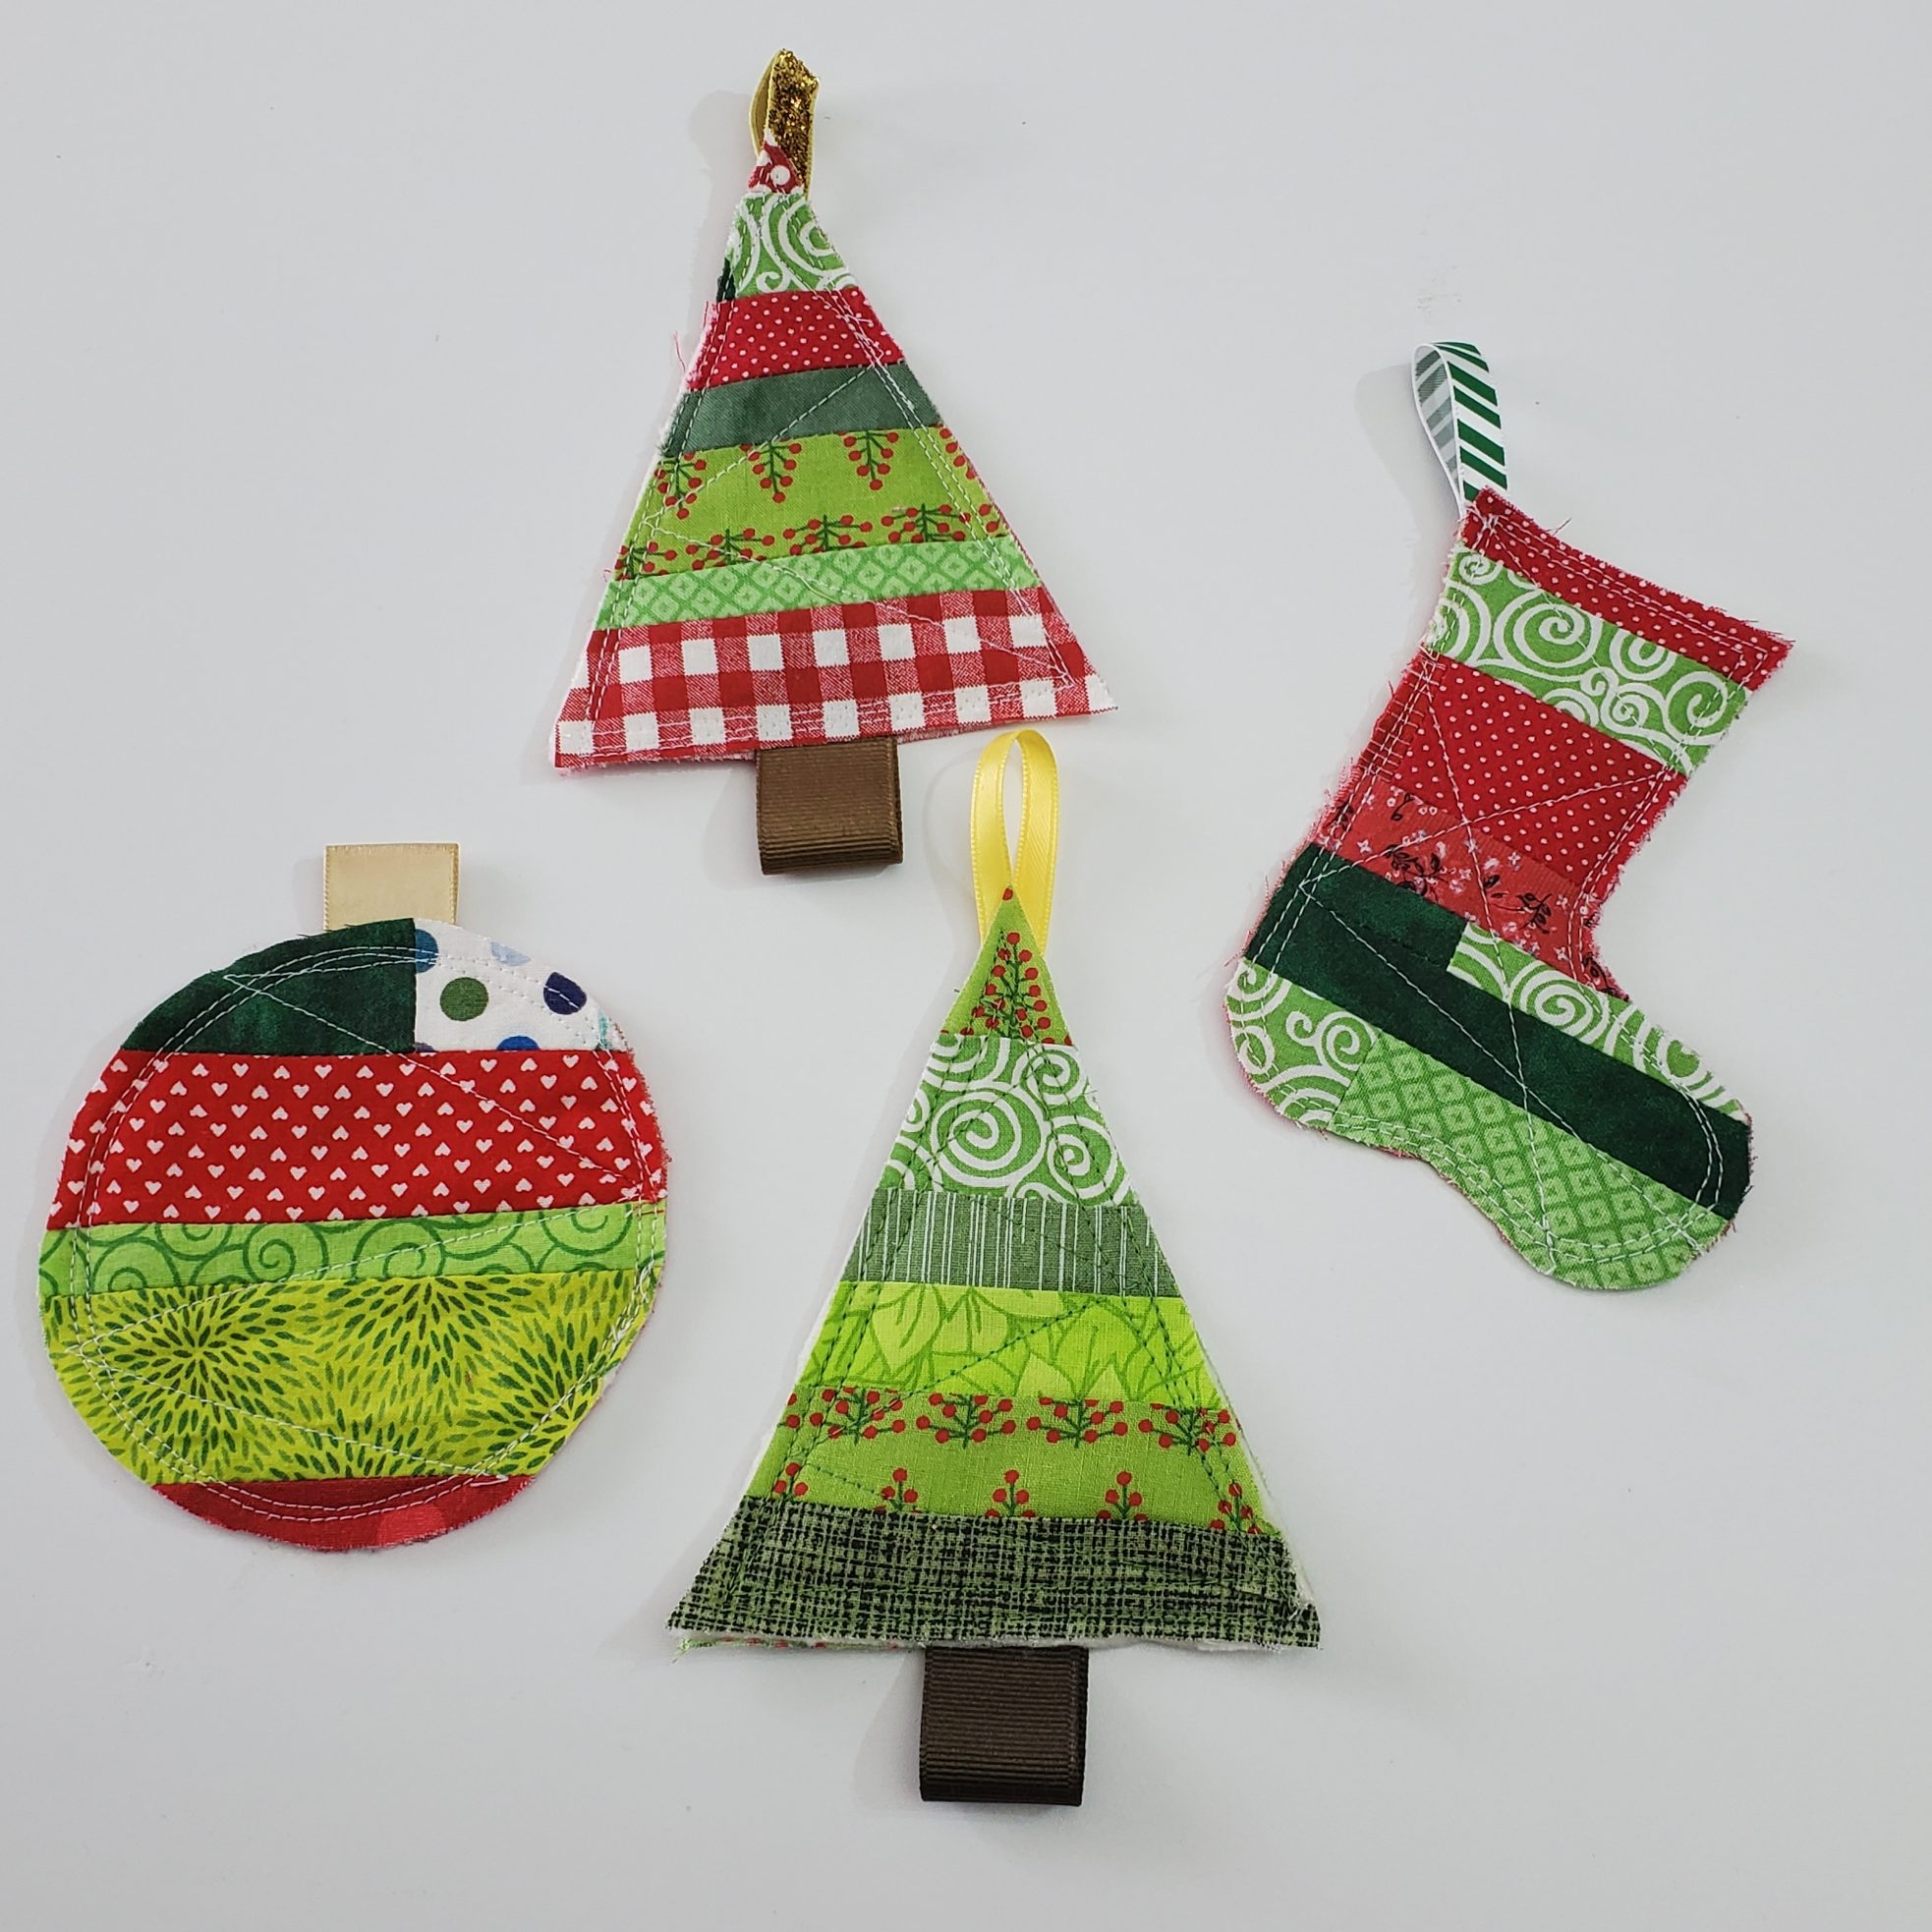
Let me know in the comments if you liked this tutorial!
