
Today I wanted to share important and useful information about how to prepare your fabric and grainline for cutting!
You might think that it’s as easy as laying your pattern pieces on a piece of fabric and start cutting. However, to get accurate results on your finished project, there’s a little more you need to do with your fabric before you are ready to start cutting. Let’s take a closer look as I walk you through, step-by-step, on how to properly prepare your fabric and grainline before cutting into your fabric!
Purchasing Fabric
When purchasing fabric, I always get ¼” more than what I need. That is because you are going to lose inches off your fabric after you pre-wash and prepare your grainline, which we are about to discuss below.
Selvage Edges
The selvage edges are the sides of the fabric that are already finished. You might notice that some selvages are white and may contain writing/descriptions about the fabric on it, while other selvage edges match the print of the fabric. Either way, those selvage edges won’t fray in the wash; they are more tightly woven together than the rest of the fabric and are held on the edges of the machines while the fabric is being made. This is important information to hold on to until later on in this post.
Pre-Wash Your Fabrics
You should always pre-wash and dry your fabric! (Unless it is a dry clean only fabric). On the end of the fabric bolt, you will always find directions on how to wash your fabric, given the fiber content that your fabric is made up of. It’s a good idea to take a picture of those instructions on the bolt any time you purchase fabric so that you remember how to care for it. There are a couple of reasons why you should pre-wash and dry your fabric:
- It shrinks your fabric! You always want to shrink your fabric before you cut out your patterns and sew something up. Imagine making a perfectly tailored dress, only to have it shrink once you wash it! If you skip this step, your project will not be the size you want it to be after washing and drying it!
- It washes out the chemicals used in the fabric-making process and leaves your fabric feeling softer and nicer.
Straightening Your Grainline
Many sewing teachers don’t teach you how to prepare your fabric. I’m not sure why, as it’s really important to straighten out your grainline and get all pieces of fabric “on grain” before you cut out any patterns. This was something that was reinforced over and over while I was in fashion school!
But what is a grain line and what does “on grain” mean?
Grain line is the weave/direction of the fabric. There are 3 directions of fabric: lengthwise (also called straight), crosswise and bias (diagonal). Have you ever seen fabric being woven on a loom? That’s exactly the way woven fabrics are made. Imagine a giant loom where fibers (threads) are woven together in a crosswise and lengthwise pattern. This gives your fabric a crosswise and lengthwise direction. In textile language, the crosswise threads are referred to as “weft” and the lengthwise threads are referred to as “warp”. The bias is the diagonal direction of the fabric (think from corner to the opposite corner). The bias direction is used when you want a garment that is drapey. Generally, you want to cut out fabric on the lengthwise grain of the fabric.
Often times, after the fabric is made, processed and wrapped onto fabric bolts, the threads get twisted out of place, which distorts the grainline. Consequently, when fabric is cut in the fabric stores, it’s not cut on a straight line. You might think it’s straight, but in reality, the threads have been manipulated. It’s hard to see with the naked eye, but if you look under a microscope (or maybe even a magnifying glass) you will see the weave of the fabric and how the threads get twisted. It sounds strange, but the only way to get a straight cut on a block of fabric is to rip along the crosswise grainline.
Here’s how you do it:
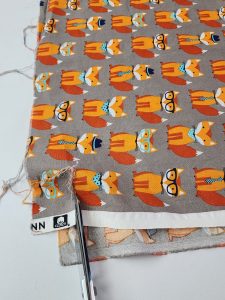
Start by cutting across your selvage on the top of your fabric, a couple inches down from the top. This means that you are cutting perpendicular with the selvage edge. You aren’t ripping off your selvages; you are ripping across the top. Take a small cut in, and then rip your fabric all the way across the top.
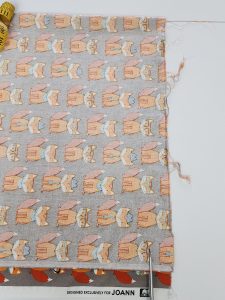
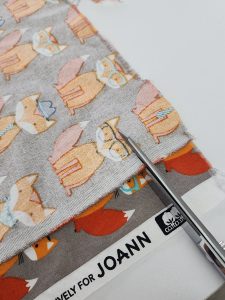
Repeat on the bottom of your fabric.
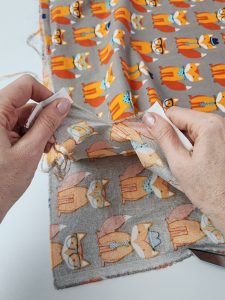
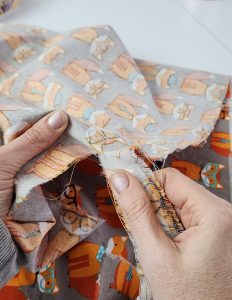
When you rip your fabric, you are basically “cutting” along the same crosswise grain all the way across. You can’t accomplish that by cutting with scissors; it’s impossible because the fibers are too tightly woven. Ripping it is the only guarantee to get that fabric edge cut along one, straight thread.
You can see, based on the amount of fabric that is ripped off, how unevenly your fabric was cut.
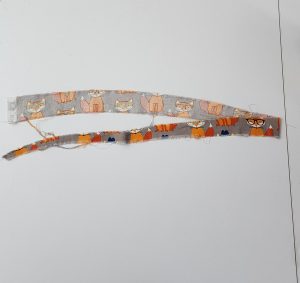
Once the top and bottom are ripped evenly, you want to straighten the threads in your fabric. Remember, they are still likely twisted; cutting didn’t fix the twisted threads.
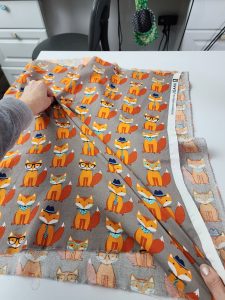
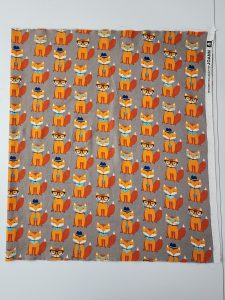
Fold your fabric in half, matching the top corners evenly together. When you hold (or lay) the fabric from top corner and top fold, the selvage edges should lay perfectly on top of each other. Chances are, they won’t.
The way to fix and straighten the grain is by grabbing the shorter end, and pulling it on the bias (diagonally). So, from the short end corner to the opposite corner, stretch your fabric. Then, line it back up again (corner to fold) and see if the selvages lay evenly on top of each other. If it still doesn’t match, you’ll pull/stretch a little more, until it does match up. Once your top and bottom edges are even, along with the selvages, you should be able to smooth your fabric from selvage end over to the fold with no twisting on the fold. The fold should be perfectly even as well.
And THAT is how you prepare your fabric and grainline for cutting!
Laying Out and Cutting Patterns
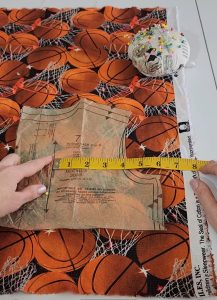
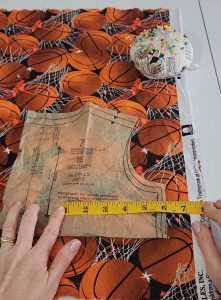
Every pattern piece has a grainline drawn onto it. This is to ensure that whatever you are making hangs and fits properly. Generally, patterns will use the lengthwise grain but occasionally patterns will have you place your pieces on the crosswise grain or on the bias. Laying out your pattern pieces is simple: lay the pattern piece out so that the grainline drawn on the pattern is parallel with the selvage edges. If a pattern is asking for you to lay it on a crosswise grain, you place the pattern so that the grainline is parallel with the crosswise edge. Make sense?
It’s not good enough to eyeball your grainline that is drawn on the pattern. You need to measure to make sure that it is perfectly parallel to the selvage. To do this, place your pattern piece on your fabric. You will want the top of your grainline arrow to be equidistant from the selvage edge as well as the bottom of your grainline arrow. For example, if the bottom of your grainline arrow is 8” from the selvage edge, you will move the top part of the fabric to also be 8” away from the selvage edge. Now the arrow is perfectly parallel to the selvage edge and your pattern piece is “on grain”.
Once all of your pattern pieces are laid out and pinned, are ready to cut out your project!
If you are struggling to understand by picture and words alone, I created a step-by-step video going over everything I just explained, with a live demonstration of how to prepare your fabric.
How did you do? Did you already know how to get your fabric on grain, or did you learn something new? Let me know in the comments!
*Sassy Cassy’s is part of the Amazon Affiliate Program, which means that if you purchase Amazon items from this website, a small commission will be earned, at no extra cost to you.

Thank you so much Sassy Cassy Sews! I am very new to sewing but I thought there might be some importance to how a pattern is laid out across fabric. I truly appreciate your in-depth explanation! It helped me understand the importance of preparing fabric to be on grain. I appreciate your generosity in sharing this information free of charge!
You’re welcome! I’m glad you found this helpful! 🙂