
One of the very first projects I like to sew with students in my private classes/lessons is a pillowcase. Sewing a pillowcase is the perfect project for beginning sewists! It requires only three straight stitches and also teaches a simple, clean hem along the top.
I’ve been sewing pillowcases in my classes for years, but I’ve never taken the time to make a tutorial. My students keep asking, and I keep procrastinating. I finally took pictures of the steps while one of my students sewed herself a pillowcase in private lessons, but then I decided to scrap that one because she is a little more advanced and sewed French seams. I wanted to keep this tutorial simple.
It’s not that it takes long to sew a pillowcase; I can whip one up in half an hour. But the process to get there takes time. I decided that this week is the week to catch up on all of the tutorials I’ve been promising and not delivering! Stay tuned for more tutorials coming your way.
There are really only 4 steps to making a pillowcase:
- Cut your fabric
- Stitch the yoke (top) to the main pillowcase
- Stitch the side and bottom of the pillowcase
- Hem the top
Pretty easy-peasy, am I right?
Let’s Get Started!
Supply List:
- 5/8 yard of woven cotton fabric (like Quilter’s cotton)
- ¼ yard of a contrasting print cotton fabric
- Thread
- Scissors
**Make sure to prewash all fabrics before cutting into them!**
First, let’s prepare our fabric. You can read all about how to prepare fabric on my post about fabric grain and fabric preparation HERE.
If you opt not to prepare your fabric in that manner, you can simply cut your fabric at the measurements you want for your pillowcase (we’ll talk more about that in a minute). Preparing your fabric how I suggest in the tutorial mentioned above will ensure that your pillowcase is cut on grain. It’s also a lot easier (and much more accurate) to rip the fabric, so take a quick minute and check out that tutorial HERE.
Cutting Your Fabric
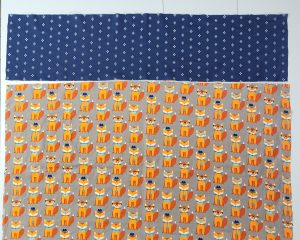
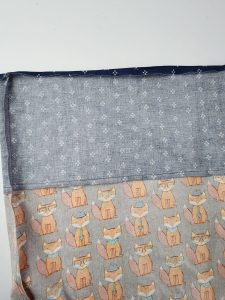
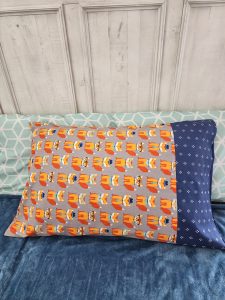
We are going to be cutting two blocks: the main pillowcase and a smaller yoke piece. A yoke is simply a part of the pattern that you cut off and sew back together. Usually, you use a contrasting fabric for the yoke piece, but not always; it depends on the pattern. For this pattern, we use a contrasting pattern. From here on out, the top (smaller) part of the pillowcase will be referred to as the yoke.
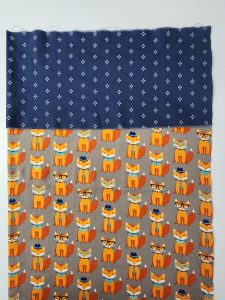
Measure the length you want for your pillowcase, minus 7”. For example, I wanted the length of my pillowcase to equal 30” once it was done. That means that for my main pillowcase piece, I cut (ripped) it 23” long. After straightening the top edge (by ripping the fabric), measure 23” down from the top, and once again, cut into the fabric (taking a small cut across your selvage). Rip your fabric, all the way across. Now you have a 23” long rectangle. (Or, cut across the top and bottom if you don’t want to rip).
Prepare your yoke piece in the same manner. Rip across the top first, and then measure 10” down, make a cut, and rip it across. Now you have a 10” block for your top yoke.
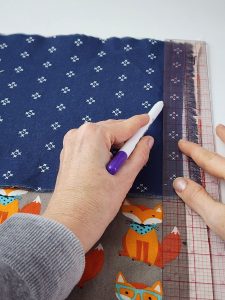
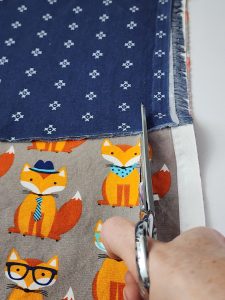
With both pieces of fabric folded (selvage to selvage), place the yoke piece on top of the main pillowcase, lining up the folds and the top edges. We want the pillowcase and the yoke piece to be the same width, so we are going to cut along the selvage to even them out, cutting off any excess fabric from the wider piece. You can draw cut lines alongside the selvage edge if you find that helpful, or if you struggle to cut straight lines. Use your seam gauge ruler or flat pattern ruler to measure an inch or so inside your selvage line, draw your line, and then cut.
Sewing Time
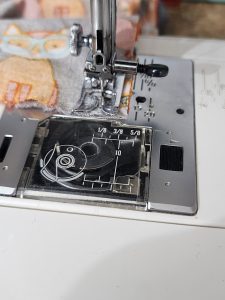
*You will be using a ½” seam allowance on all seams.
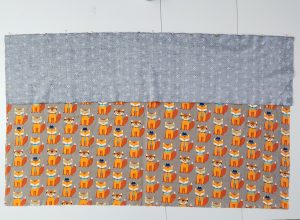
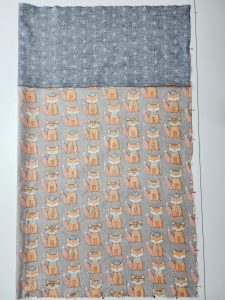
Open up your two pieces and lay them out exactly how you want it to look once it’s sewn (meaning the yoke on top, and the main pillowcase underneath it). Make sure your print/pattern is going in the right direction if you have a pattern on your fabric.
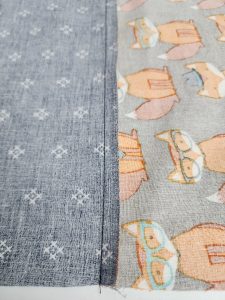
Flip the top yoke over onto the main pillowcase, lining up the top corners first, and then aligning the top edges of the fabric. Pin in place, and then stitch the yoke and pillowcase together.
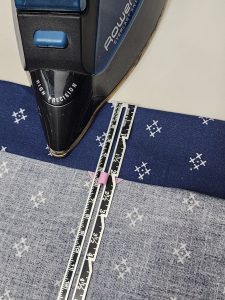
Iron your seam allowance open.
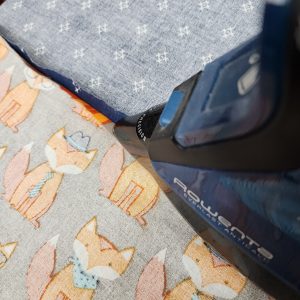
*Note: You might notice that my seams aren’t ironed open in the tutorial. That’s because I used a serger to finish my seams so that they won’t fray later on. You are welcome to use any kind of seam finish you like if you want to prevent fraying. The easiest way to finish seams for a beginner is by cutting along the edge seams with pinking shears.
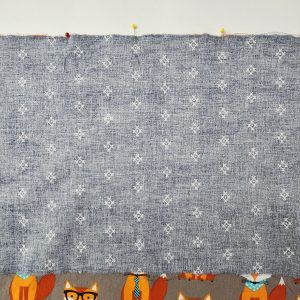
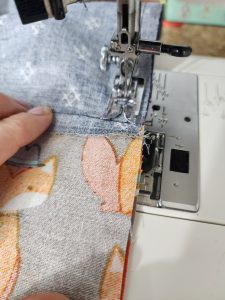
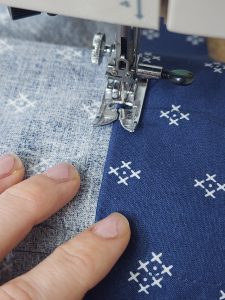
Next, fold your pillowcase in half lengthwise, right sides together. Pin along the side and the bottom of the pillowcase, making sure that your edges and corners are even.
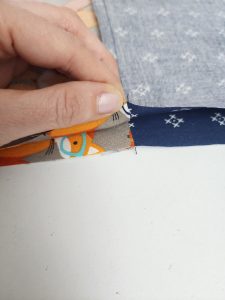
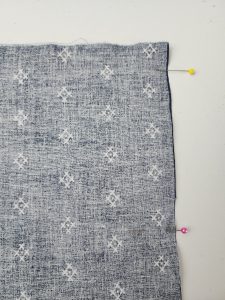
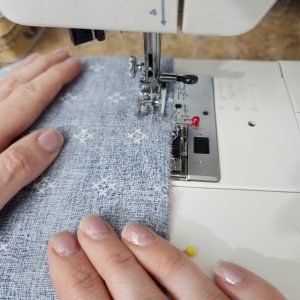
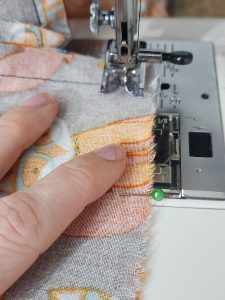
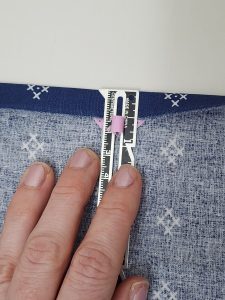
Starting at the top of the pillowcase, stitch until you are about ½” away from the bottom of the pillowcase. With your needle down, lift your presser foot and pivot (turn your fabric) so that your bottom seam line is now on the ½” seam allowance line.
Time to make your hem! With your seam gauge ruler, fold the top [raw] edge down towards the wrong side of the fabric ½”. Pin in place and then press along the fold line. Use steam on your iron (so long as you are using cotton and not a synthetic fabric). The better you press the seam, the easier the next step will be.
Once the top edge is pressed, turn it under again, this time at 2”. Pin and press.

Stitch your hem around the pillowcase, keeping your stitch line fairly close to the bottom fold (about 1/8” away from the fold).
That’s it! You’ve just sewn a pillowcase in just 4 easy steps! Didn’t I tell you it was easy?
Let me know how you did in the comments!
SINGER 00220 Sewing Gauge, 6-Inch,Fiskars Sewing Ruler – 6
Fiskars SoftGrip Pinking Shears – 8
*Sassy Cassy’s is part of the Amazon Affiliate Program, which means that if you purchase Amazon items from this website, a small commission will be earned, at no extra cost to you.
