
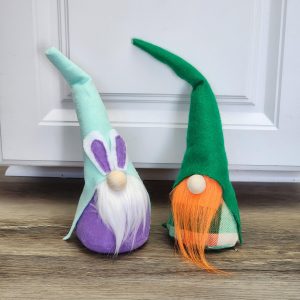
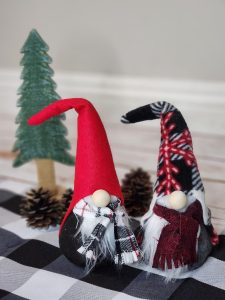
Raise your hand if you love gnomes! (My hand is raised high!)
Gnomes are funny little creatures, aren’t they? You either love them or you hate them. To be honest, I used to hate them when they were just creepy ceramic statues in the garden. But cover their eyes, give them an oversized hat and a chubby little body, and all of a sudden they are no longer creepy; they’re adorable. At least I think so.
Halloween, Christmas, Valentine’s Day, St. Patrick’s Day…you name the holiday and I have a gnome to go with it! Not all are homemade, of course. But making gnomes is a lot of fun! There are a lot of really great patterns out there and so many ways to make them, but I picked up a pattern from The Gnome Makers that I like to use in my sewing classes. I like it because it’s a simple pattern to follow, and there are different sizes and variations included in the pack. In fact, they have an entire shop full of adorable gnome patterns and accessories for any occasion you can think of!
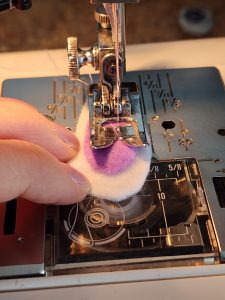
Since my sewing workshops are geared more toward beginning sewers, I stick with a basic pattern. We usually don’t sew the arms, since they are so small and trickier for beginners. We stick with a simple body and hat and add embellishments at the end. If you are keeping it simple, there are really only 3 seams to sew on gnomes!
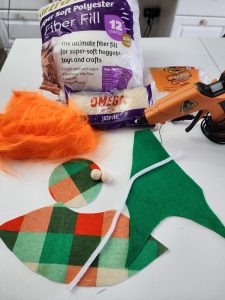
Before sewing your gnome, there are some supplies you will need:
- Gnome Pattern
- Material- you can really use anything, but my favorites are felt, flannel, or cotton
- Rice
- Fiber fill
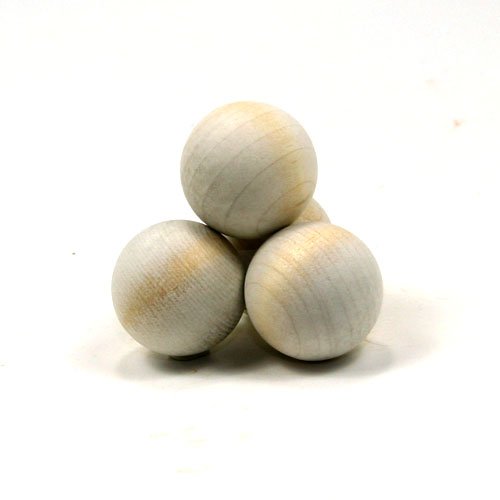
- Wooden balls (I usually use ½ or 5/8”, but you can use whatever size you like)
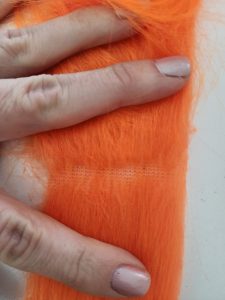
- Fur strips for the beard
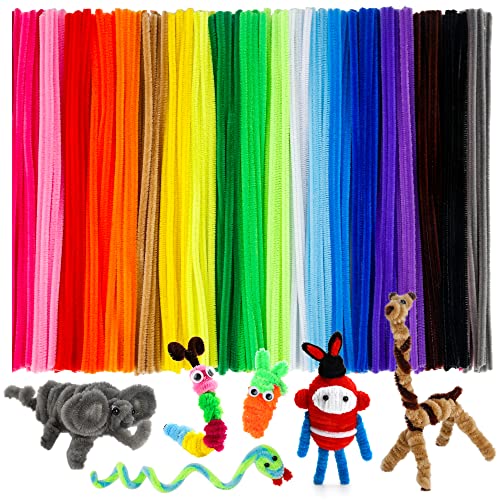
- Pipe cleaner
- Hot glue gun
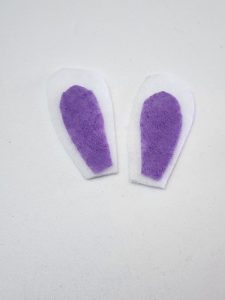
- Any other accessories you want to add to your gnome
Fairfield The Original Poly-Fil, Premium Polyester Fiber Fill, Soft Pillow Stuffing, Stuffing for Stuffed Animals, Toys, Cloud Decorations, and More, Machine-Washable Poly-Fil Fiber Fill, 16-ounce BagShaggy Plush Faux Fur Fabric Precut Strips Fluffy Fuzzy Craft Fur for Gnomes Beard Hair Cosplay Costume Dwarf Decoration (White, 8×60 inch)
AUXBC 1/2 inch Wooden Balls, 12MM Small Round Wooden Balls, Unfinished Natural Wood Ball DIY Decorative Balls for Arts and Crafts, 100 PCS
Mylittlewoodshop – Pkg of 6 – Ball – 5/8 inches in Diameter 16mm Unfinished Wood(WW-RB0625-6)
Caydo 200 PCS Thick Pipe Cleaners Craft Supplies Multi-Color Chenille Stems for Art and Craft Projects Creative DIY Decorations (12inch x 6mm)
Gorilla Dual Temp Mini Hot Glue Gun Kit with 30 Hot Glue Sticks


Steps To Sewing Your Gnome
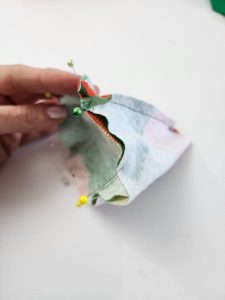
Fold your body in half, right sides together, and pin along the side seam. Using a ¼” seam allowance, stitch that seam. [You will be using ¼” seam allowance on the entire project.]
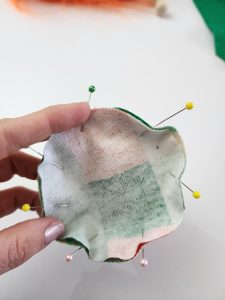
With right sides together, pin the bottom (circle) piece to the bottom edge of the body. It might seem a little awkward, but it’ll all work out. Take it one pin at a time. Once it’s pinned, stitch the seam.

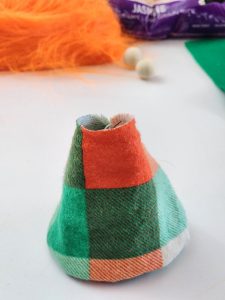
Turn your body right side out. Set aside for later.
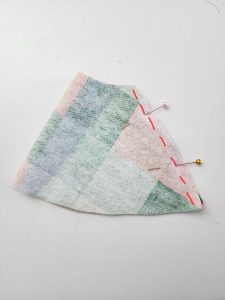
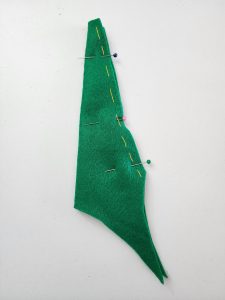
Now, fold your hat together, with right sides facing each other. Pin the long, straight edge and then stitch. Flip your hat right side out.
Now we are ready to stuff our gnomes, beginning with the body.
First, fill the bottom with some rice. I fill it maybe 1/4 to 1/3 of the way full. You just want enough to help the gnome stand up on its own.
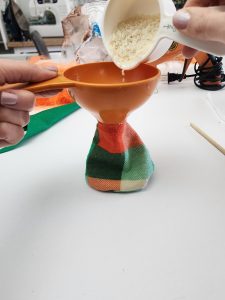
Next, stuff the rest of that body with stuffing. My students always ask me how much stuffing to add. My answer: do you want a skinny gnome or a chubby gnome? Stuff it as full as you like. I fill it all the way up to the top.

If you want to be able to change the shape of the hat (bending it to the side), you will want to put a pipe cleaner inside. Measure your pipe cleaner inside the hat and cut it so that it ends just inside the hat, and isn’t sticking out. You can try to add a dot of hot glue to keep the pipe cleaner in place, but it’s kind of hard to stick that pipe cleaner all the way back to the top of the hat with glue on it. Sometimes I add a dollop of hot glue on the ends just to be sure it doesn’t slip or slide. It should be fine once you add some fluff.
Which brings me to our next step: add some fiberfill in the hat. Be sure to get it all the way down to the top of the hat. Once it’s full, you should be able to bend it whichever way you like.
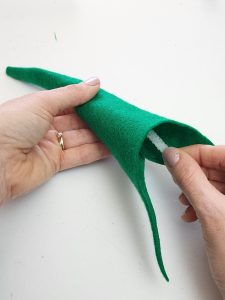
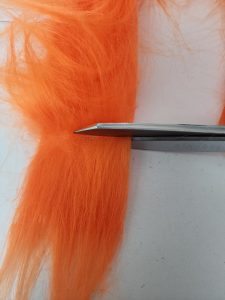
Let’s cut ourselves a beard!
On your roll of fur, cut a square (approximately 2”). I always lift up the fur at the top (as seen in the picture) so that I’m not cutting off the bottom part of my next beard.
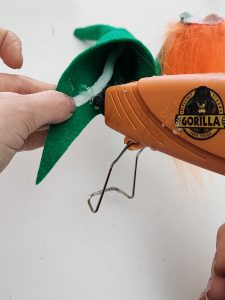
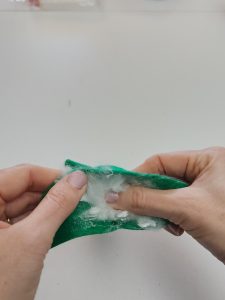
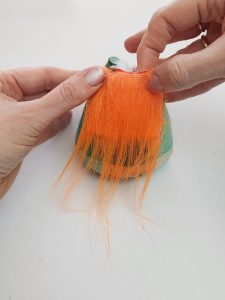
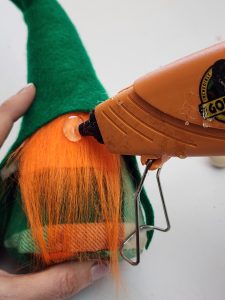
Add some hot glue to the back side of your fur, and then center it on the upper front portion of your gnome body.

At this point, if there are any other accessories that you want hidden under your hat (for example scarves, arms, etc), glue or stitch those on at this step (if you’re choosing to sew arms, your pattern will give you more details about that). Once those additional accessories are sewn on, position your hat over the body where you want it, and then carefully lift up the sides and the back and add some hot glue underneath to hold it in place.

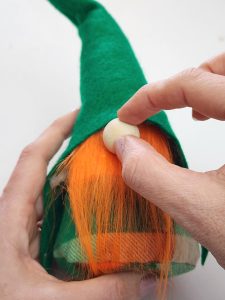
Add a big glob of glue where you want your nose, and attach your wooden ball.
Add any other embellishments you wish!

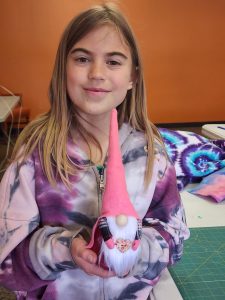
That’s all there is to sewing a gnome! I told you it was super easy!
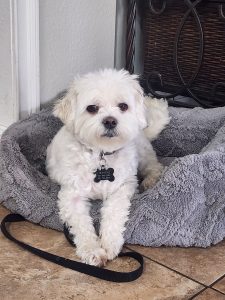
And now a word of caution: Do not leave these gnomes where your pets can reach them. Apparently, they are hard to resist! In hindsight, I should’ve known better to pick it up right away when it was knocked off the table before my dog had the chance to get to it. He’s a little mischievous (and lacks self-control) when it comes to food, but who would’ve thought he’d go after UN-cooked rice??
RIP my little bunny gnome ☹
You better believe somebody was put in time out for this.
*Sassy Cassy’s is part of the Amazon Affiliate Program, which means that if you purchase Amazon items from this website, a small commission will be earned, at no extra cost to you.
