
What is it about stuffy’s that makes every kid squeal with delight? With no exception, every class of kids that I teach at the learning centers requests that we sew some sort of stuffy. Also, how cute is the word “stuffy”? Back in my day, they were just called stuffed animals. Boring!
This semester, in my more advanced classes, we are working on big squishmallows. You can imagine the excitement in that class! The main characteristic of Squishmallows is that velvety soft, squishy fabric. It’s a little more challenging to sew because the fabric does have some stretch to it and there are darts and other advanced sewing techniques used in the sewing process. So, for my beginners, I start with something a little more simple; simpler shapes and simpler fabric.
You can’t get much simpler than flannel. Flannel is the best fabric to learn to sew on, in my opinion. It doesn’t stretch and the fabric kind of sticks to itself, which means it’s not slipping and sliding around like other fabrics and it makes pinning a whole lot easier.
Pinterest is my go-to for inspiration and I’ve seen plenty of cute ideas for stuffys, including owls. It was trickier to find one that included a pattern in just the right size and shape, so I decided to create my own pattern. I’m sharing it for free here with you today!
Materials
To sew your owl stuffy, you will need the following:
- Flannel fabric
- Fabric scraps (or felt)
- Polyfil fiber fill
- Scissors
- Thread
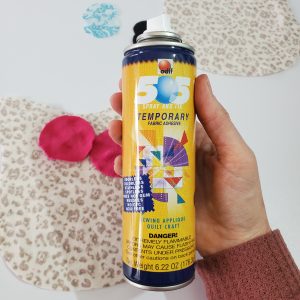
- Basting spray (optional)
- Owl Pattern
Poly-FilGingher Shears, Right Hand
All Purpose Polyester Thread
Basting Spray


Steps to Sewing Your Owl Stuffy
First, you’ll want to cut out your pieces.
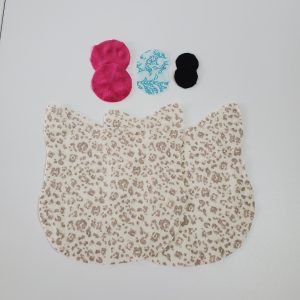
I didn’t create a tummy piece on my owls, but some of my students in my class wanted a tummy on their owl, so we traced the bottom line of the owl and then drew a semi-circle for the tummy. I think it’s pretty cute with the tummy!
On one piece of your owl body, lay out your largest eyes where you want them. Owls typically have their eyes set close together, but of course, you can do it however you like it. Just make sure not to get them too close to the top of the head where your seam will be sewn.

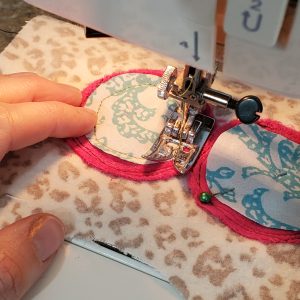
If you’d like, you can use a small spray of basting spray on the back side of the eyes. Basting spray is sticky, so it will temporarily hold down your pieces for you while you sew. It’s easier than pins, but if all you have are pins, that totally works.
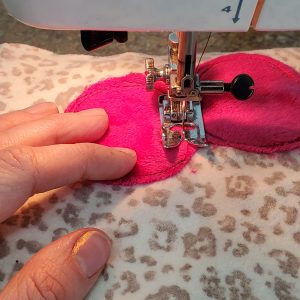
Sew your large circles on the front of your owl. This part is kind of fun because you can be as creative as you like with it. You can do one circle stitch around the eye (about ¼” away from the edge of the eye) OR you can have fun with it and sew two (or as many as you like) irregular circles around. I like this option because circles can be challenging to sew for beginners. Since your circles are unlikely to be even (for a beginner), it makes it look intentional if you sew more than one circle. I only sewed two circles, but you can be creative and do as many as you like!
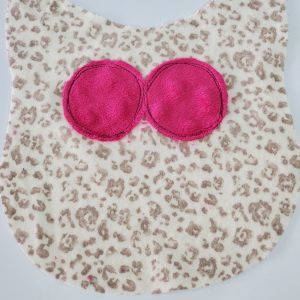
You are going to repeat this process with the middle-sized eye, on top of the large eyes.
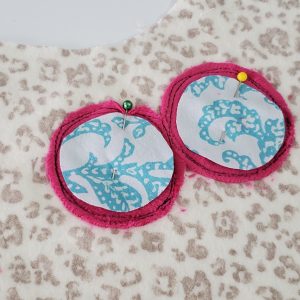
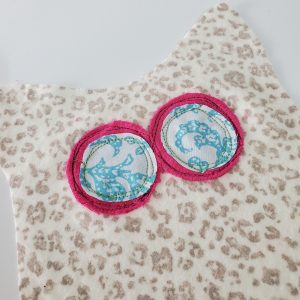
And then you will continue one more time with the smallest eye, on top of the middle circles.
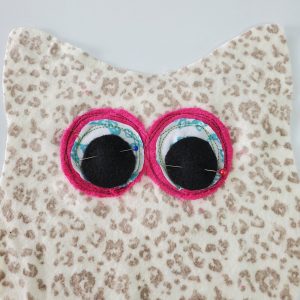

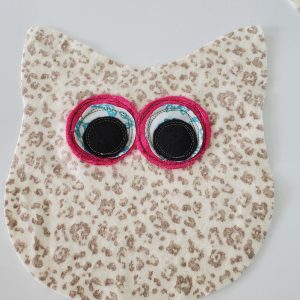
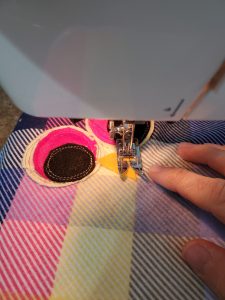
Now, you will want to add a beak.

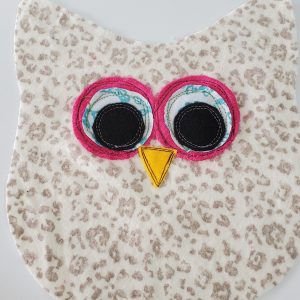
If you are doing a tummy, you can add that now. As you can see, I didn’t do a tummy.
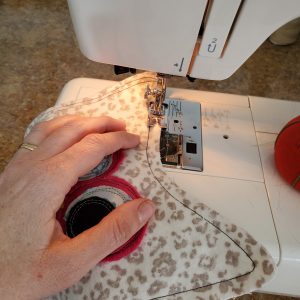
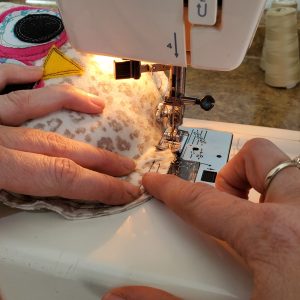
For your last step, you are going to place your owl body pieces wrong sides together. I know I always teach about sewing right sides together, but on this project, I opted to keep the seams on the outside. Of course, you can sew right sides together and flip if you’d like the seams on the inside. Just keep in mind that your owl will end up a little bit smaller. Back to pinning…pin your body front and body back together and stitch around the owl, using a ¼” seam allowance. Be sure to leave an opening so you can stuff with fluff when you’re done. (Side note: I like to start my stitches, and leave the opening on the straightest part of the owl so that it’s easier to close later). If you left your seams on the outside, go ahead and stitch a second line next to the first line, 3/8” away from the edge, also keeping in mind to leave an opening! Adding a second stitch line helps with reinforcement if your owl starts to fray later (a little fraying would look cute!)
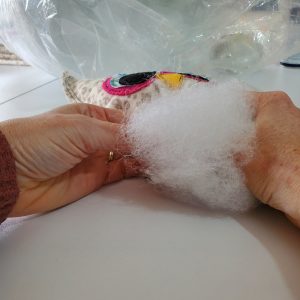
Now the fun part – stuffing! Stuff that owl nice and good! Make sure you push your poly-fil up into the ears. Get that owl nice and full, and push the stuffing back a little farther away from your opening so that you can stitch the opening shut.
Stitch that opening shut (on both stitch lines) and you are done!
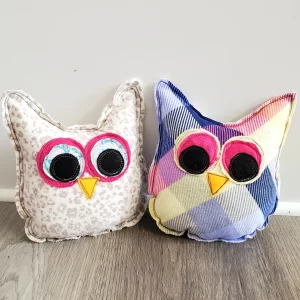
How cute are these little owls??
That’s all there is to it! Your owl stuffy is all sewn. Easy peasy, right?
Let me know in the comments how you did!
*Sassy Cassy’s is part of the Amazon Affiliate Program, which means that if you purchase Amazon items from this website, a small commission will be earned, at no extra cost to you.
