
Does anyone else have a fussy eater when it comes to meats and proteins? My daughter has decided that she hates pretty much every kind of lunch meat there is (except for salami, go figure). In fact, she’s not a big meat eater in general. It’s been a struggle to find protein meals (that she likes) to pack in her lunch; things that are healthy and will keep her filled up.
I’ve had to put my thinking cap on with this one. We’ve done a lot of experimenting over the past several months; a lot of trial and error, figuring out likes and dislikes. I’ve compiled a pretty good list of healthy protein snacks that my kids will actually eat (check back next week for a long list of healthy lunch/snack ideas!!)
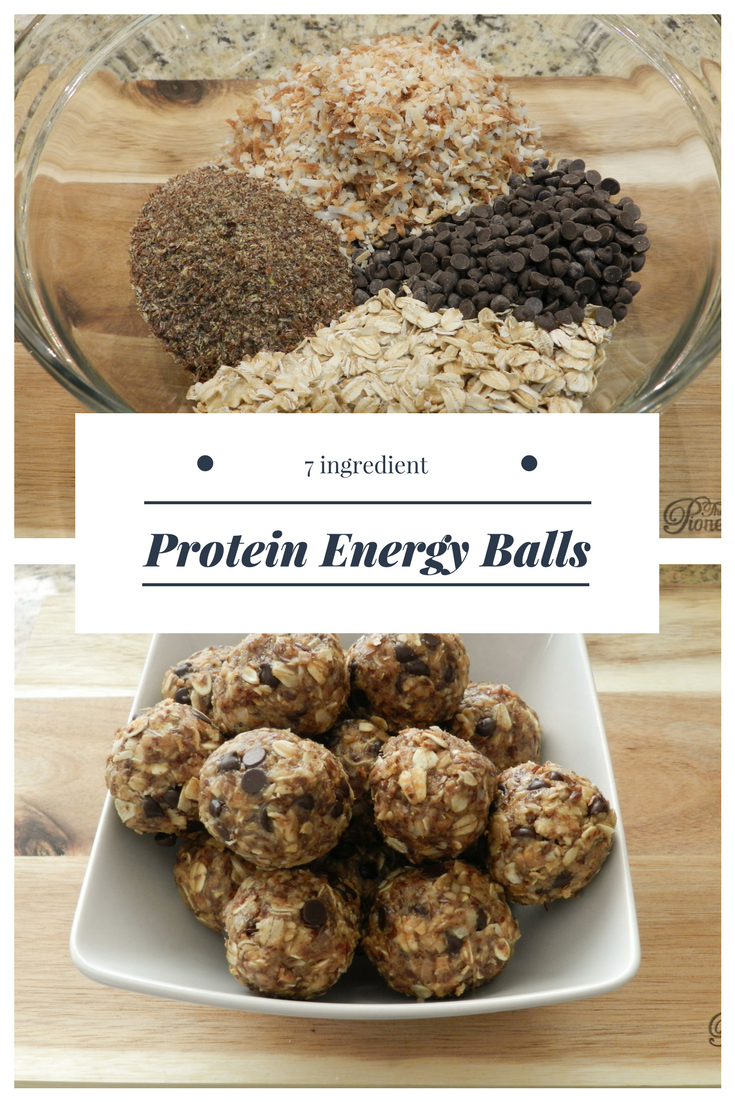
One of my daughter’s favorite snacks is an “energy” protein ball recipe that my sister-in-law passed on to me. They are a great alternative to processed, sugary granola bars and carry a lot more protein in them. They are quick and simple to make and only uses a few ingredients, all of which are pretty healthy: oats, flax seed meal (high in omega 3’s!), peanut (or other nut) butter, coconut flakes (good fiber!) and honey and chocolate chips (optional) to sweeten them up a little. Even though honey is a sweetener, there are many health benefits that it carries! The chocolate chips aren’t essential, but I buy the allergy friendly “enjoy life” brand which is free of dairy, gluten and white sugar. You can find them at the store, or at the link at the bottom of my post.
To keep these protein balls truly healthy, use organic ingredients when possible. Unsweetened coconut flakes are going to be a better option than sweetened flakes, and when it comes to peanut butter, avoid brands like Jif and Skippy; they are full of high fructose corn syrup and other harmful ingredients. It isn’t healthy! Go with natural, organic peanut butter; you know, the kind you stir. We made the switch a few years ago and the kids have adjusted just fine!
So here you go; a visual of what you need to put these energy balls together.


To get toasted coconut flakes, simply spread your flakes on a cookie sheet and pop the pan in an oven (preheated to 400). You’ll want to keep a good eye on them so they don’t burn. Check on them every minute, tossing the flakes with a wooden spoon each time to mix it up and prevent the flakes from burning. Make sure that you let the flakes cool down before adding them with the other ingredients, otherwise your chocolate chips will melt.
Mix all of your dry ingredients together.

Add your honey, peanut butter and vanilla (optional). Mix it really well with a spatula.


Stick the mixture in the refrigerator for 20 minutes to stiffen it up a bit. It will make it easier to roll them into balls. I will admit that when I’m in a hurry, I skip this step and it turns out fine, but it is easier if it’s refrigerated a bit first. After it’s a bit chilled, roll into balls; make them whatever size you like. You can keep them in the fridge for about a week, but they probably won’t last that long! These go quick in our house…they are a little bit addicting!

For more healthy recipe ideas, CLICK HERE!
*Sassy Cassy’s is part of the Amazon Affiliate Program, which means that if you purchase Amazon items from this website, a small commission will be earned, at no extra cost to you.


| Prep Time | 15 minutes |
| Passive Time | 20 minutes |
| Servings |
balls
|
- 1 cup (dry) oatmeal
- 1 cup toasted coconut flakes
- 1/2 cup chocolate chips
- 1/2 cup peanut butter
- 1/2 cup ground flaxseed meal
- 1/3 cup honey
- 1 tsp. vanilla extract
Ingredients
|
|
- First, lightly toast your coconut by spreading flakes out on a cookie sheet. Put it in a preheated oven (at 400) and leave it in there for about 5 minutes, checking and tossing it with a wooden spoon every minute so that it does not burn.
- Put all of your dry ingredients in a large bowl and mix together.
- Mix your wet ingredients in a separate bowl and then combine with your dry ingredients.
- Let it chill in the refrigerator for about 20 minutes.
- Once chilled, roll into balls at whatever size you like.
- Keep in an airtight container in the fridge. They will stay good for a week (but they won't last that long!)