
A couple months ago, I launched hand-stitching classes for my younger crowd. I’ve had so many young students want to start sewing with a machine, but it’s difficult for kids much younger than 8 years old (I will work privately with 7 year olds, but it’s extremely difficult in a group setting). The reason being is that there are a lot of fine motor skills involved with sewing that aren’t quite developed well enough at that age; not to mention some dangerous objects involved in sewing (pins, needles, hot irons, etc). Needless to say, younger kids need a lot more one-on-one help when learning to sew, and I can’t provide that as well in a class/group setting.
I wanted to find a way to include, and prepare, younger kids who are anxious to get started in their sewing journey! I definitely want to nurture that creative spark! After giving it a lot of thought, I decided to let a couple of younger siblings into a hand-stitching class I offered in October. They ended up doing really well and had so much fun in class, so I figured this was my sign to get these classes started!
I will say that my hand stitching classes have [so far] been quite popular! In fact, I had to add two extra time slots, on top of the two I already had in my schedule, on my calendar last month and each class was filled up! They have definitely become popular classes in my calendar and I have so many fun ideas of projects in the weeks to come!
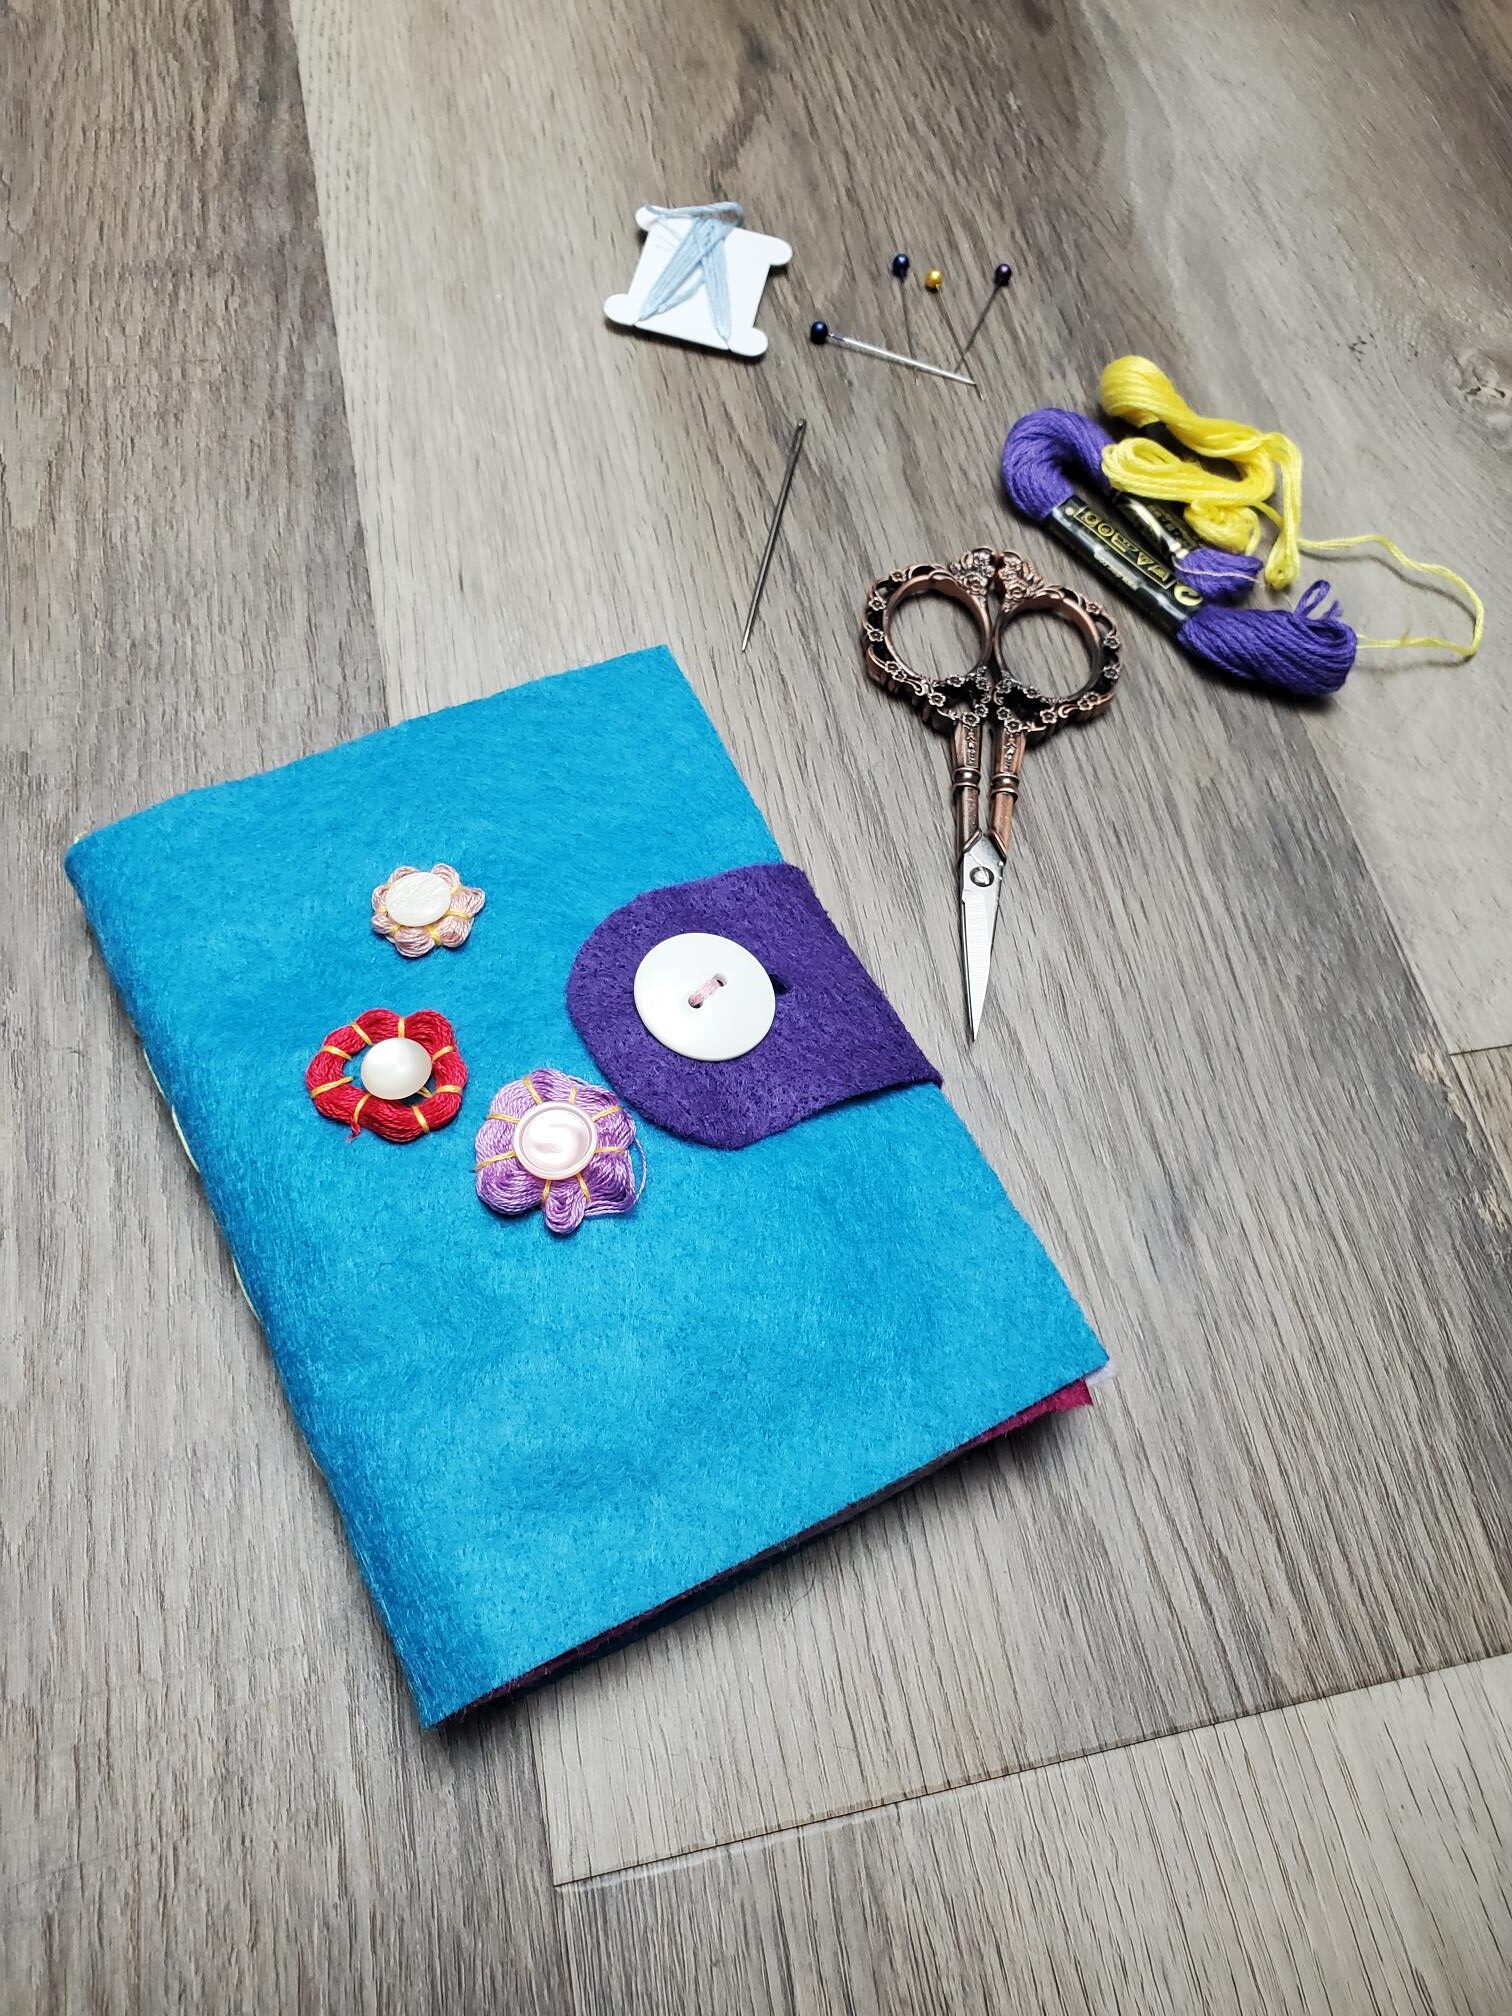
I thought it would be fun, at the start of this new year, to offer a project that would benefit the kids throughout the year of classes. I wanted them to have their own “kit” of things they need to bring for each class: snippers, pins, needles, etc. In the past few classes, I’ve sent home needles on a piece of felt, and wrapped extra thread around a piece of cardstock. I thought about all of the “needs” and things I wanted to be included in these kits, and came up with the idea of a needle book. I browsed pinterest for some inspiration and in the end came up with this adorable book that organizes everything students need for each class!
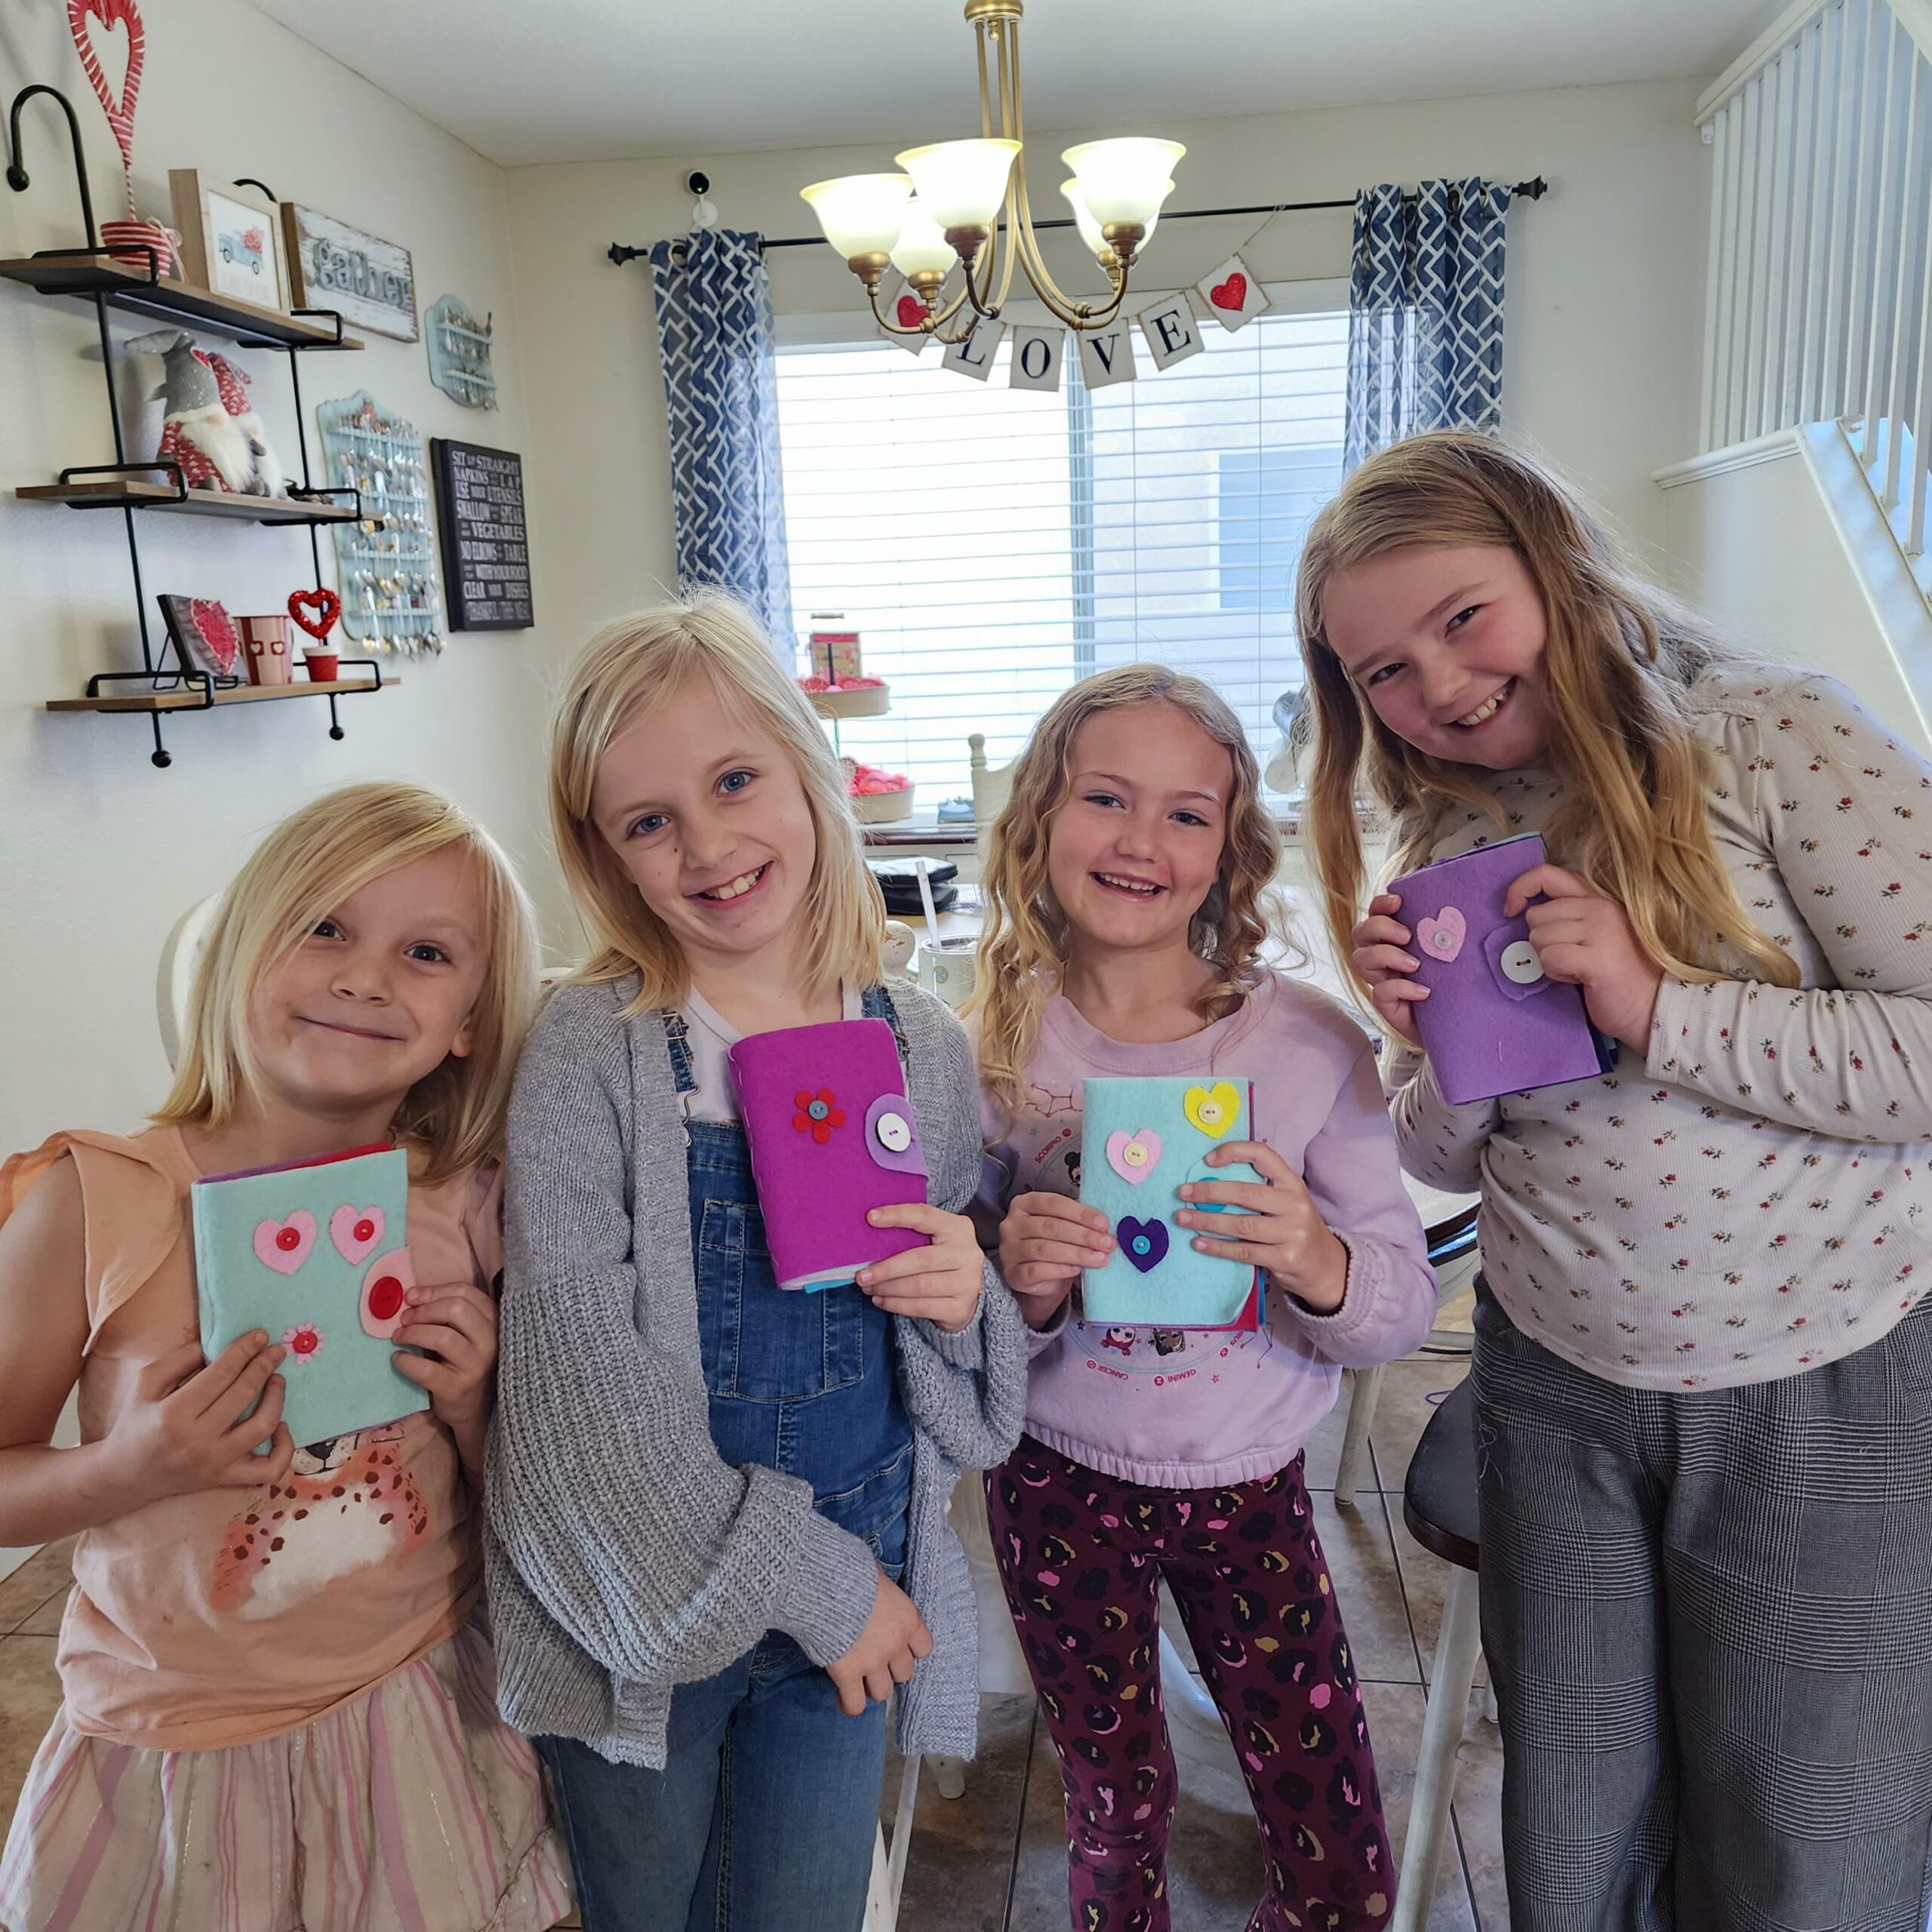
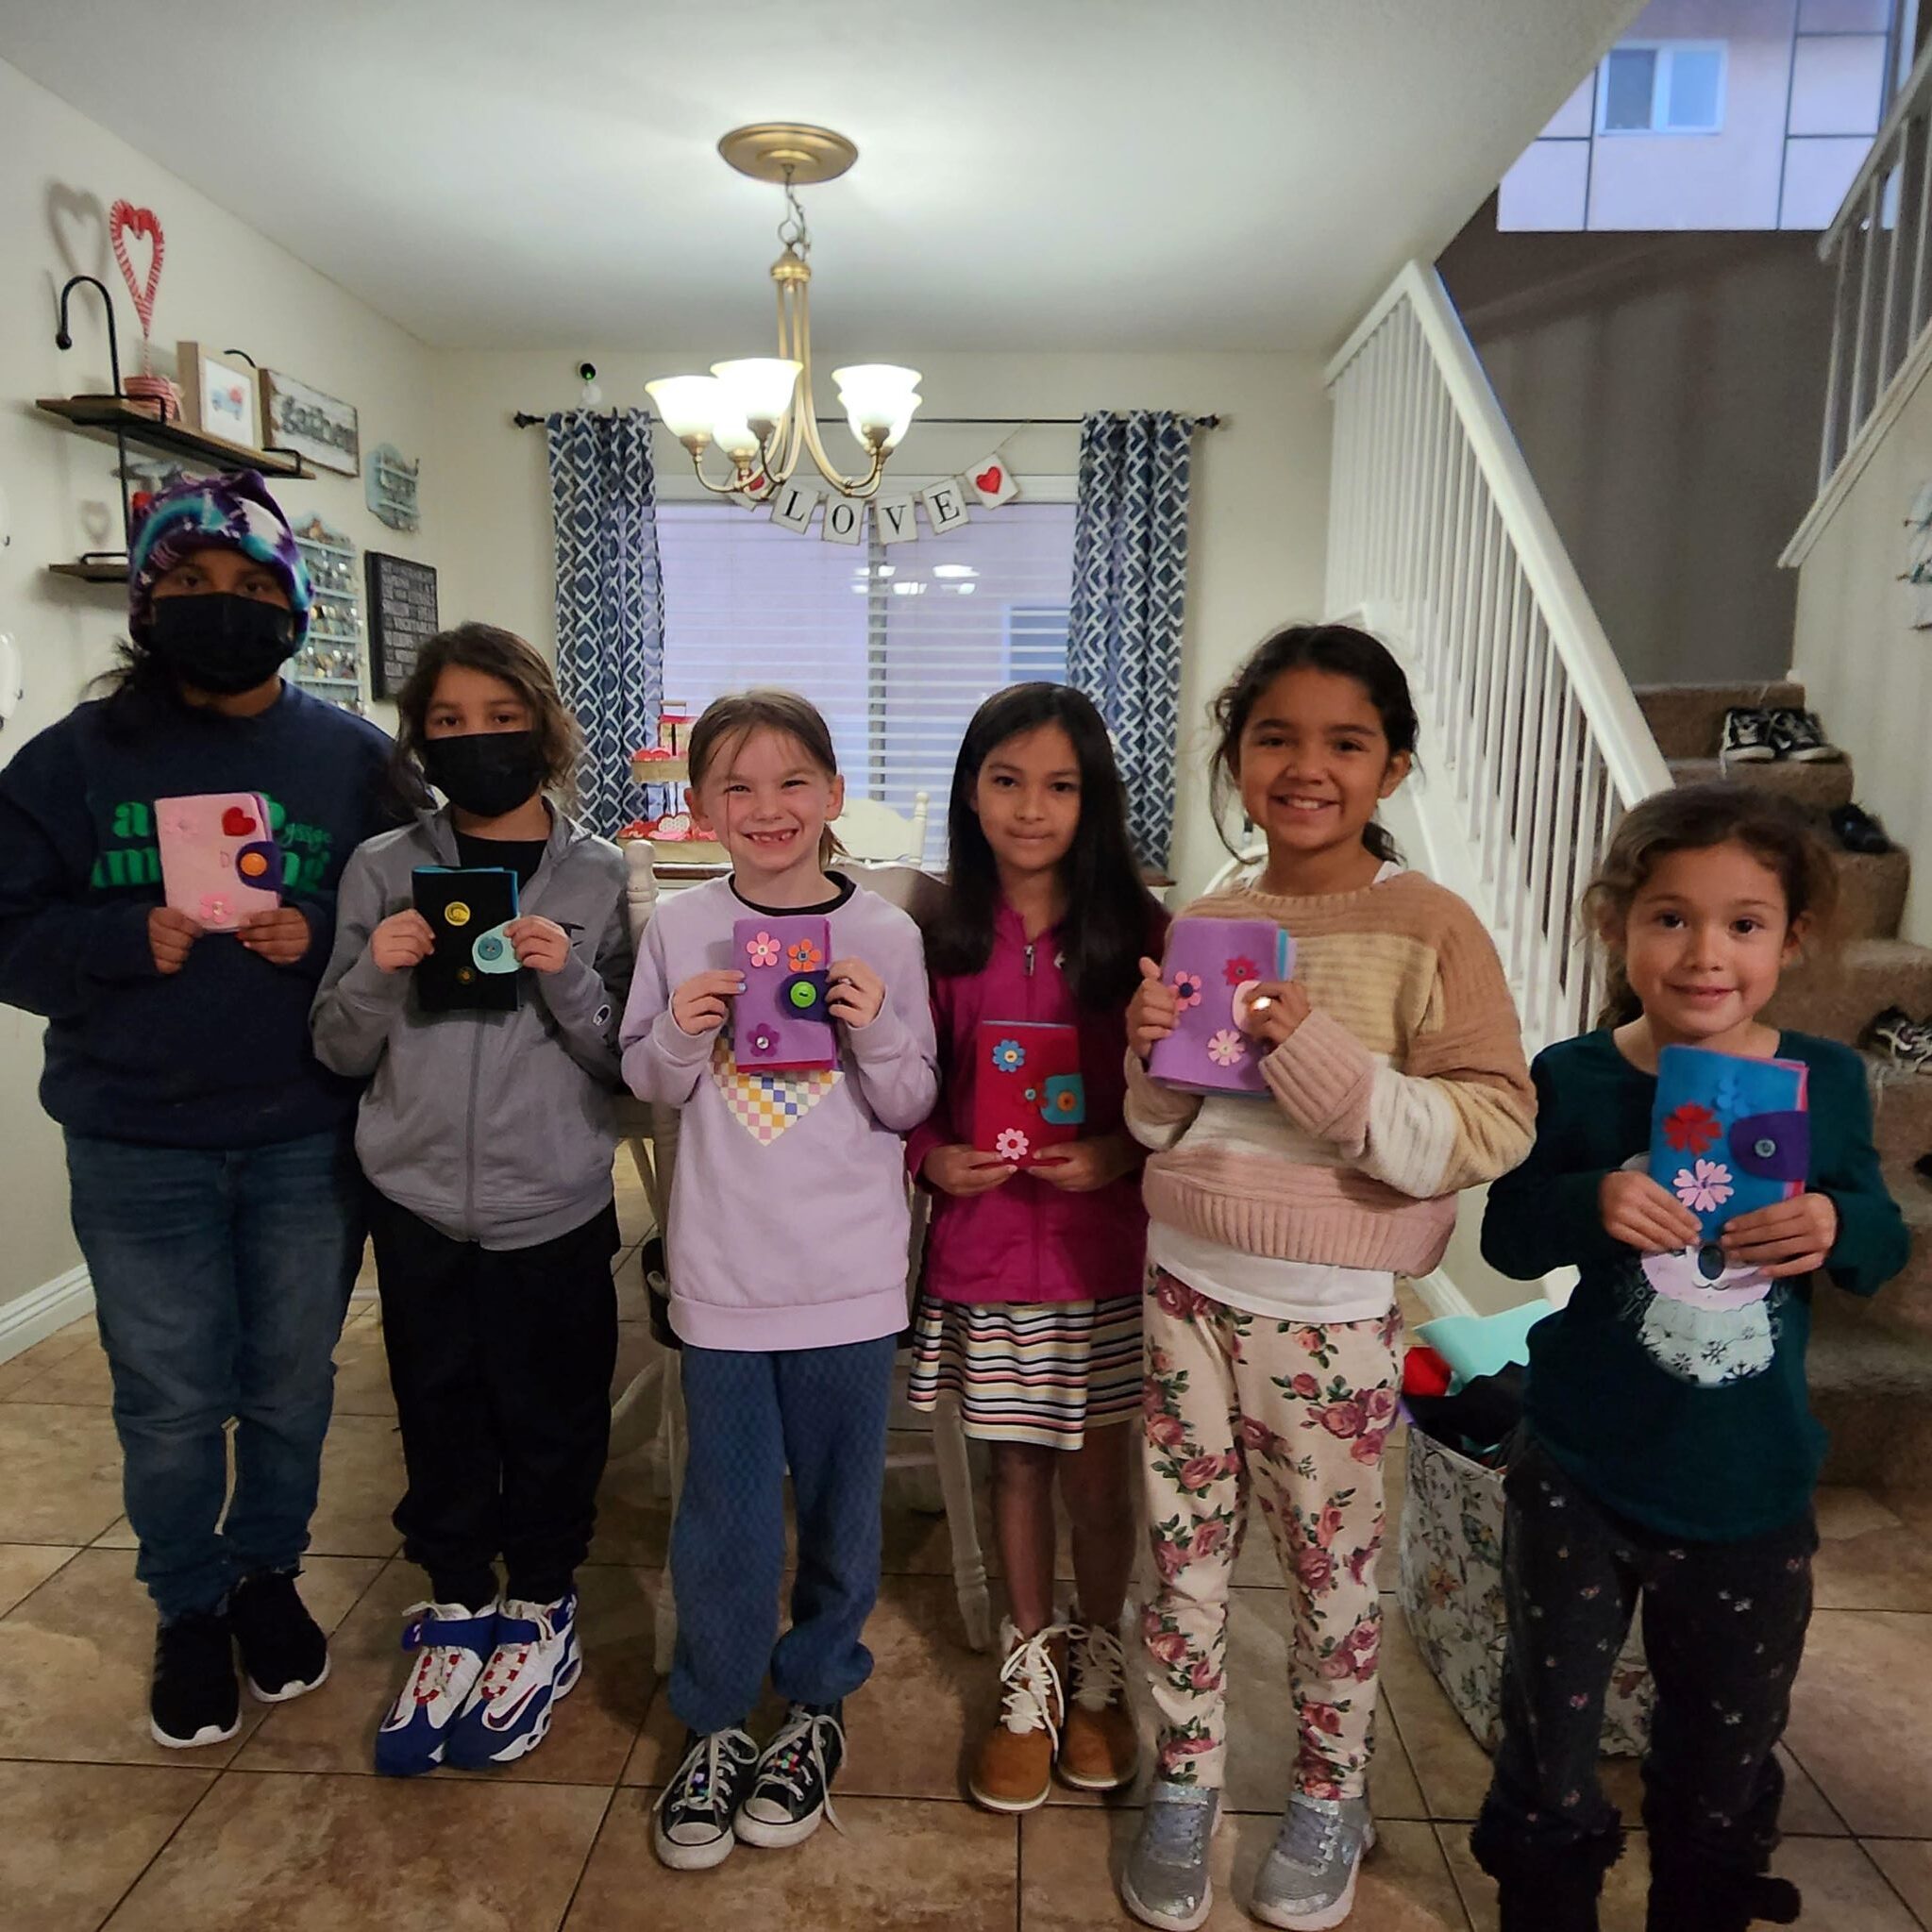
This class ended up being a HUGE hit! The kids loved their books, and they were especially excited about the little trinkets I included with it (snippers, cards for thread, needles, etc). One of the moms texted me after the class to tell me that her girls hadn’t put their books down all afternoon; they wanted to facetime grandma to show her and were waiting for dad to get home to show him what they made. I just love it when a class is a big hit and students are gushing about it afterwards!
For the students who missed the class (and anyone else on the world wide web) and want to make a felt needle book, here is my tutorial showing how!!
Supplies
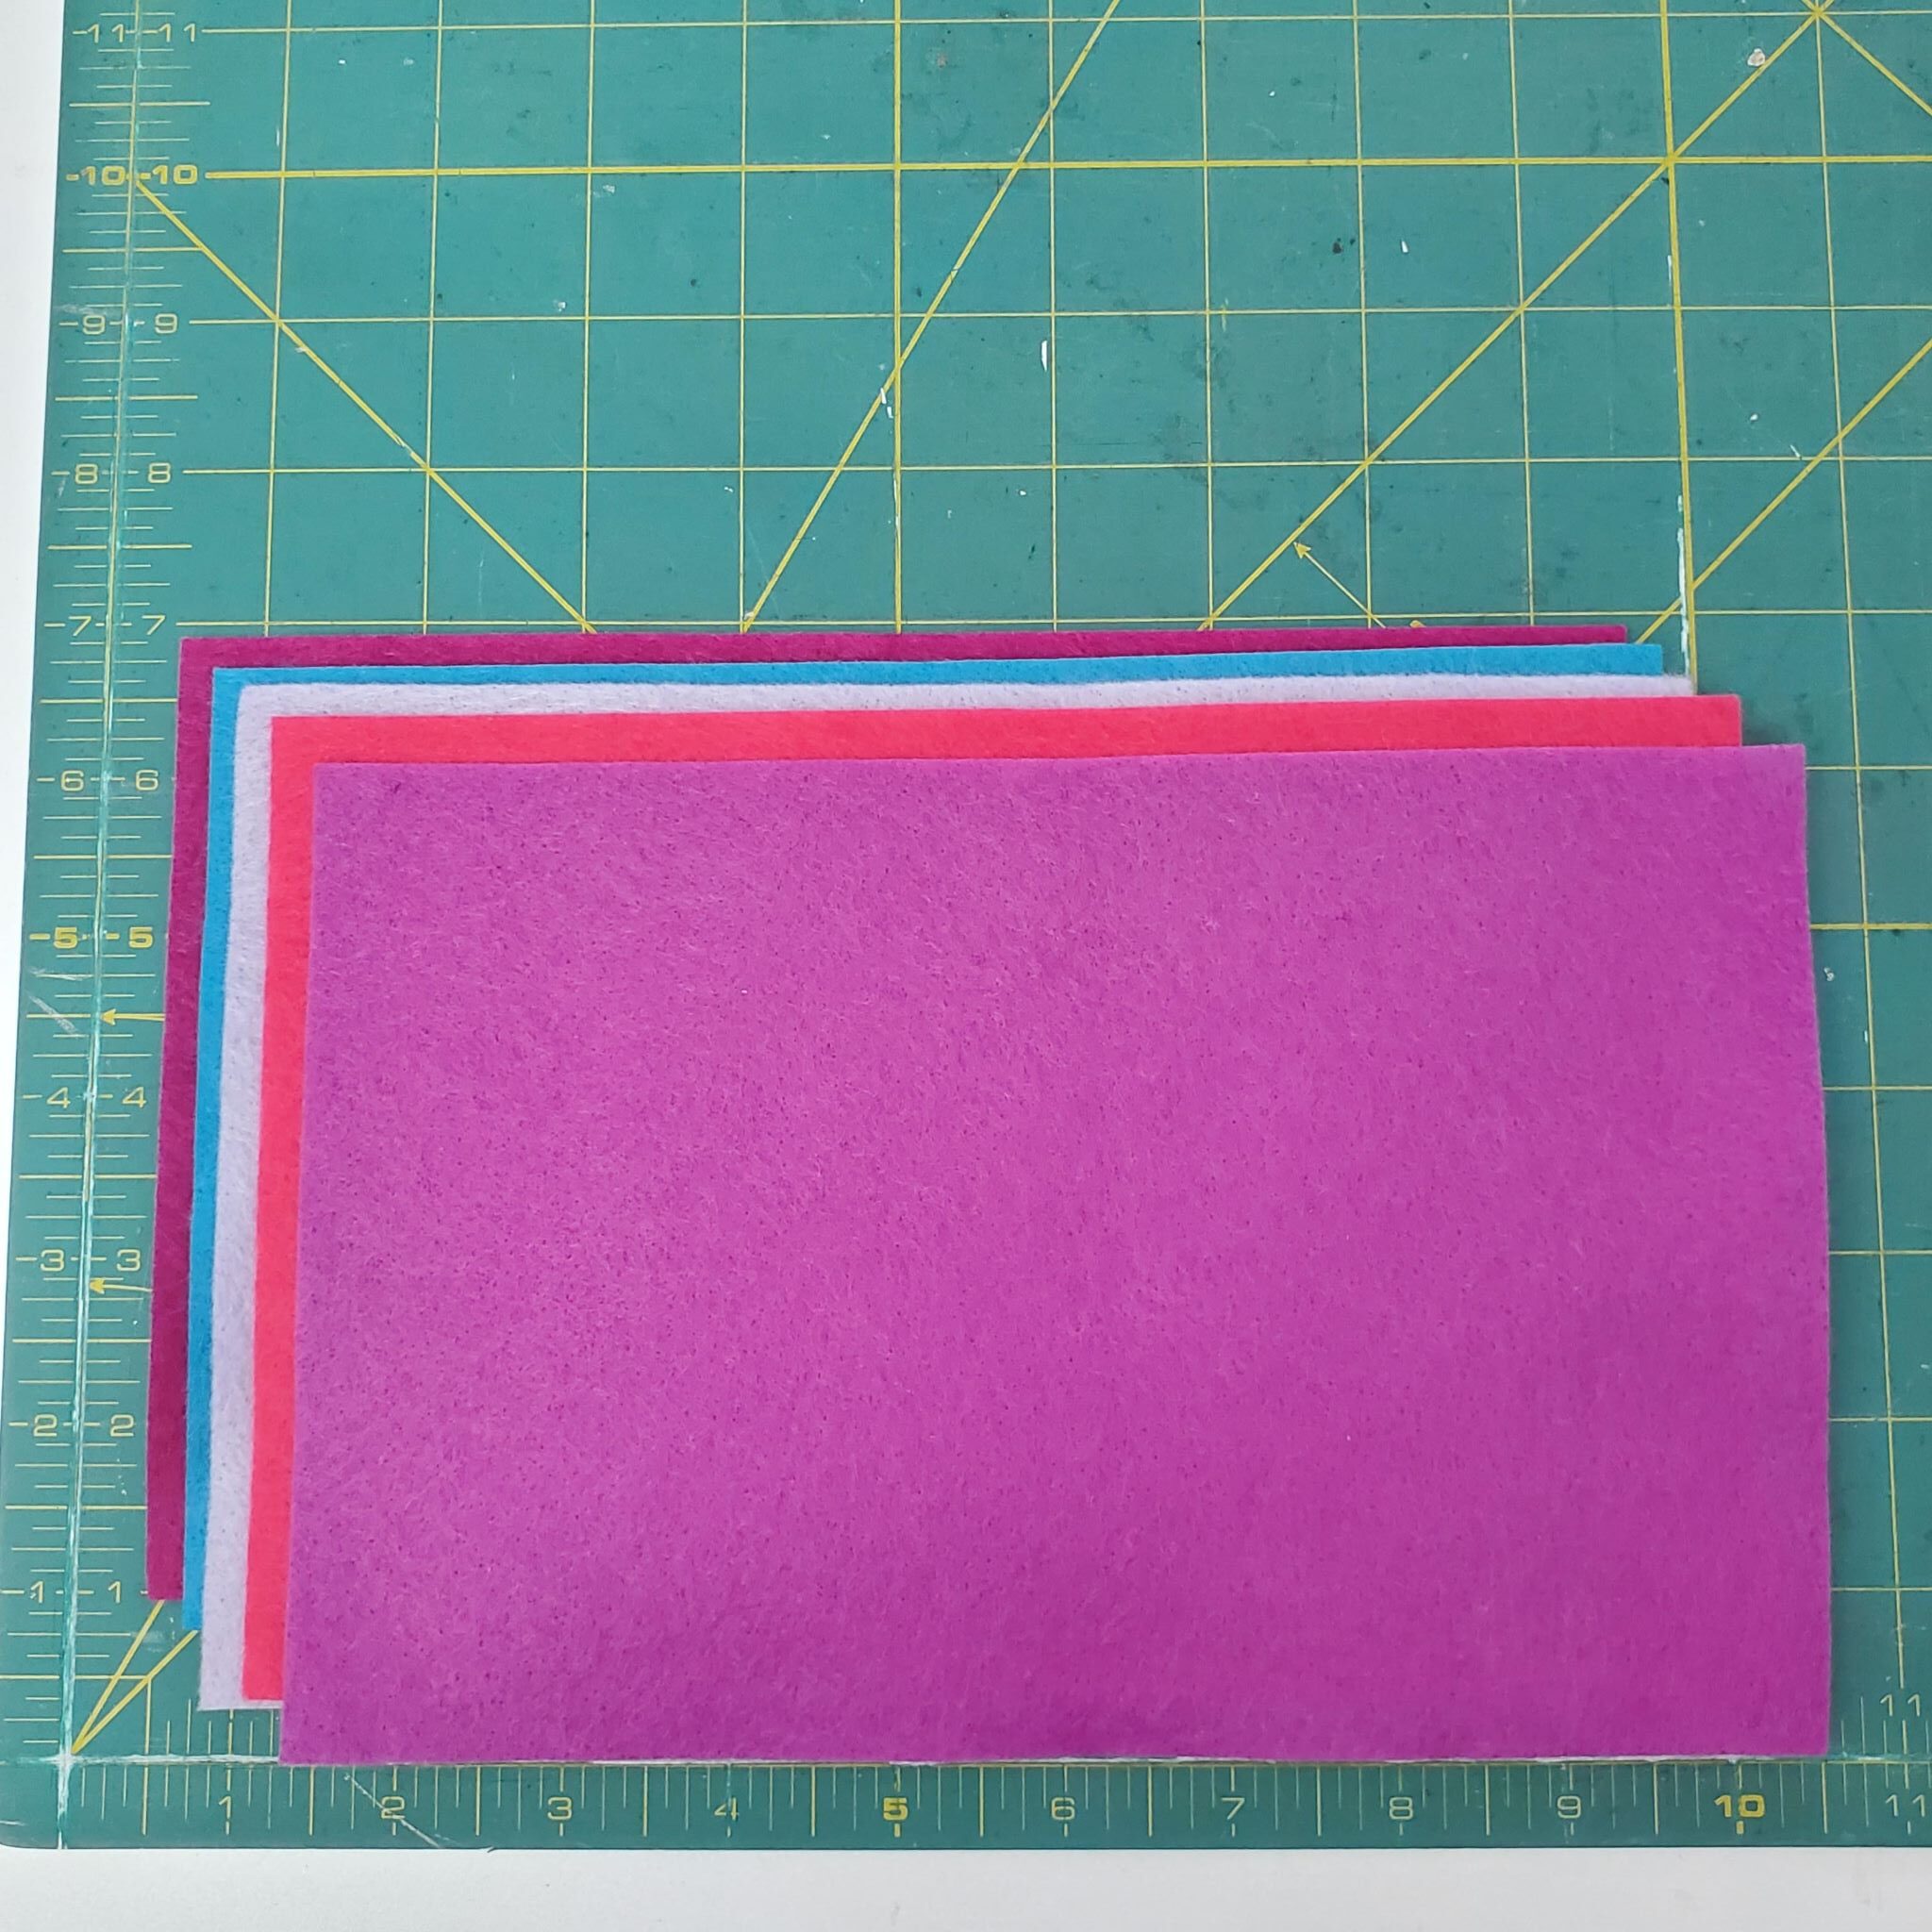
- two sheets of felt, which will be cut into four rectangles
- extra felt for pockets
- at least 2 buttons
- pattern for the pockets (download here)
- items to go inside the book (shown at the end of the post)
You can get all of these supplies at your local craft store, but for convenience purposes, I also linked them at the end of this post 🙂
To sew/assemble your needle book:
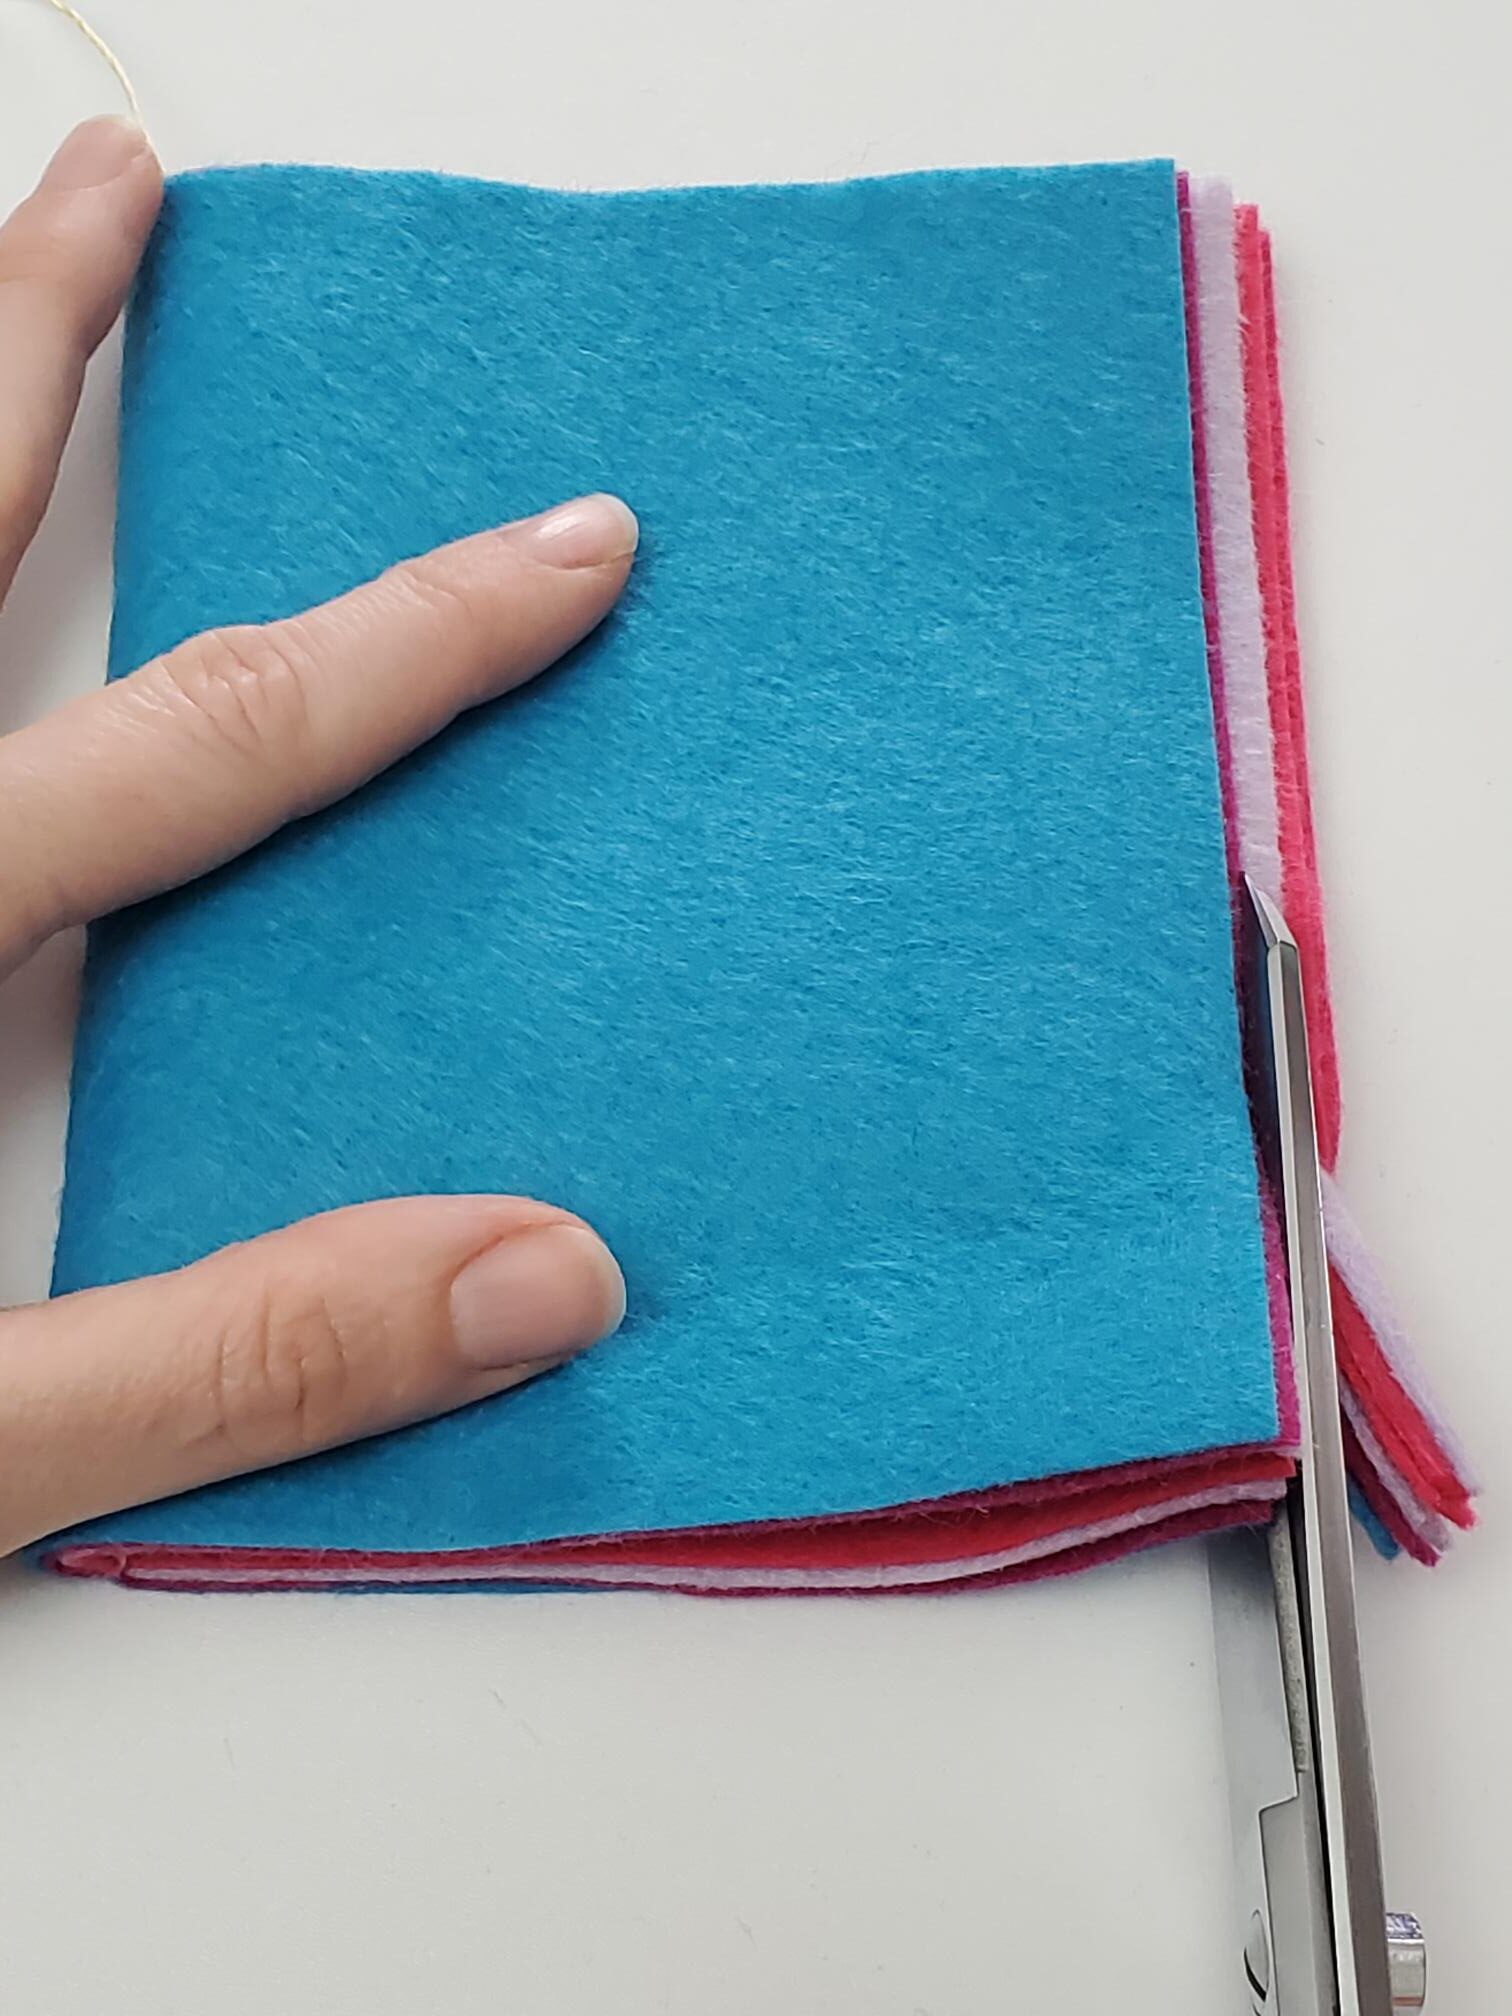
First, cut your felt pieces to measure 6″x9″. You will need four rectangles at this size.
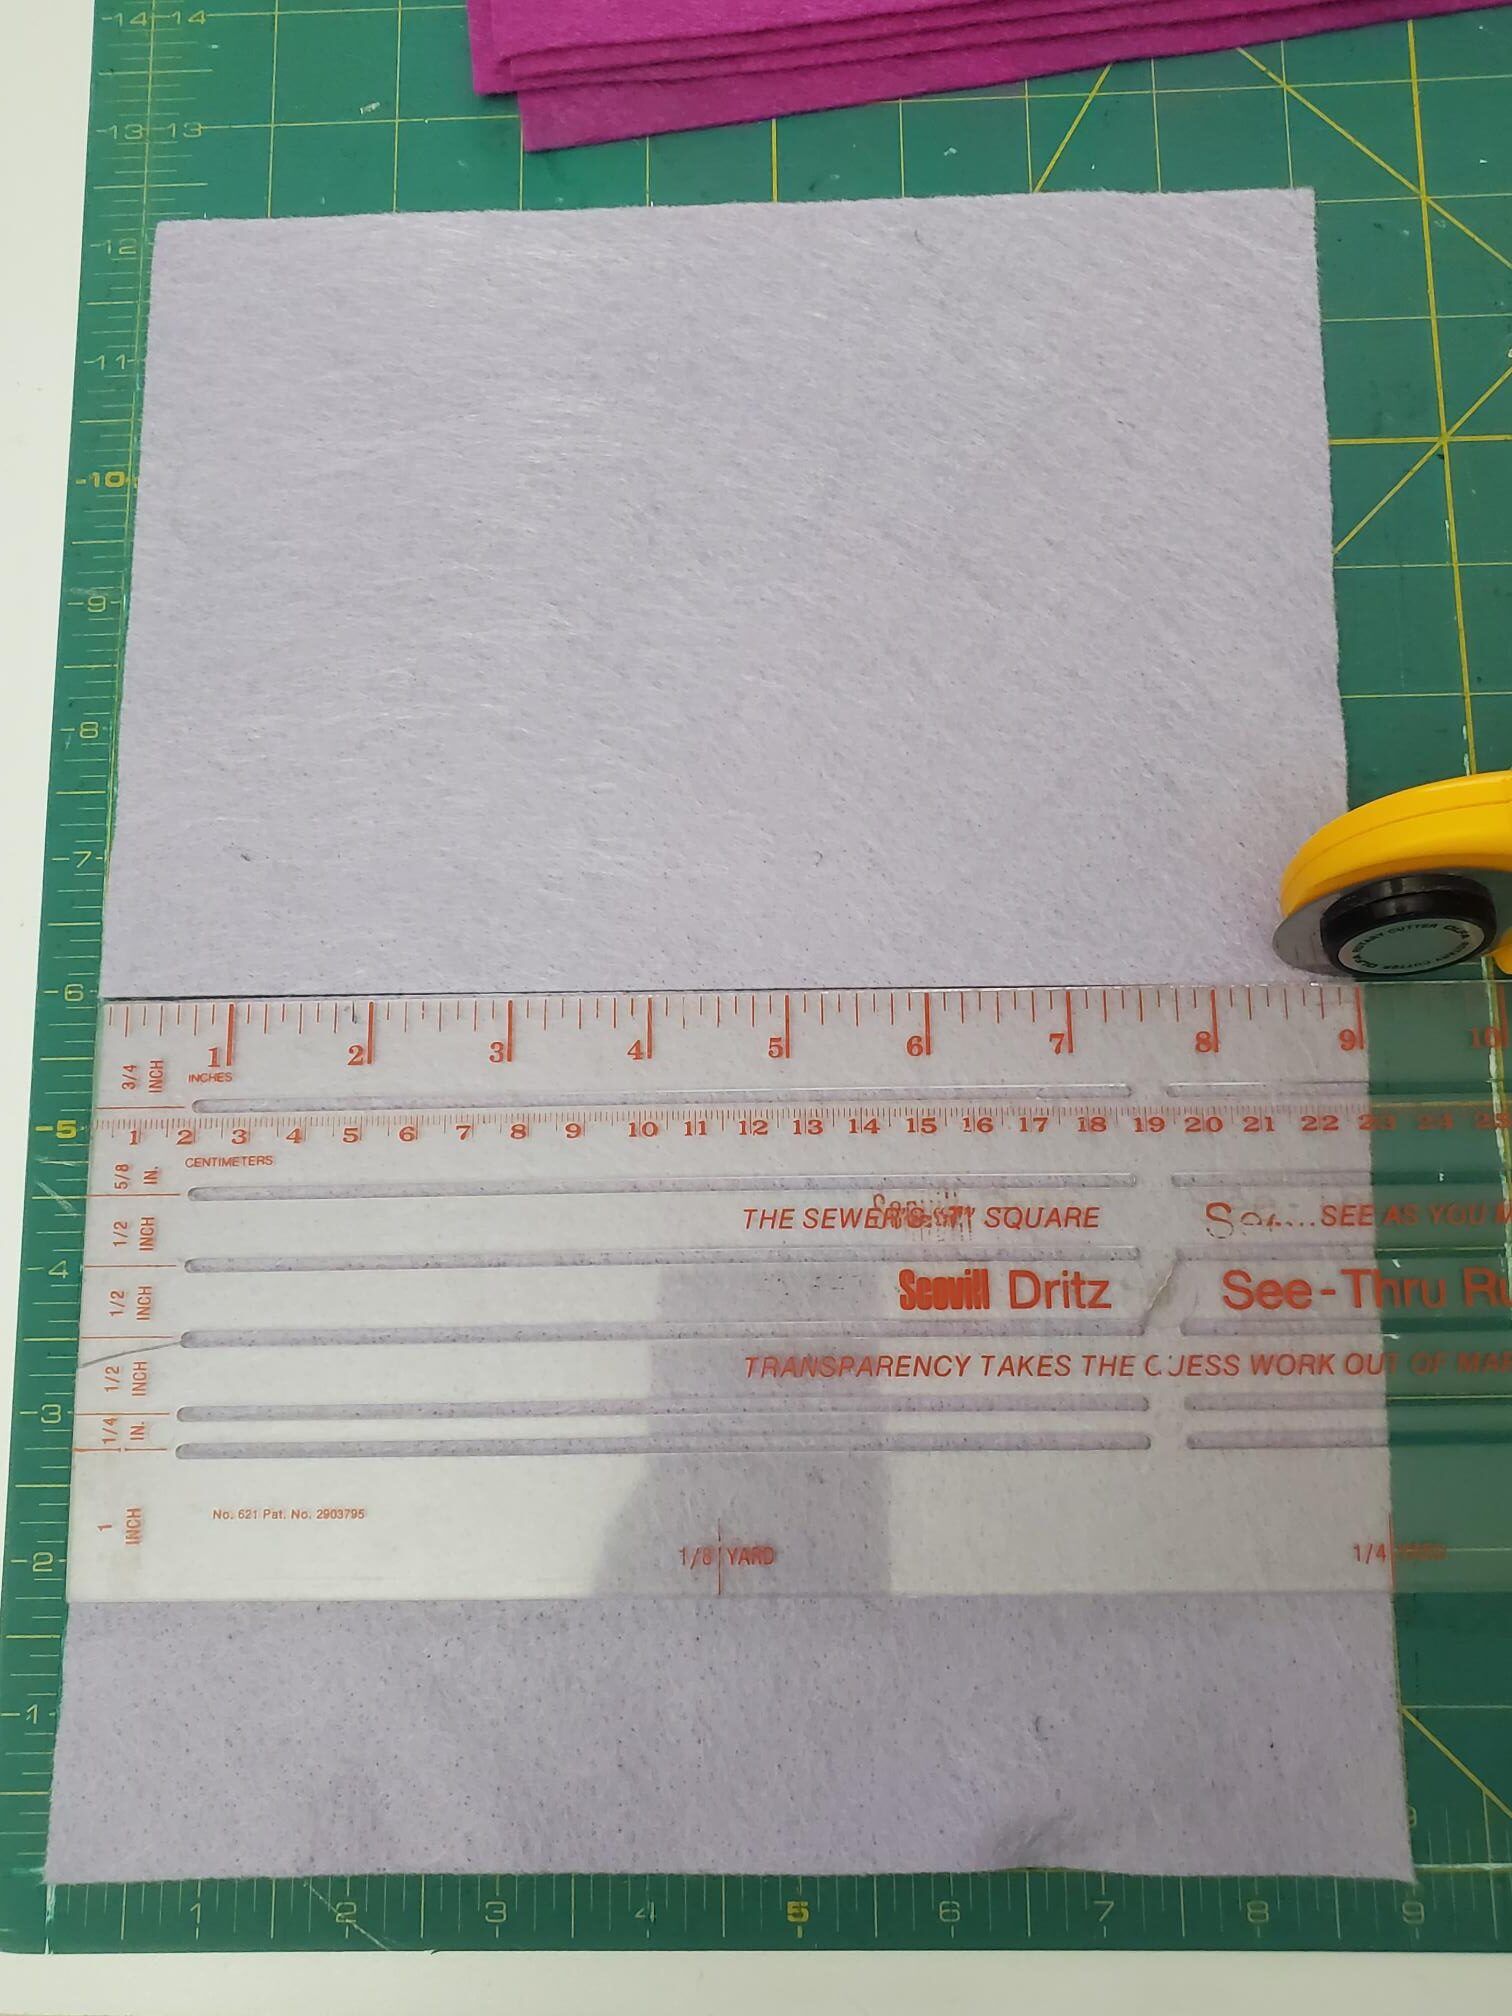
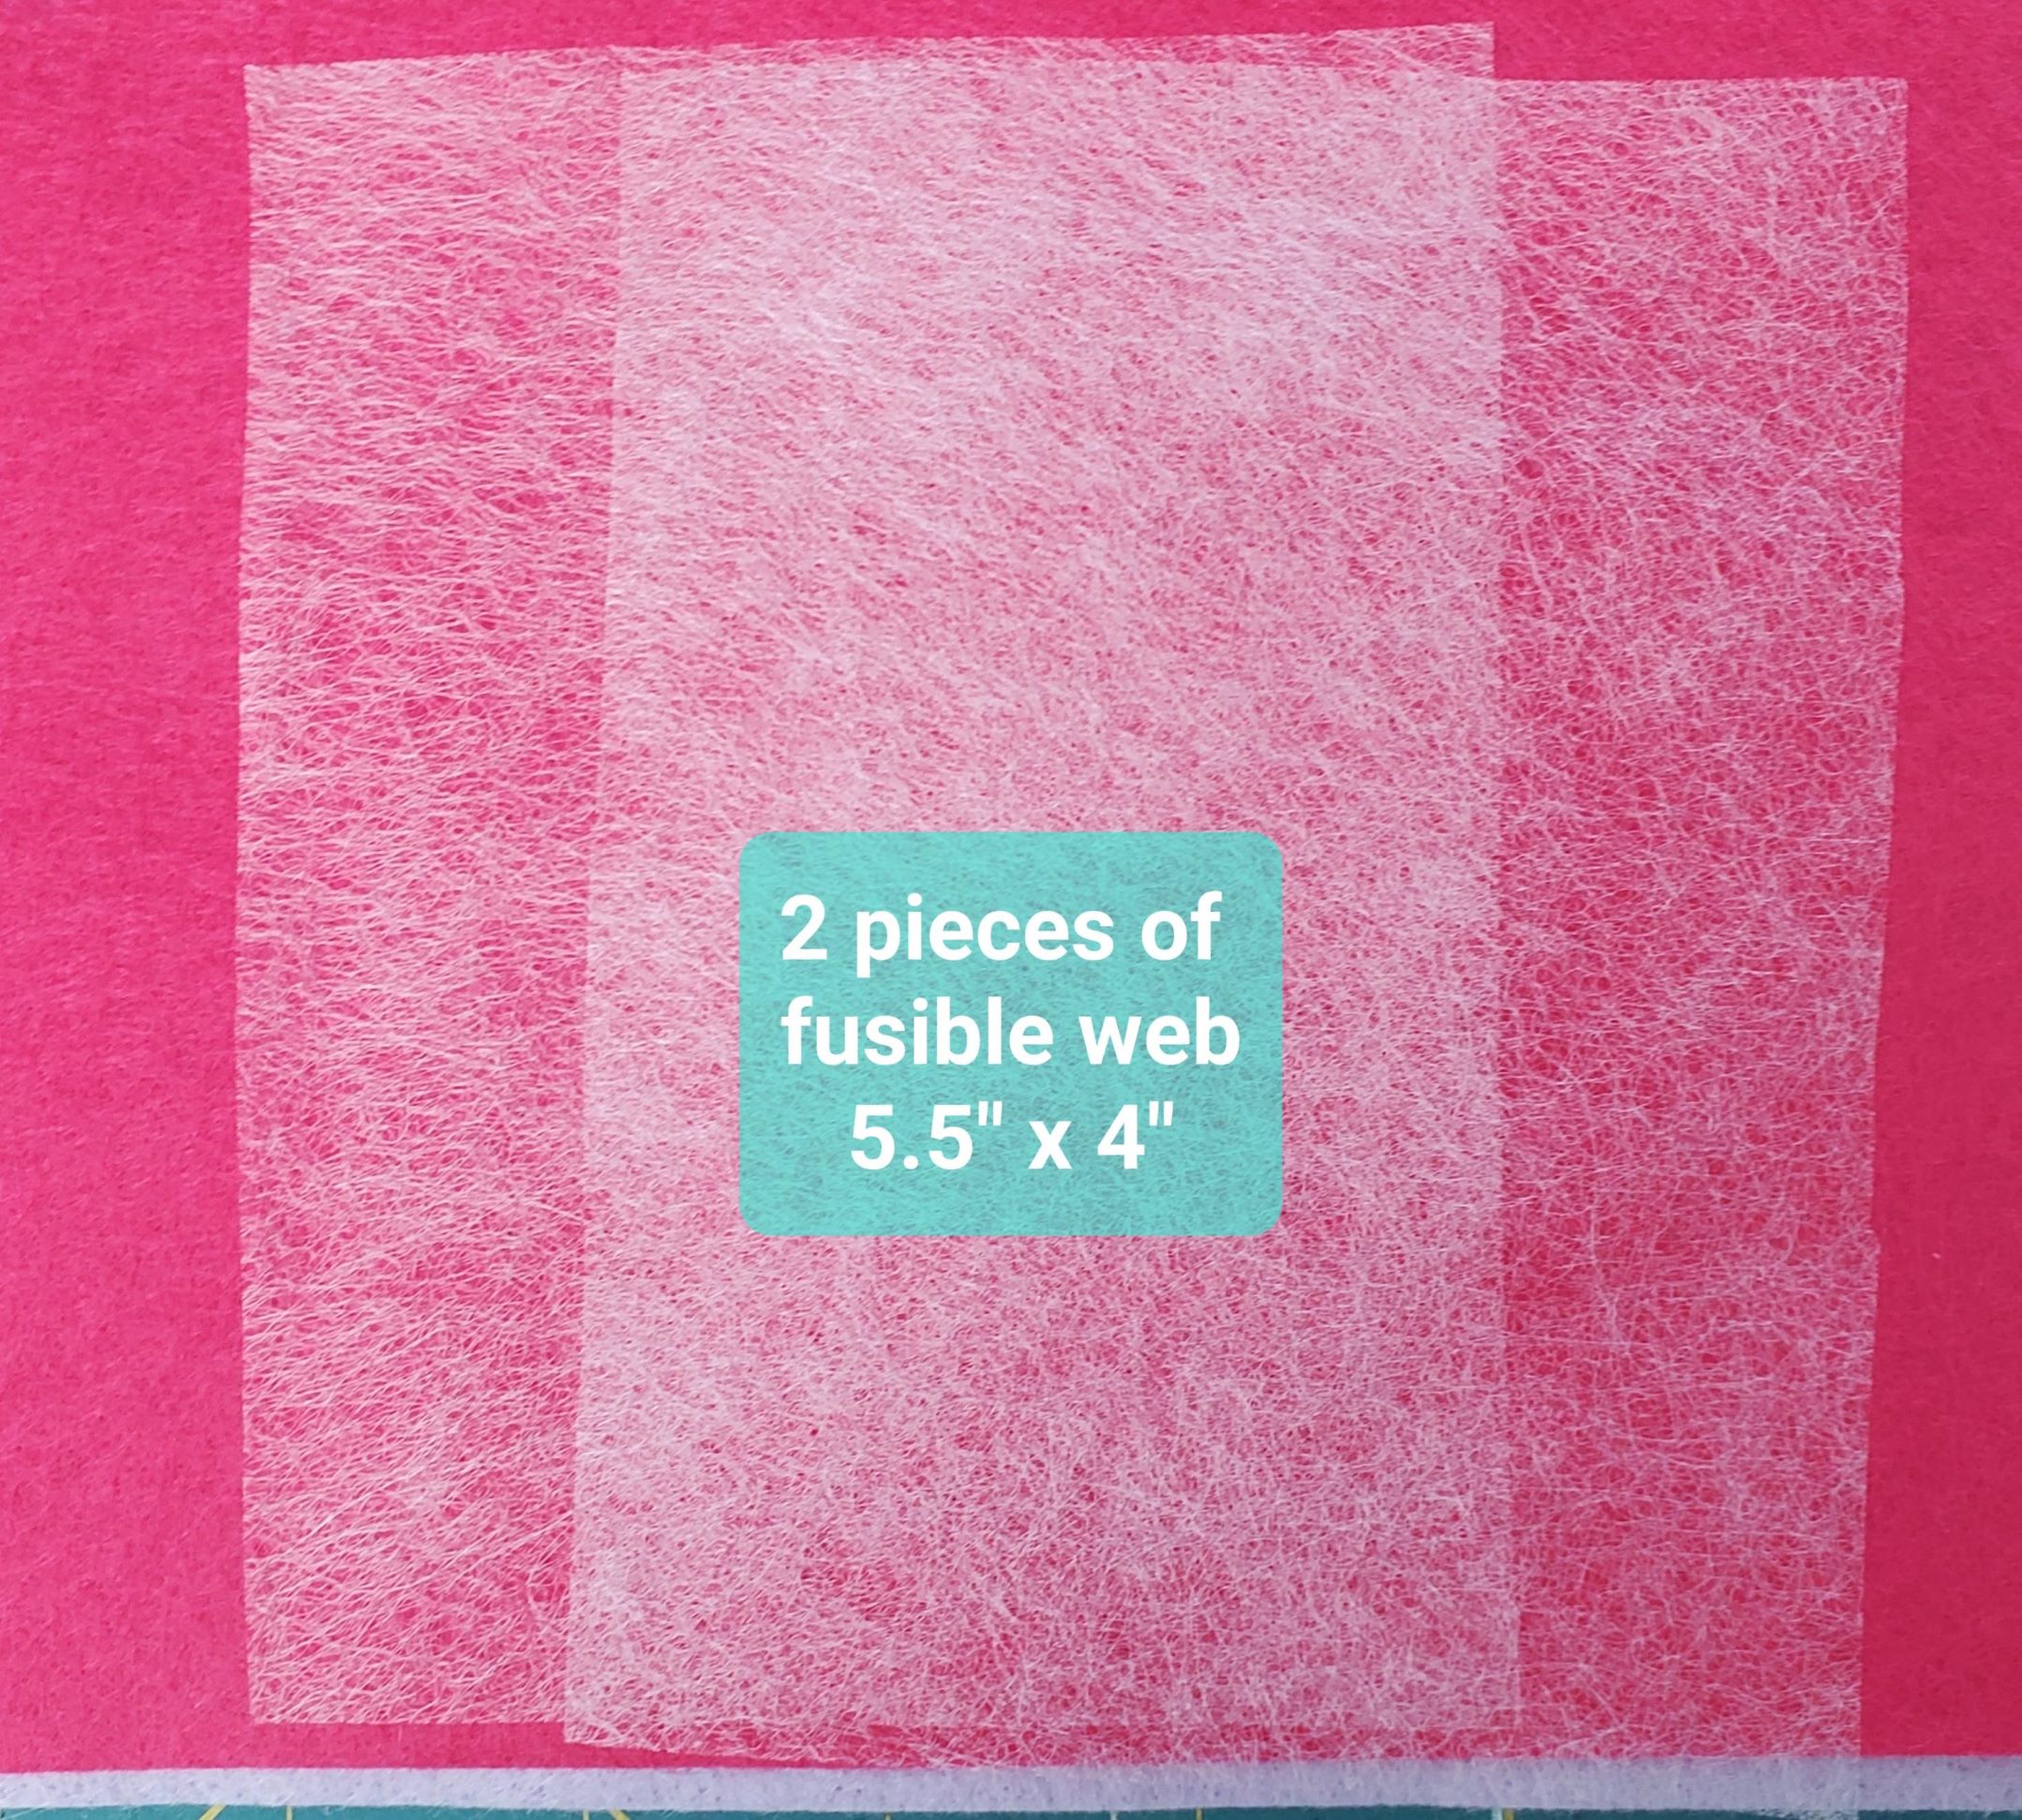
You will also need to cut out one rectangle (of the same size) of the fusible web. Cut that rectangle in half so that you have two smaller, rectangle pieces.
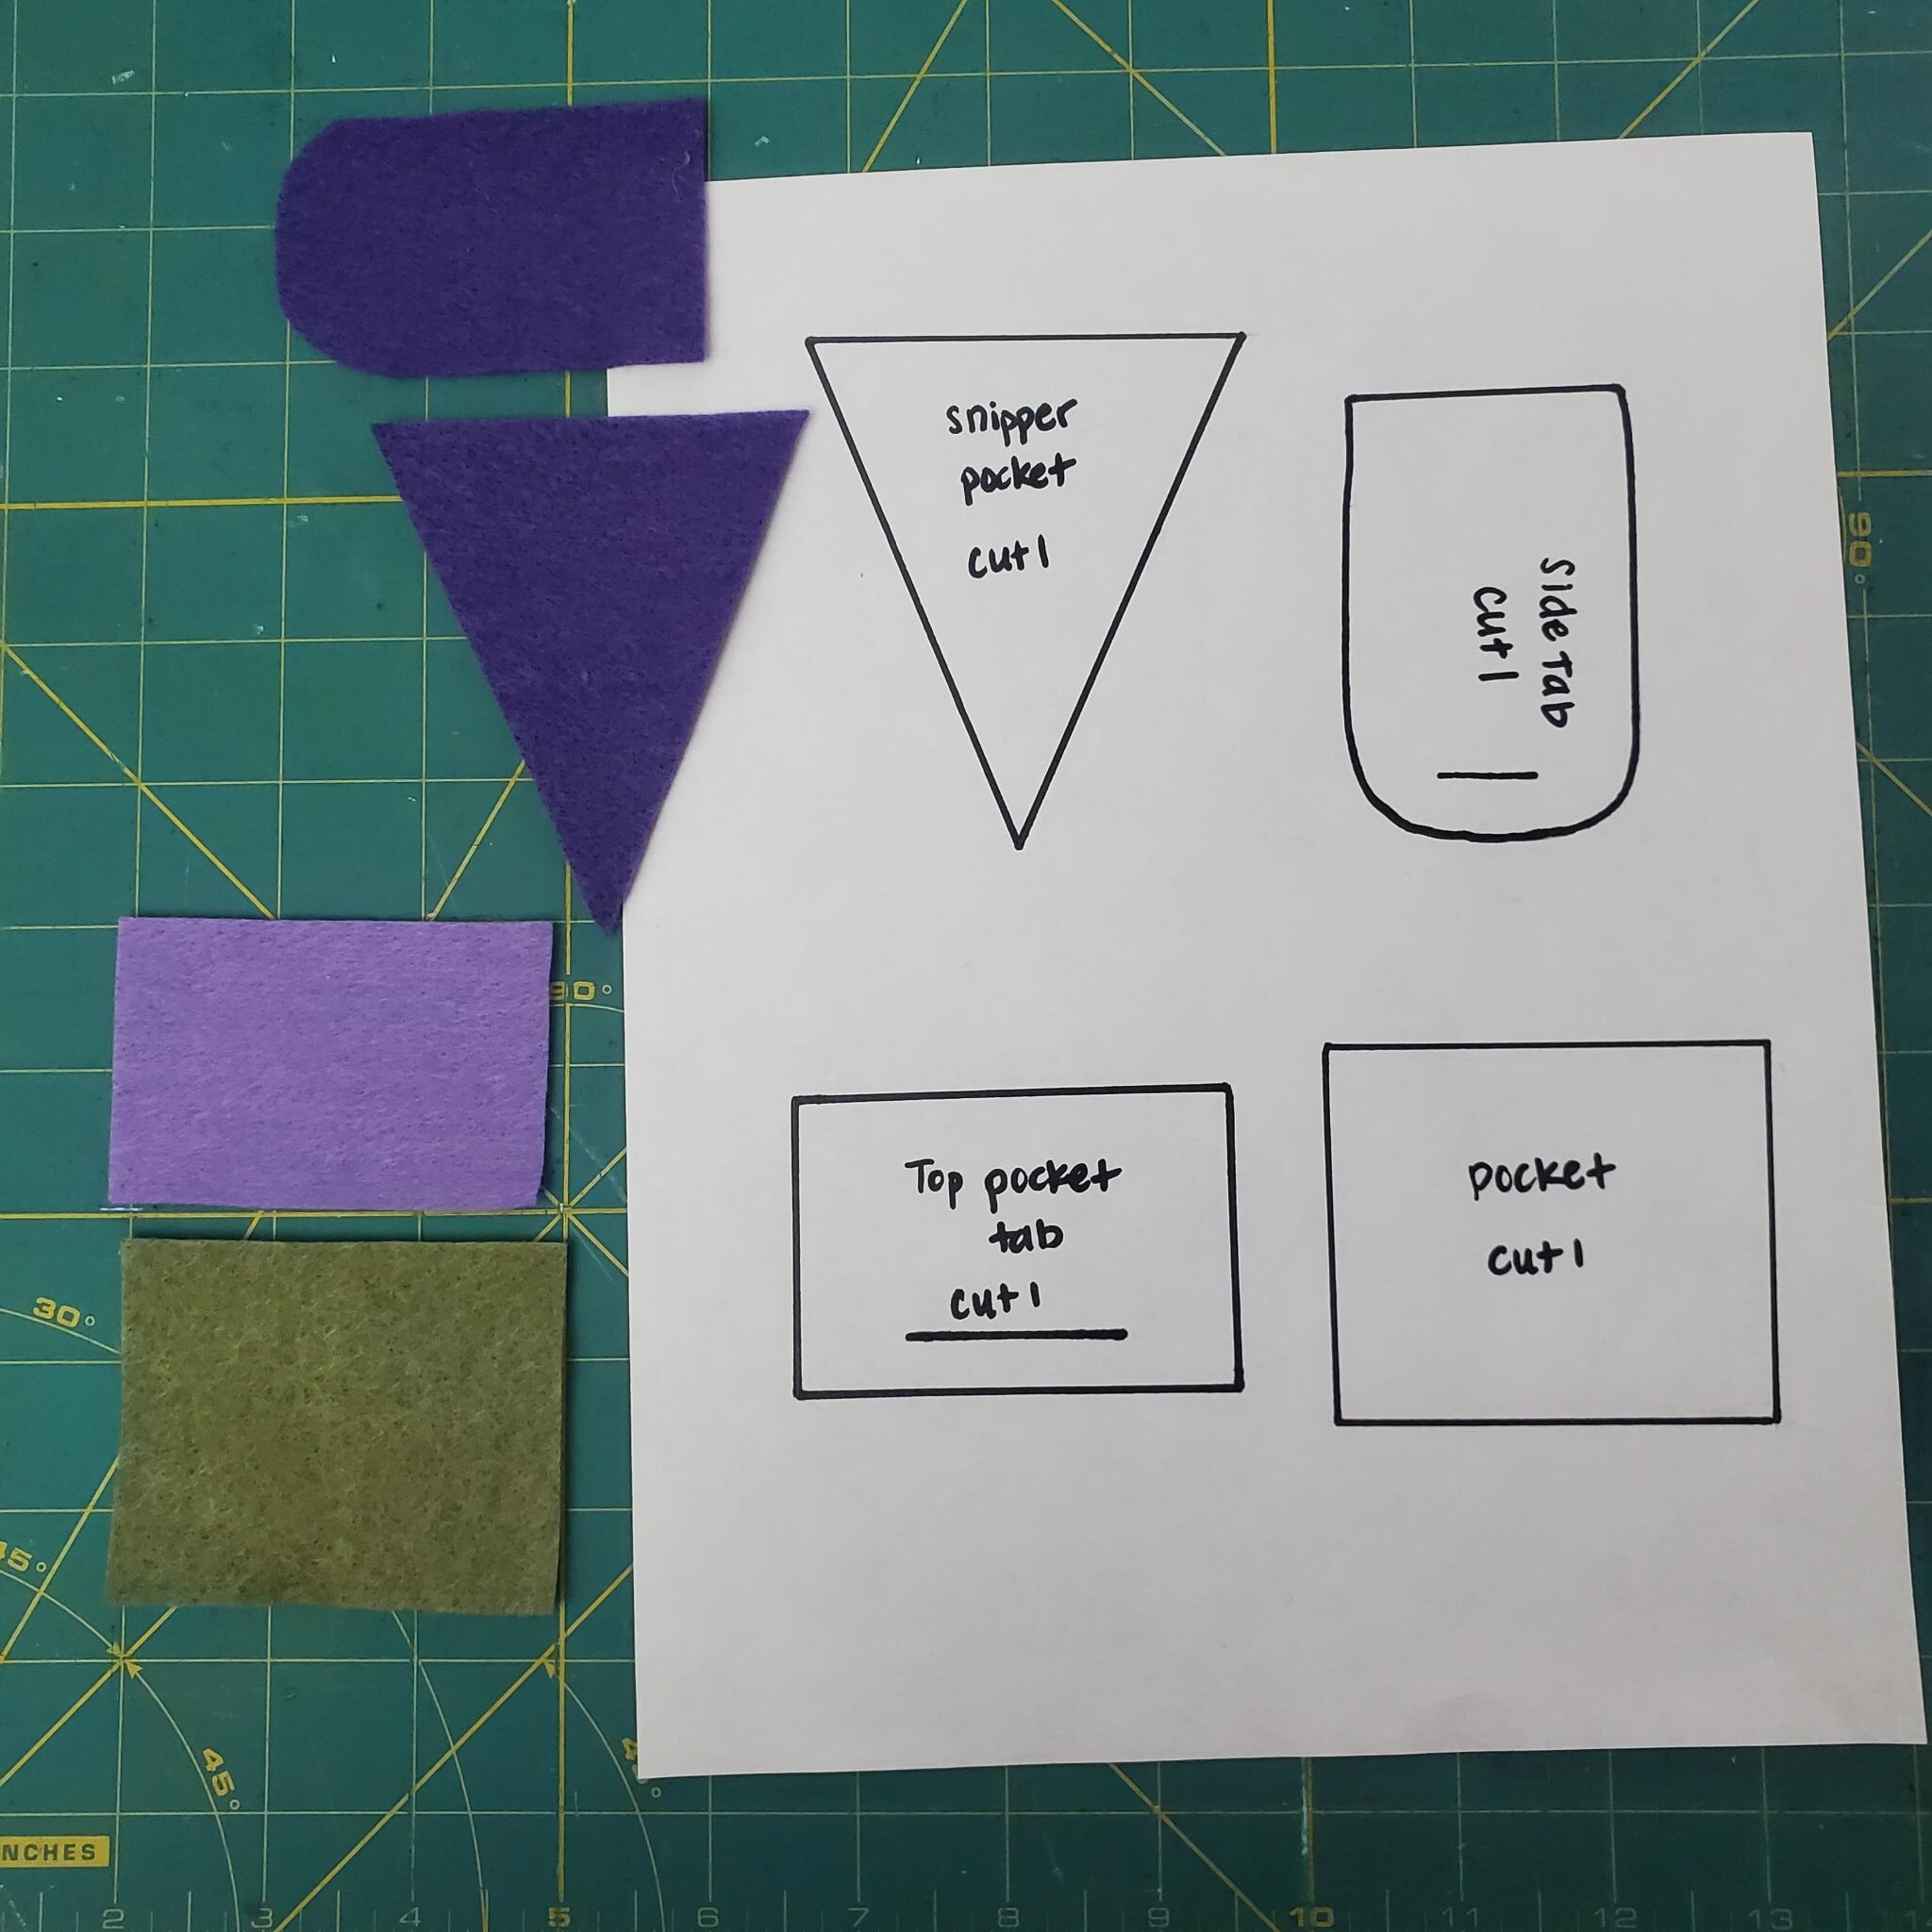
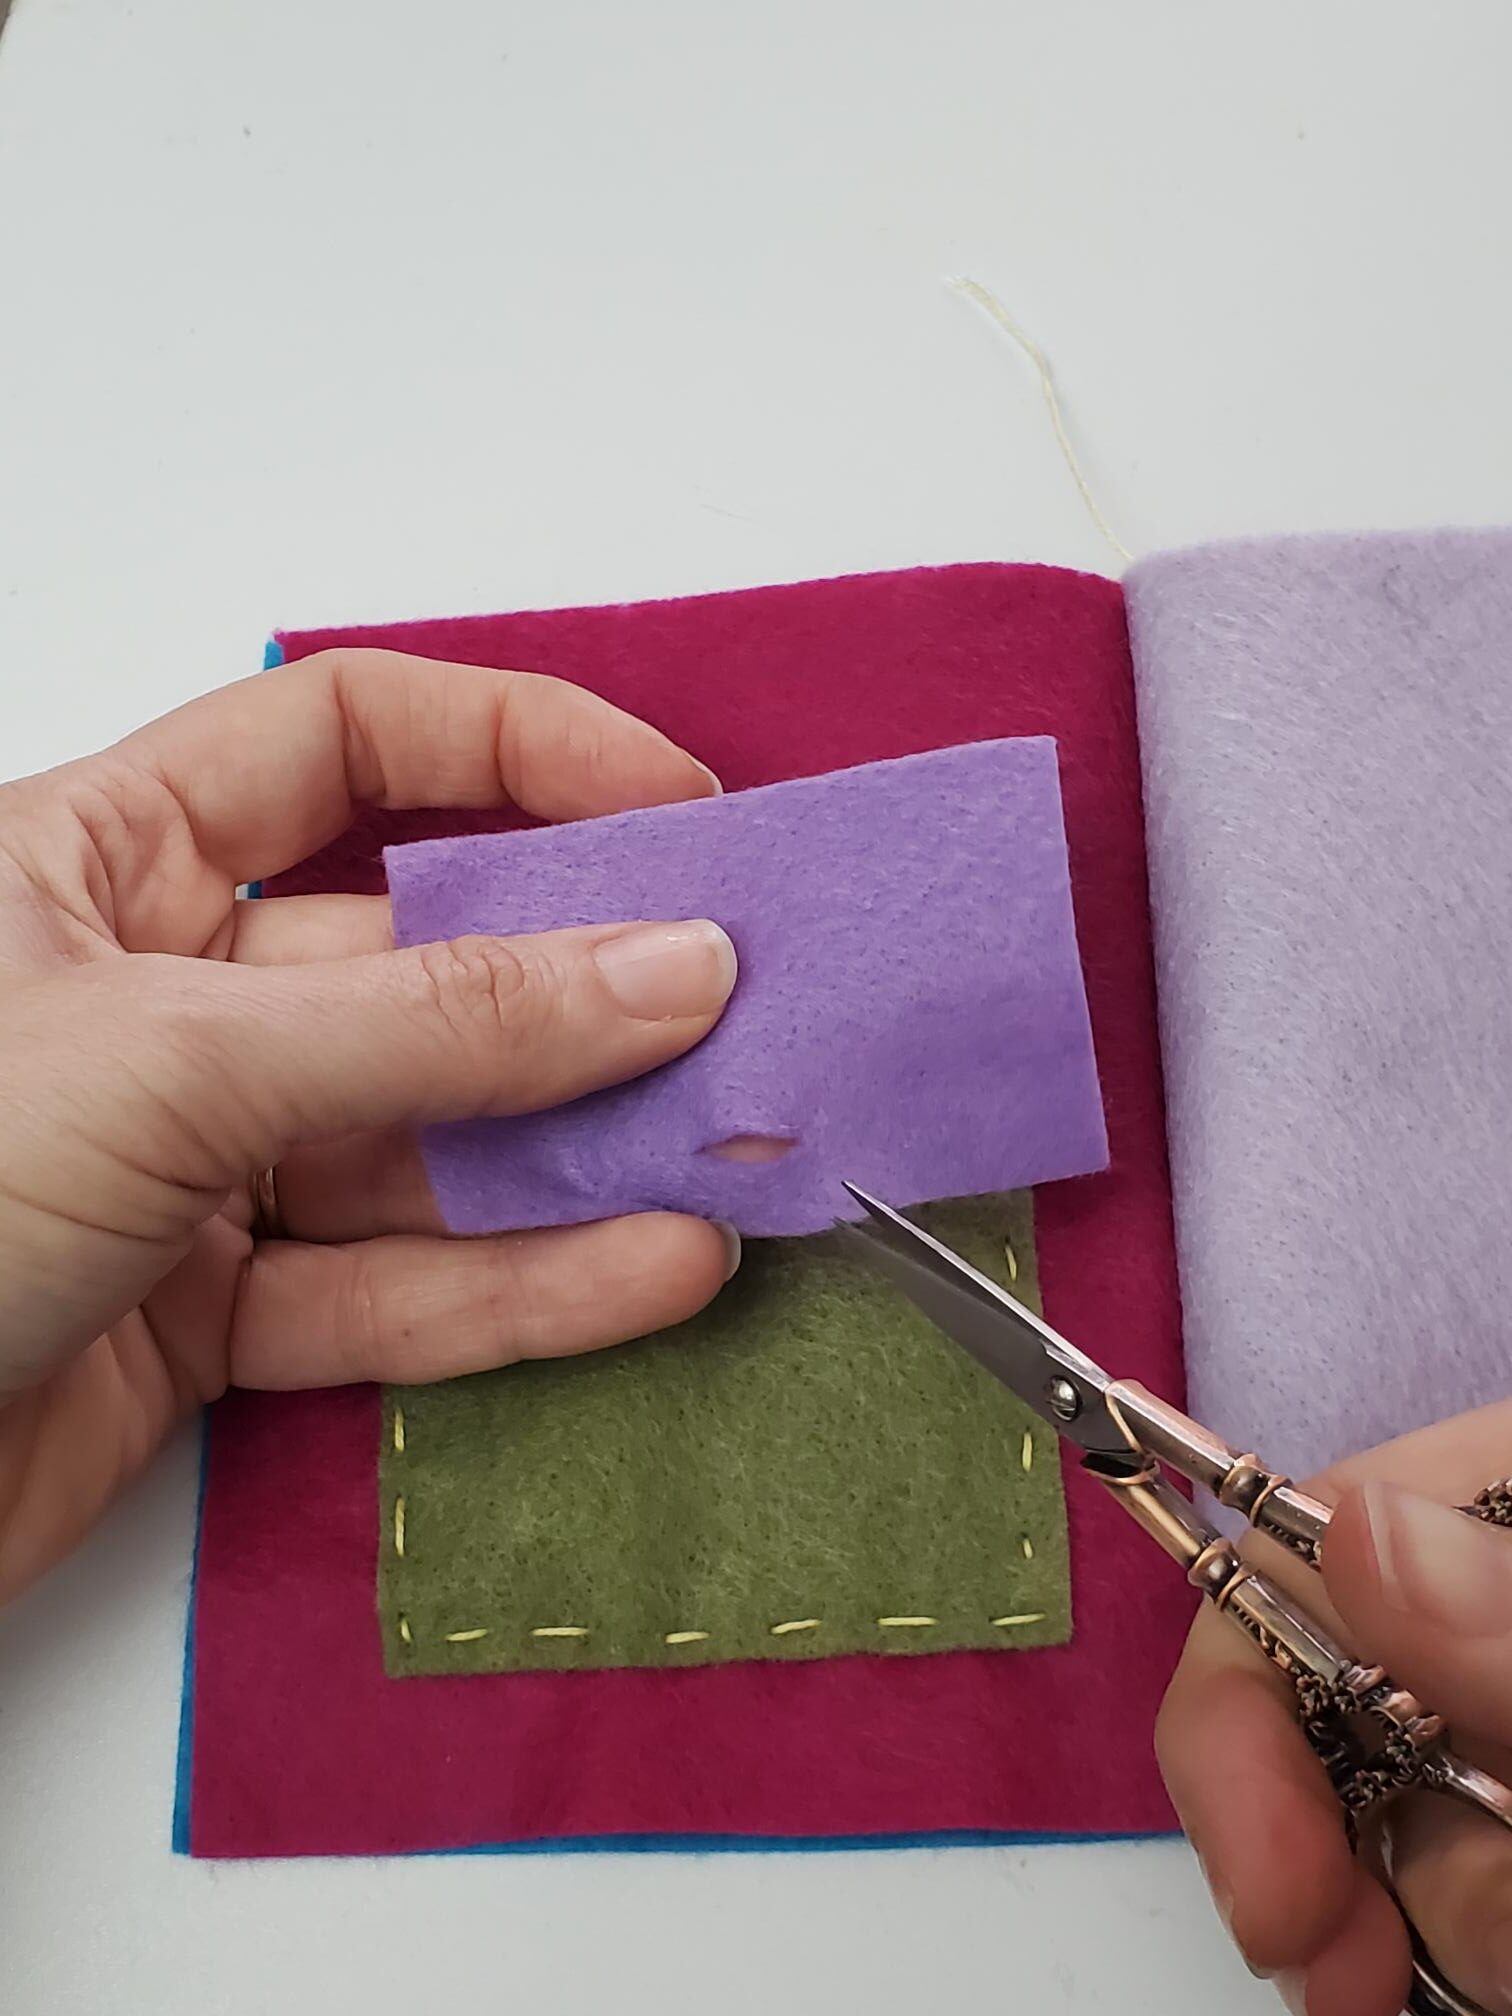
Cut out the rest of the pieces (the tab, pockets, etc). You can either create your own or use the pattern I created (linked above, under the supply list). Note: even though the pattern for the pocket says cut 1, cut 3. I used the other two pockets for the inside of the book to hold the thread/thread cards. You still only need one pocket tab.
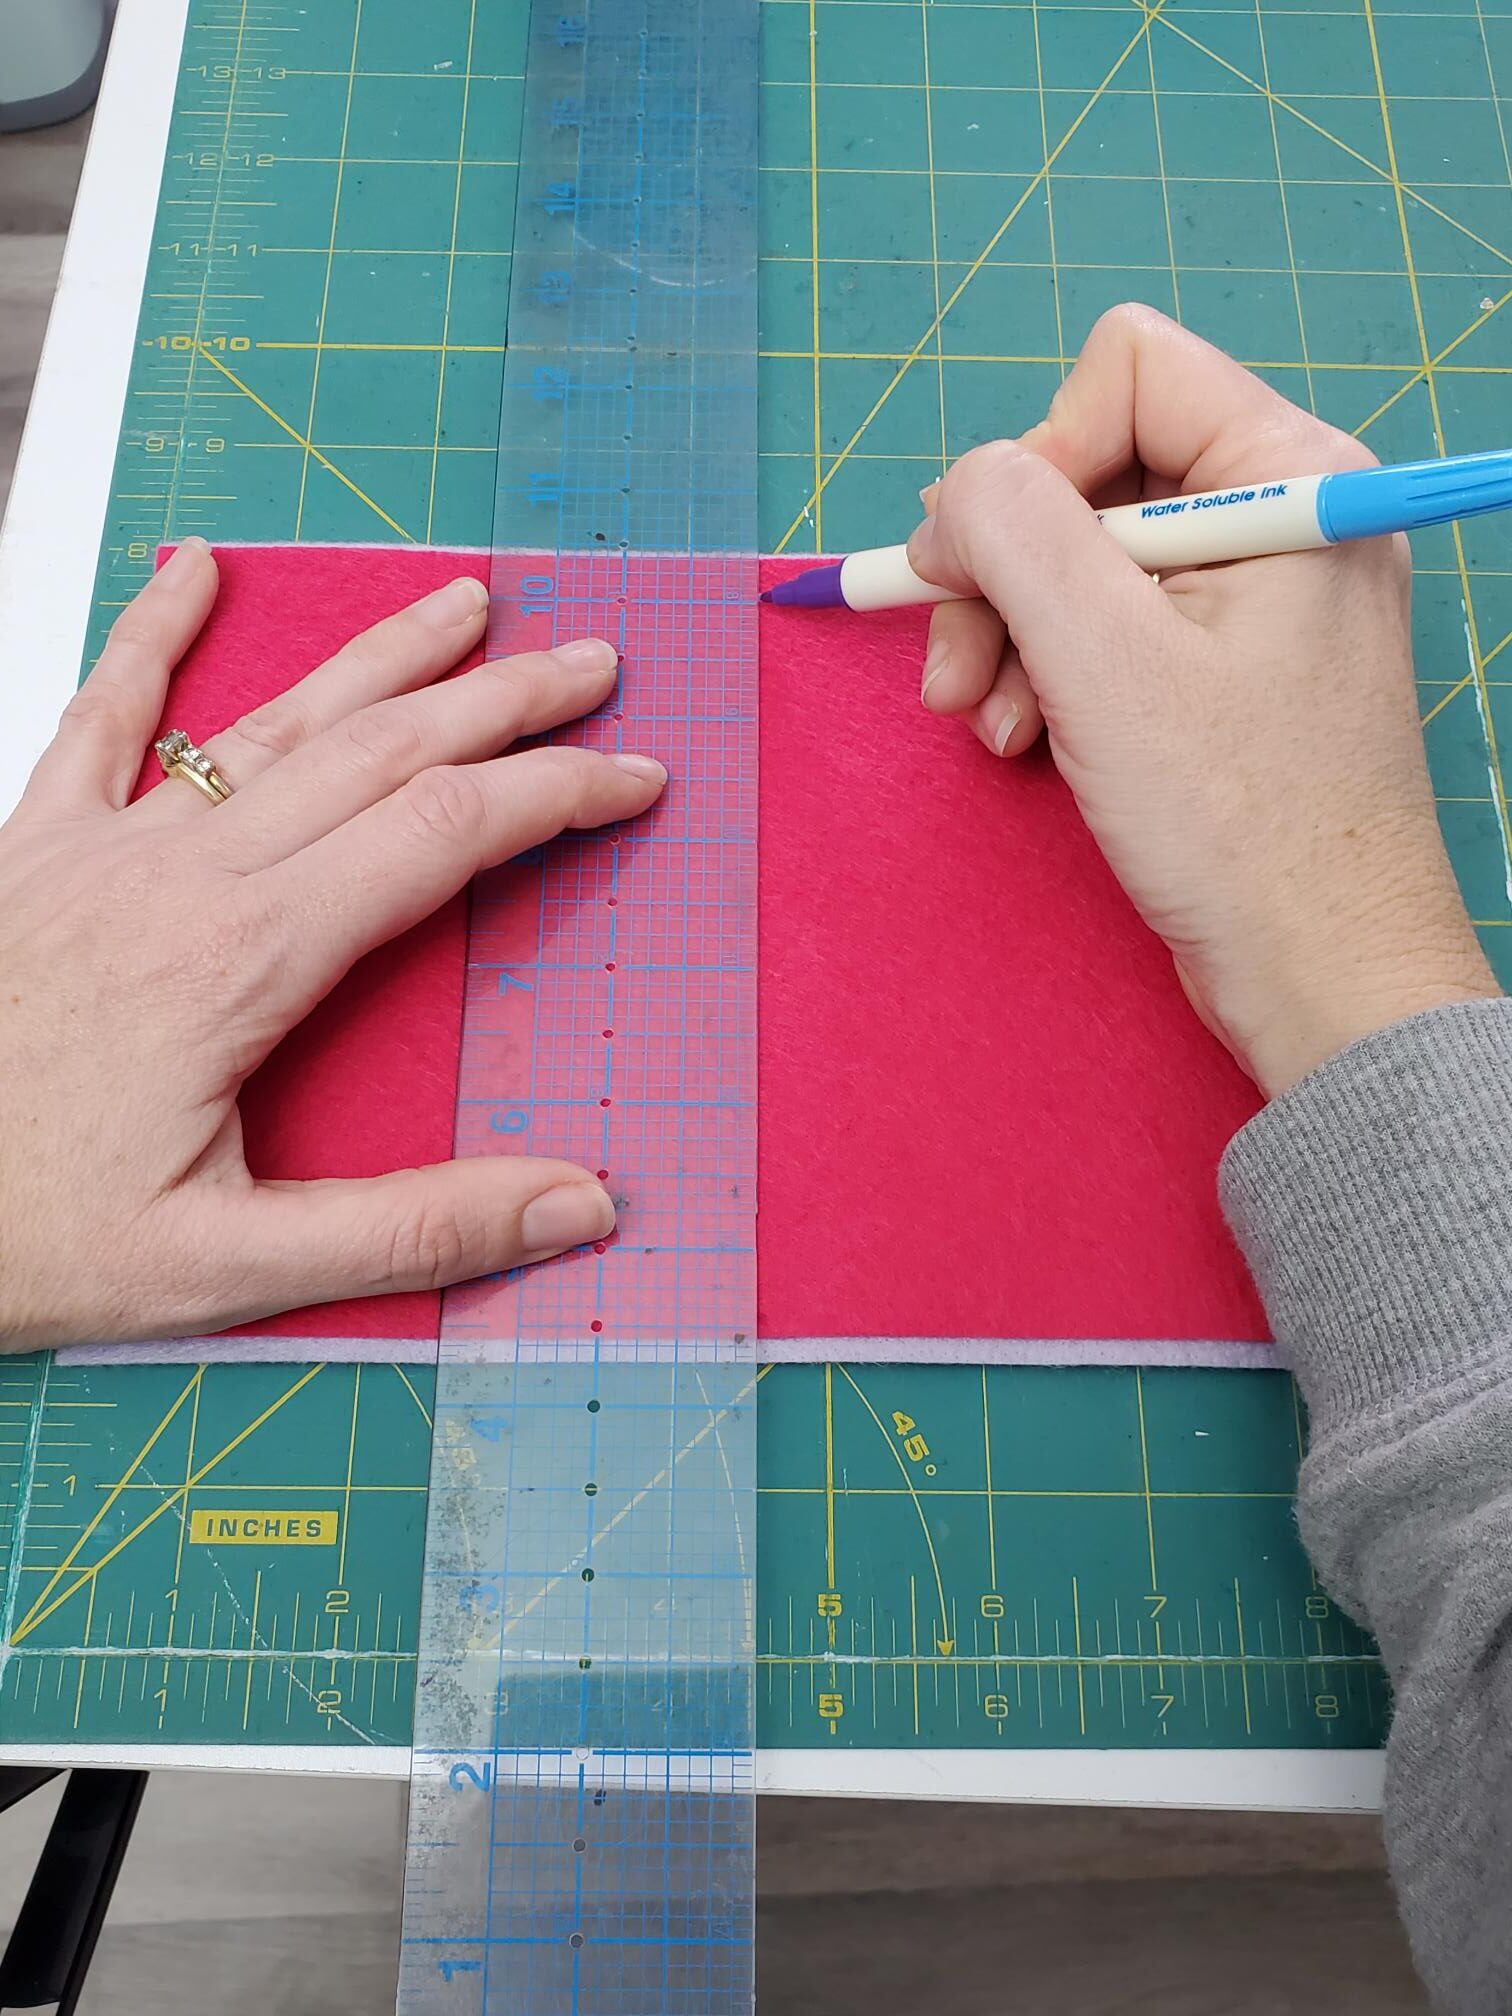
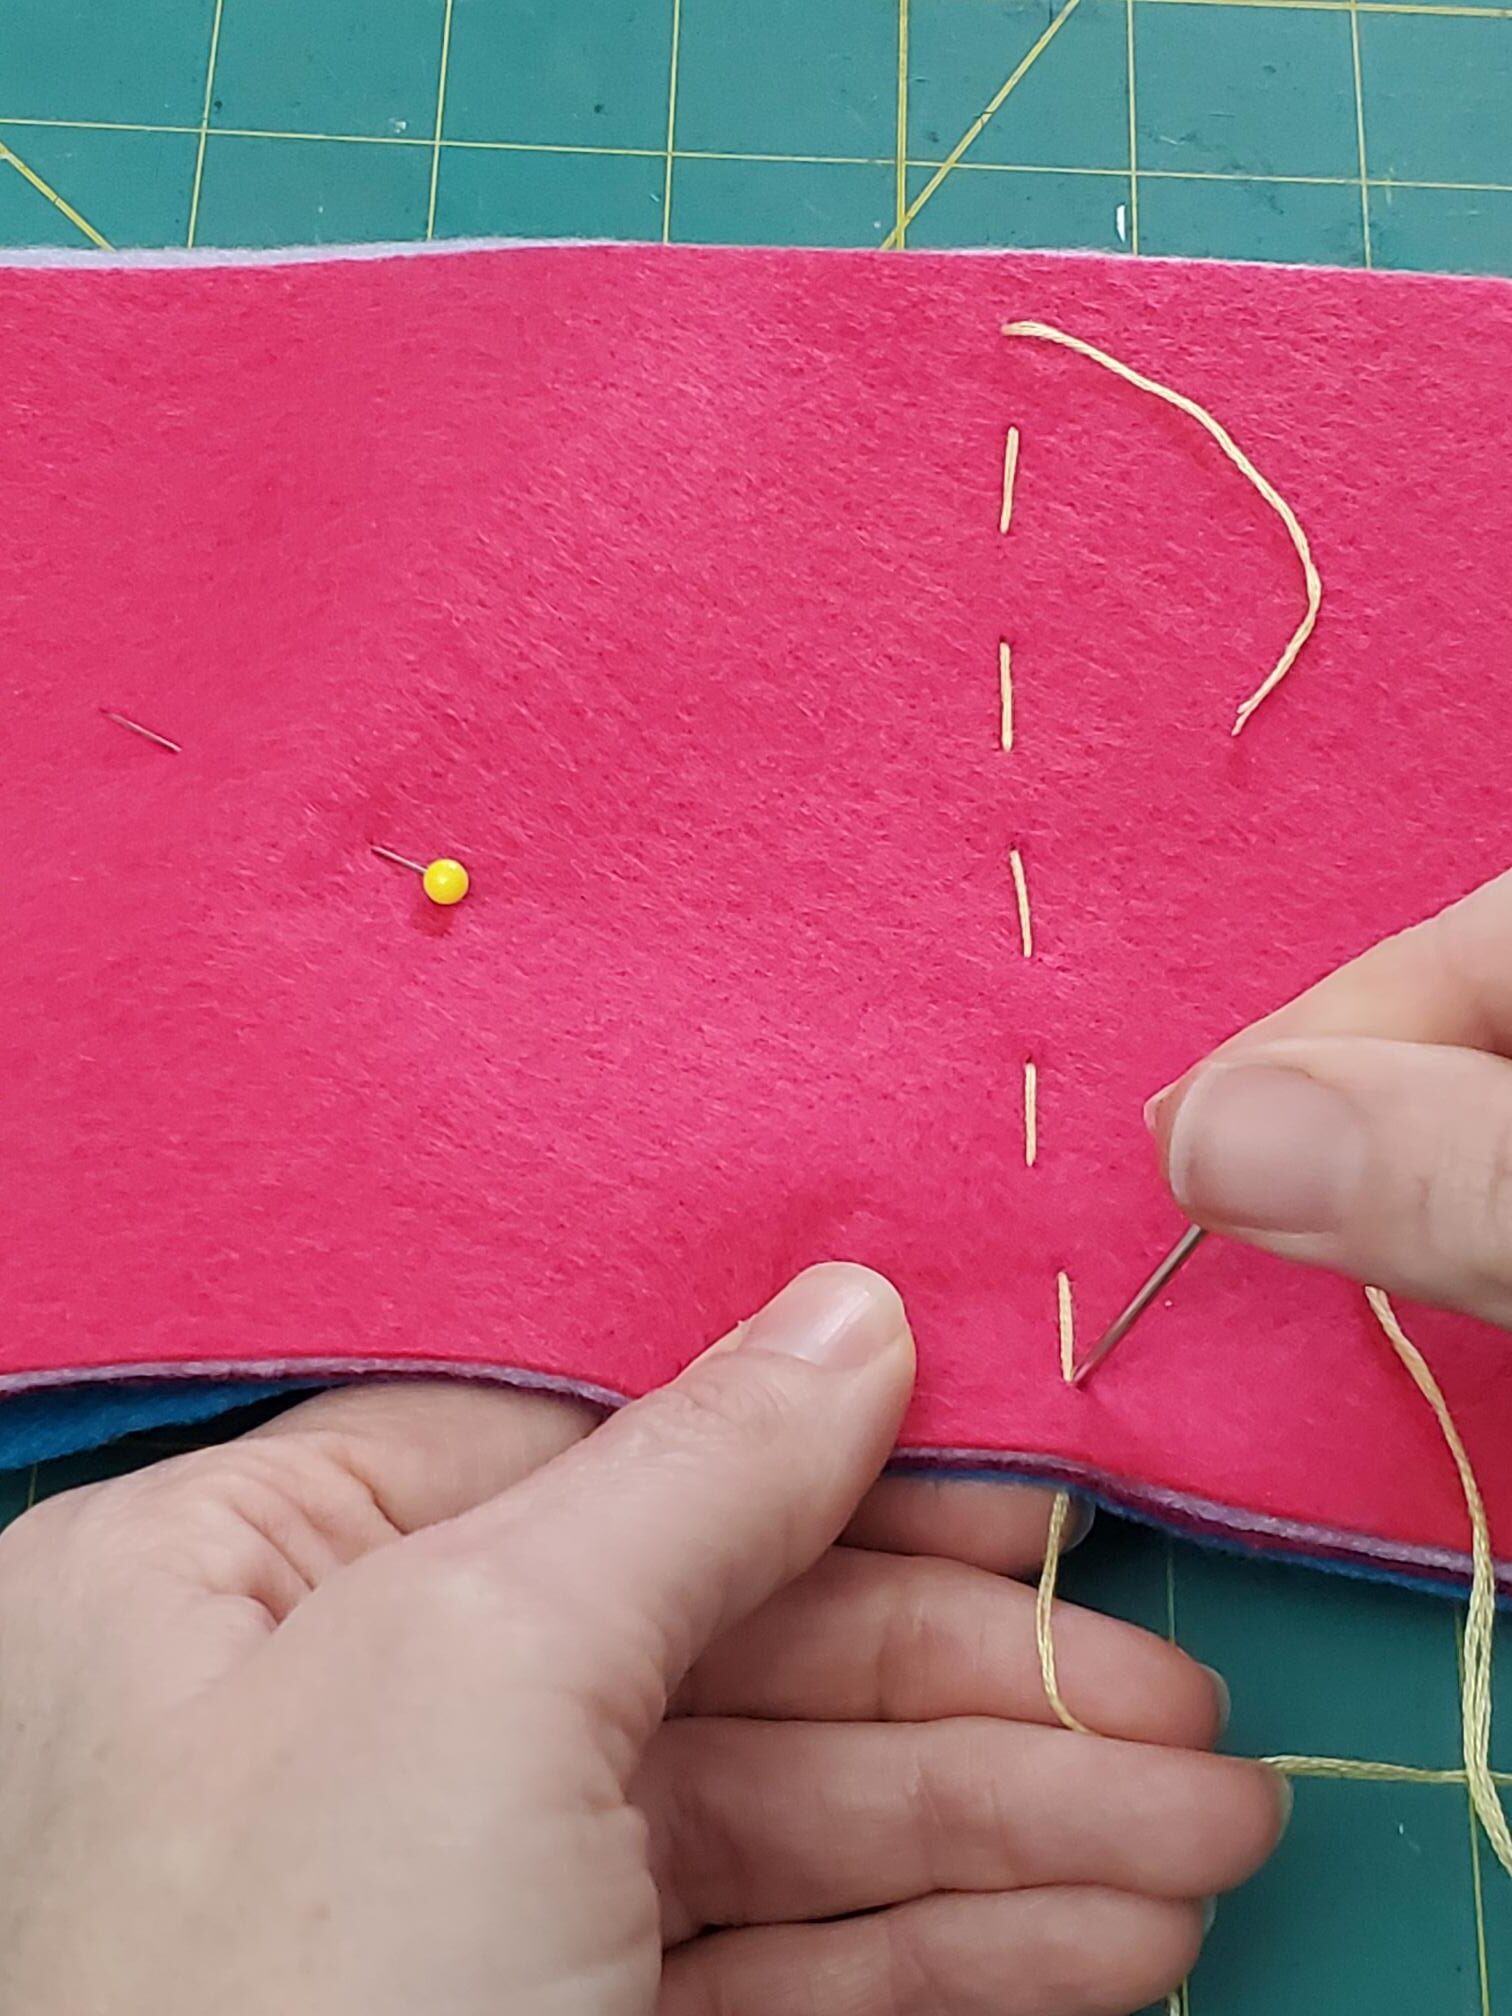
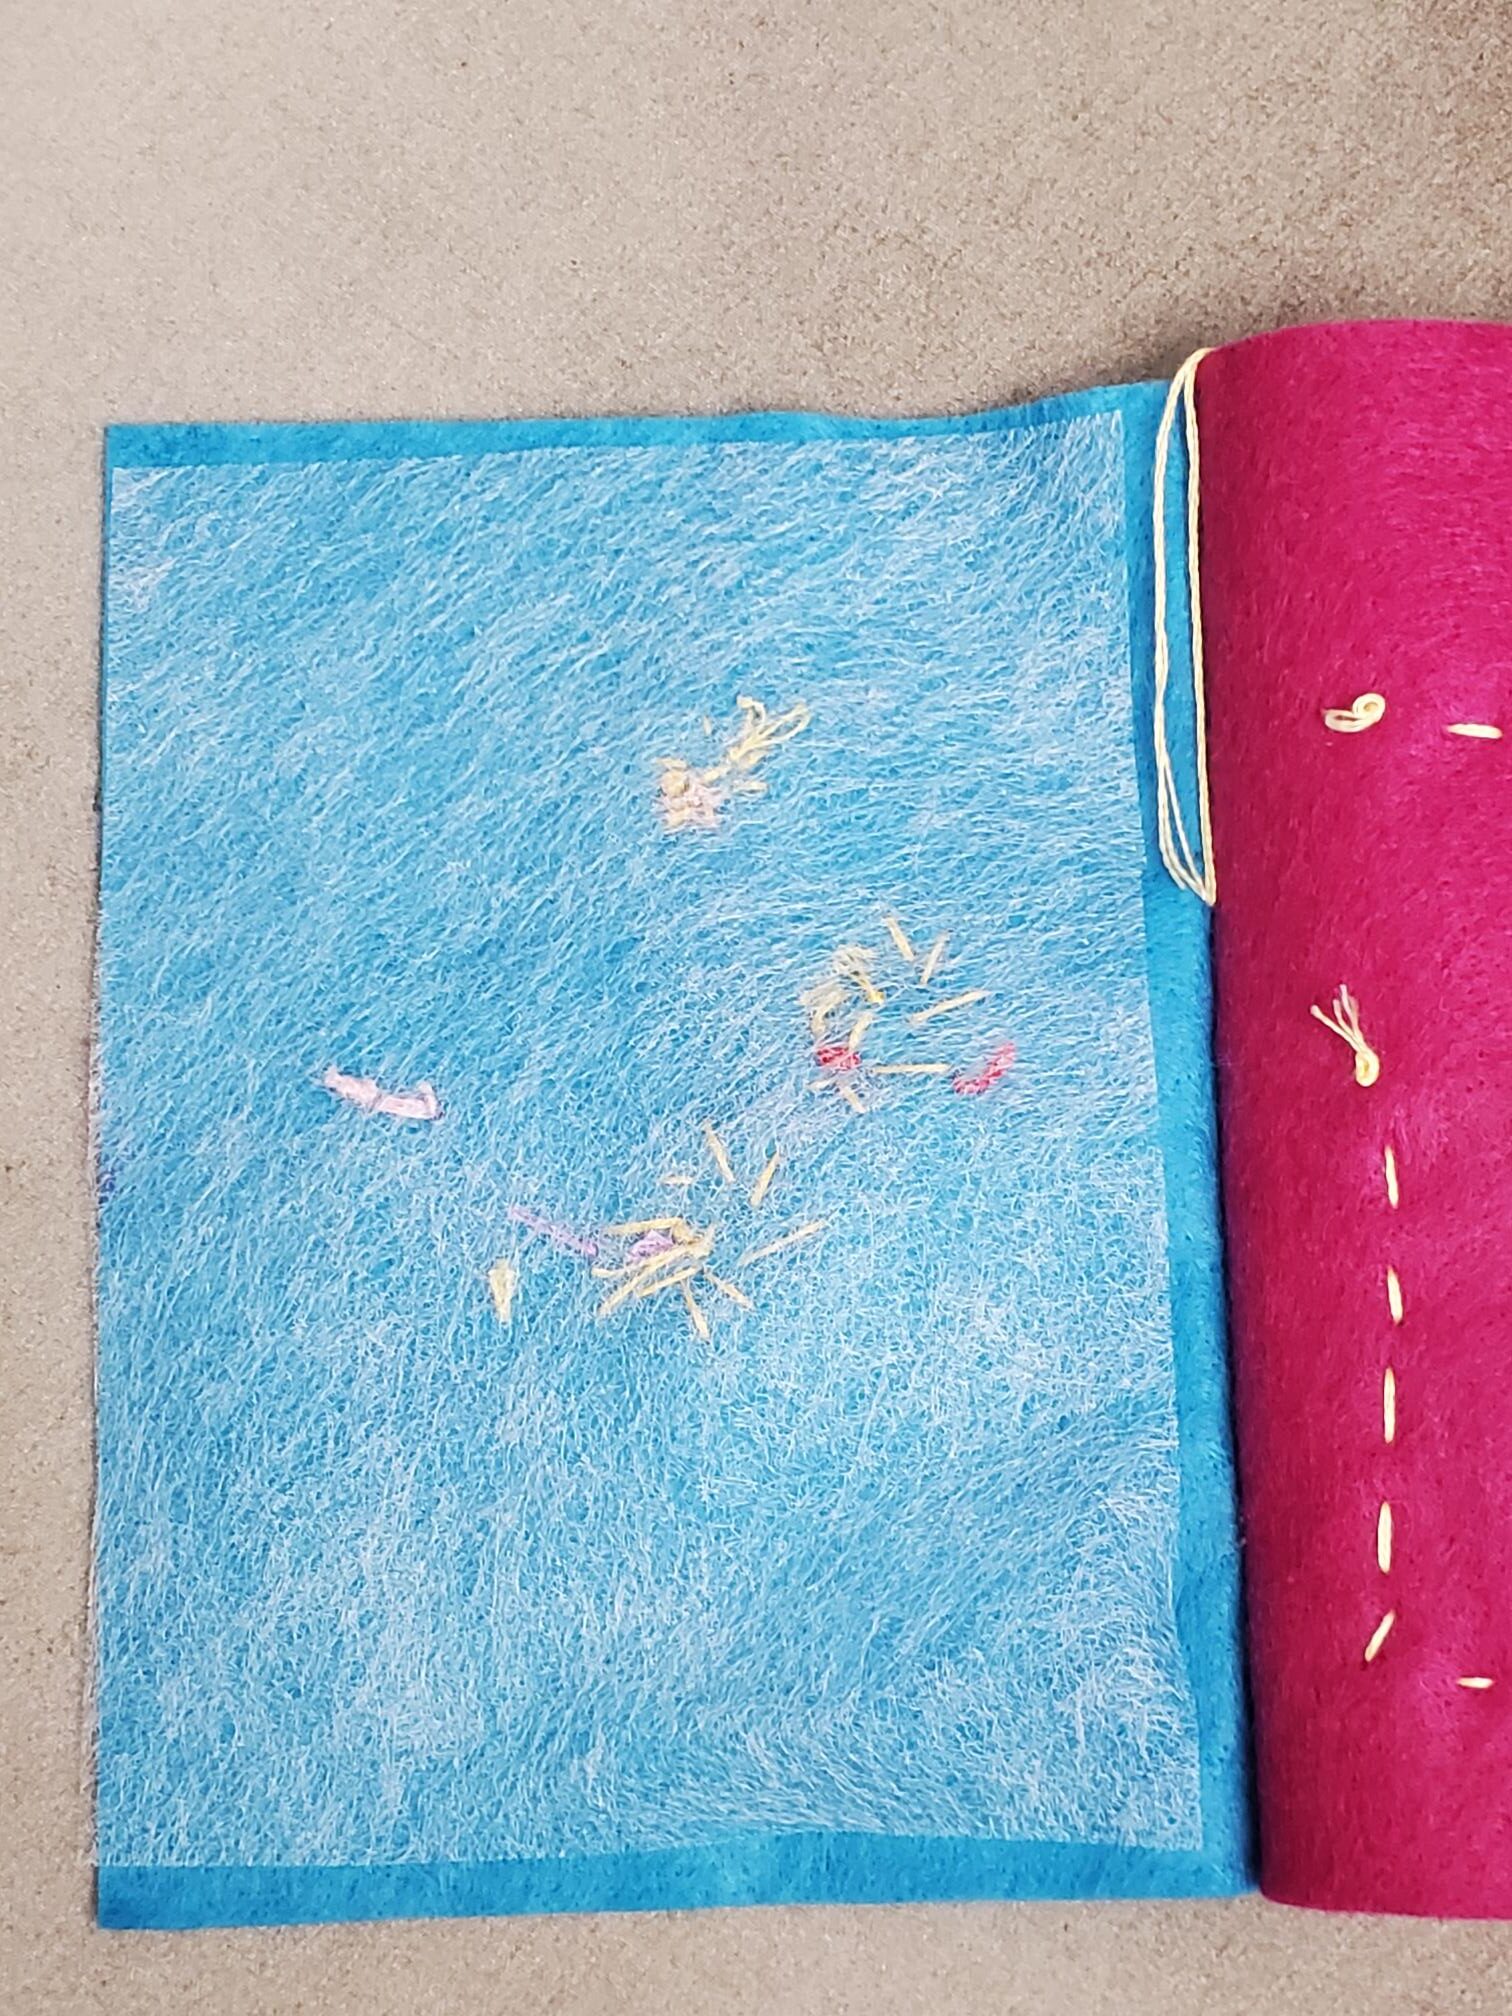
Take your four rectangle pieces of felt, and layer them on top of each other, beginning with the piece you want for the outside of the book on the bottom. With a fabric marker and ruler, draw a line down the middle of the page.
Thread a needle with embroidery thread. I usually separate three strands of thread and use that, rather than using all six threads. Knot the end of the thread and keep a tail (you’ll do this every time you start a new thread to sew a new piece). Starting at the top, from the inside of the first page (so that your knot will be hidden and not seen from the outside), bring your thread up on the line you just drew. Continue stitching down and up, down and up, making each stitch about 1/2″ long.
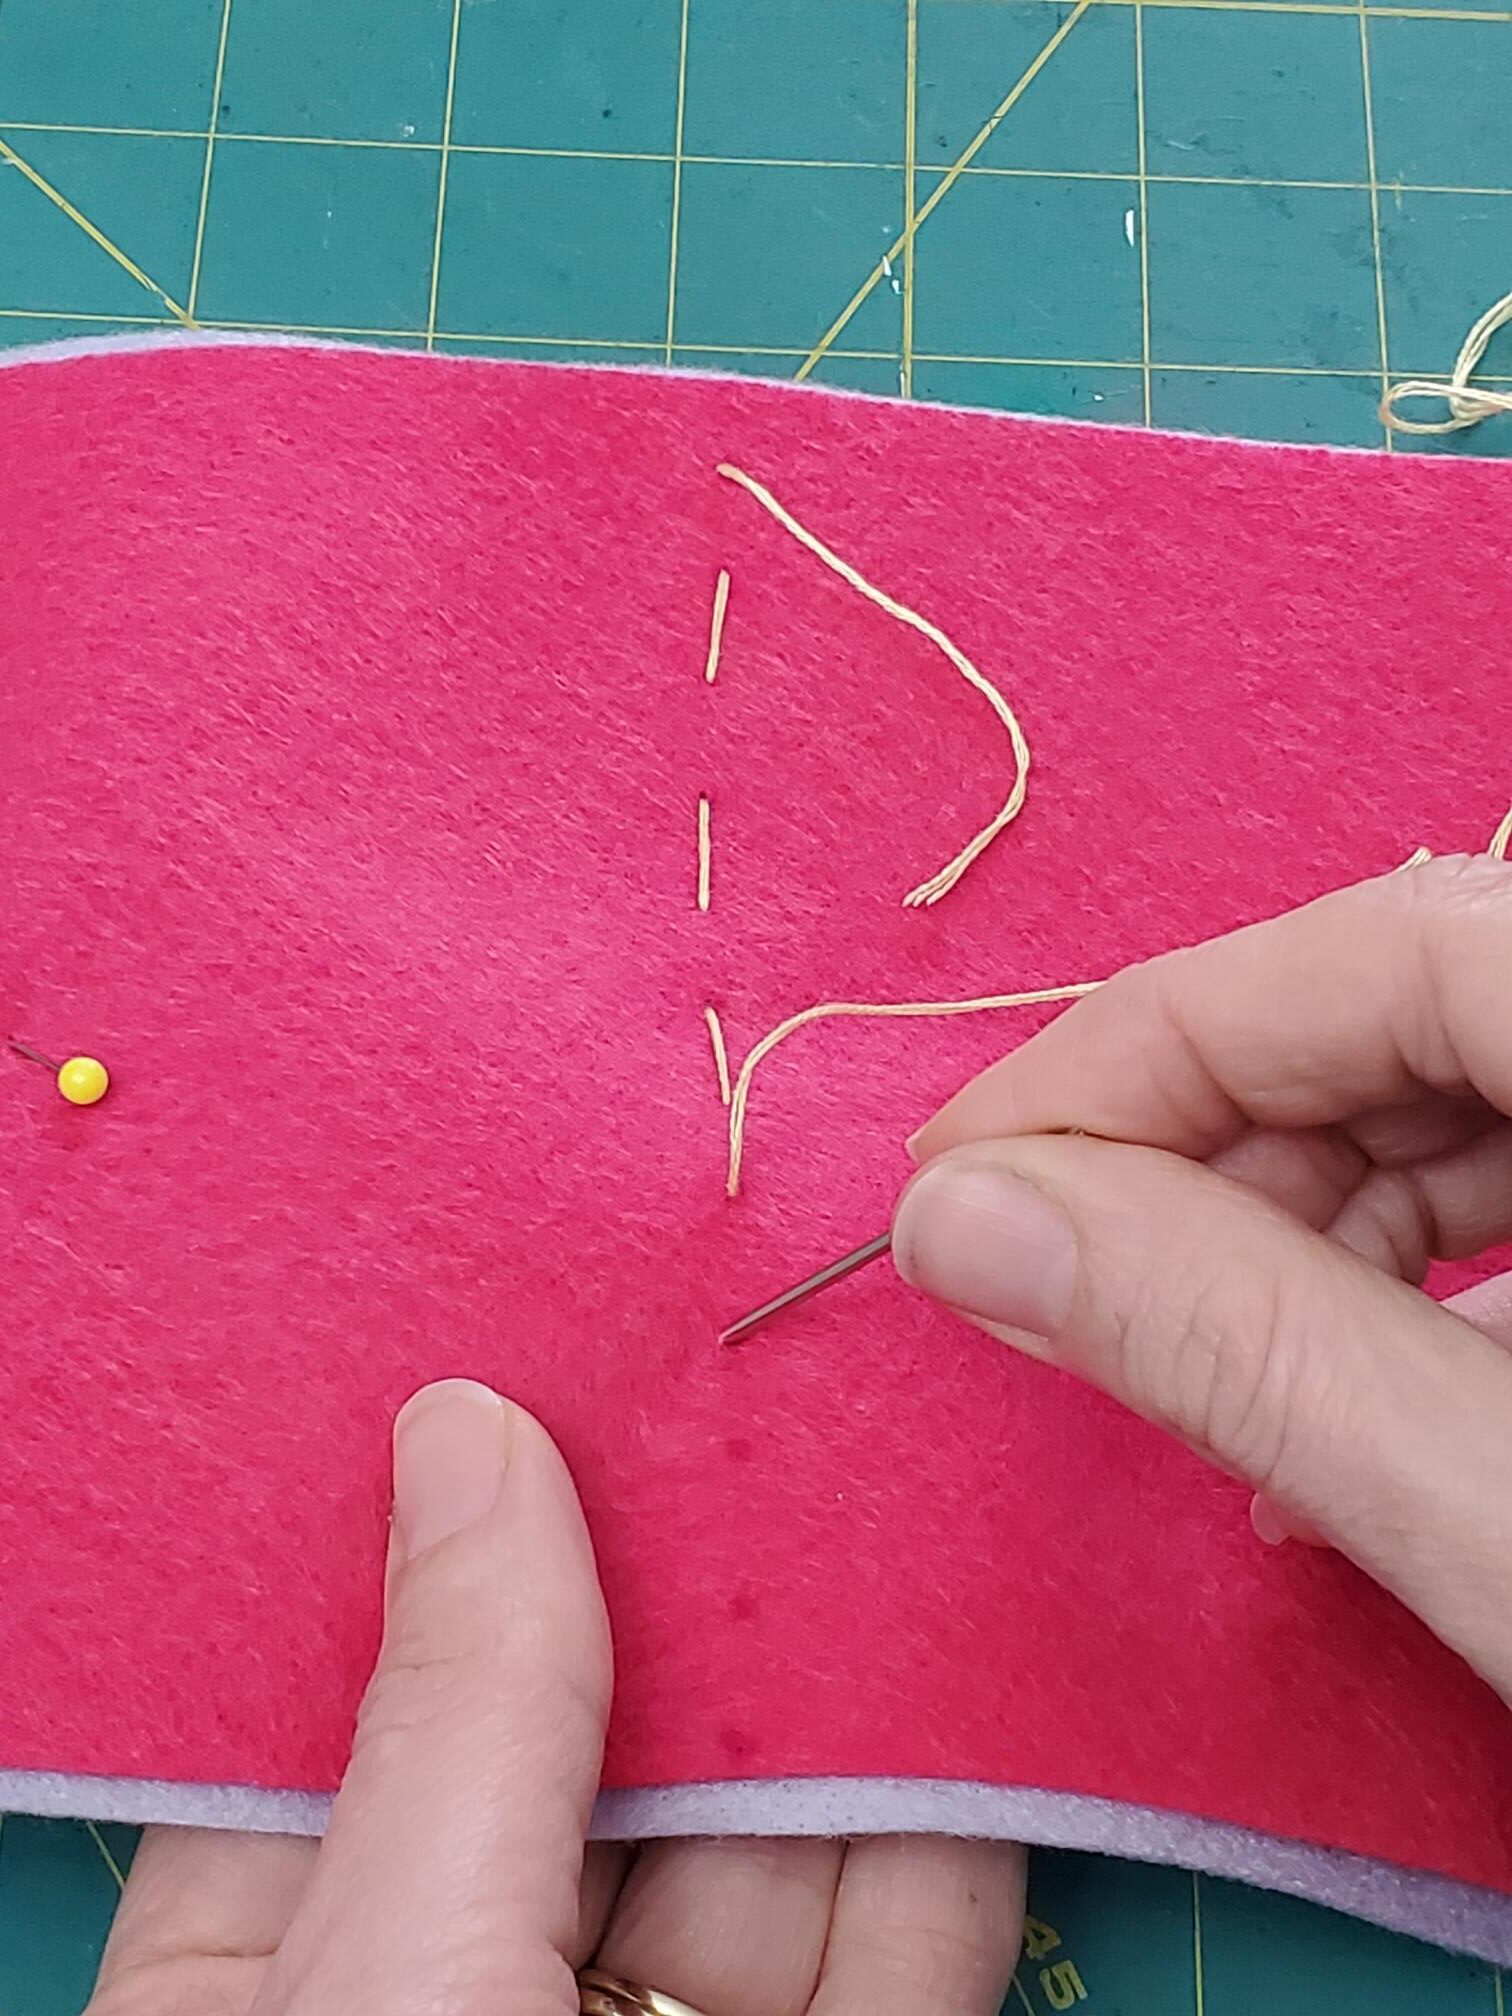
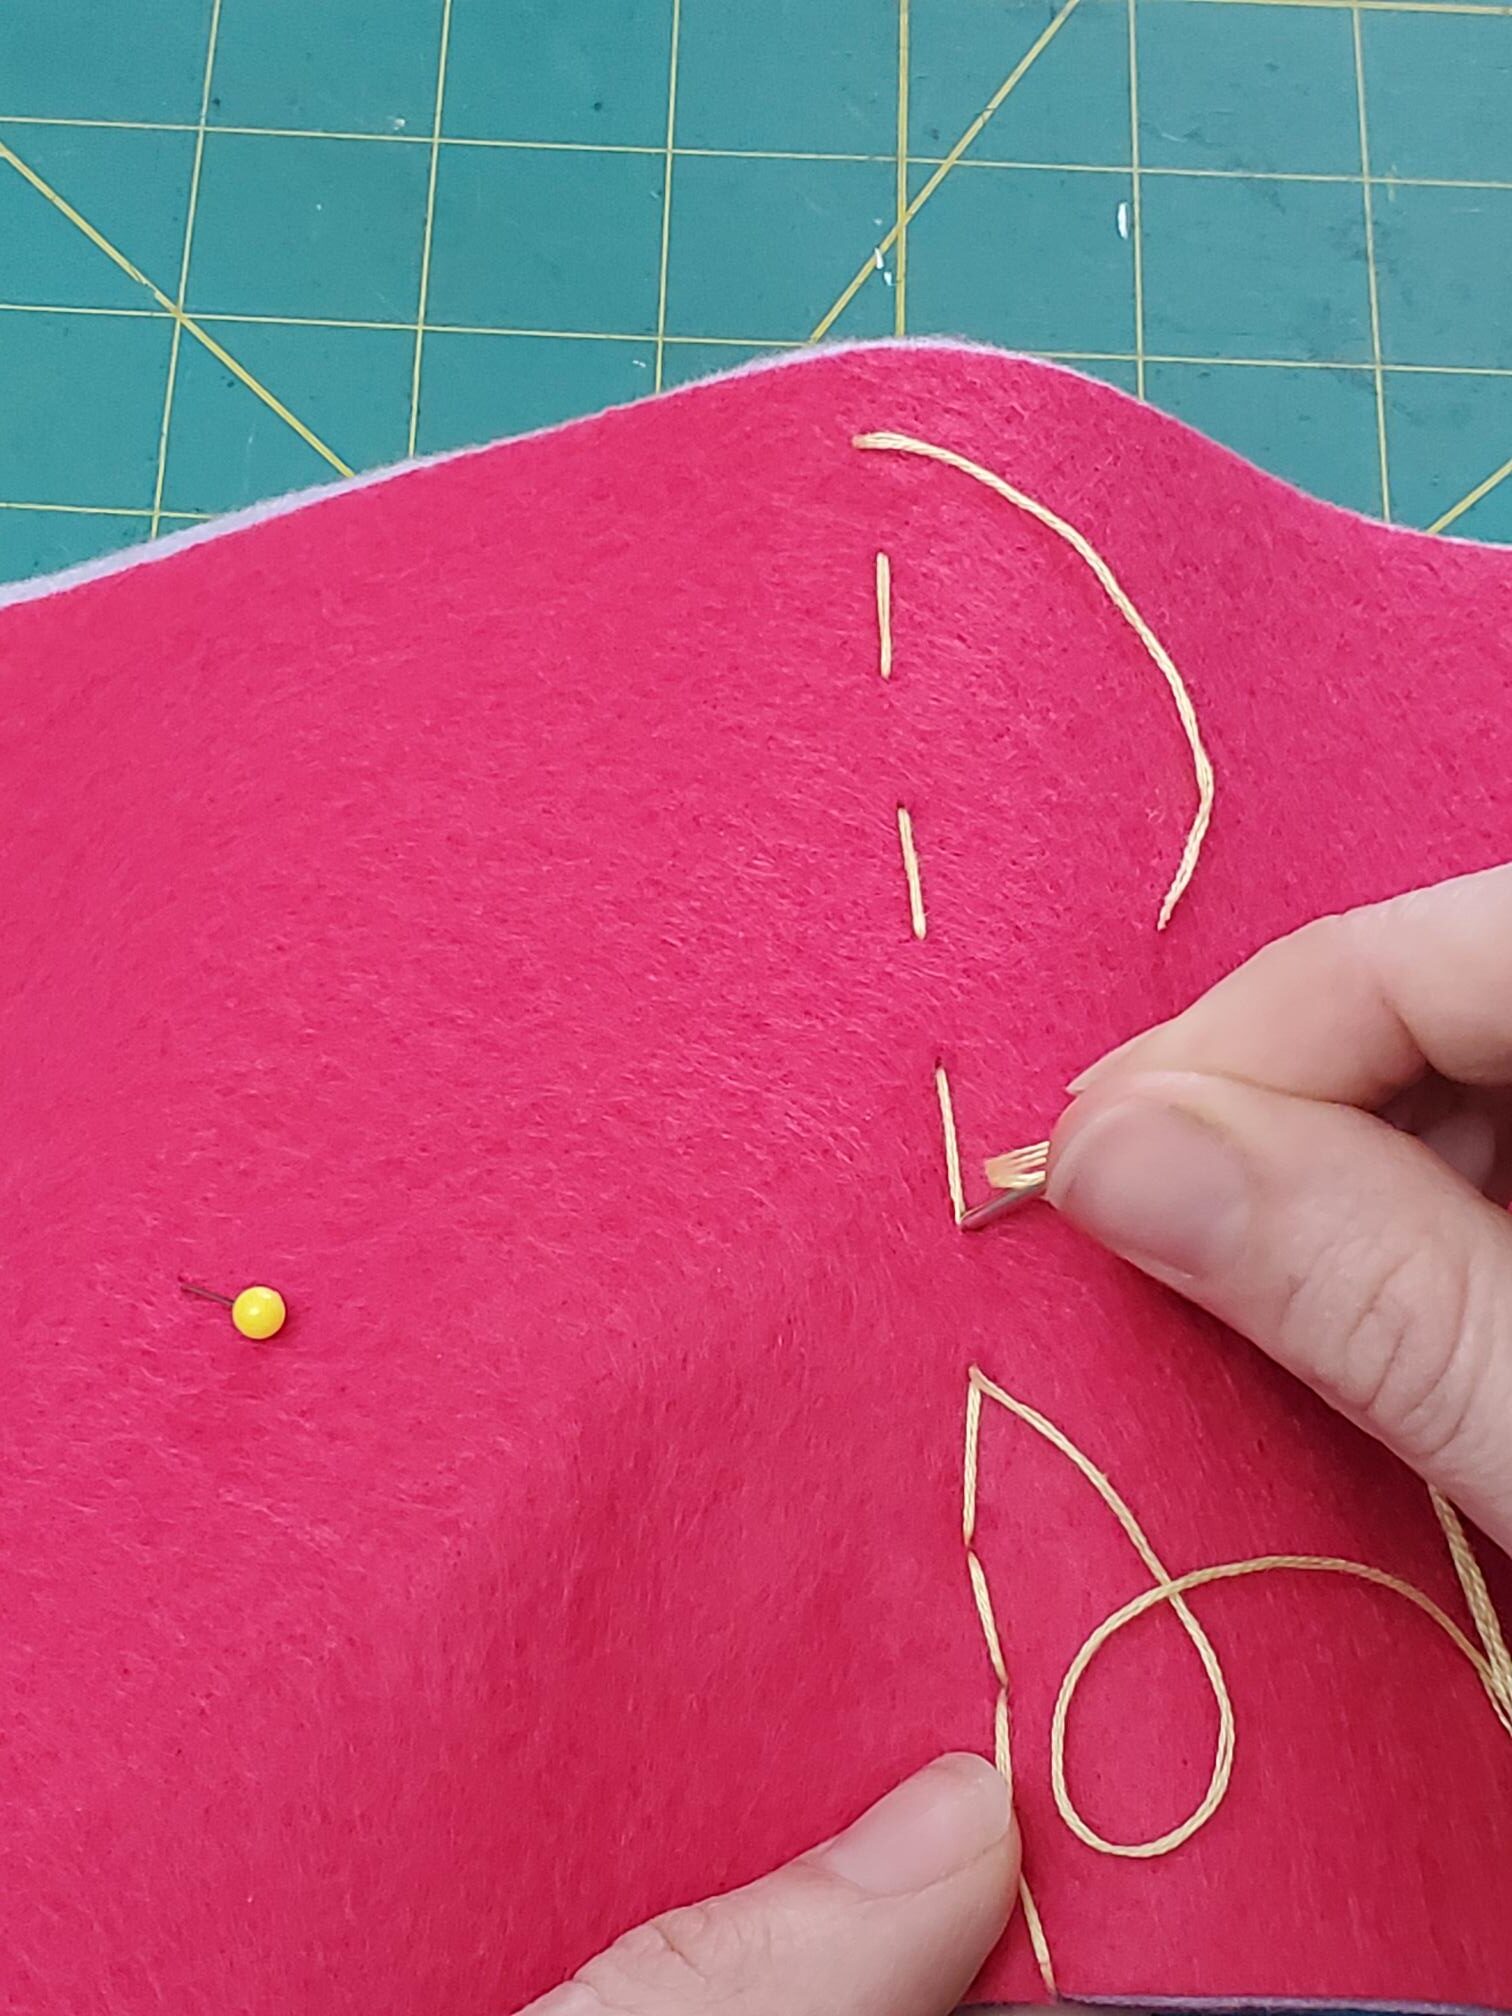
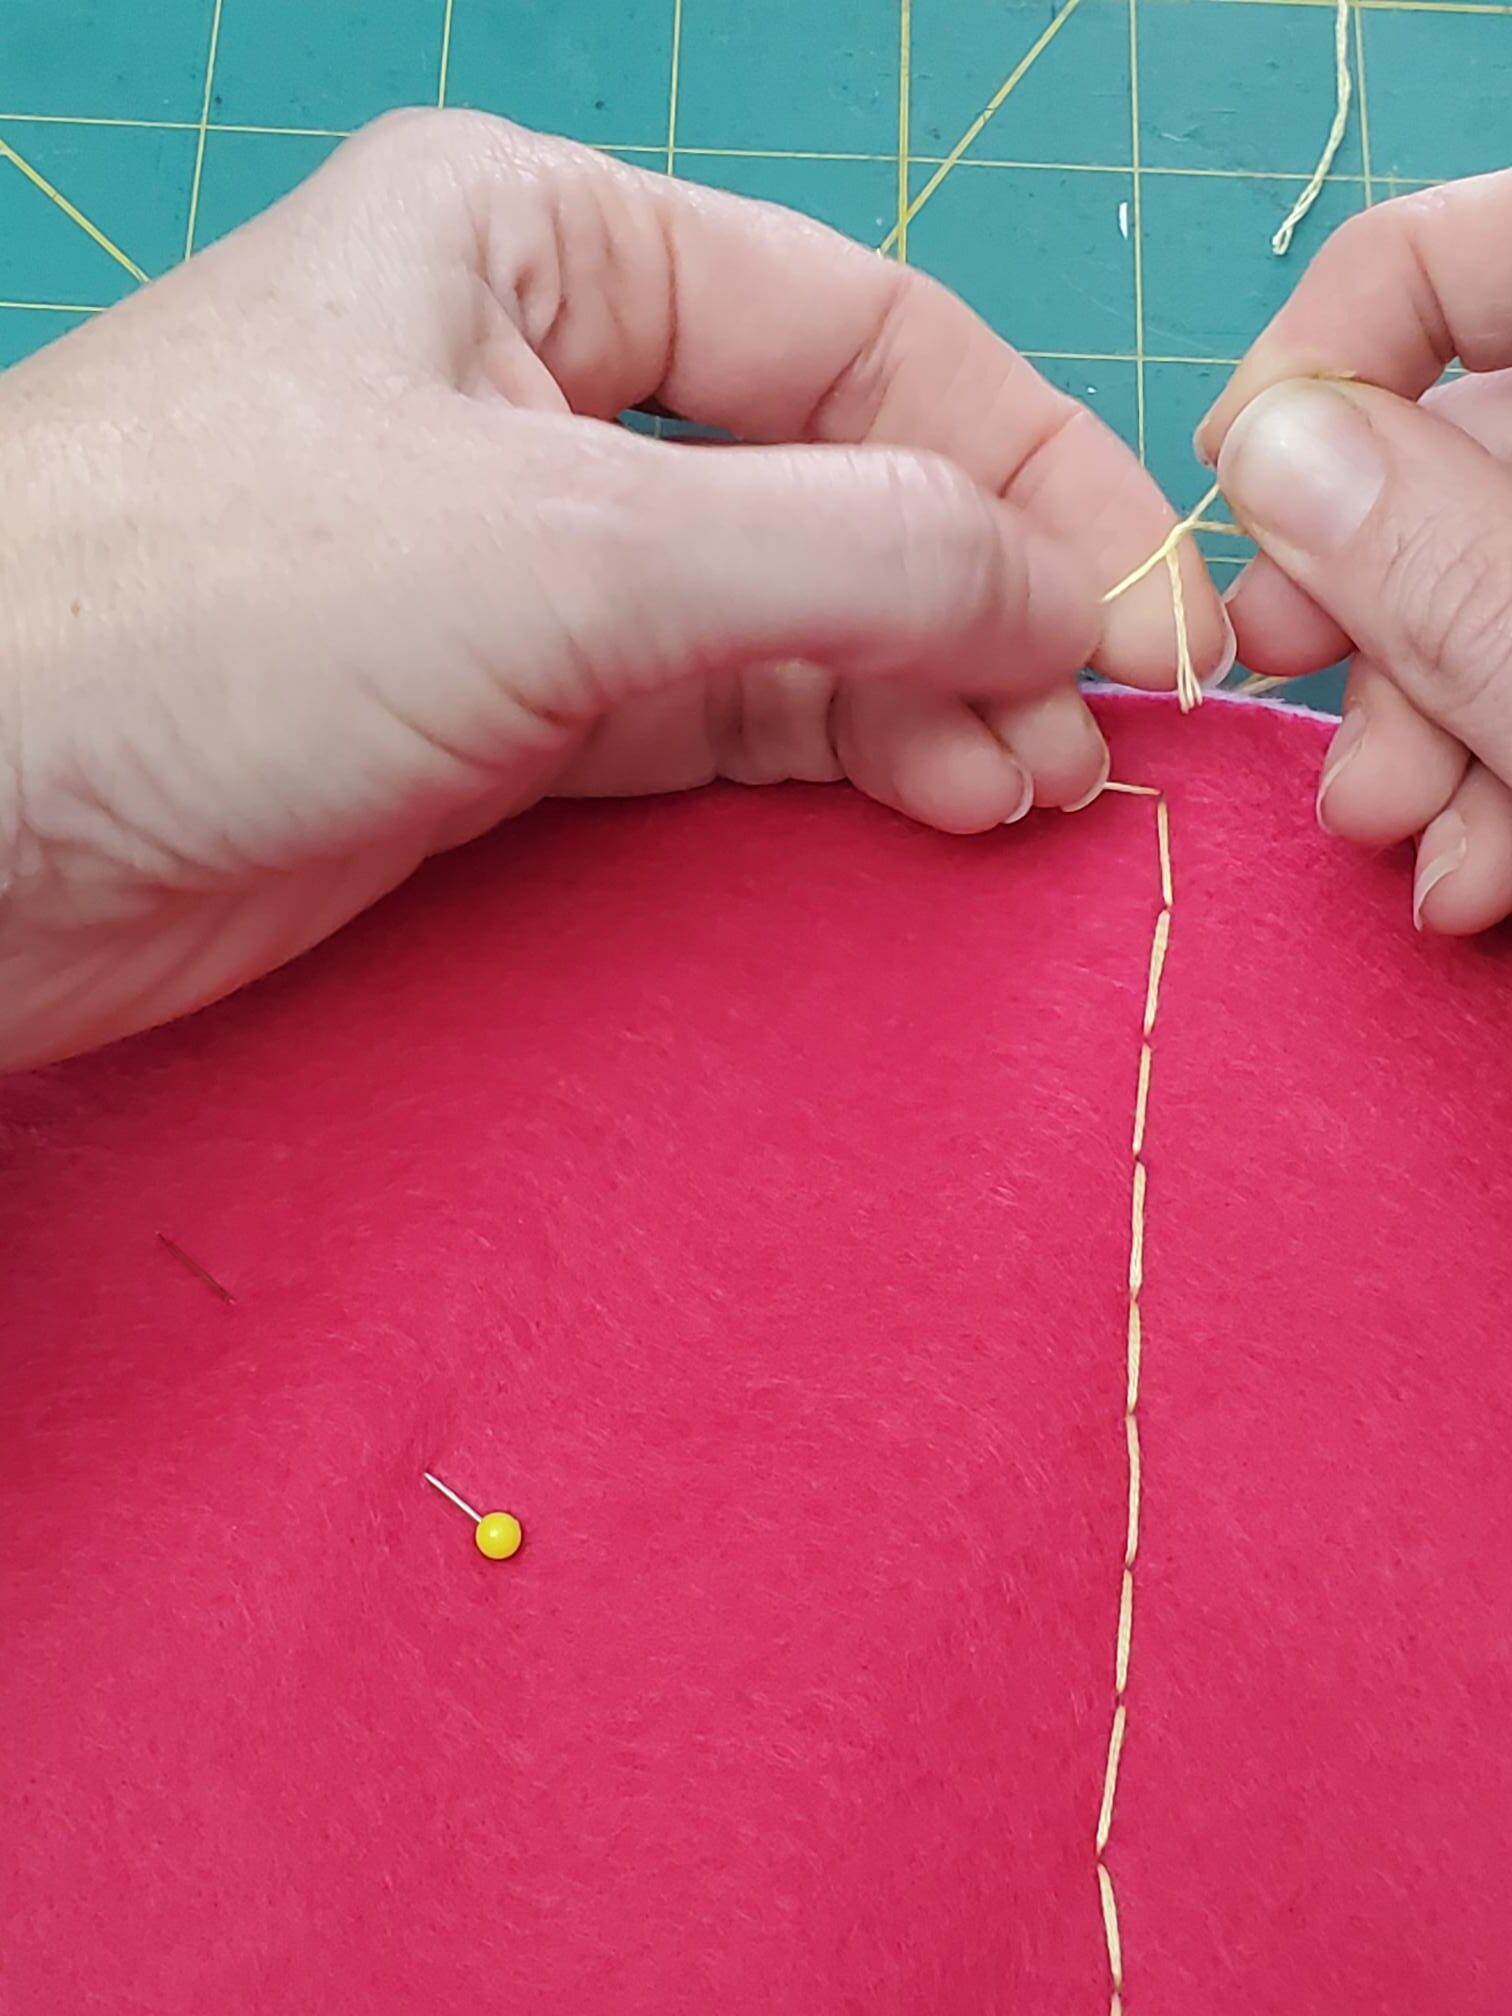
When you get to the end, wrap your thread around the top and go down on the end of the stitch you just created. Continue stitching along the line, connecting your stitches by coming up on the end of the next existing stitch, and down on the stitch after. It’s hard to explain it in writing, but look at the pictures below and hopefully that give you a good idea 🙂 When you get back to the top, take your thread to the inside of the first page, and create a knot.
Fold your book in half, and trim up any pages that are longer than the others (the inside pages will be longer than the outer pages).
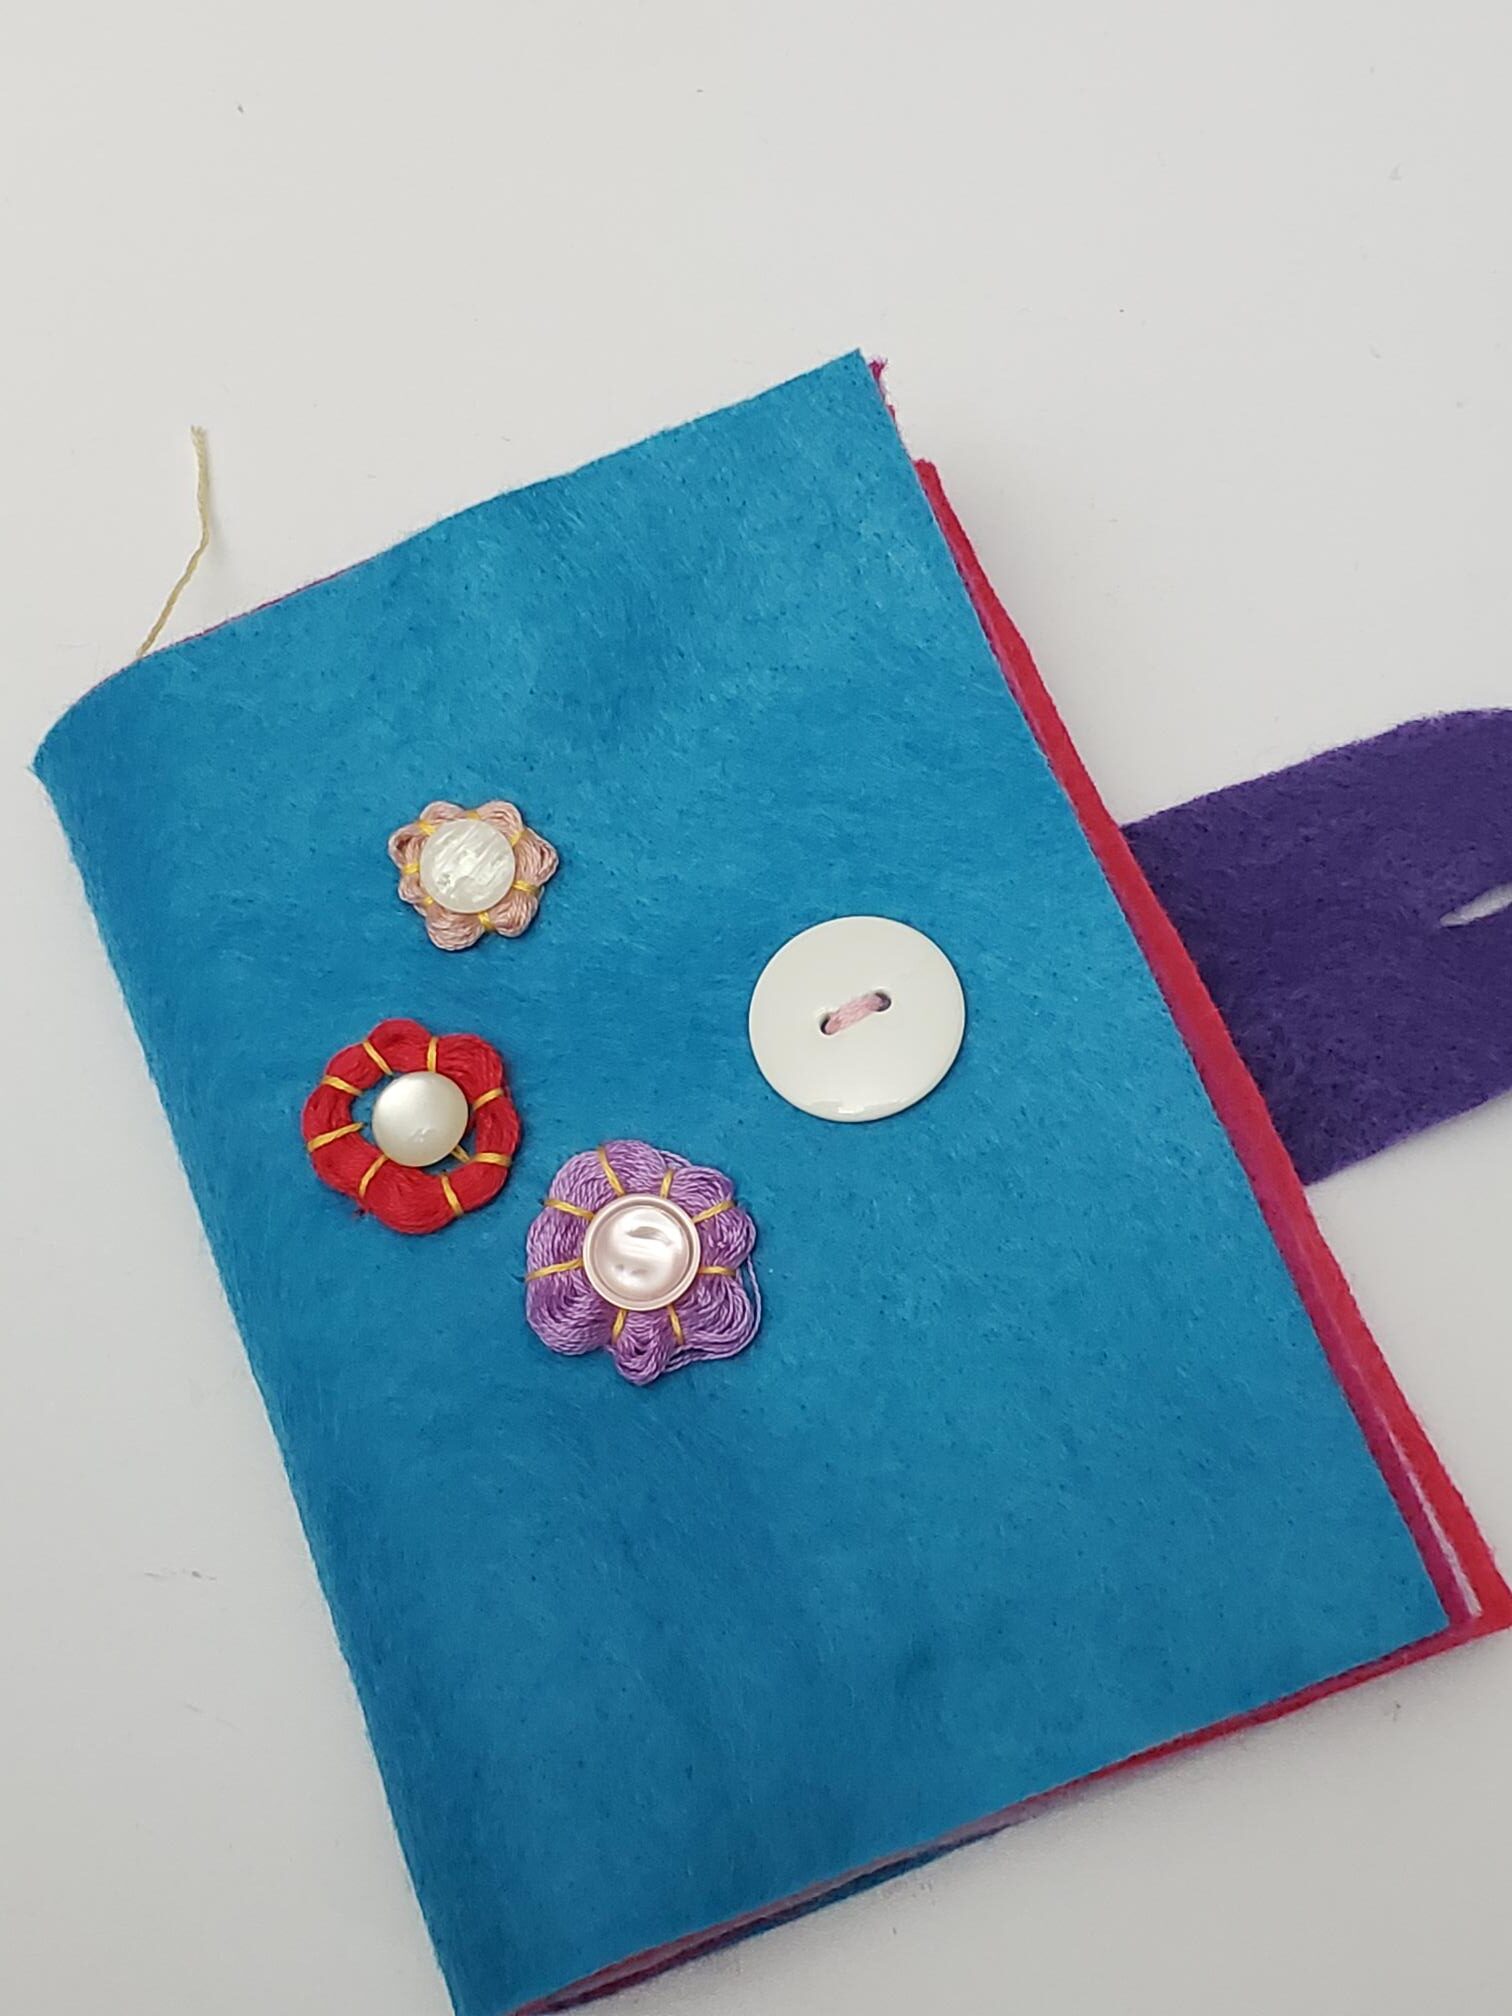
The order in which you work on the pages doesn’t really matter. We kind of skipped around a little and that’s perfectly fine. I had the kids work on the outside page of the book first. I attempted embroidery flowers on mine (which I’ve never done before) but ended up buying felt flowers/hearts for the kids to sew on their books. I thought it would be a lot easier (and it was!) I also put out buttons to sew in the center of their cut outs. Have fun with it! Apparently, I forgot to take a picture of this step before everything was put together, but here’s a picture of it once it’s all done!
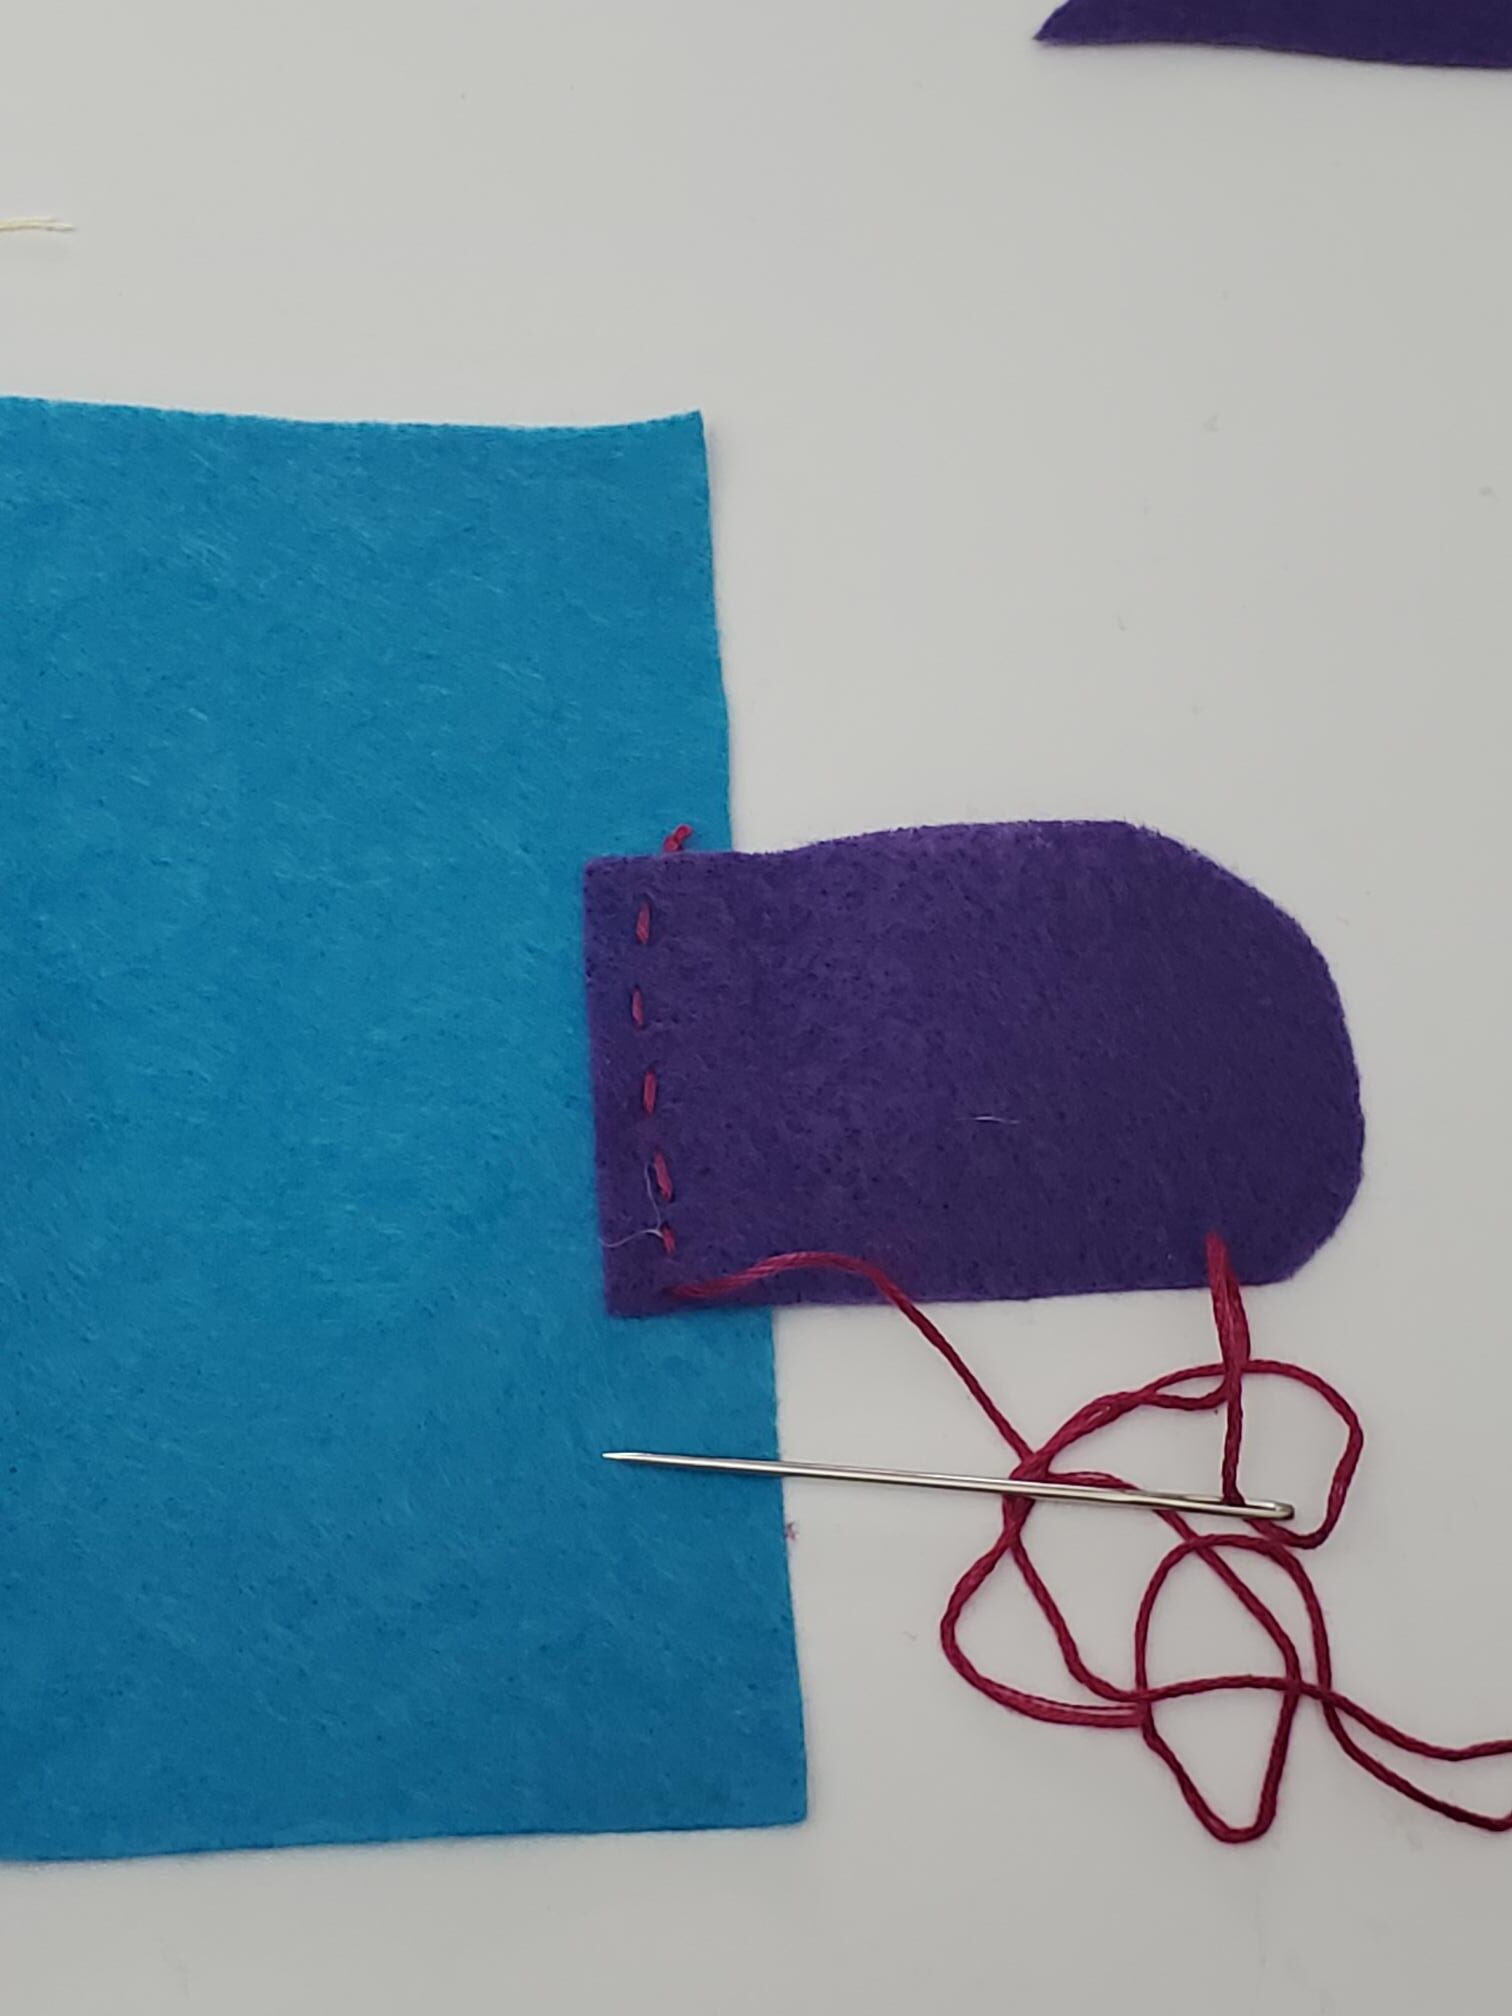
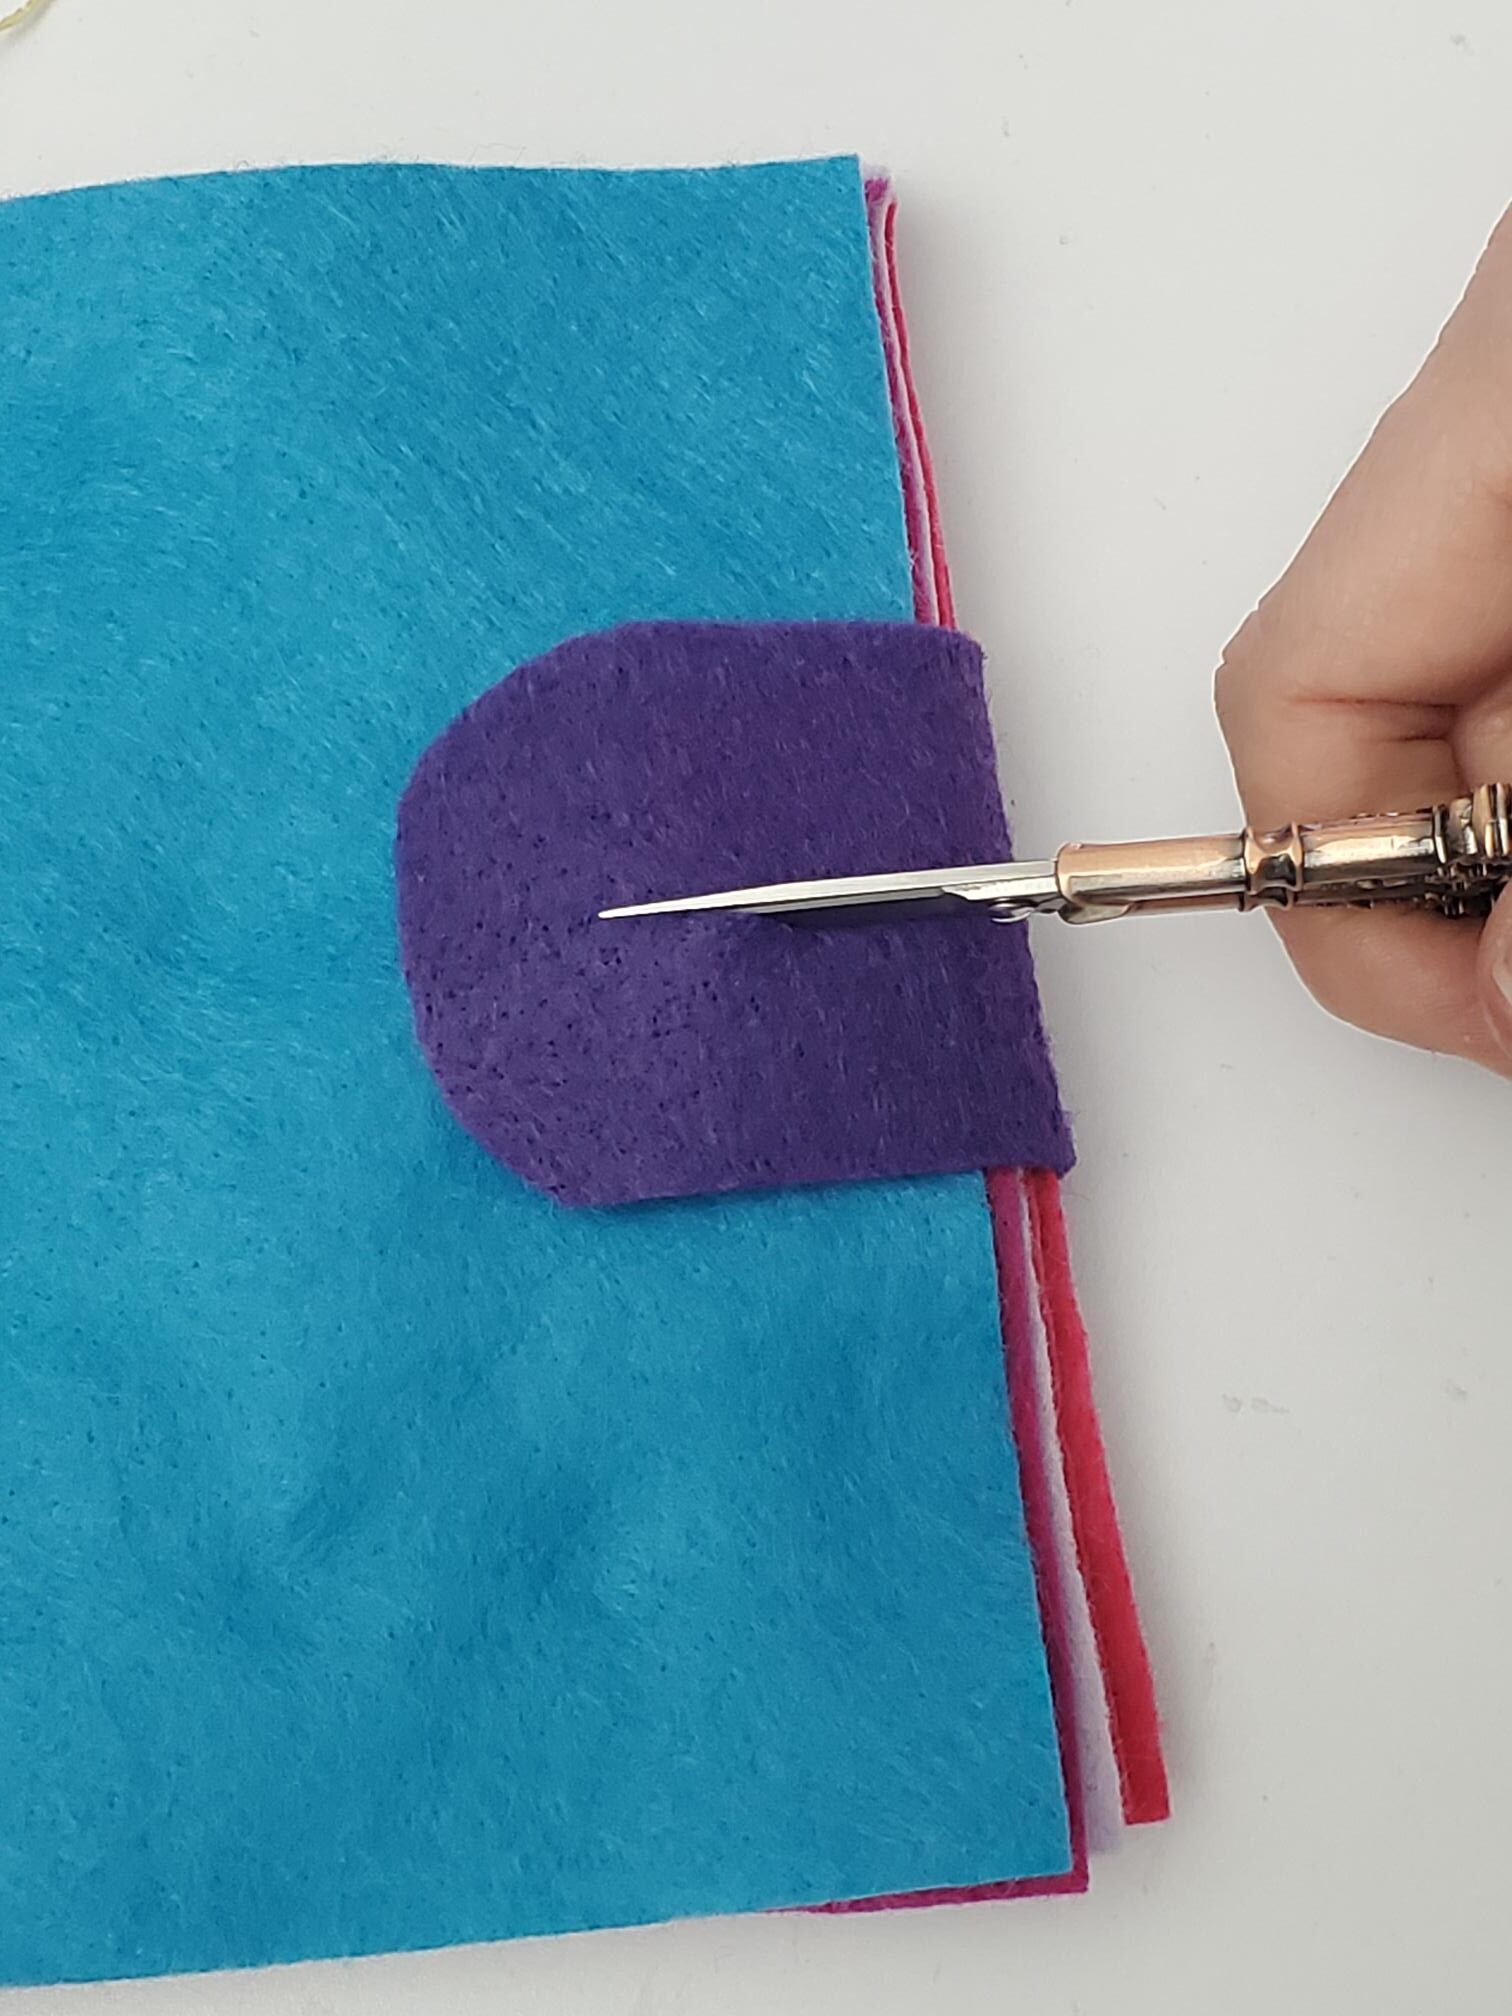
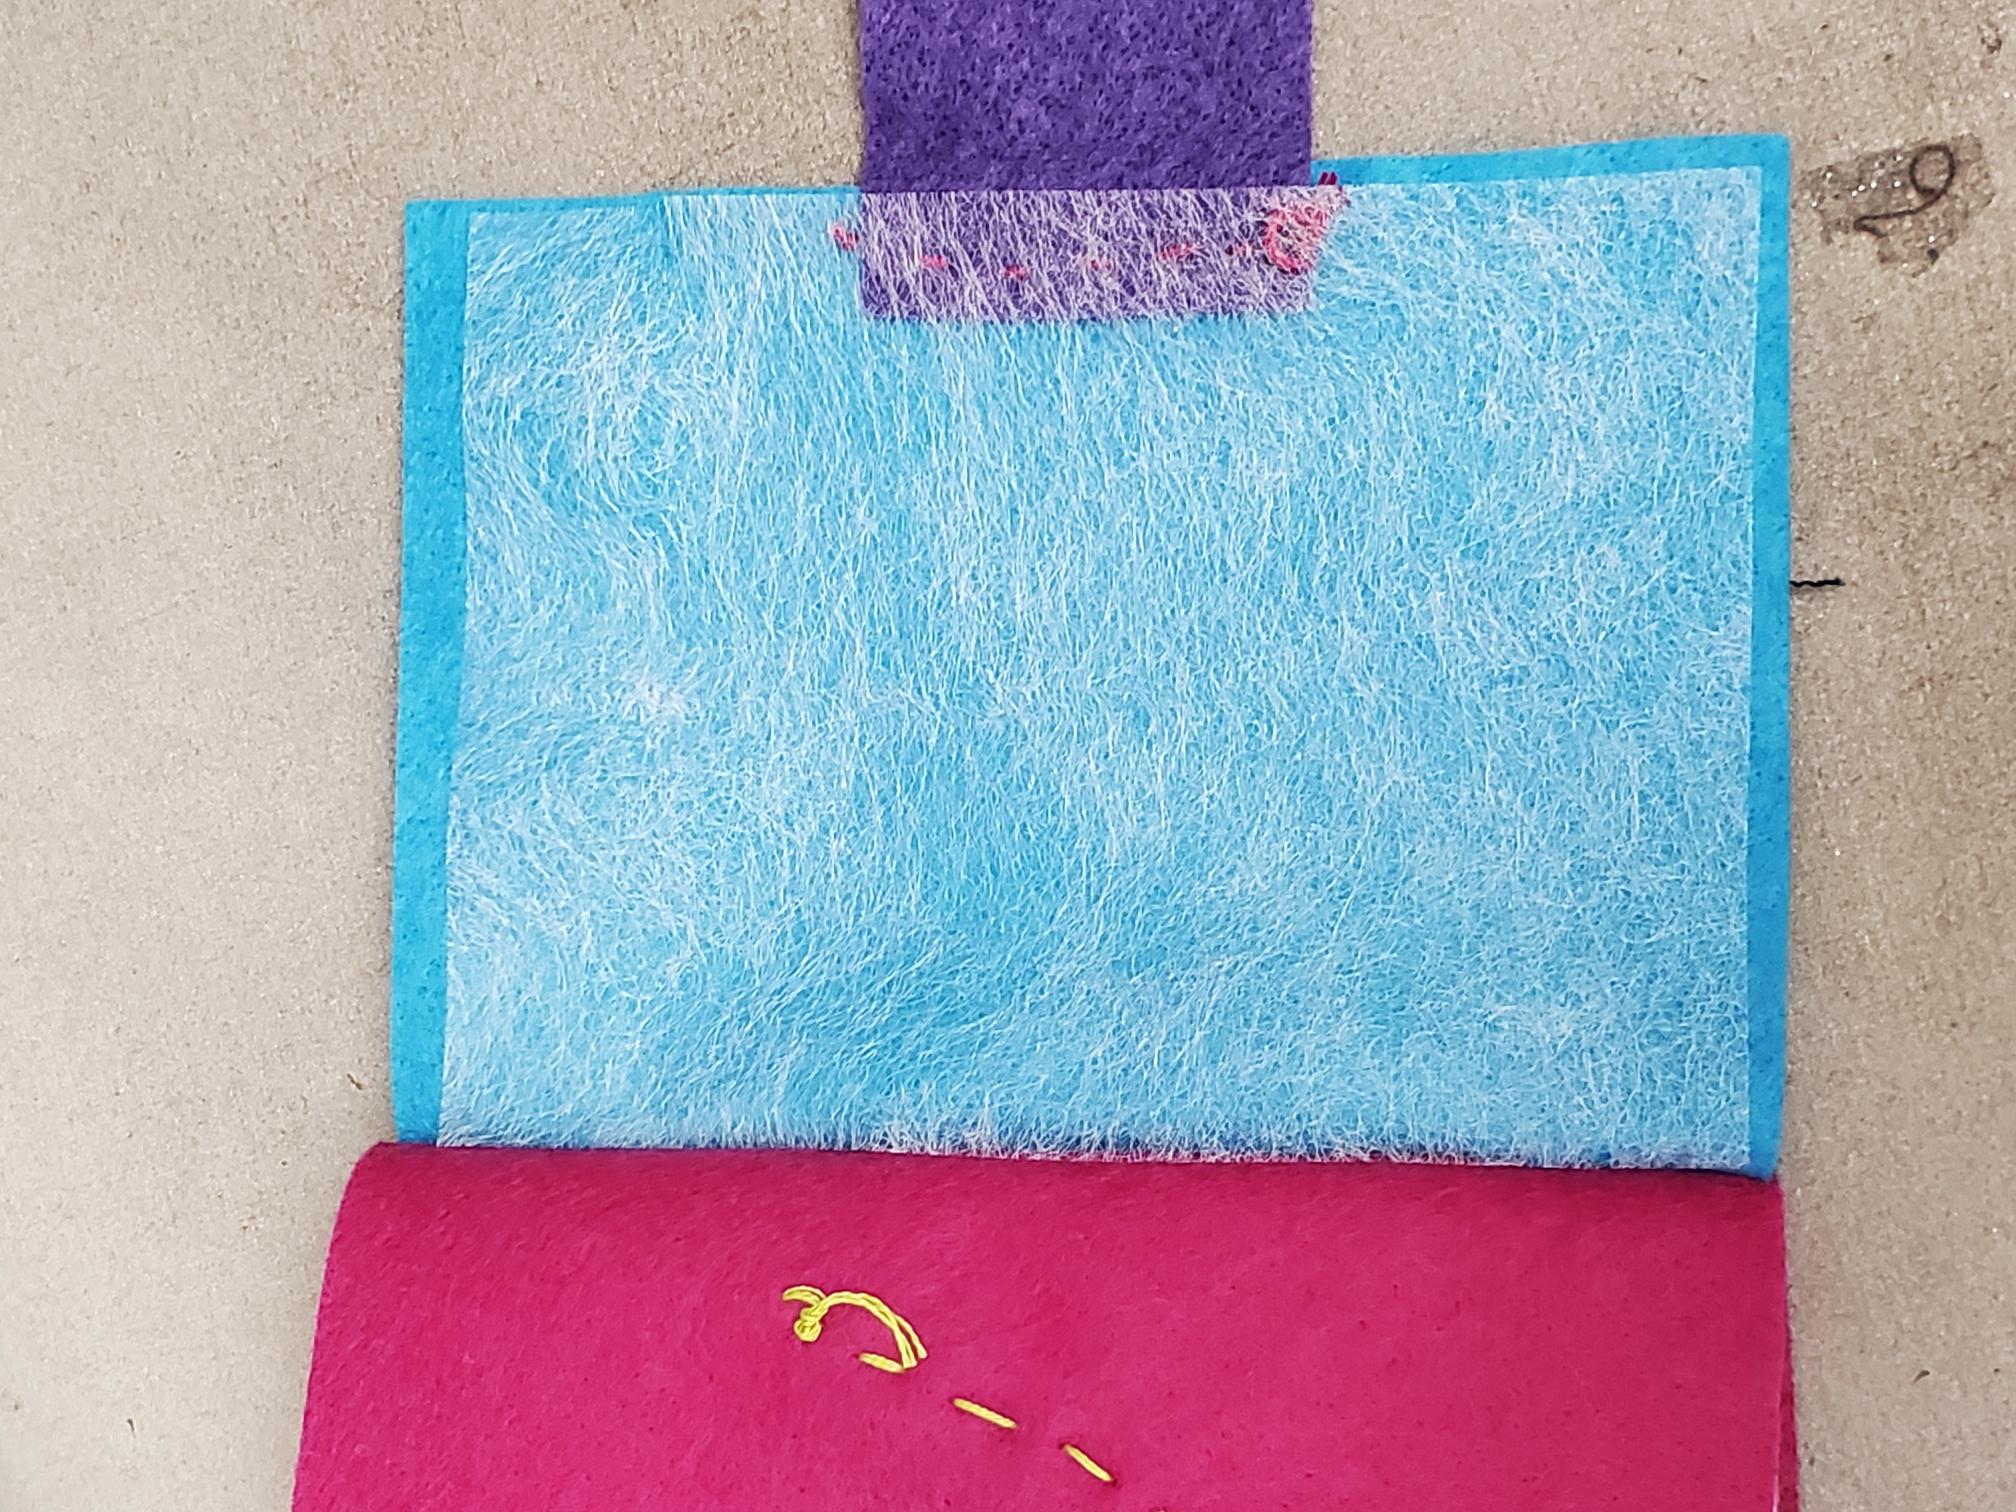
On the inside of the back “cover”, lay down your tab piece, and stitch across the straight edge. Keep your knots on the inside; they will be covered at the end.
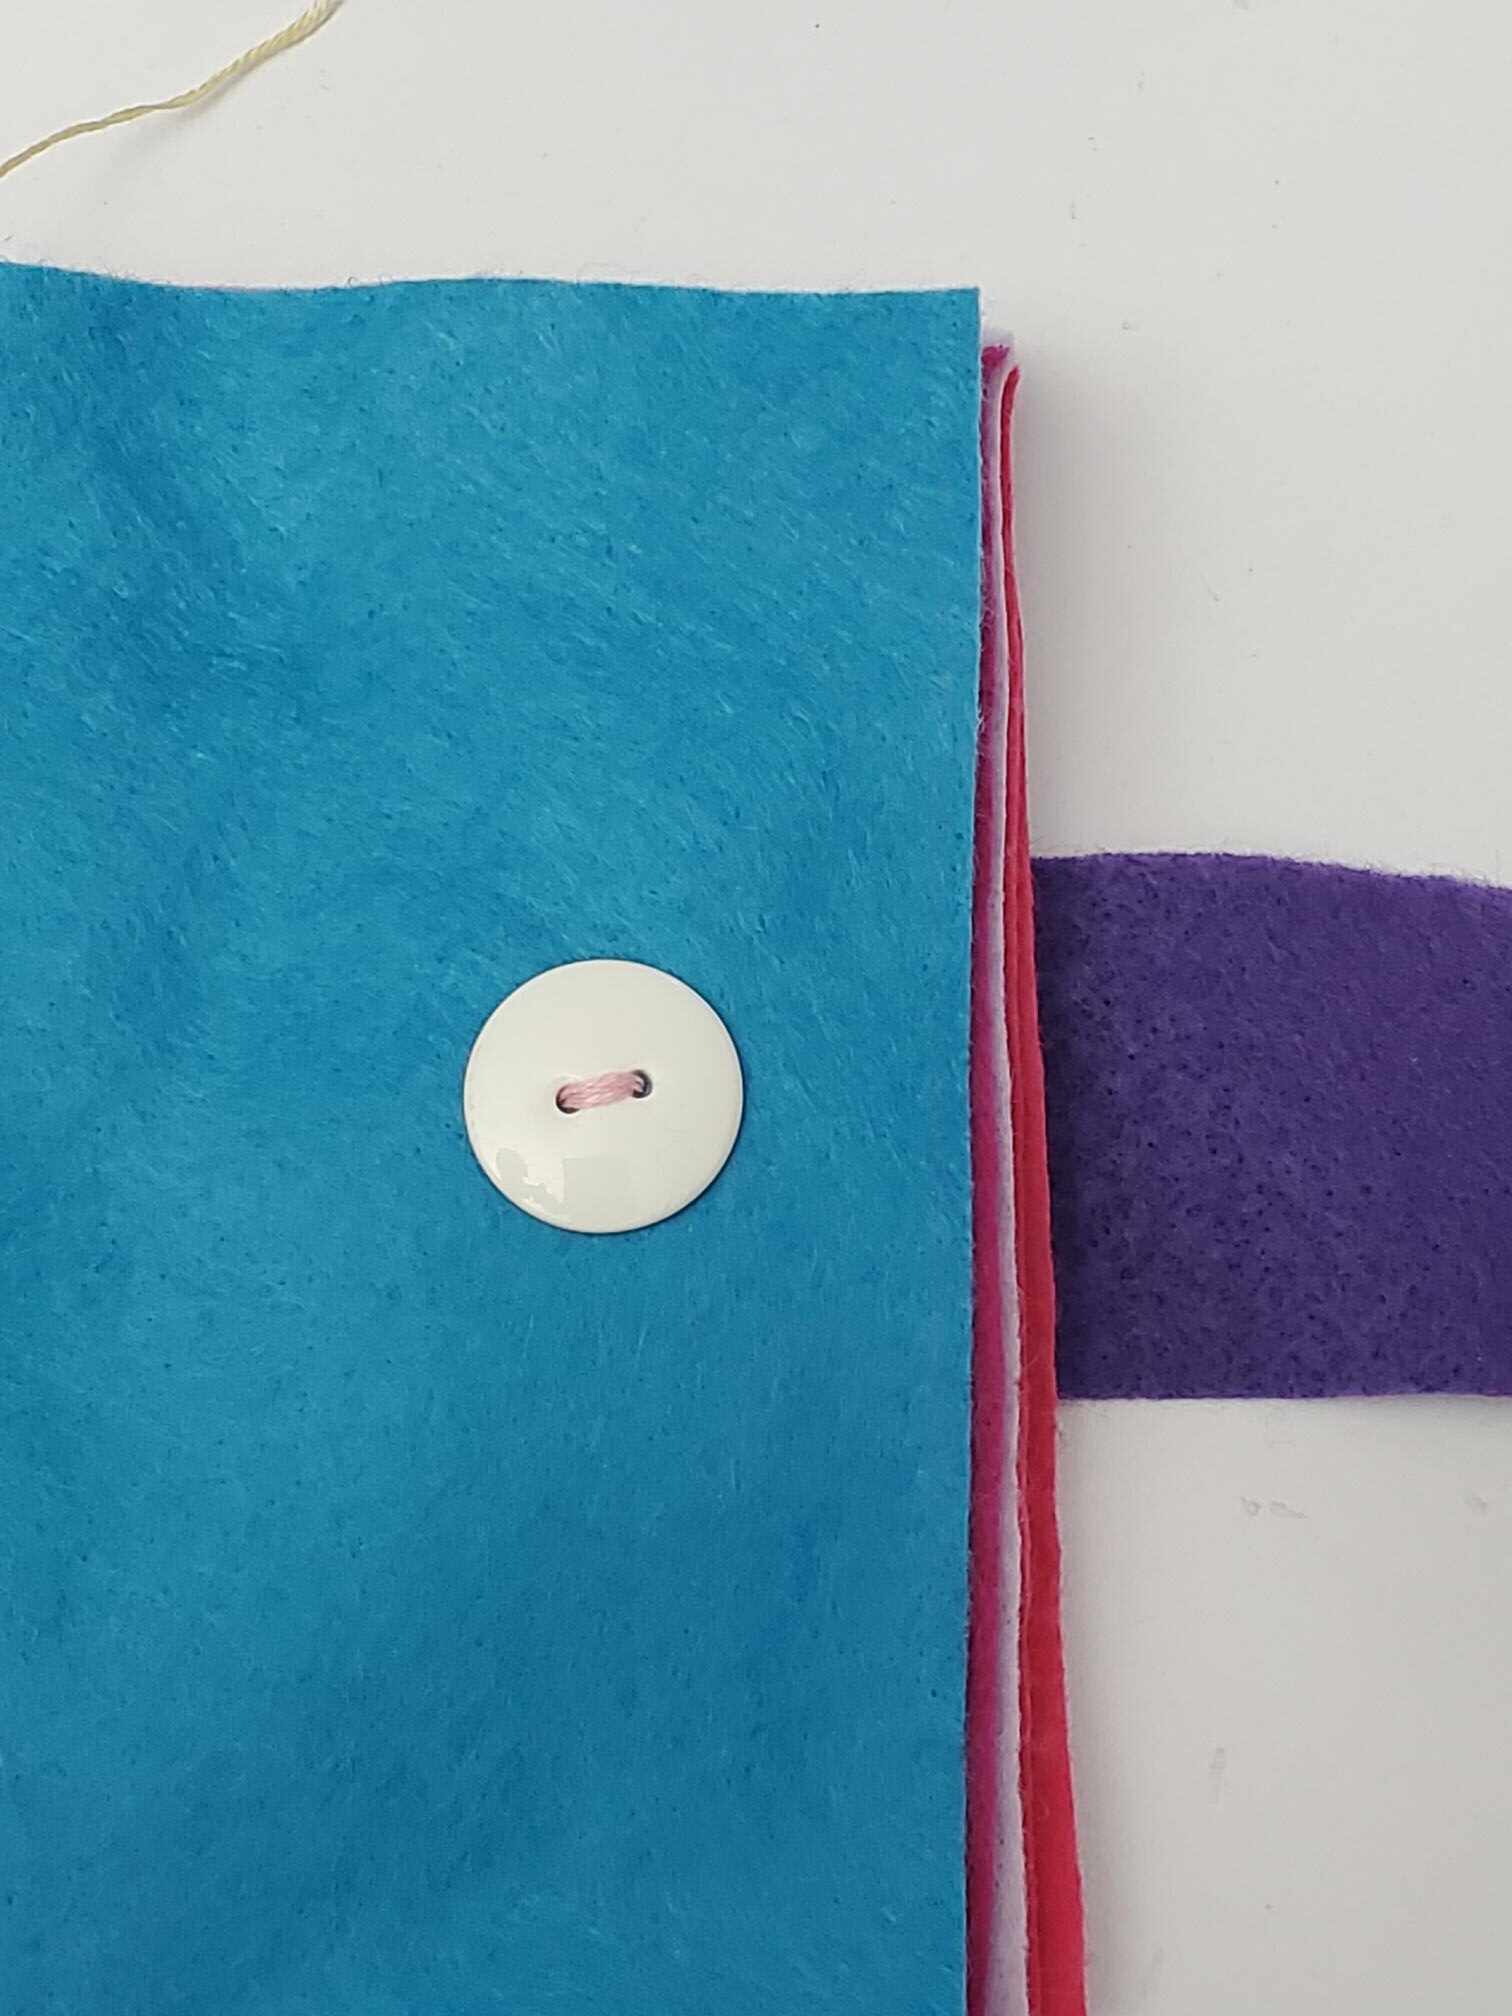
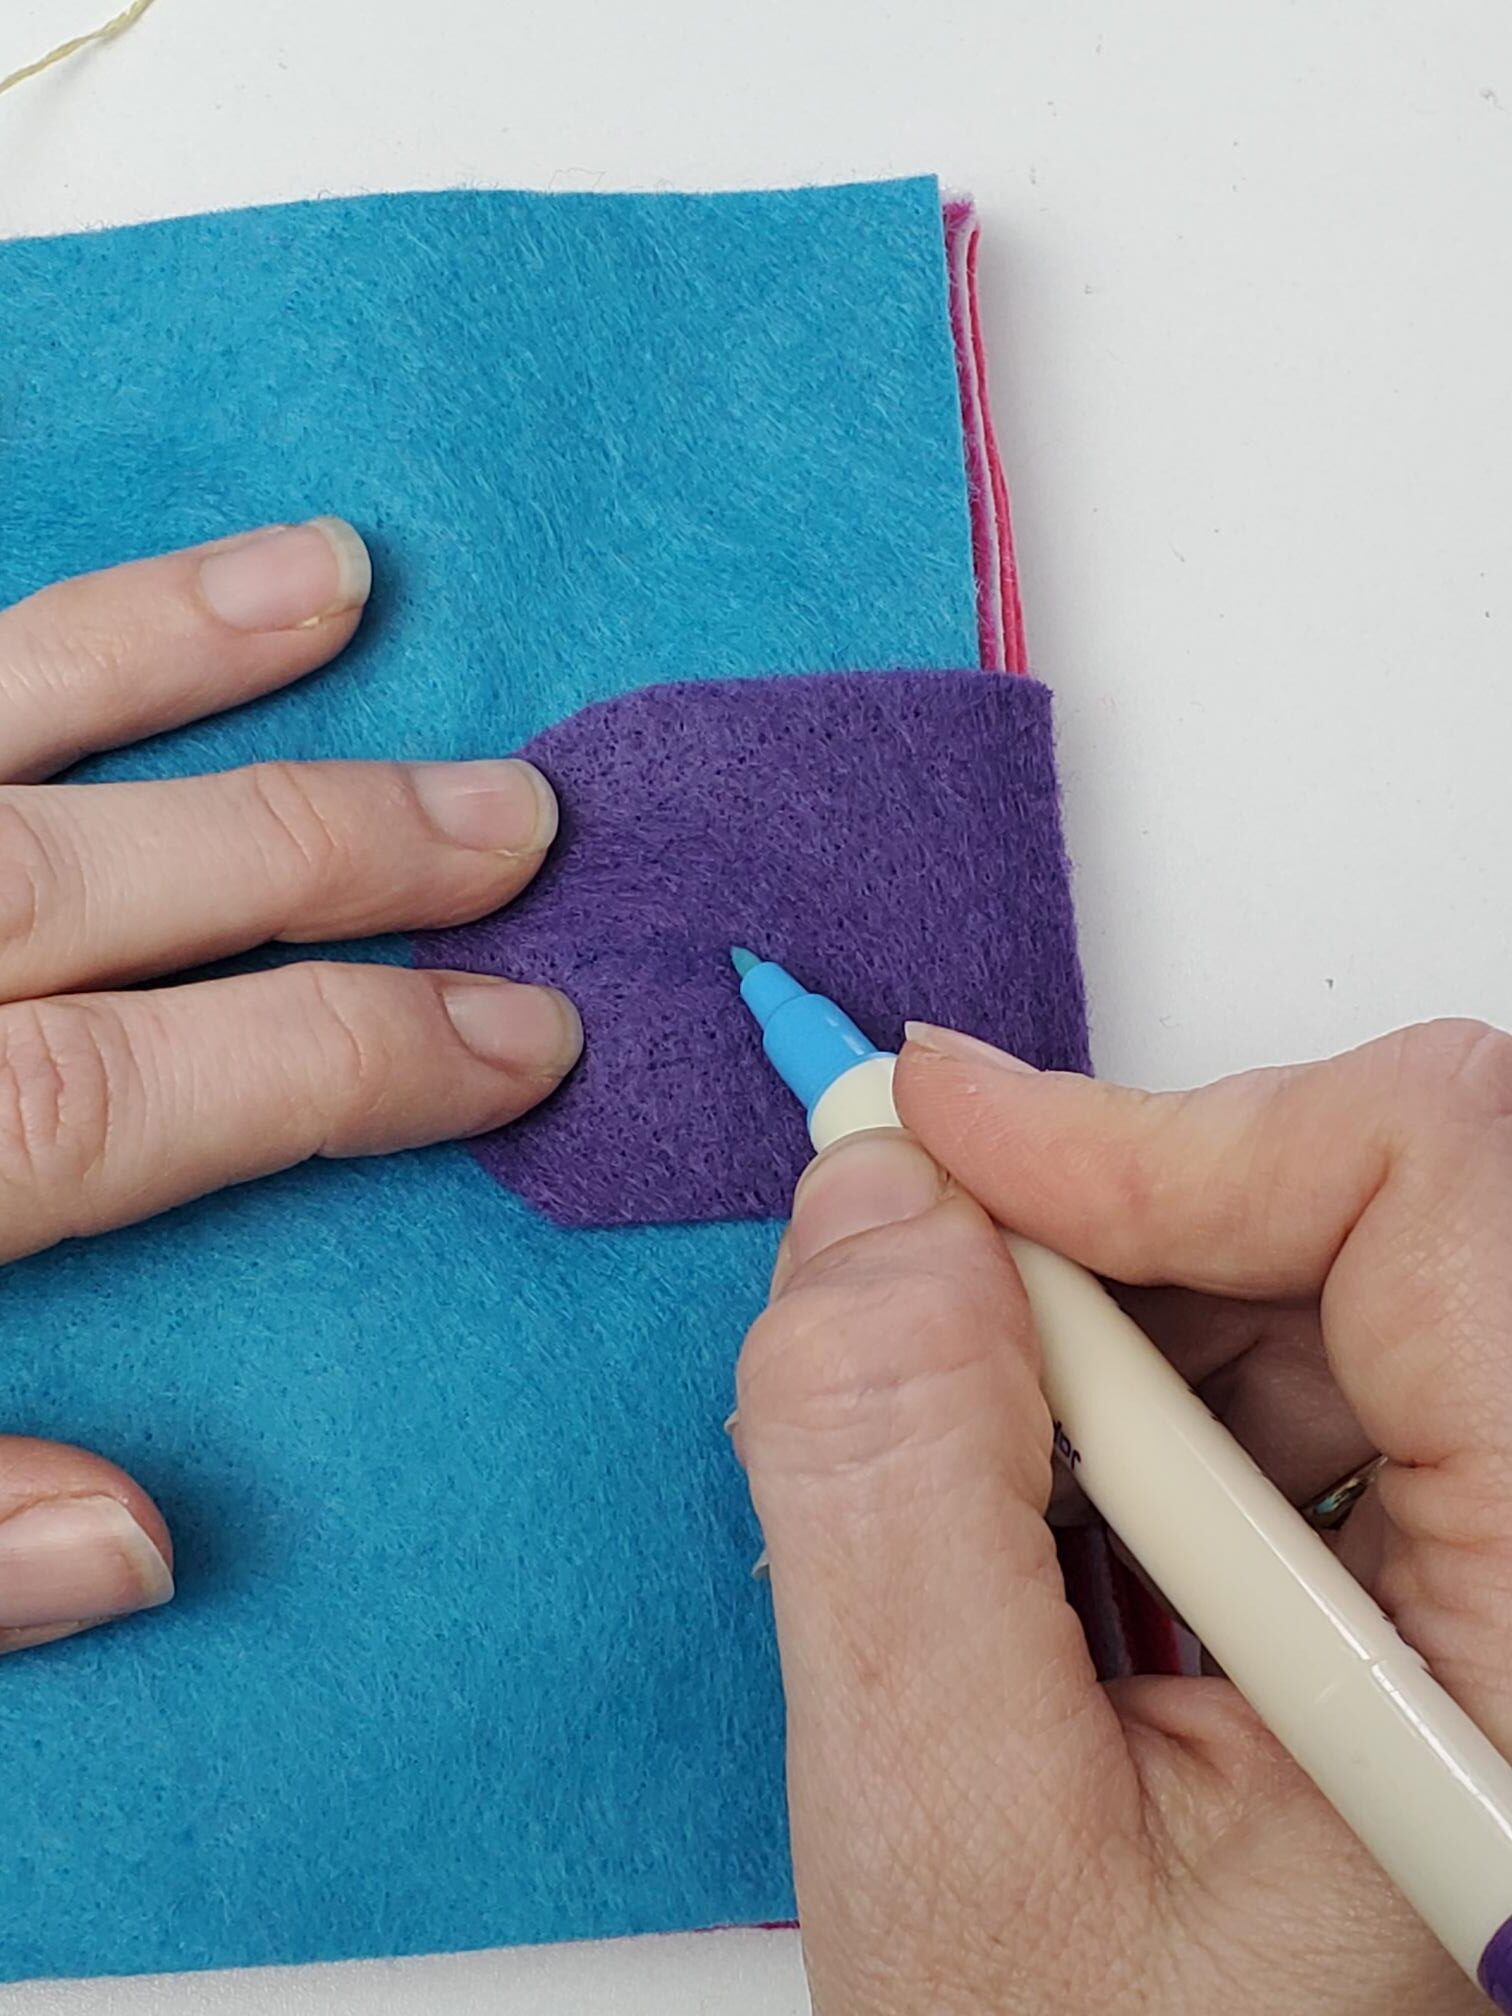
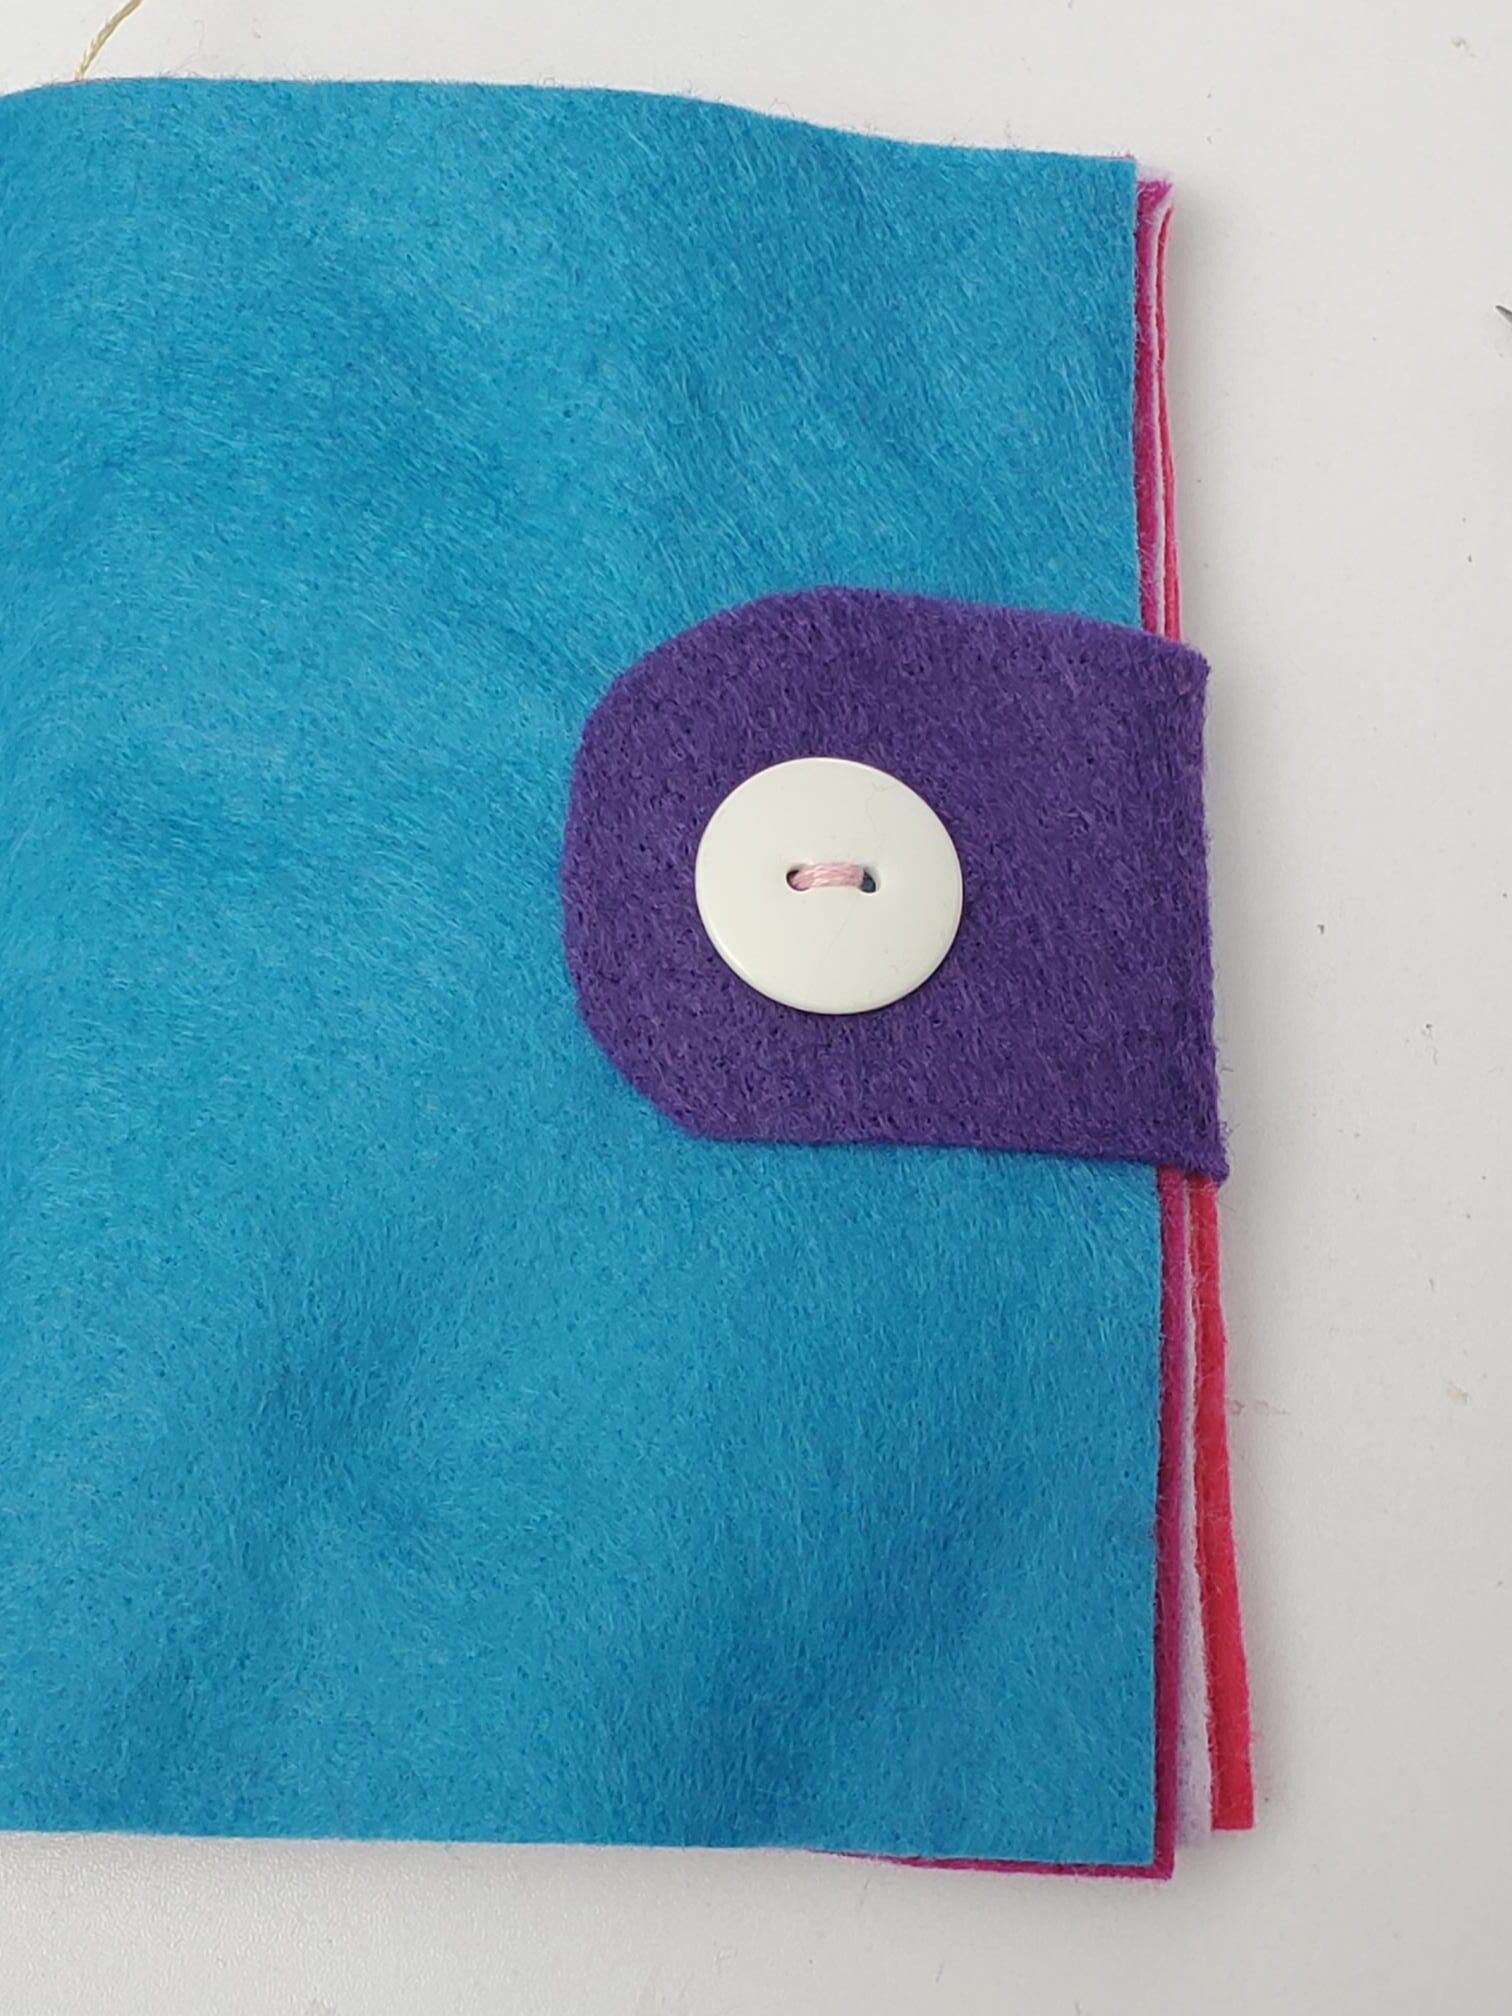
Wrap your tab around to the front of the book, and mark a spot just underneath the center of the tab to sew your button on. Sew on the button. Then, wrap that tab back over on top of the button, and feel where the button is. With your fabric marker, draw a line from one end of the button to the other end. Cut on top of that line to create a buttonhole.
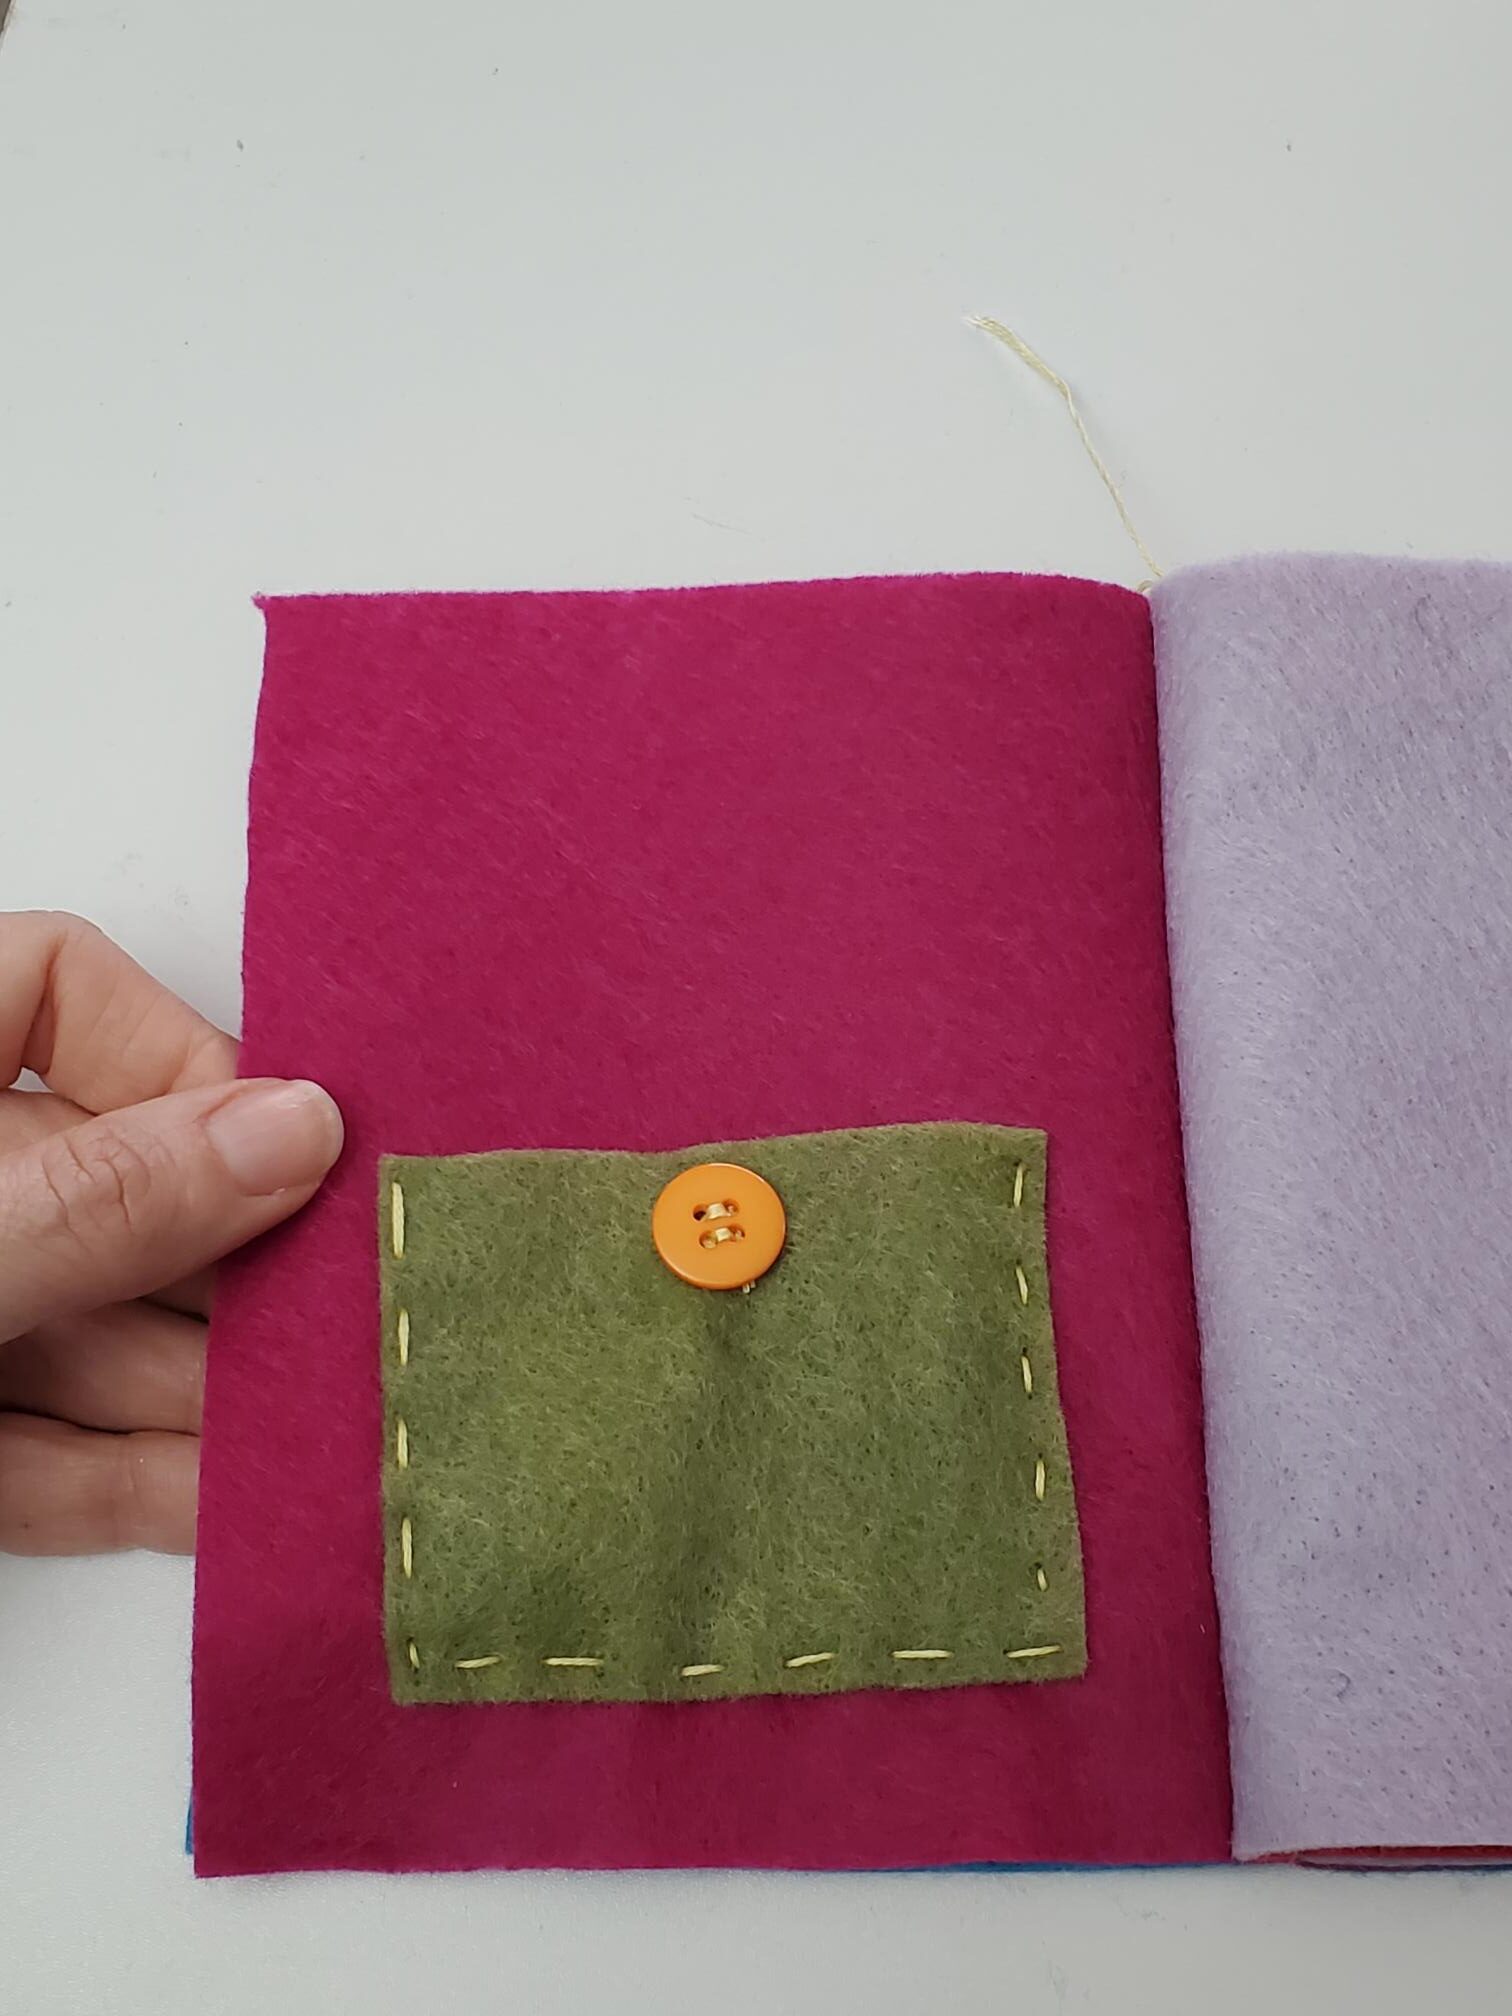
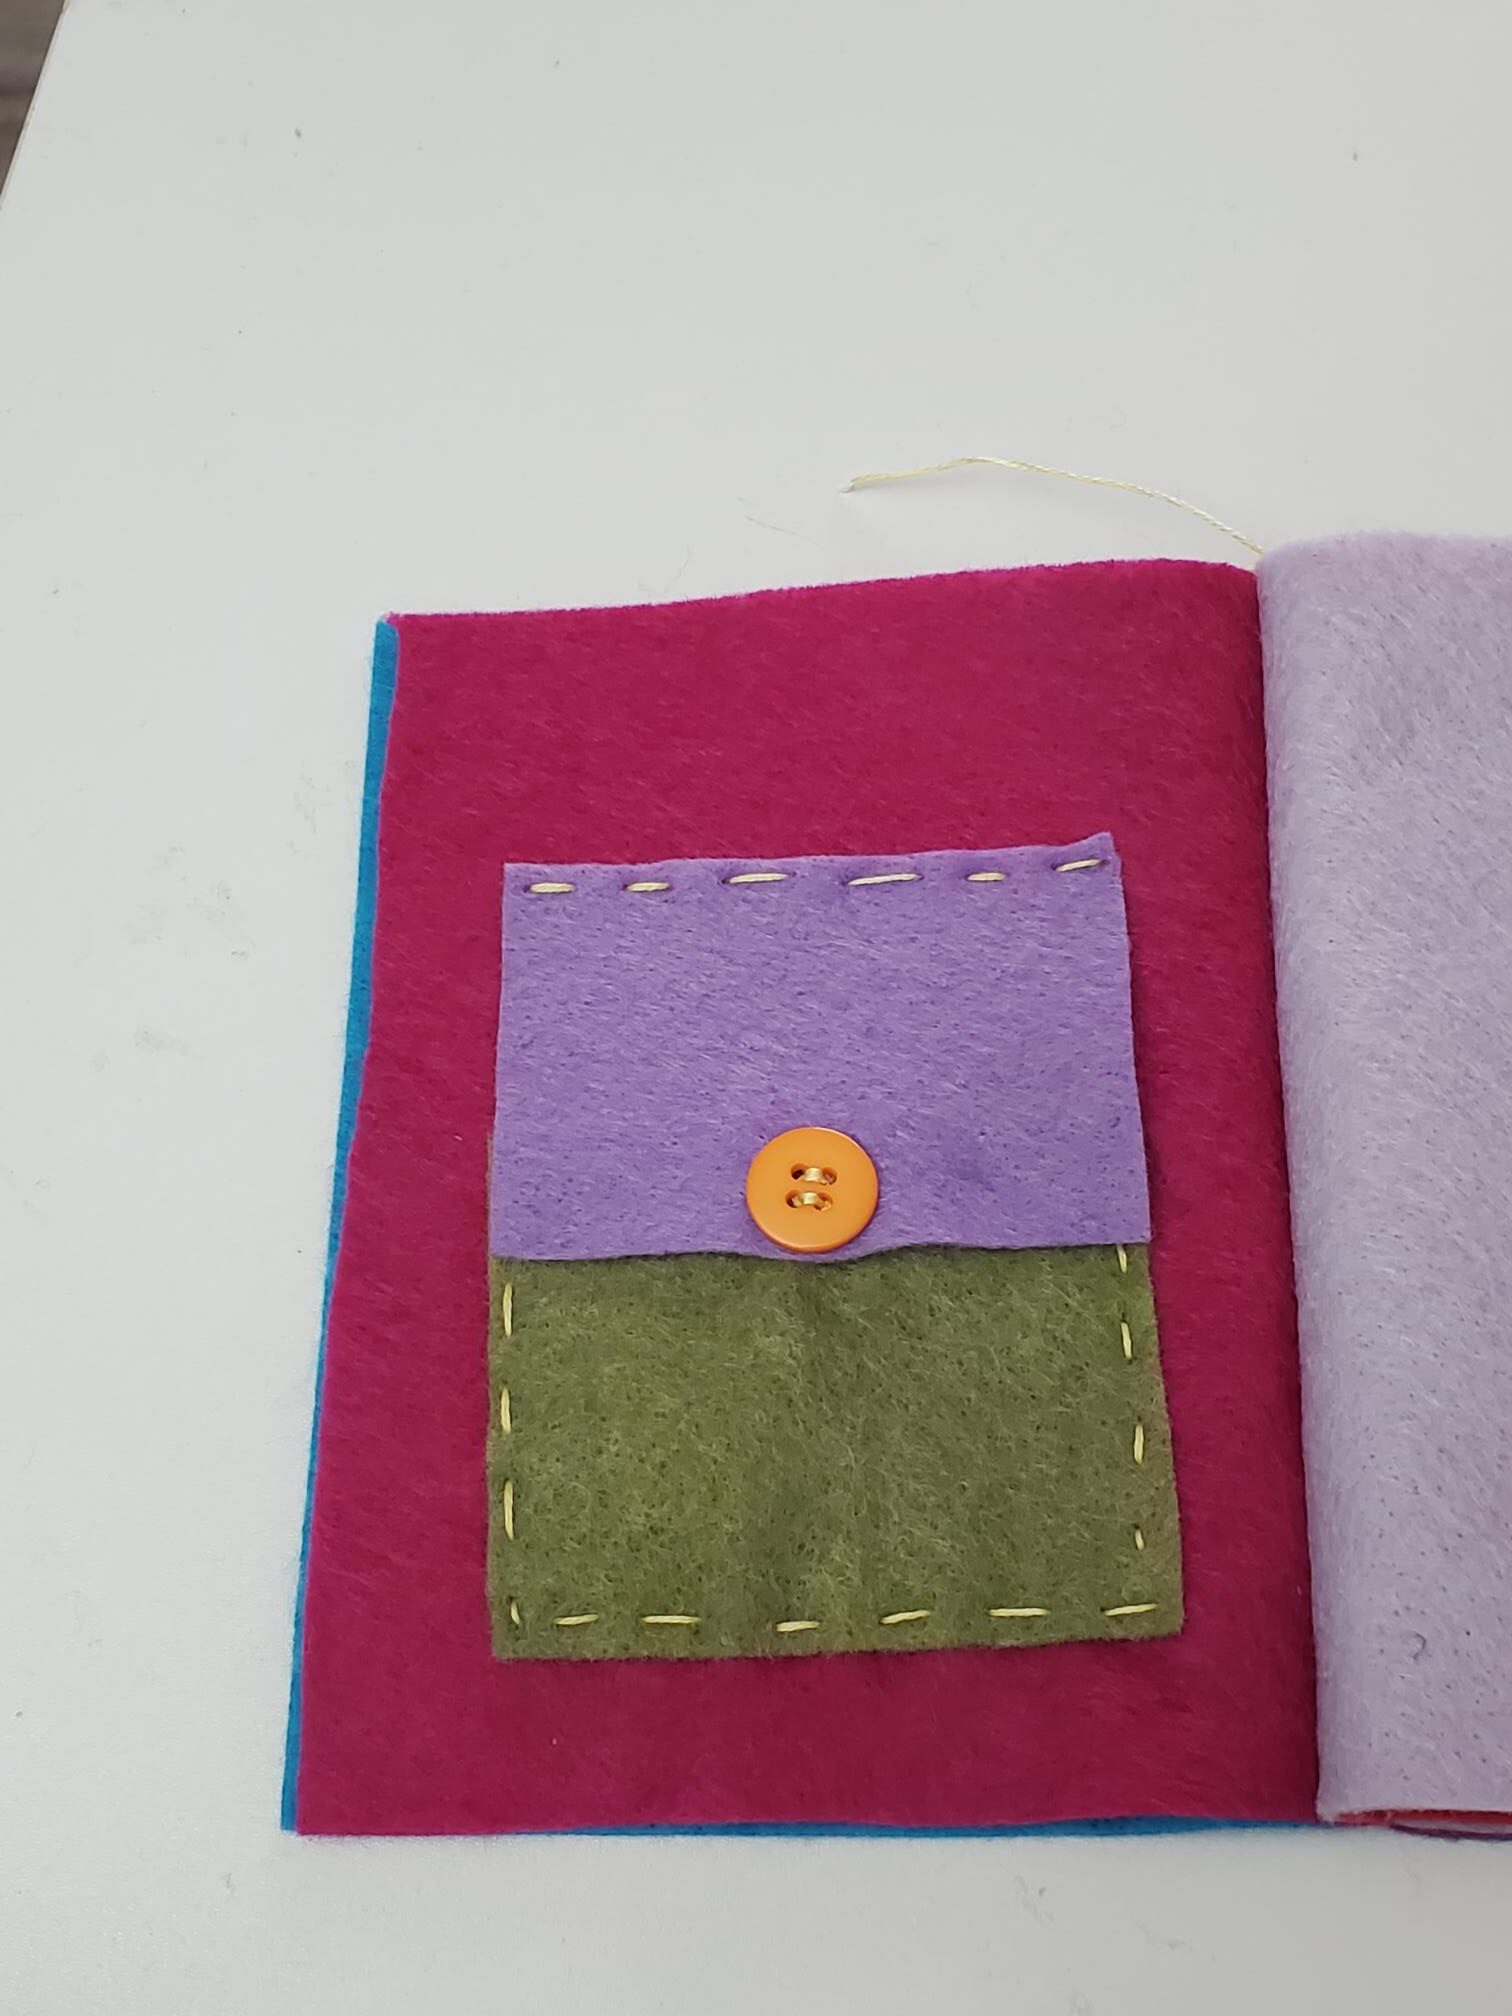
On the second page, on the left side, you are going to sew on a pocket with a button. I used this pocket for safety pins and my self-threader for my needles. First, sew a button on the top center of the main pocket (the bottom part). Then, sew the pocket on to the page, making sure to only sew the two sides and the bottom of the pocket.
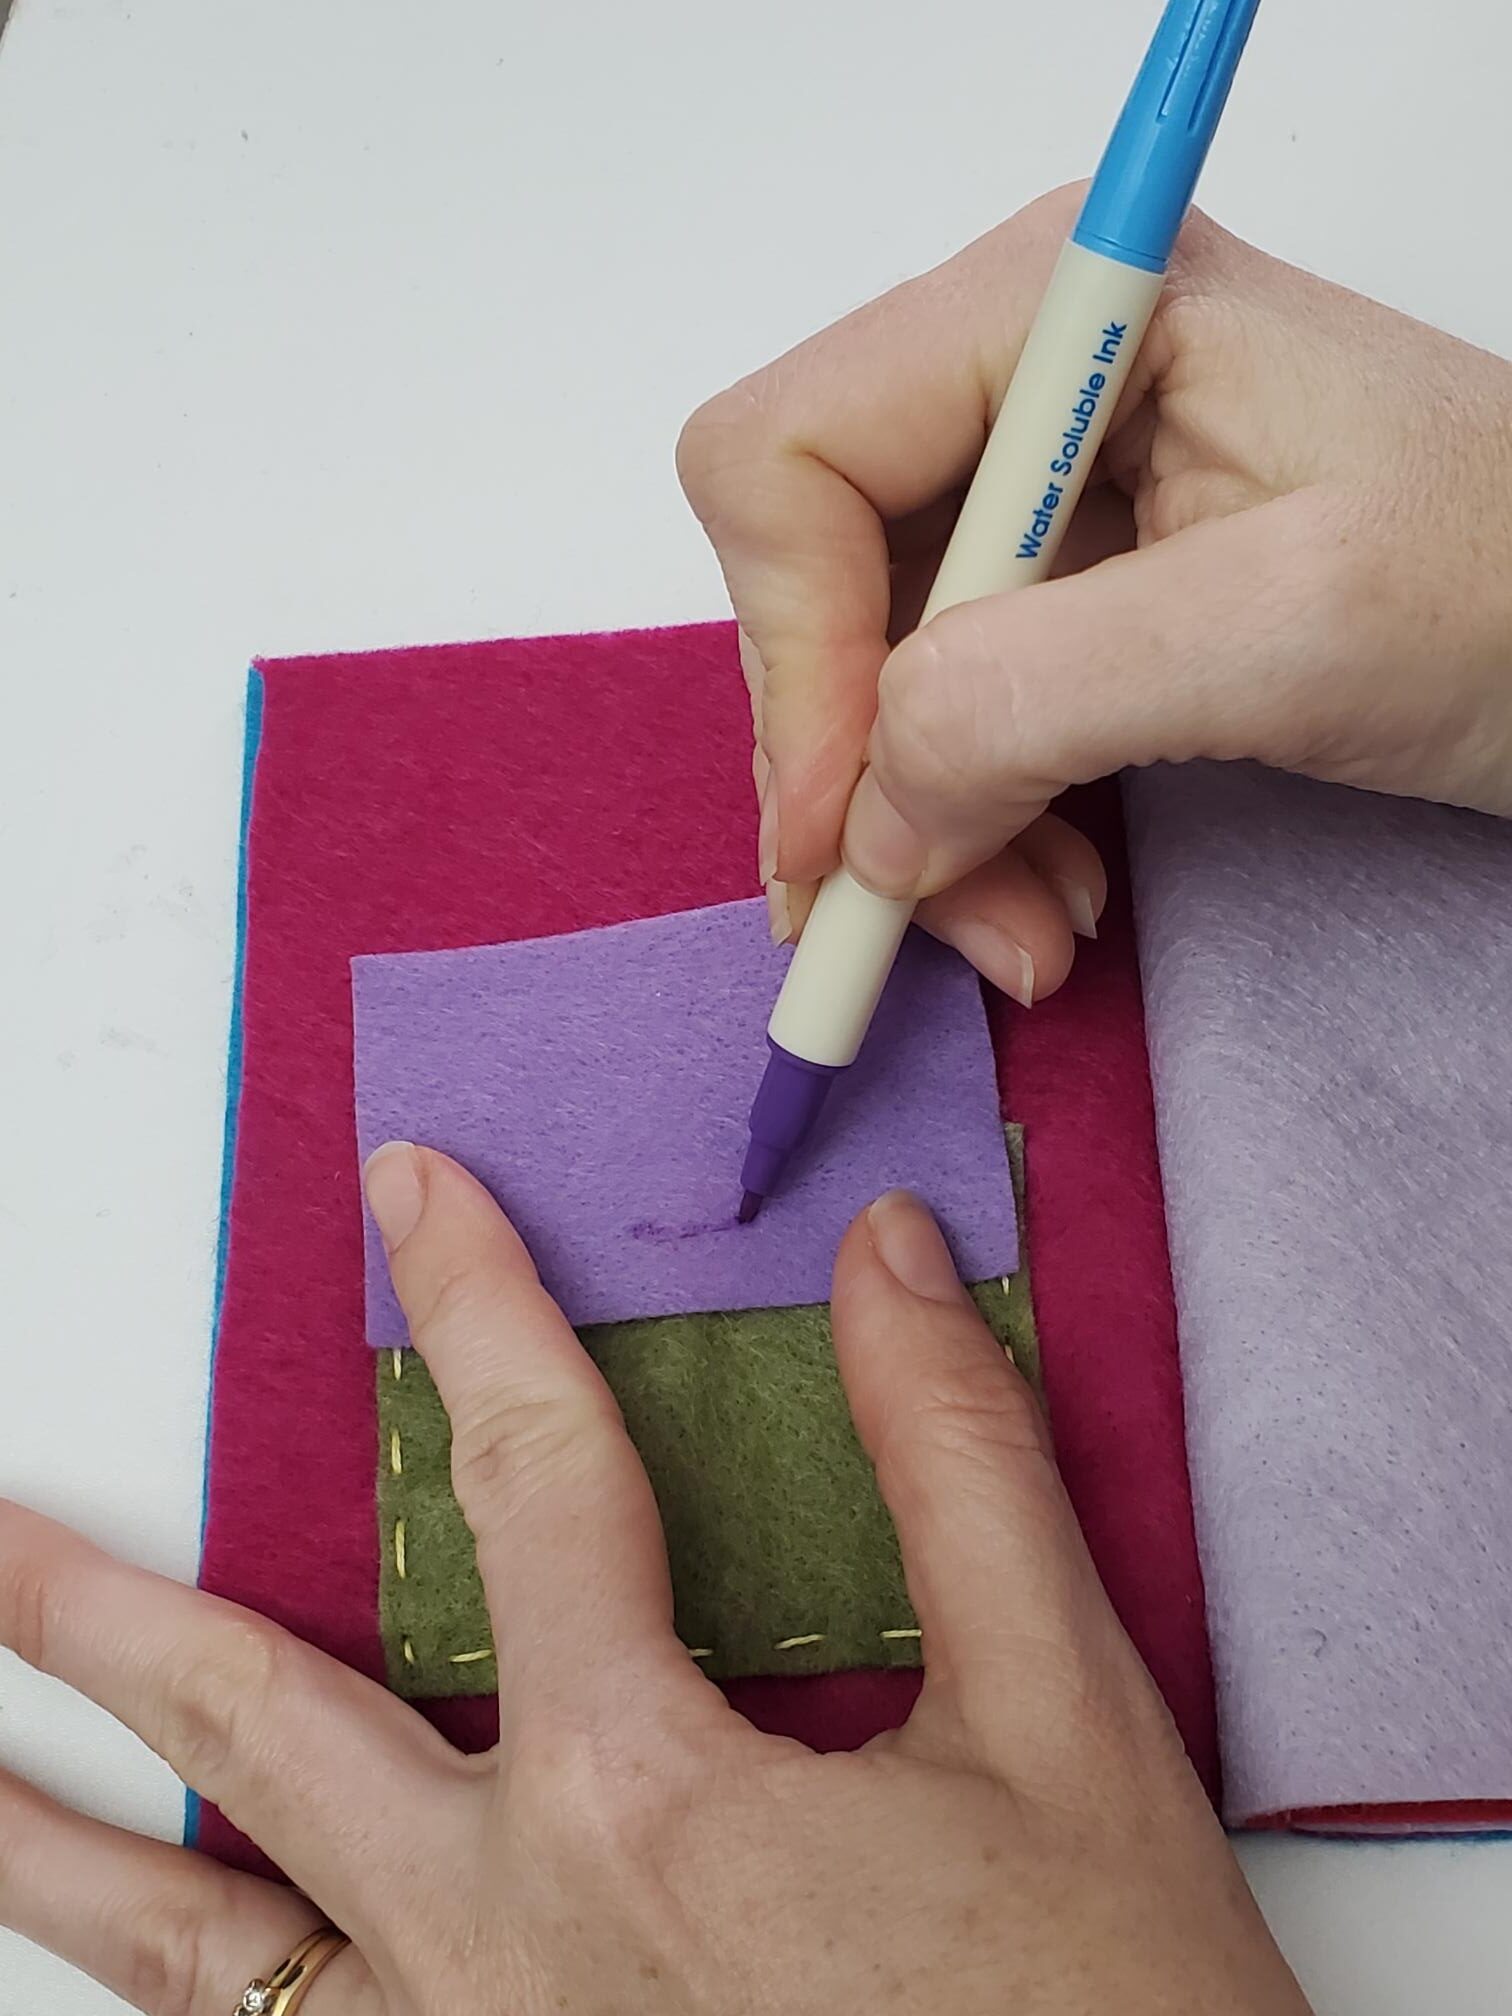
Place the top pocket tab [overlapping the pocket] so that the bottom covers the button, and then feel for the button and draw a line across one side of the button to the other (like you just did for the tab/front of the book). Cut a hole for your buttonhole, and then after you button it up, stitch across the top of your pocket tab.
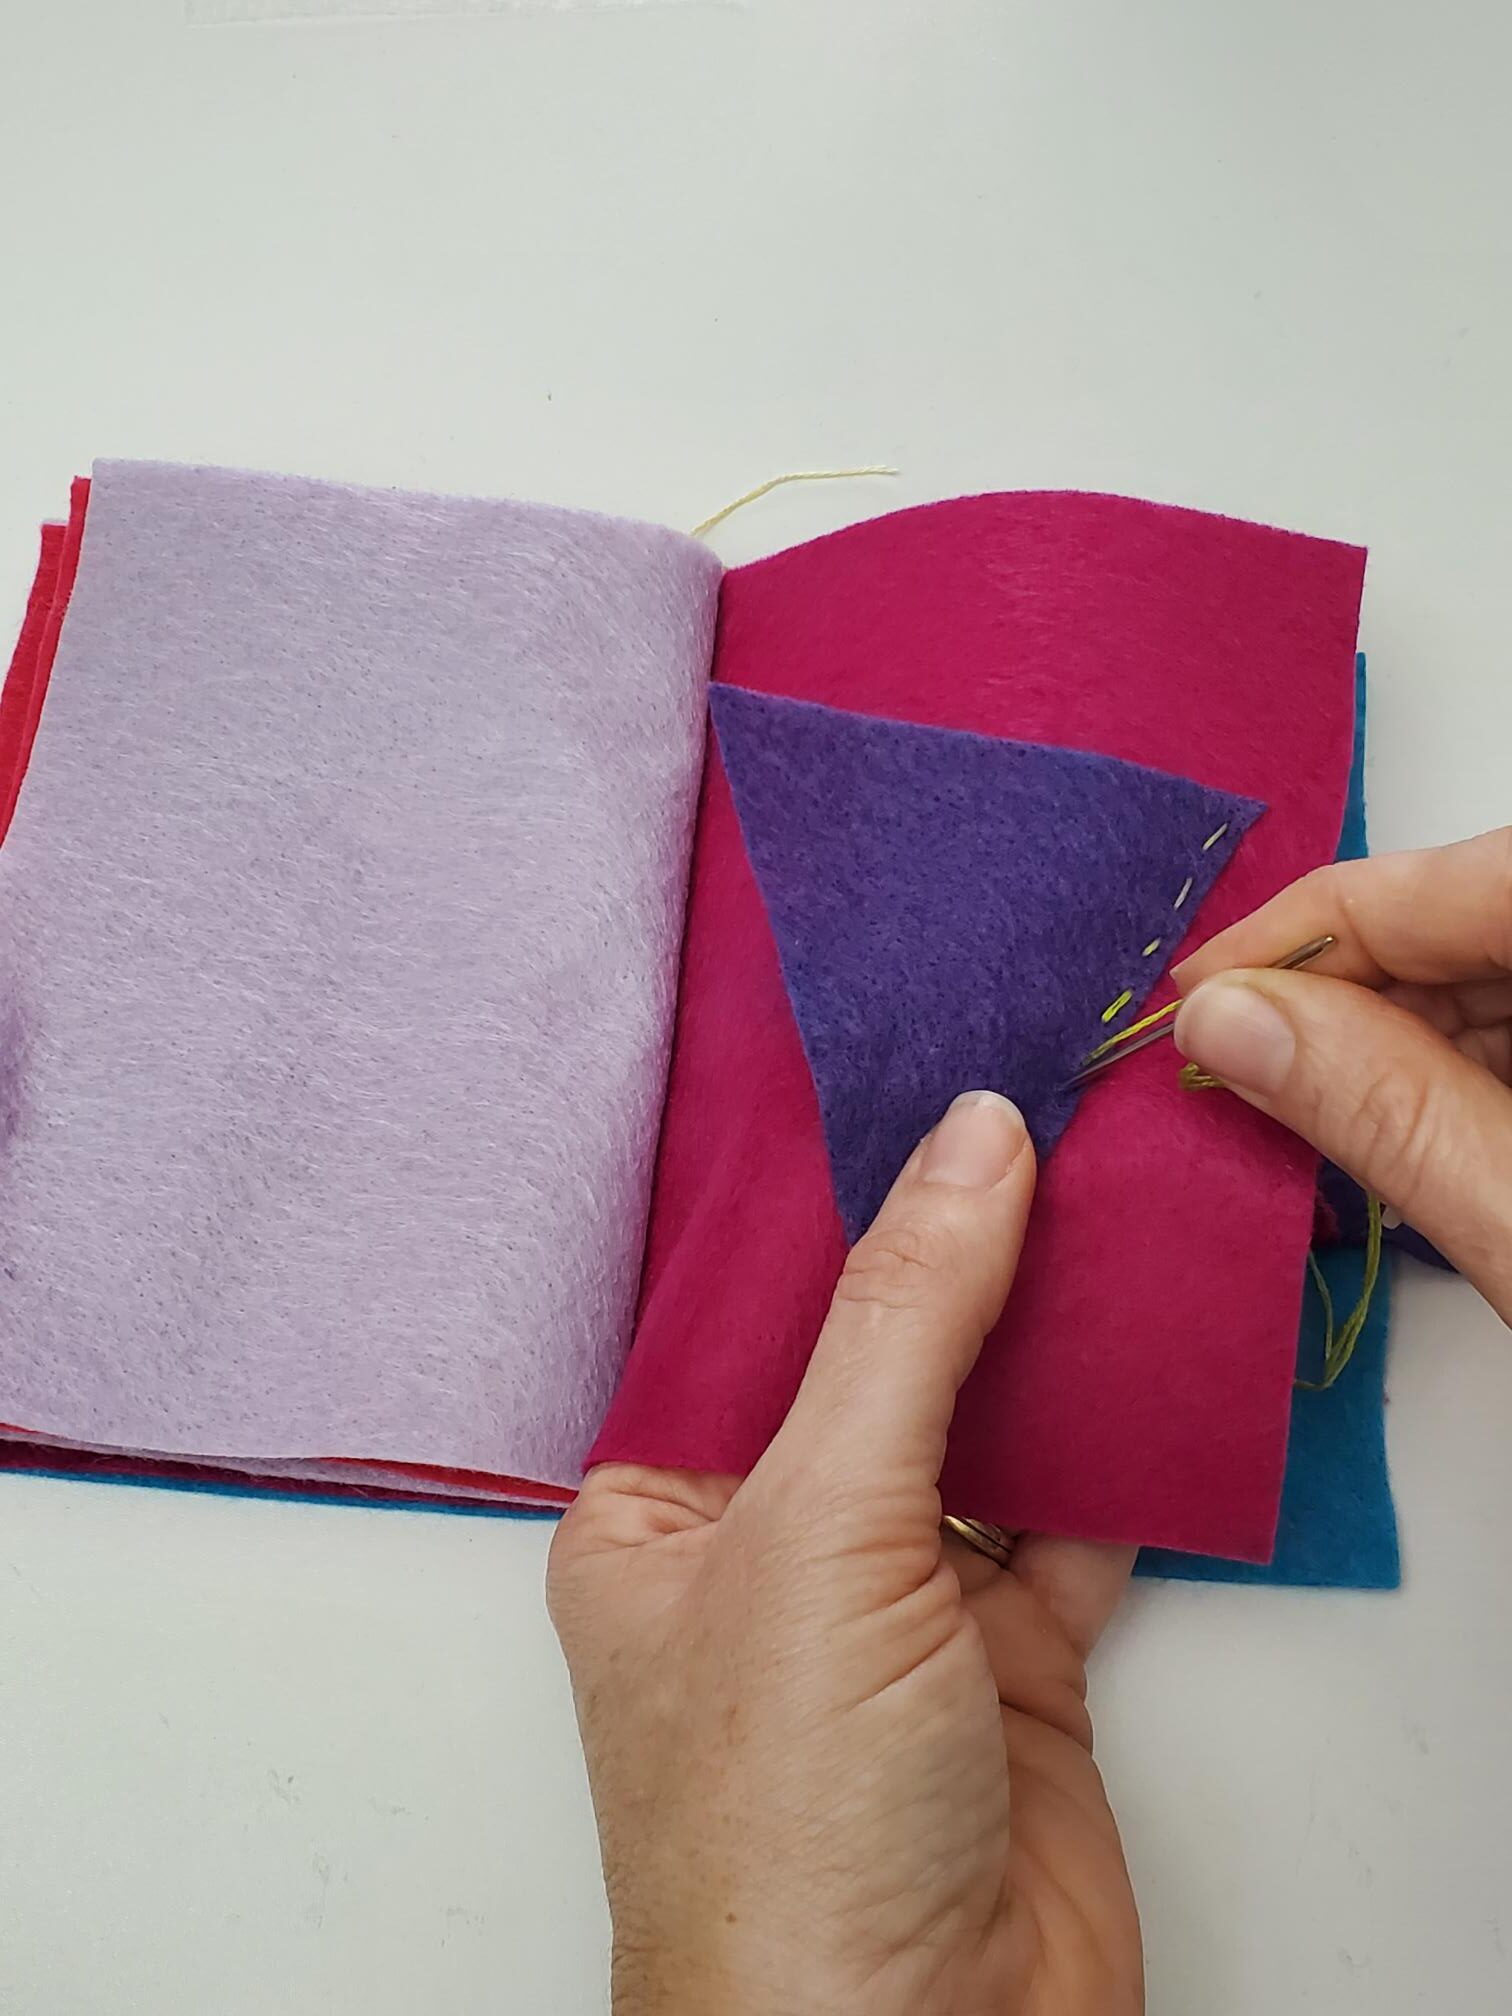
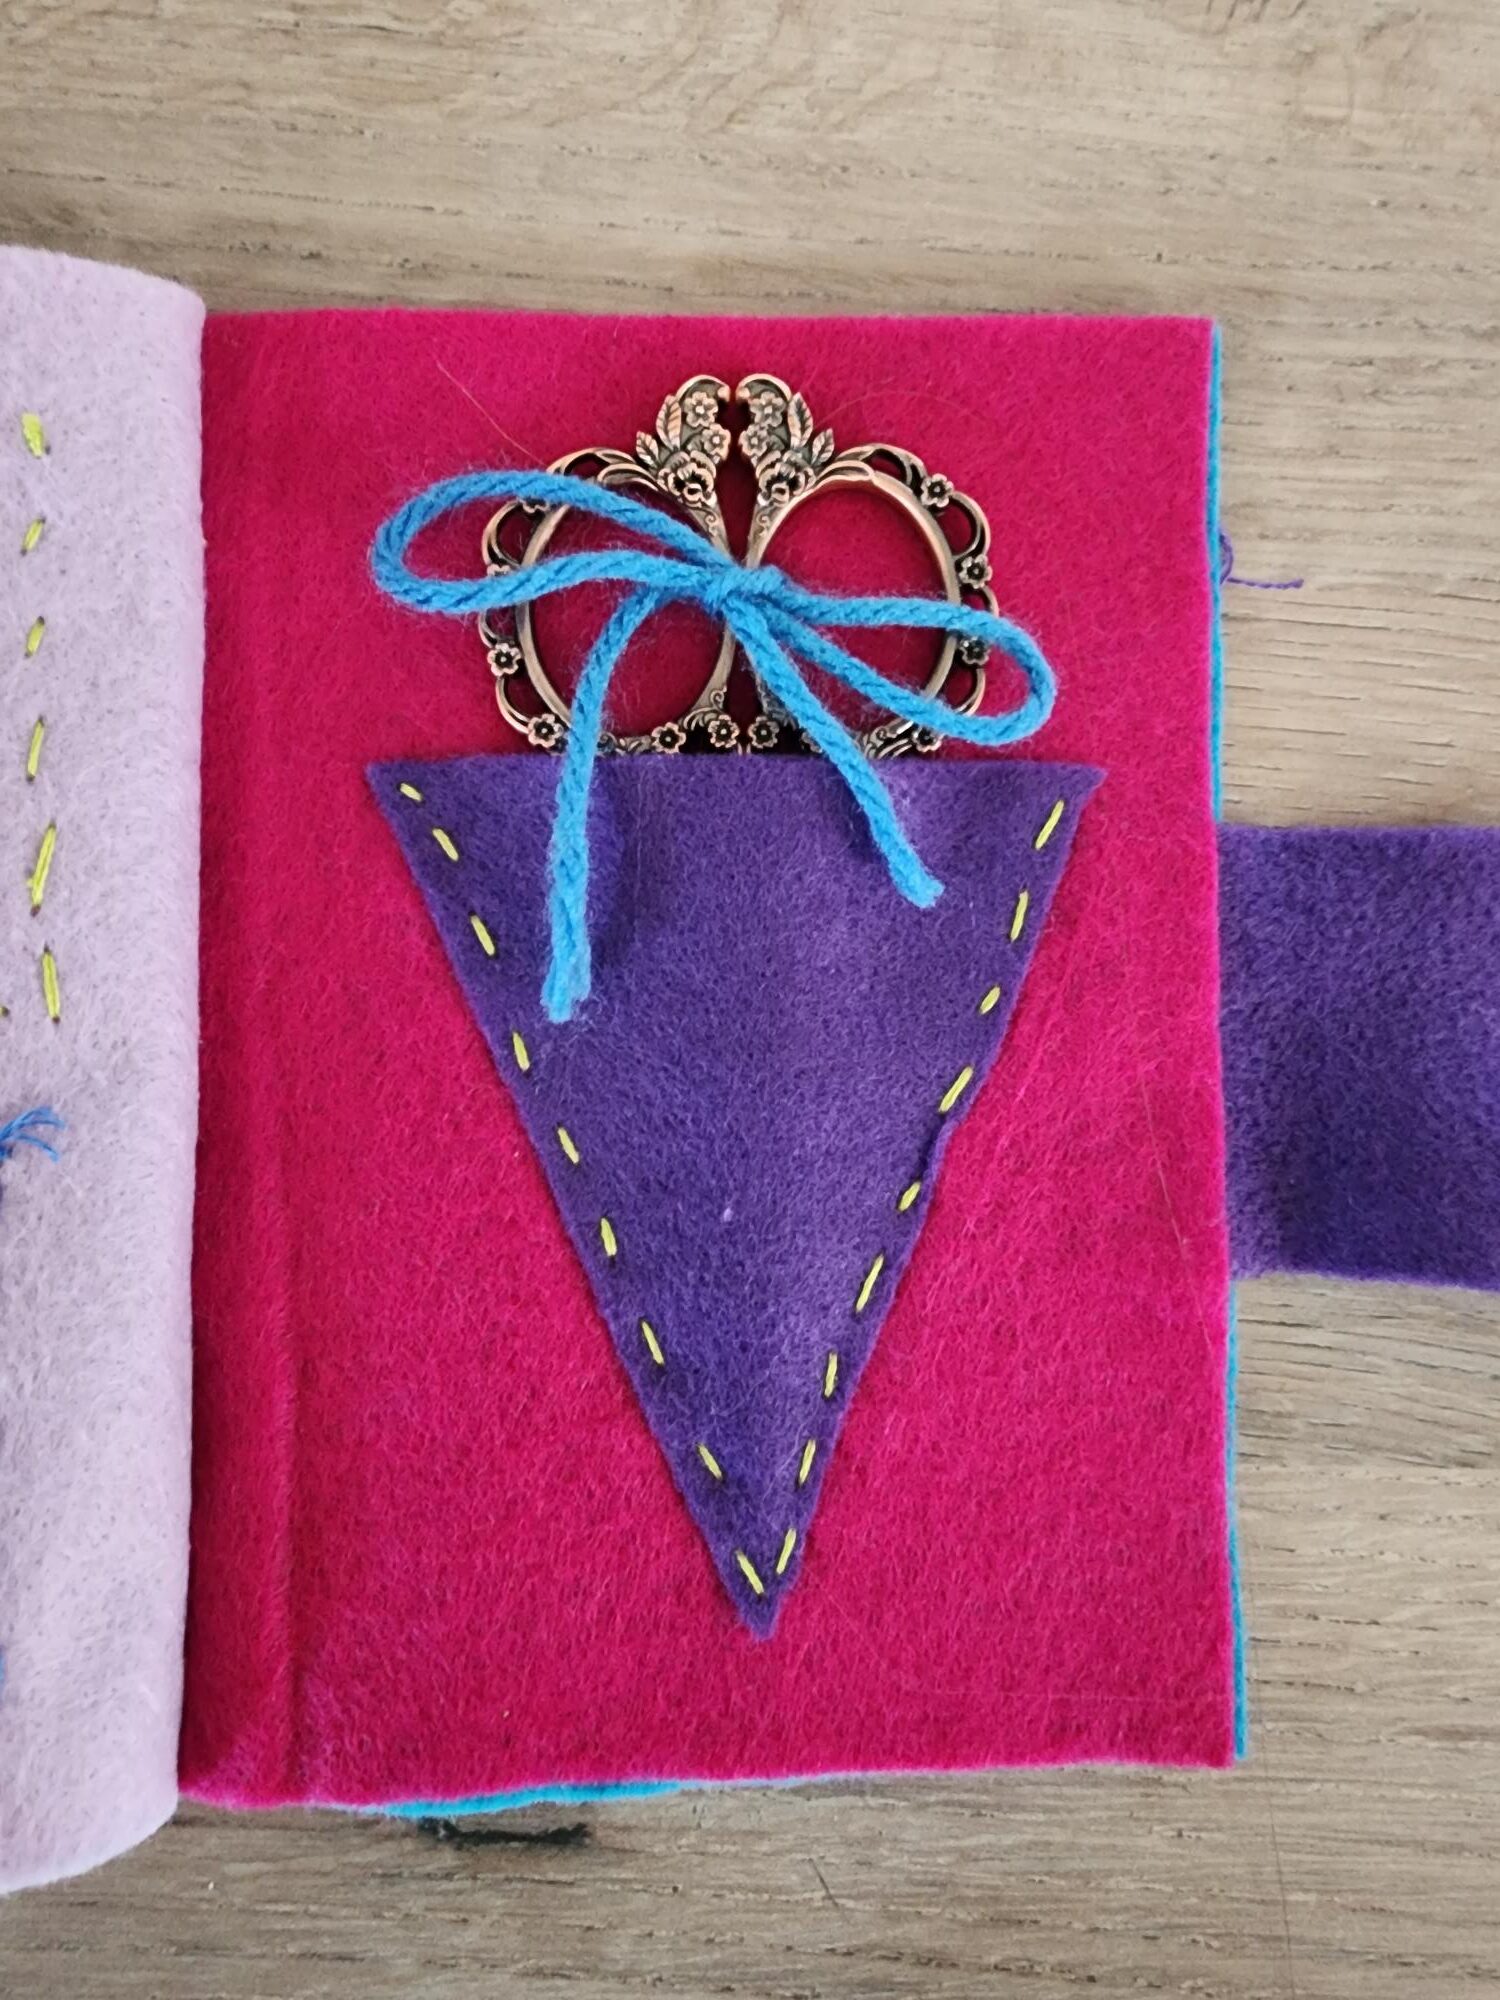
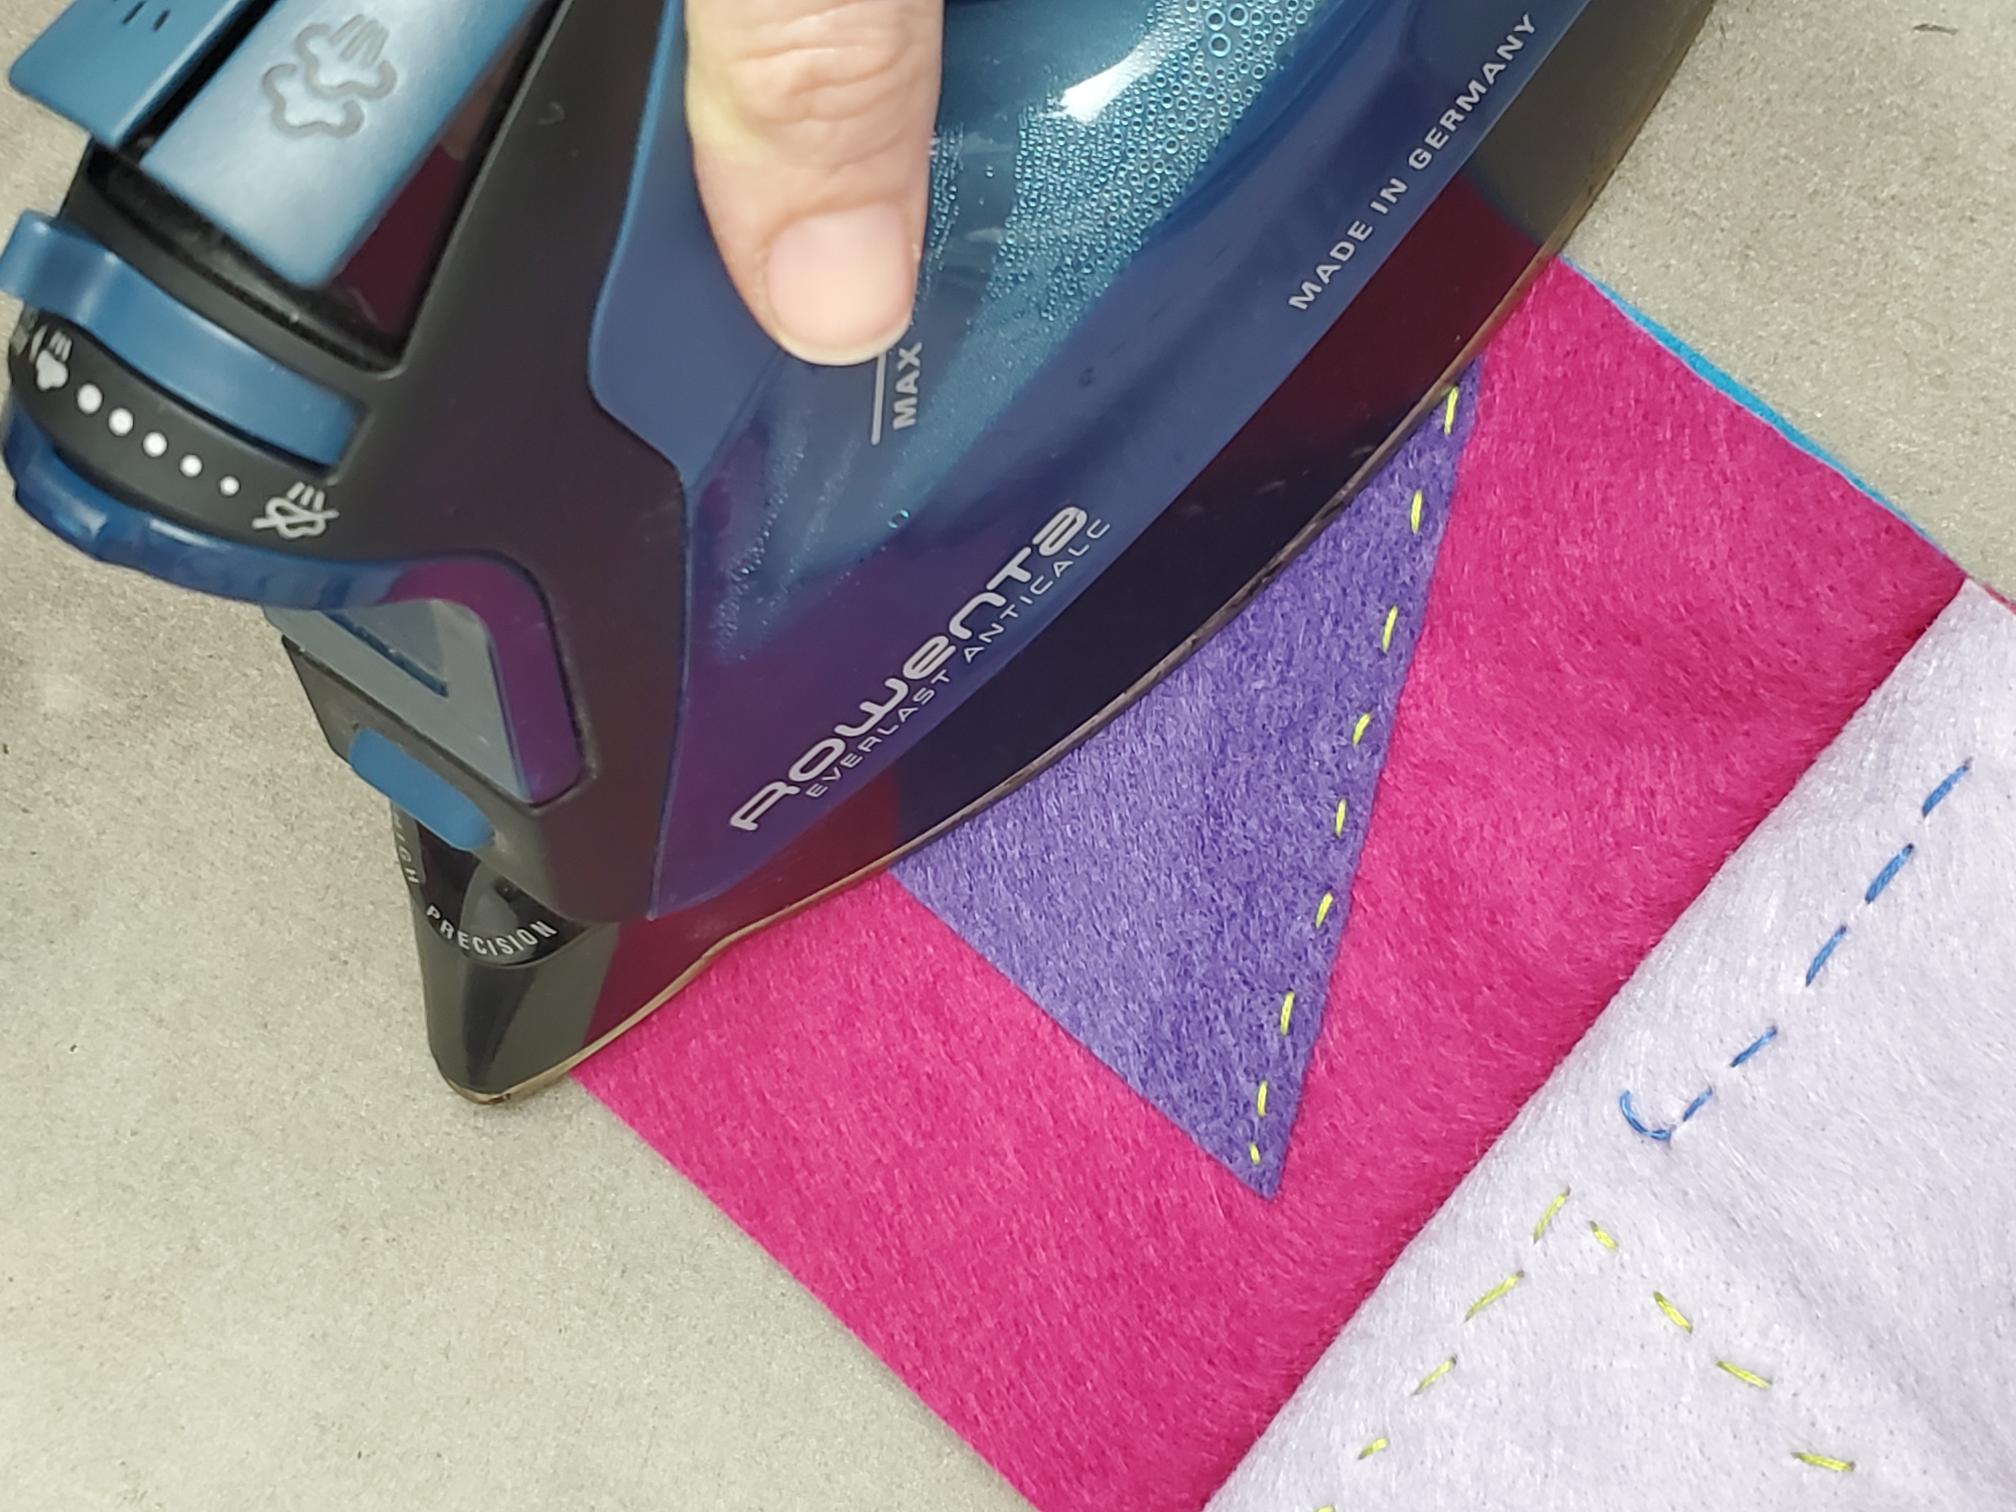
Now, on the second to last page, place your triangle pocket (for your snippers) and stitch it down on the two sides. It might not seem like it matters which page you put which pockets on, but I chose the second to last page because we are going to fuse it to the back page, which will make it stronger. You want it to be strong enough to hold the snippers 🙂
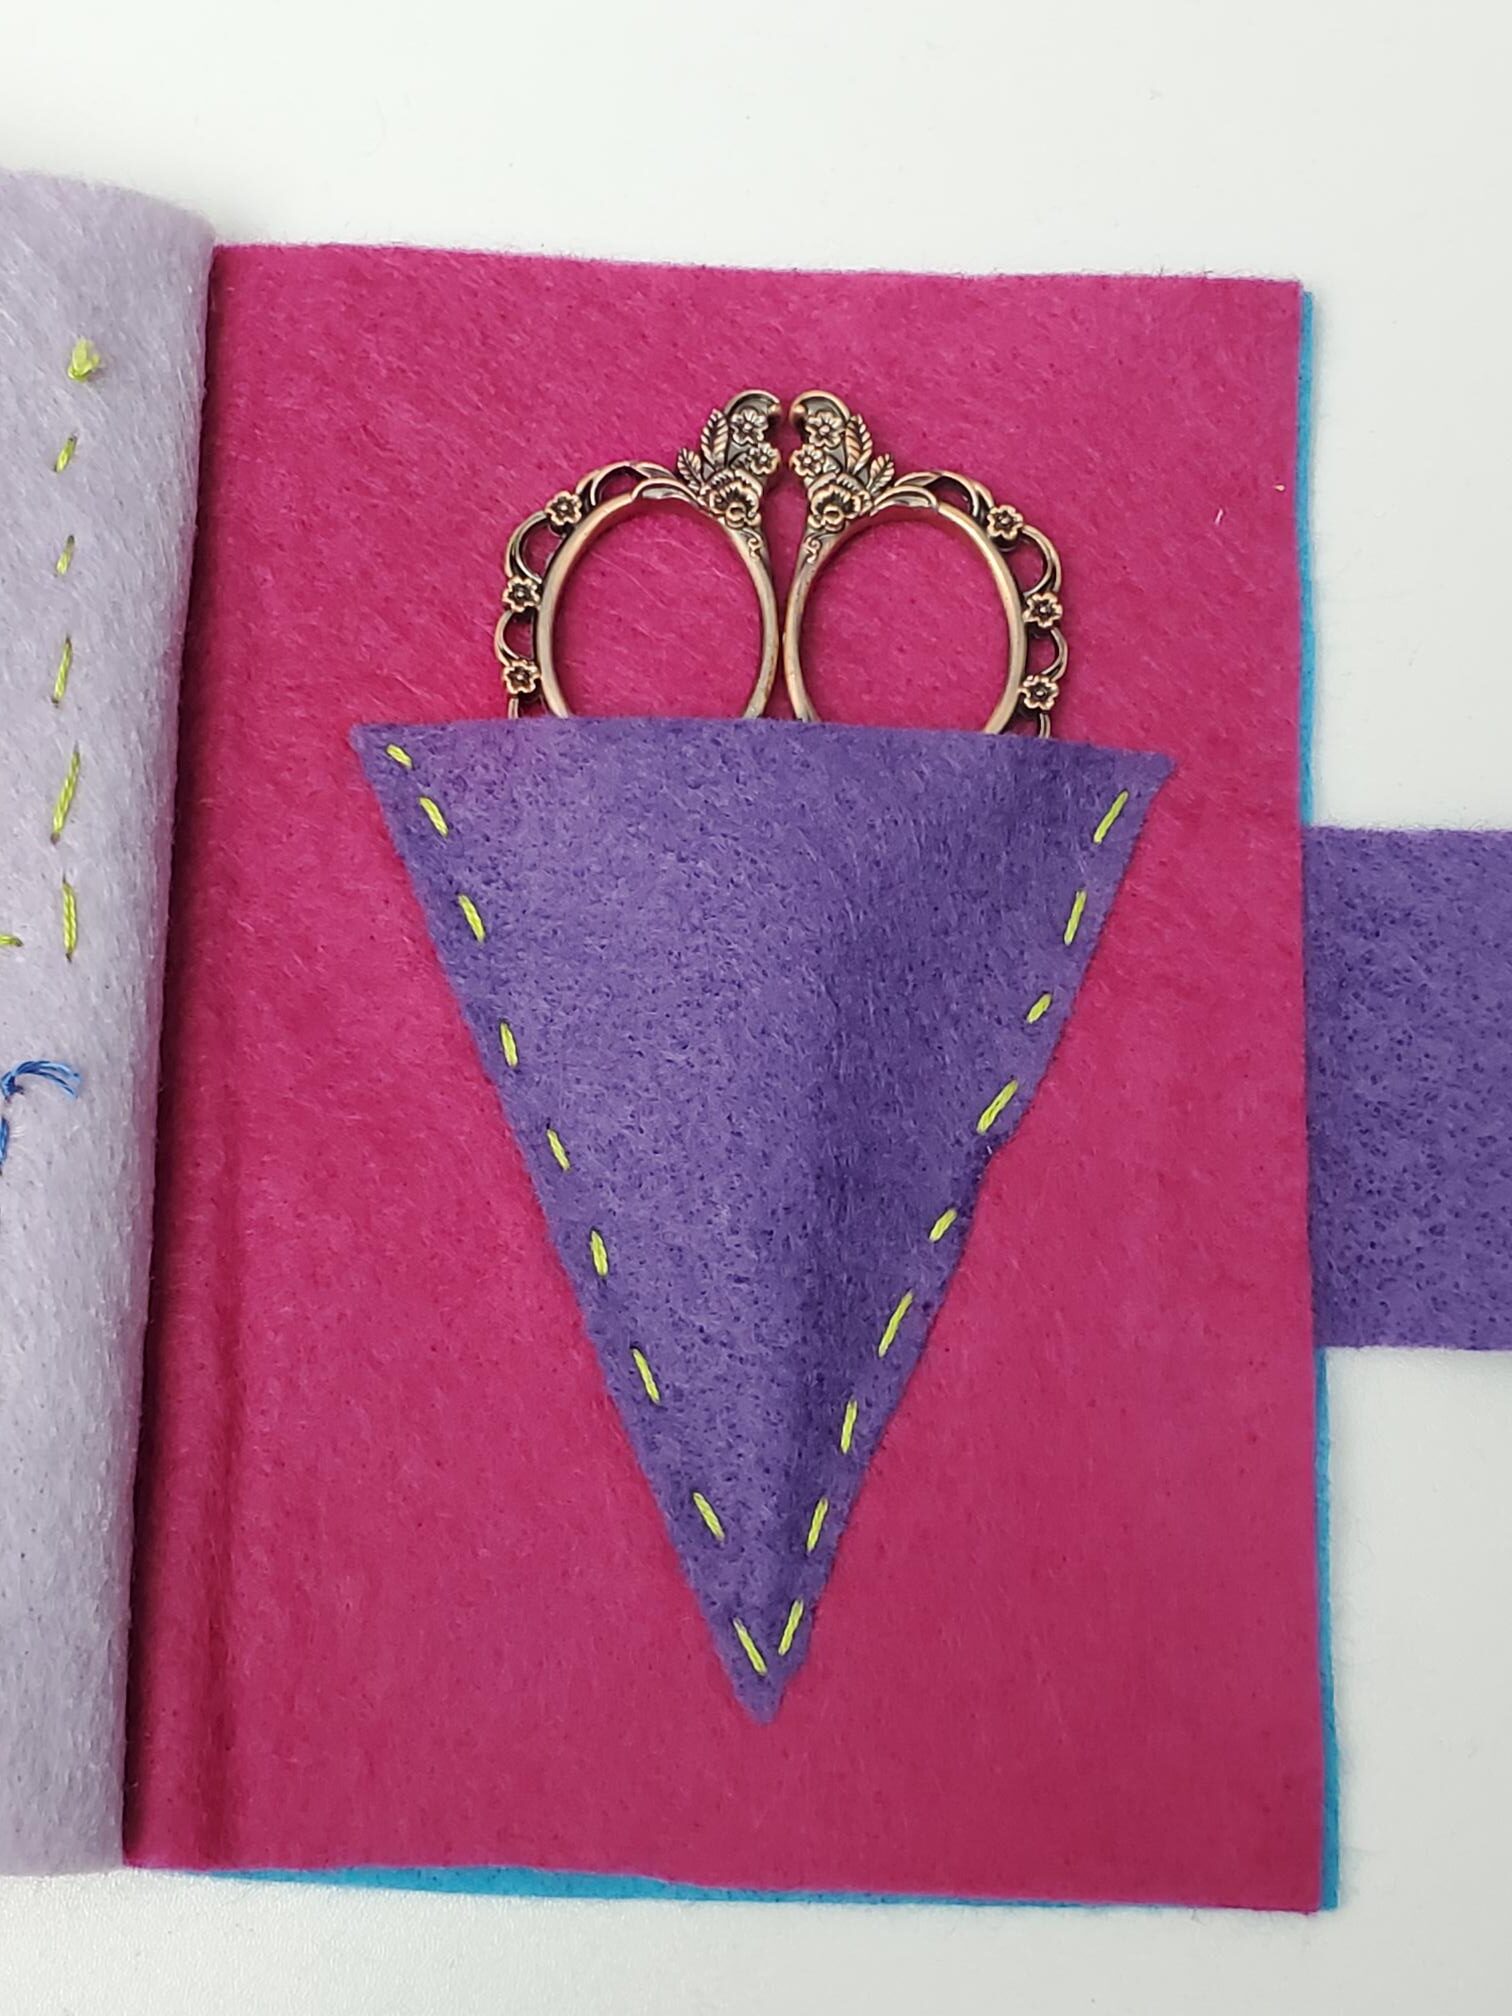
I ended up adding a piece of yarn afterwards to the scissor page. You will want to do this step before you fuse (fusing is the last step, so if you follow this order you’ll be fine!) I added this after I made this tutorial because my snippers slid out. We don’t want that! To fix this problem, I threaded a piece of yarn on a big needle, and (with my scissors placed in the pocket for reference), I took the needle down one side of the handle and then up on the other side. Remove the scissors and tie a knot with your yarn. When you are ready to put your snippers away, simply bring one strand of yard up through each handle, and then it in a nice bow to secure your snippers!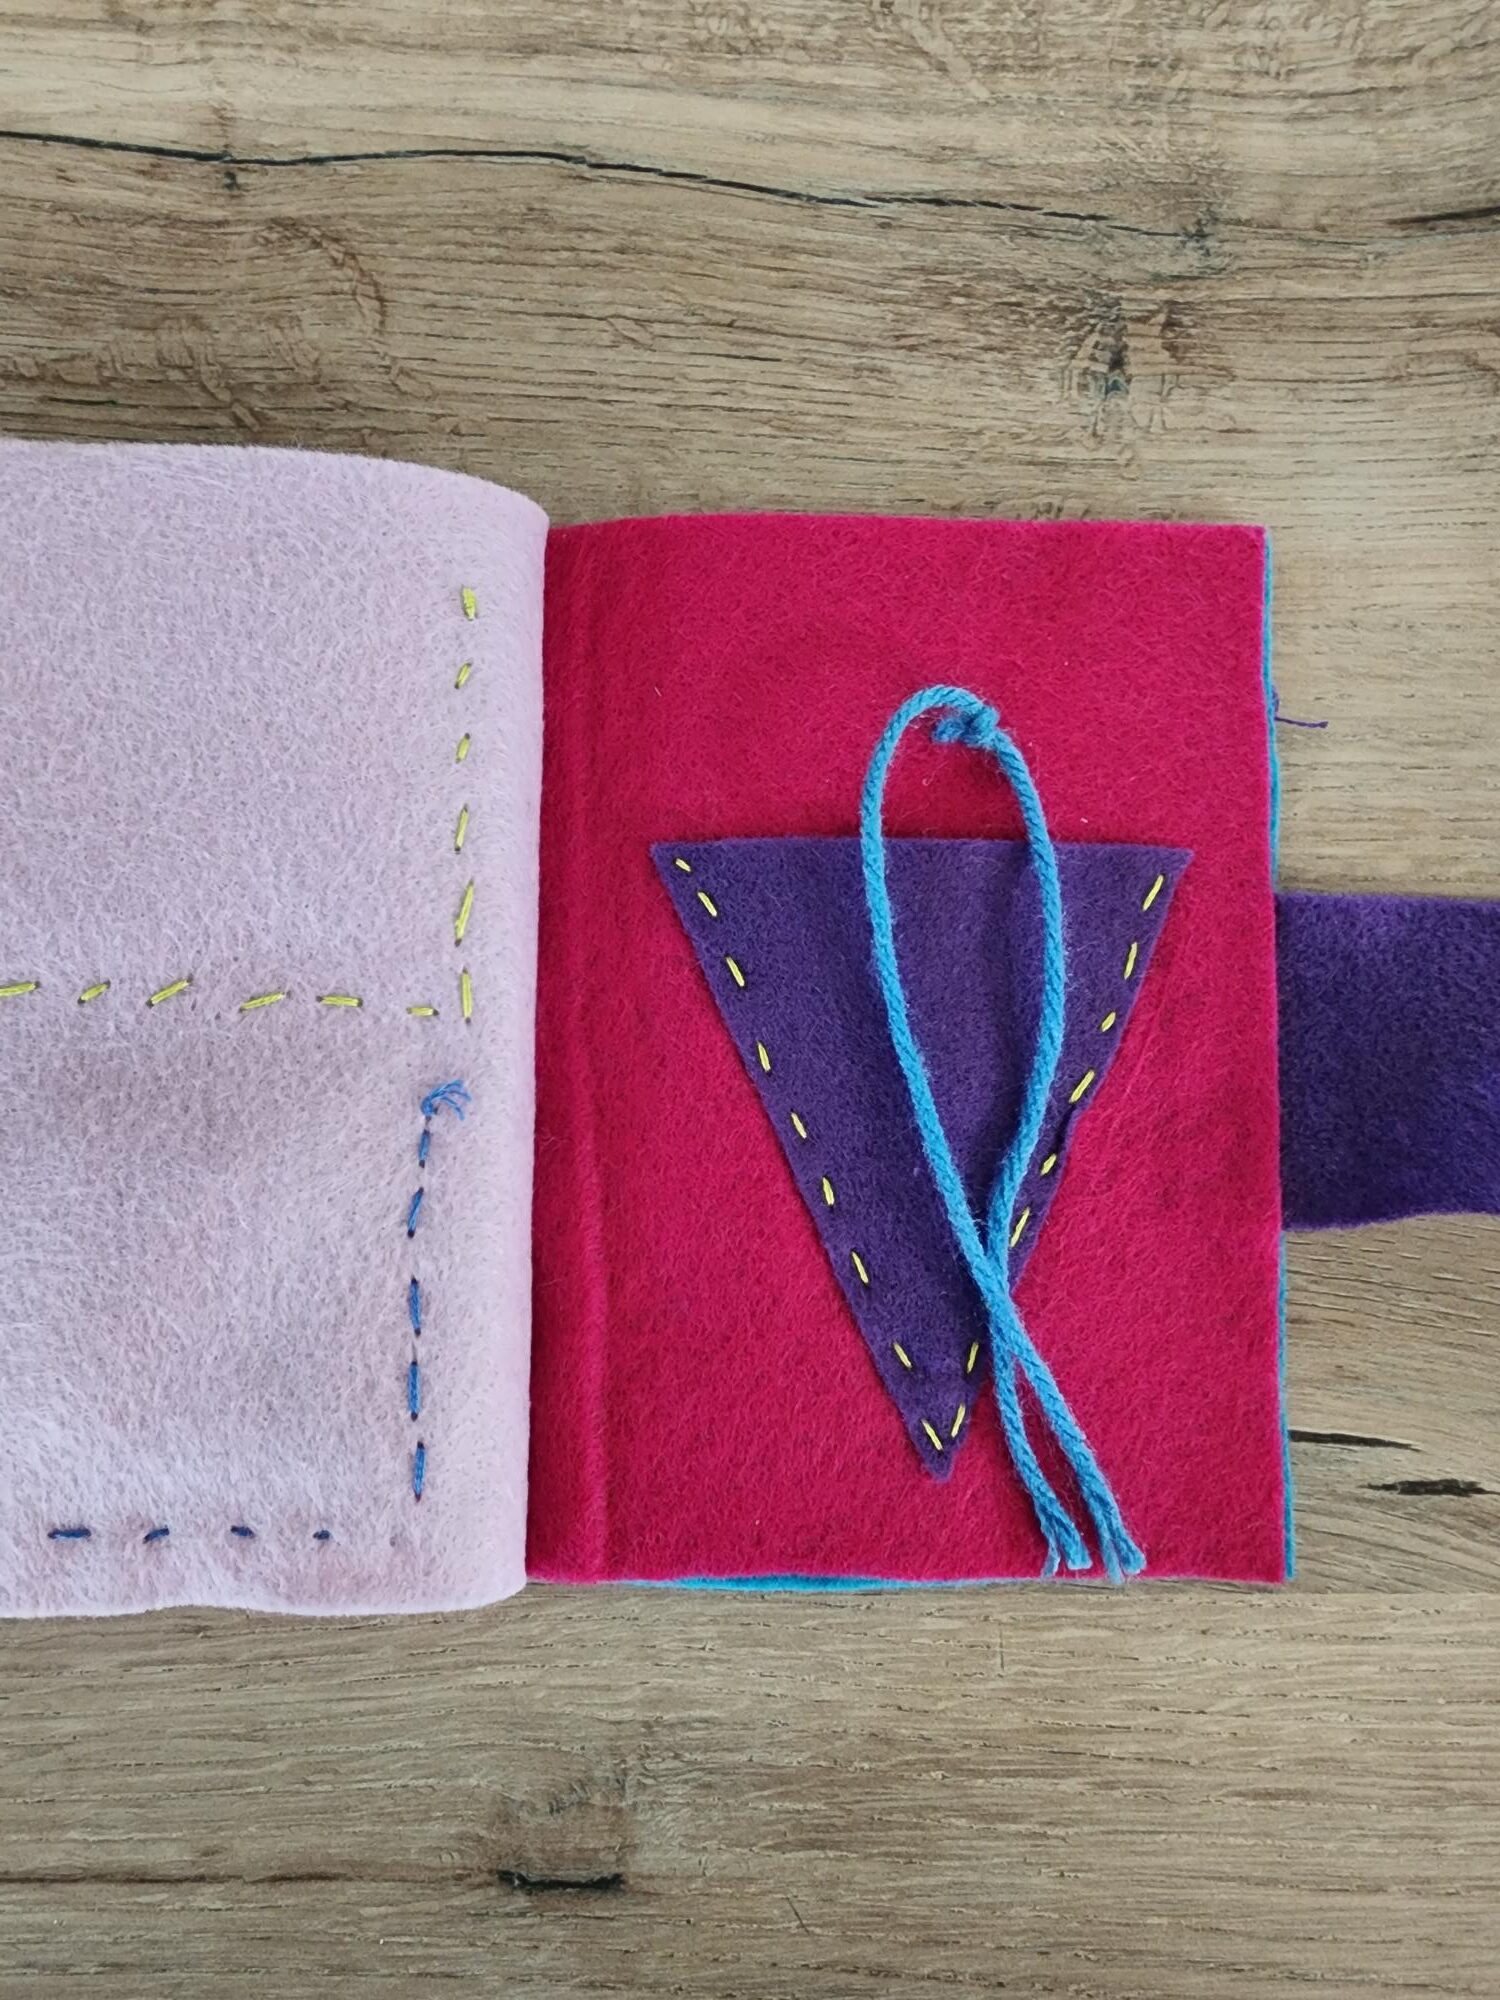
Sew two more pockets on any of the middle pages. I used the first couple pages to keep my pins and needles on, and I put these two pockets on the page before the scissor pocket page. These pockets will be used for keeping extra threads. I bought actual thread cards that I gave to each of the kids to wrap their extra thread on. I was so excited to find these cards; they work much better than my business cards, ha ha.
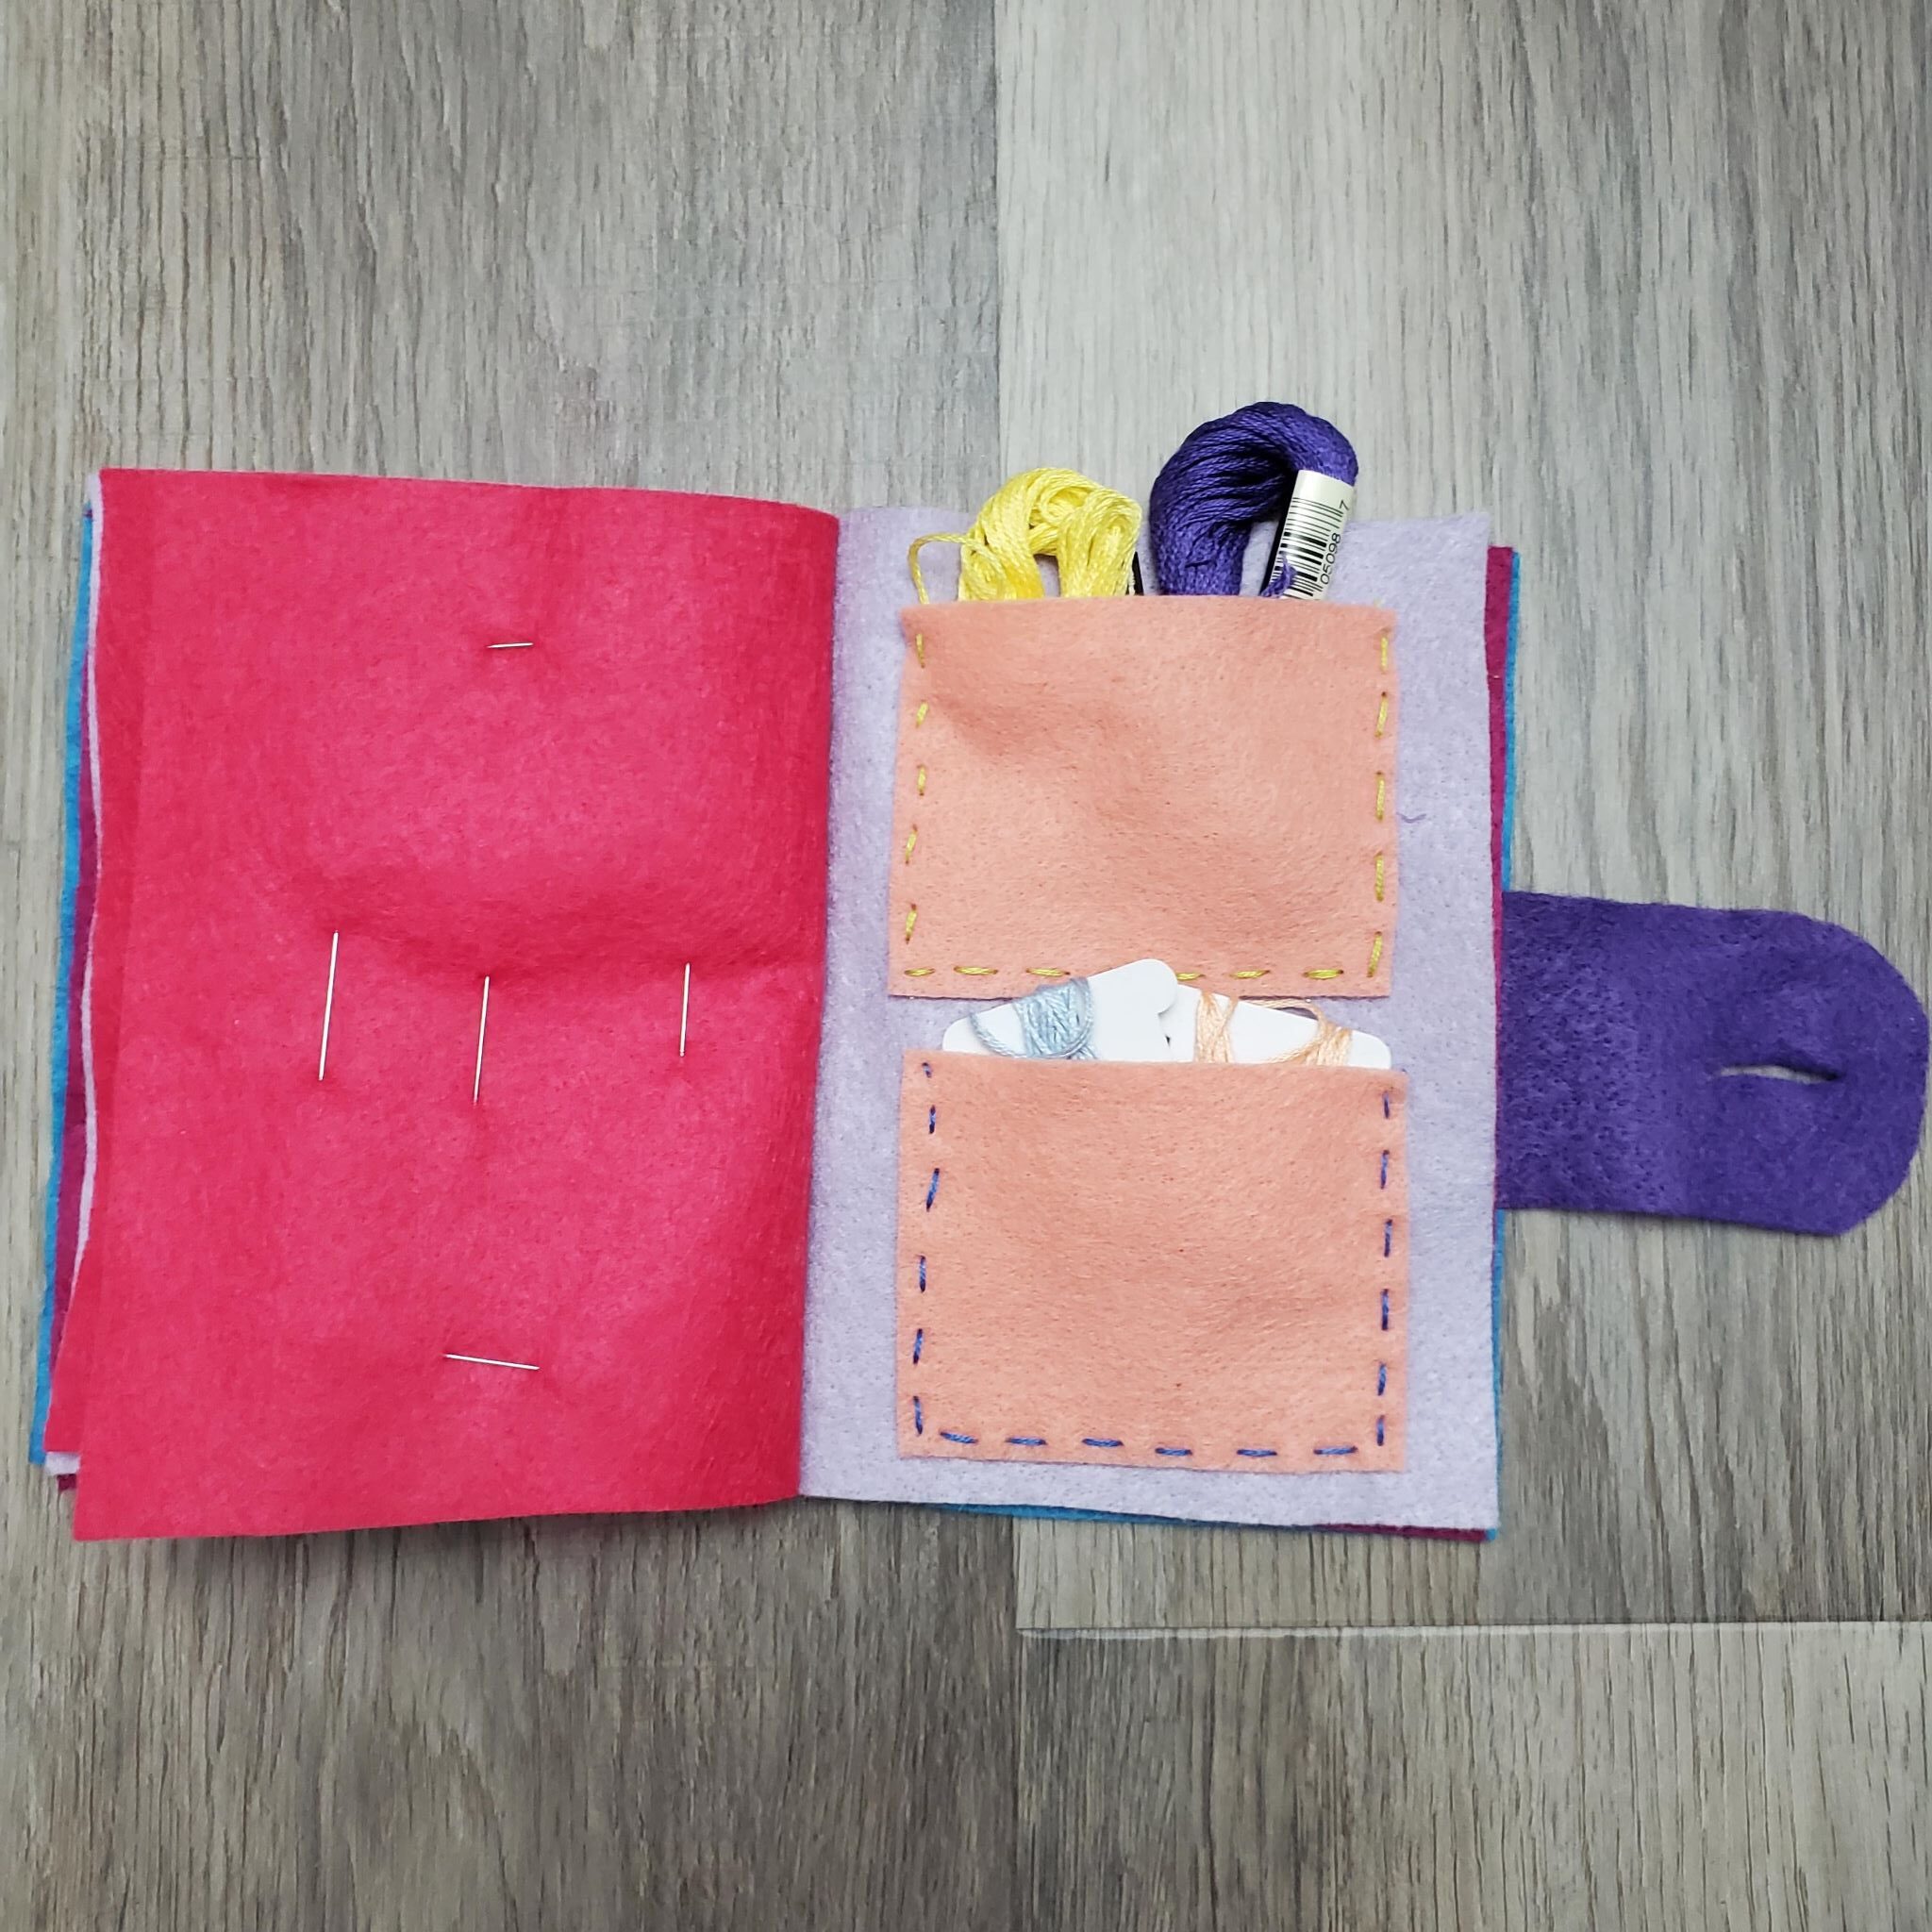
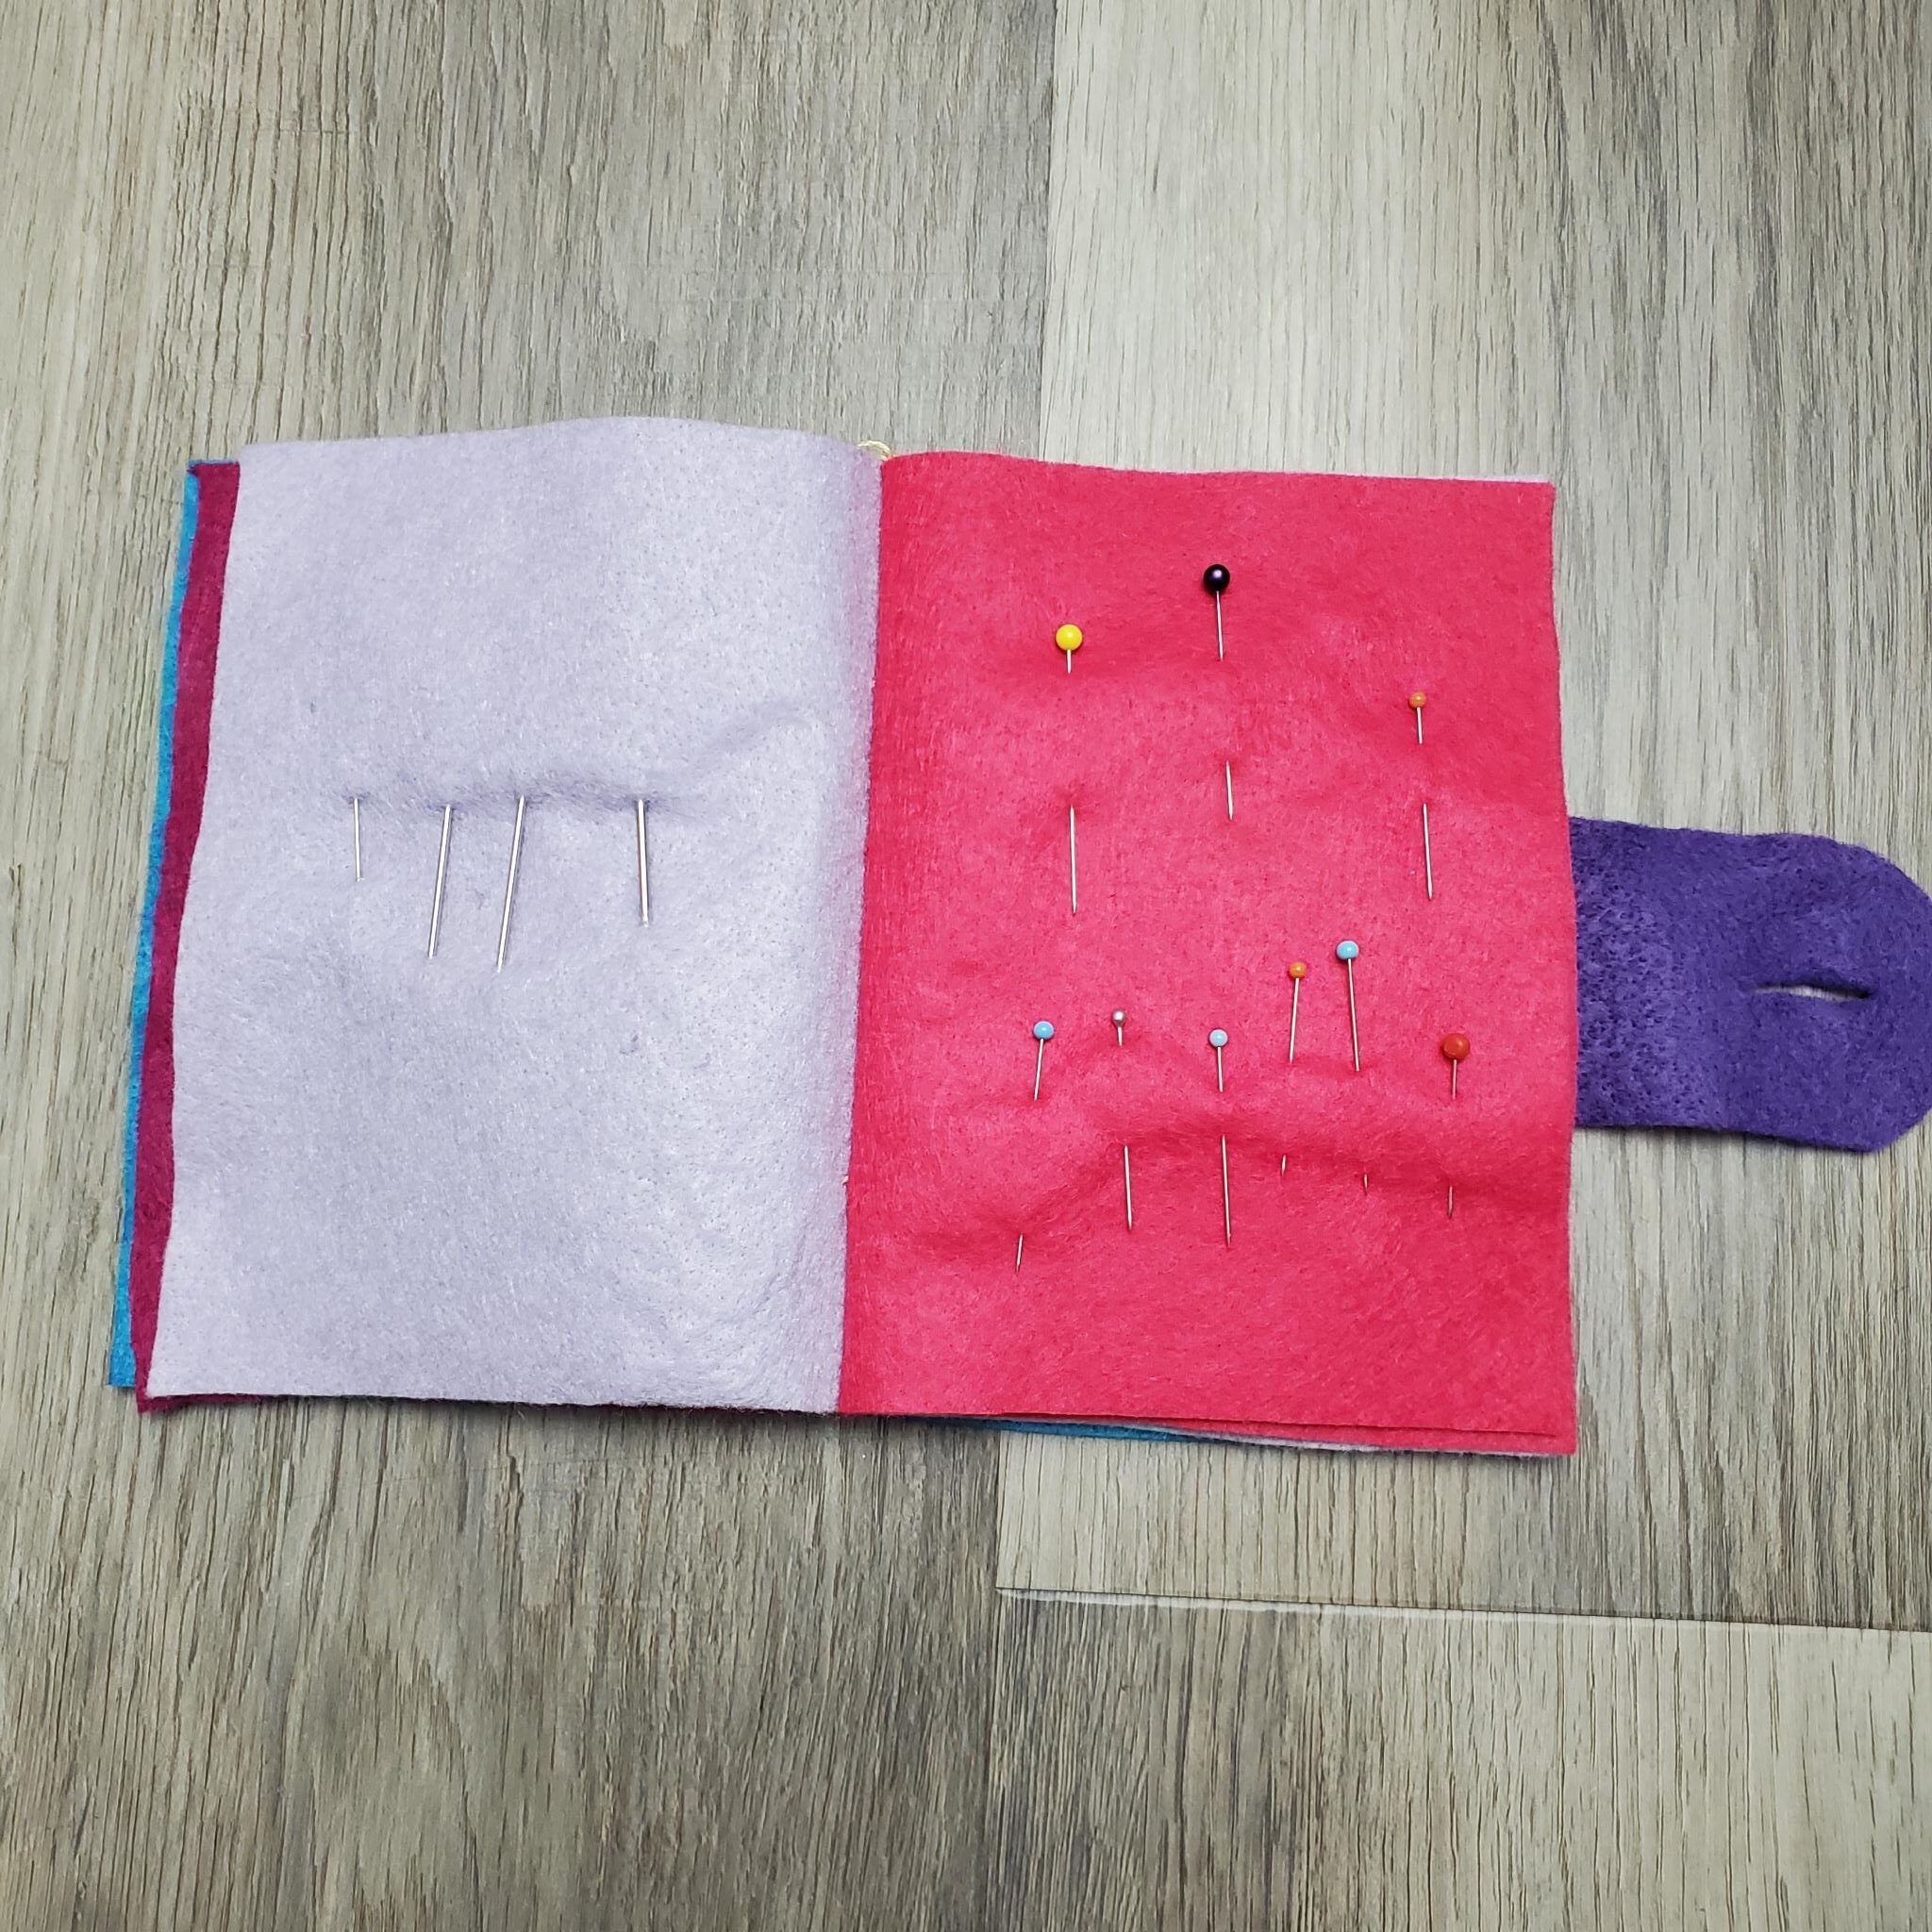
Here’s what my other two pages look like (they’re basically plain, but I store my needles on one page and my pins on the others!)

Now for the last step. Take one piece of your fusible web and place it on the inside of your book, in-between the cover and the first page. Place a warm iron (not too hot or steamy or it may melt your felt) on the first page to fuse the pages together. I missed the picture where I turned the first page back onto the front cover; do NOT put your iron directly on the fusible webbing. It will melt on your iron and gum it up! See the pictures in the next step below if you are having trouble understanding.
Repeat this on the inside of the back cover (where your tab is sewn) and the last page.
And that’s it! You can really add or subtract as many pages as you like, but this was a good amount to carry everything my student’s need to bring to class. From start to finish, it took them two hours to stitch this whole thing up! (I had already pre-cut everything). It’s a great project for beginning stitchers!
Shopping List:
*Sassy Cassy’s is part of the Amazon Affiliate Program, which means that if you purchase Amazon items from this website, a small commission will be earned, at no extra cost to you.
