
Thanksgiving is just around the corner! Where has 2022 gone? I can hardly believe we are at the end of the year already. Is it just me or does every year seem to go by faster and faster??
At any rate, holiday sewing is my favorite kind of sewing! I see so many fun ideas of things I want to sew. Time is the only thing holding me back. That’s one of the great things about teaching classes: I am forced to make samples which means that I get to sew up some of those cute ideas that I see and want to sew!
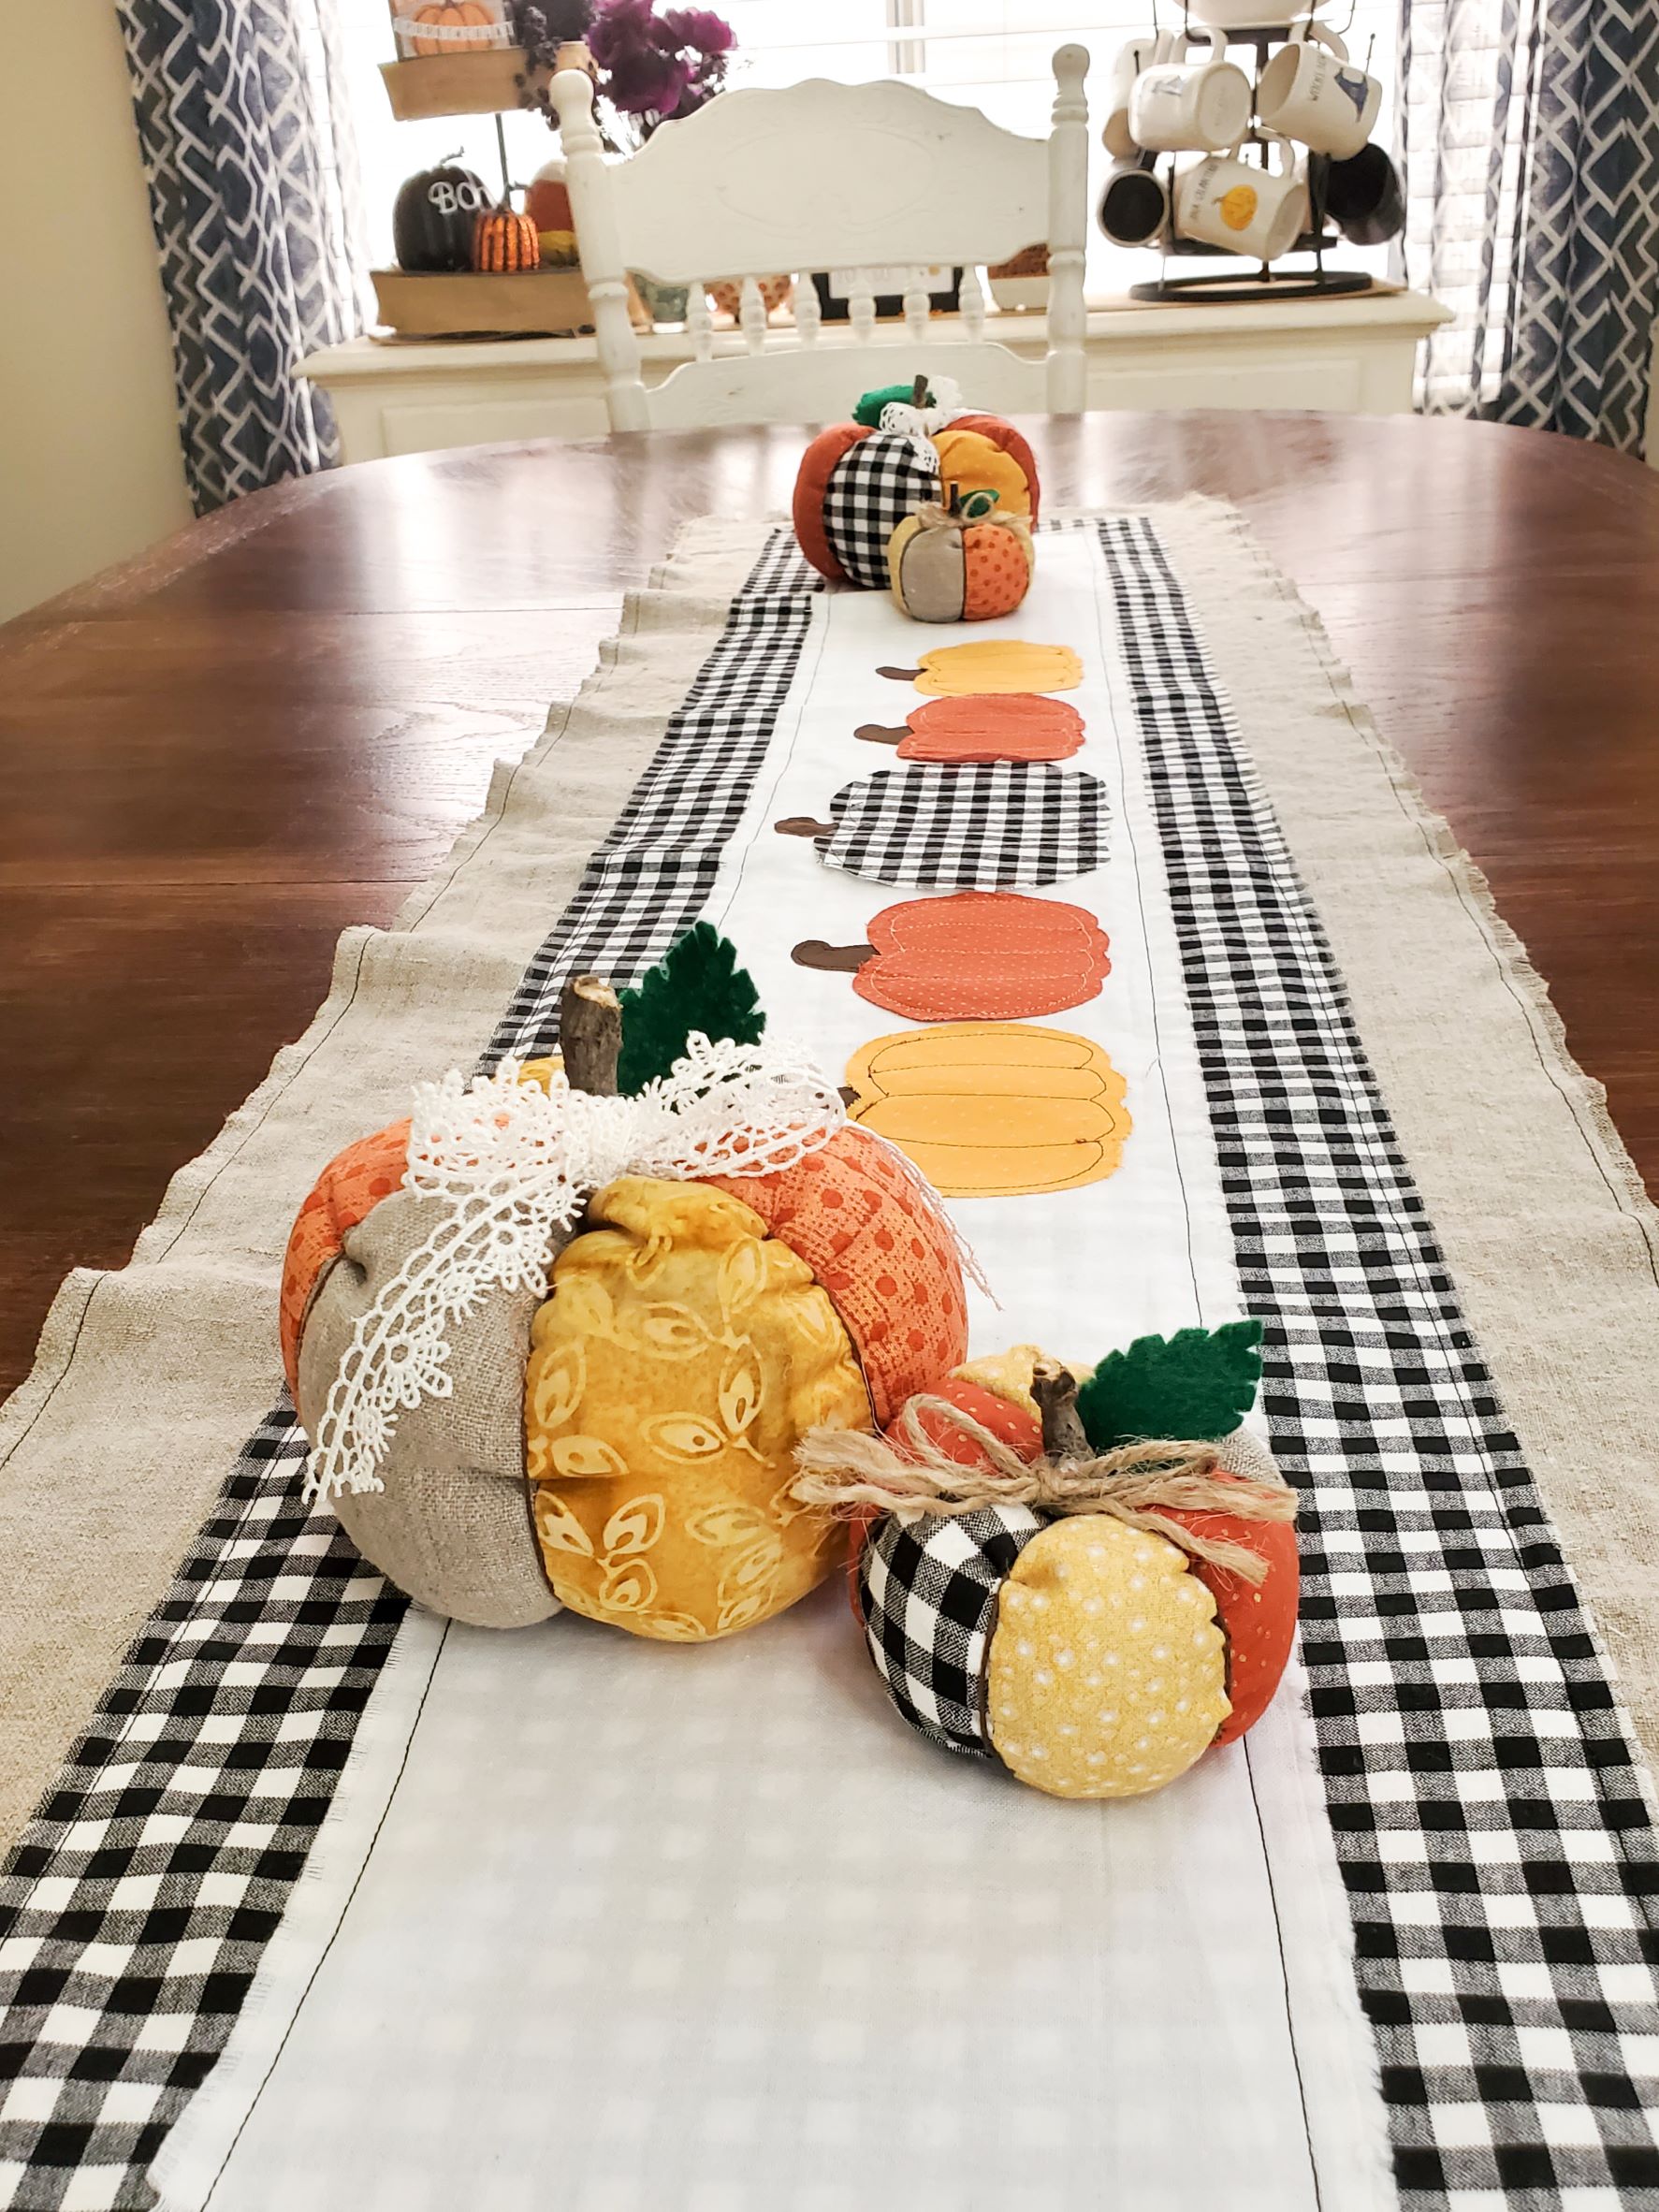
I think I’ve probably mentioned in some of my other posts that I’m just a little bit obsessed with pumpkins. I have so many pumpkins on display; ceramic pumpkins, wooden pumpkins, fabric pumpkins. You name it, I’ve probably got it! Ha ha. So it’s not really that I needed more pumpkins for my collection…but I wanted to sew these all the same! Besides, I’m hosting Than.sgiving this year (for the first time in forever!) and it gave me a good excuse to make some cute decorations for my table!
As is the case with most of my sewing tutorials, we made these fabric pumpkins in class last week. I found a tutorial online but revised the pattern to my liking. Their large pumpkin was a bit larger and they did their smaller pumpkins completely different, which I thought was more complicated. I like simplicity! So, I created my own pattern, which you can find linked below. The kids were able to complete two pumpkins in class (a large pumpkin and a small pumpkin), so they are fairly easy to make! (Although I will say that we were rushing a little at the end to finish the embellishments). Either way, you can whip up some of these pumpkins fairly quickly!
There are a few things you’ll need to sew fabric pumpkins. For your convenience, I’ve linked these things at the end of this post, but of course you can always look for them at your local fabric/craft store as well.
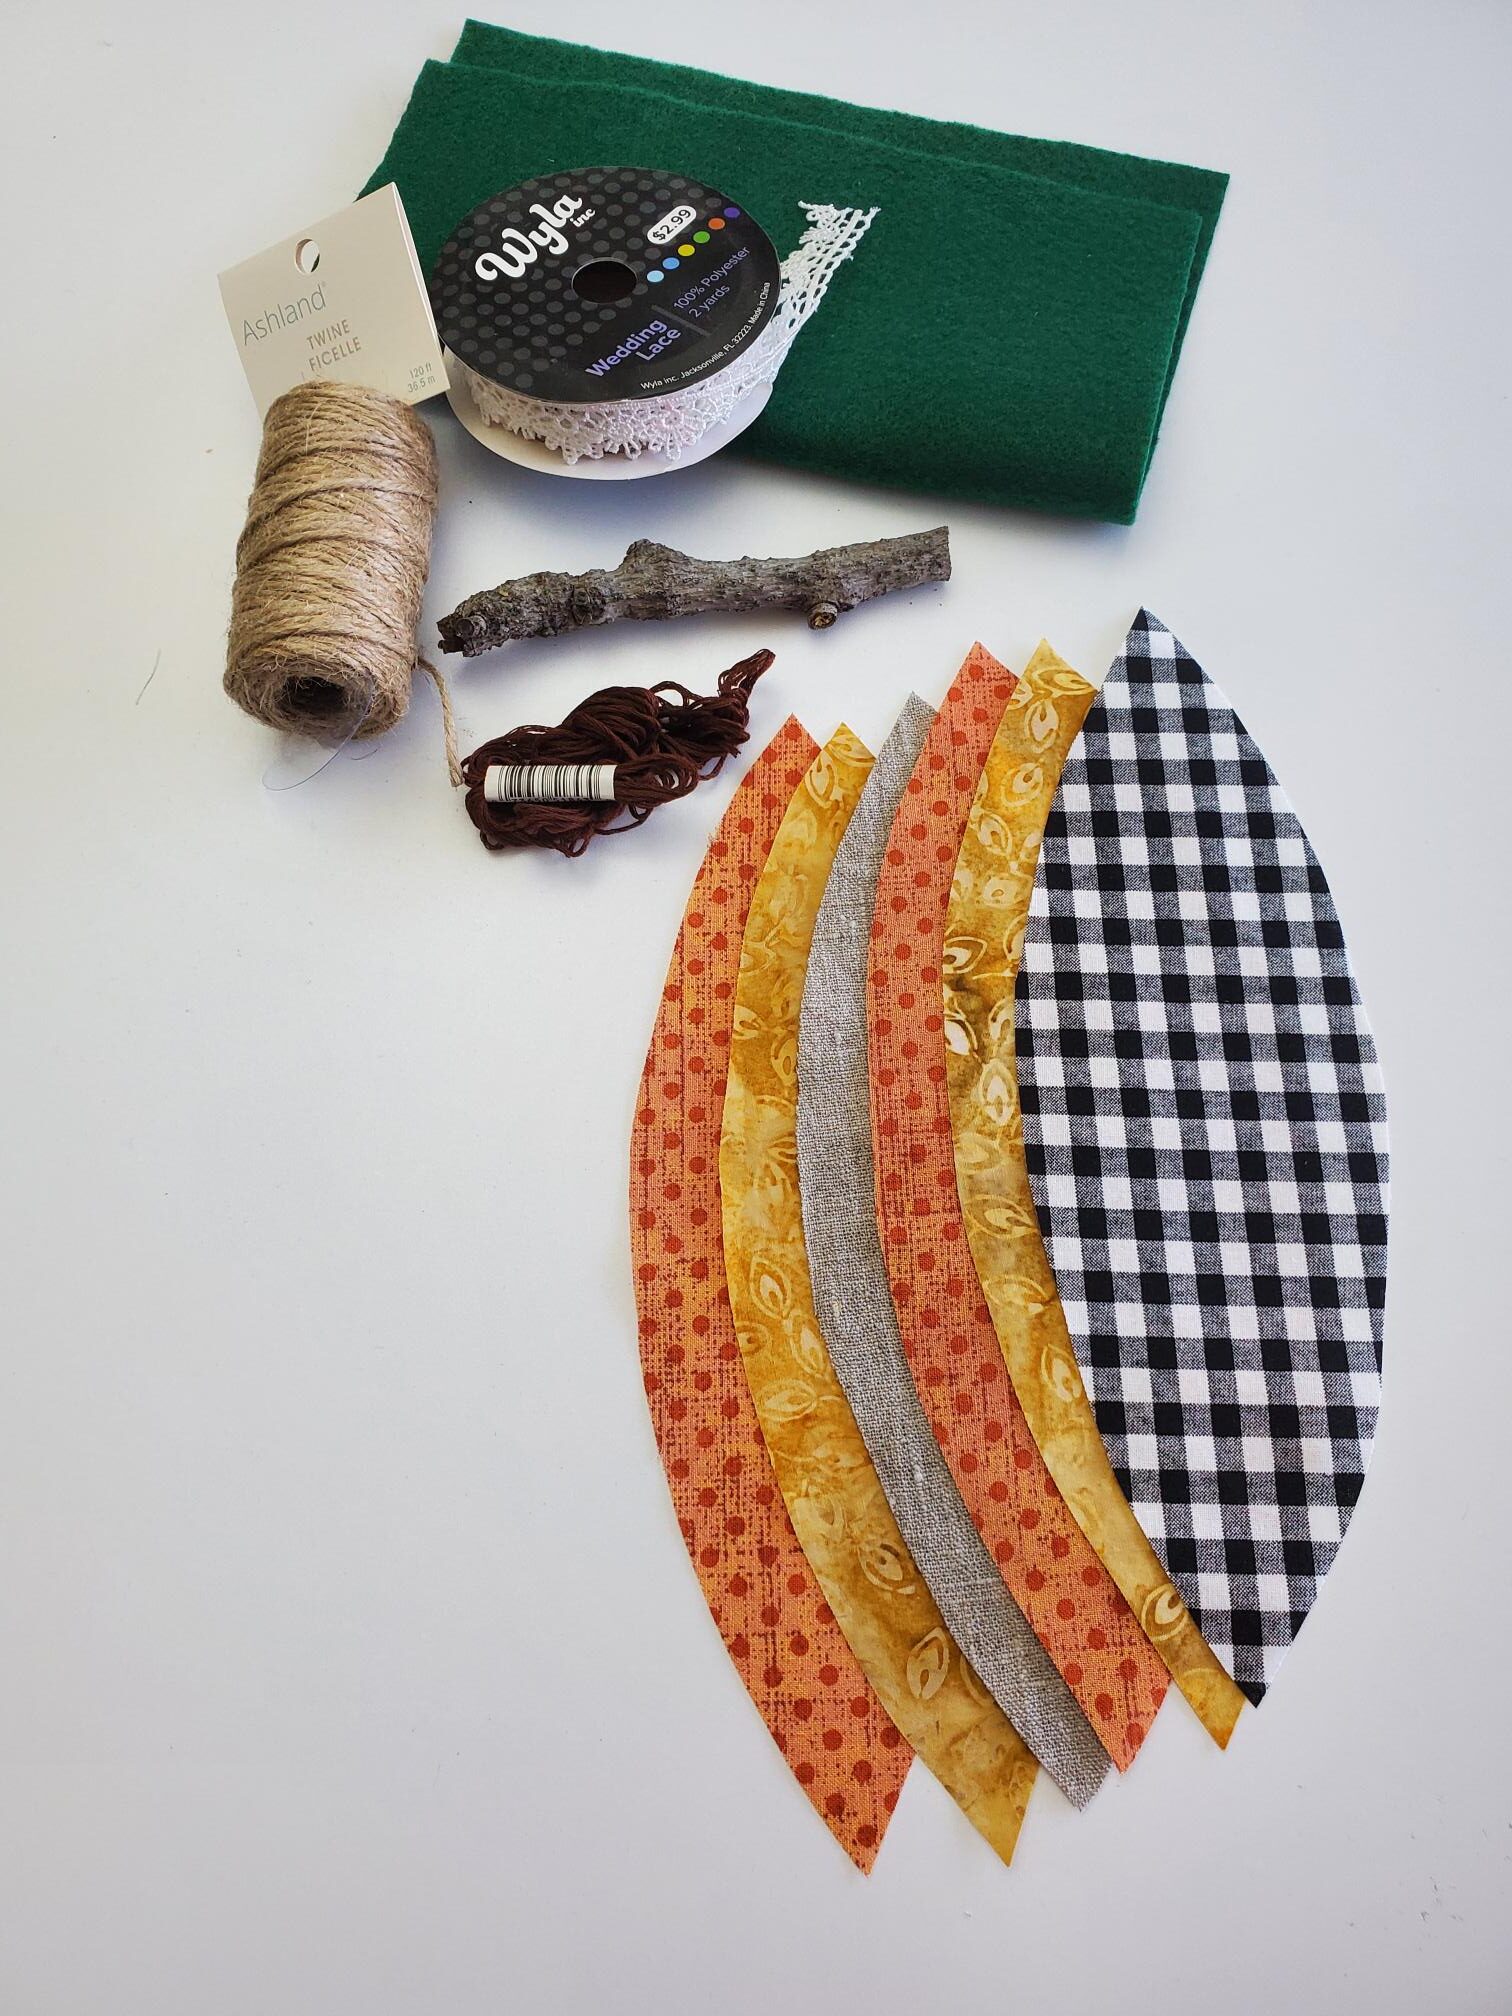
You will need:
- Fabric scraps to cut pumpkin sections
- Pattern for sections (click here)
- Twine and/or lace
- Green felt
- Brown embroidery thread and embroidery needle
- Twig or stick (I just used twigs from the tree in my backyard!)
- Polyfill
- Hot glue gun and glue sticks
Steps to Sewing Your Fabric Pumpkins
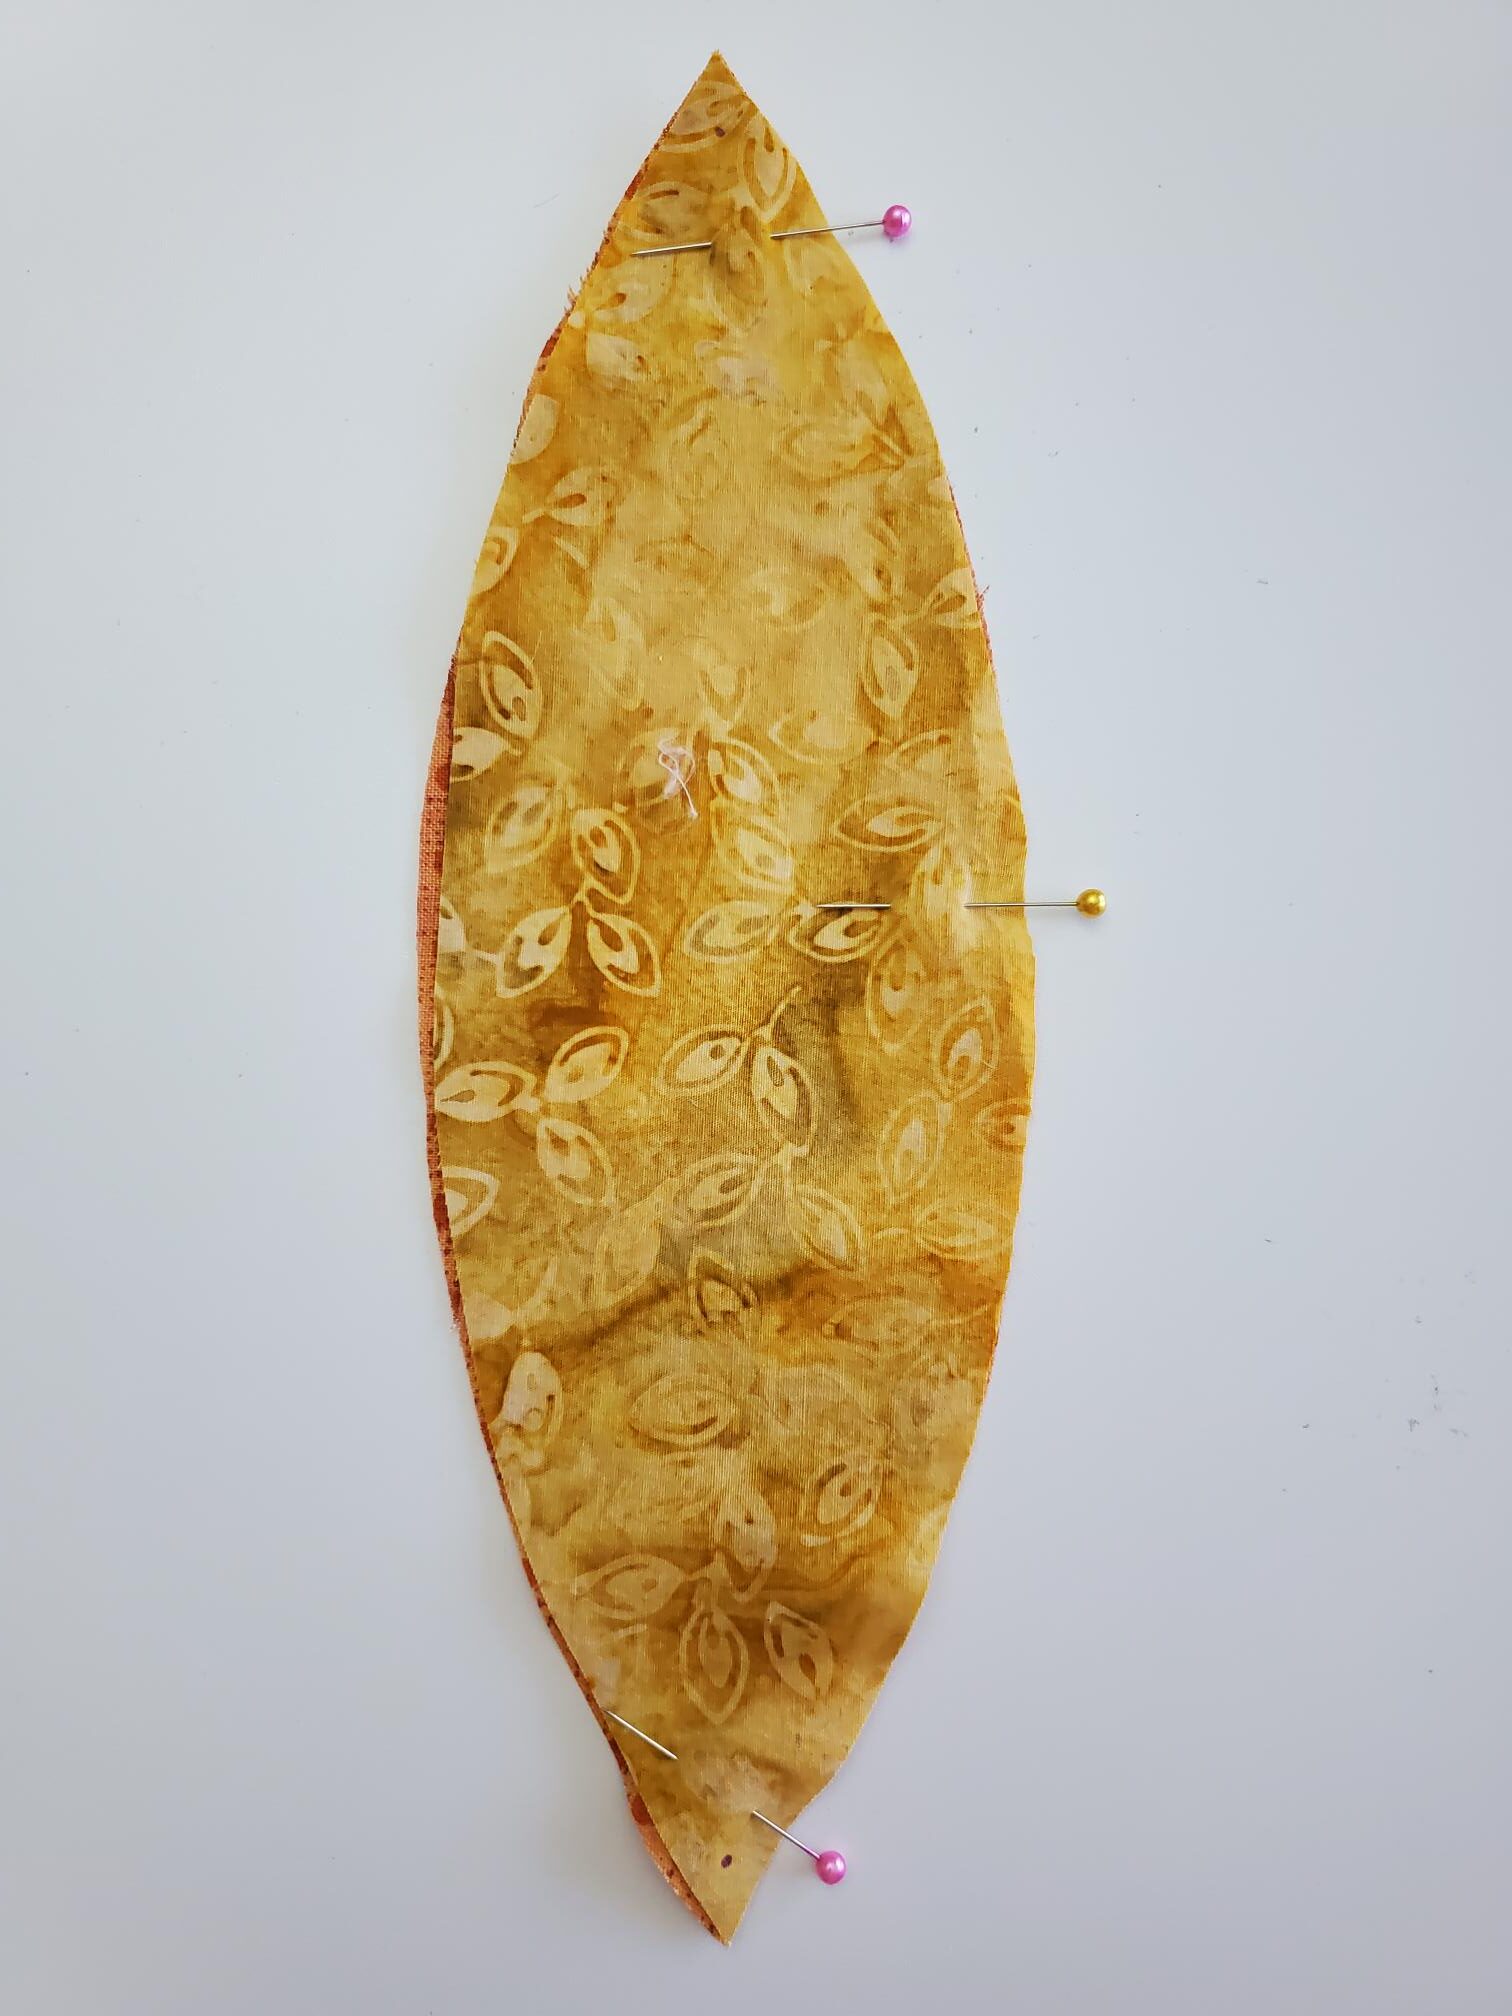
First, print out your pattern for your pumpkin sections. You will need 6 sections for both pumpkin sizes. Be sure to mark the dots from the pattern onto your fabric. It will be best if you mark on the wrong side of the fabric.
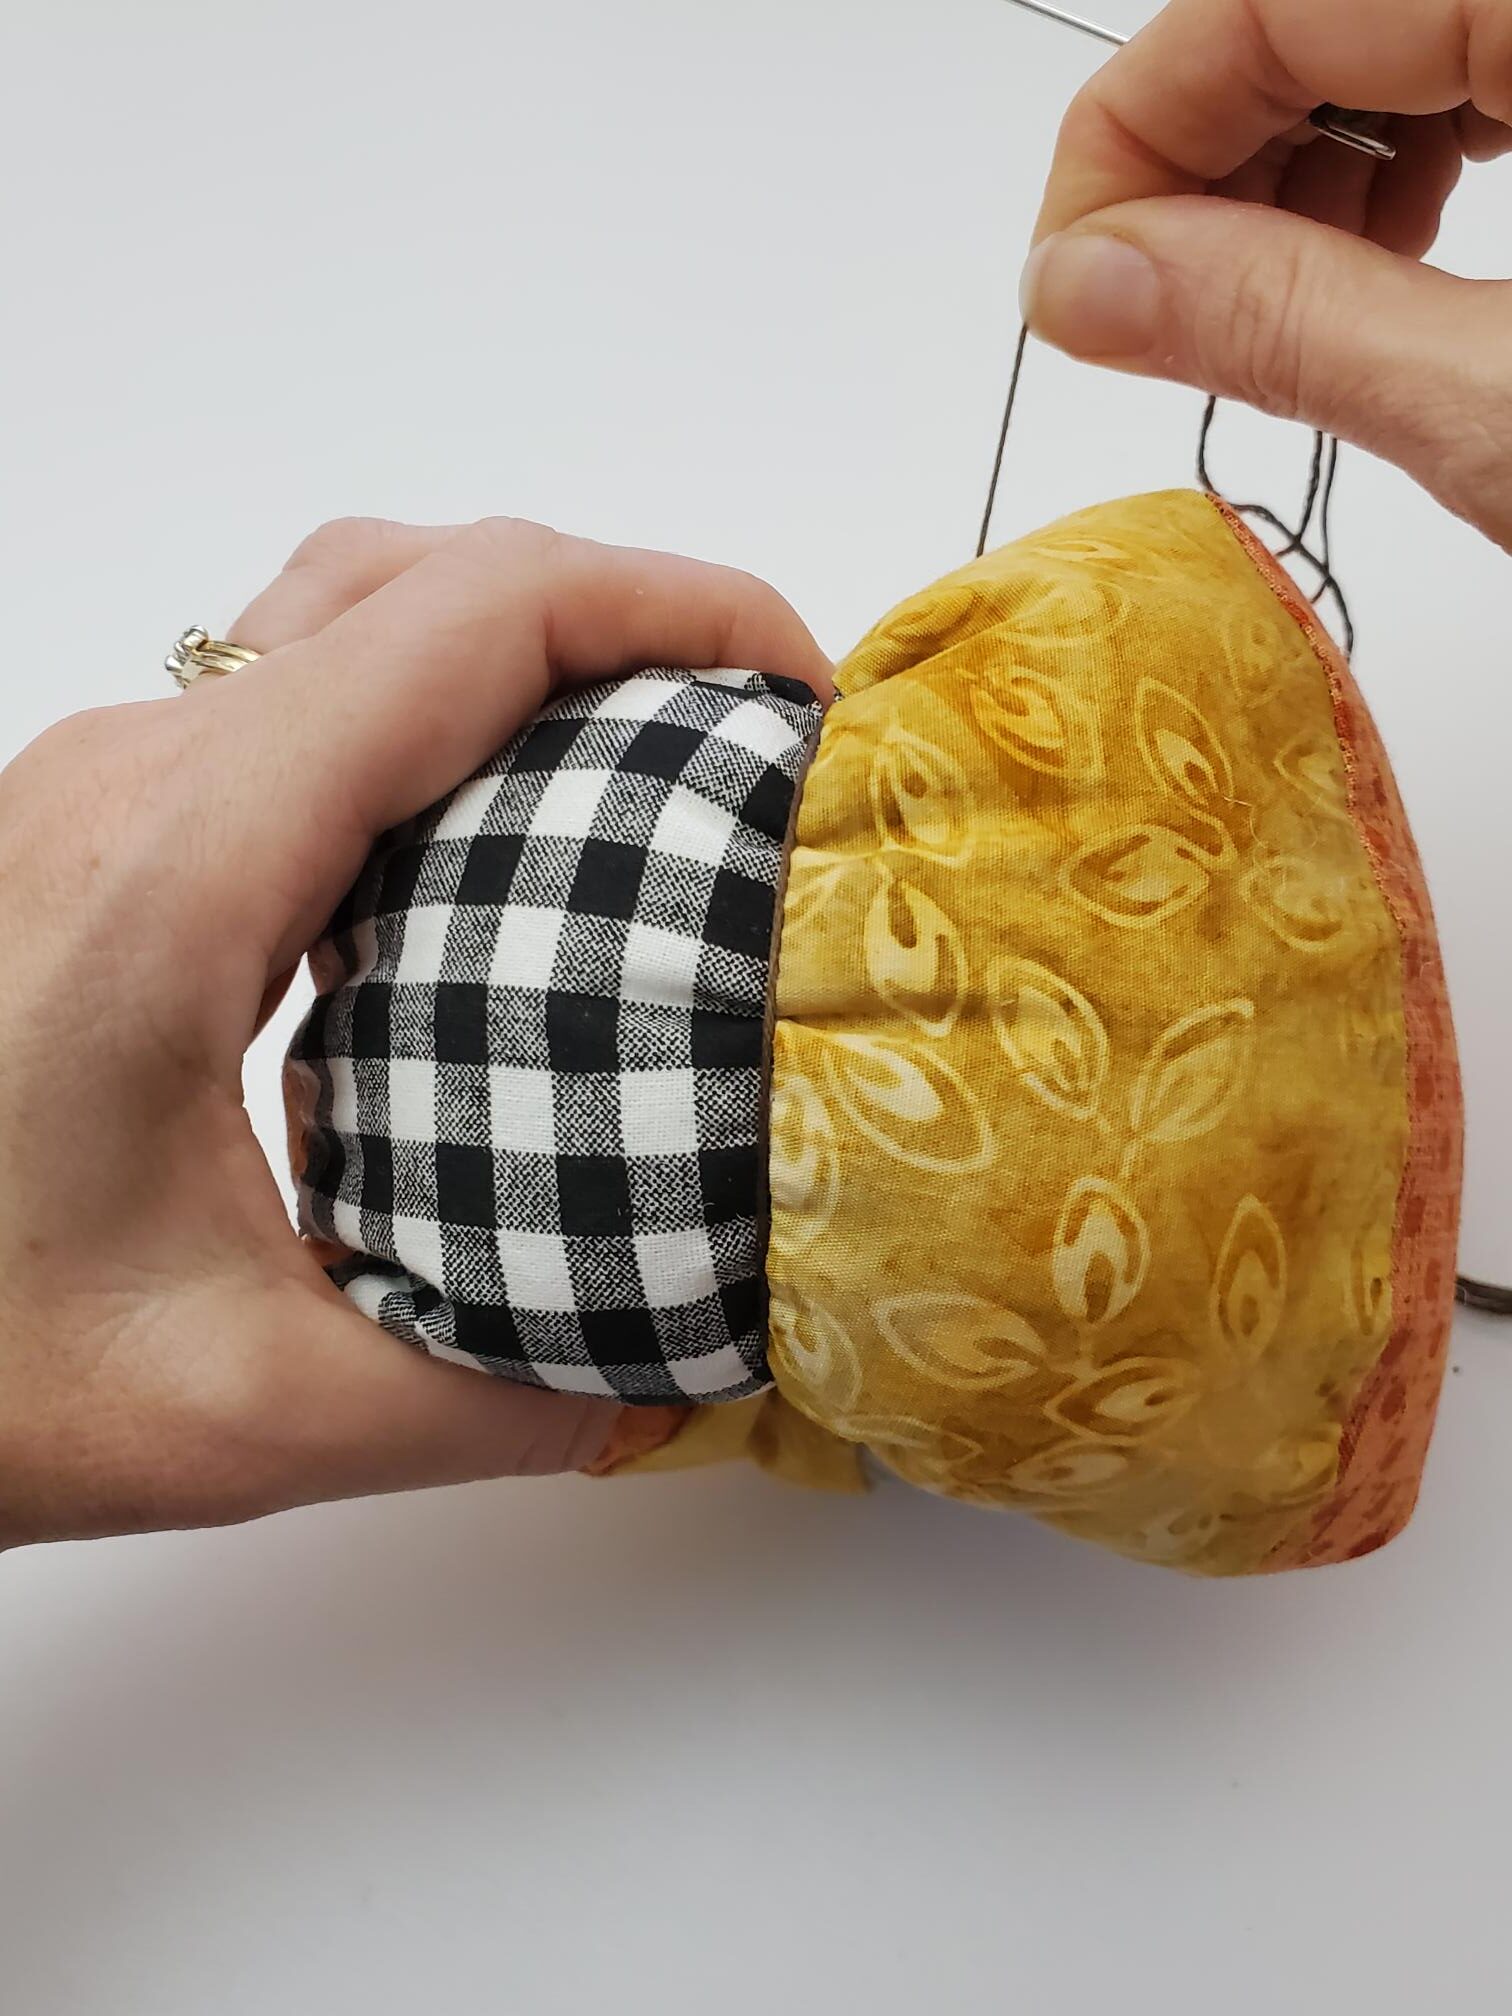
You will now sew your pumpkin sections together, one section at a time. Start by lining up your sections in the order you want them sewn into your pumpkin, and then turn the second section of the pumpkin on to the first section of the pumpkin, pinning on the right side, right sides together. If you look closely, you can see the purple dot marked on the top and bottom of the section.
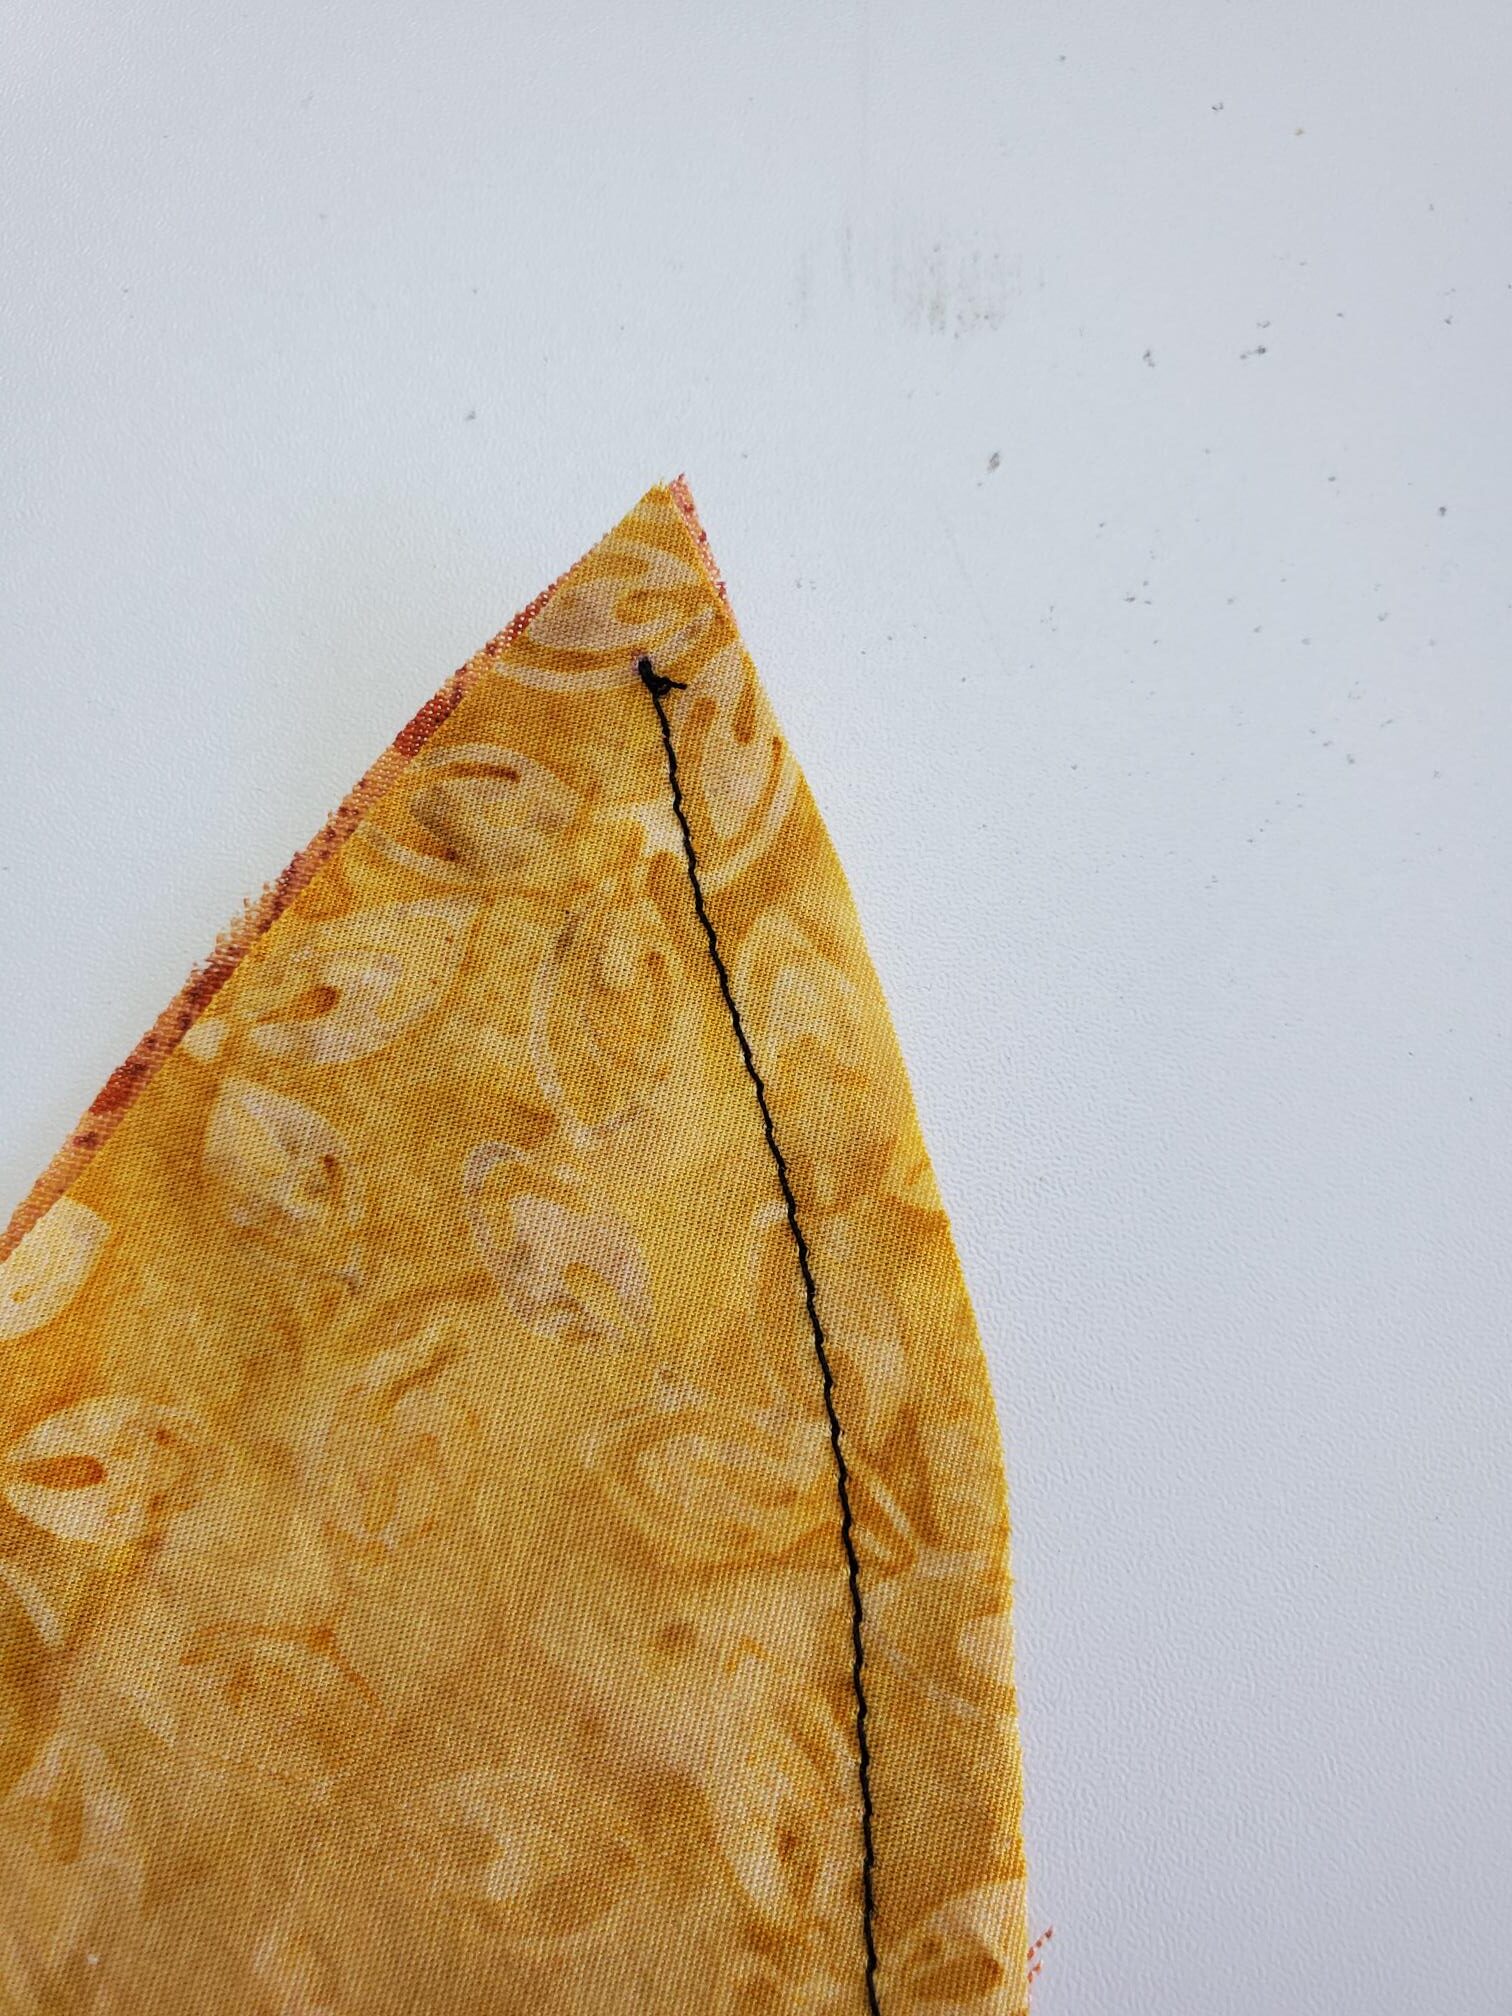
Now, sew the right side (which you have pinned) from purple dot to purple dot, using a 1/4″ seam allowance.
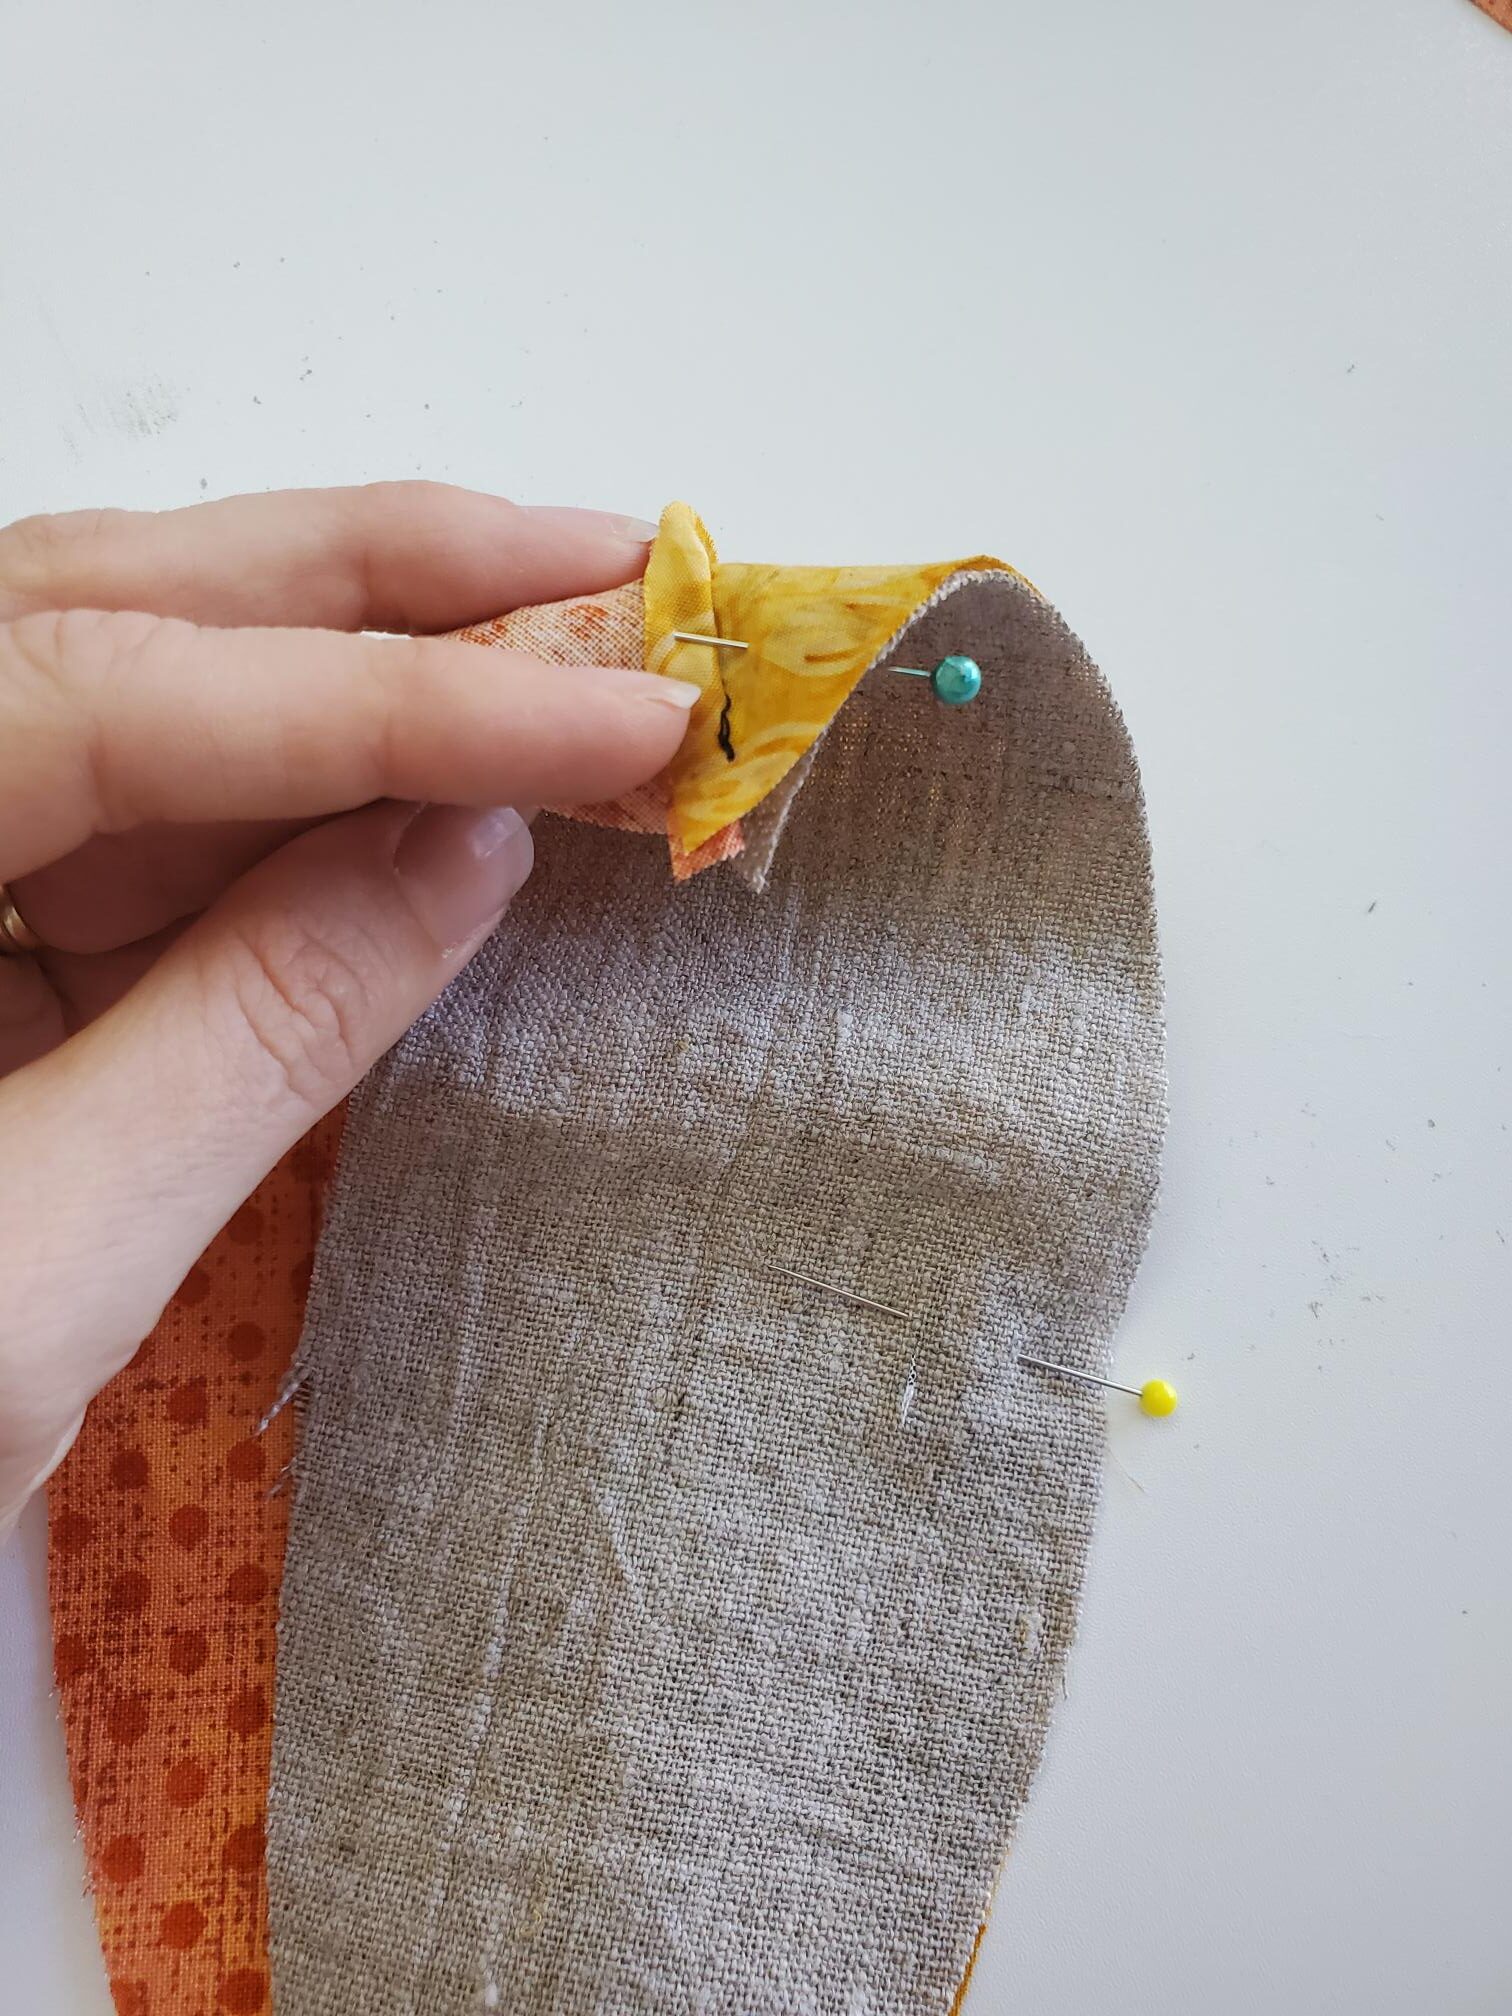
Open up your two sections, and now turn the 3rd section over to the second section (right sides together), again pinning on the right side of the fabric. Sew between the dots. Make sure to fold your seam allowances to the left so that the sections you are sewing line up together.
Continue sewing each of these sections in this same manner, always opening up the sections and then pinning the next section to the previously sewn section. When you have all sections sewn together, you will then face your first and last pumpkin section right sides together and pin. You will stitch that seam just like you did the others, except you will leave an opening to flip your pumpkin right side out once you’re done. Beginning at the top dot, sew about 1/3 of the way down, and then backstitch. Start a new stitch approximately 2/3 of the way down the section to the bottom dot, backstitching at both the beginning and the end.
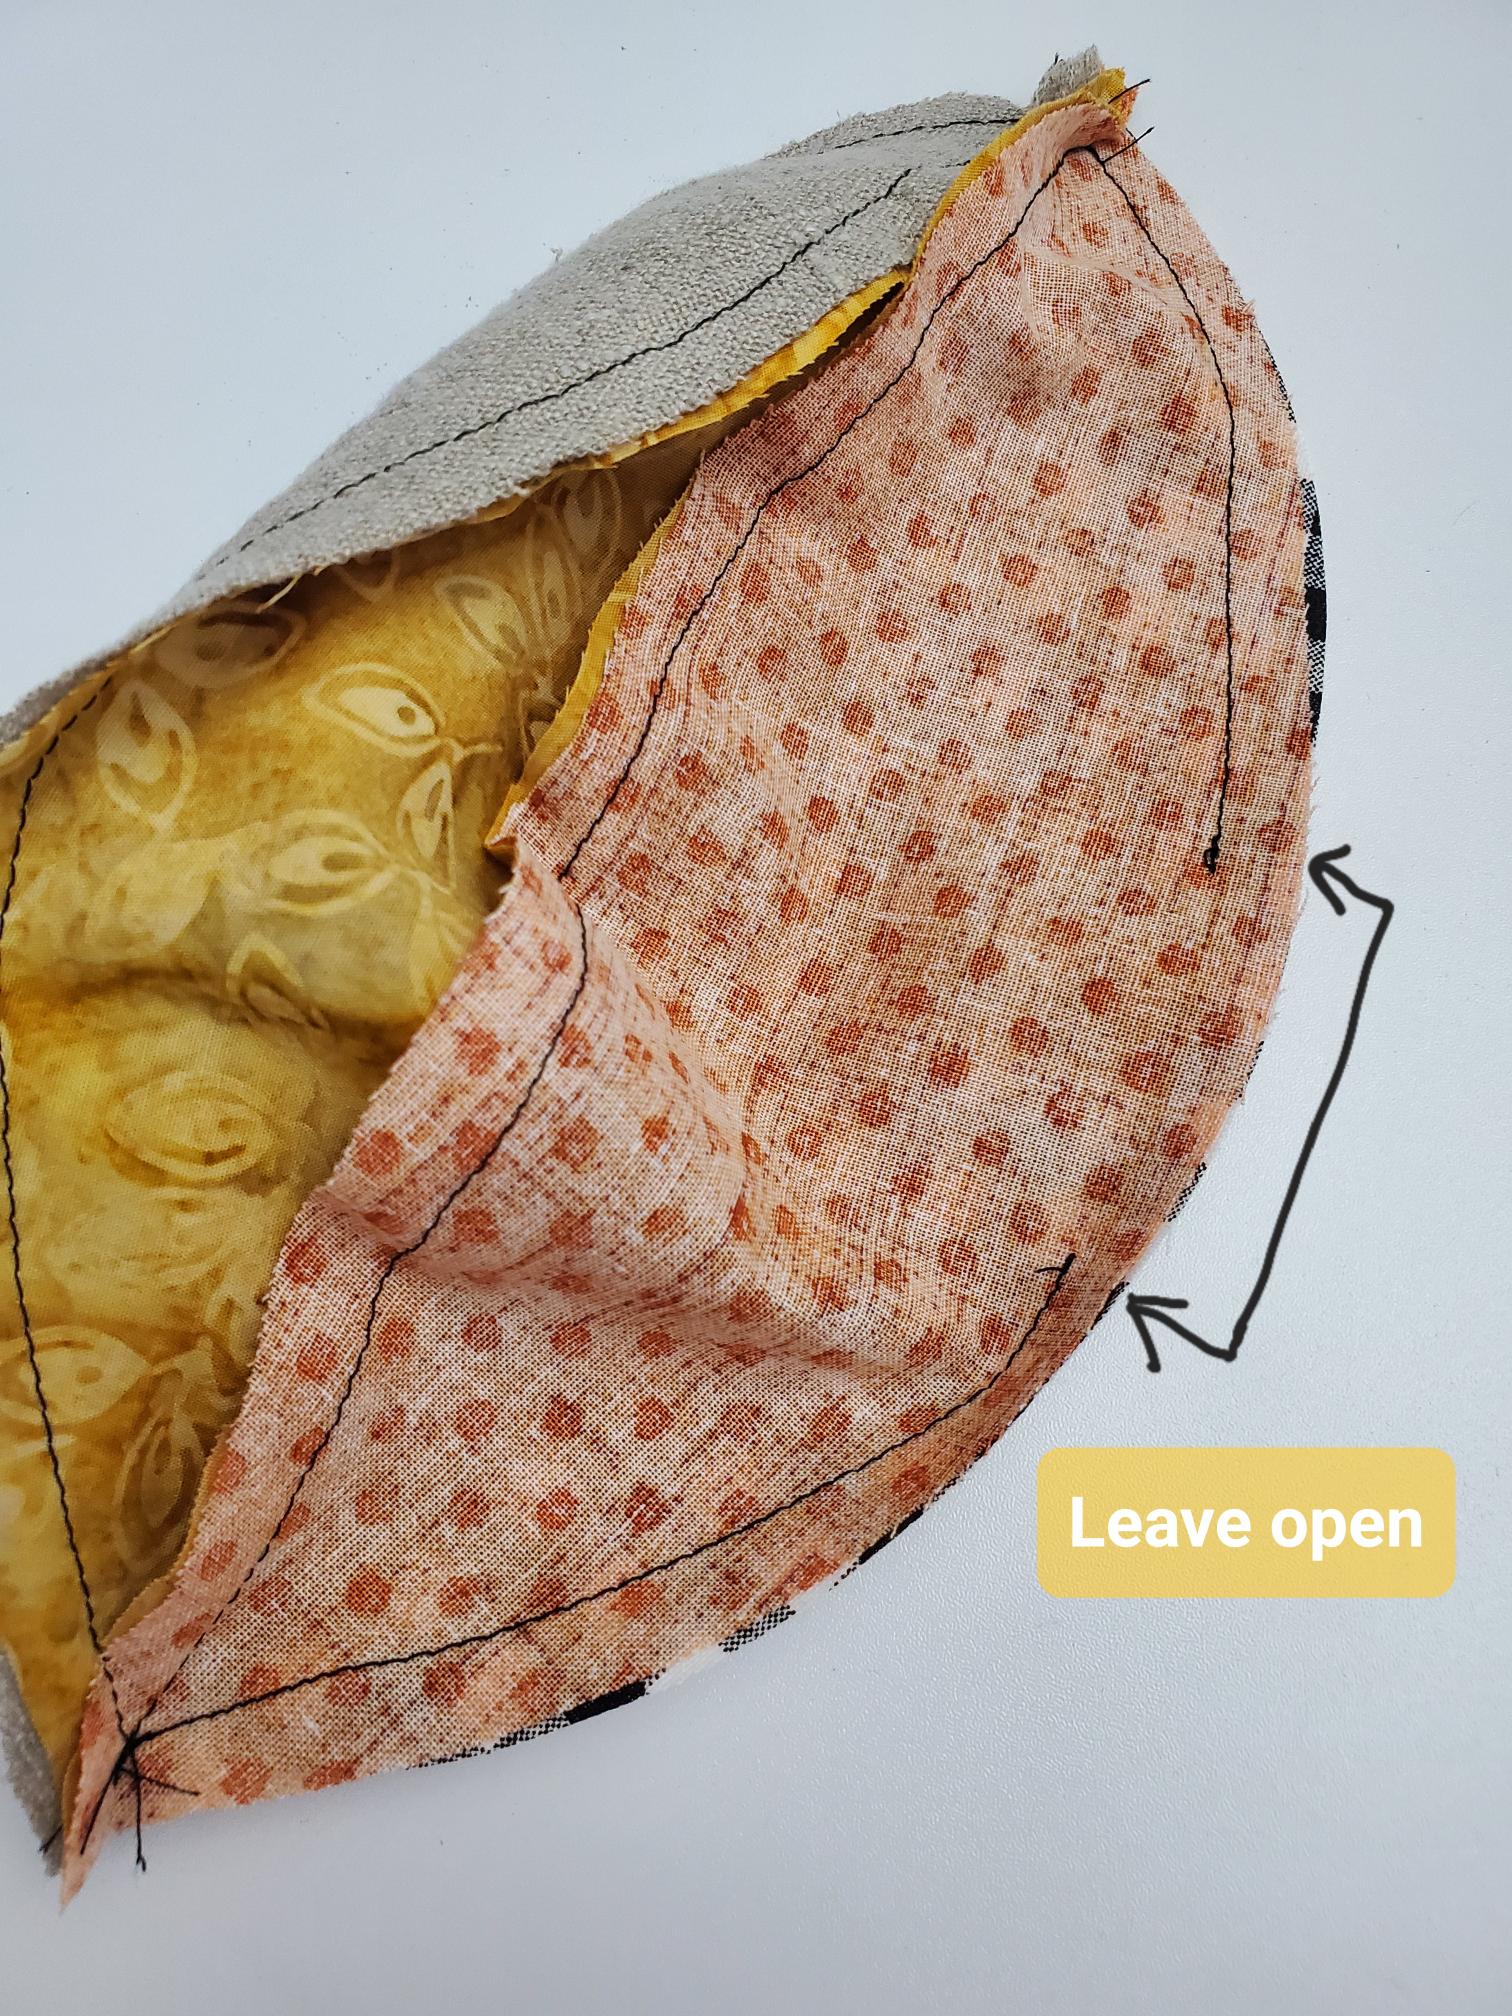
One little note about sewing these sections together: don’t stress out if there are tiny gaps up at the top and bottom of the sections. The idea is to not have gaps, if you are marking and sewing to your dots accurately, but this can be difficult for beginning sewers, so don’t stress about it. Those gaps will close up and be hidden on our last steps of the project.
Flip your pumpkin (through that opening) so that it is now right side out. You’ll notice that your pumpkin has a weird football shape to it; don’t worry! That’s what it should look like right now! It’ll all work out. Keep on going! Stuff your pumpkin with fluff. Be careful not to over fill it with fiberfill. You want to be able to squish that football down into a round pumpkin shape (see the steps below to see what I mean), which will be hard to do if you over-stuff it.

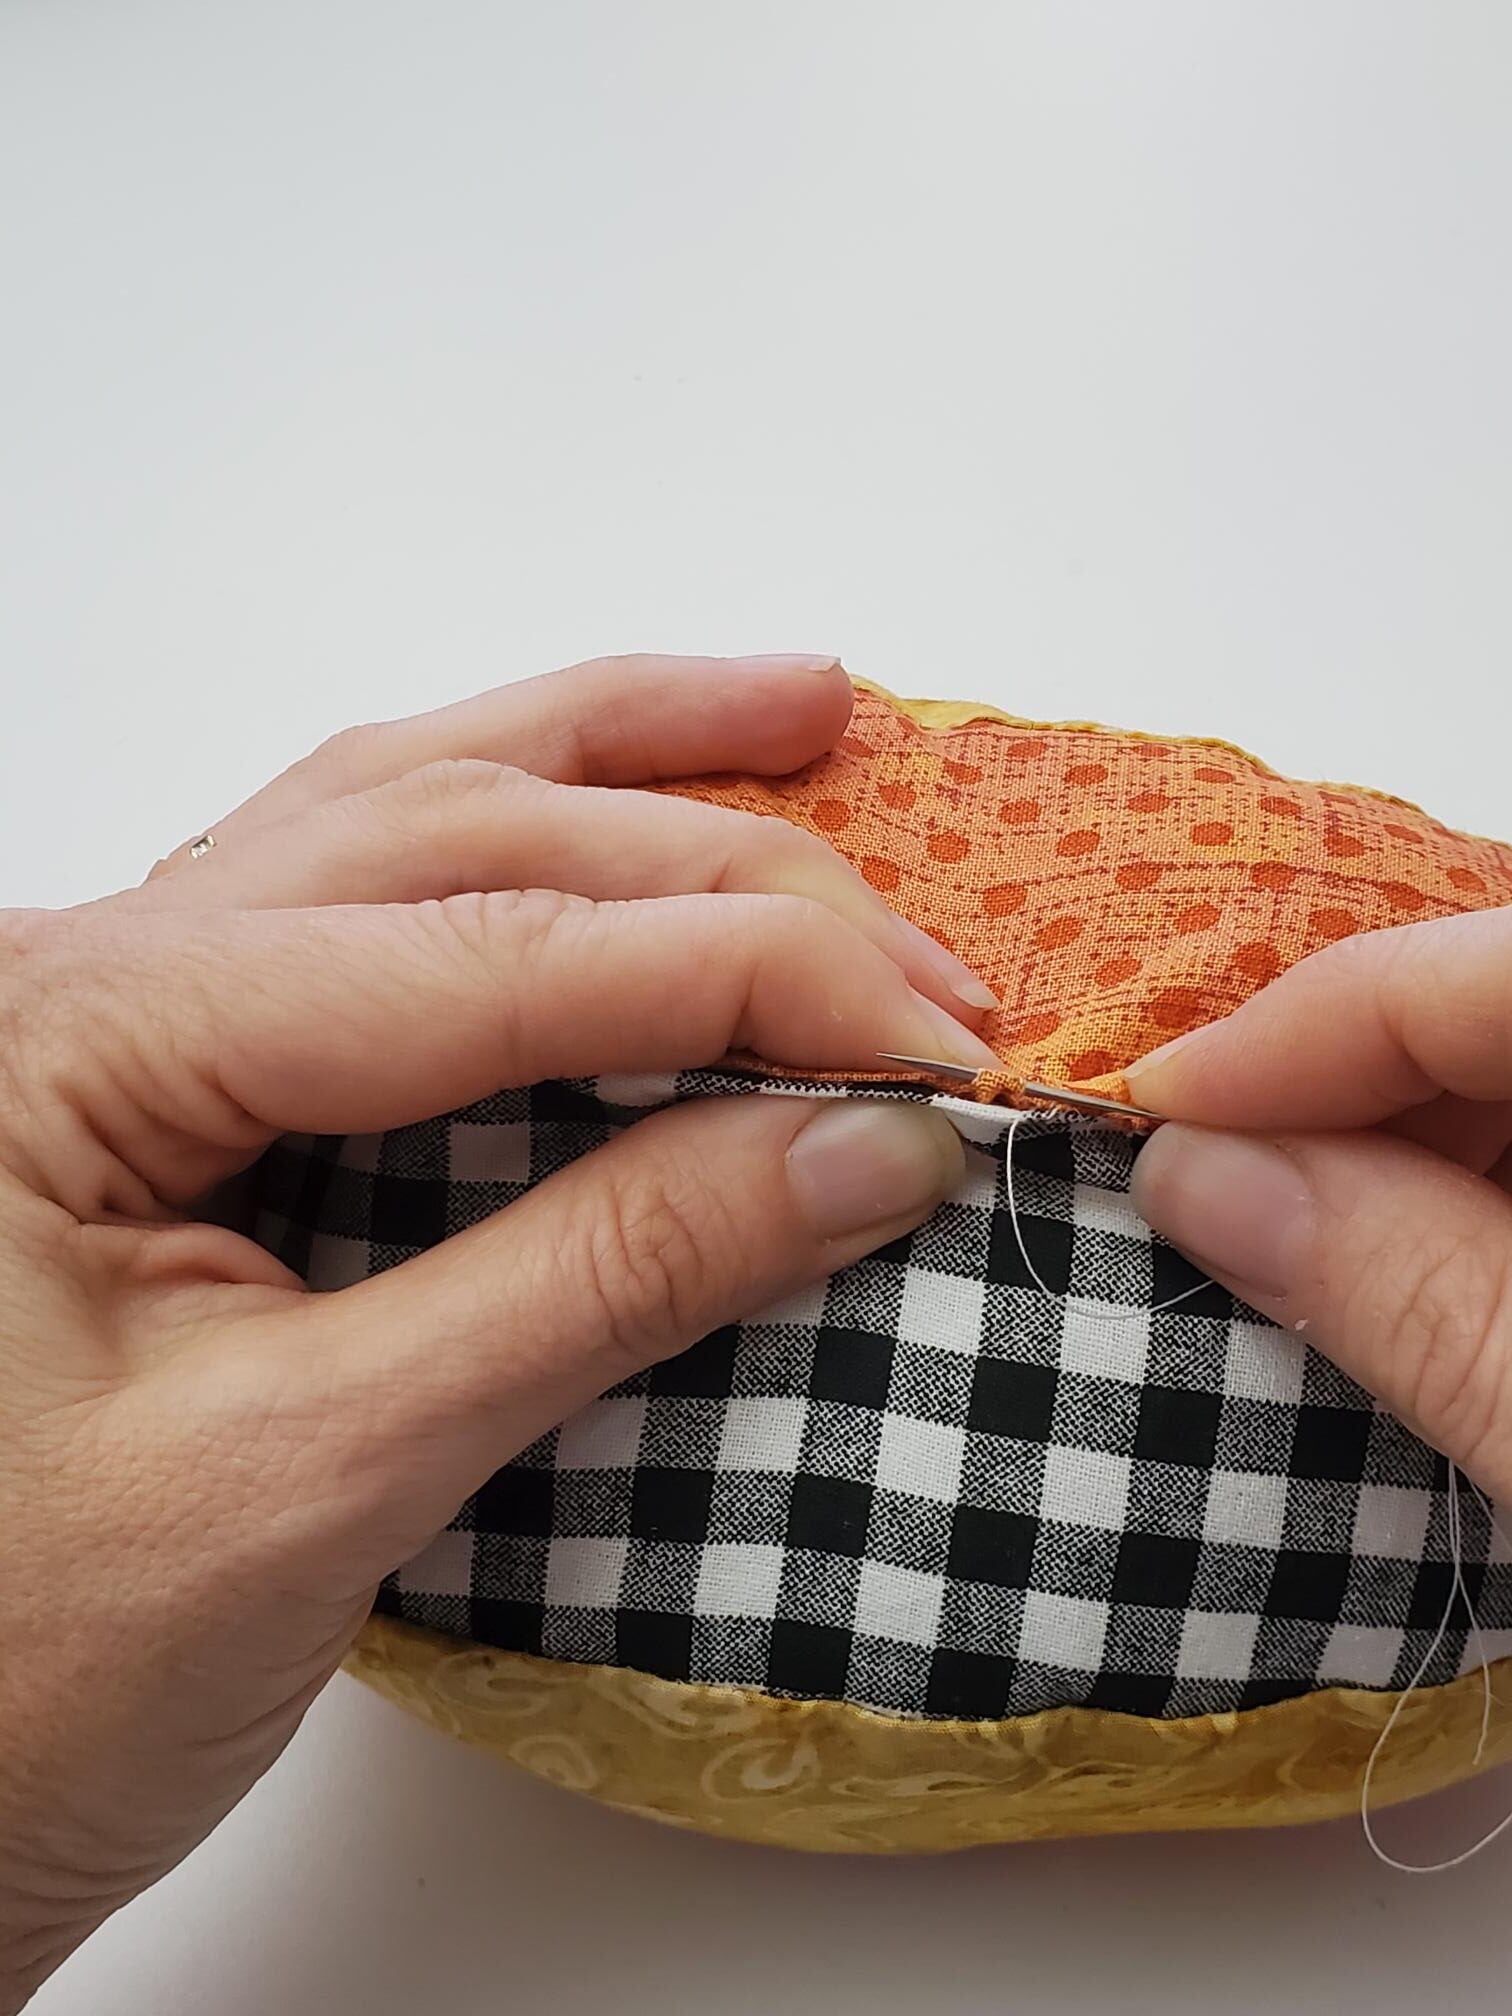
With a hand needle, stitch your opening closed. I like to use a slip-stitch, which is basically slipping the needle along the fold from one side of the fabric to the fold of the other side of the fabric. One day I will make a tutorial teaching hand-stitches, but for now, you can google different hand stitches to see how it’s done!
This is the part where you will squish down your football to form a pumpkin. But first, thread a large embroidery needle with a long piece of embroidery thread. You will want to make sure your thread is quite long so that you don’t run out in the middle of wrapping your pumpkin. If you aren’t sure how much thread that would be, wrap it around your pumpkin 7 times and then leave another few inches, just to give you an estimation of how much you’ll need. Remember, you do not knot your thread around the eye of the needle. You knot it at the bottom of the thread and keep a long tail with the side of the thread that you put through the eye. So back to the squish; with your thumb on the top of the pumpkin and your fingers on the bottom, squish your pumpkin down, almost so your fingers are touching each other.

With your embroidery needle, push down from the center of the top of the pumpkin and push the needle through the center of the bottom. By center, I mean where all of those section corners meet.

Wrap your thread around one section of the pumpkin on the seam line, bringing your needle back up to the top of the pumpkin, and push the needle down once again, repeating it just how you did before. Continue doing this over each seamline section of the pumpkin. (To summarize: you are not going up and down with your needle; you are only pushing the needle down and then wrapping it around your pumpkin and pushing it down again. You’re never pushing your needle up to the top. Does that make sense?)
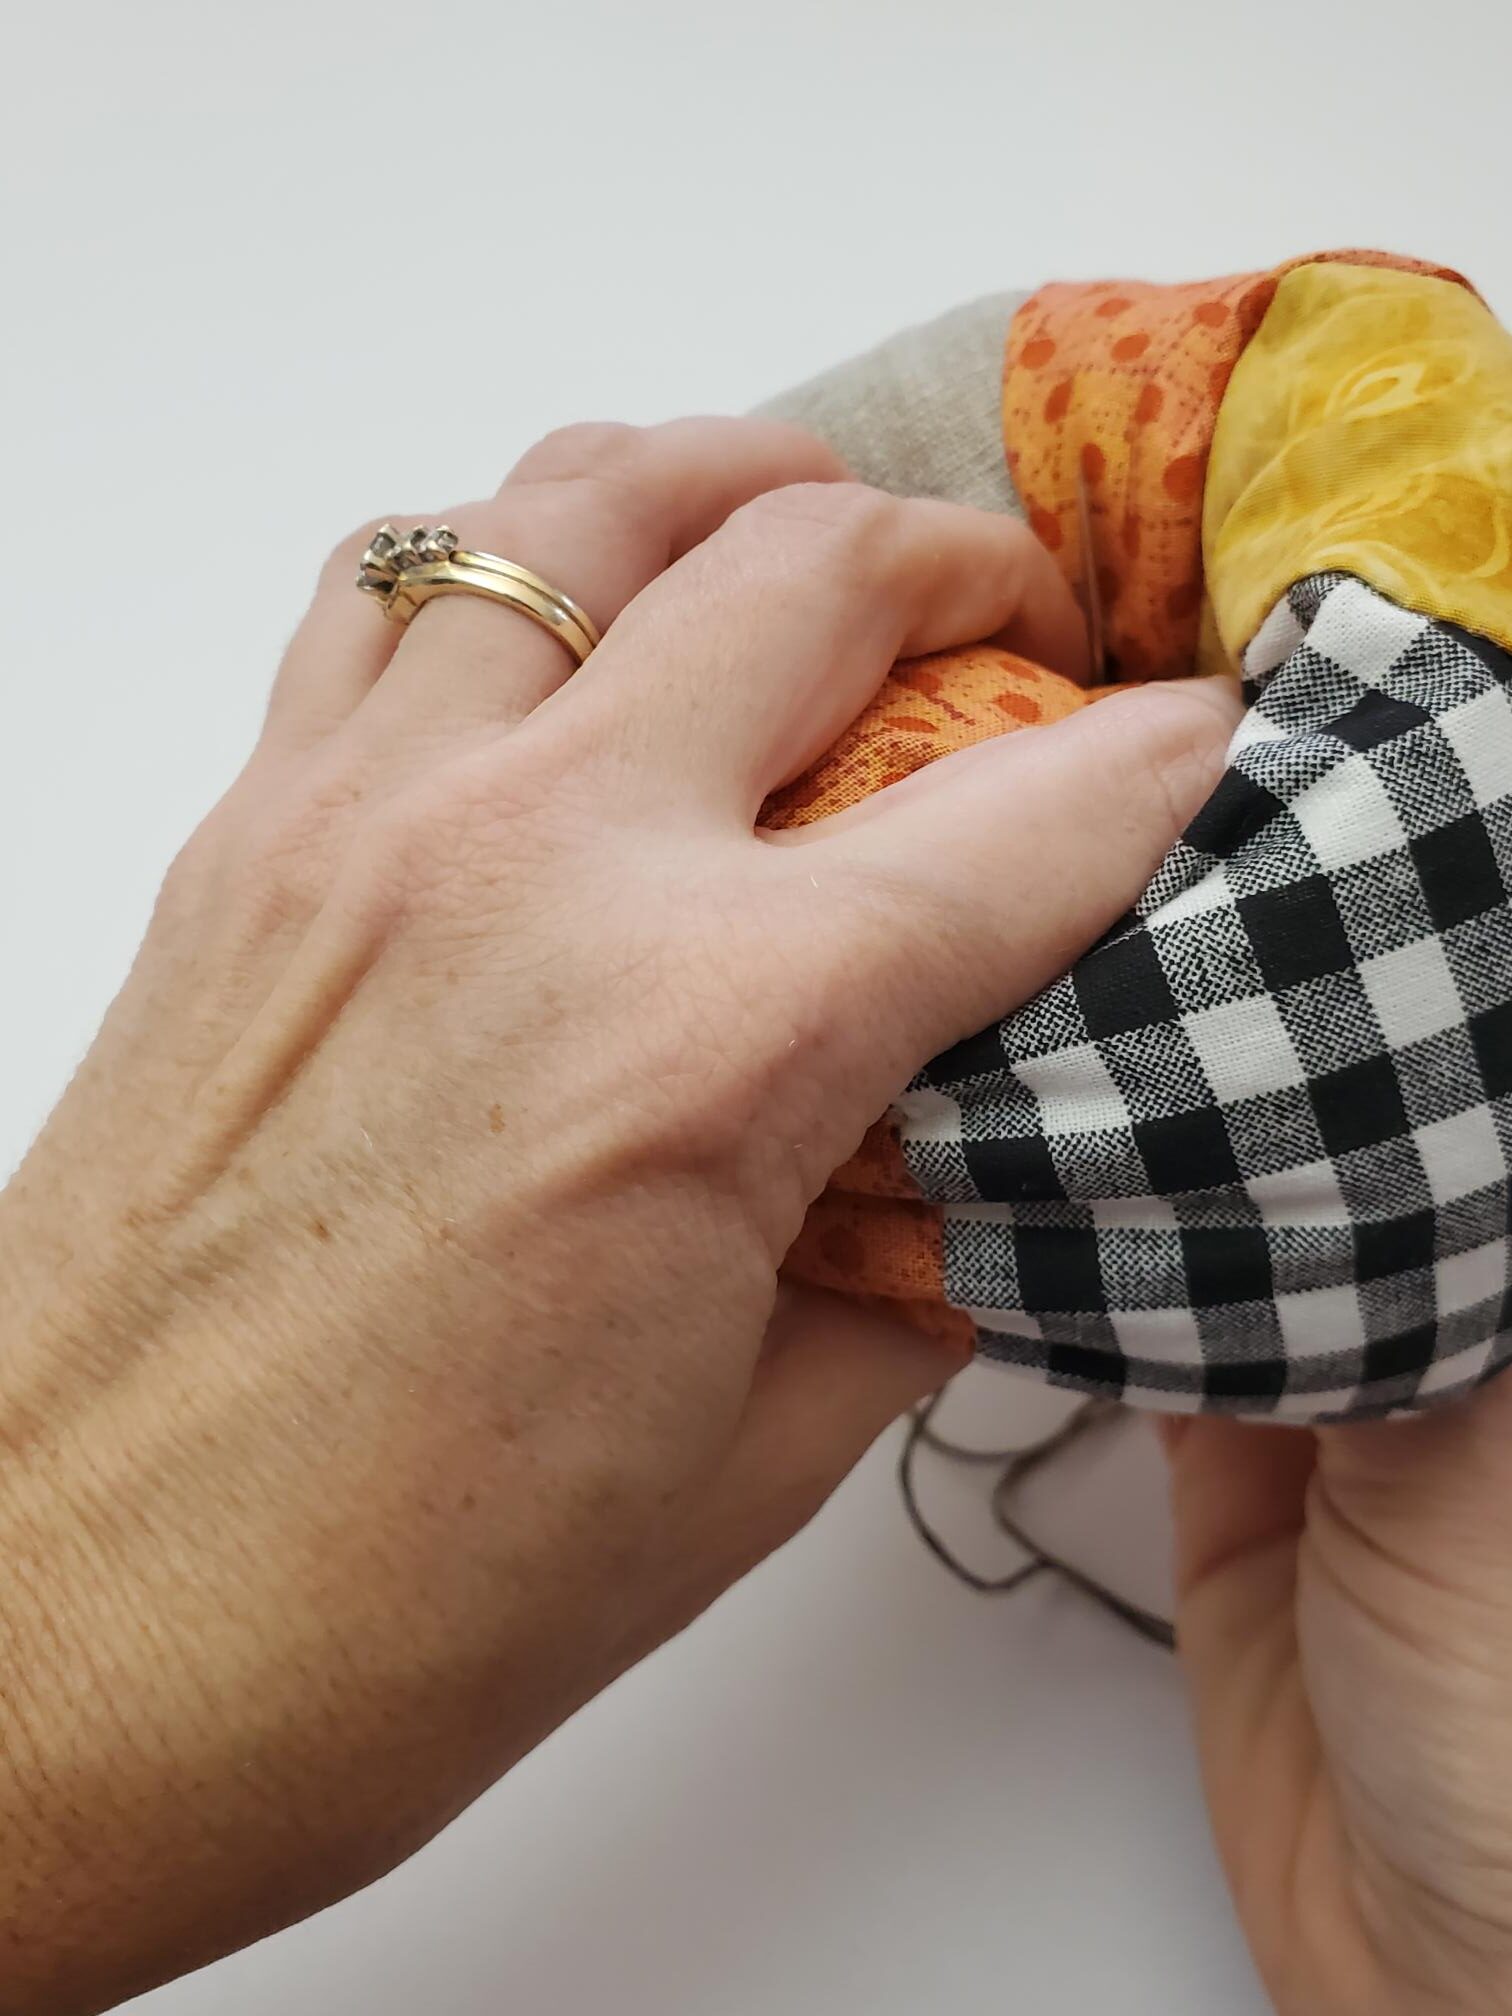
The tighter you pull the thread, the squishier the pumpkin will be. You can decide how tight you want it.
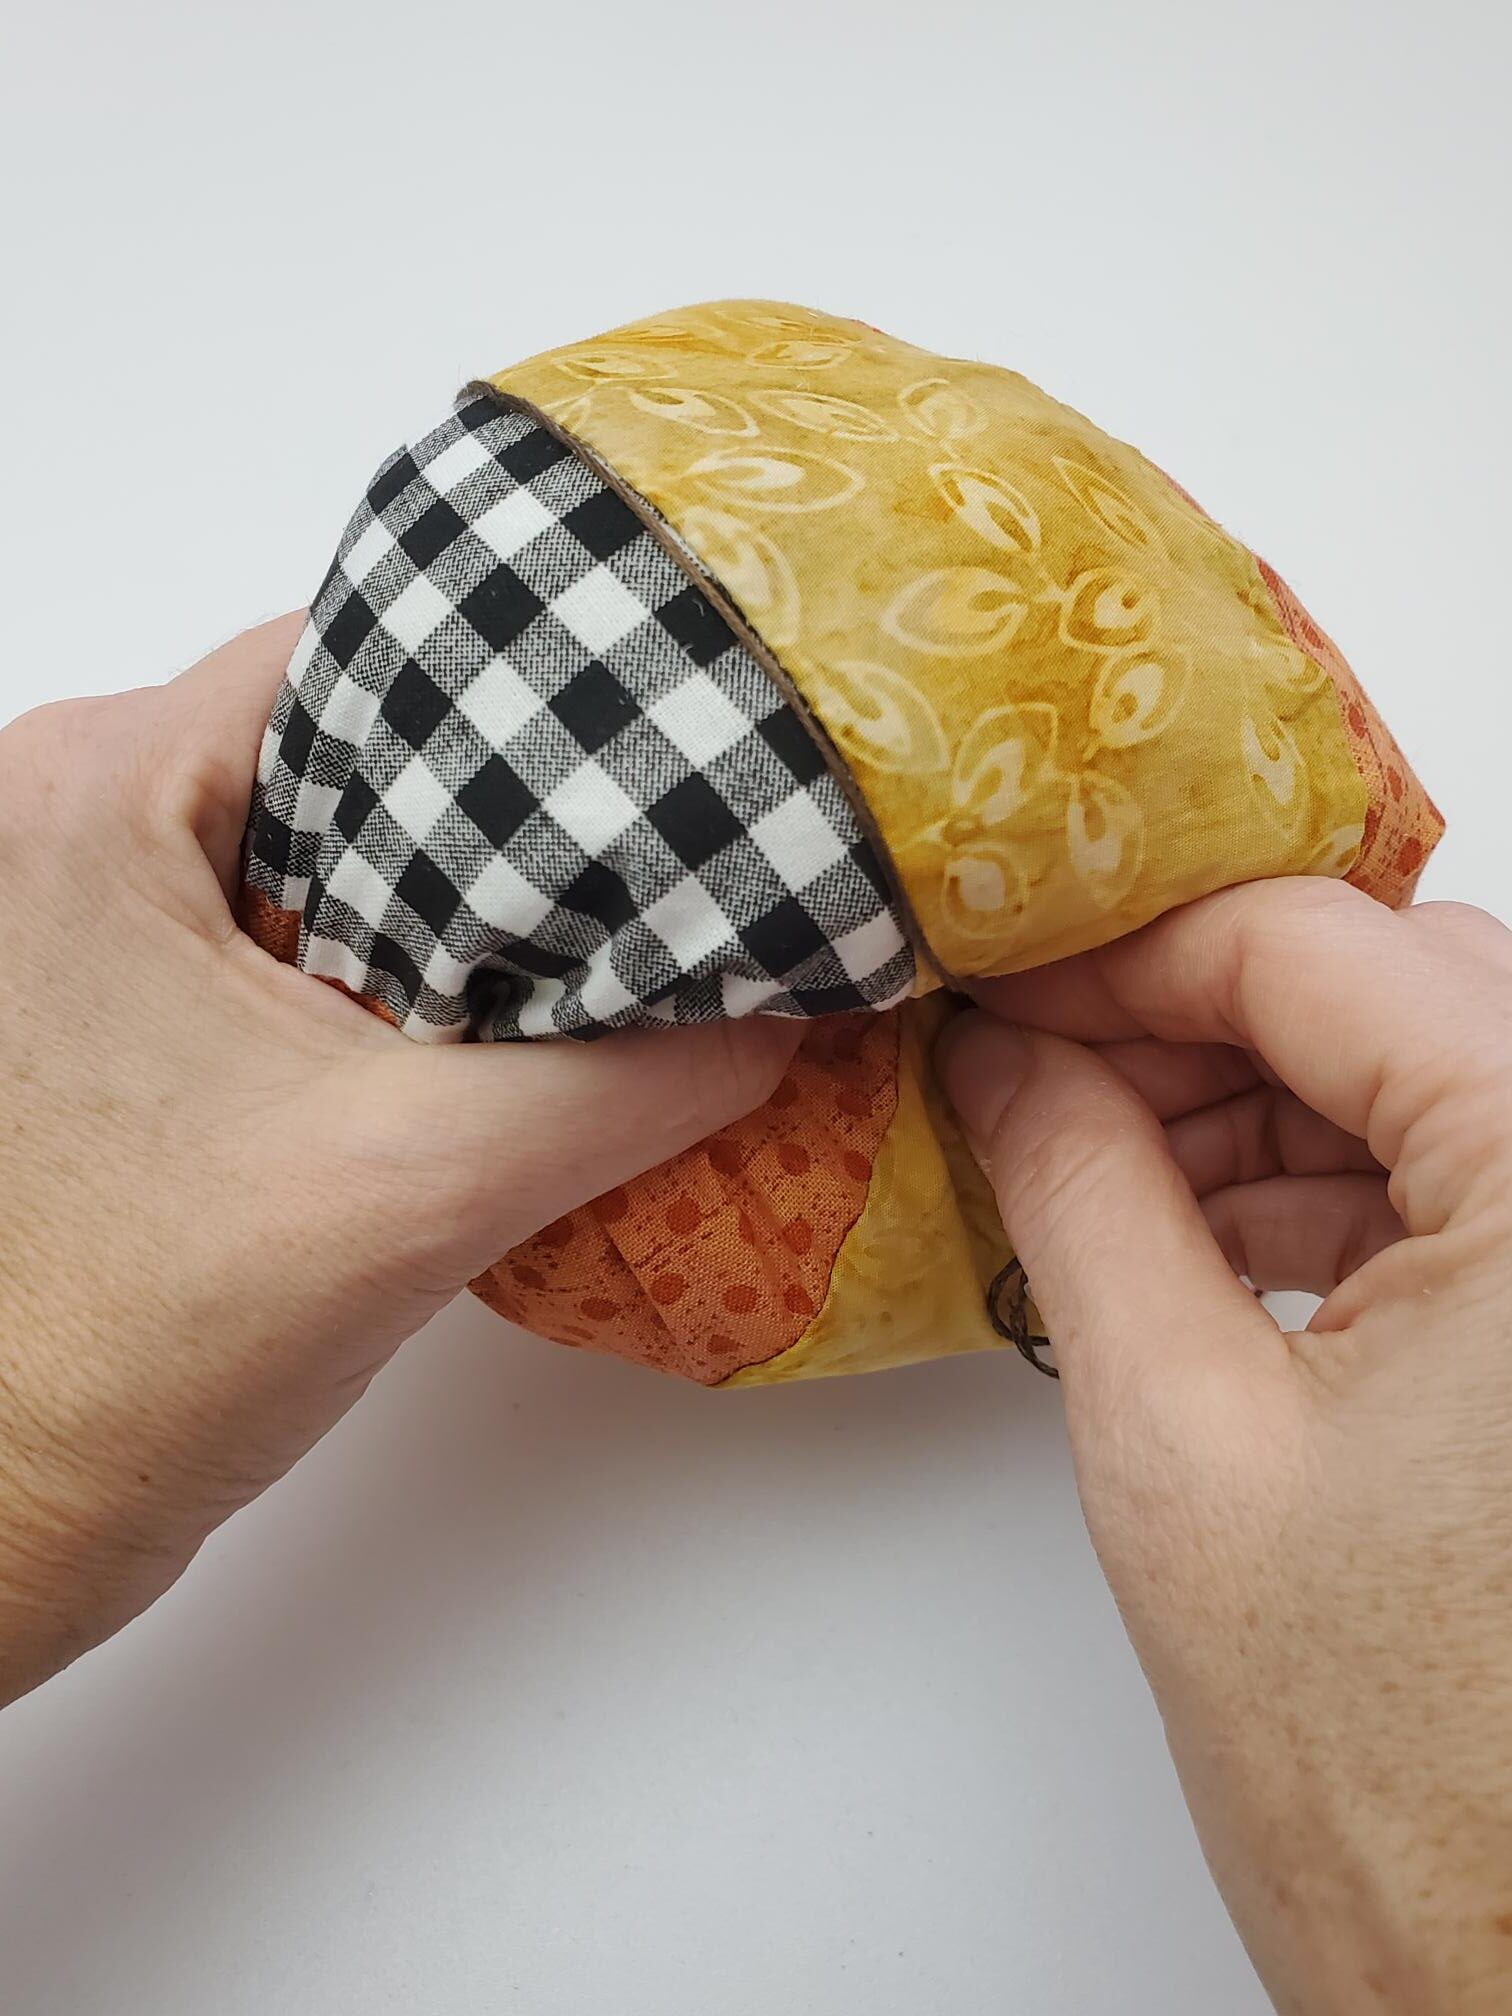
When you’ve wrapped that embroidery thread around all sections of the pumpkin, end your thread with a knot on top. You are done with the hardest part! Now for the embellishments.
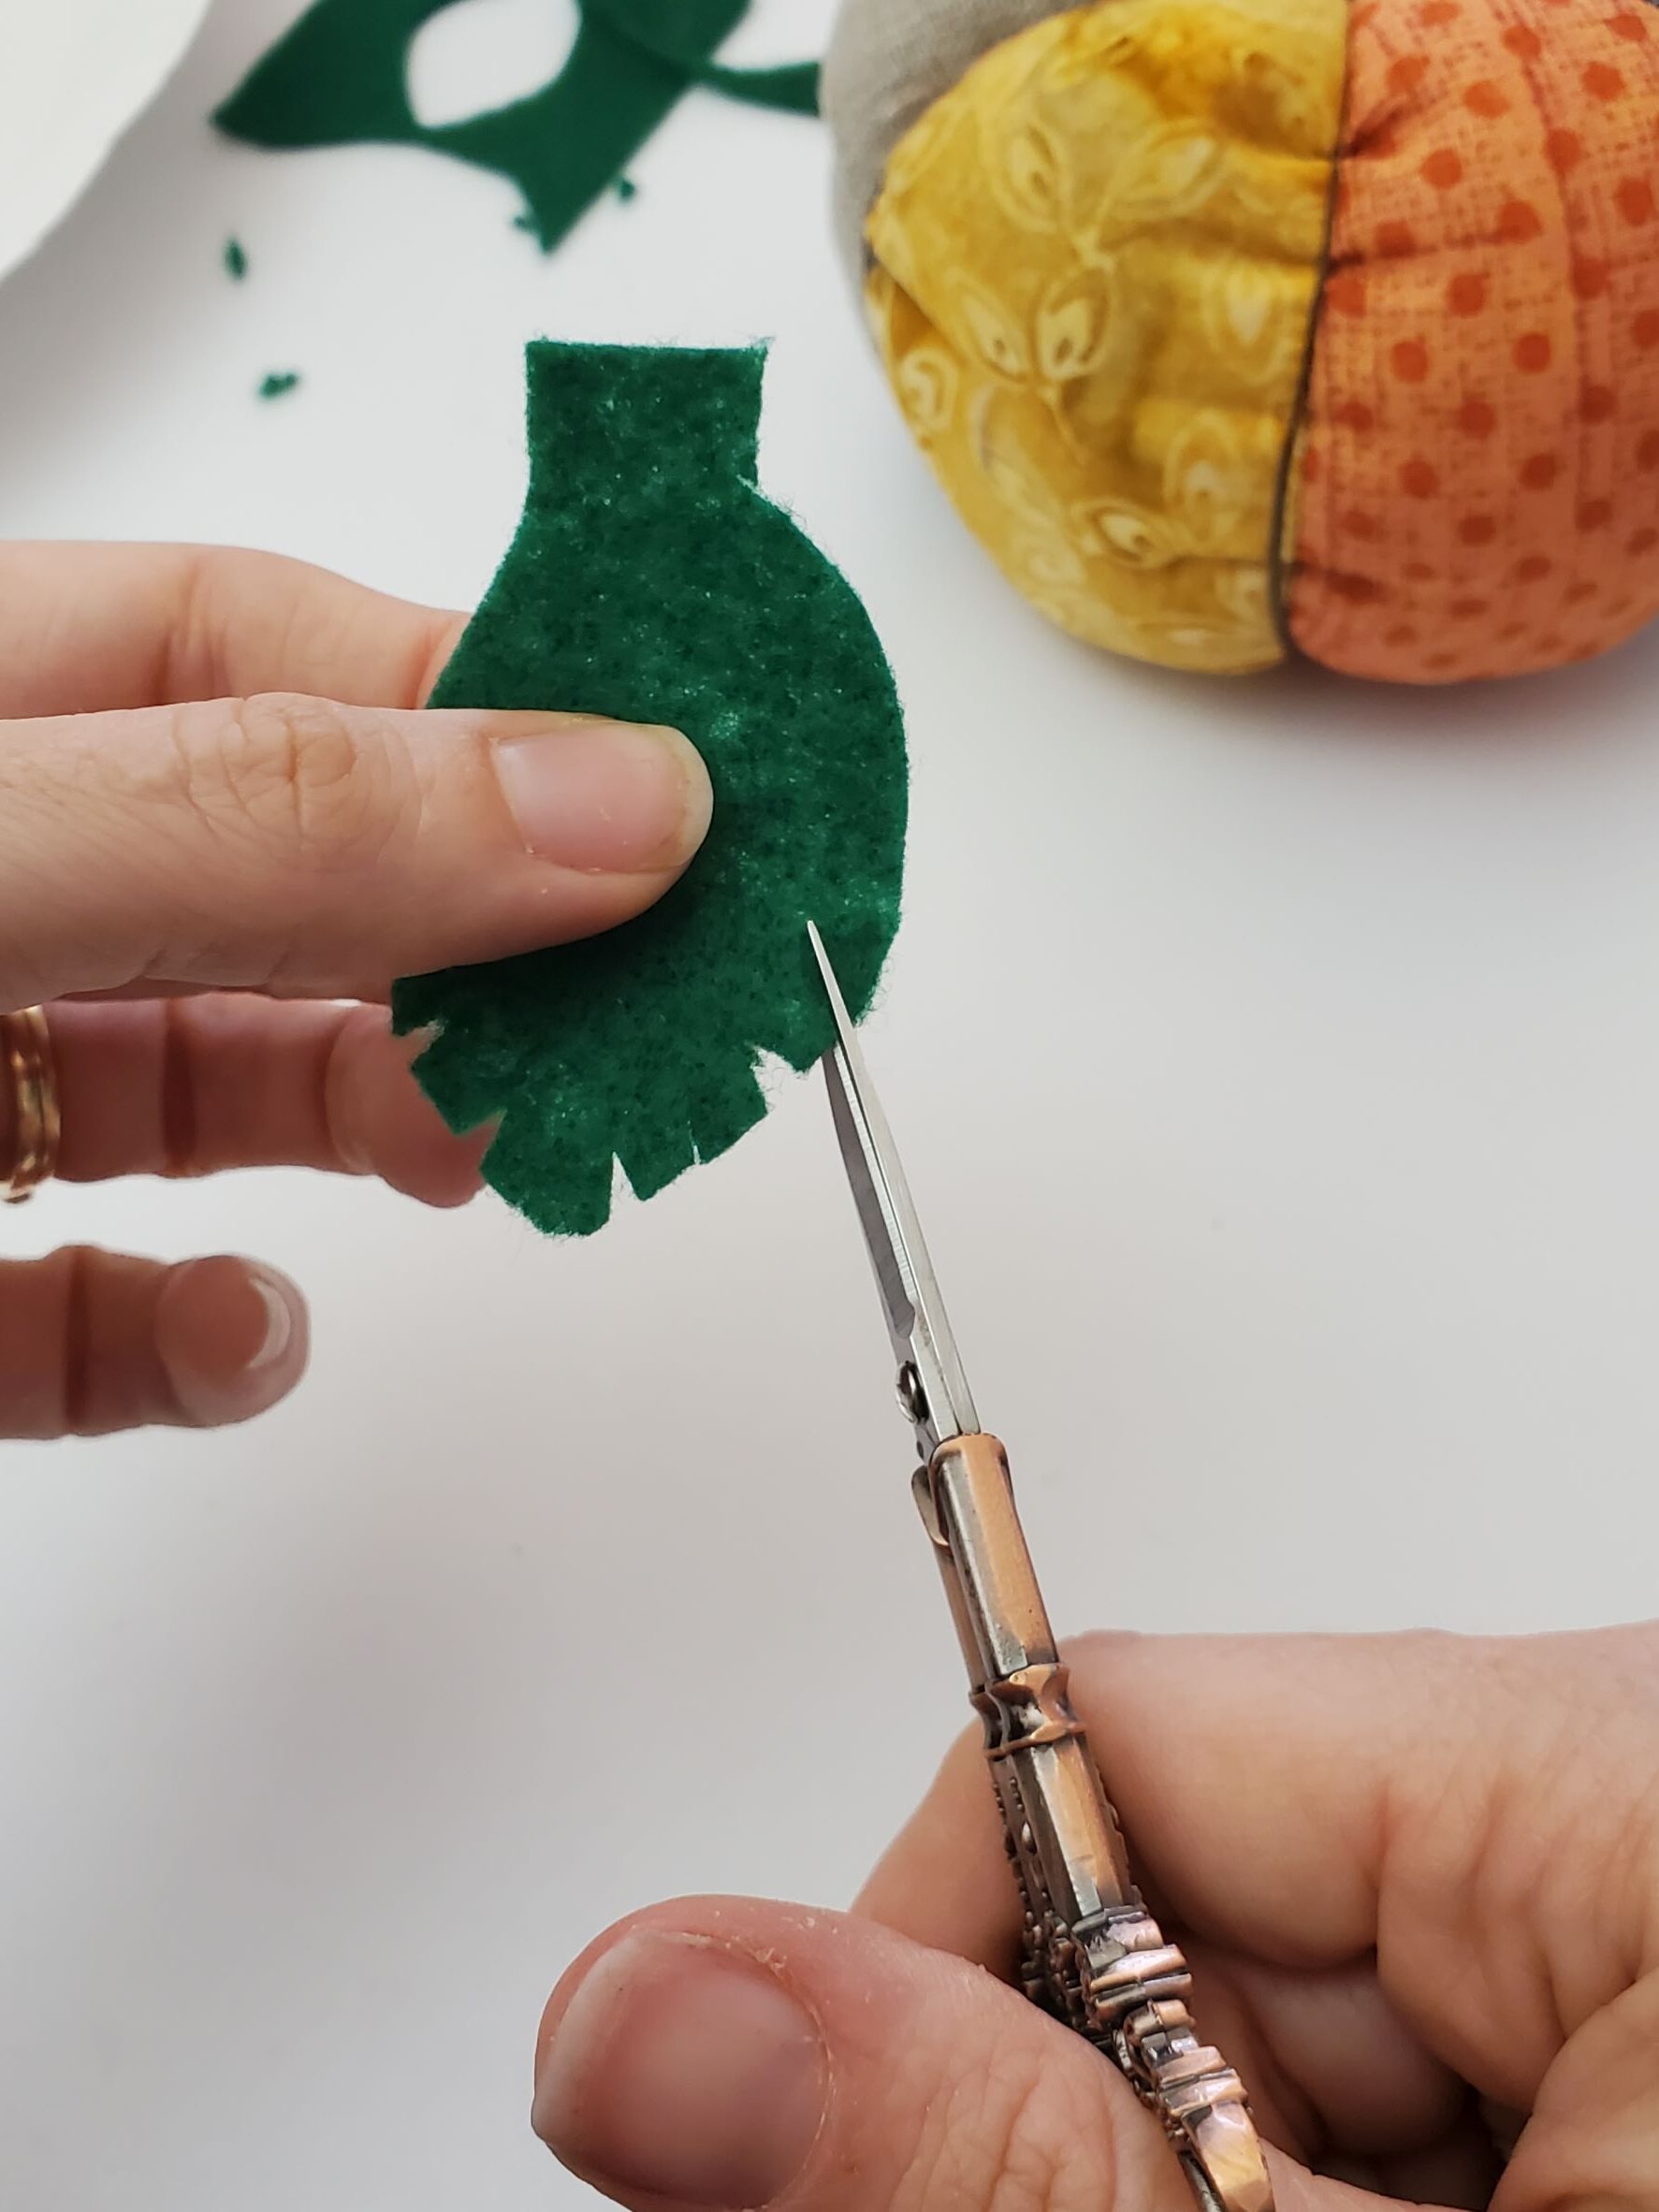
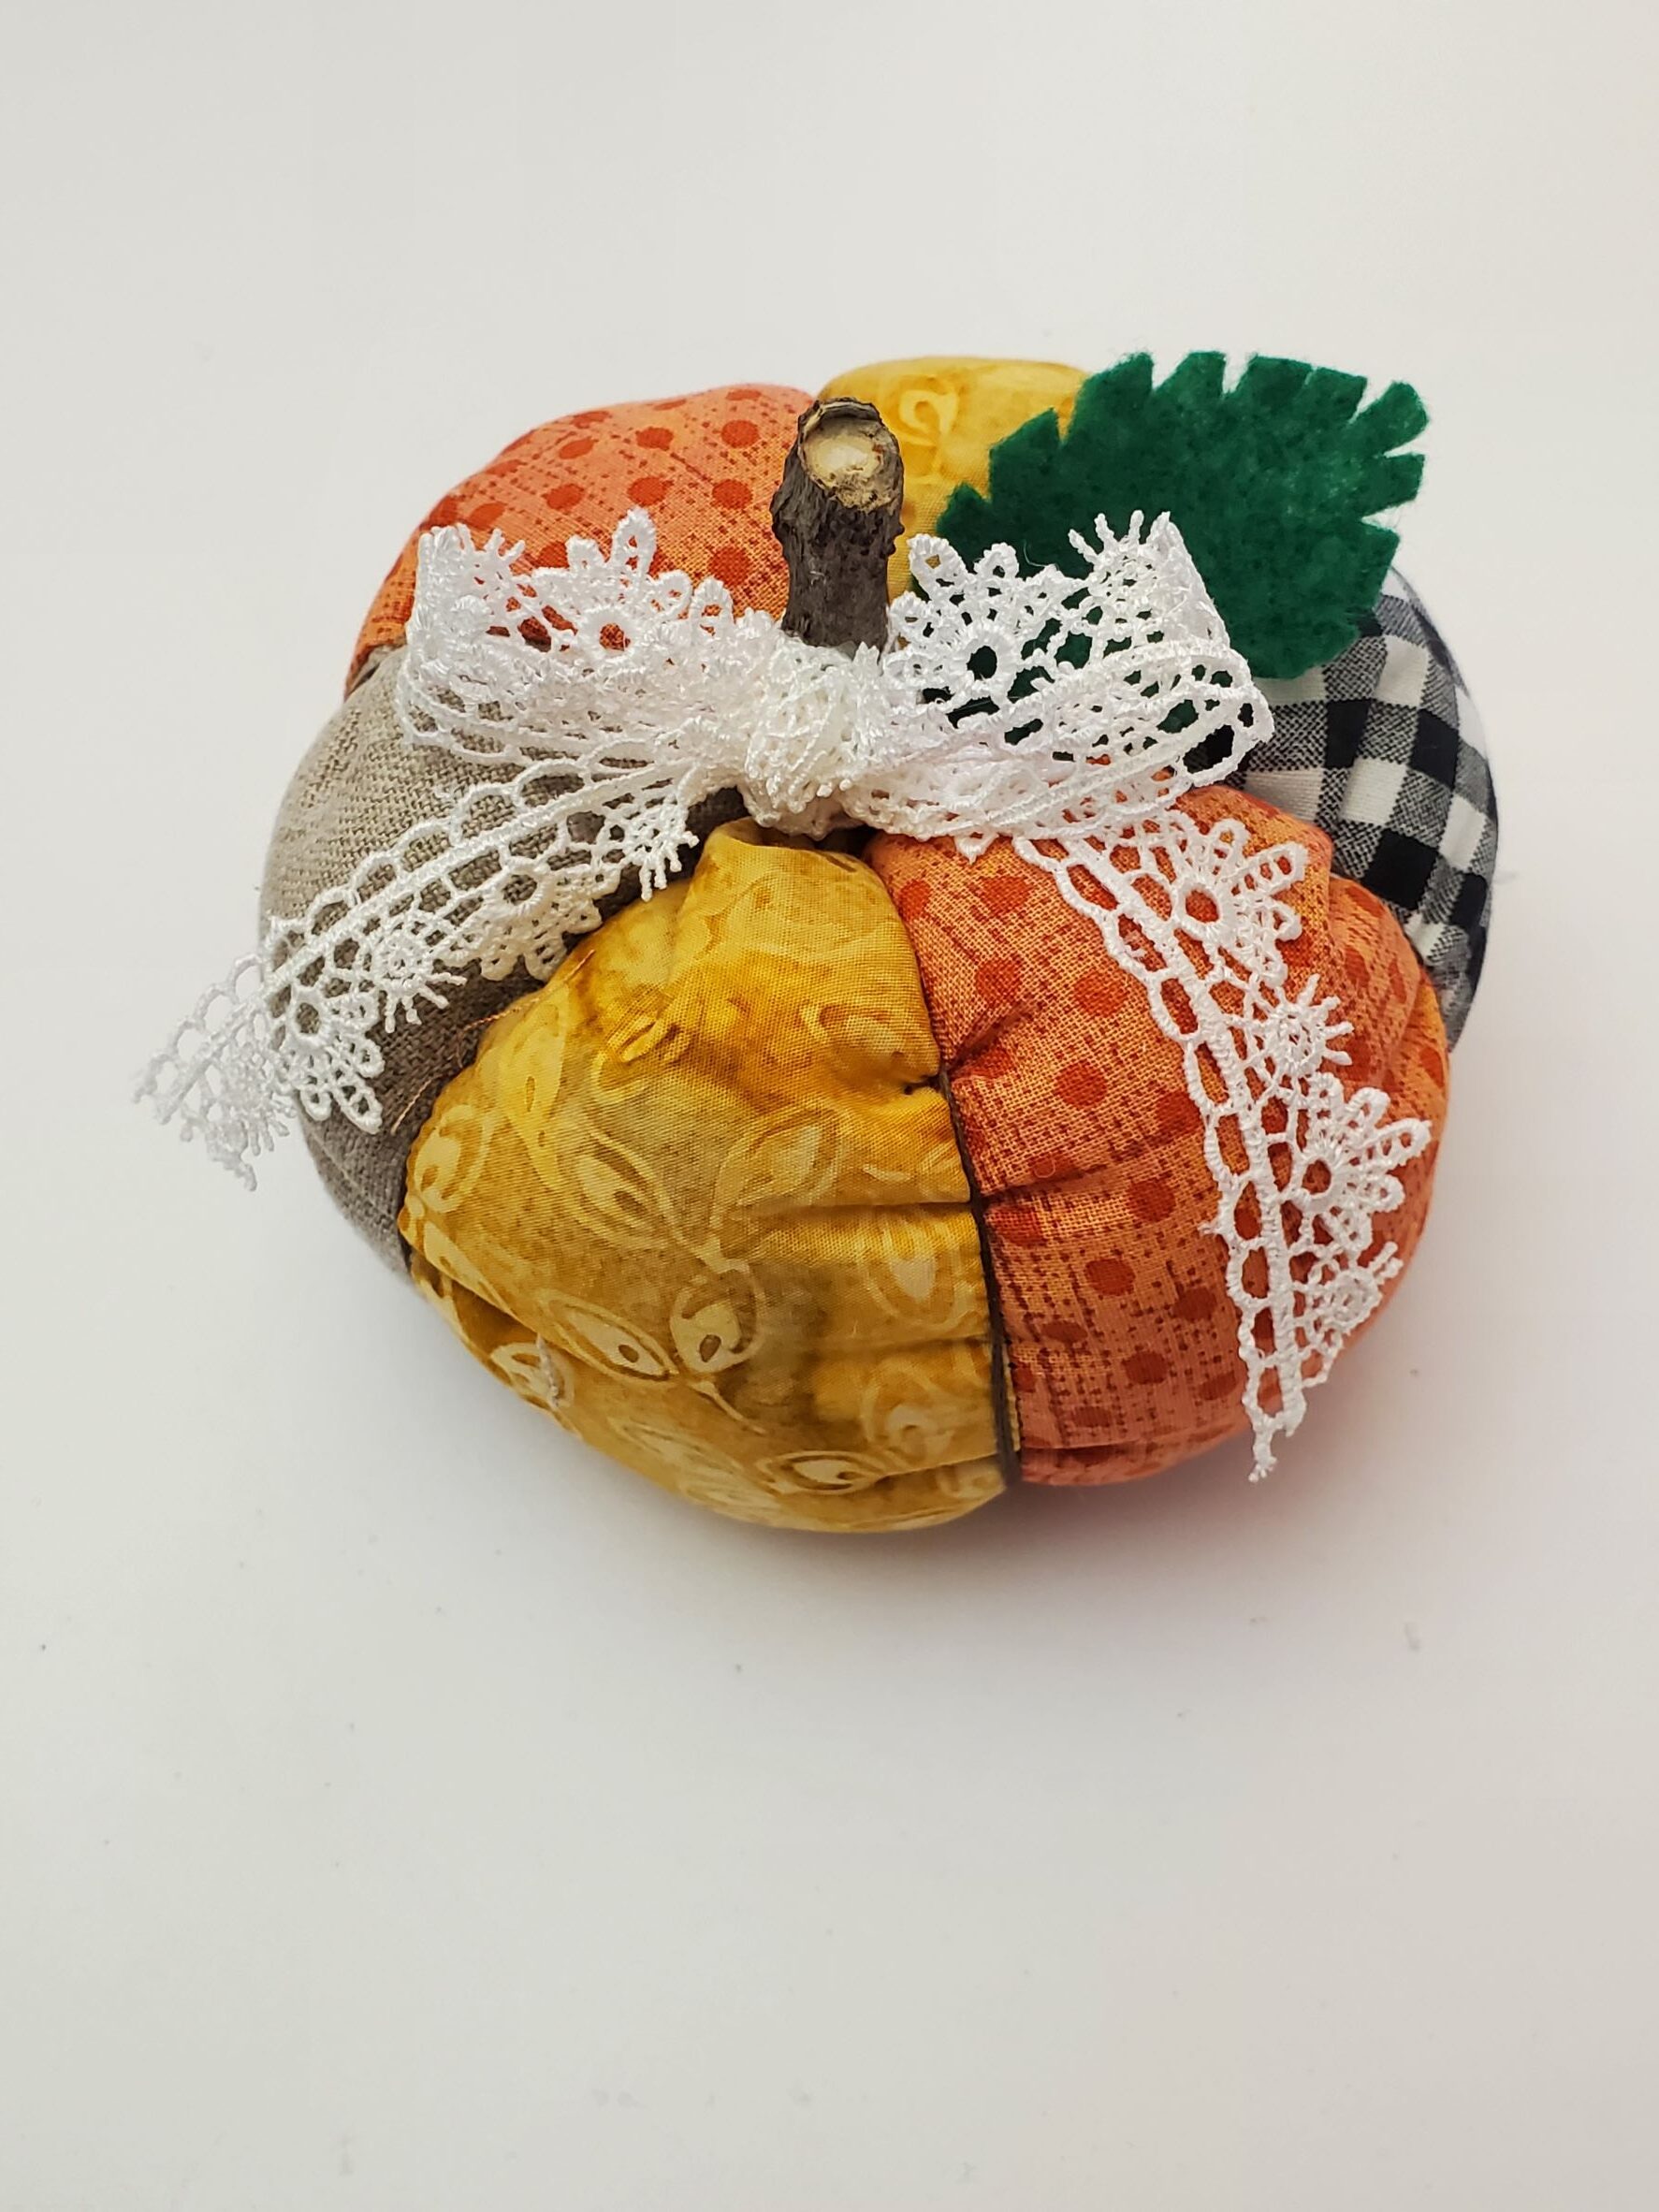
Cut out a leaf from your green felt. To be honest, I just free-handed this. And I’m not a great artist so don’t look too closely, lol. Although, if anything, this shows you that you don’t have to be perfect in order for it to be cute 😉
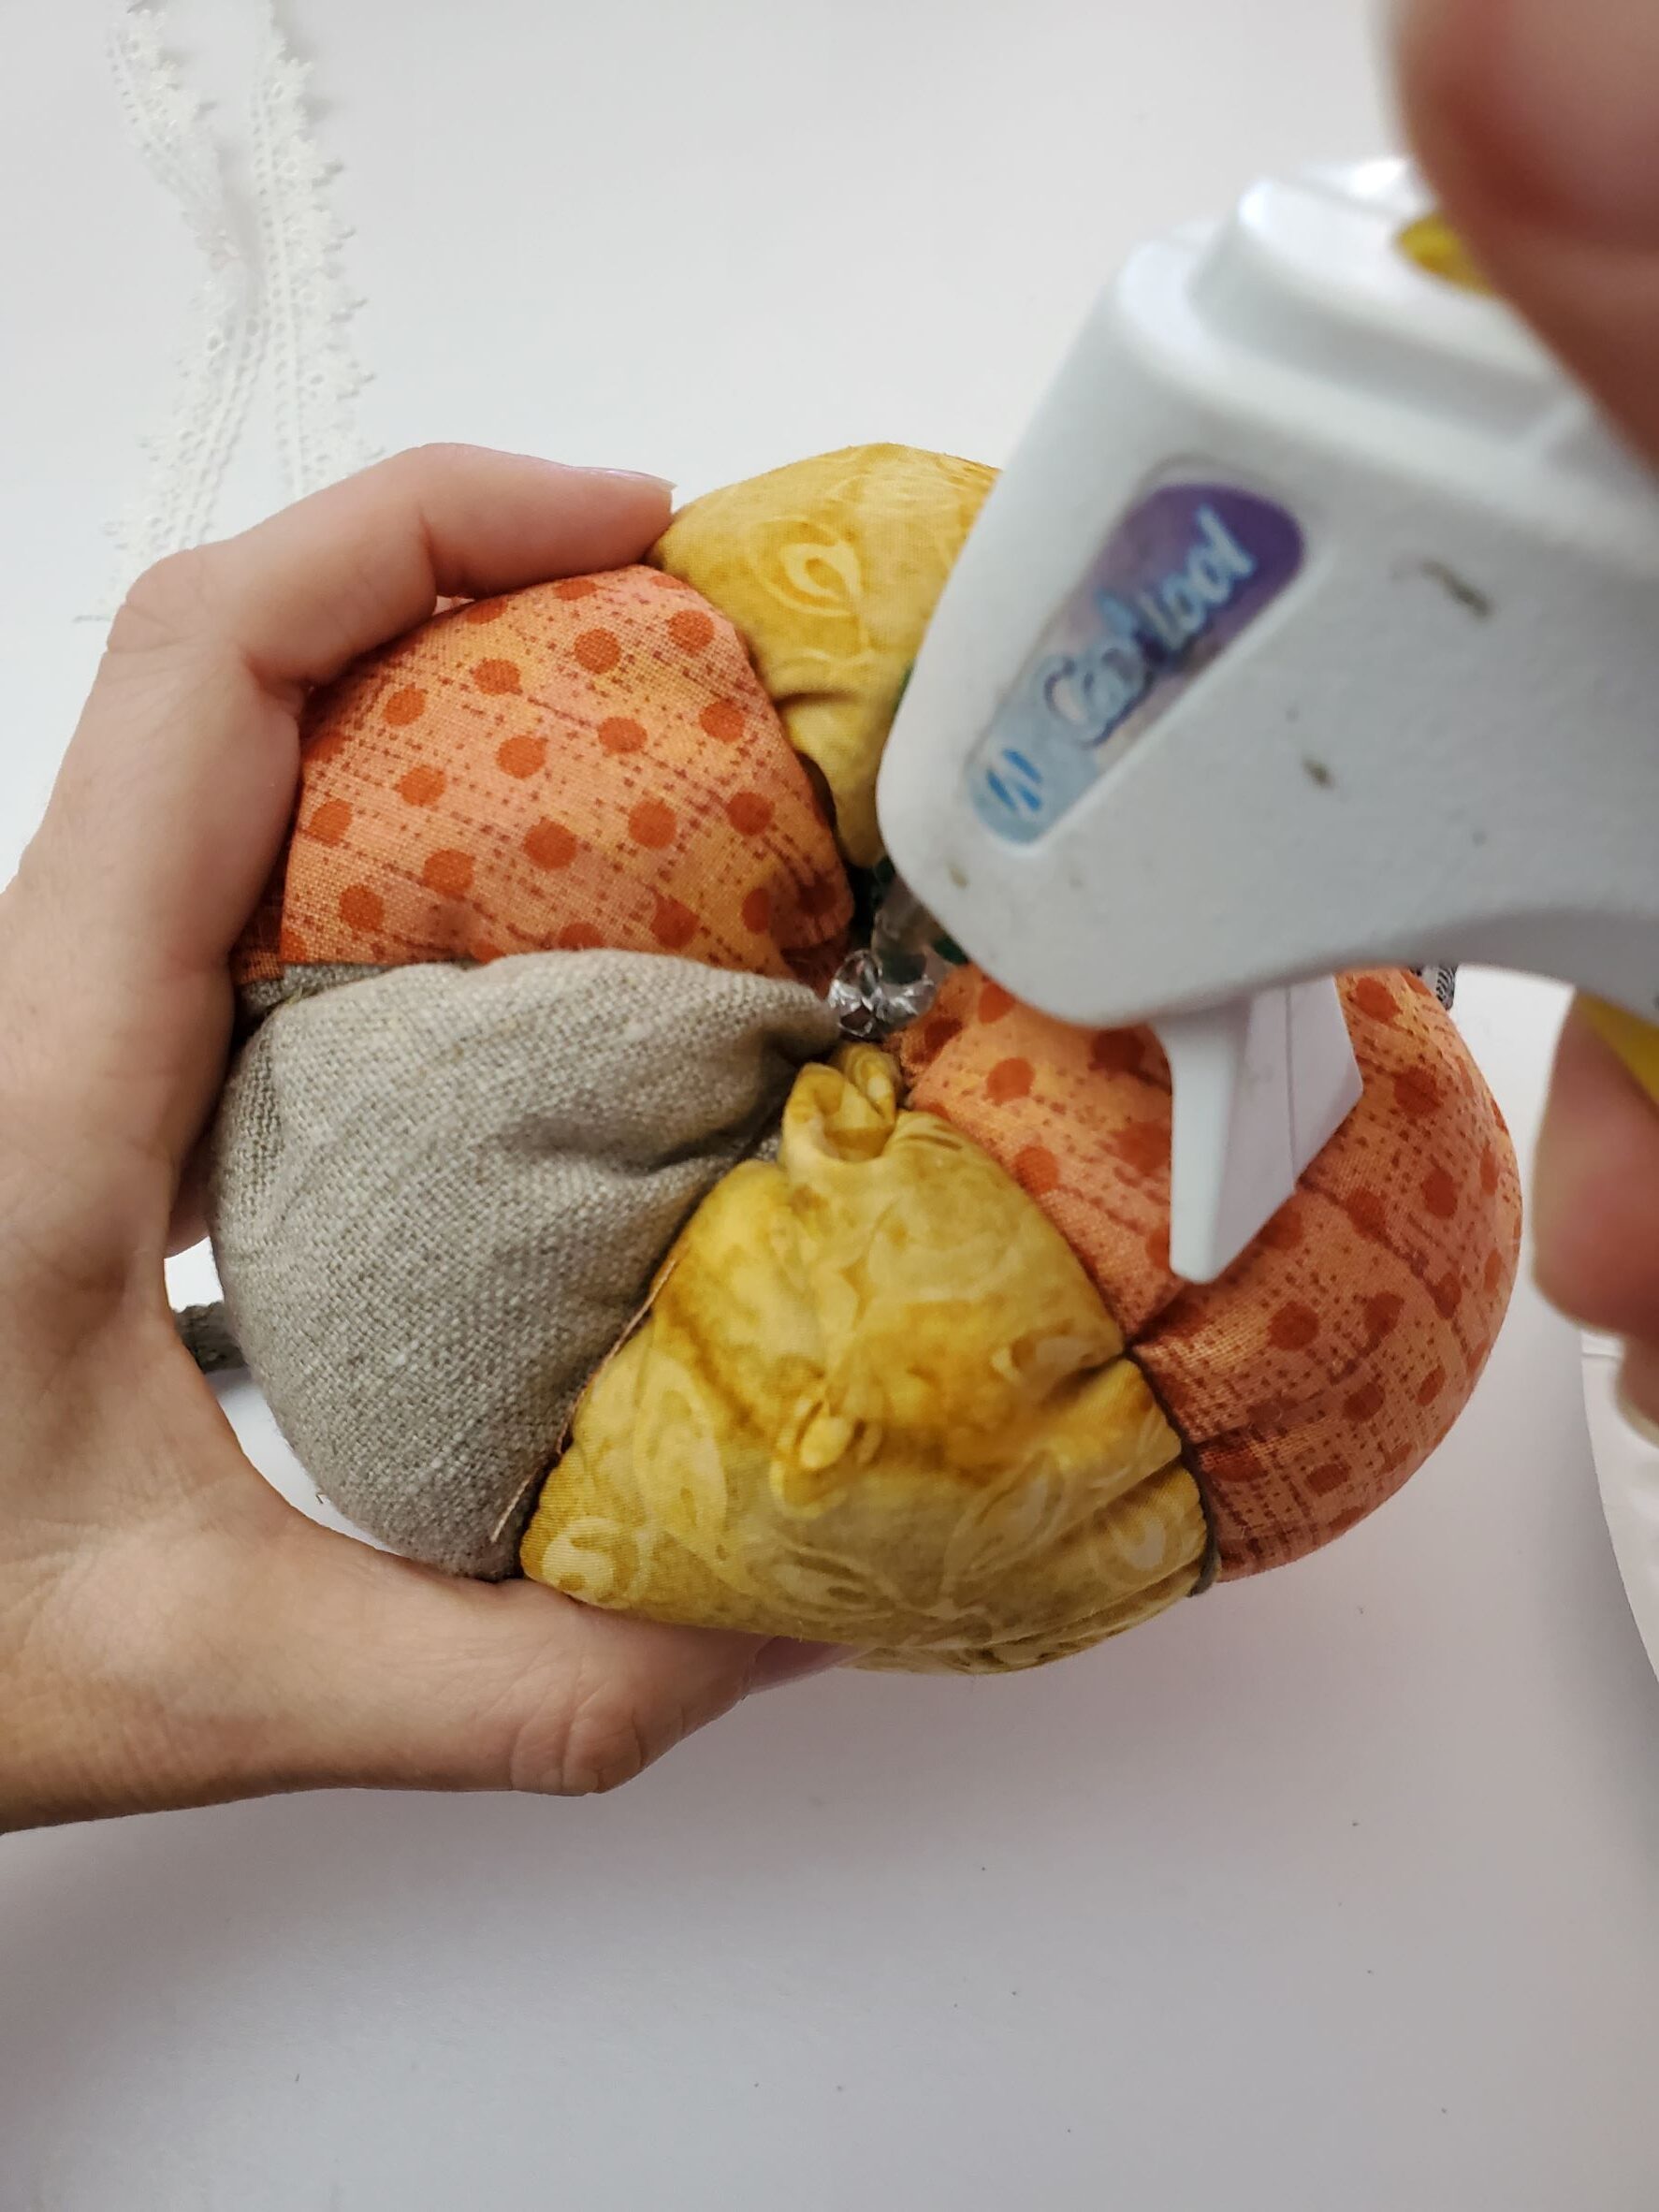
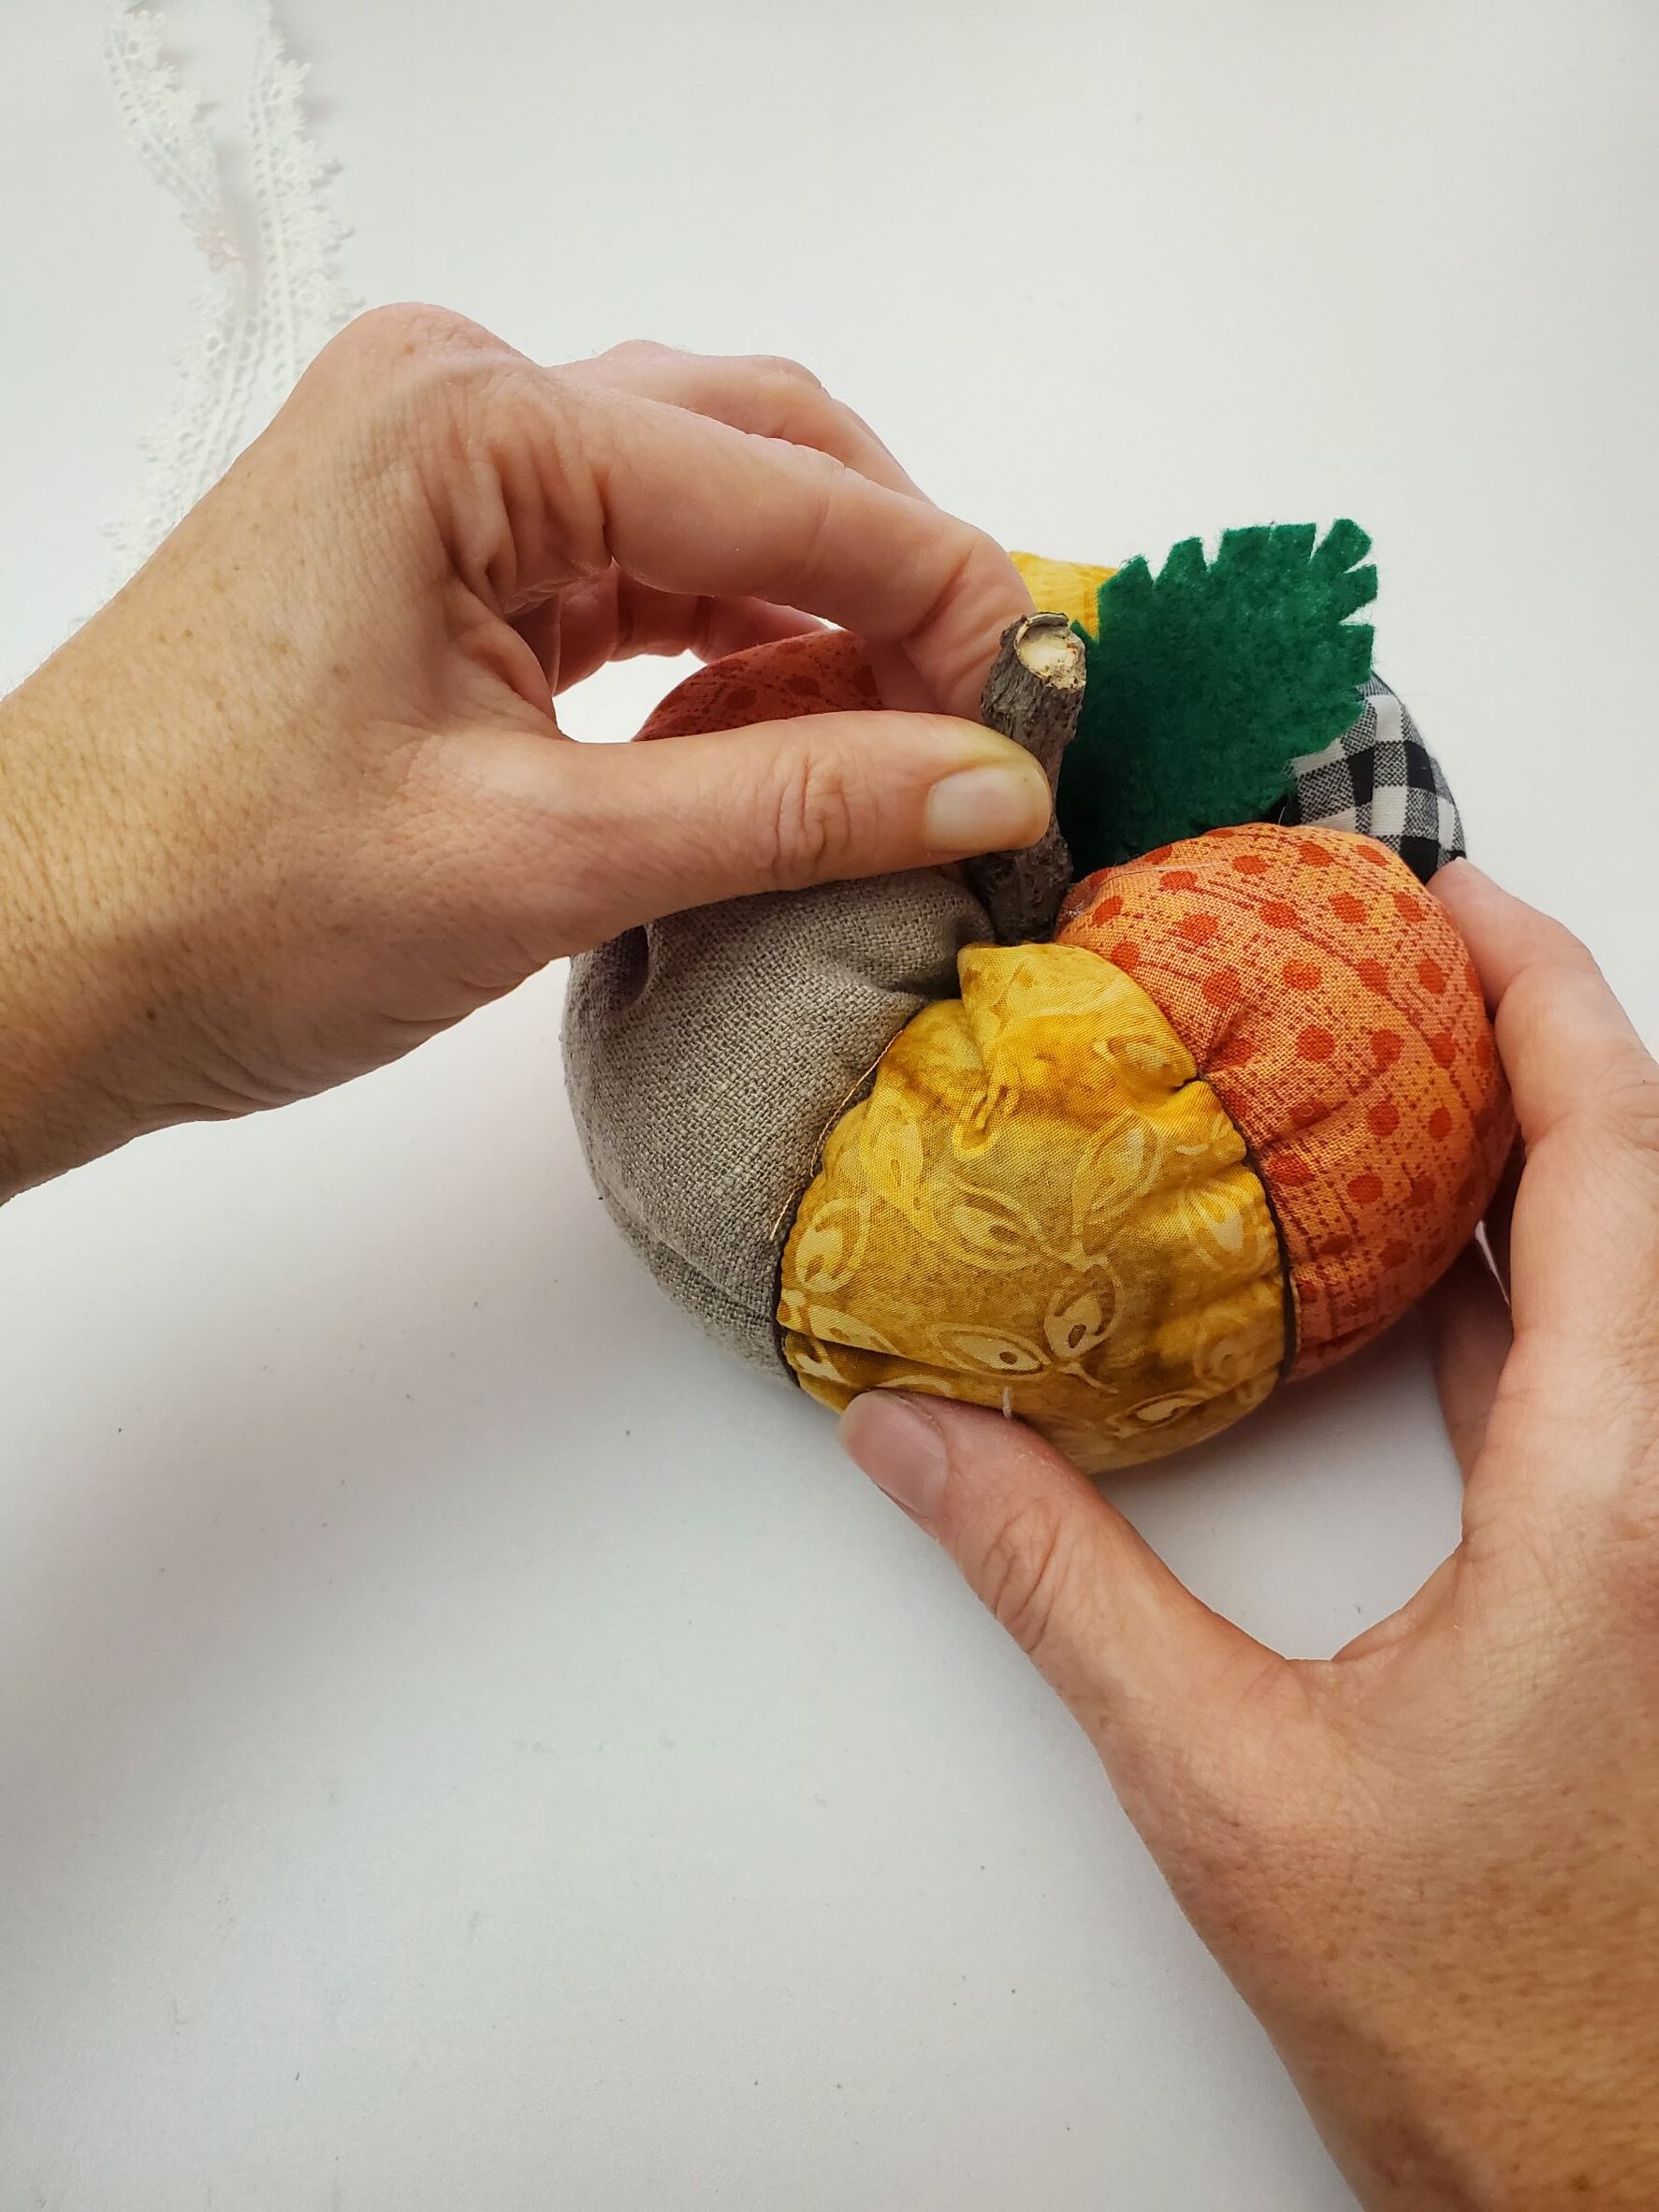
Take your twig and glue that on with your leaf. I dumped a big blob of hot glue right down the center of my fabric pumpkin, and put the leaf down first, and then I pushed the twig down and held it for several seconds while the hot glue dried.
For finishings, you can tie a piece of twine, or you can use a pretty piece of wedding lace. I love the look of both! Luckily I made myself multiple fabric pumpkins, so I didn’t have to decide. I used twine for the small fabric pumpkins, and lace for the big fabric pumpkins.
And now you’re all done!!
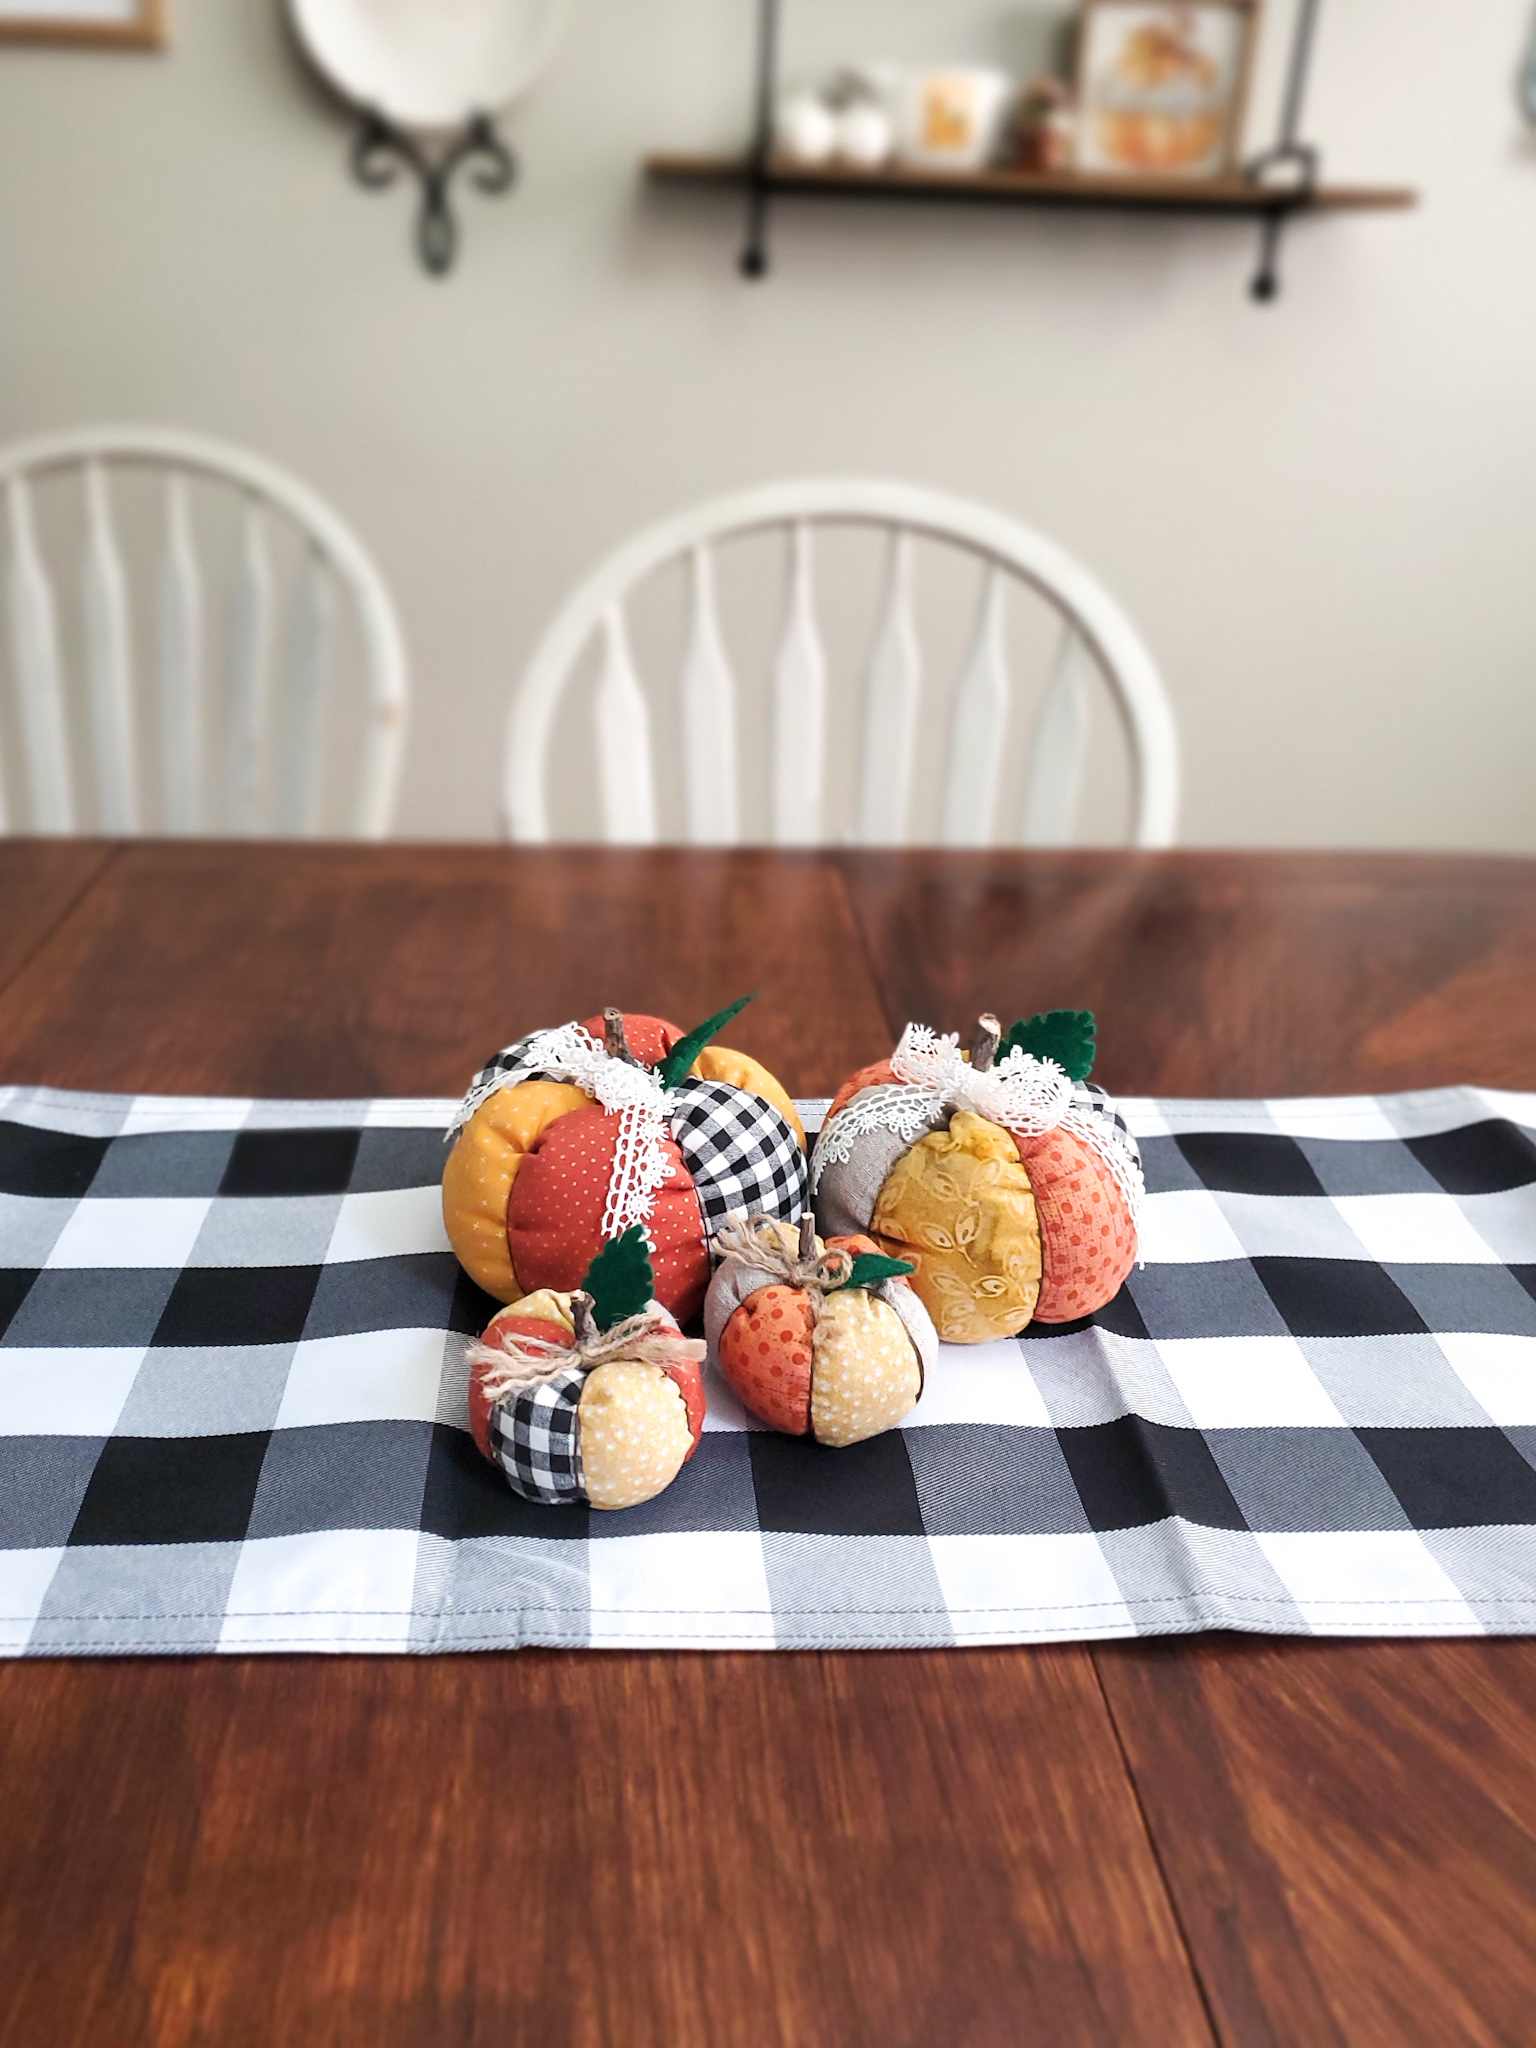
I made myself a matching pumpkin table runner, and I love how it all looks together!!! I’m very excited to be hosting Thanksgiving this year and displaying my adorable fabric pumpkins!!
Shopping List:
*Sassy Cassy’s is part of the Amazon Affiliate Program, which means that if you purchase Amazon items from this website, a small commission will be earned, at no extra cost to you.

Good luck!