
Holiday sewing is one of my favorite things to do! I love love love the holidays- all of them! I have a couple of spaces in my house where I like to change out my decor for festive decor for the holidays. It’s nice to change things up and it just makes me feel happy to have a space where I can display the cute decor that I find (or make).
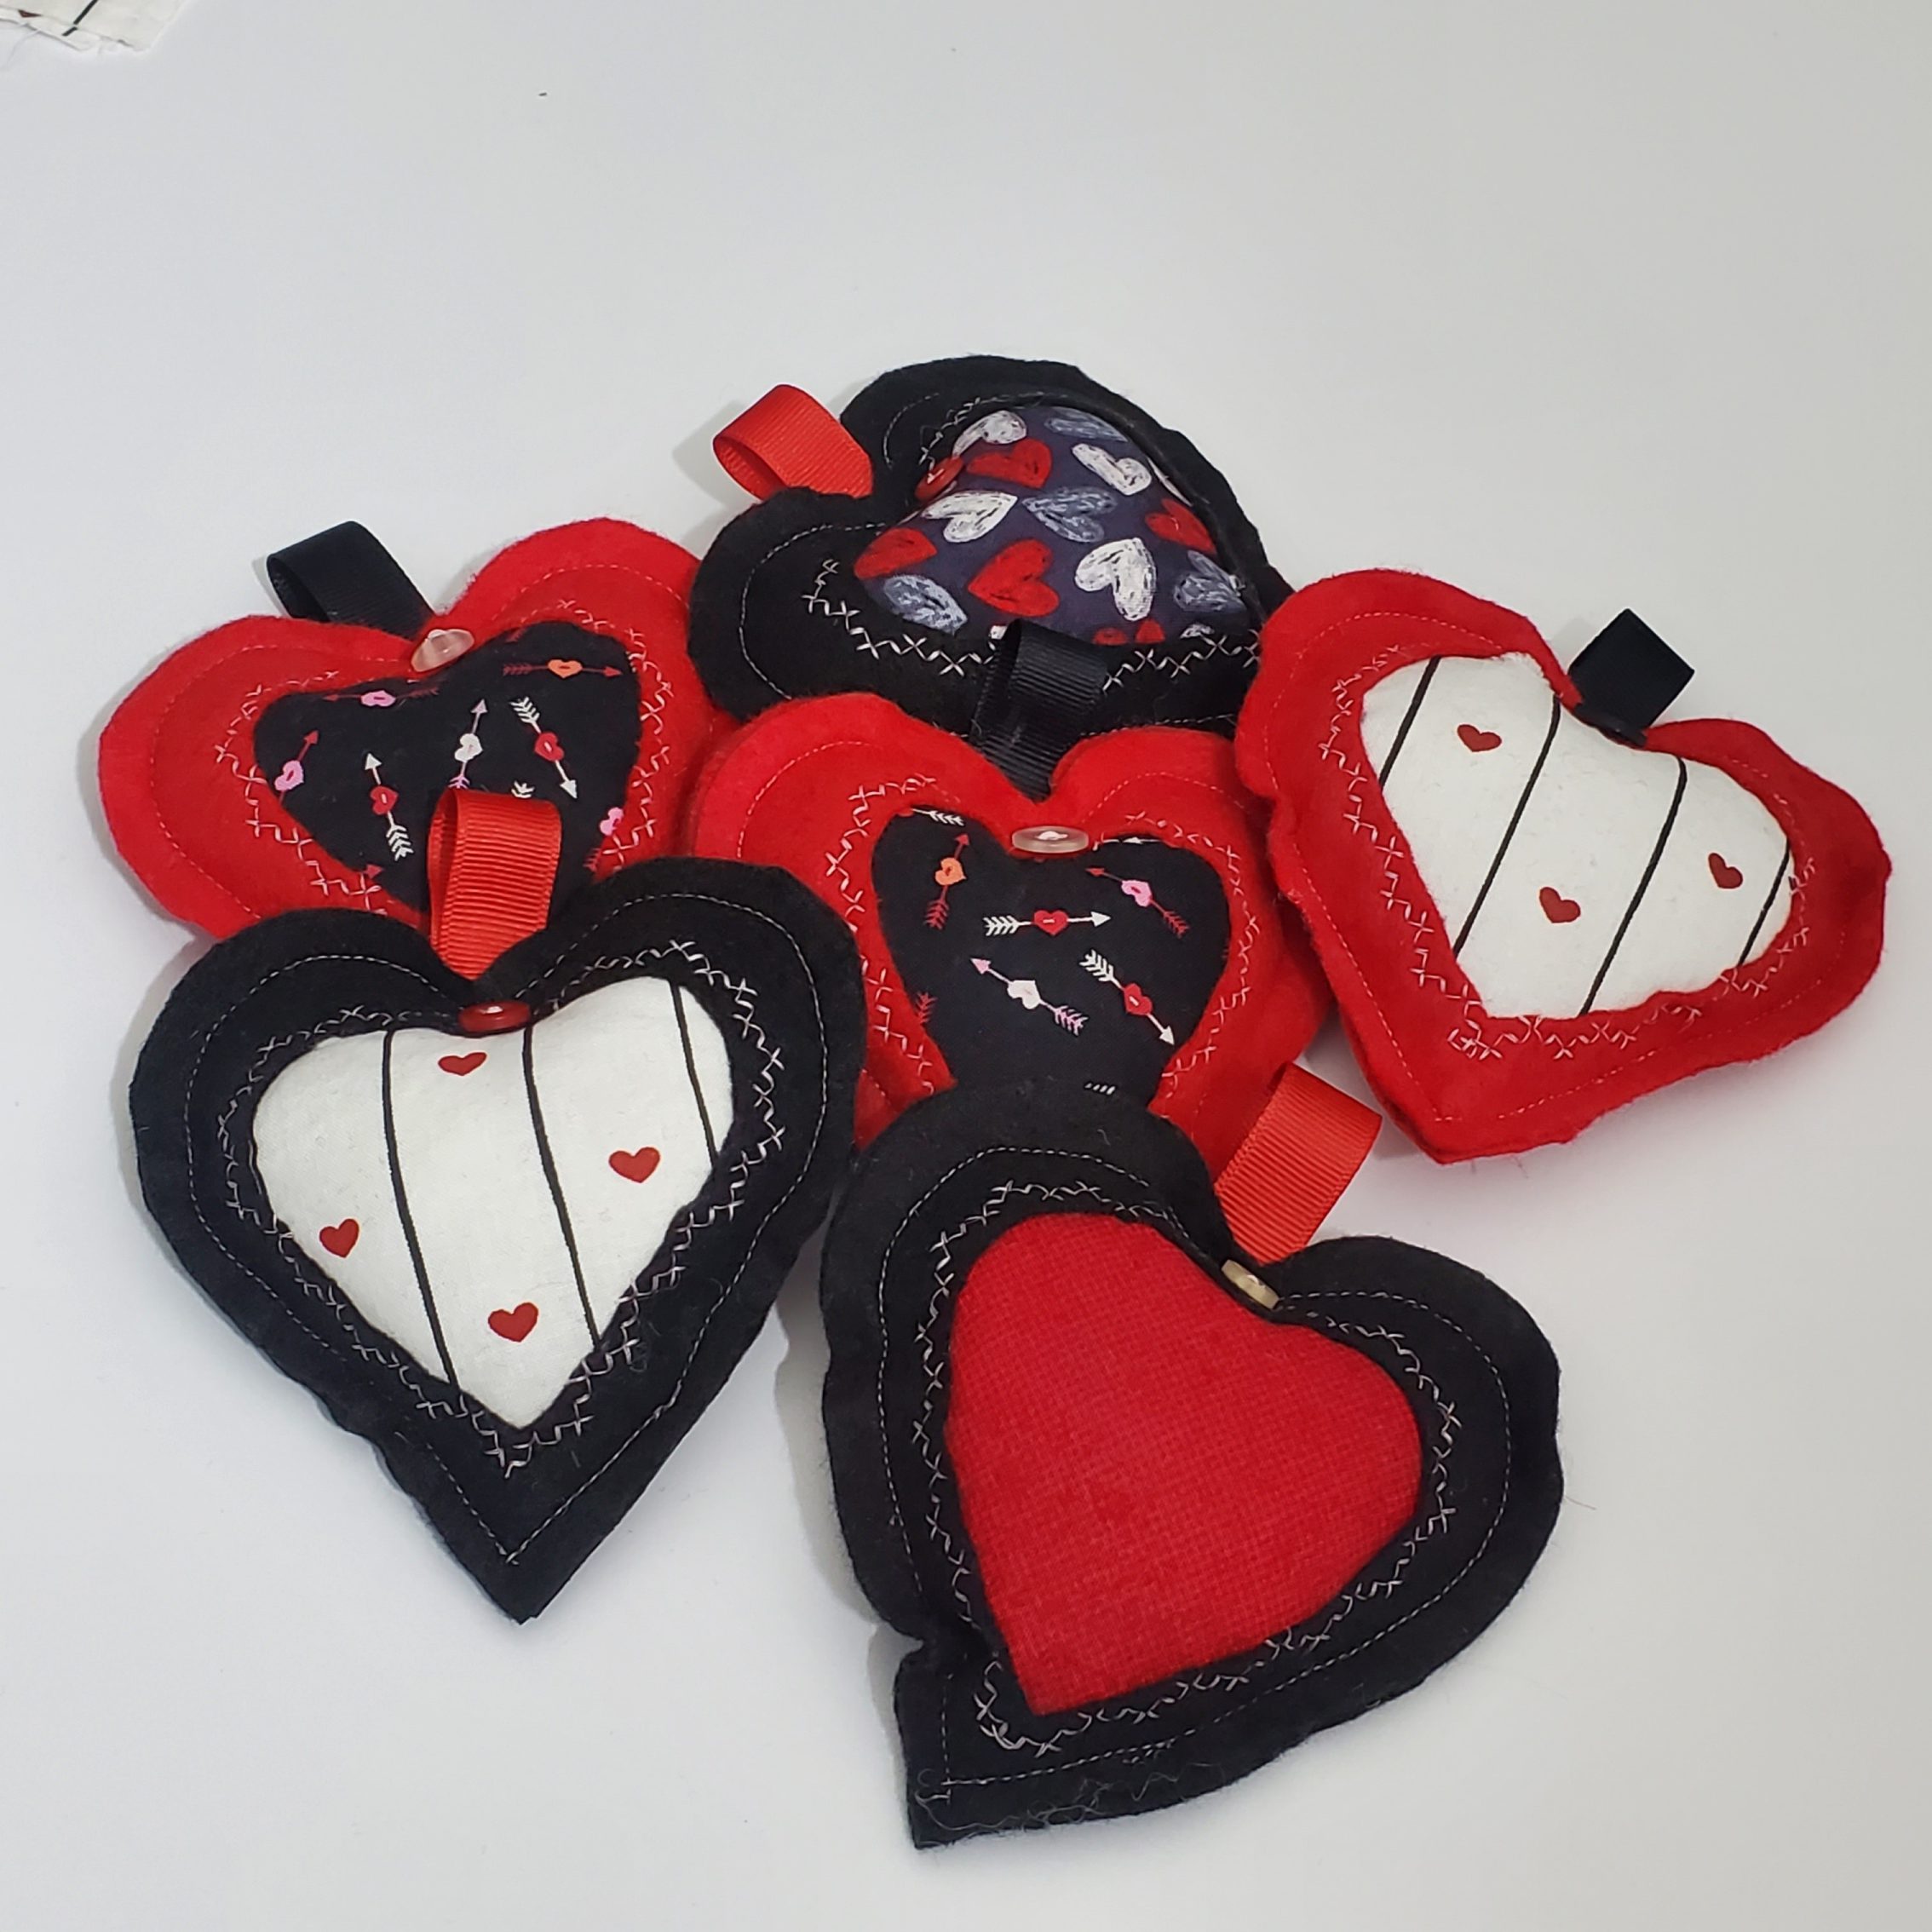
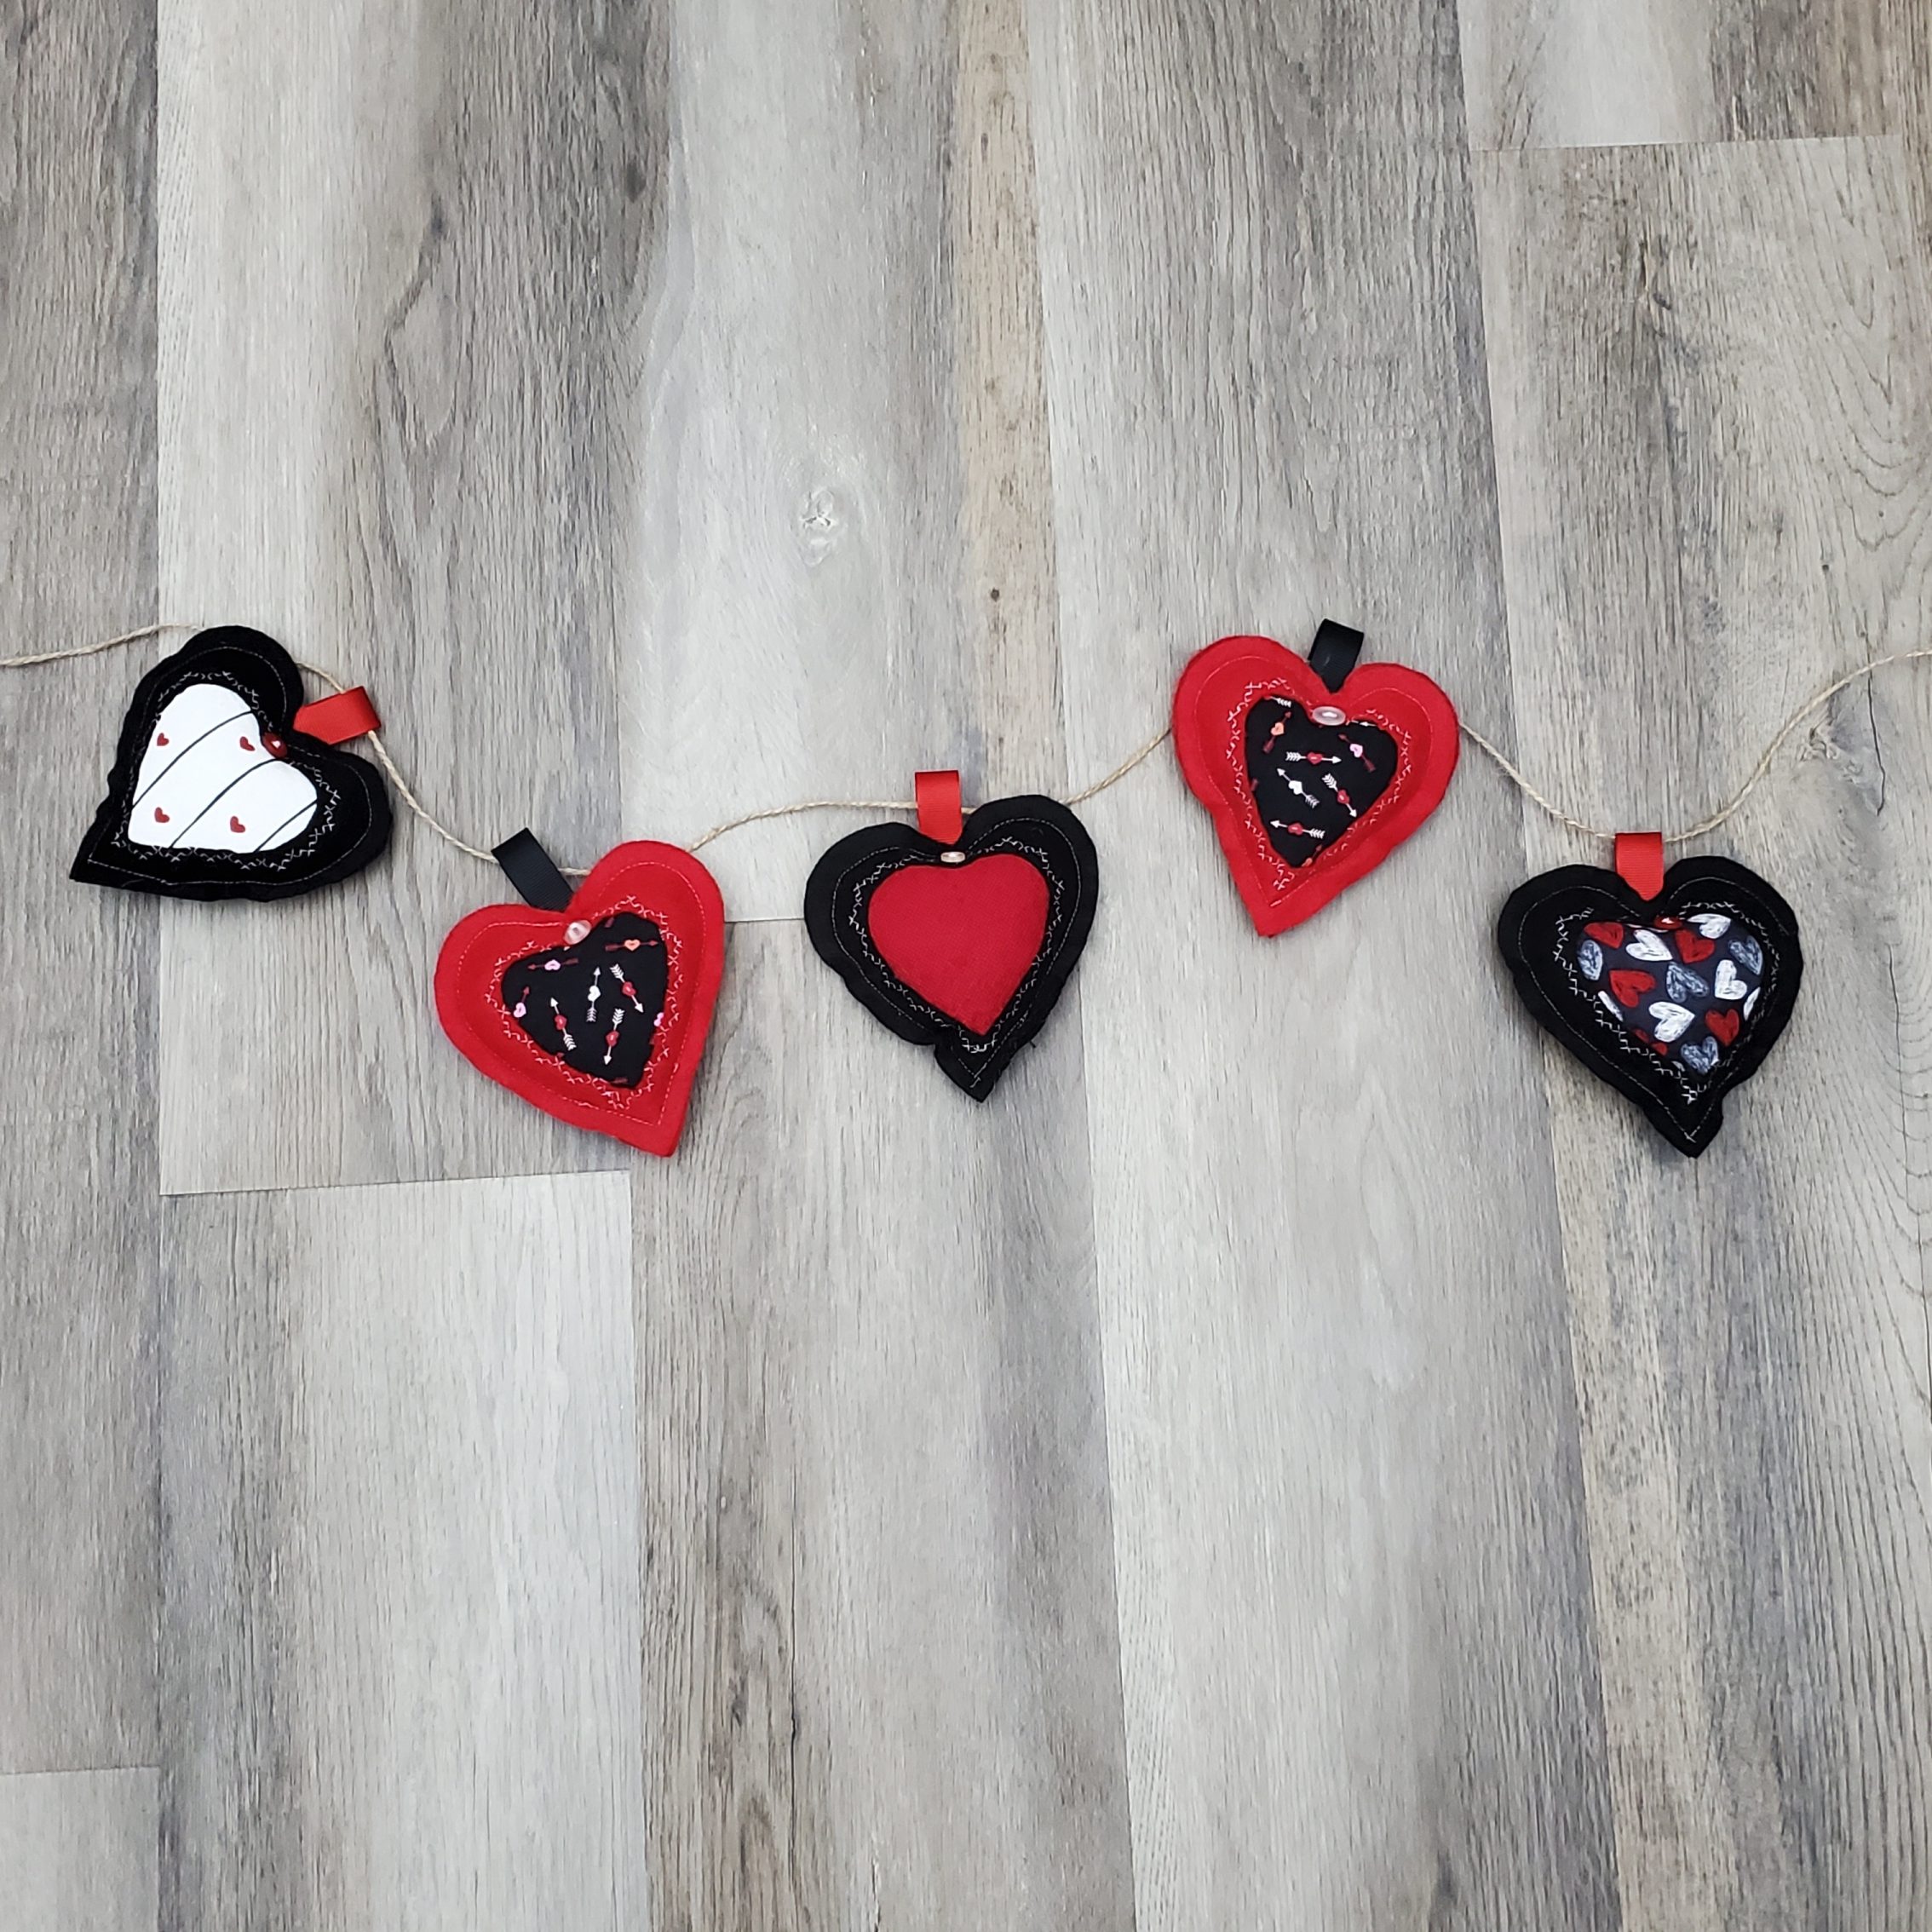
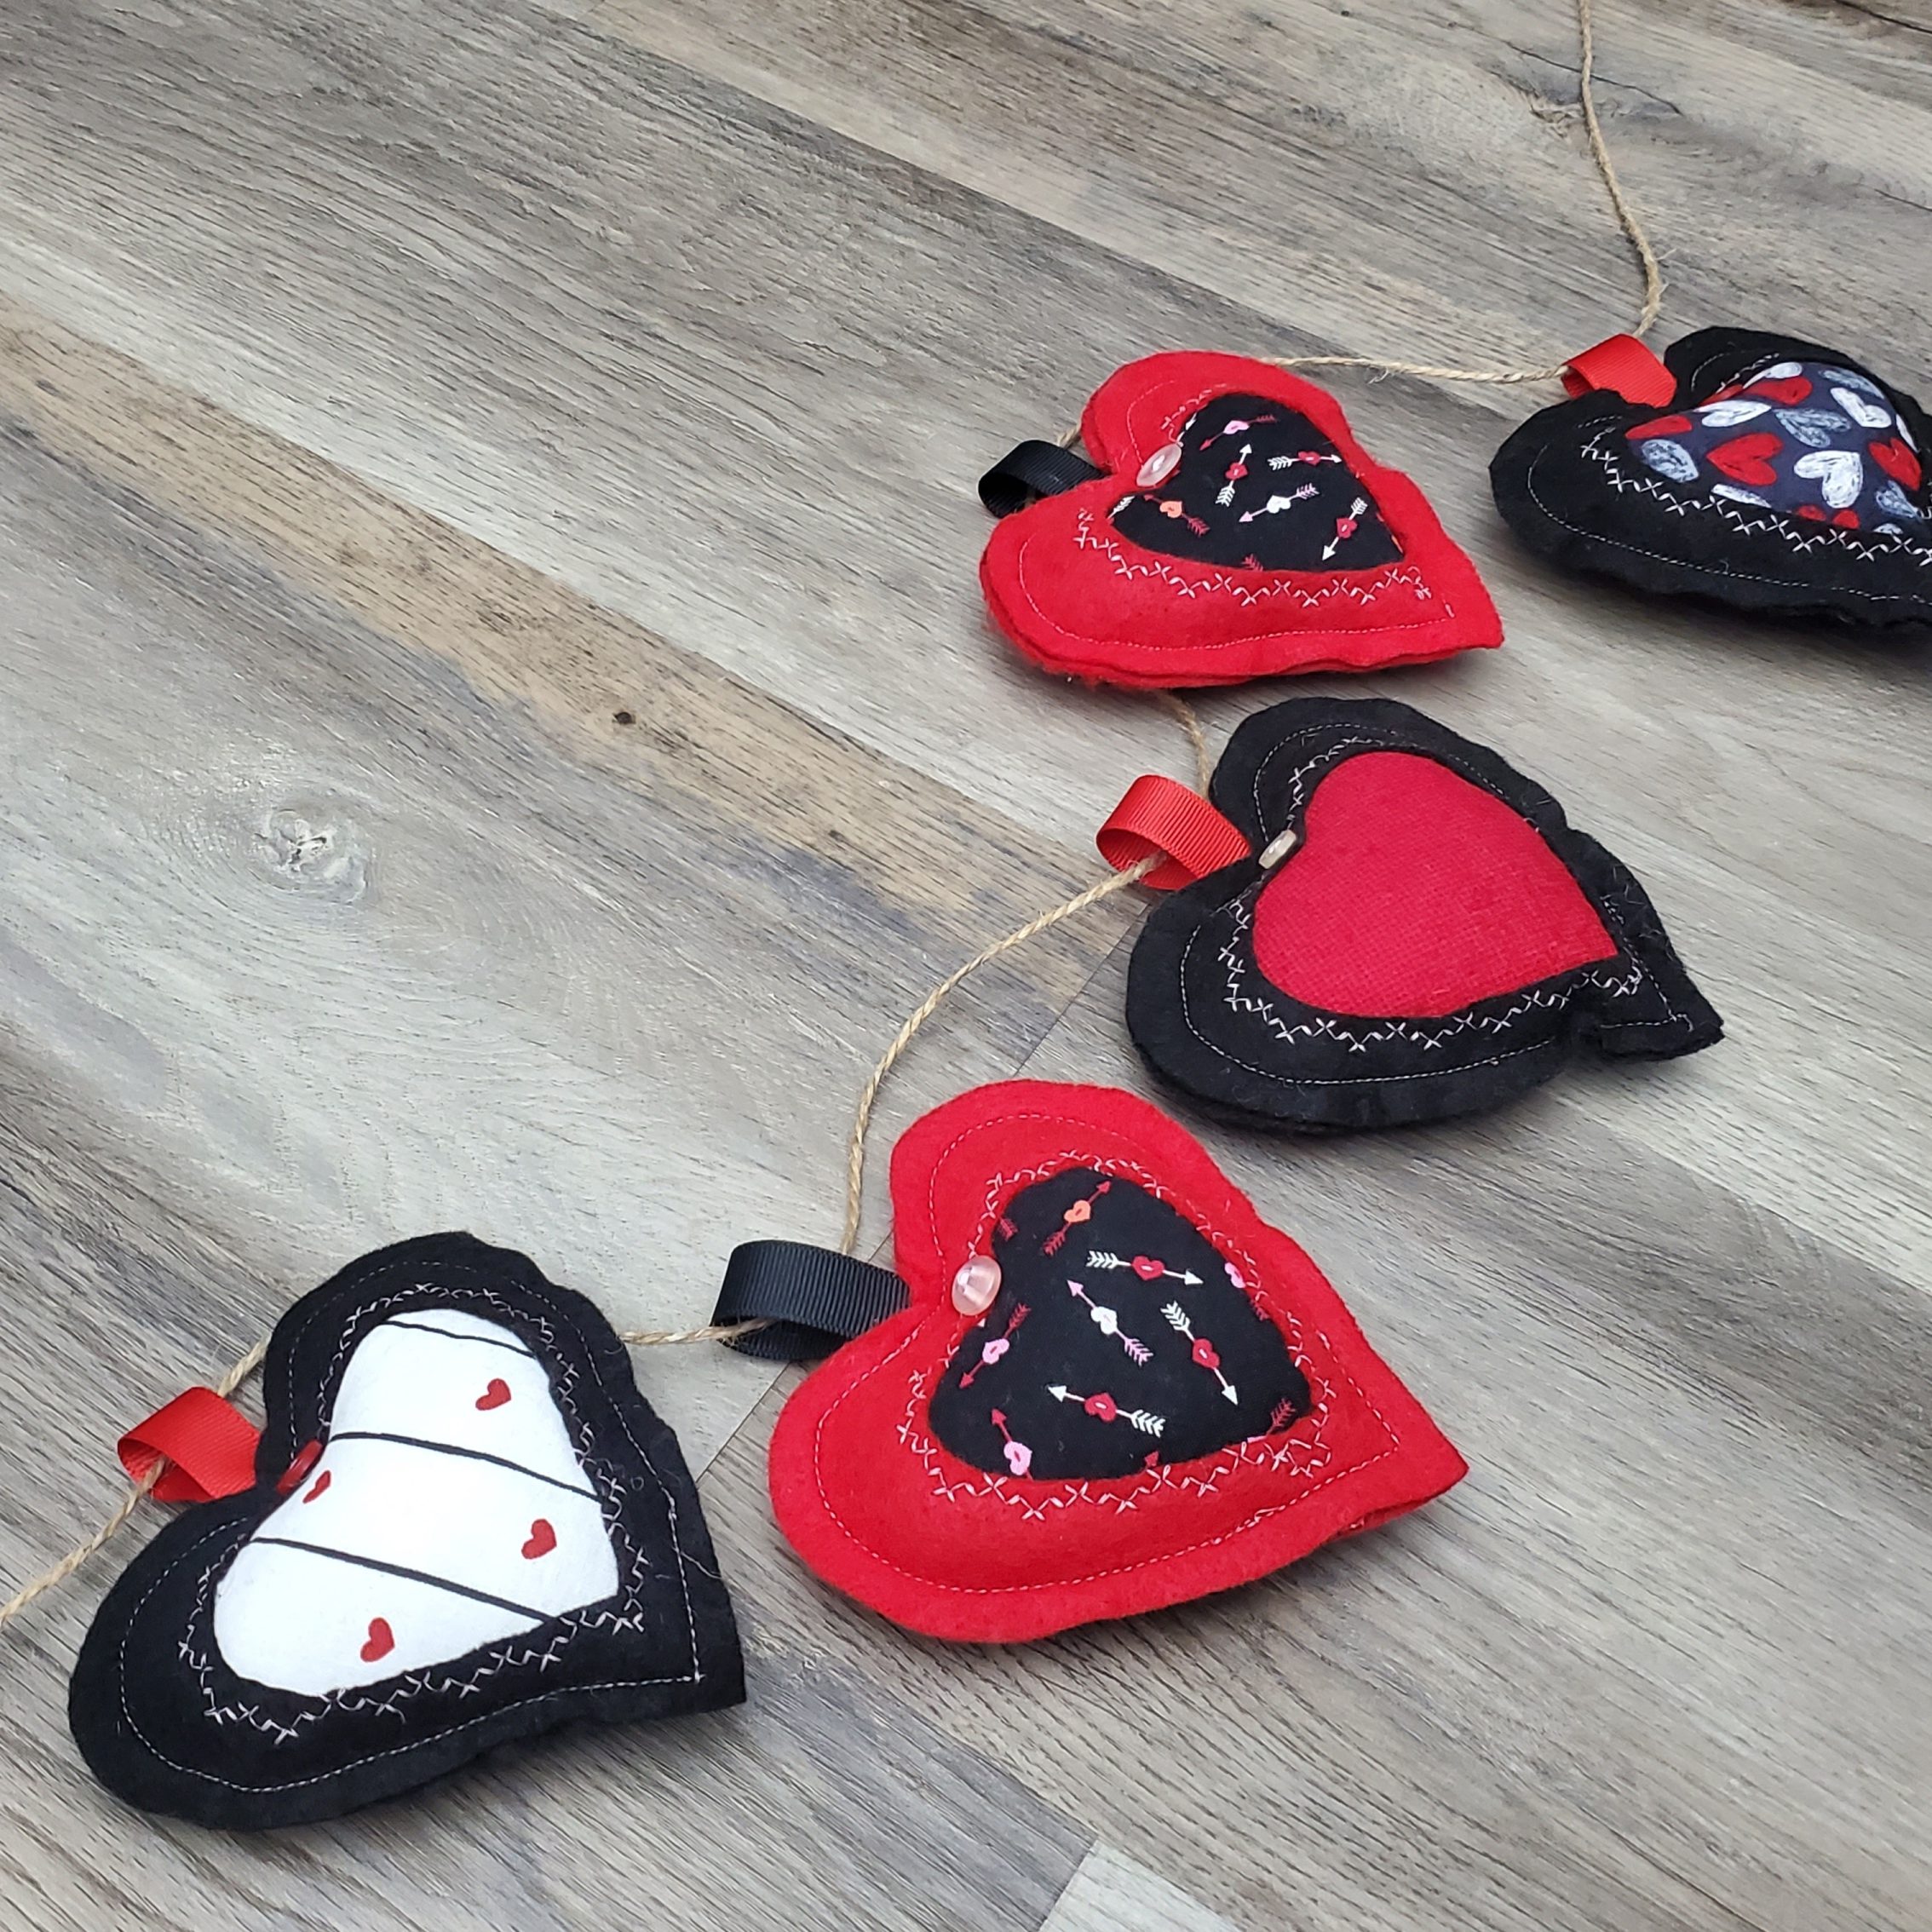
When the Christmas decorations go up, the Valentine’s Day decorations come down. Who doesn’t need an extra month of love in their life? I have been trying to incorporate more holidays into my sewing workshops. The kids really like it and it changes things up a little. I had so many fun ideas for Valentine’s Day, and it was so hard to decide what to do. I actually held a couple different classes: one making Valentine’s Day pillow covers, and one making this cute Valentine’s Day banner.
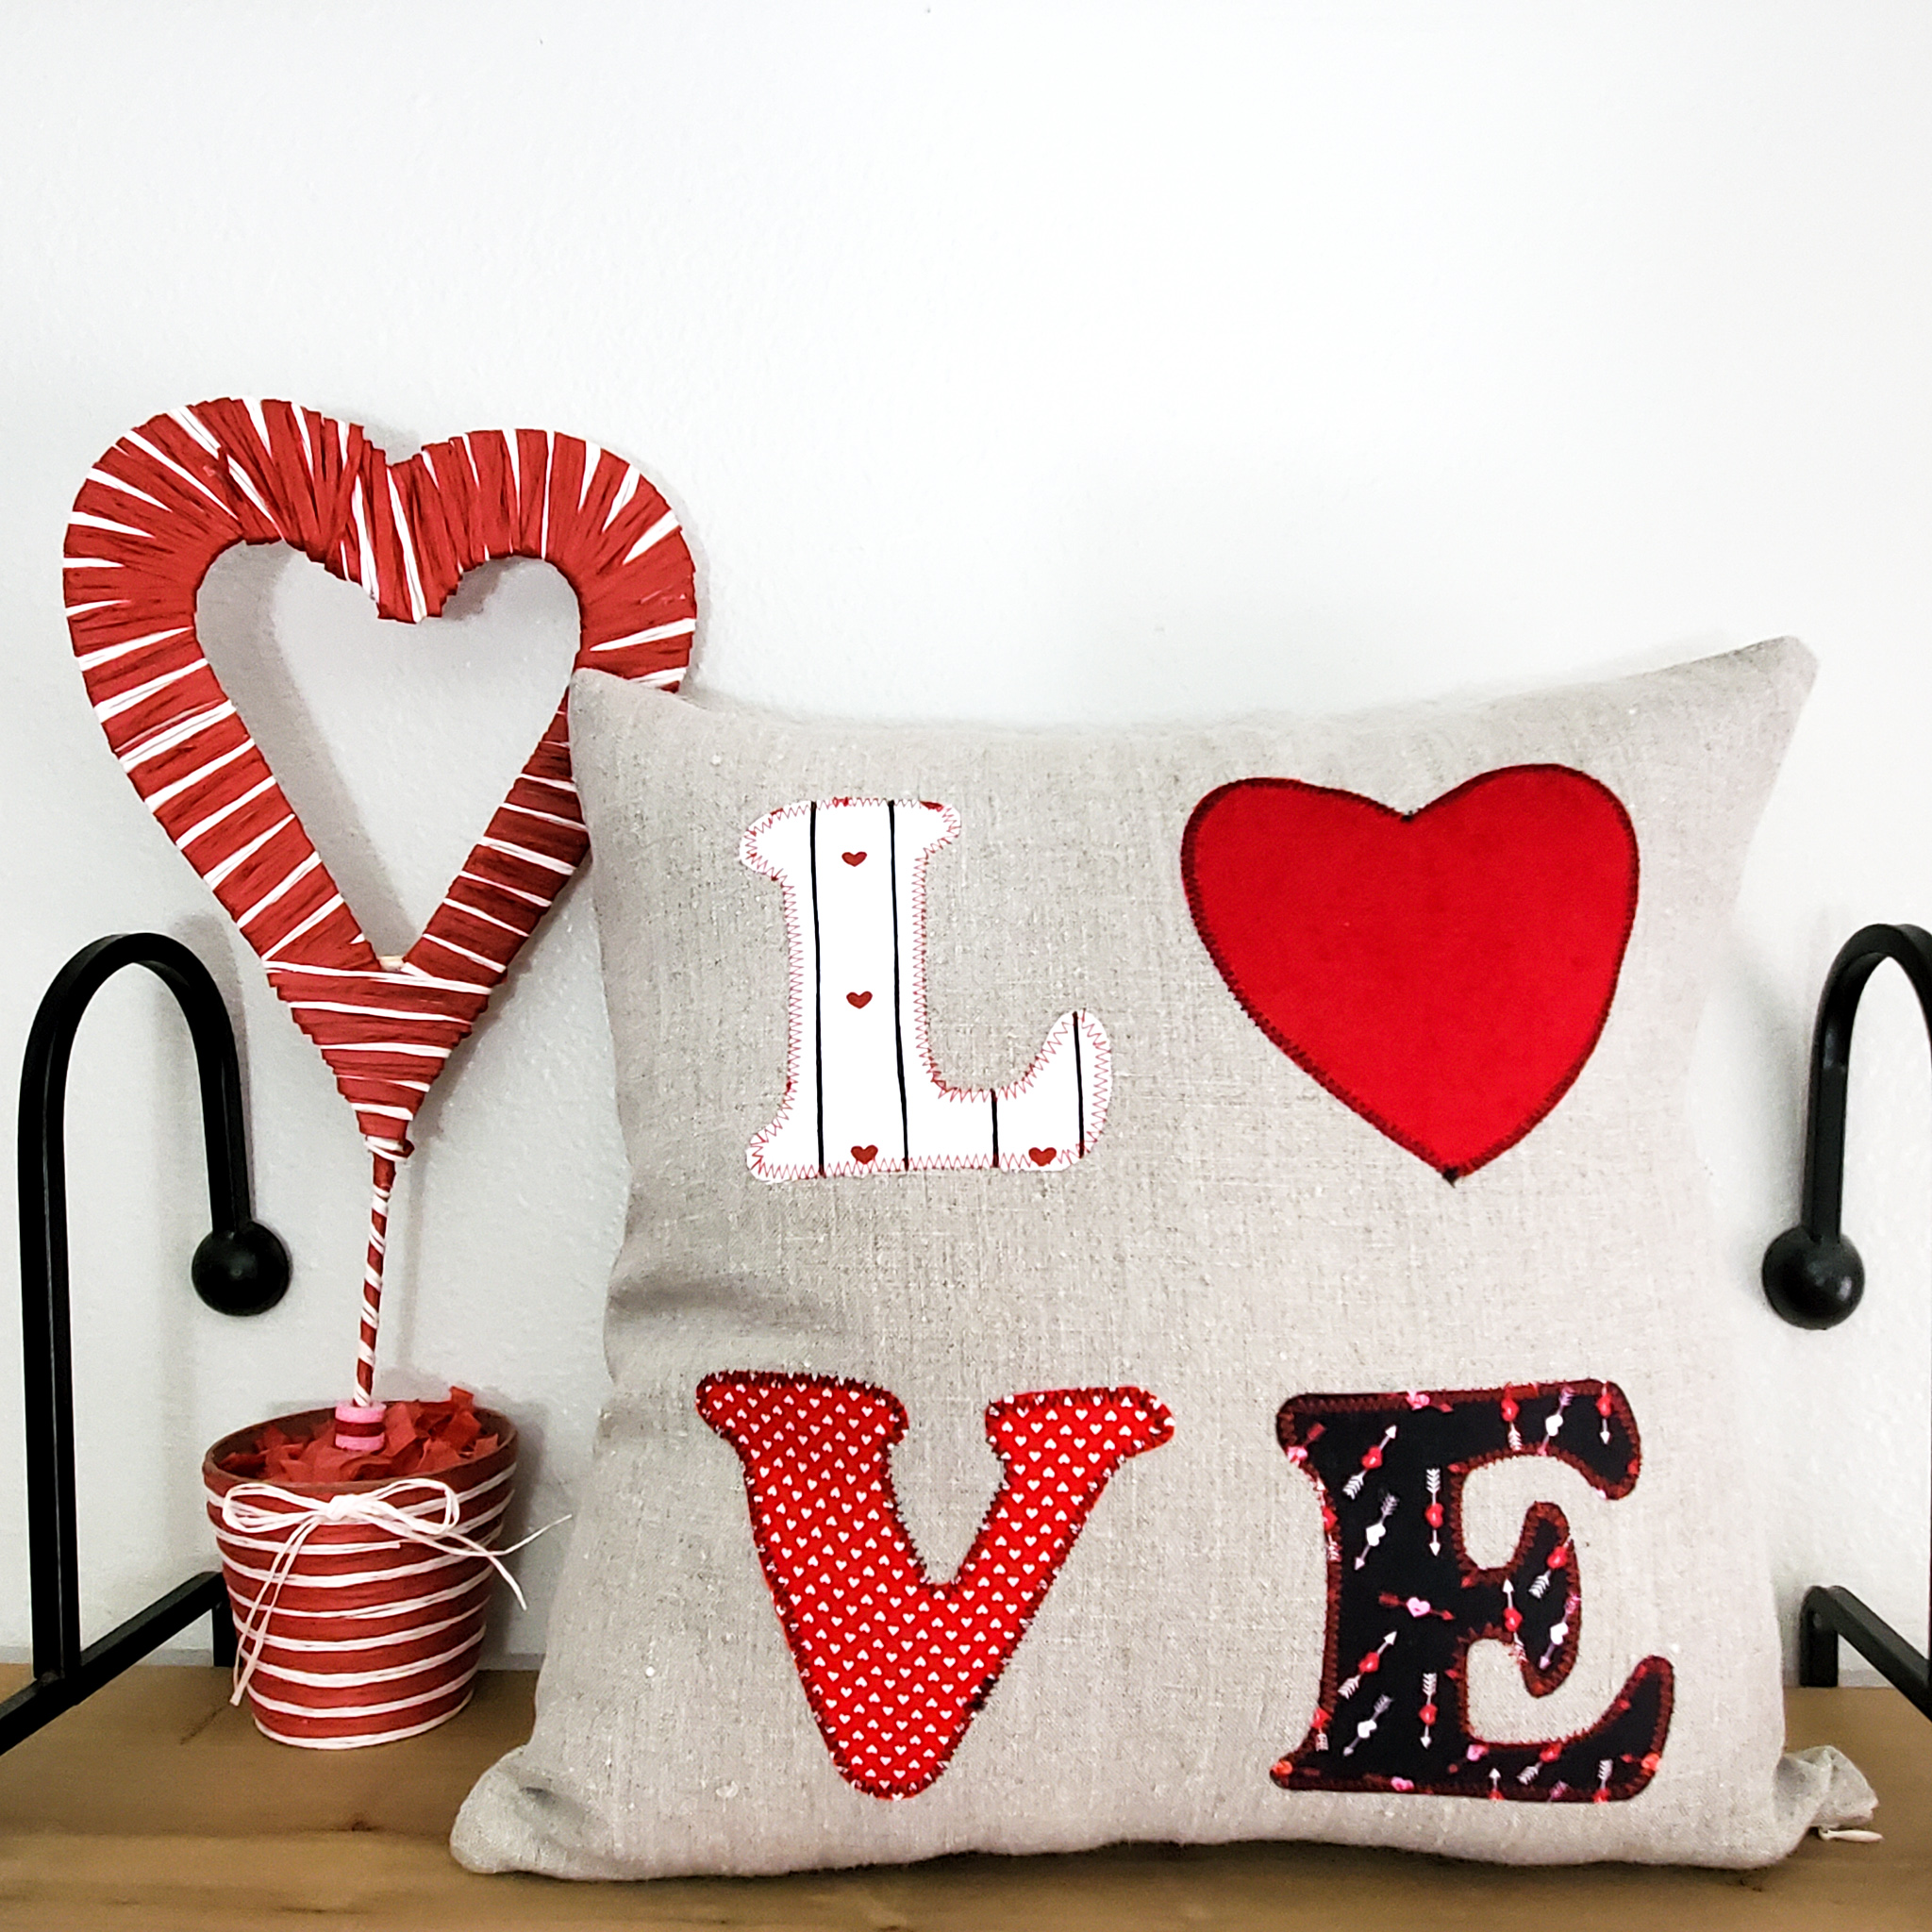
How cute is this pillow cover that we made? We did the letters with applique and I’ll be sharing a tutorial with you soon about how to do applique on fabric! It was actually really easy and you can do anything, not just Valentine’s Day letters.
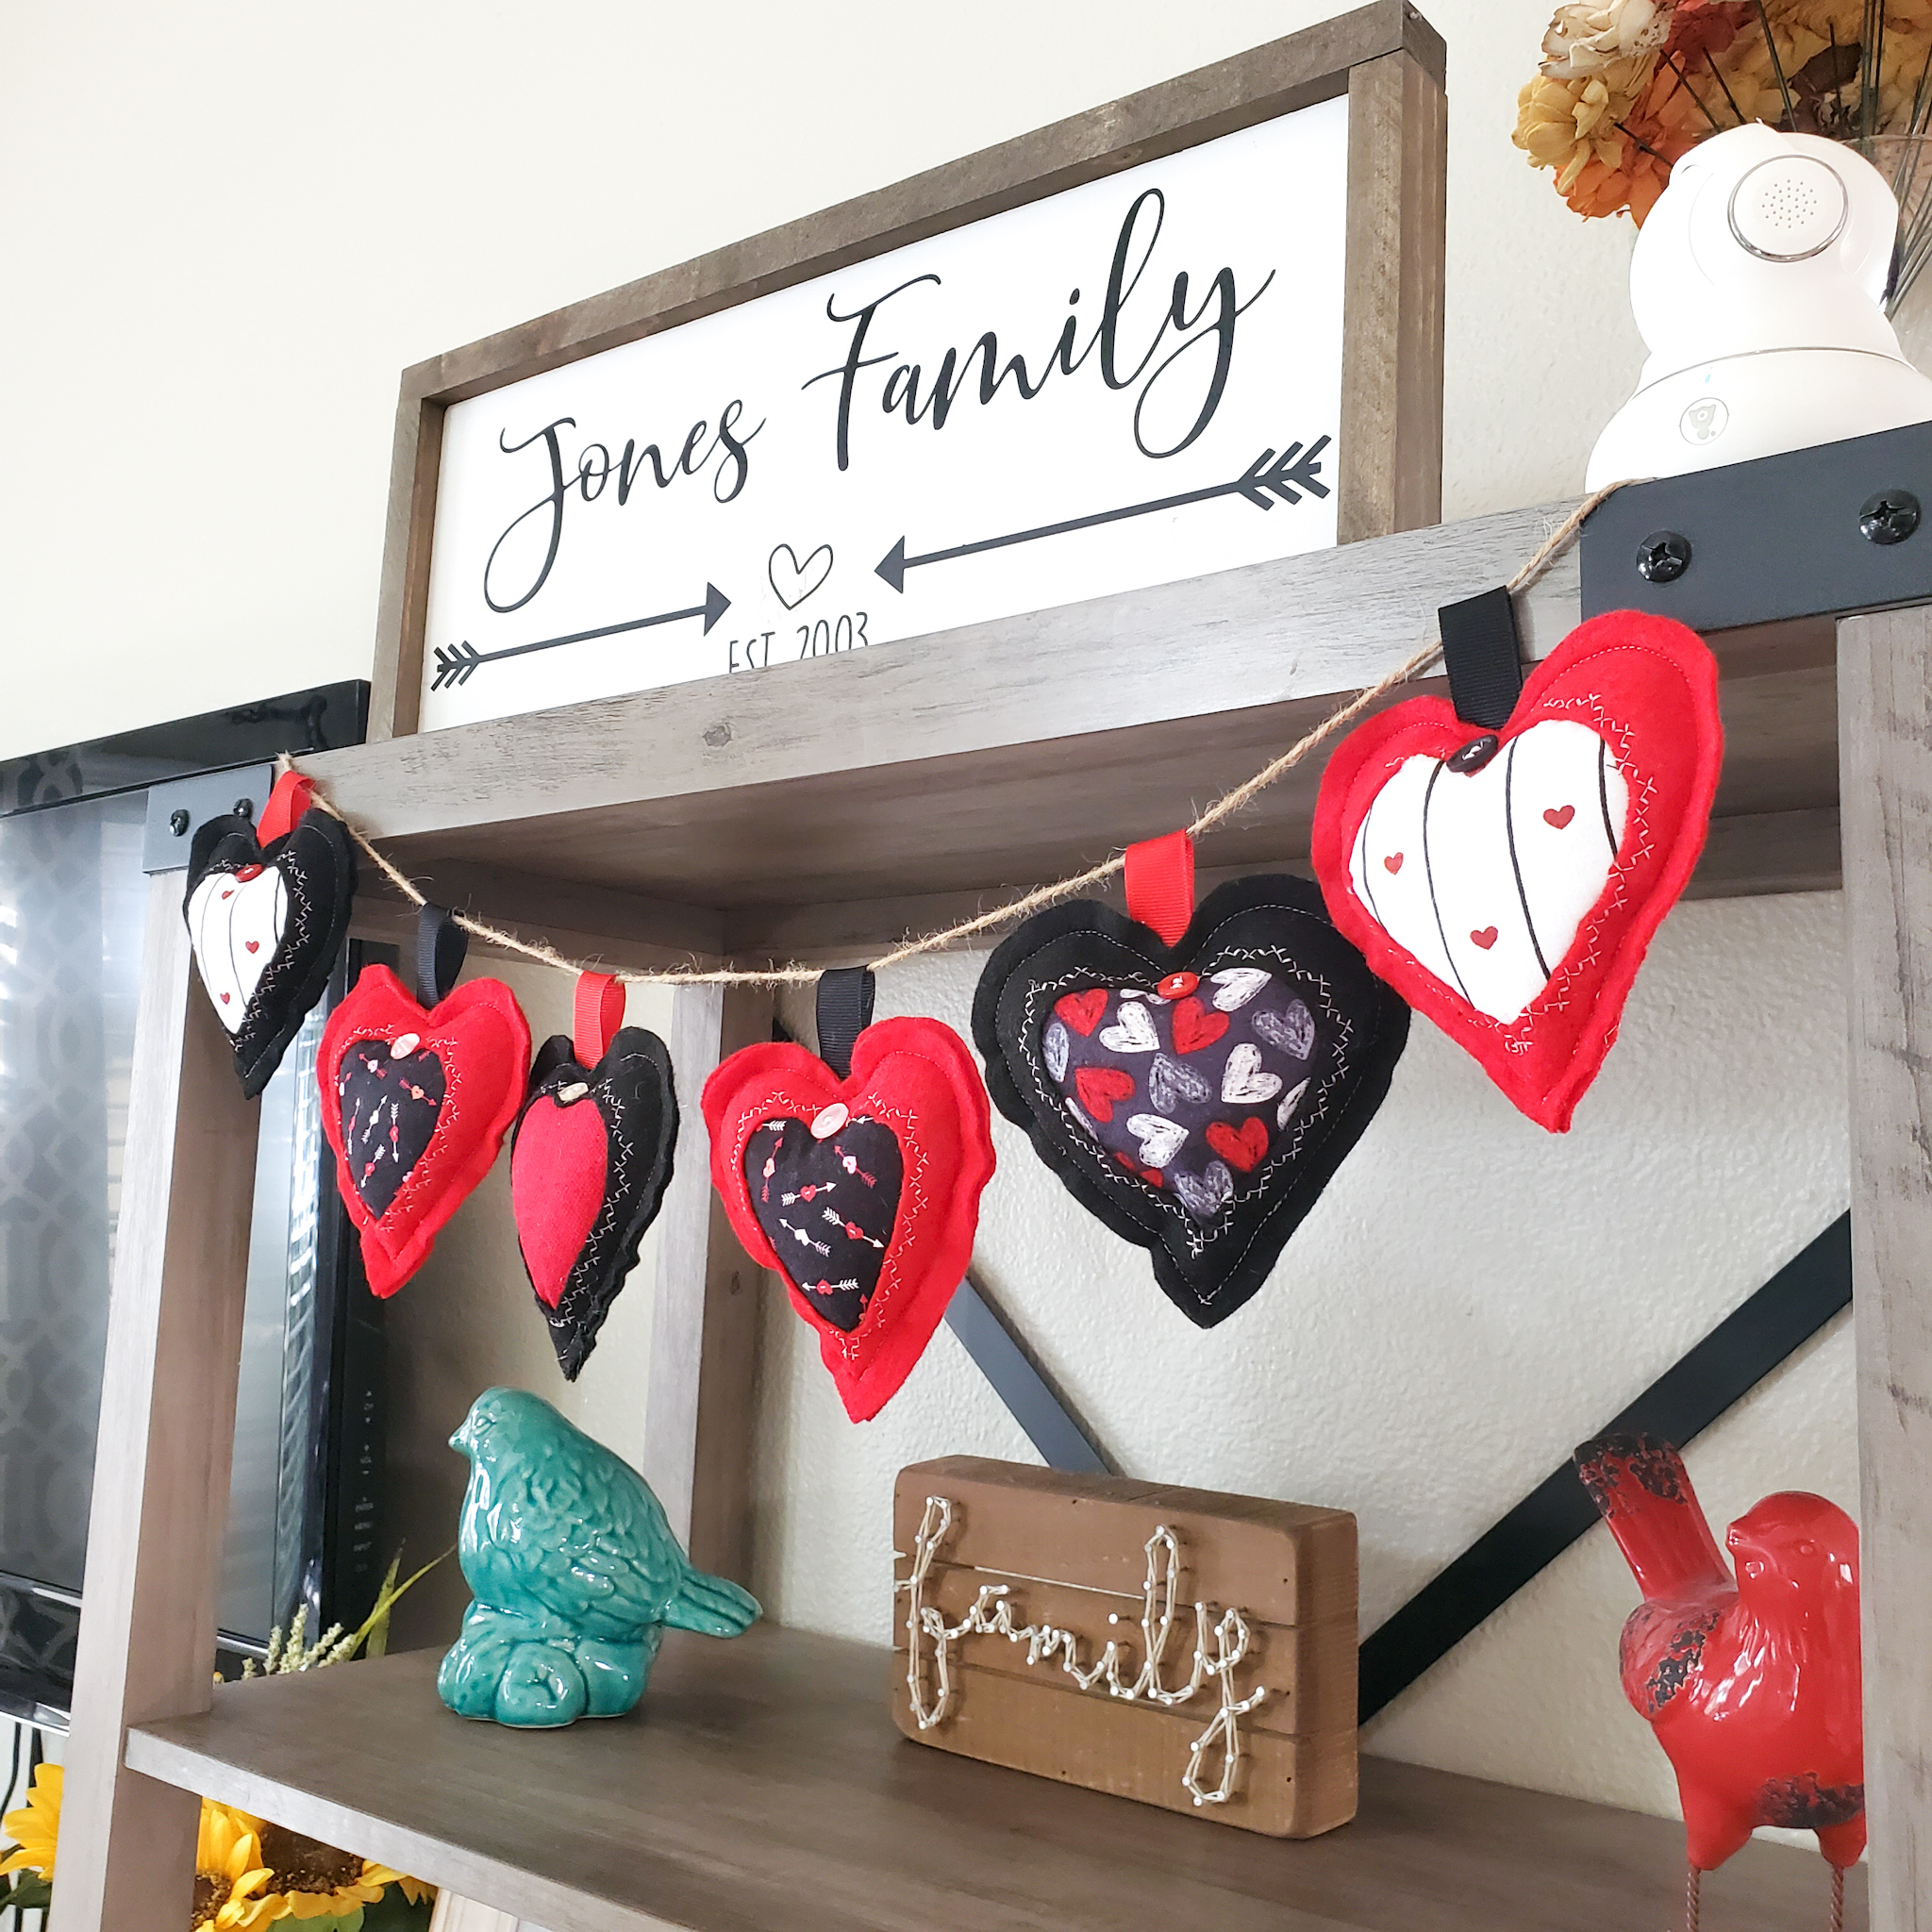
So now, back to the banner. To be honest, I wish I’d thrown some more pink in there. I think it looks a little dark with so much black, but I thought I already had pink felt in my sYtash, so I didn’t pick any up when I was shopping for my other fabrics, and you know how it goes…I just wanted to get my sample made up and my tutorial done before Valentine’s Day had come and gone. I think I will eventually go back and add some more hearts to the banner using pinks, just to brighten it up a bit. And the fun thing is that you can really make it as long or as short as you want. Right now it fits perfectly in the space on my shelf, but if I make some more hearts, I can easily hang it in a longer space, or make a second one for the shelf on the other side of the TV!
This project is great to use up scraps! You don’t necessarily have to have heart/Valentine’s Day fabric, either. You can use whatever colors and fabrics you want. Be creative and have fun with it!
Without any further ado, here is the tutorial for making your very own Valentine’s Day banner!
How To Make A Valentine’s Day Banner
What you will need:
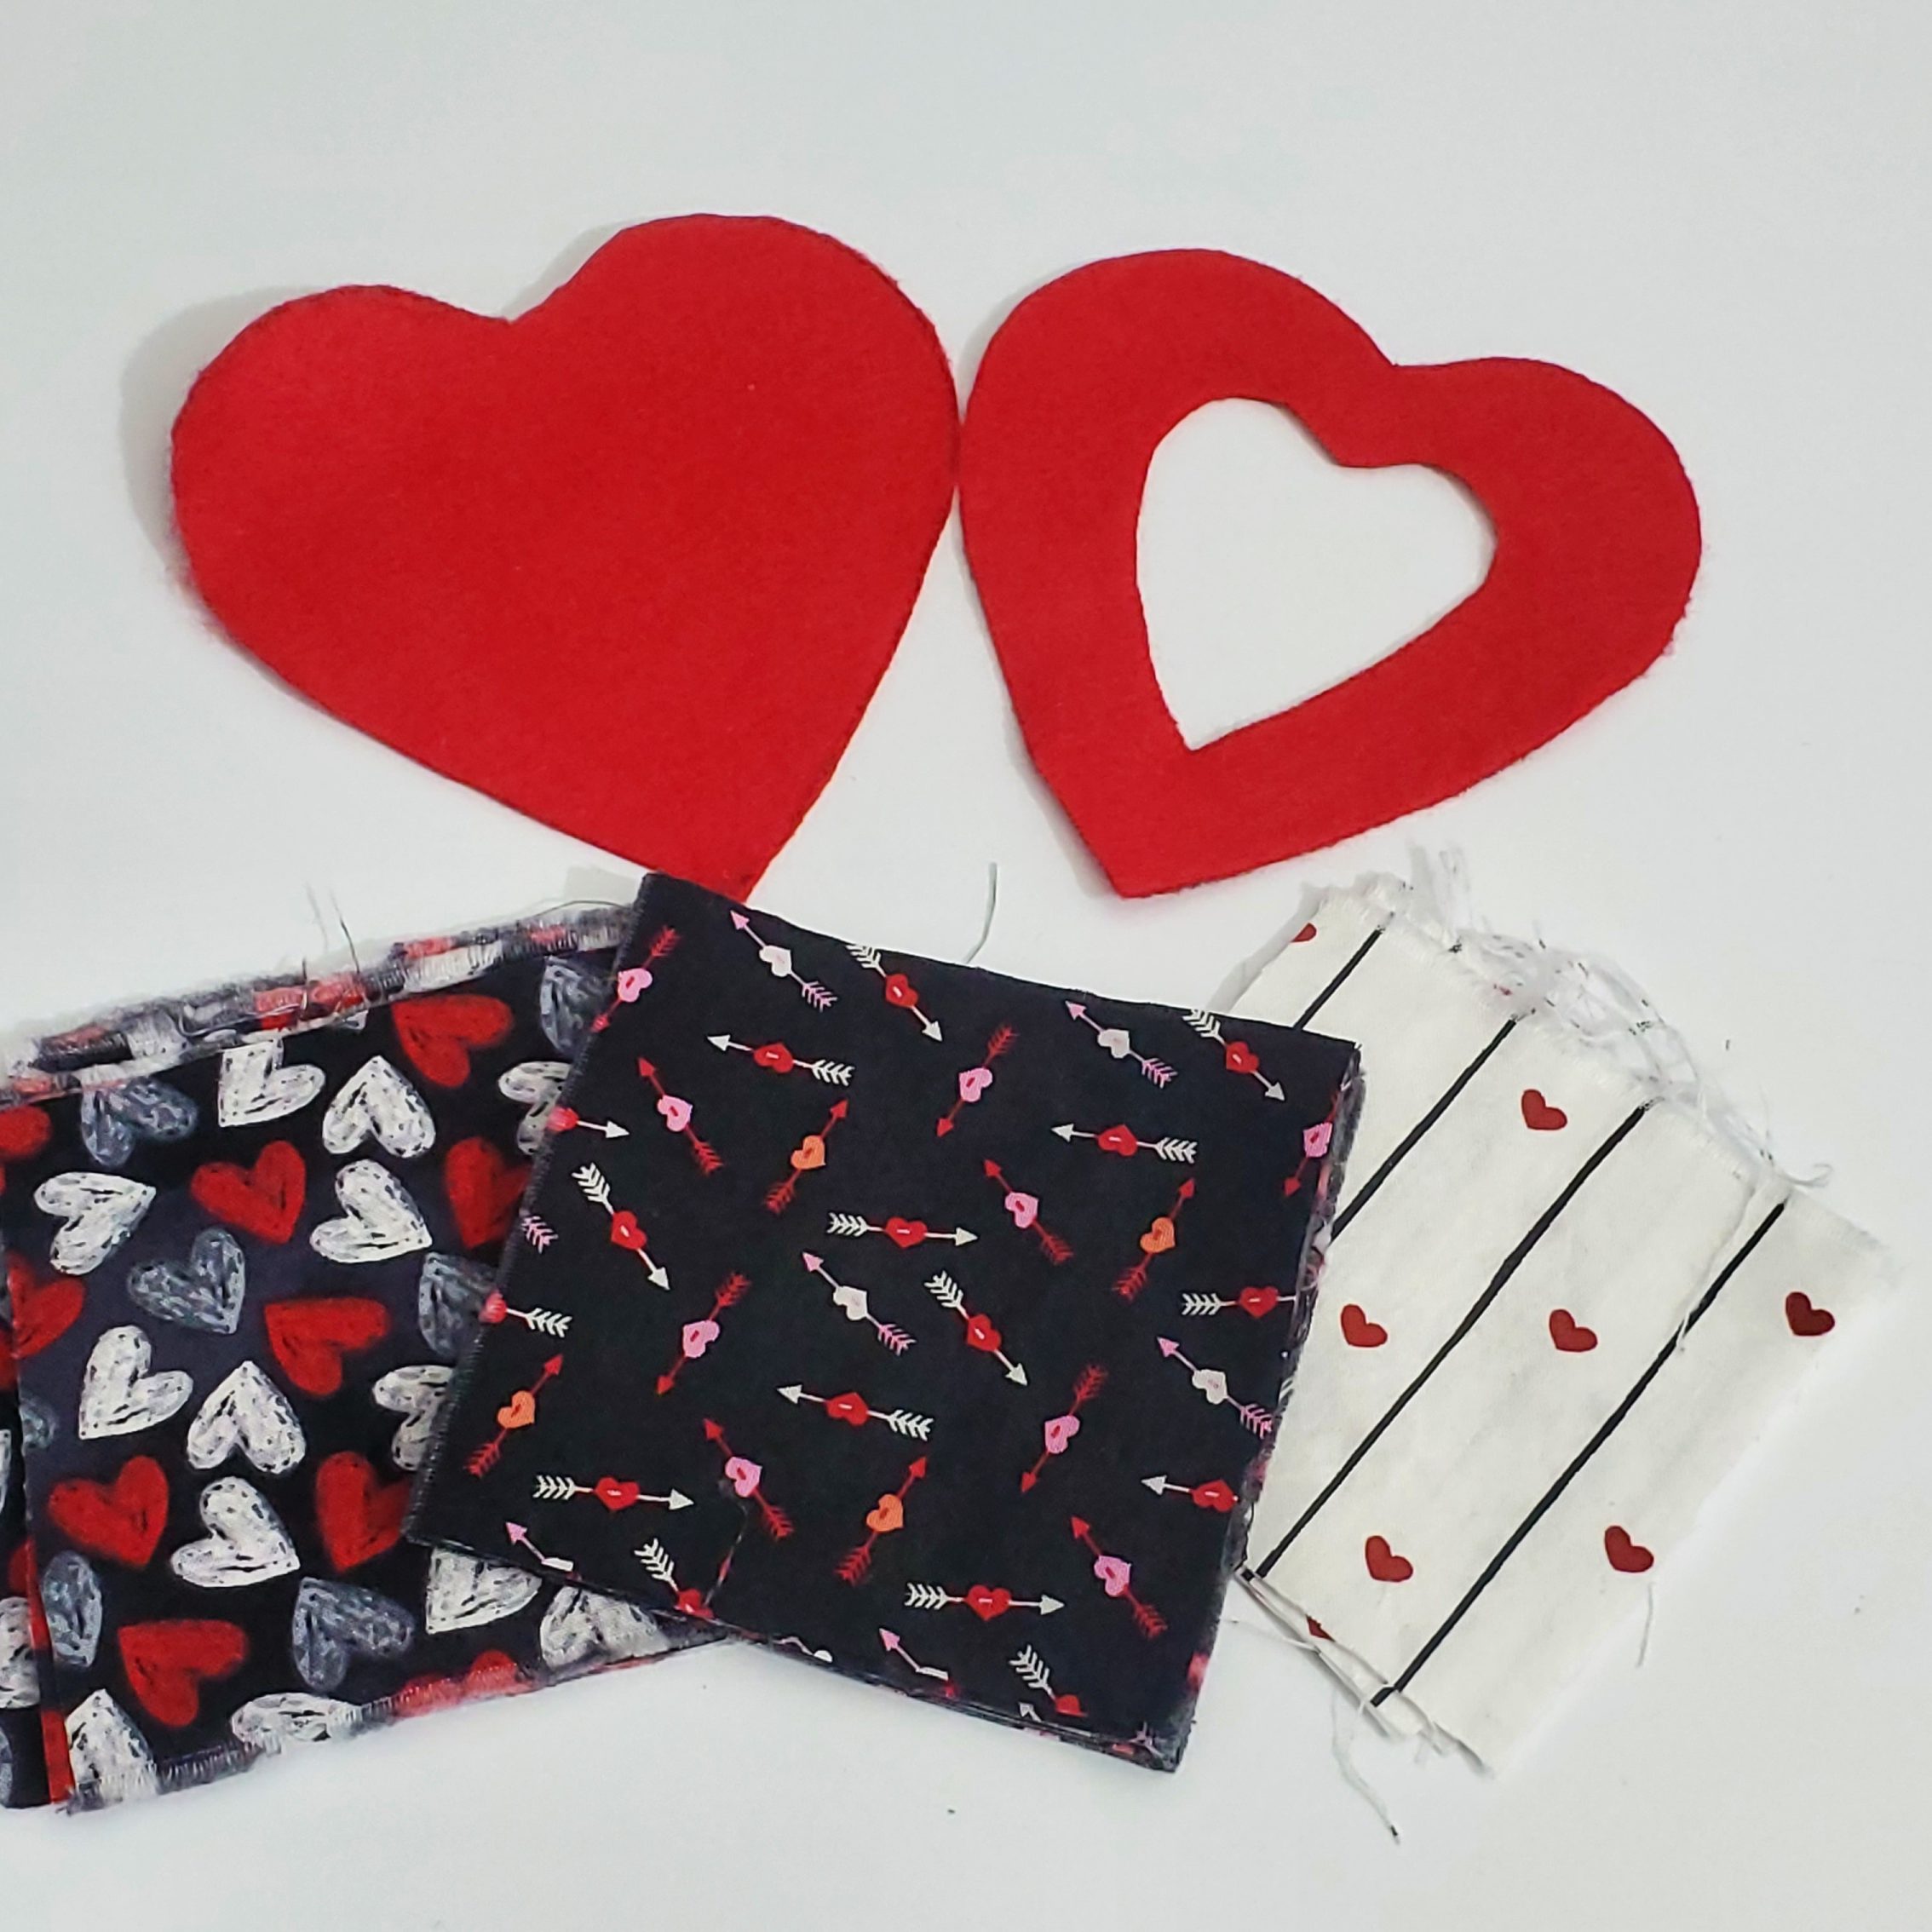
- Felt for the hearts (it doesn’t have to be felt, but keep in mind that a cotton fabric will fray)
- Fabric squares (you can use cotton scraps for this)
- Buttons
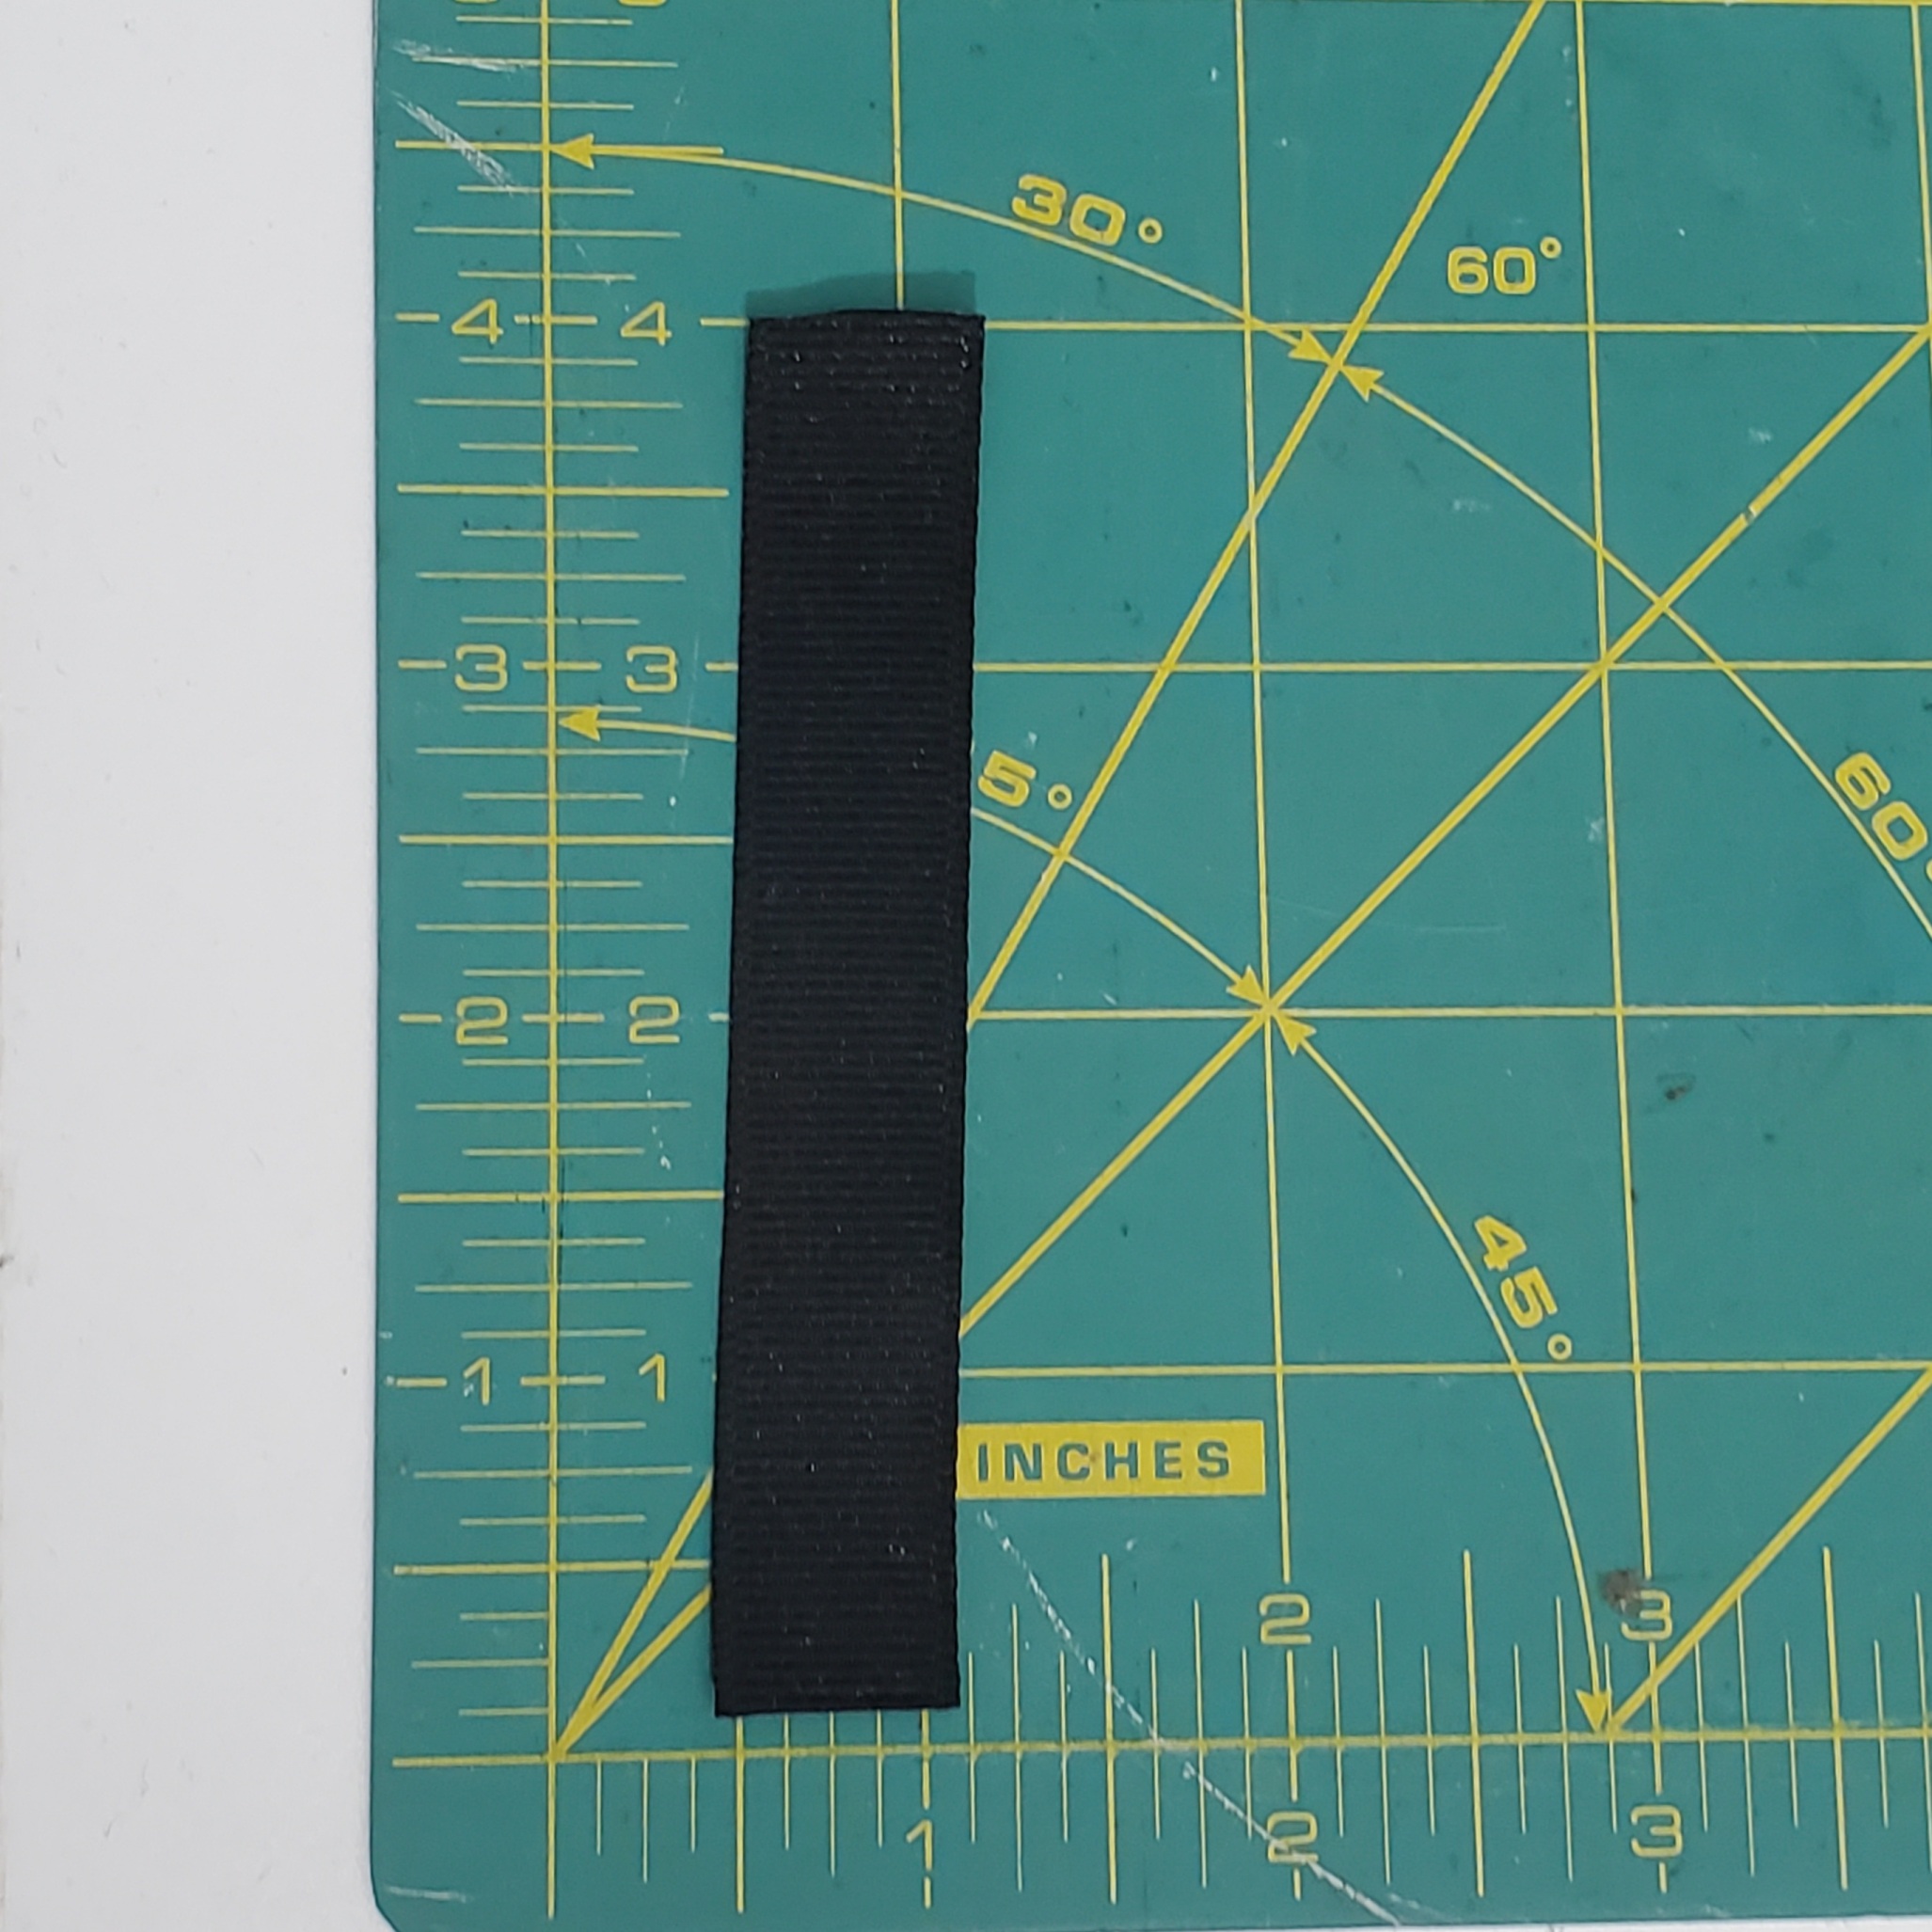
- Ribbon, cut in 4″ pieces
- Fiberfill (if you want it to be stuffed like a little pillow)
- Twine (for hanging)
You can find links for most of these items at the end of this post.
Sewing Time
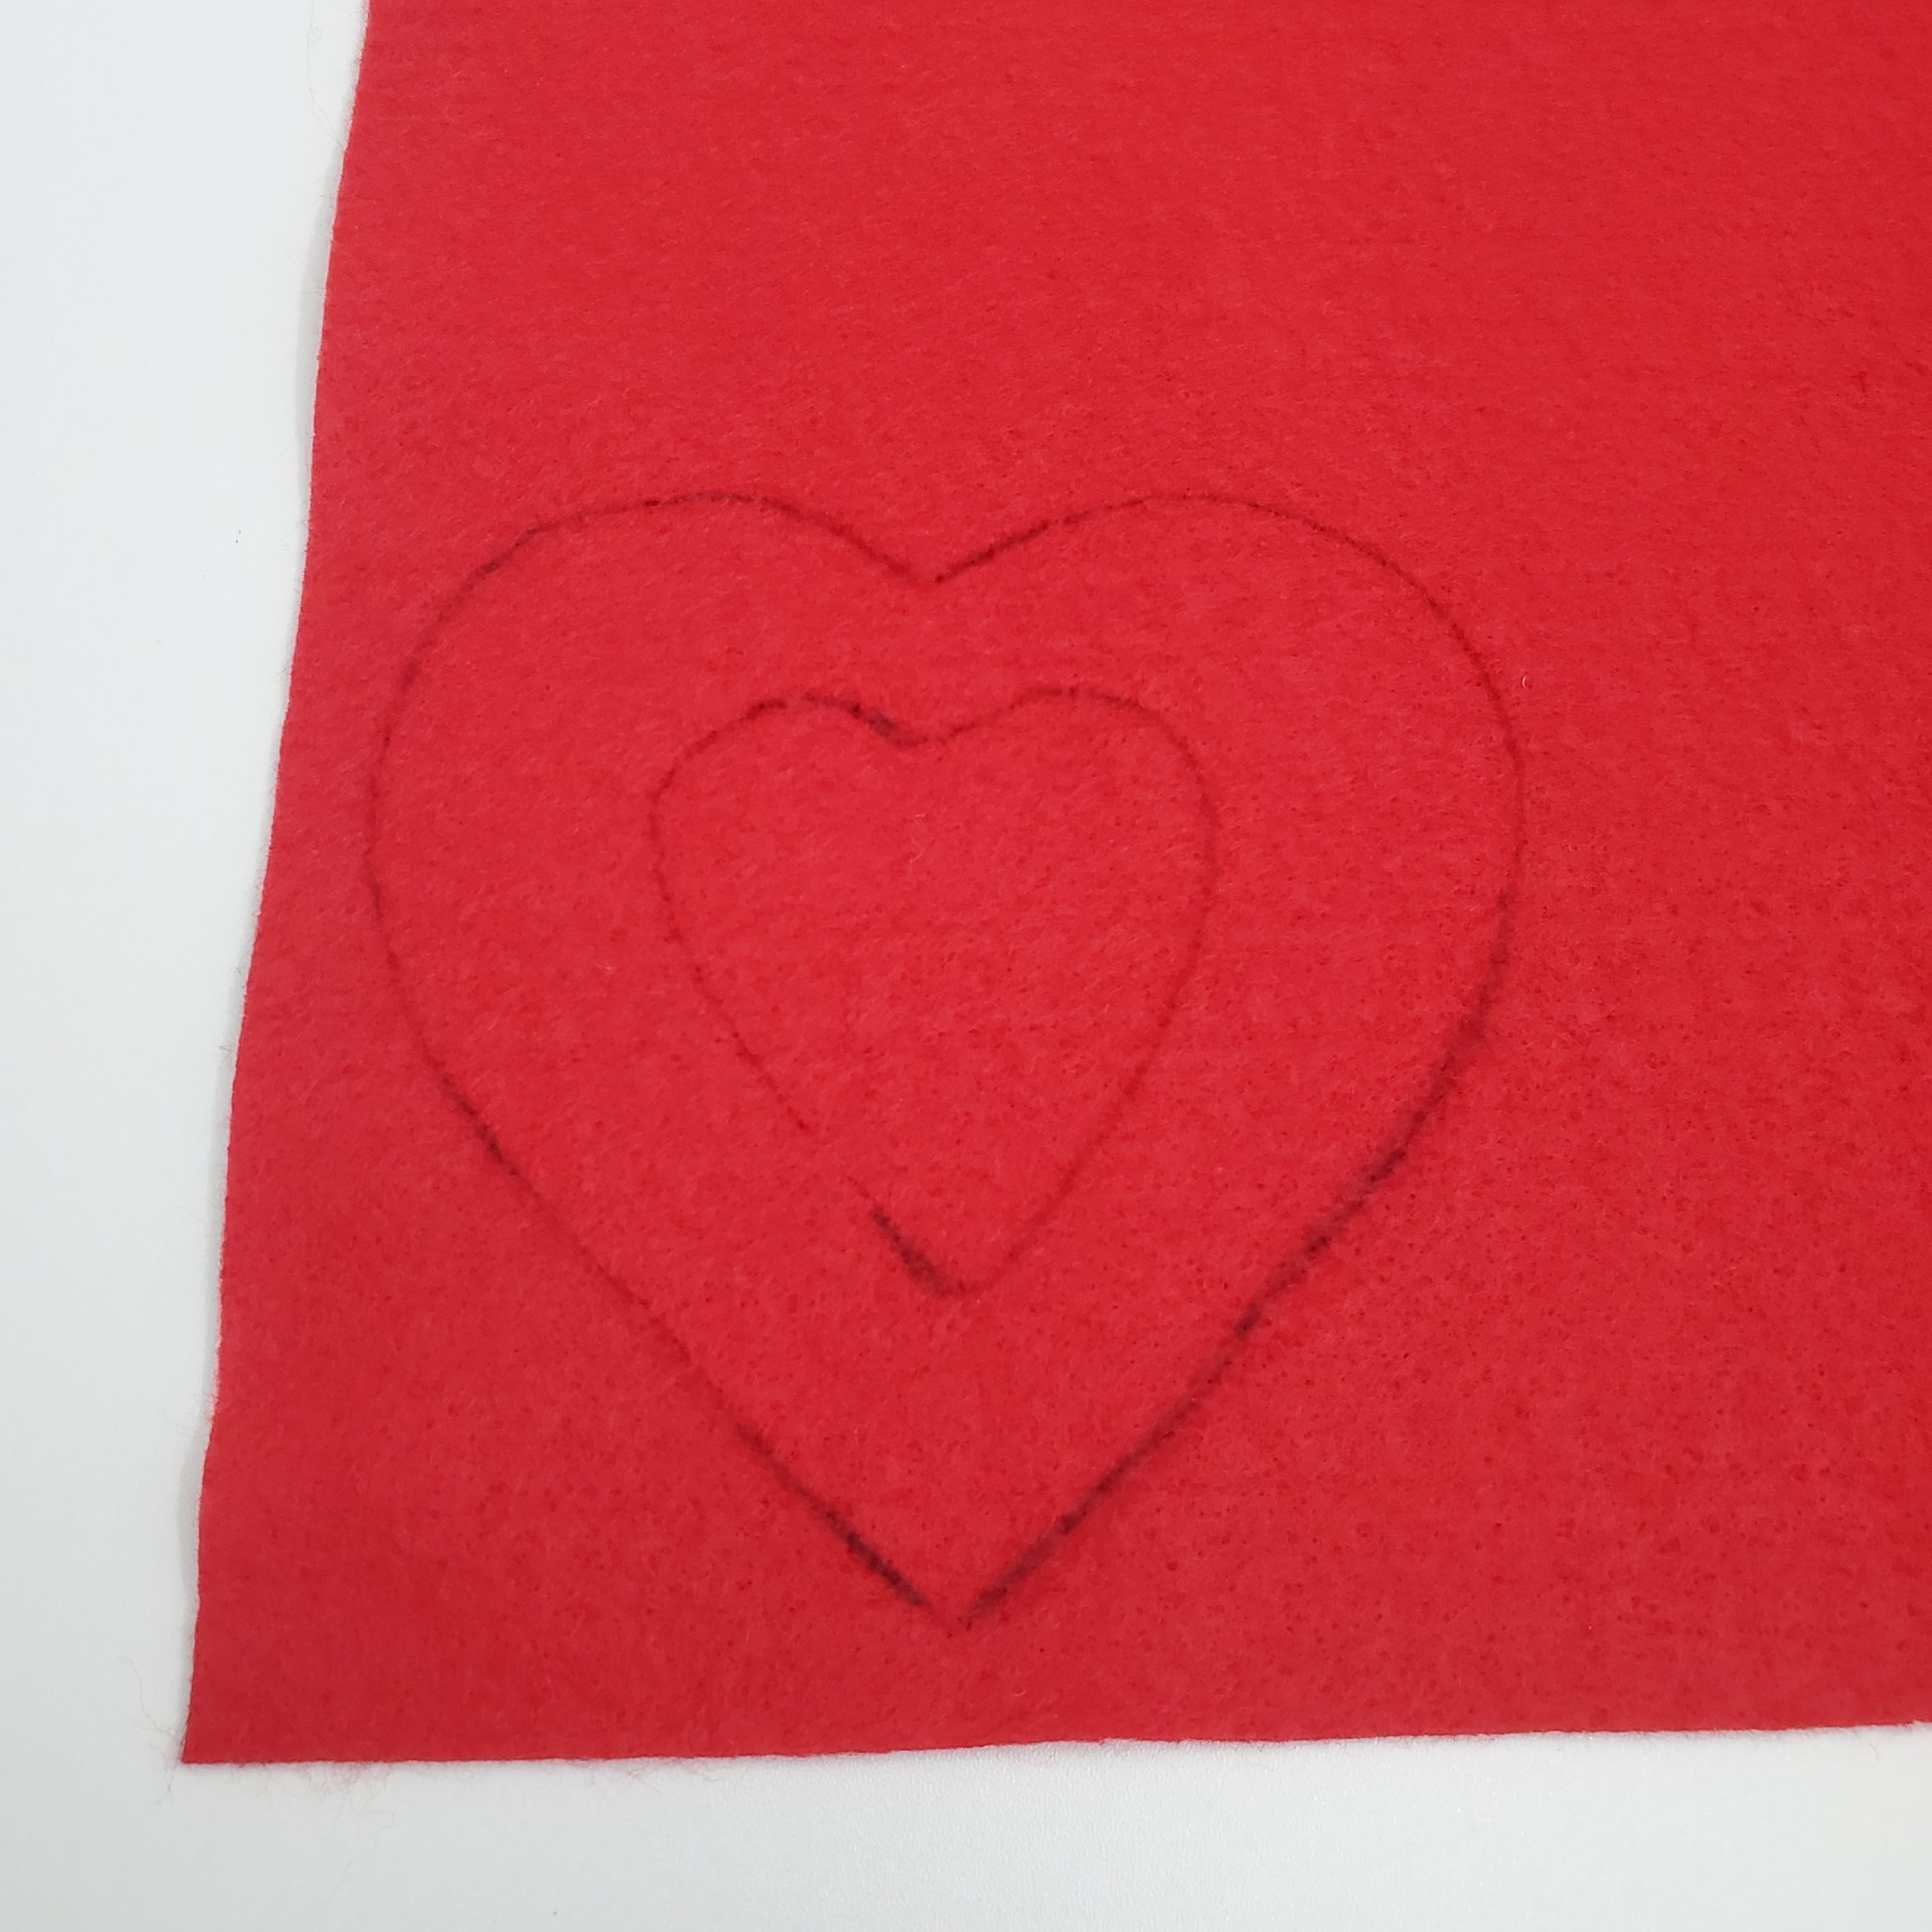
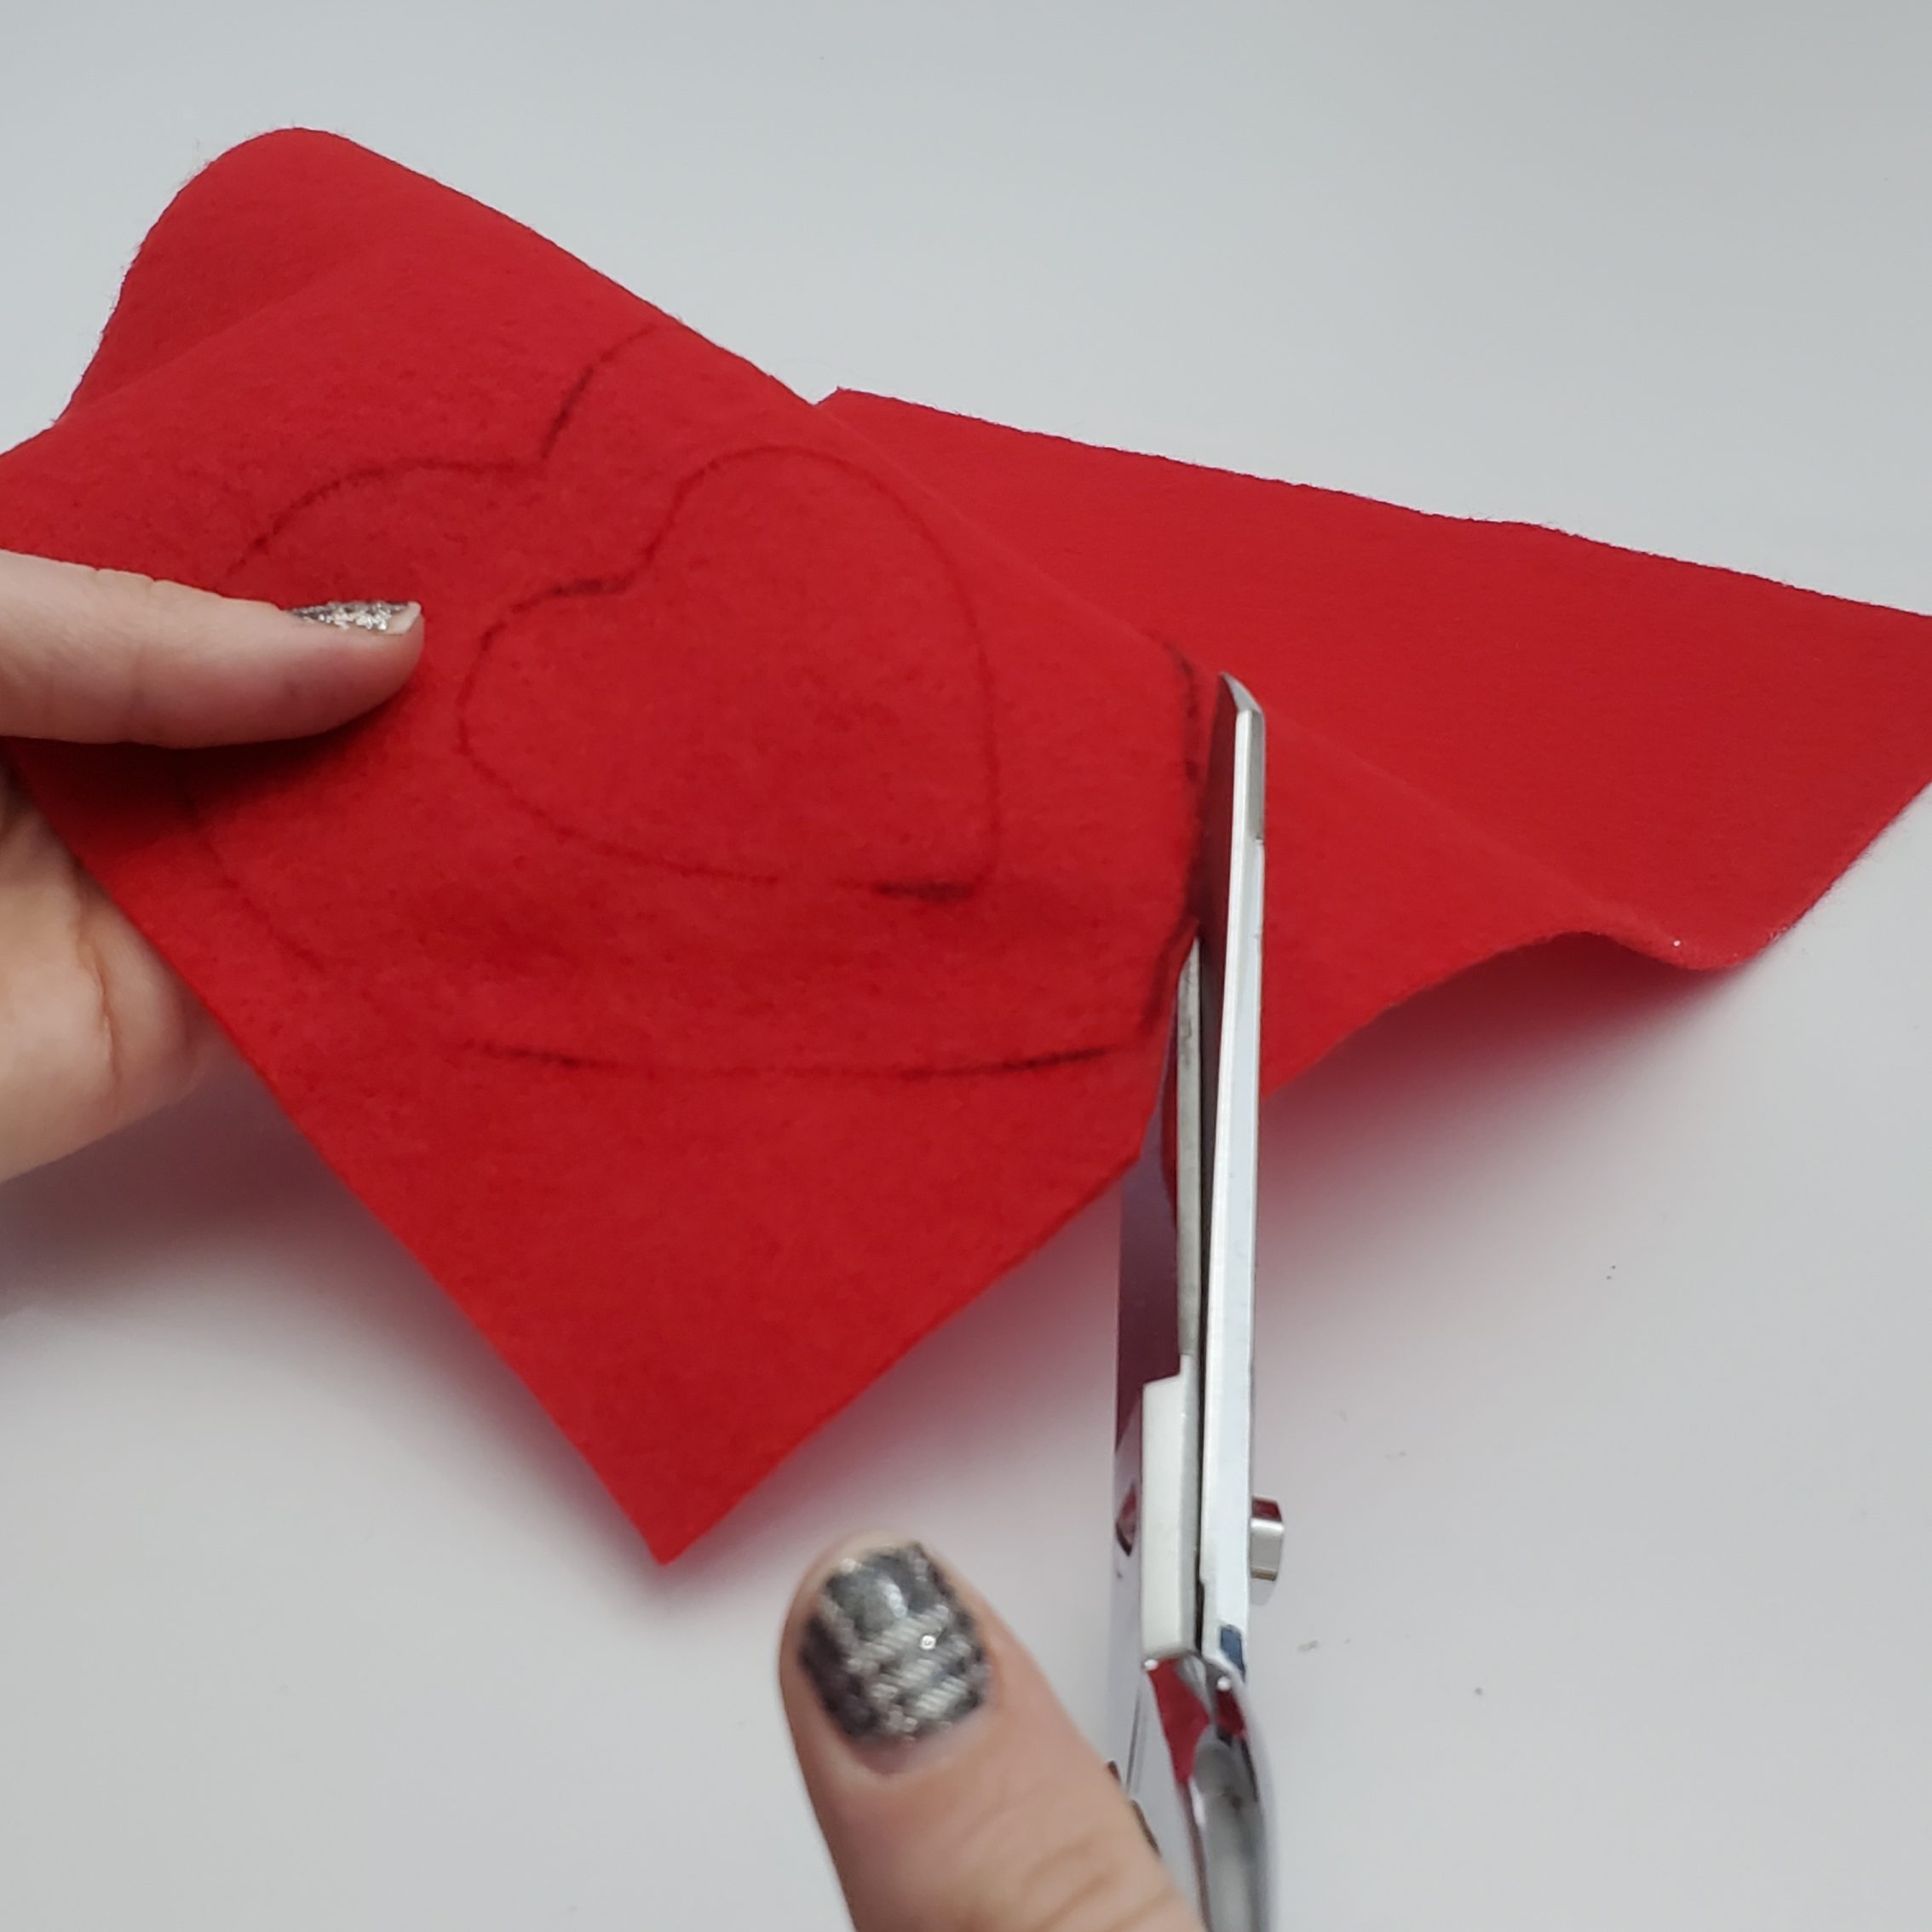
First, you will want to draw hearts onto your felt fabric. You can use any heart stencils you have or even print them off your computer in microsoft word. If you’re really good, you can even freehand them! I used cookie cutters as my stencils!
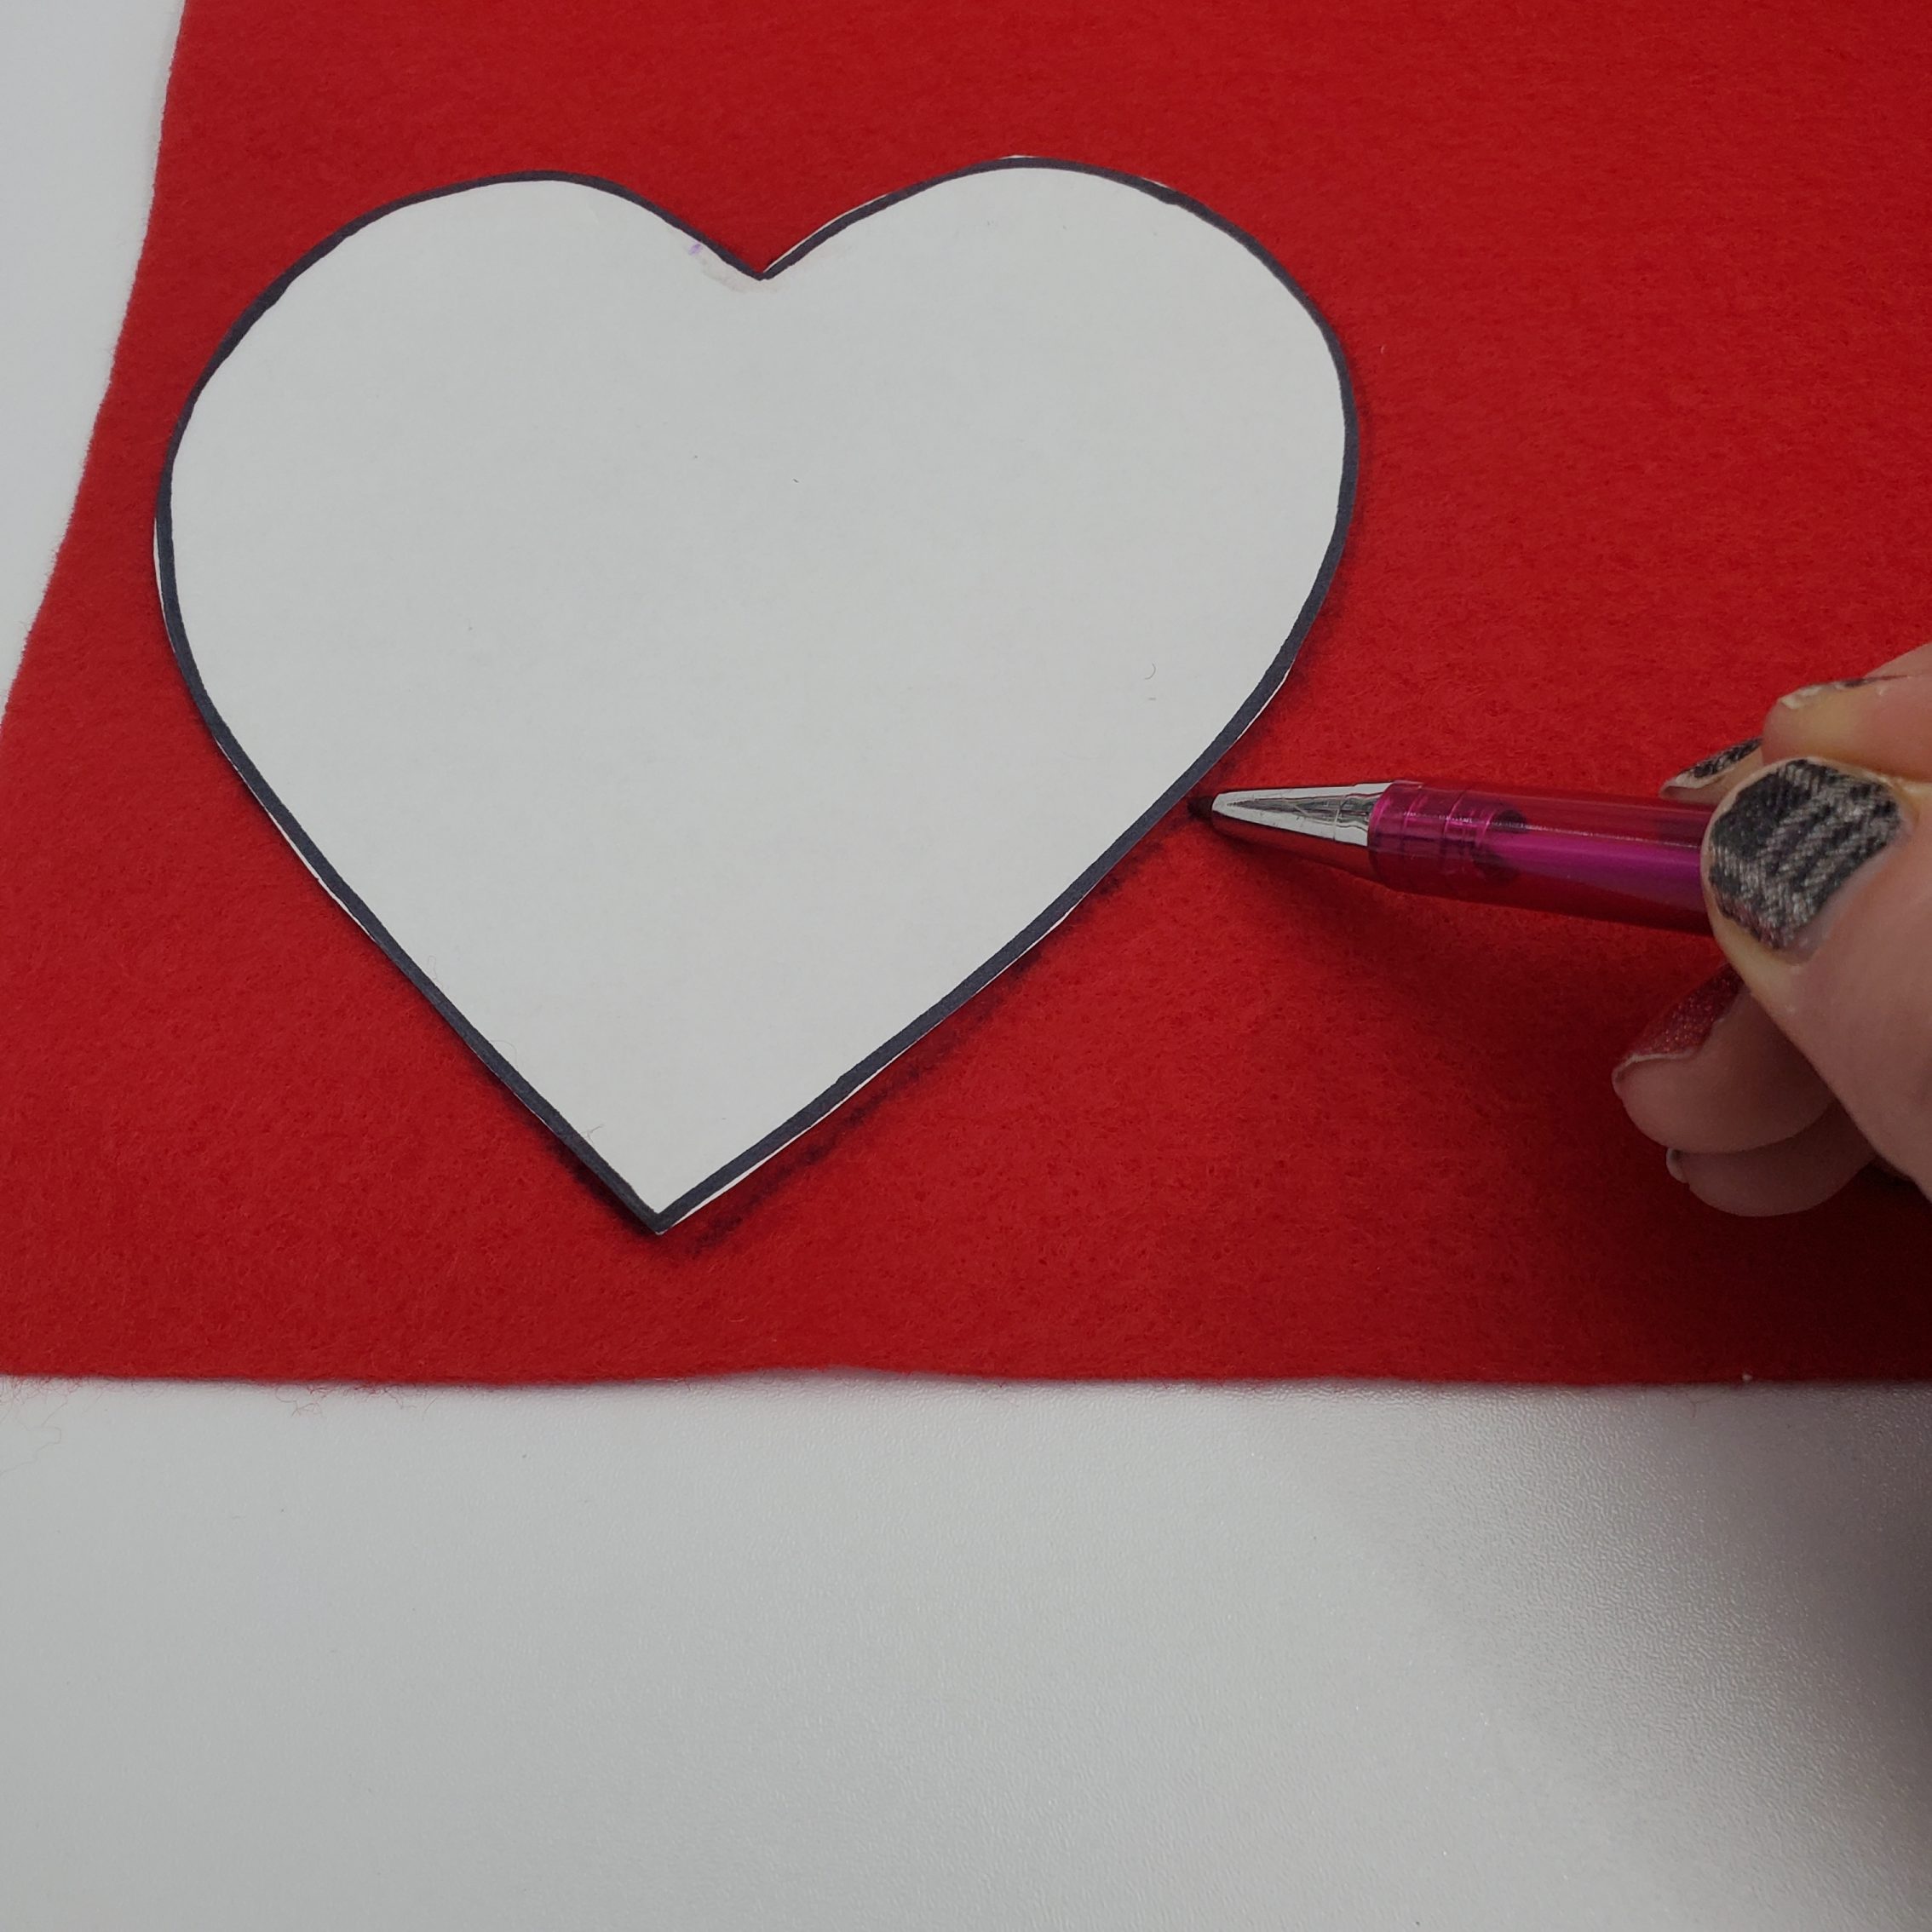
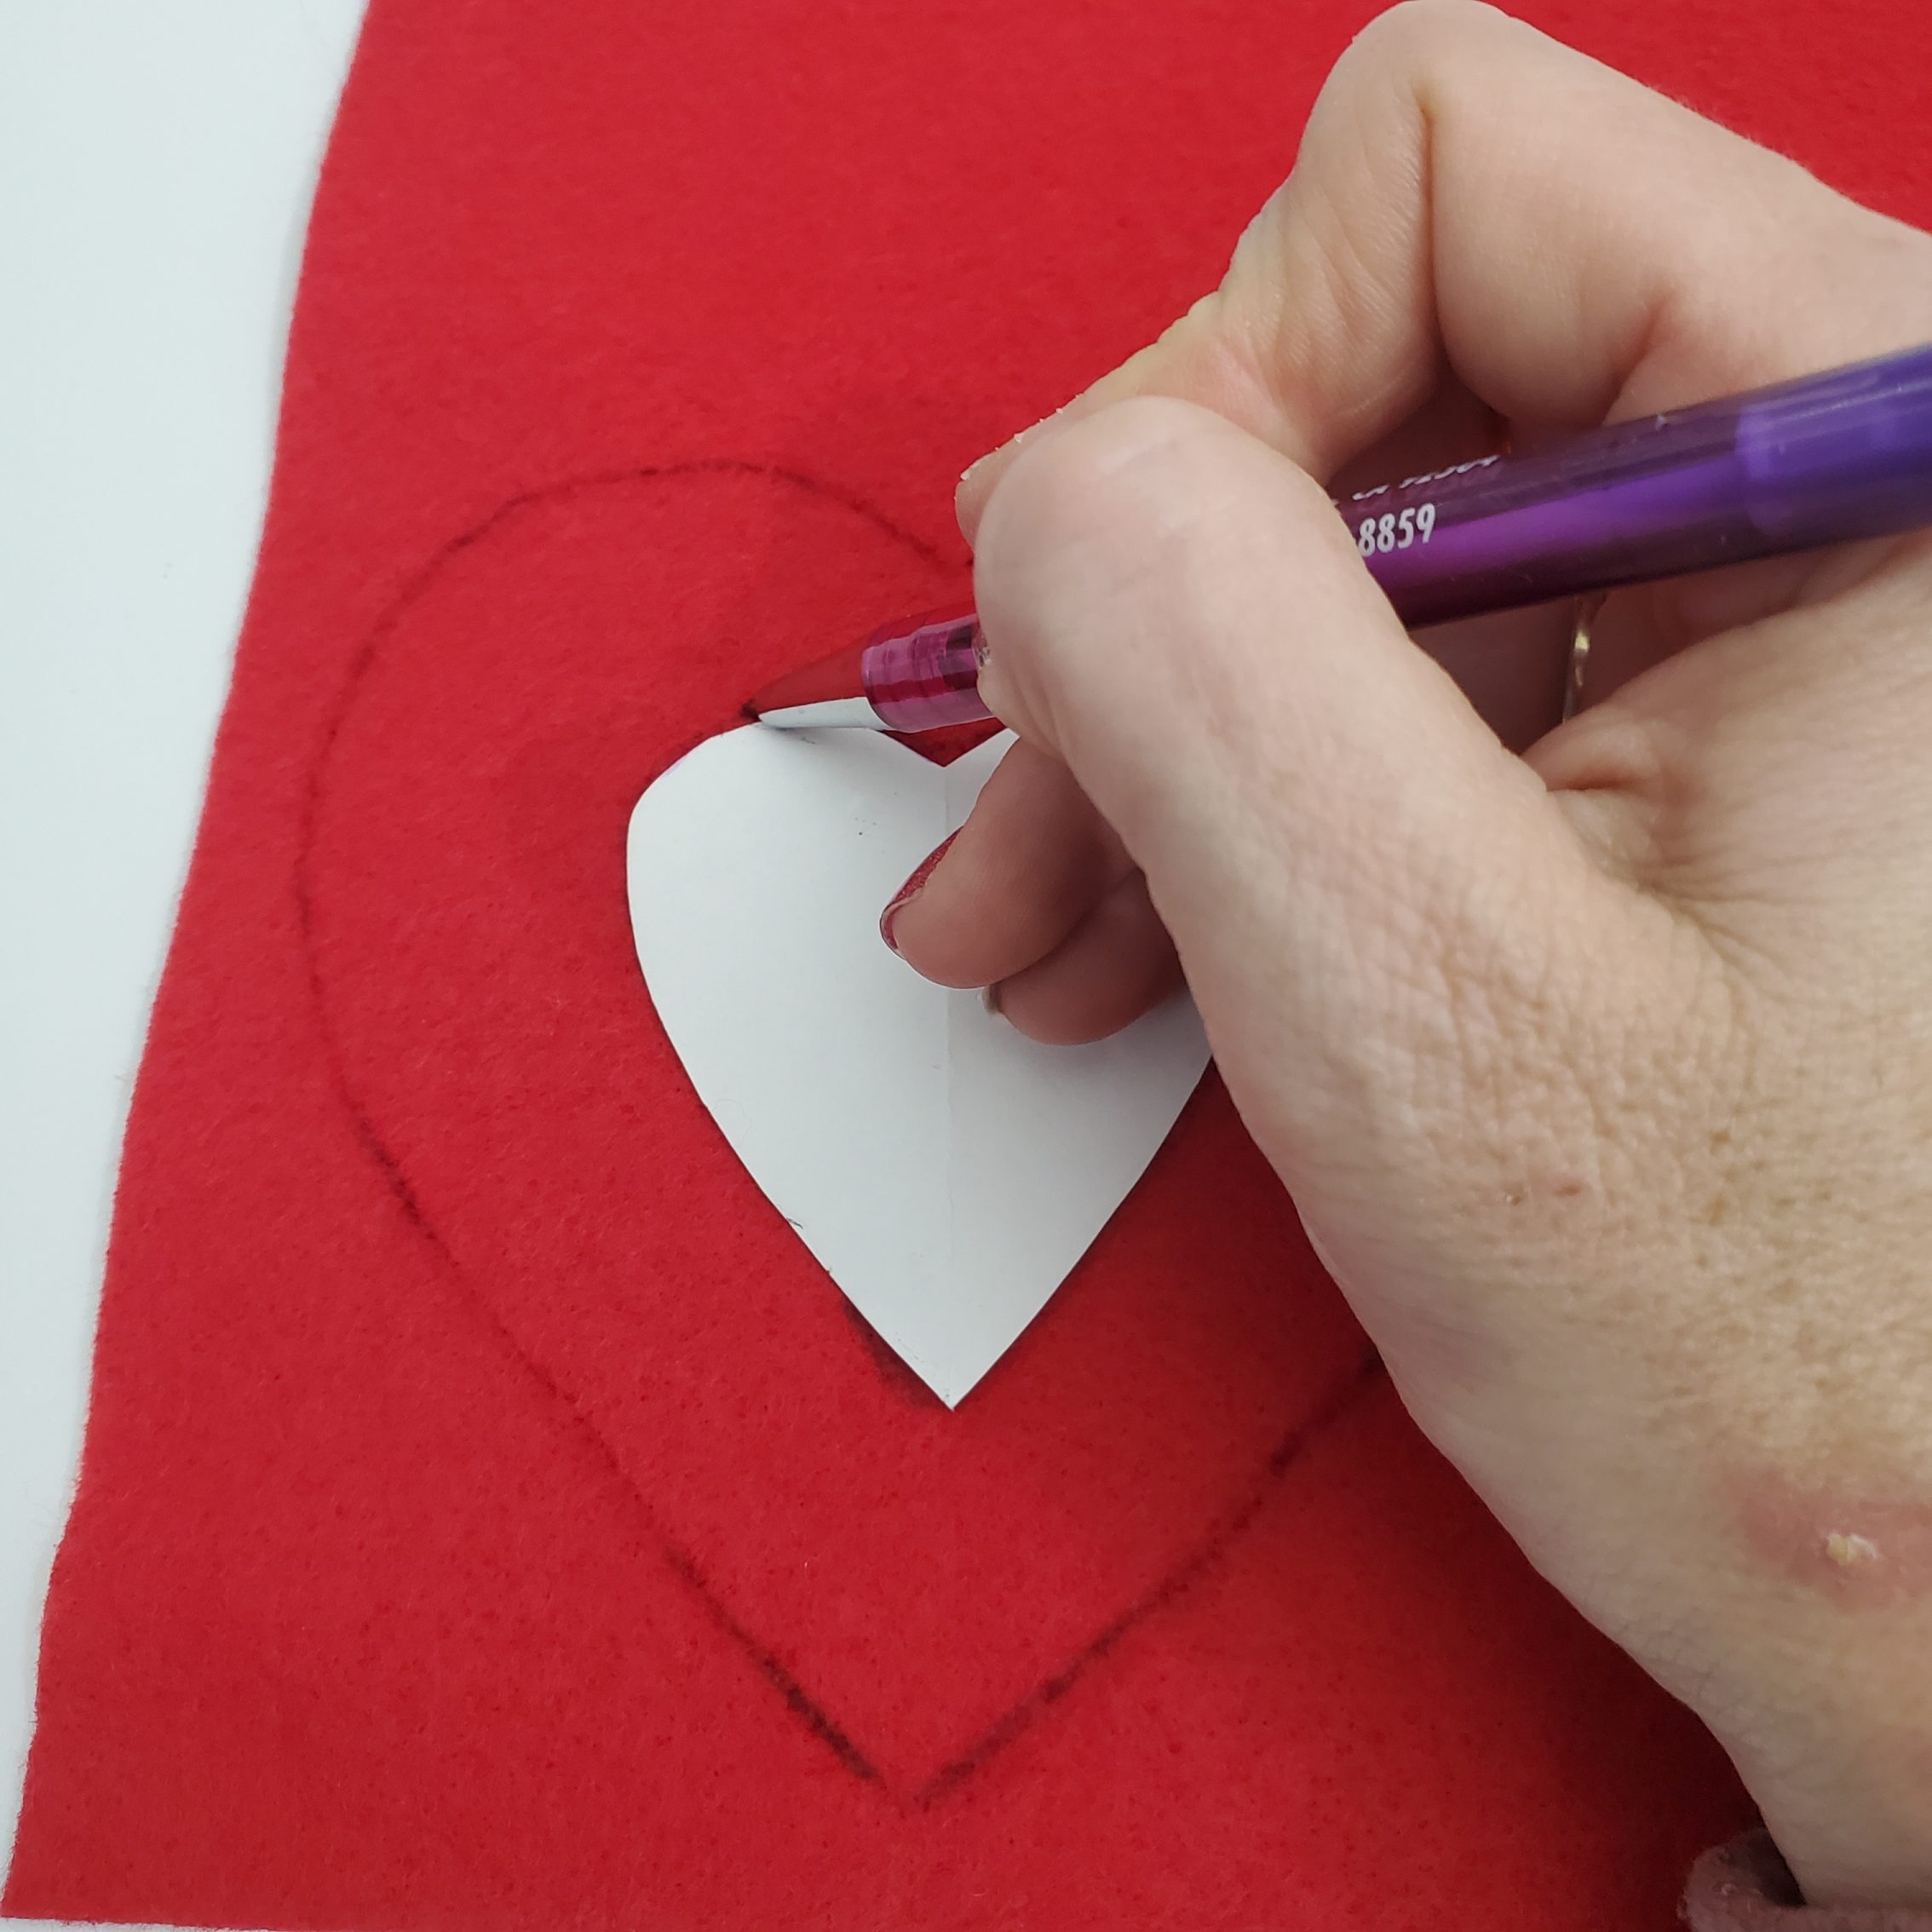
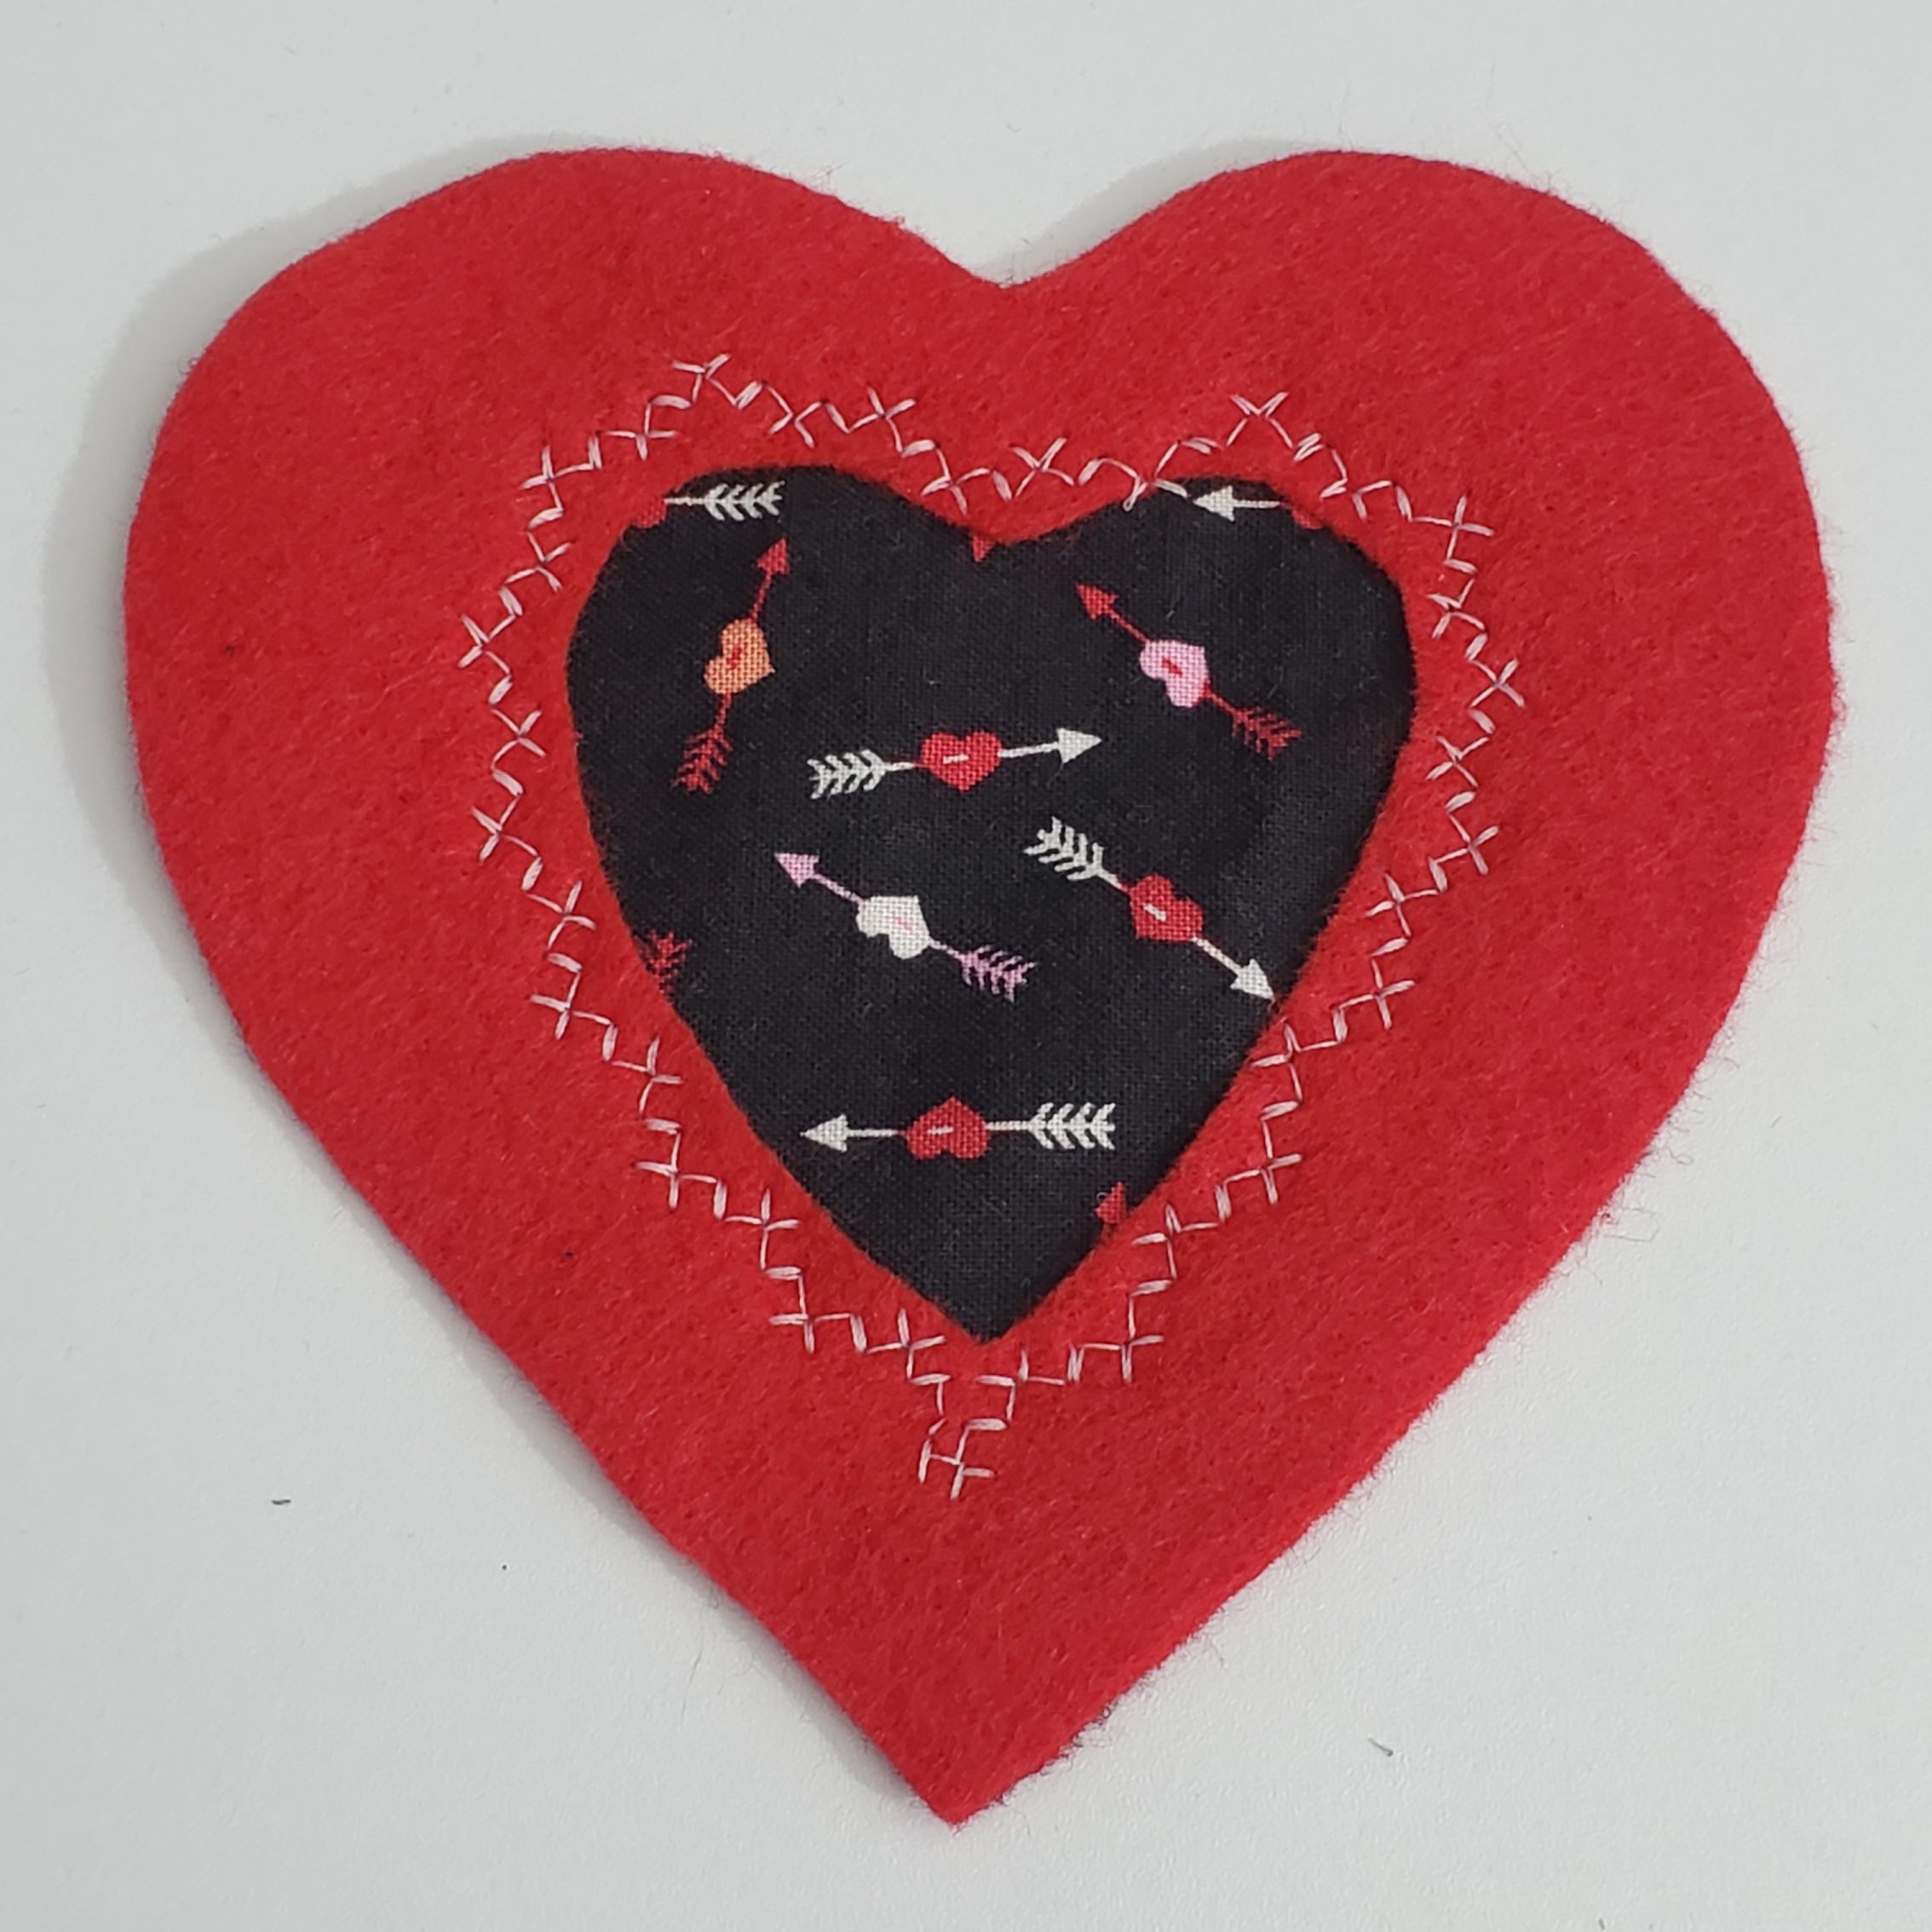
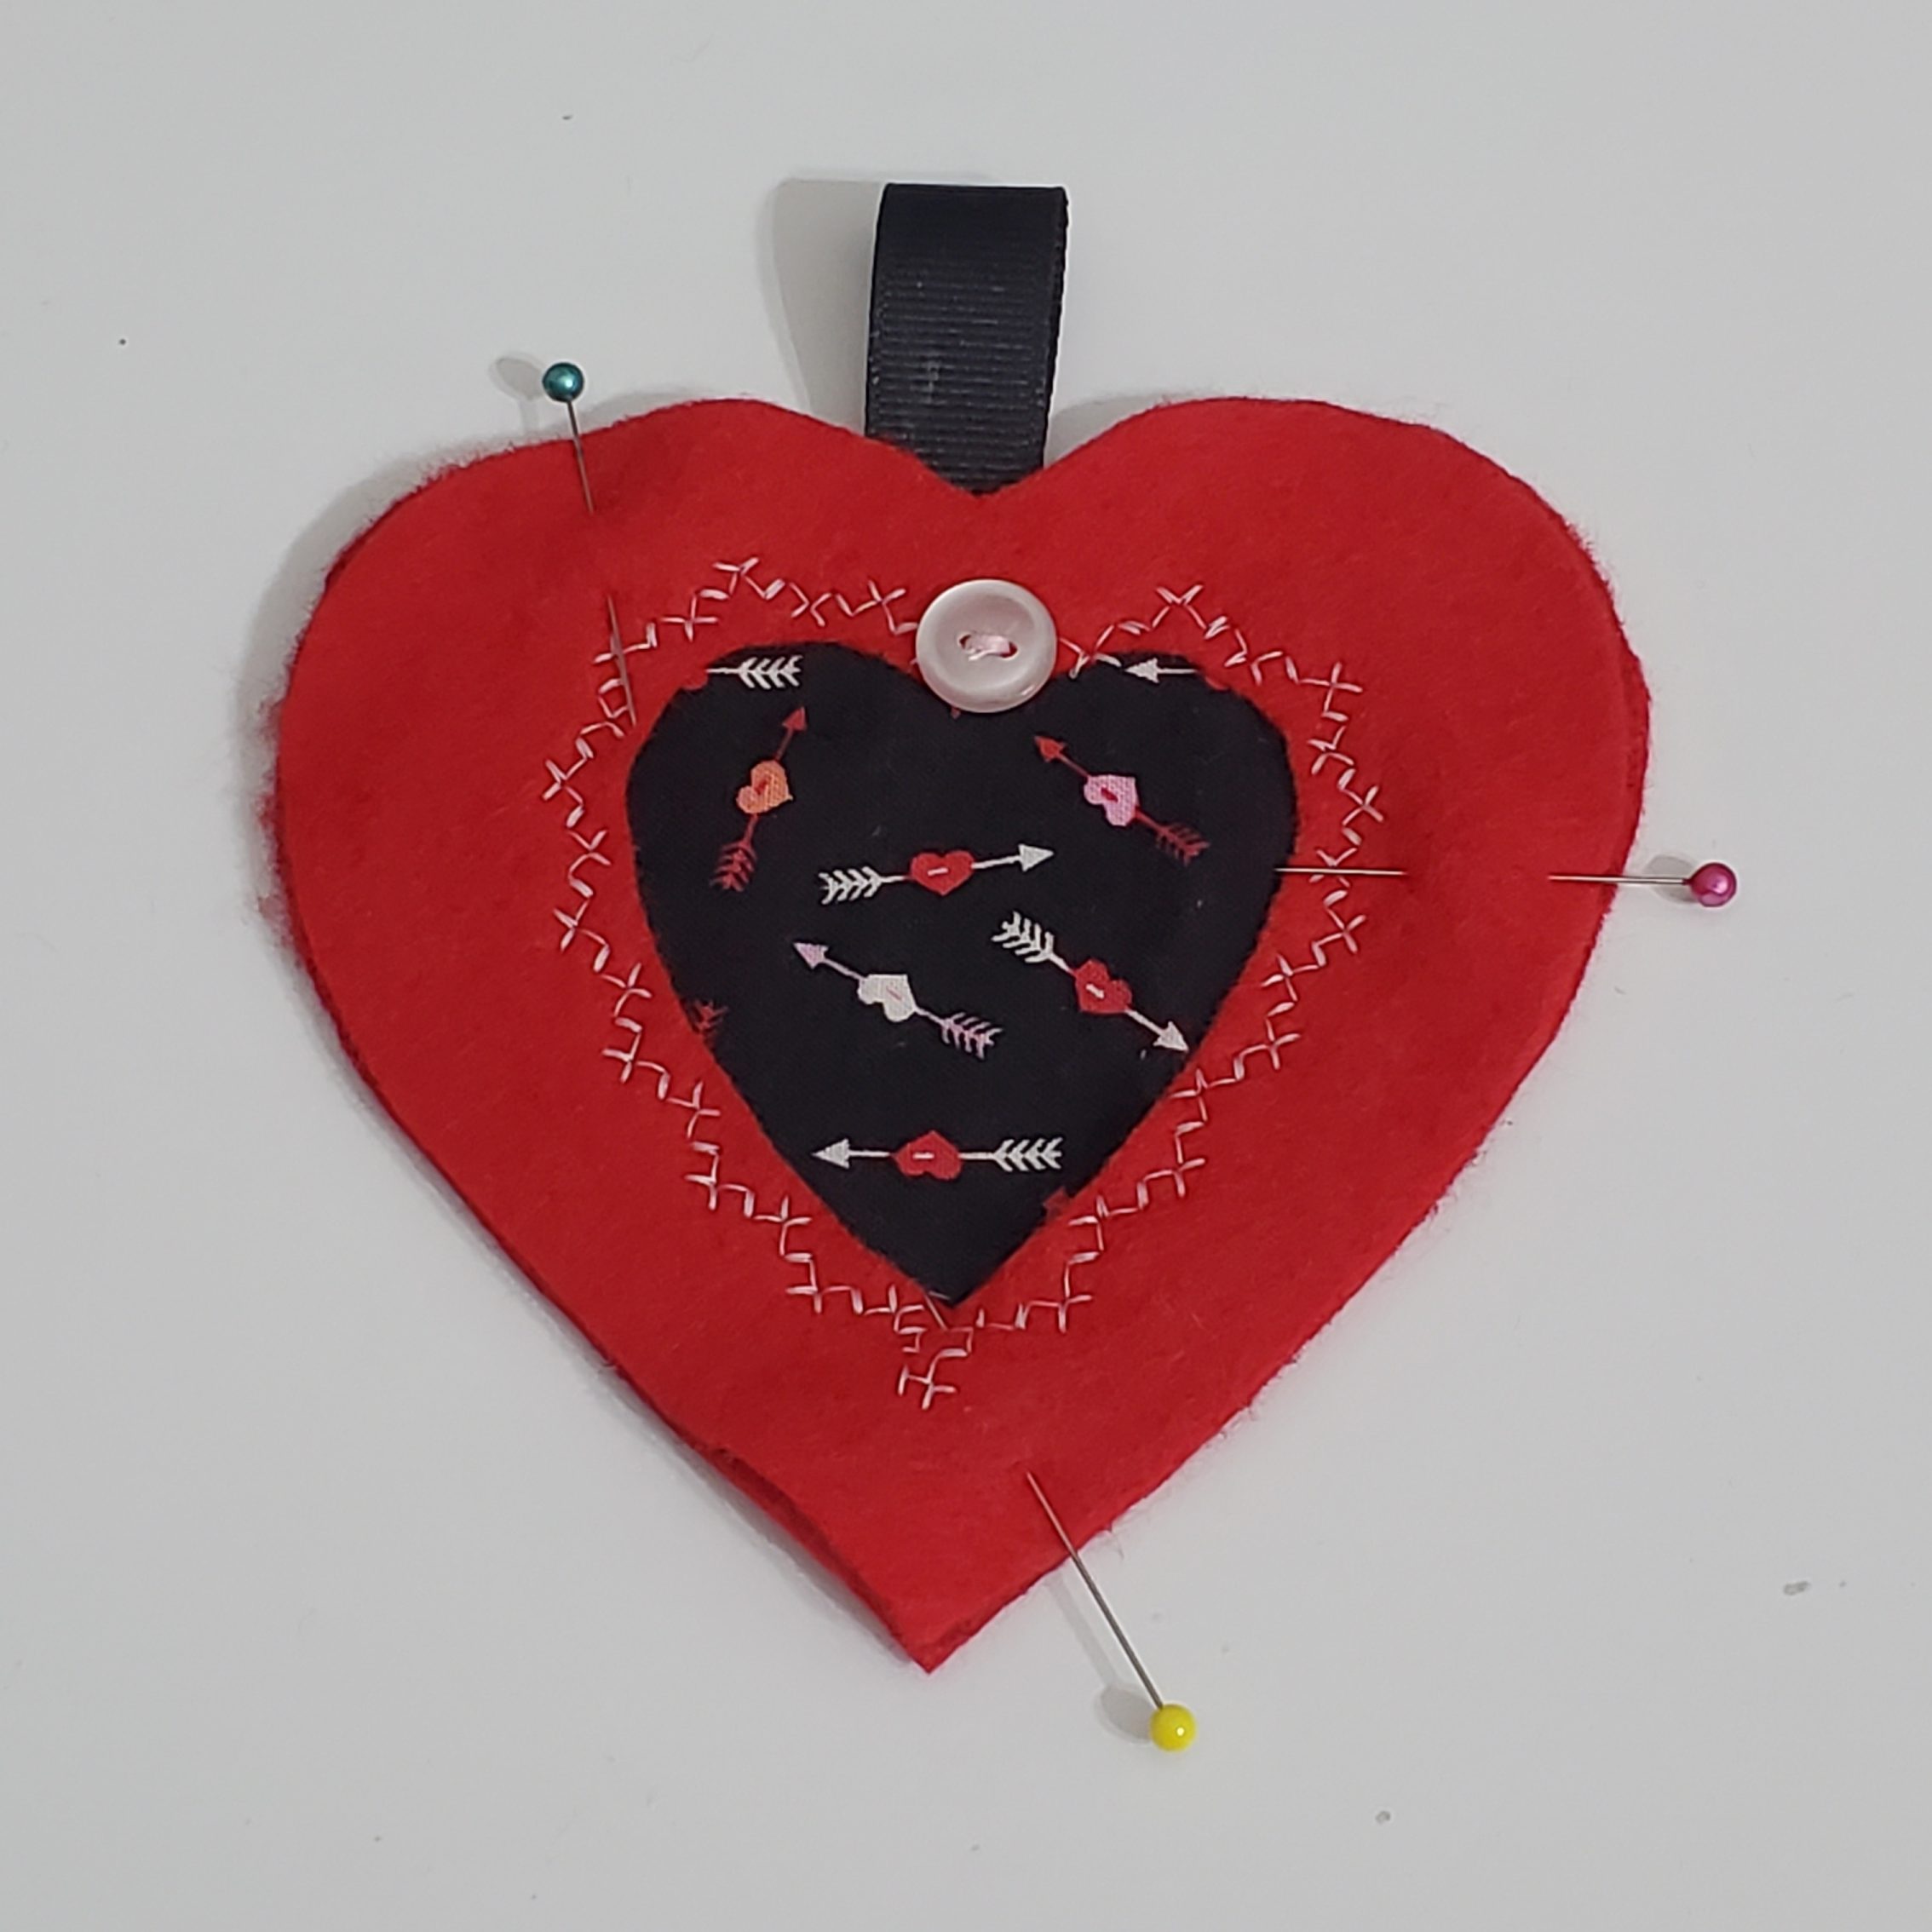
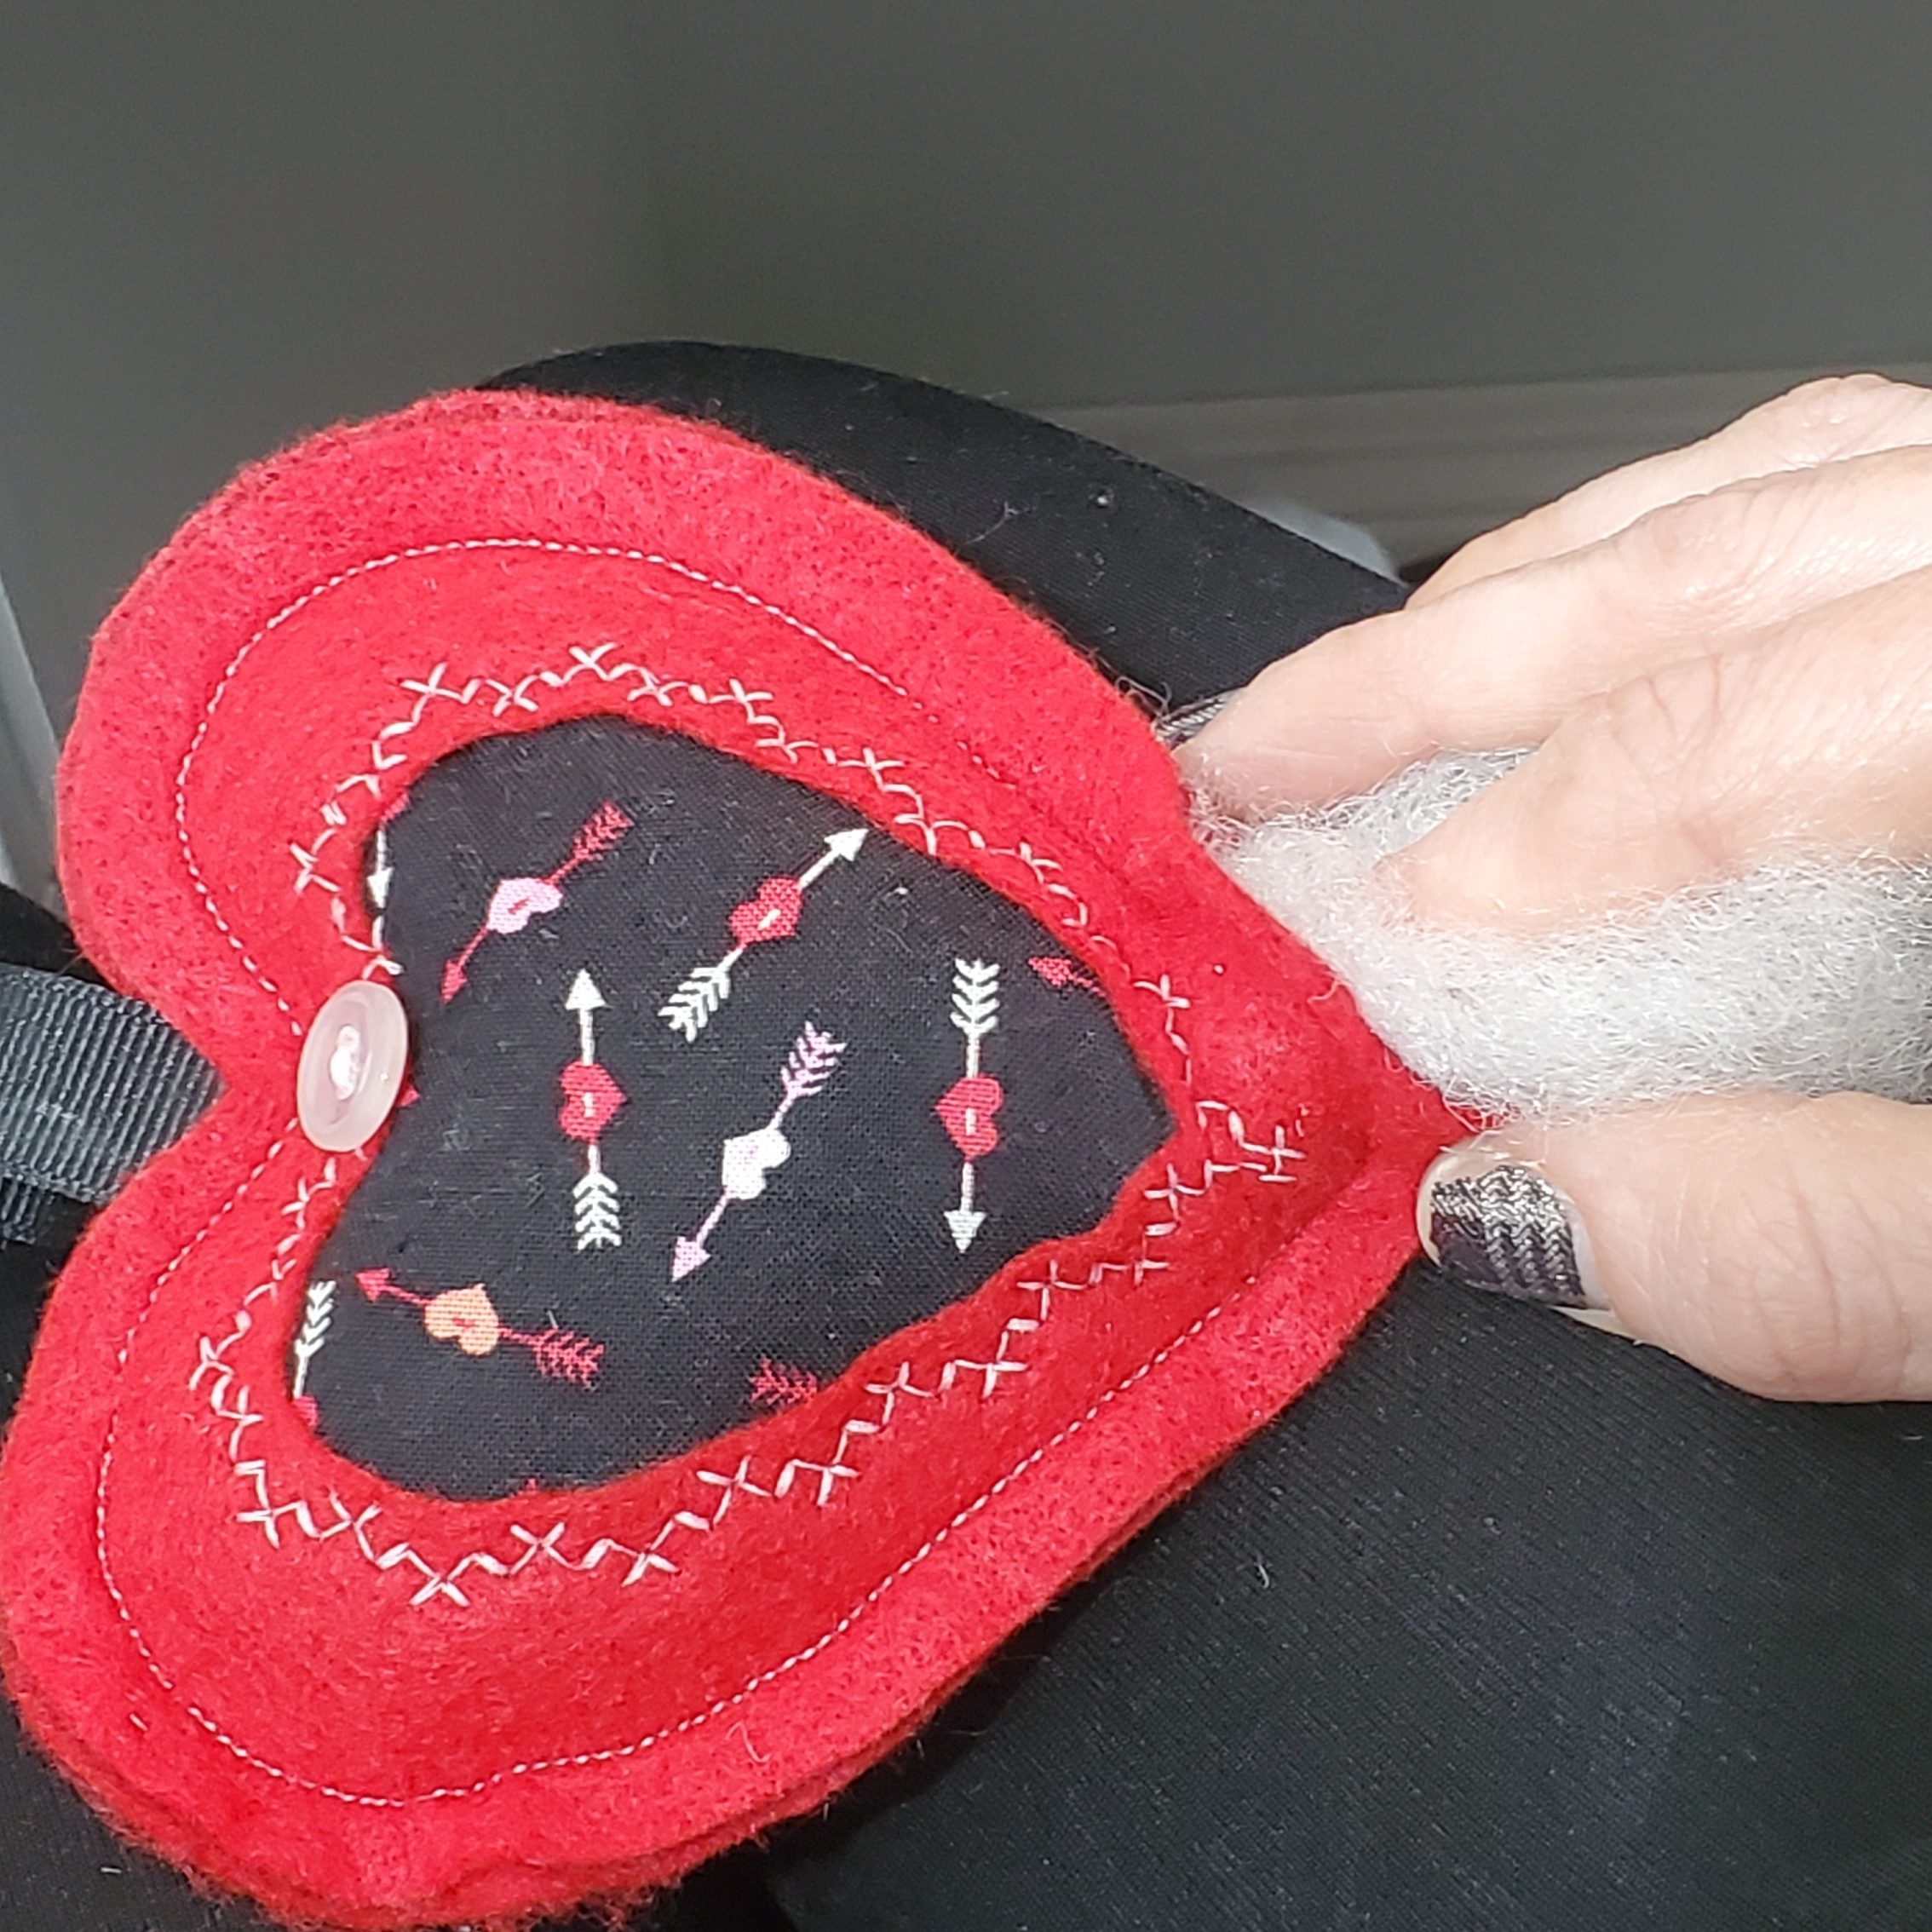
You will need one solid heart for the back side, and one hollowed out heart for the front side.
Place a square of cotton fabric on the back side of your hollowed out heart, with the wrong side facing up. Pin in place.
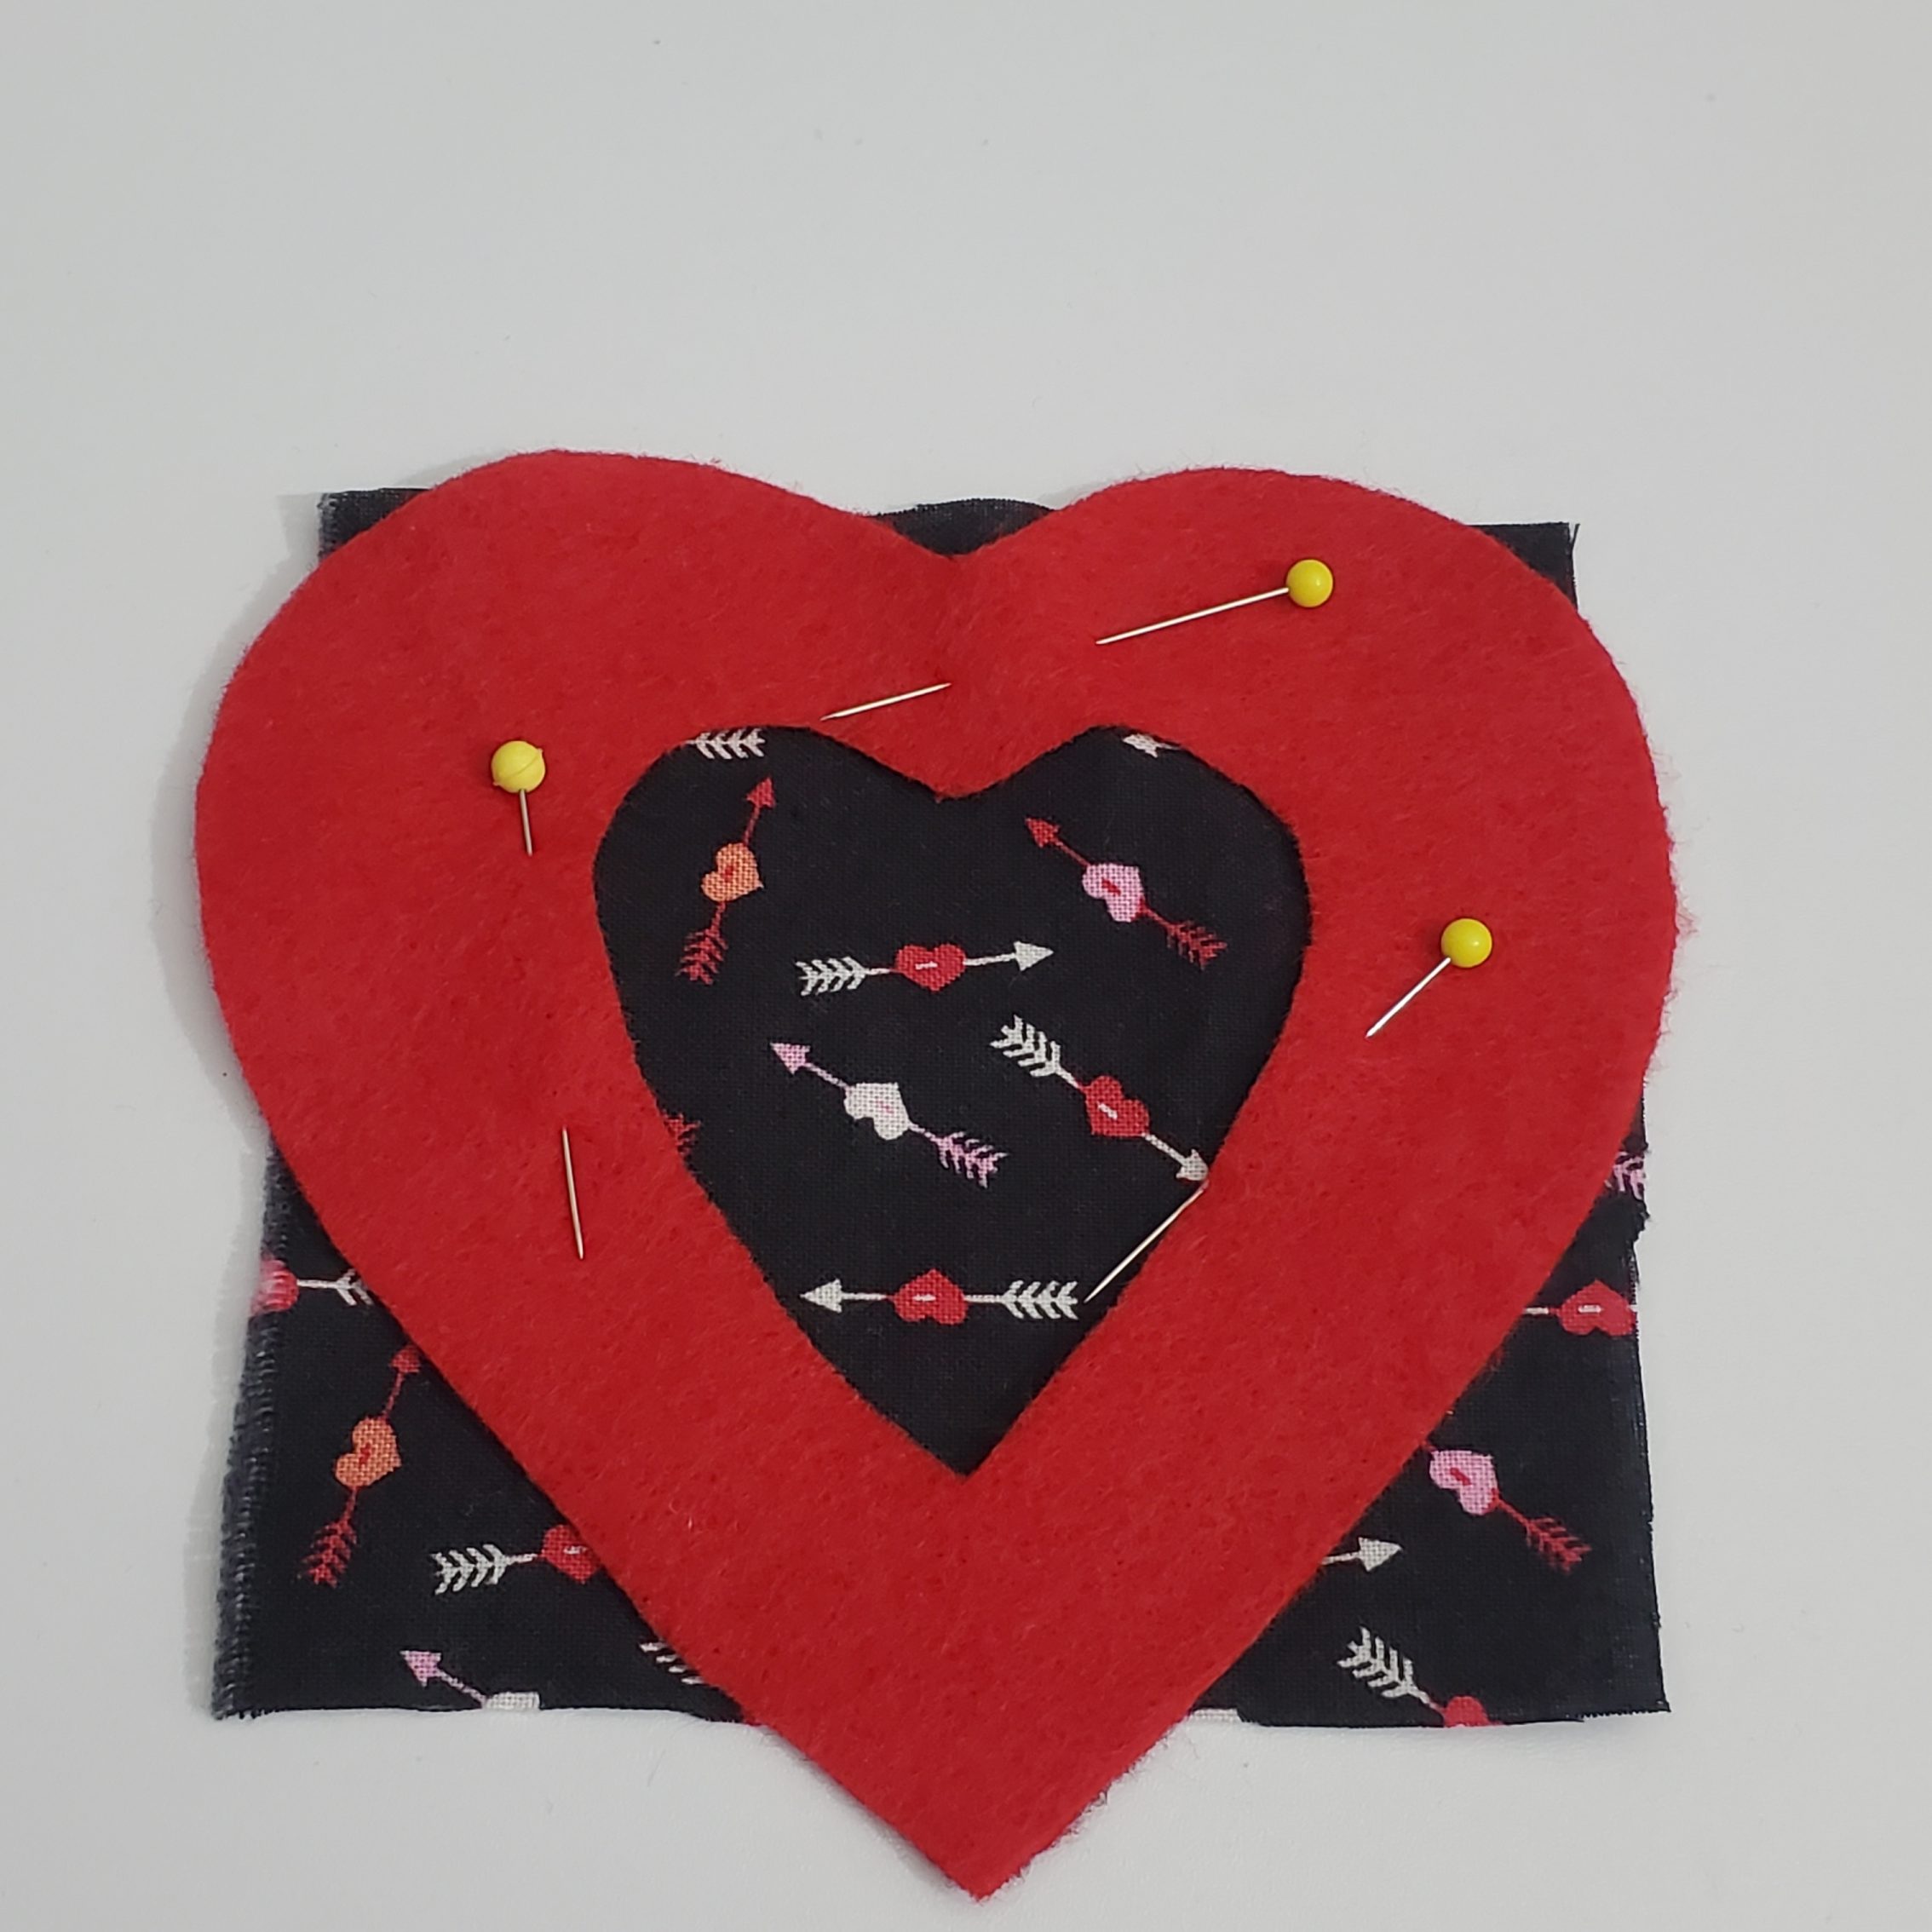
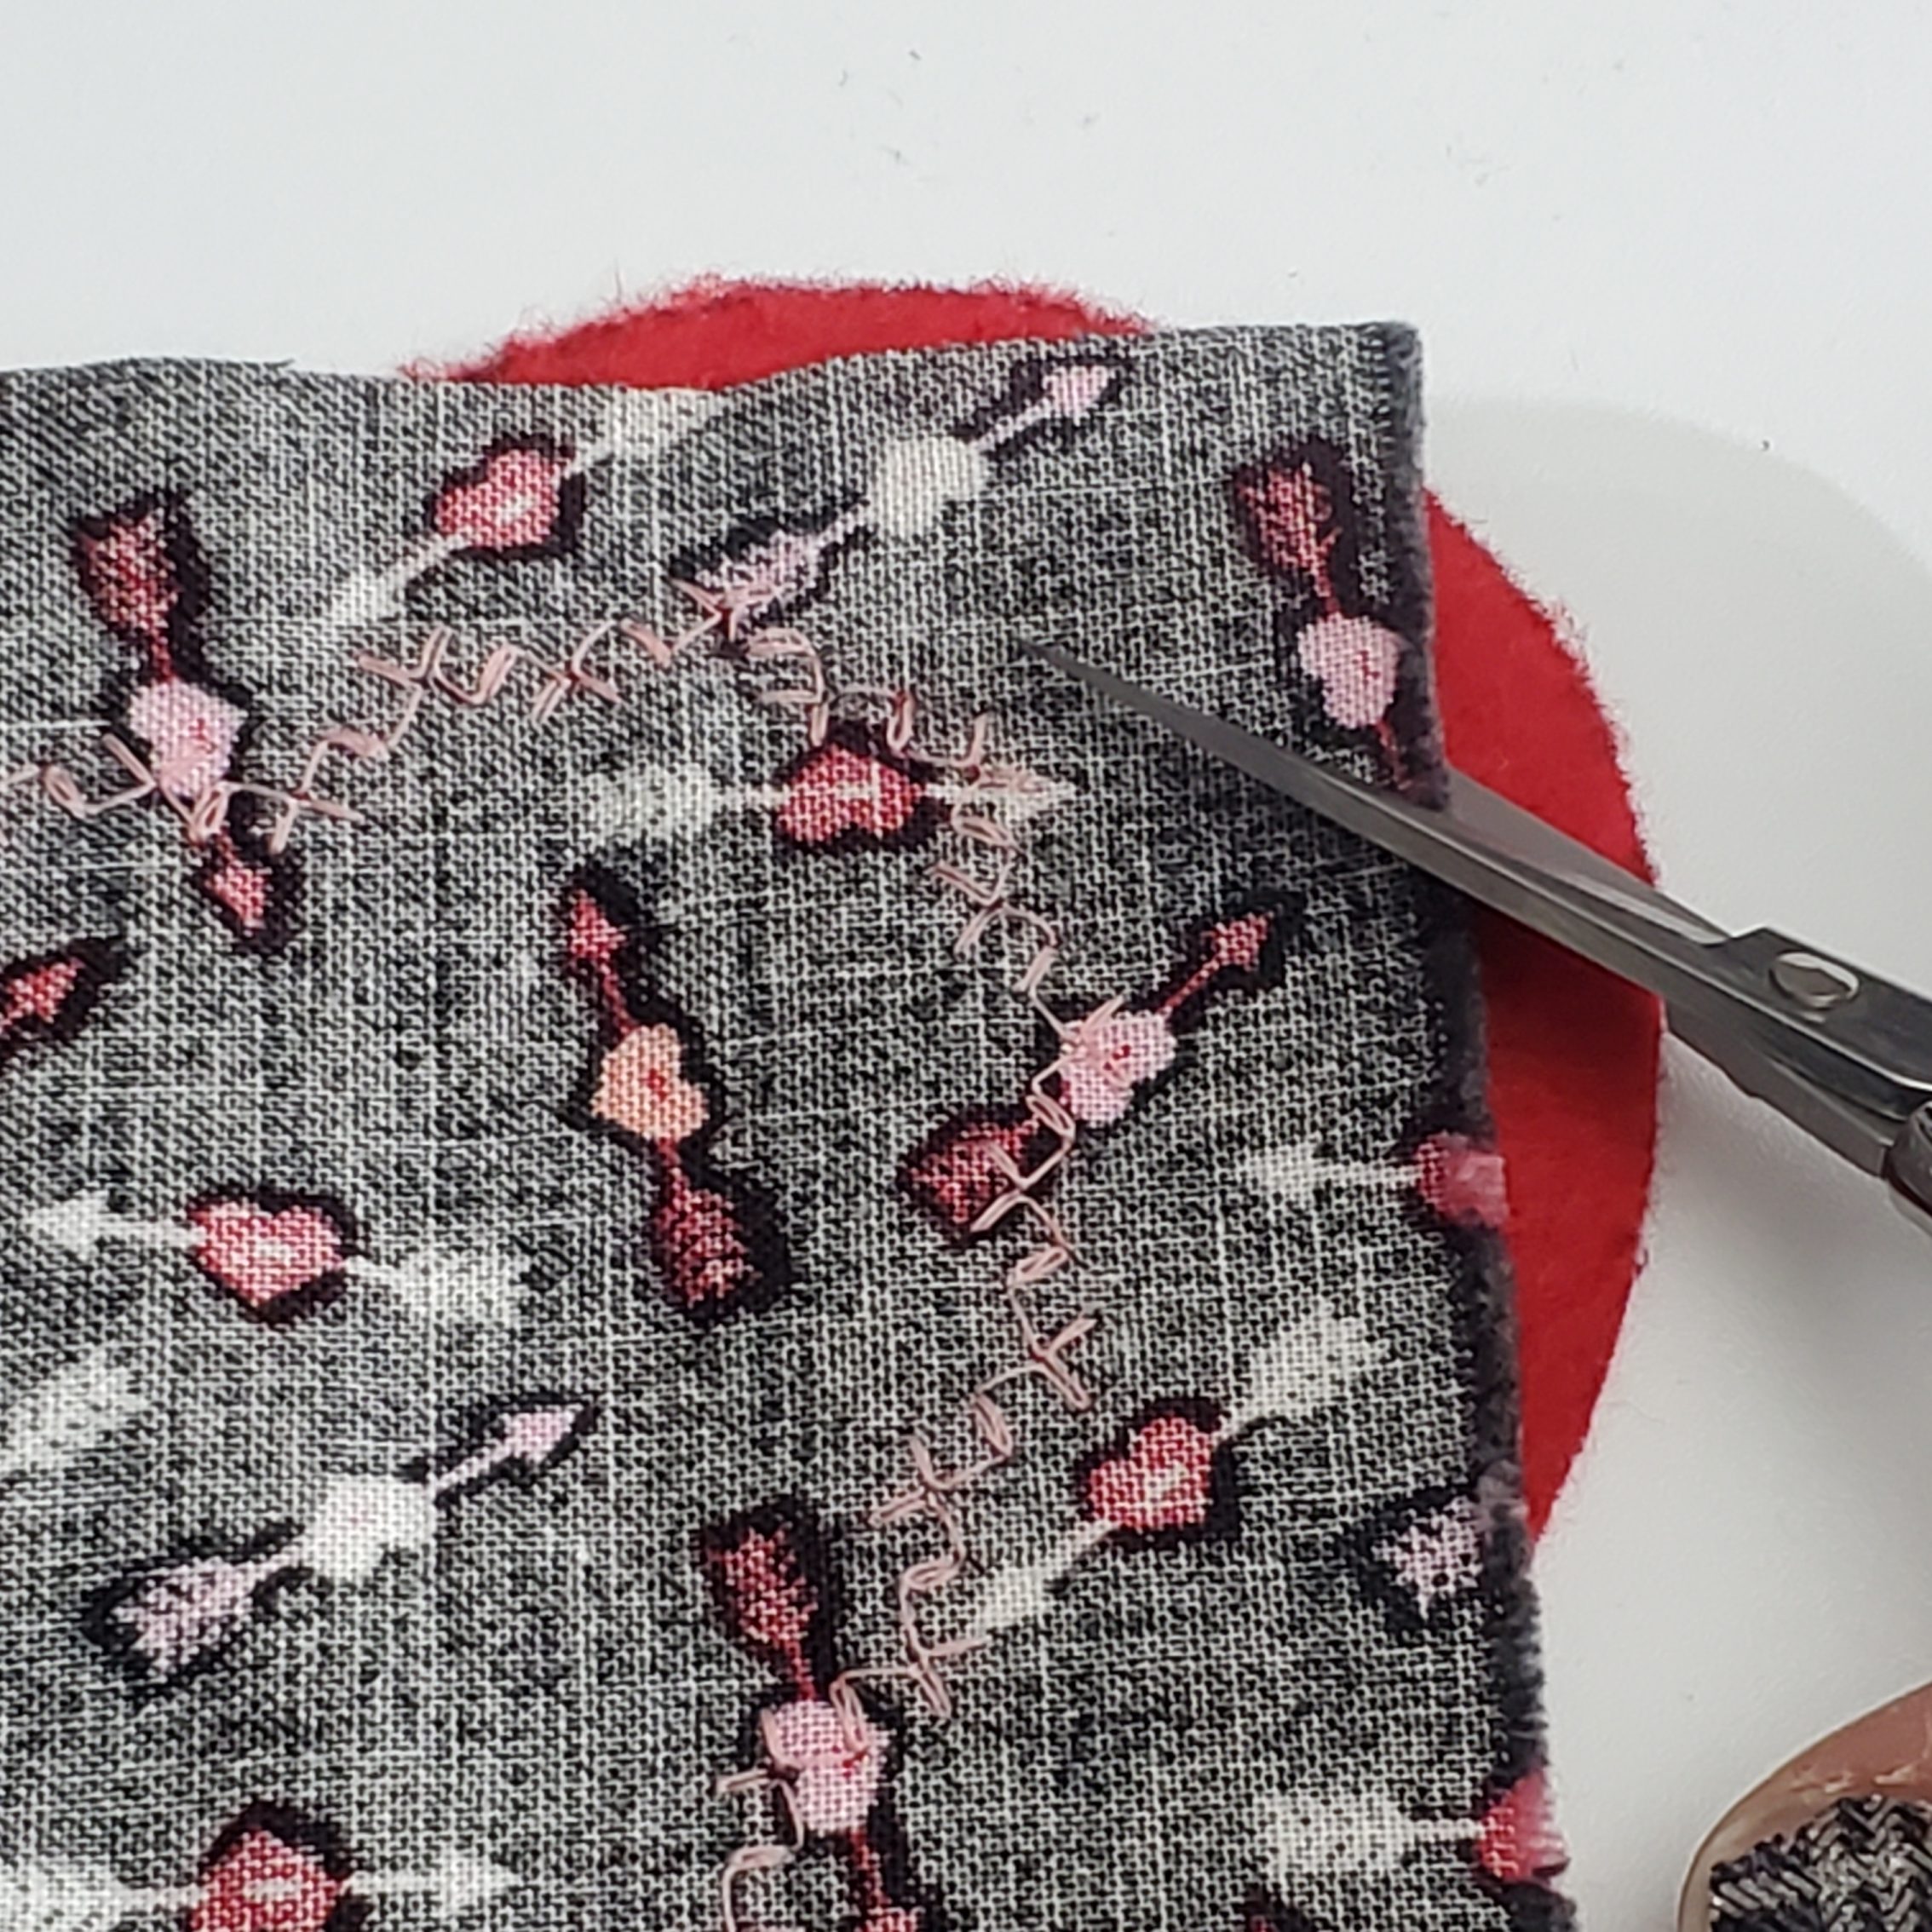
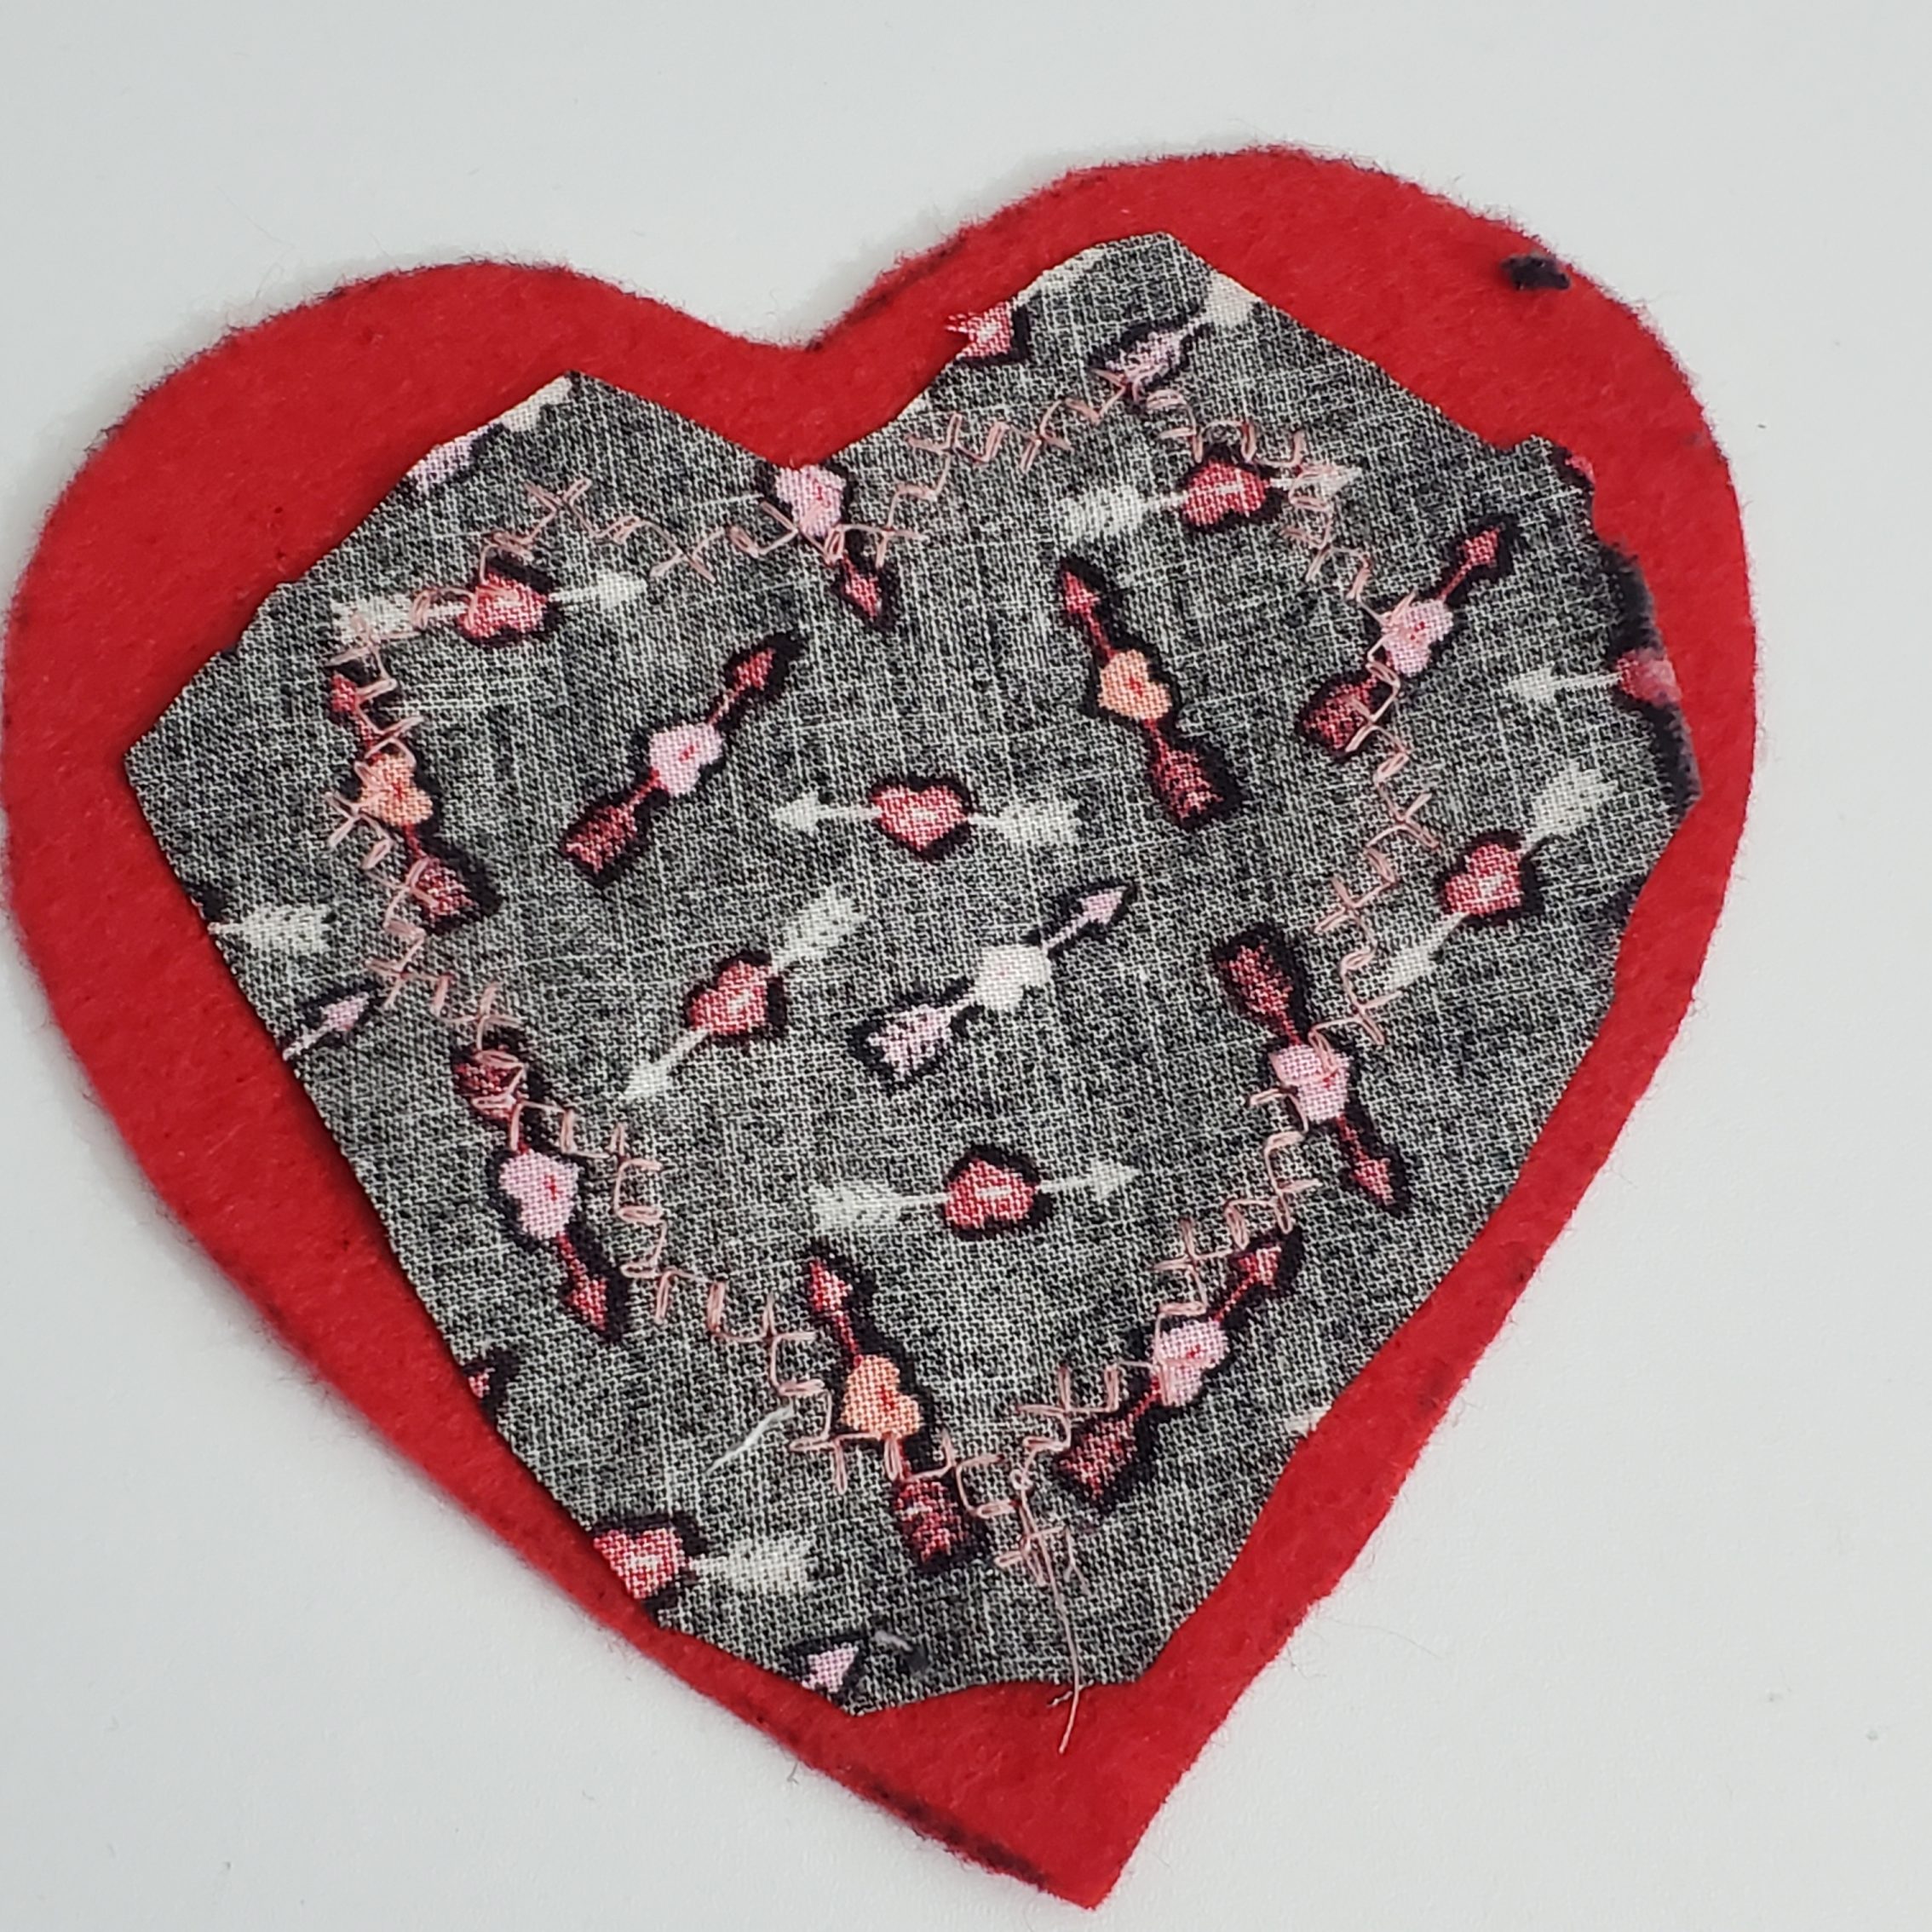
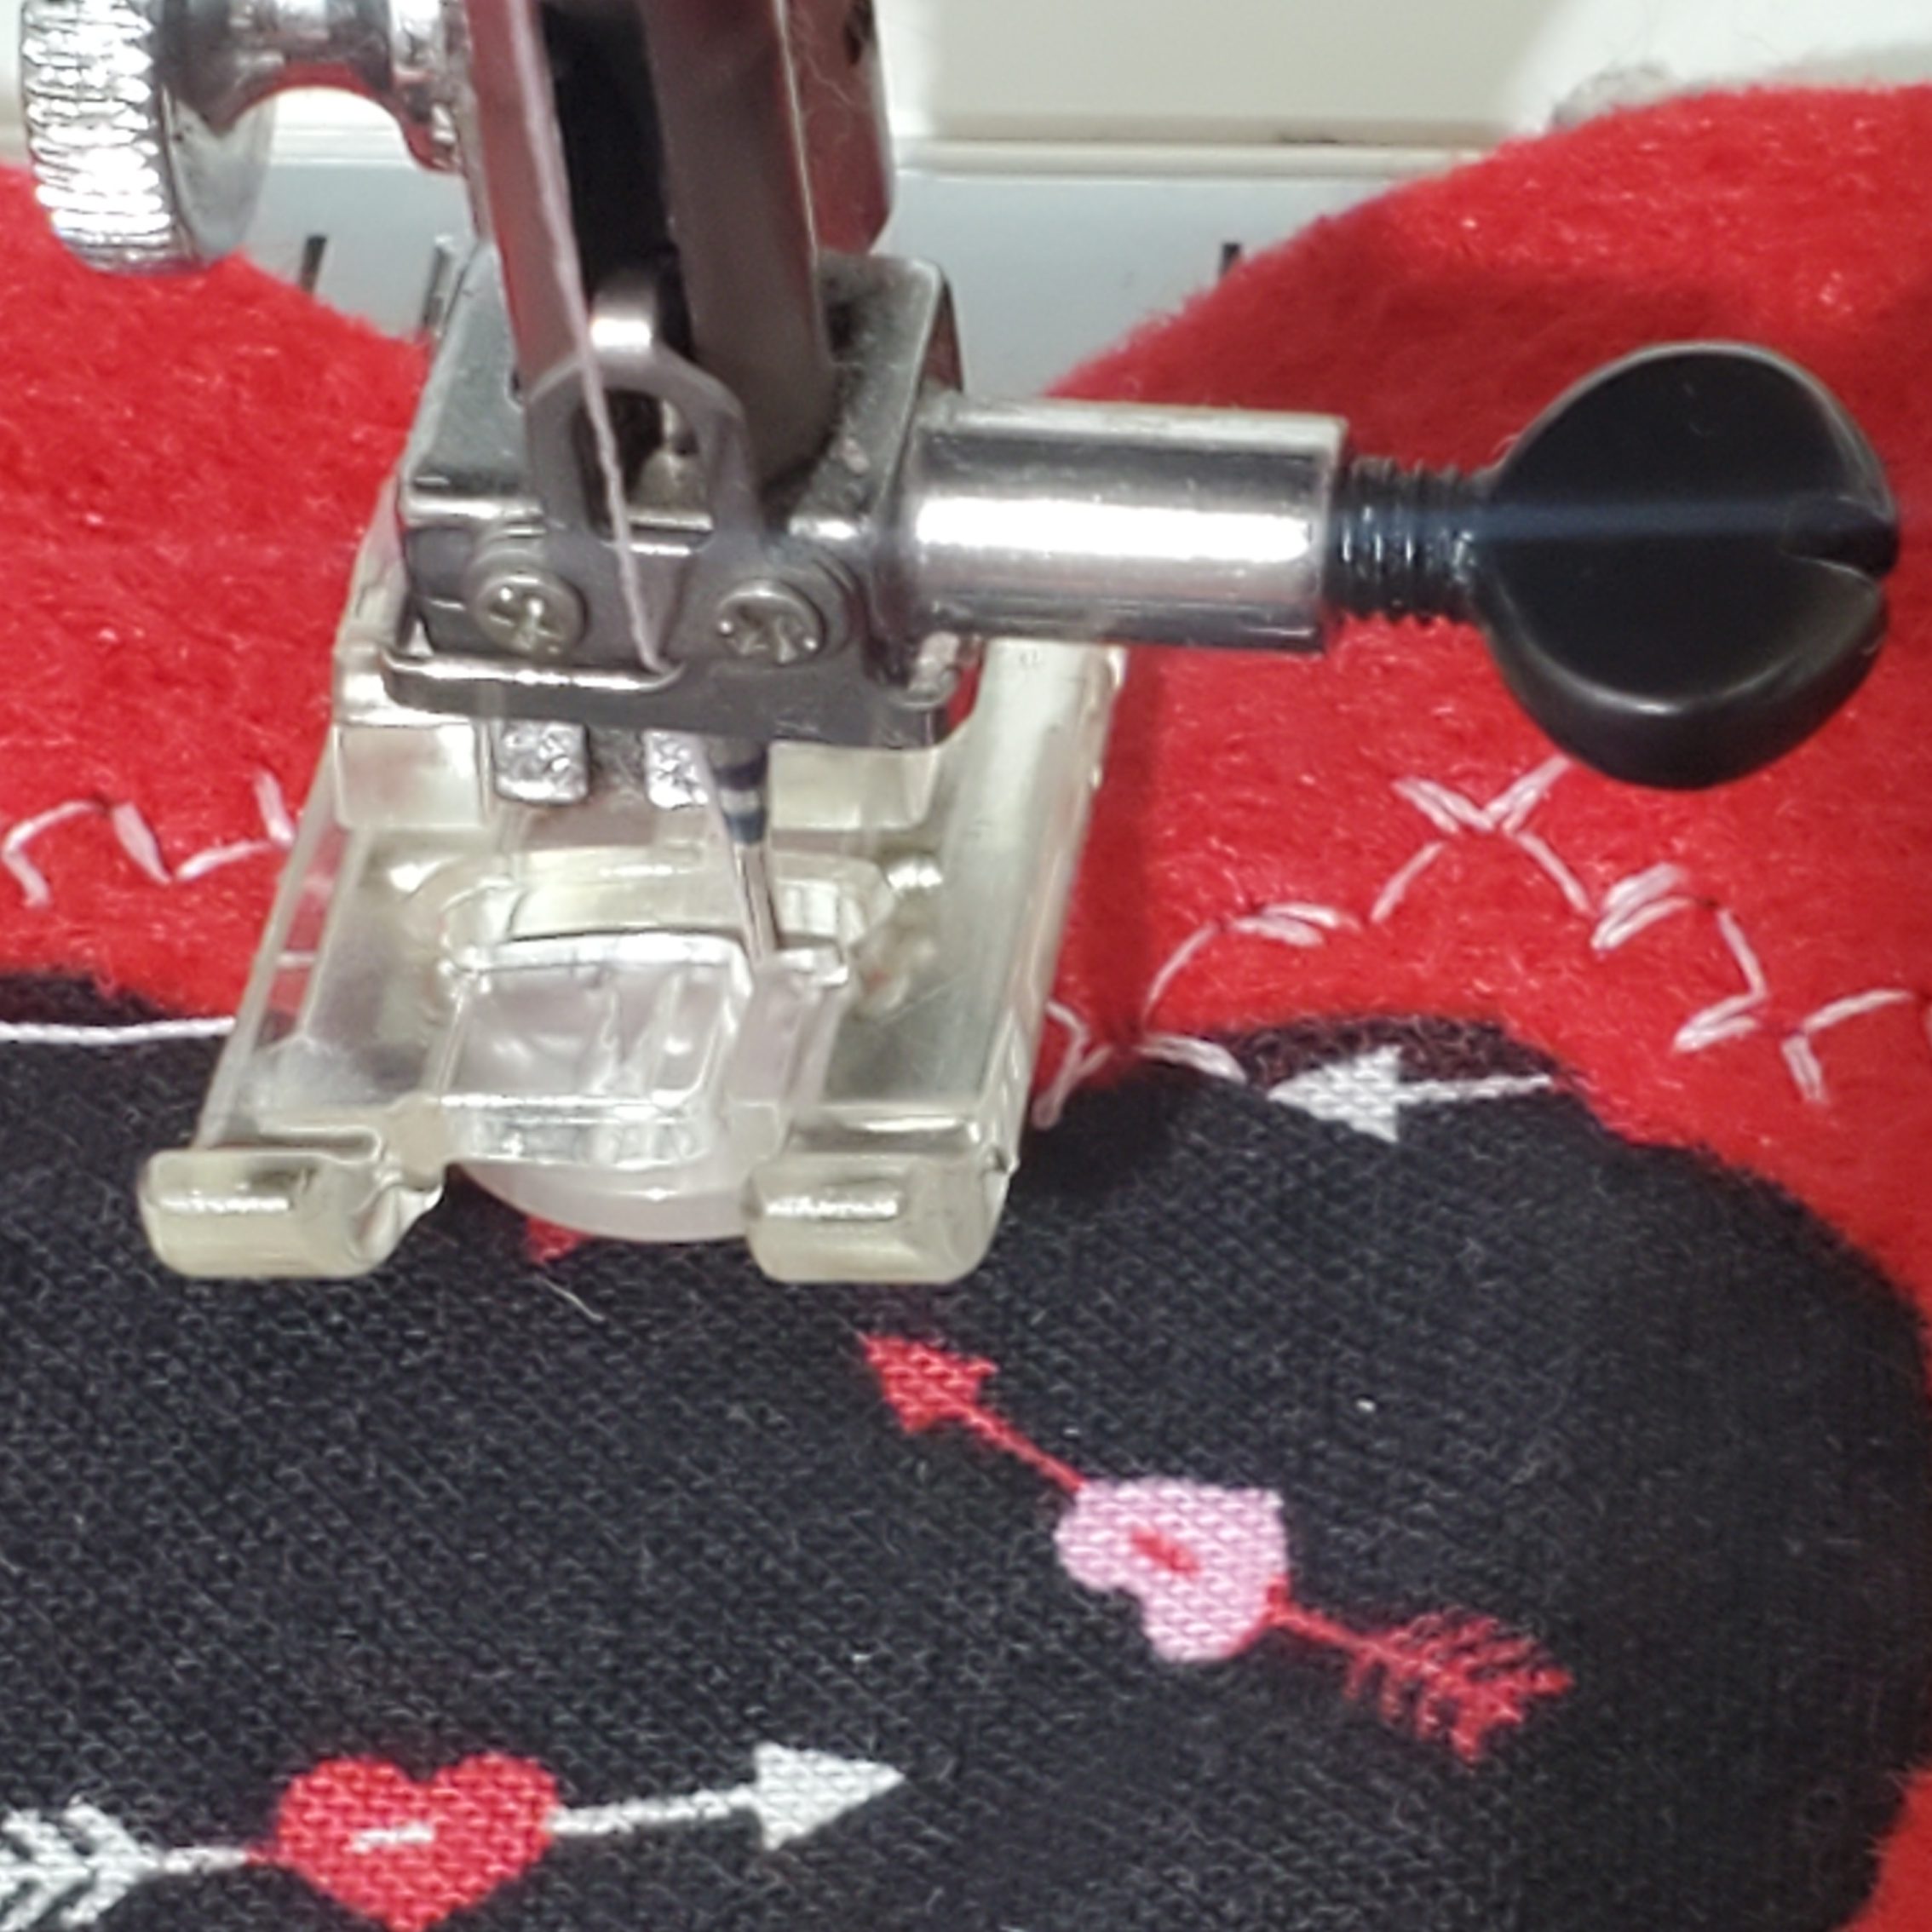
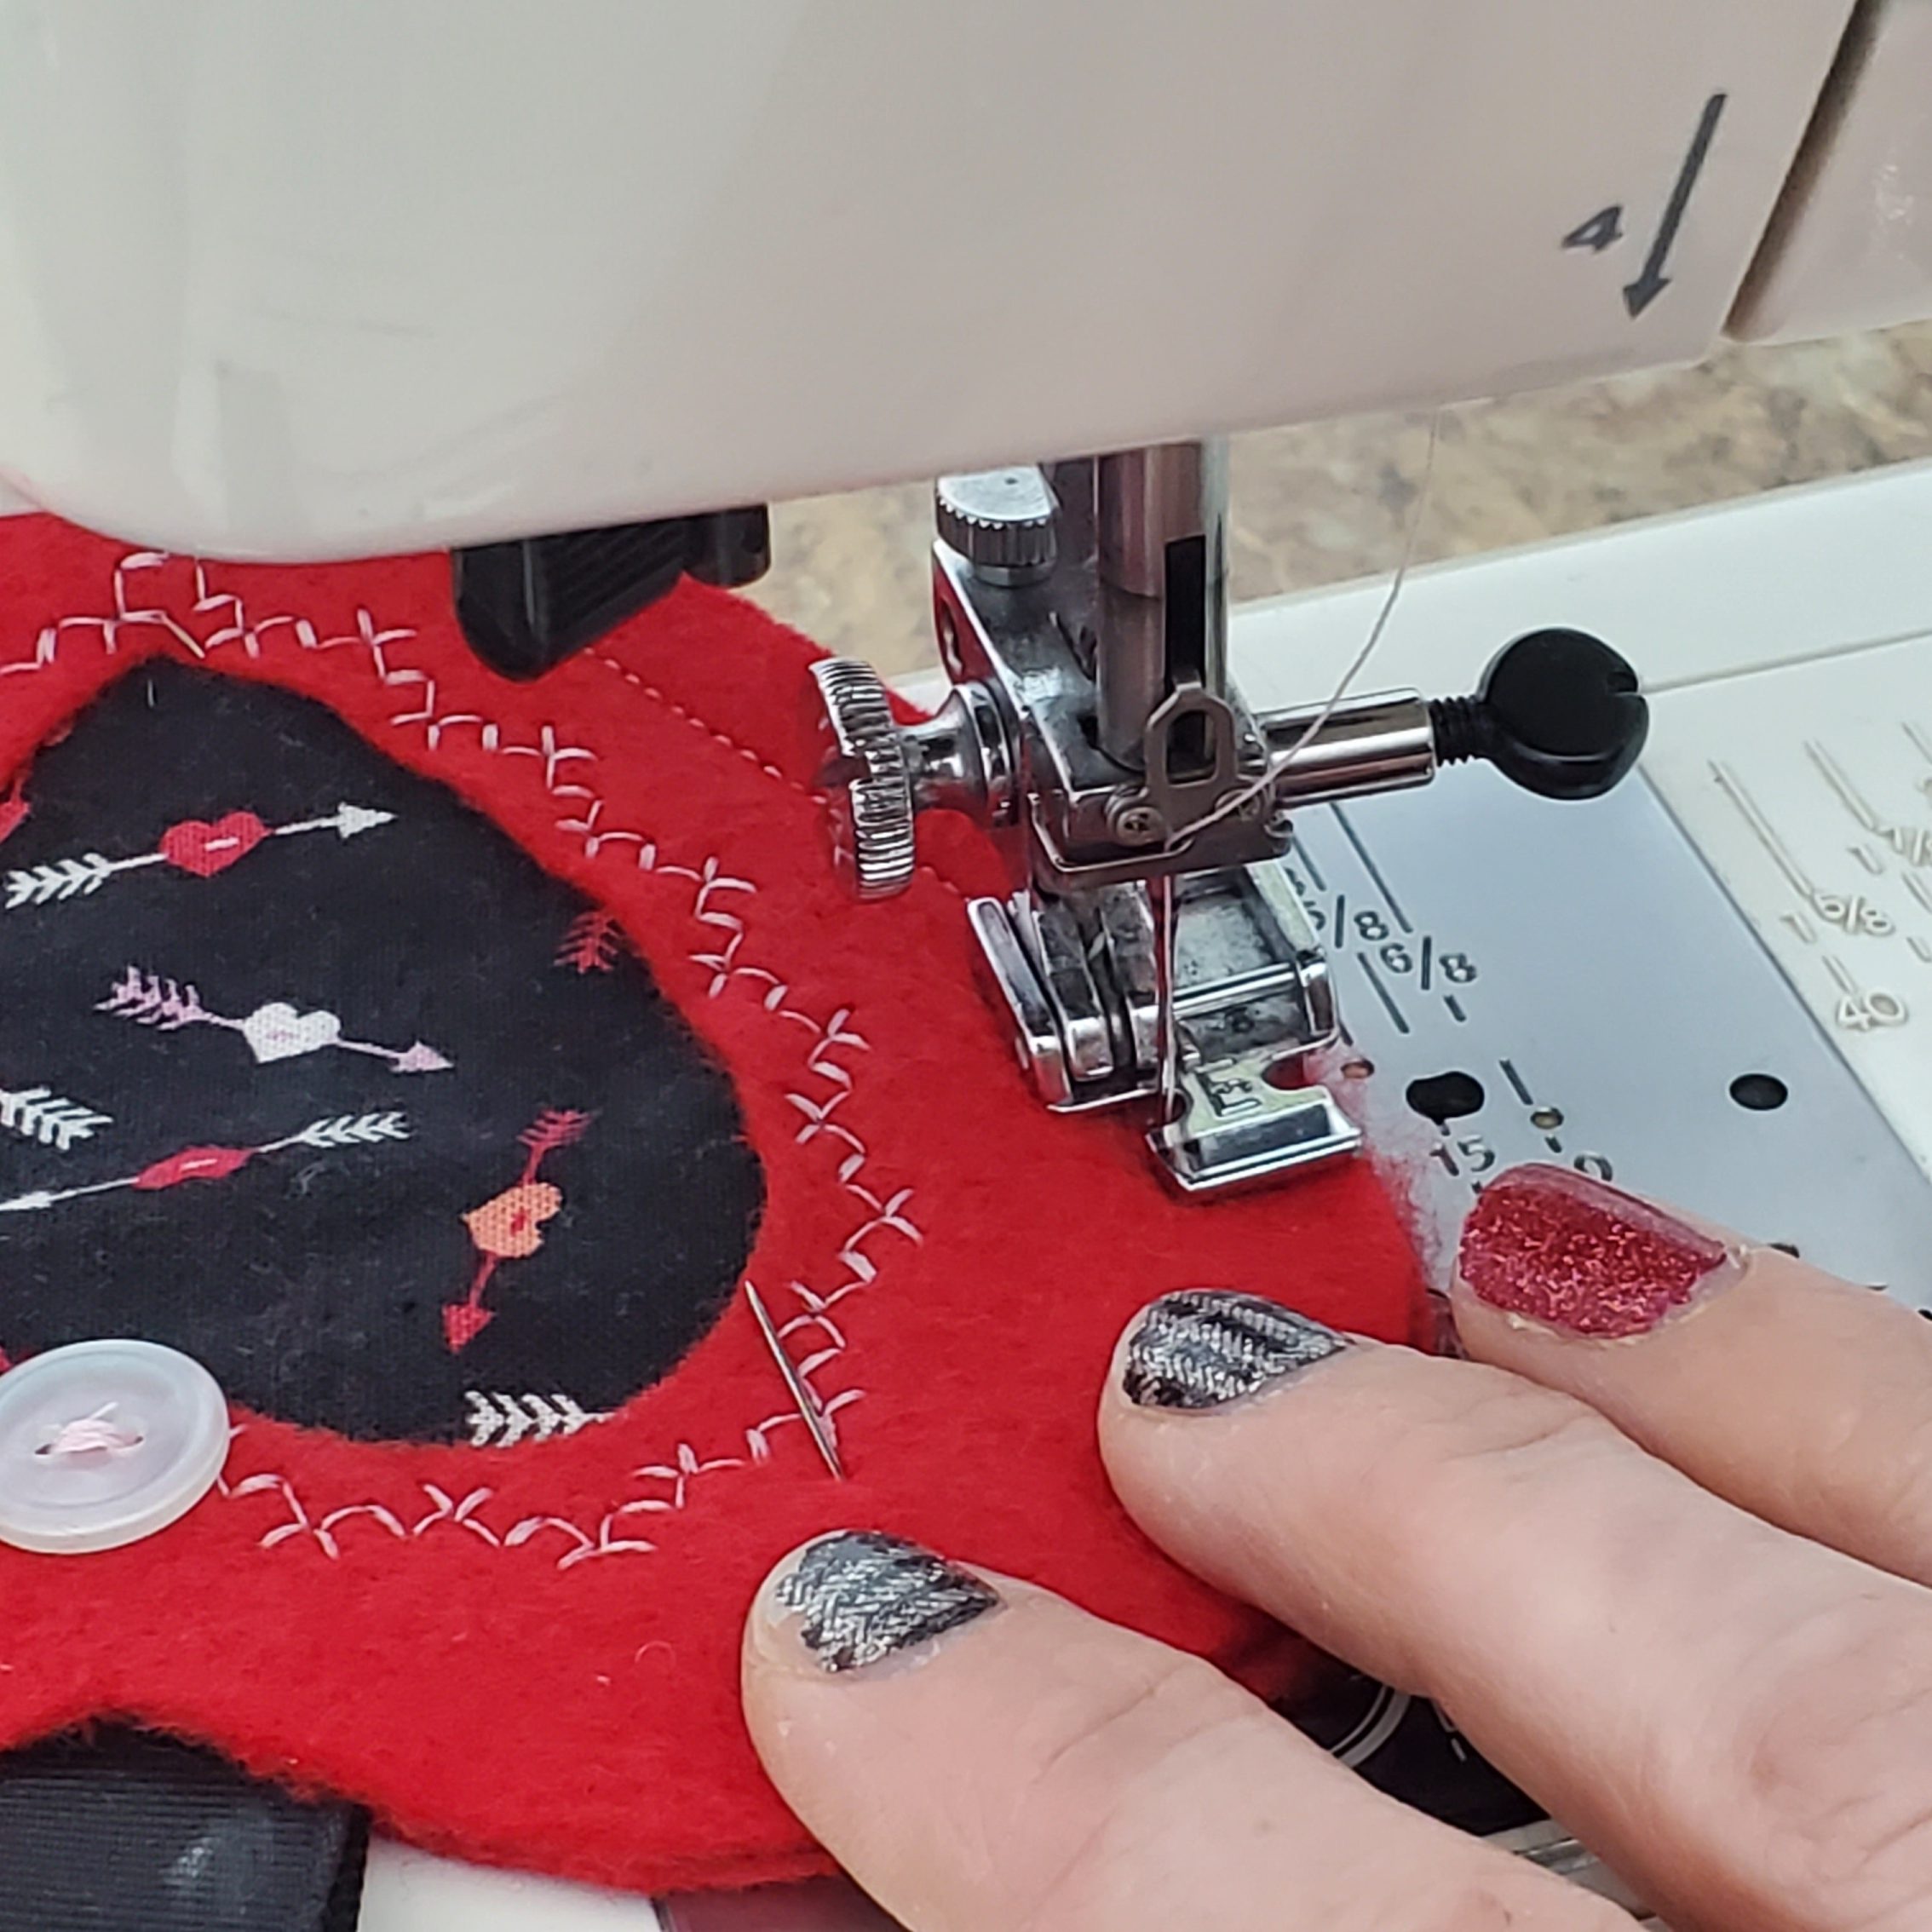
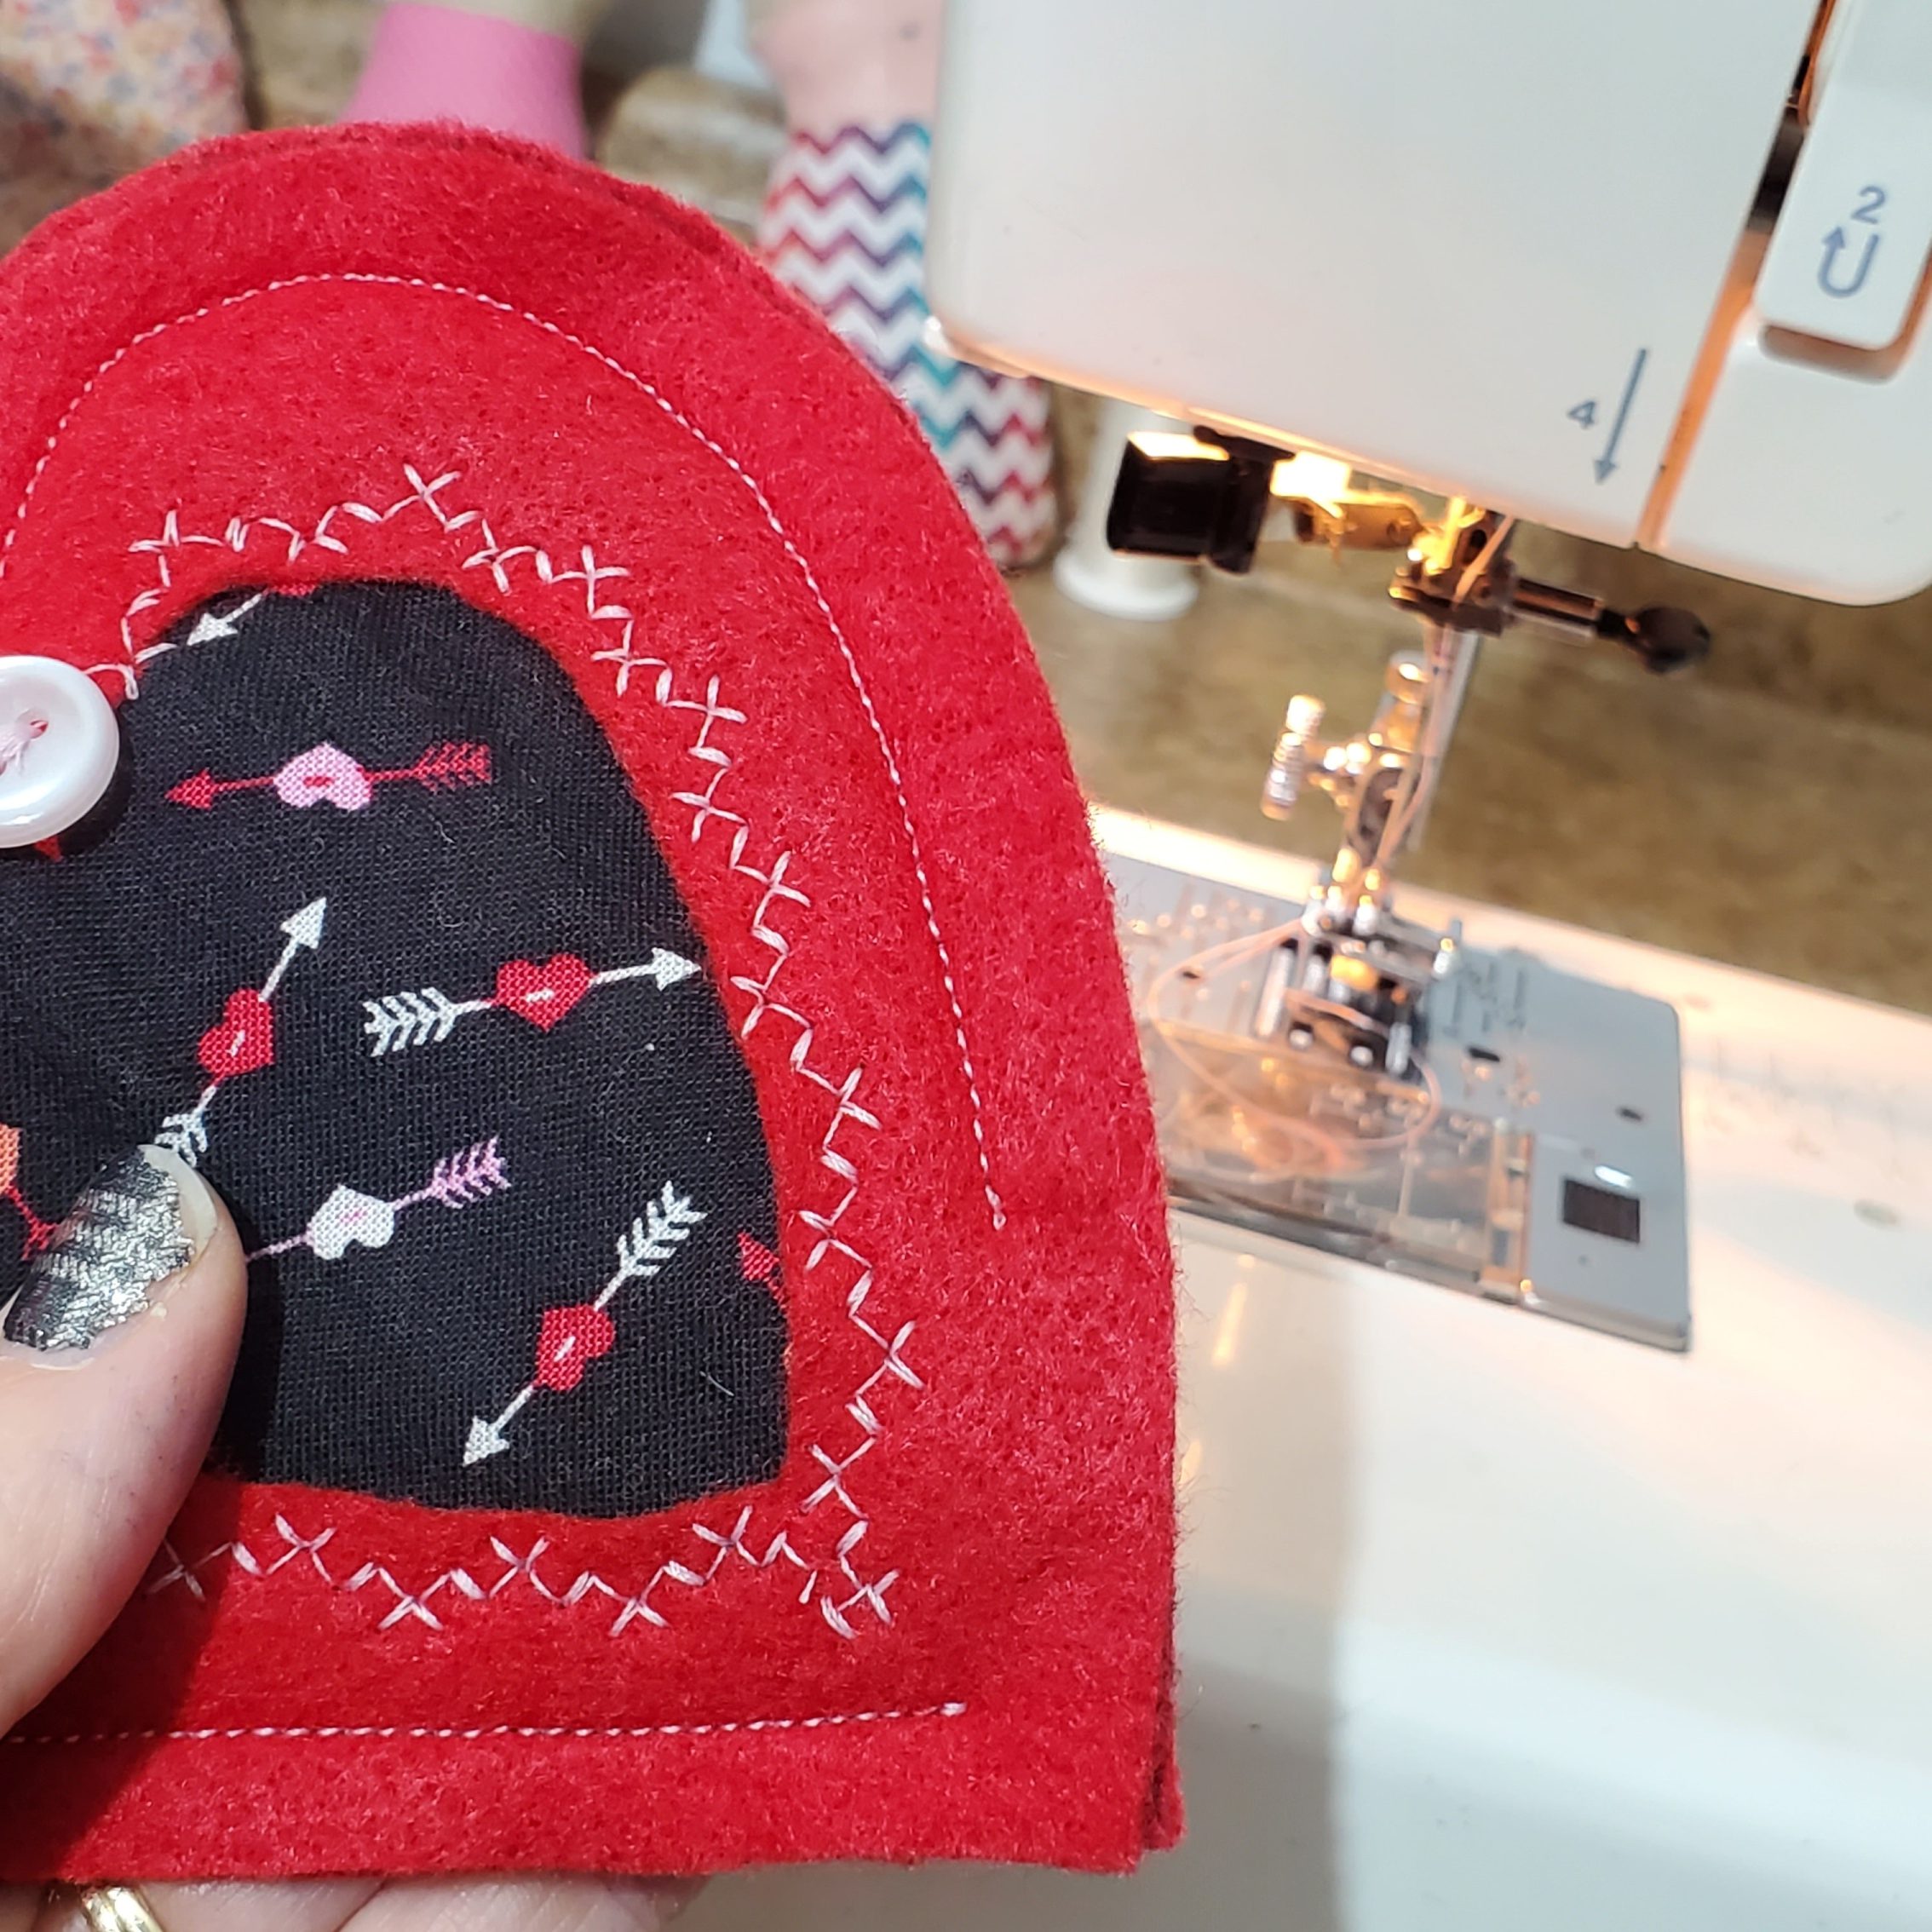
Stitch around the inner line of the heart, on the right side of the fabric. You can either choose to do a straight stitch, a zig-zag stitch, or a decorative stitch. I chose a decorative stitch, as you can see. I recommend practicing on a scrap piece of fabric first. I also recommend keeping your stitching line right inside the felt heart piece, as you can see in the picture. You want to make sure that you are sewing into both layers of fabric.
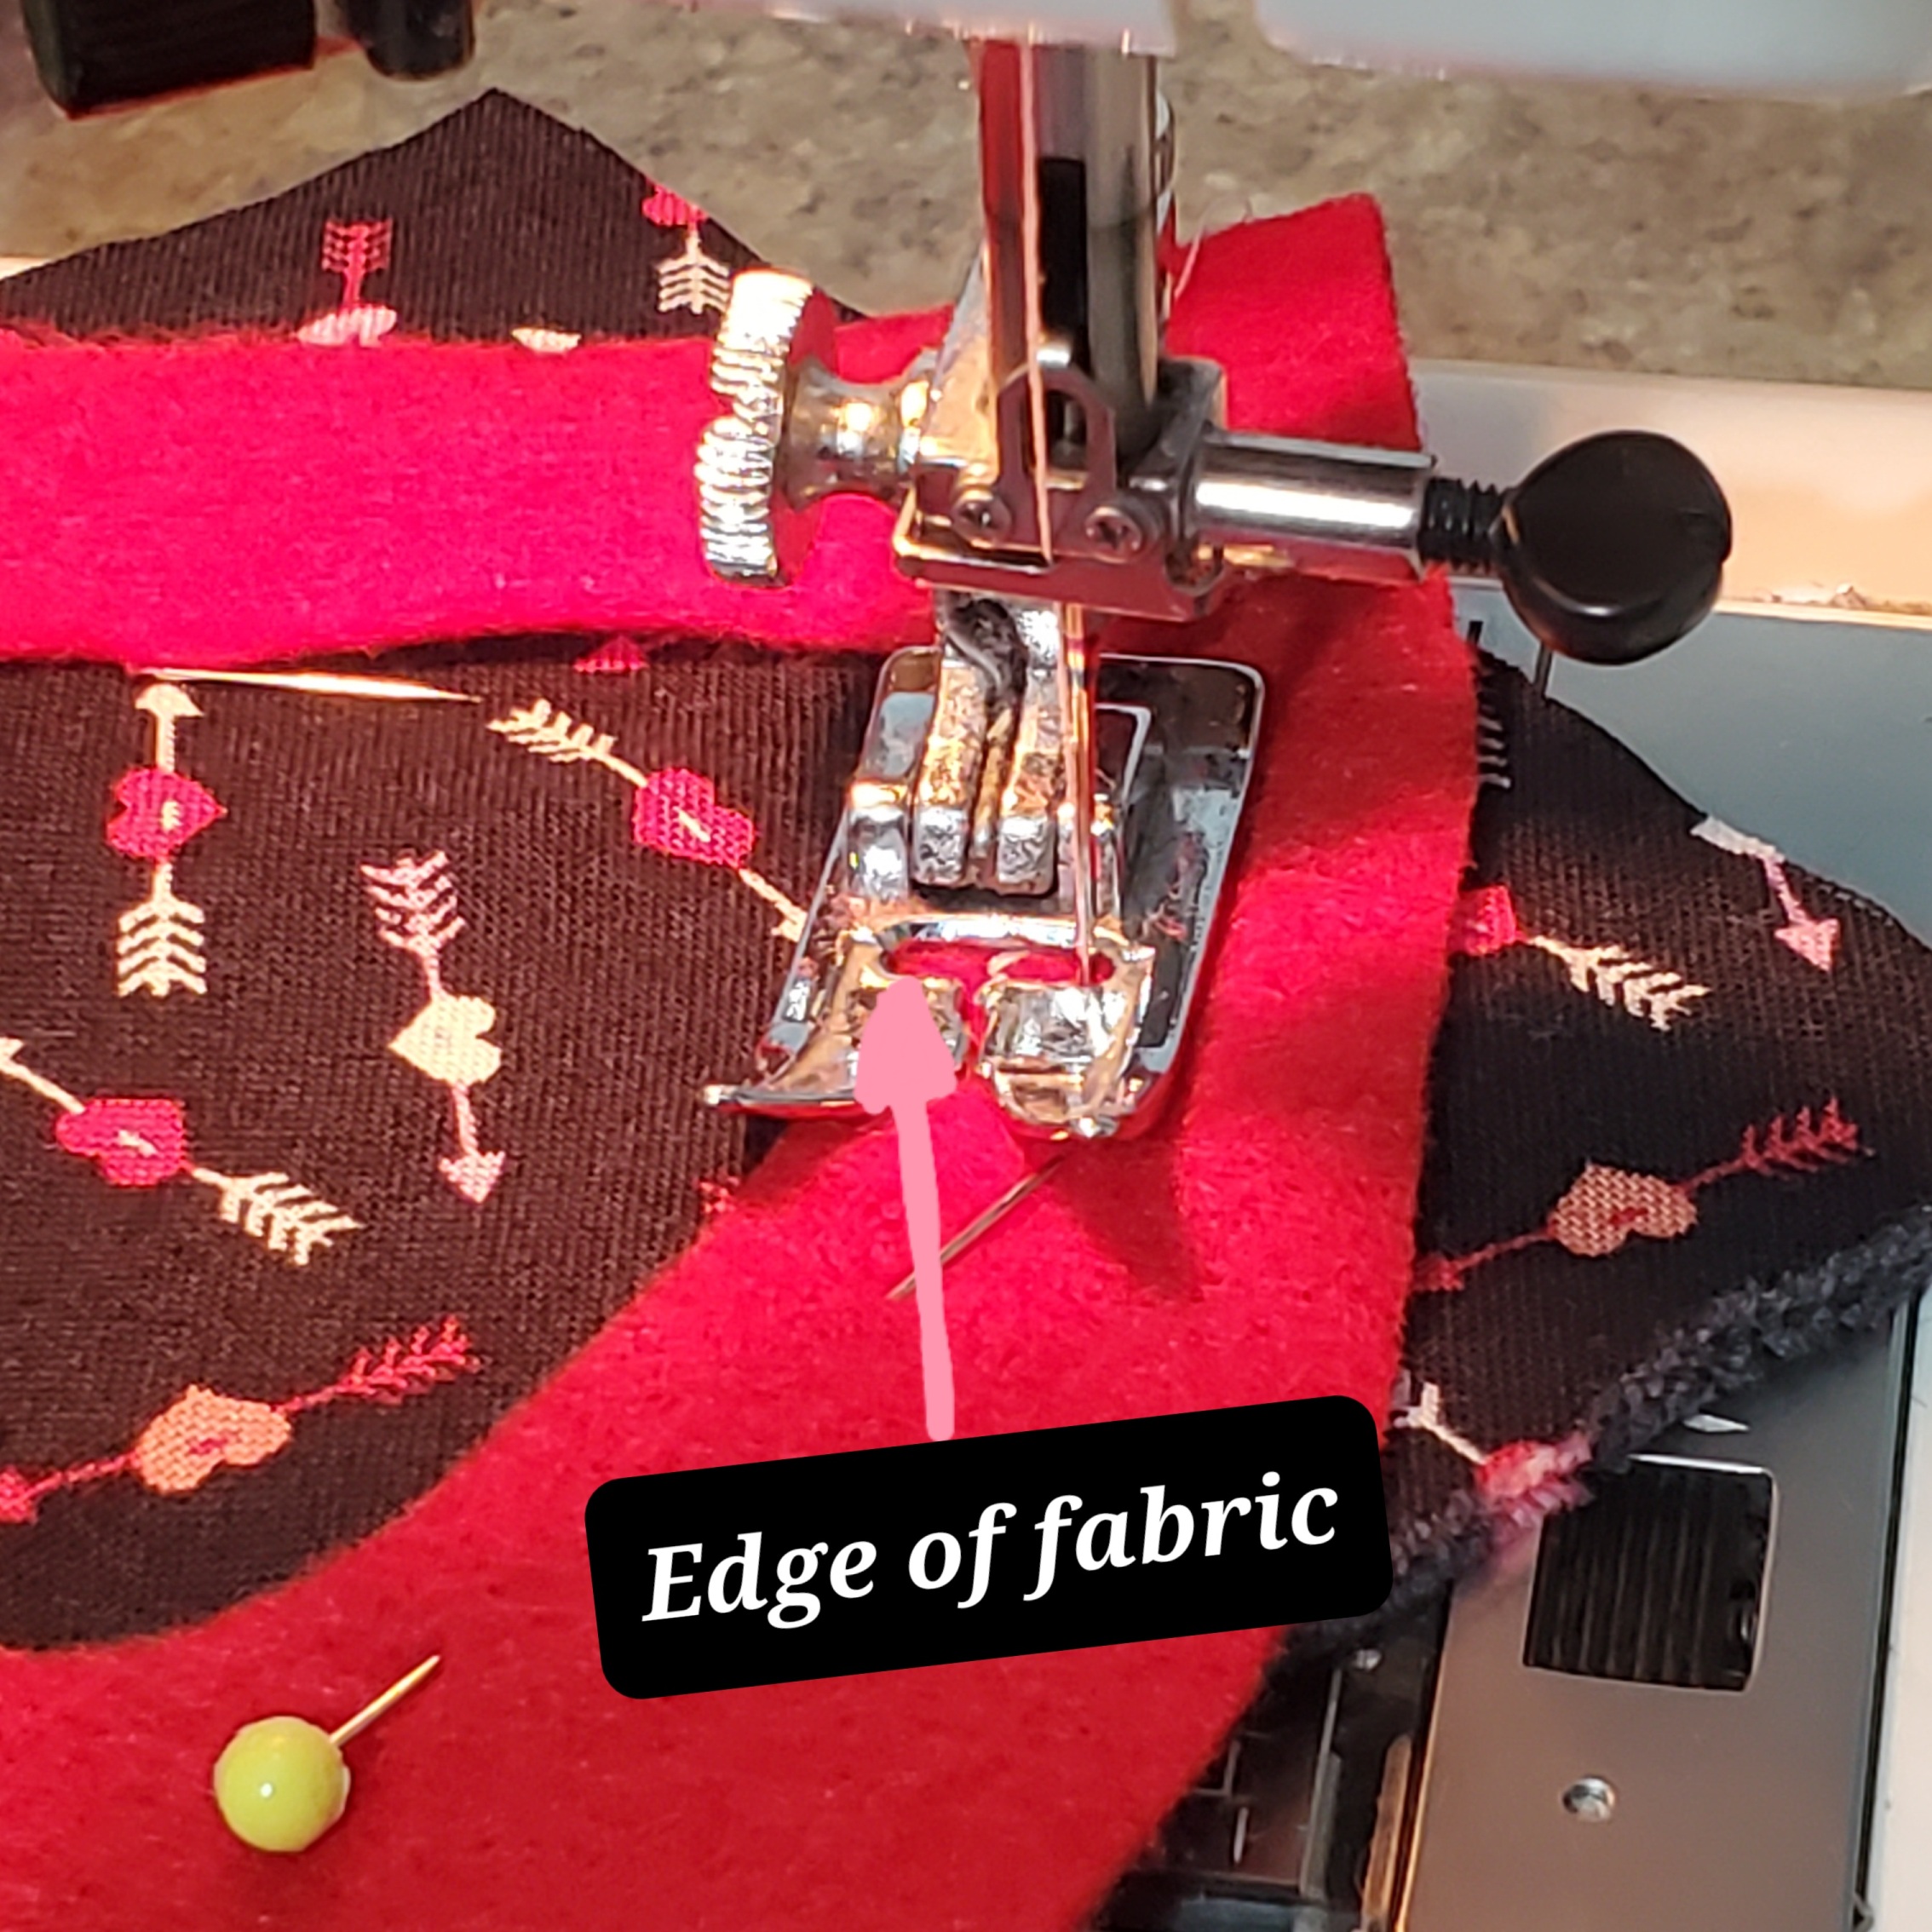
Turn your heart upside down and trim your cotton square so that it’s not hanging over the edges of the heart.
If desired, you can sew a button on the top of the heart. I thought it added a cute, decorative element 🙂
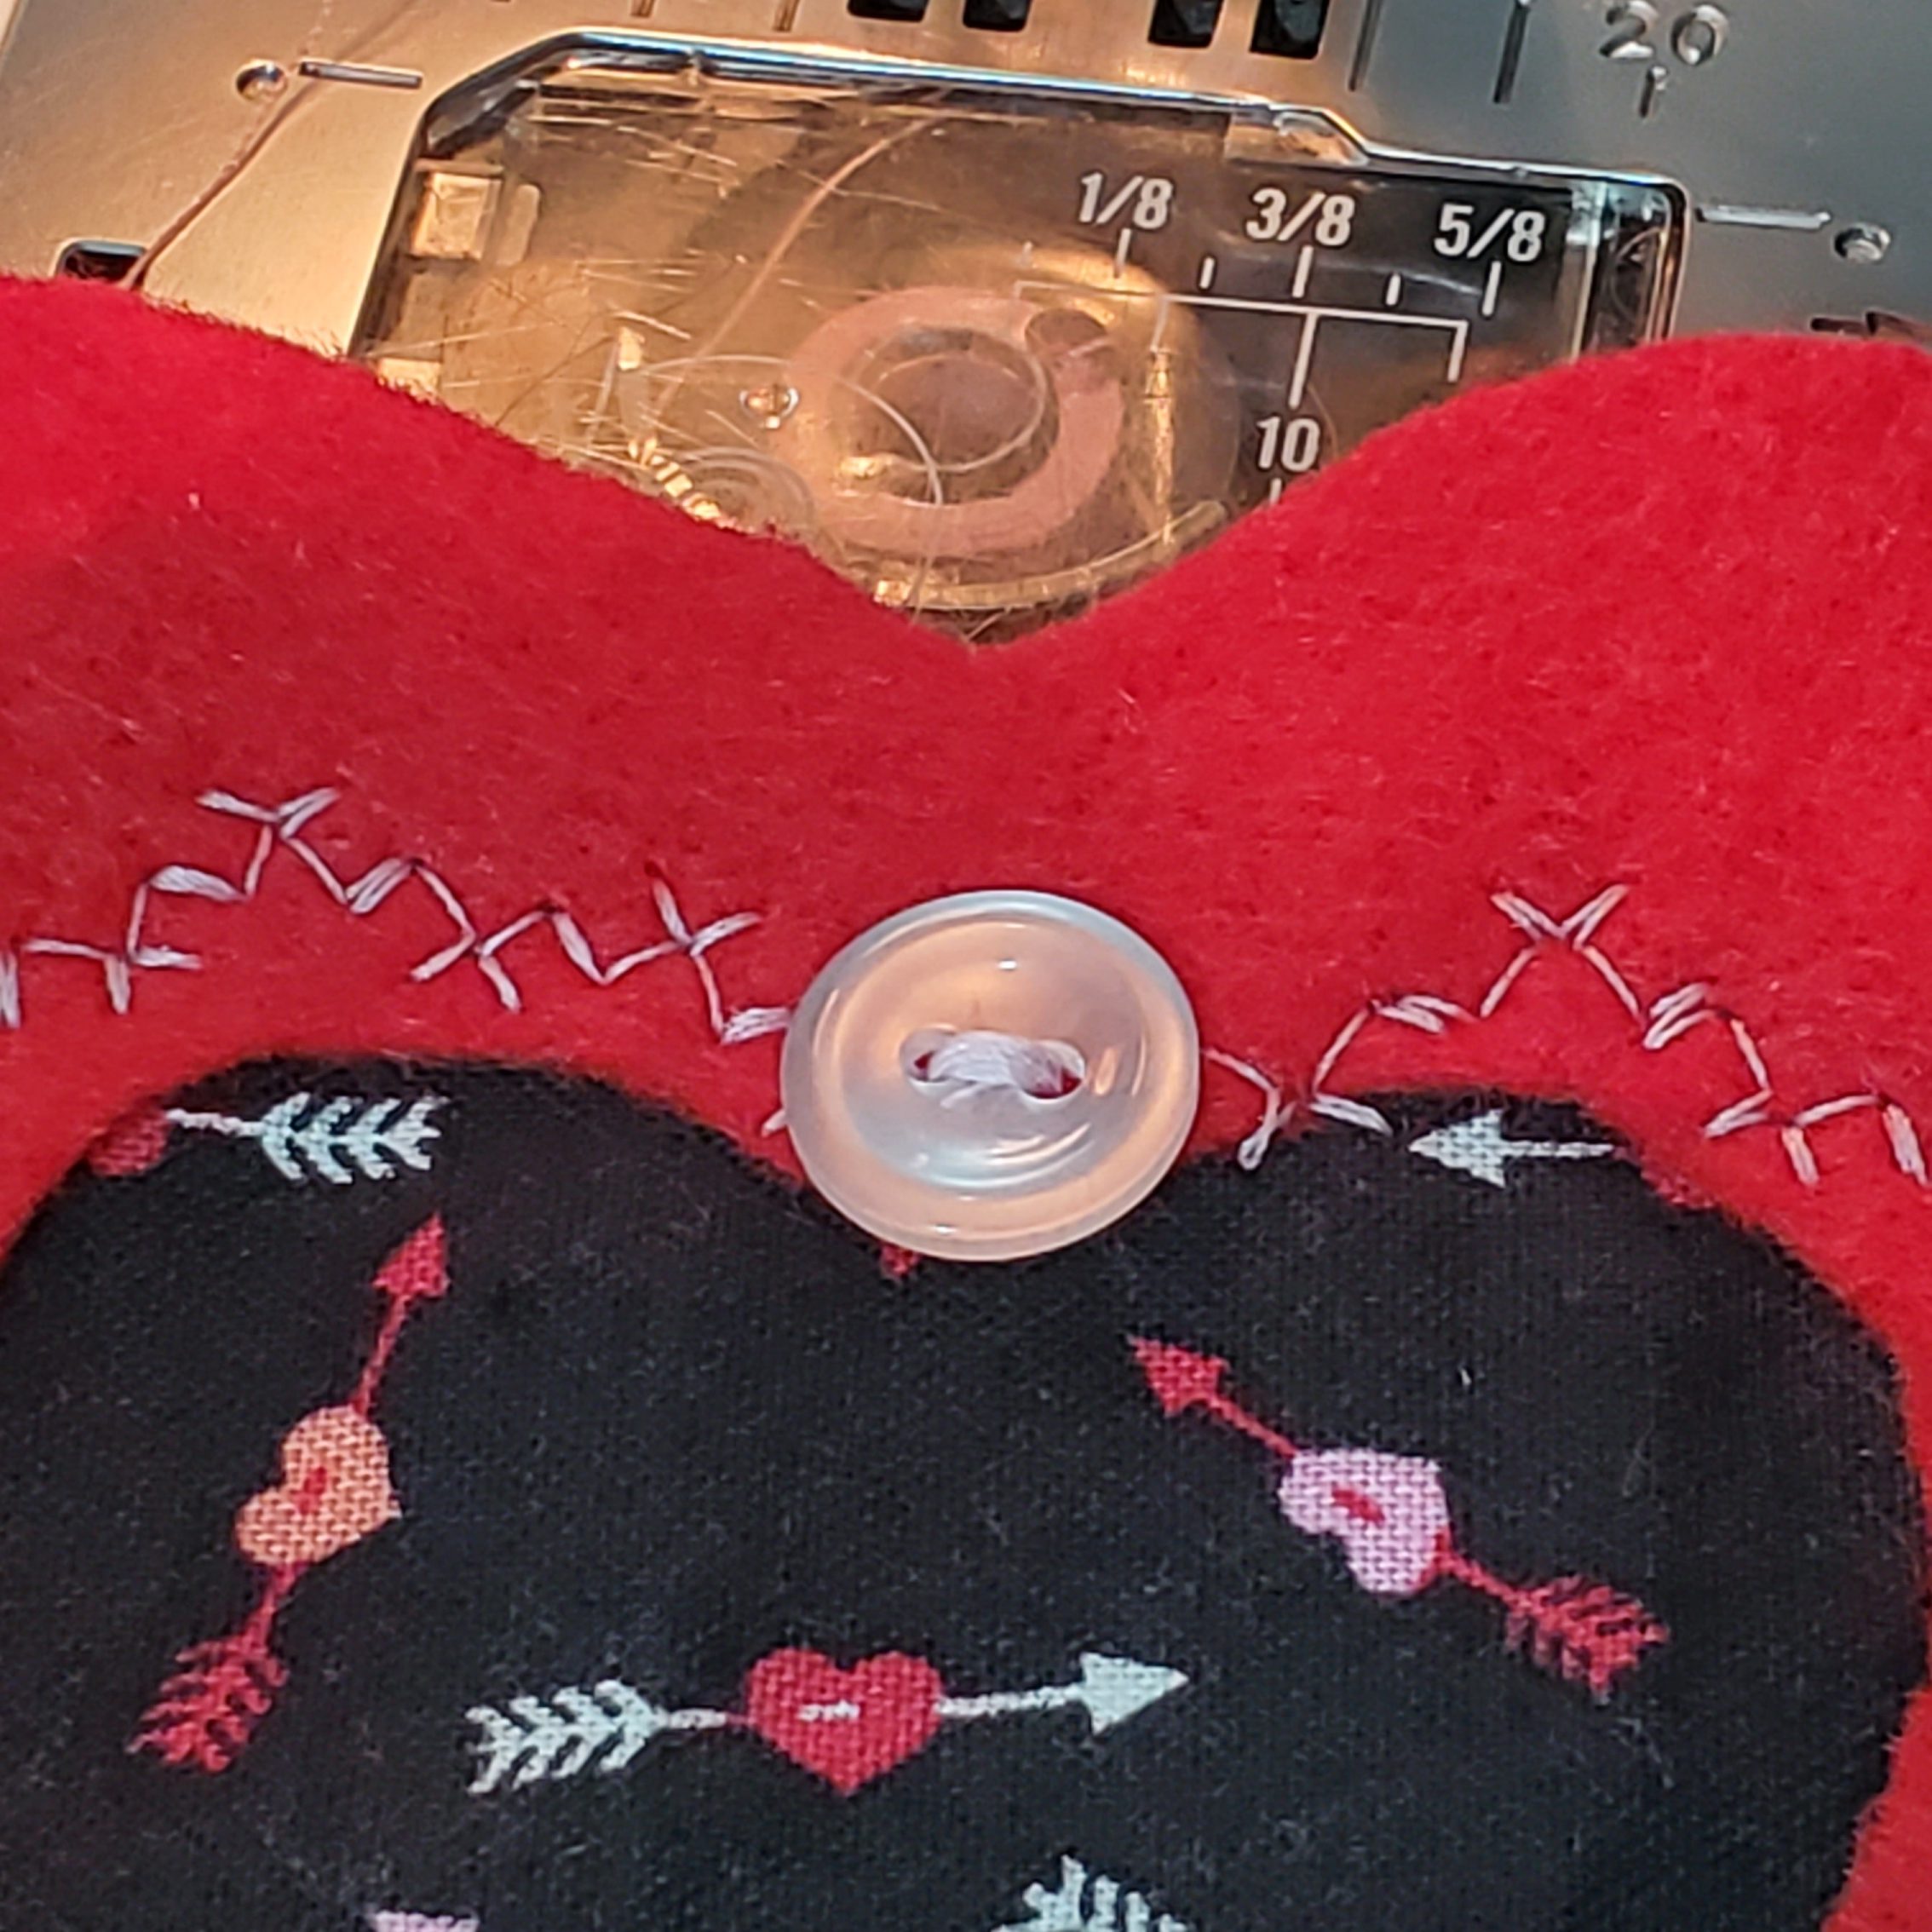
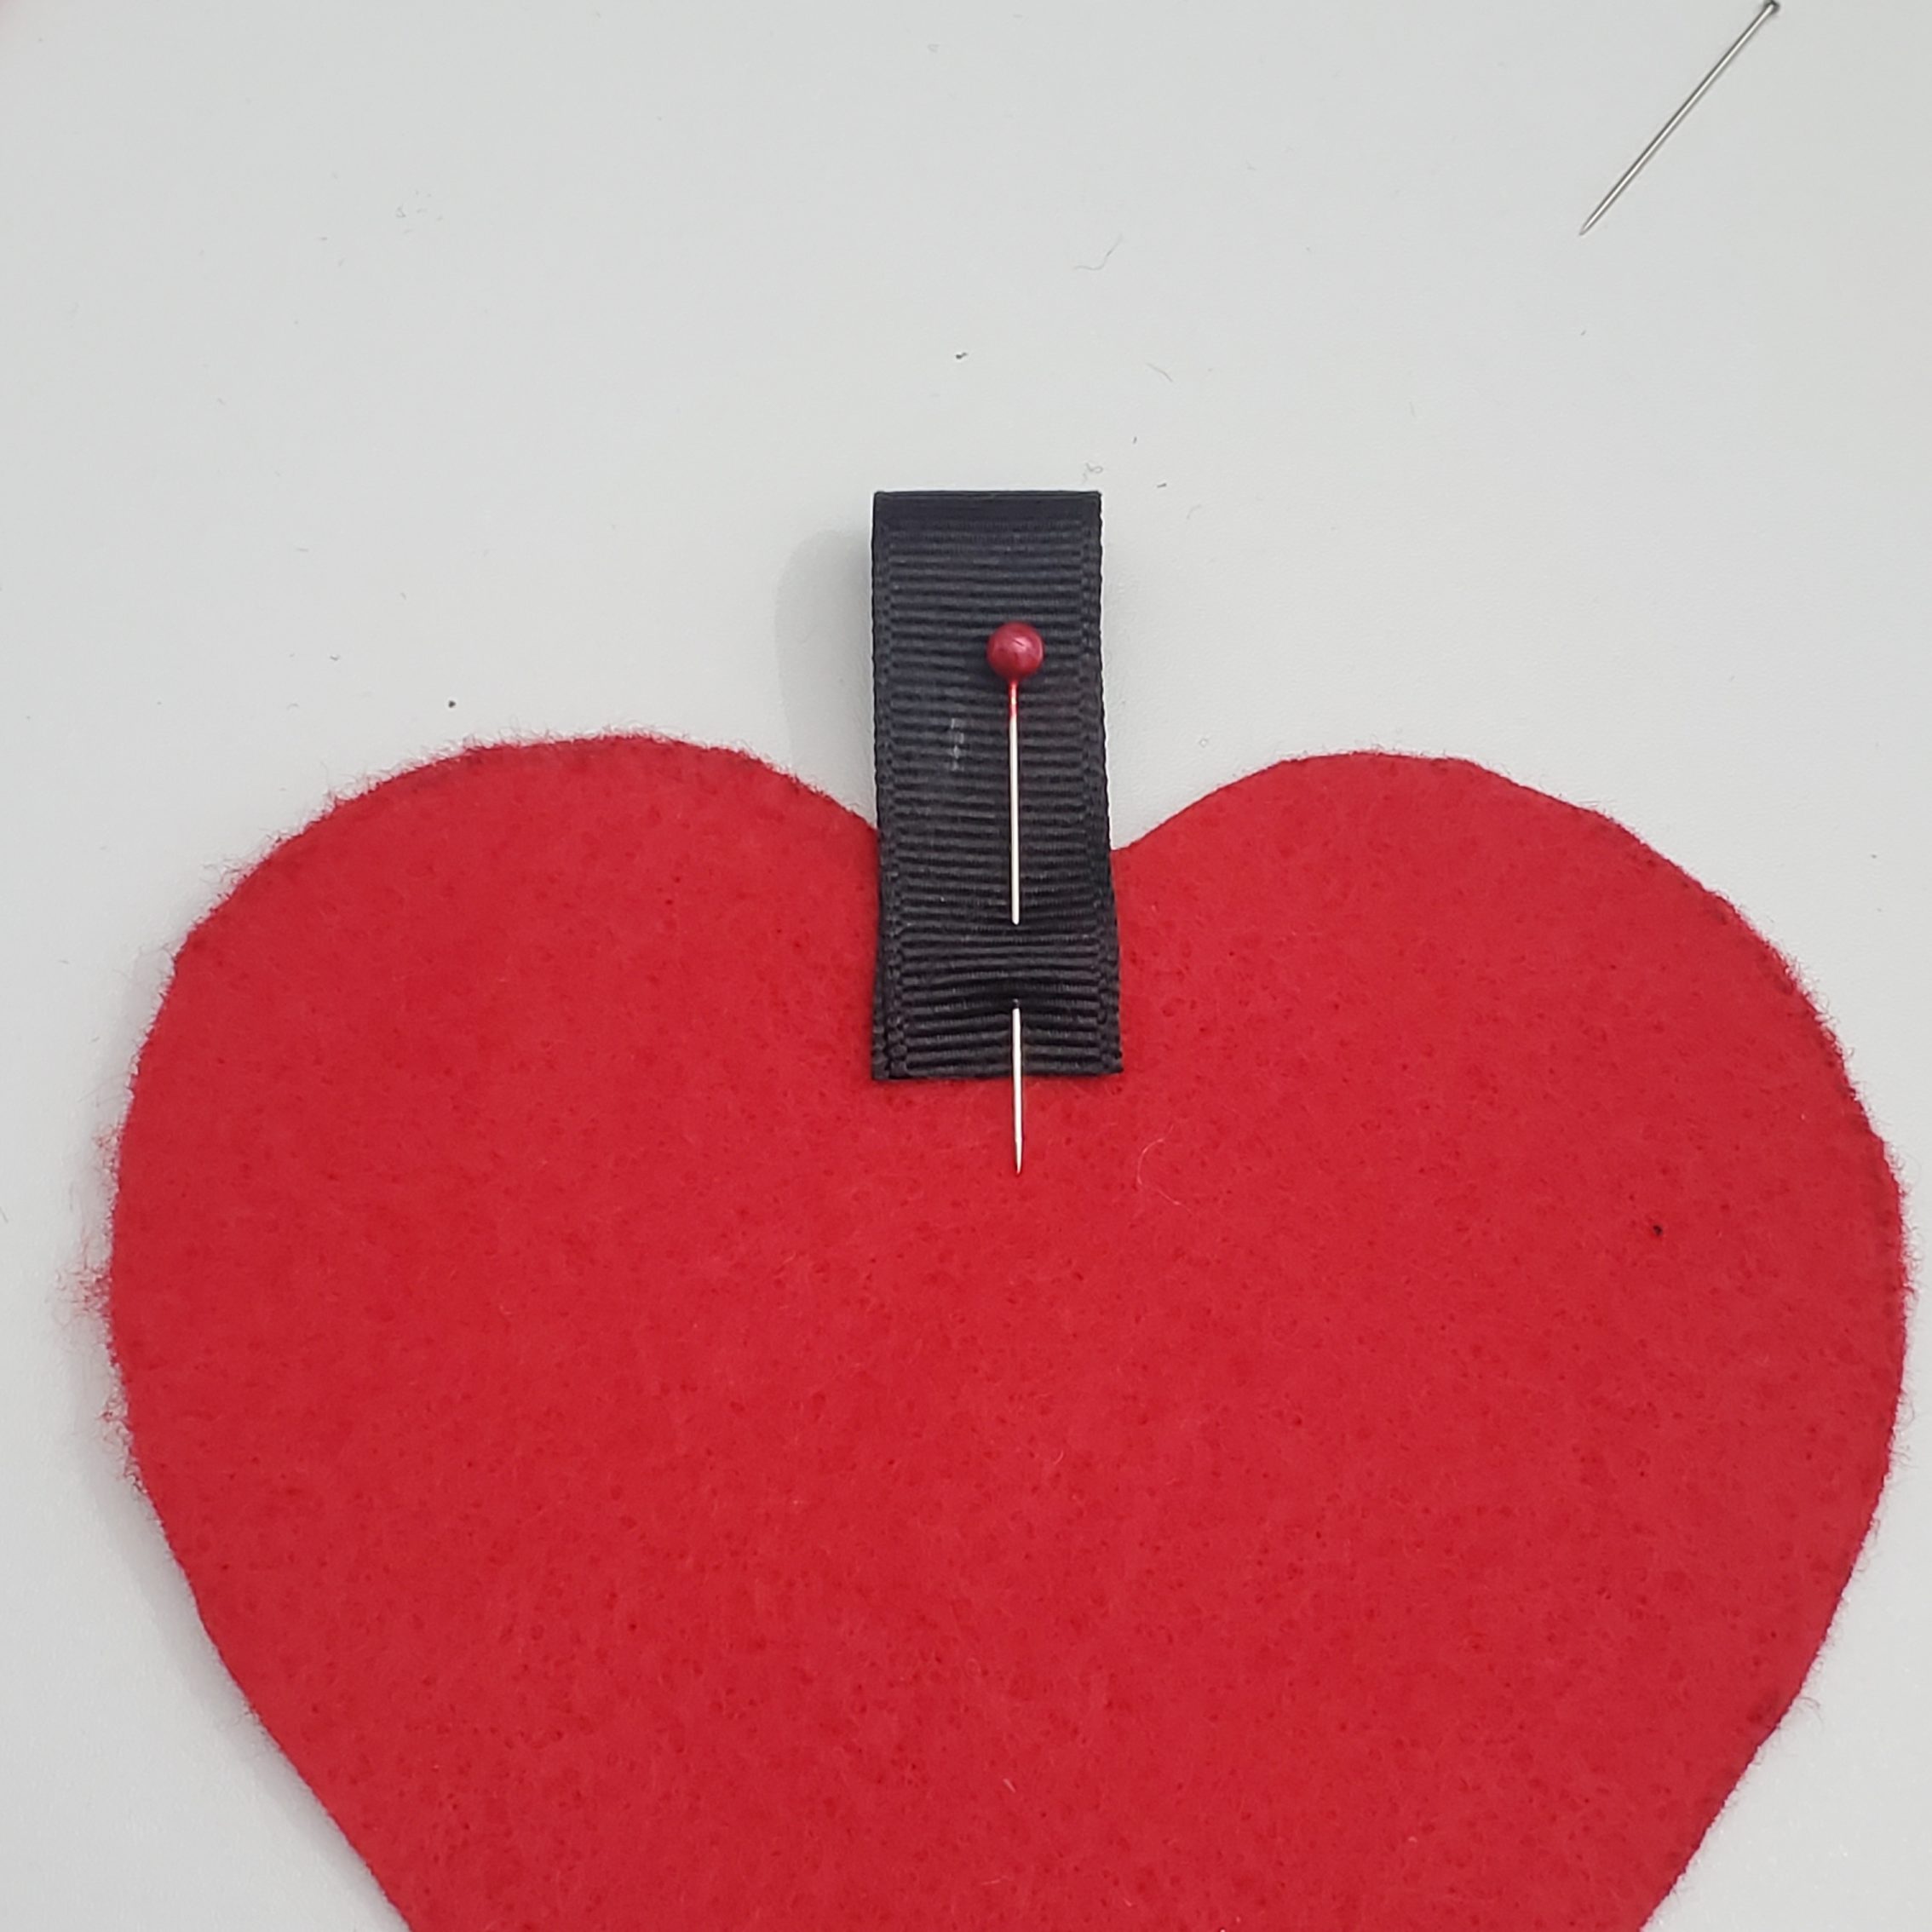
Cut your ribbon pieces to be 4″ long. Fold your ribbon in half and then pin it on the top of the heart backing, on the inside of the heart. Stitch it into place.
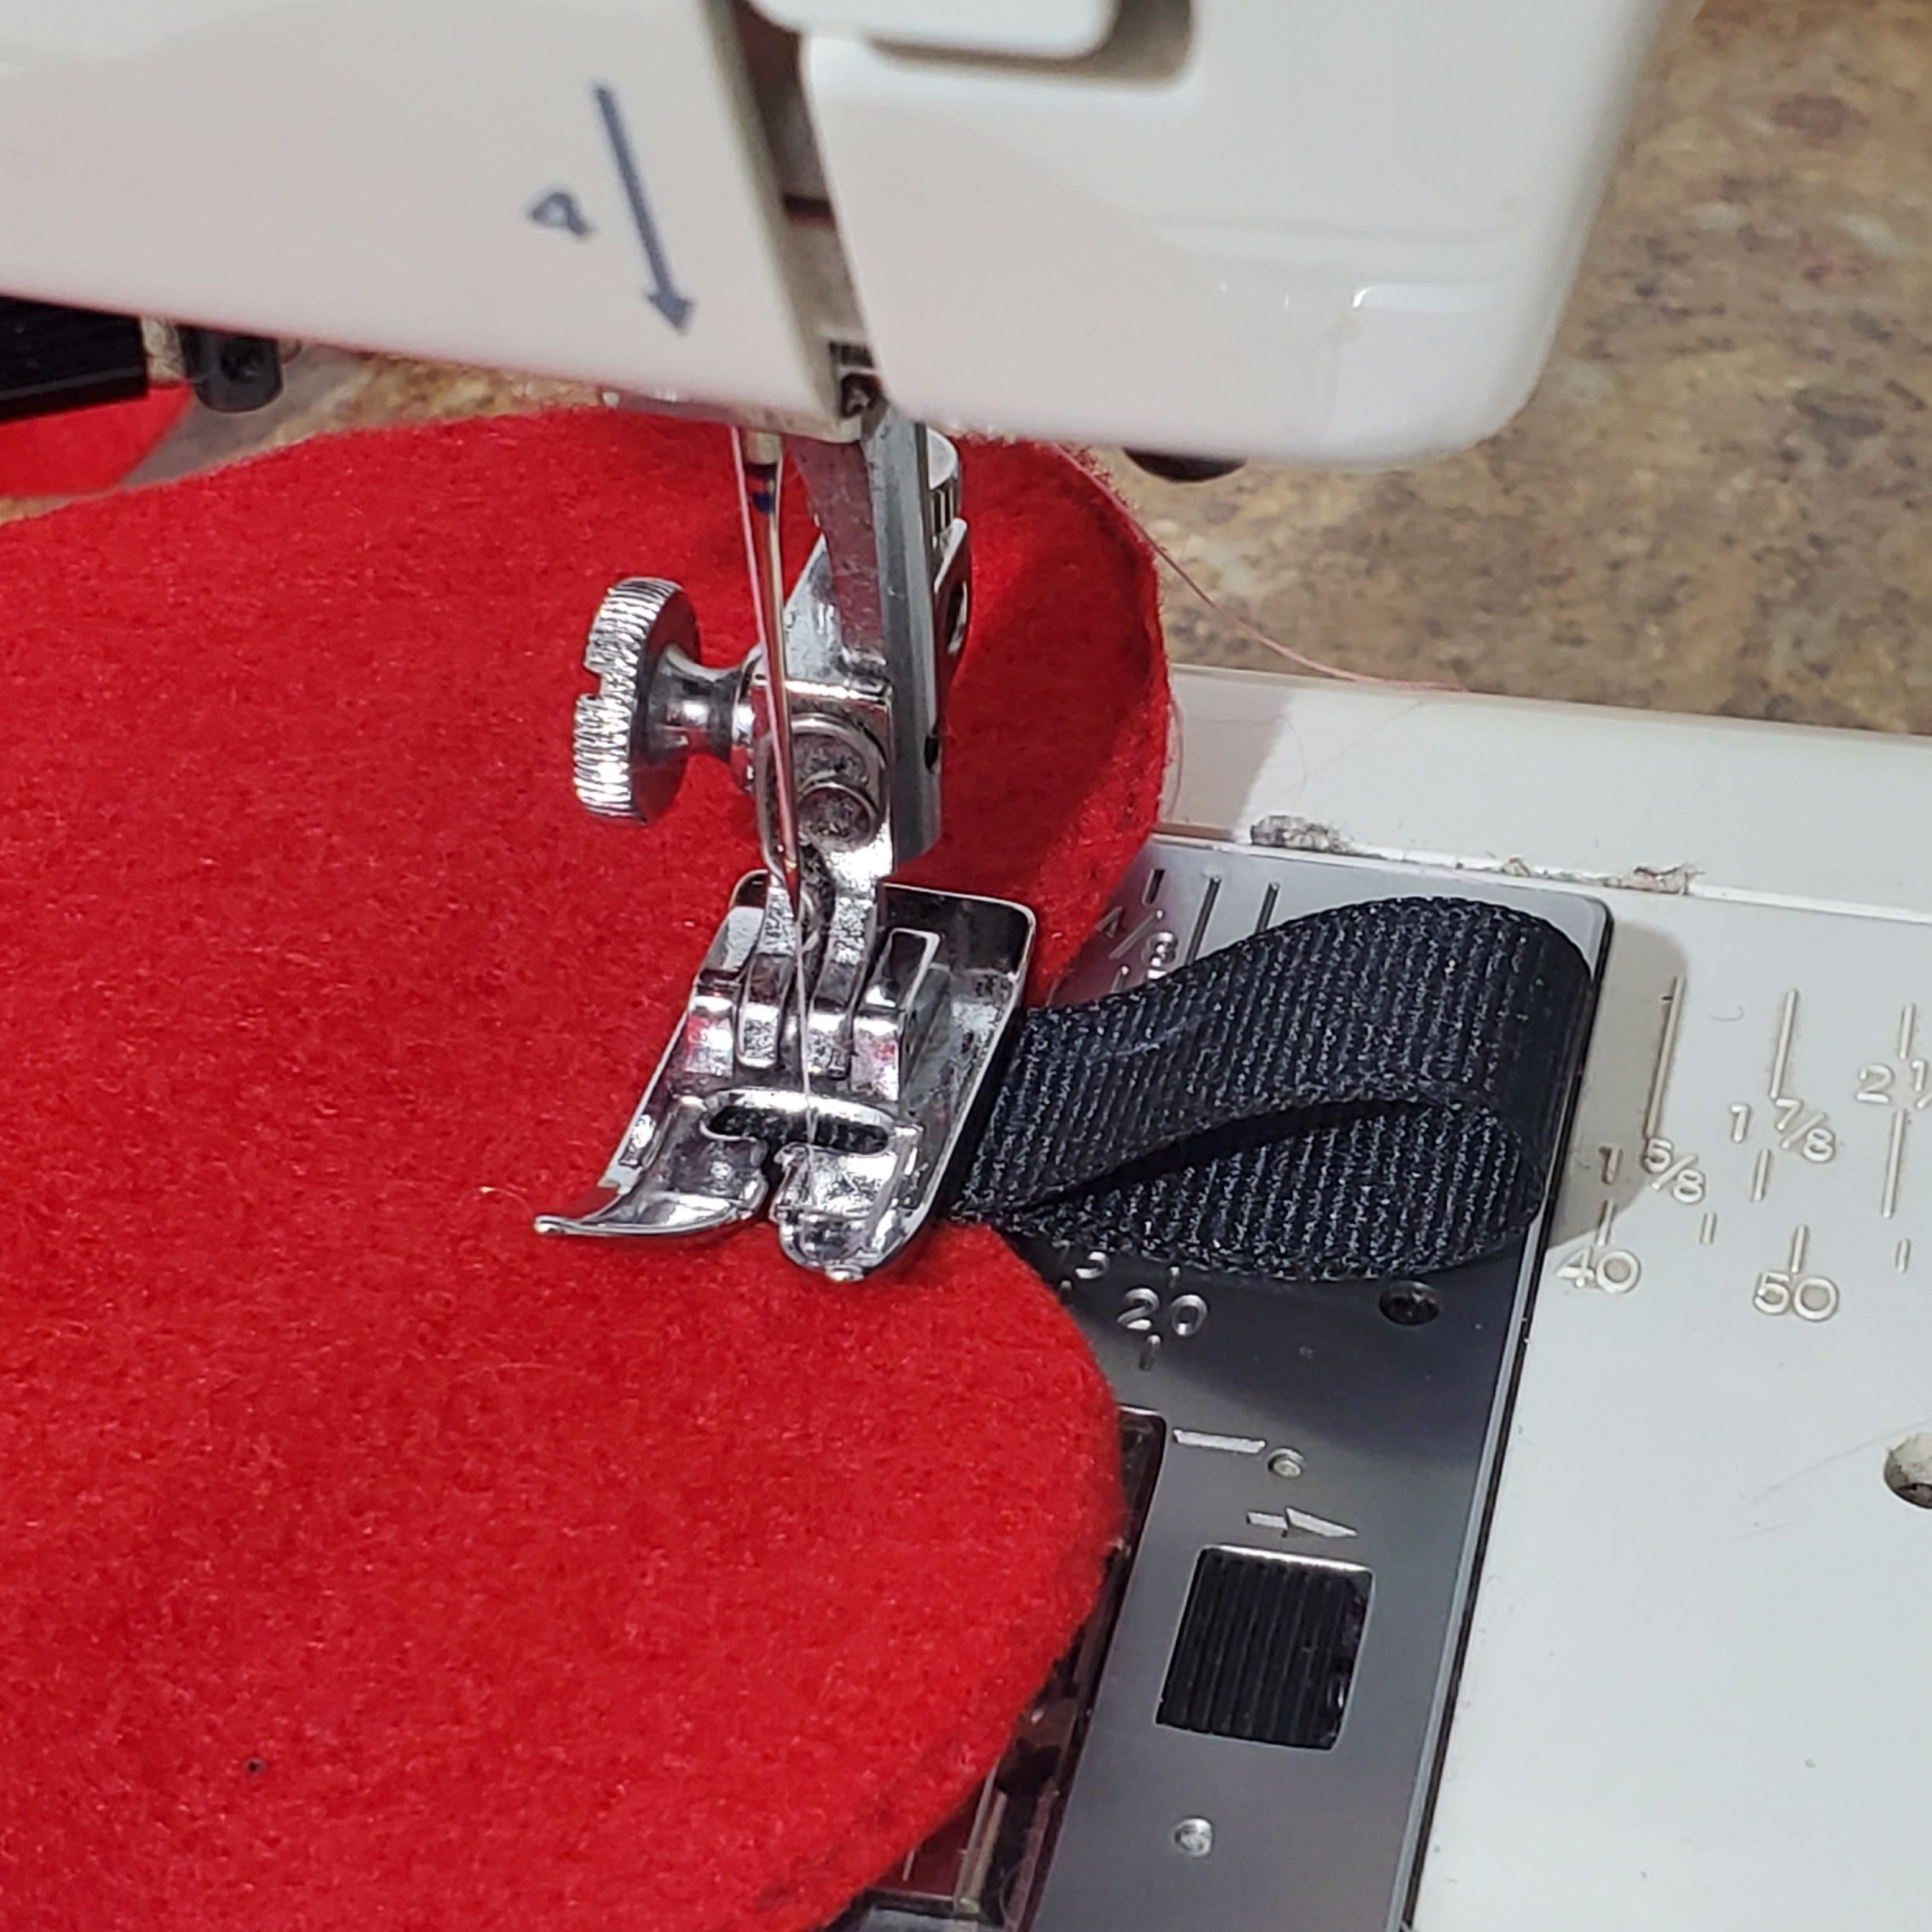
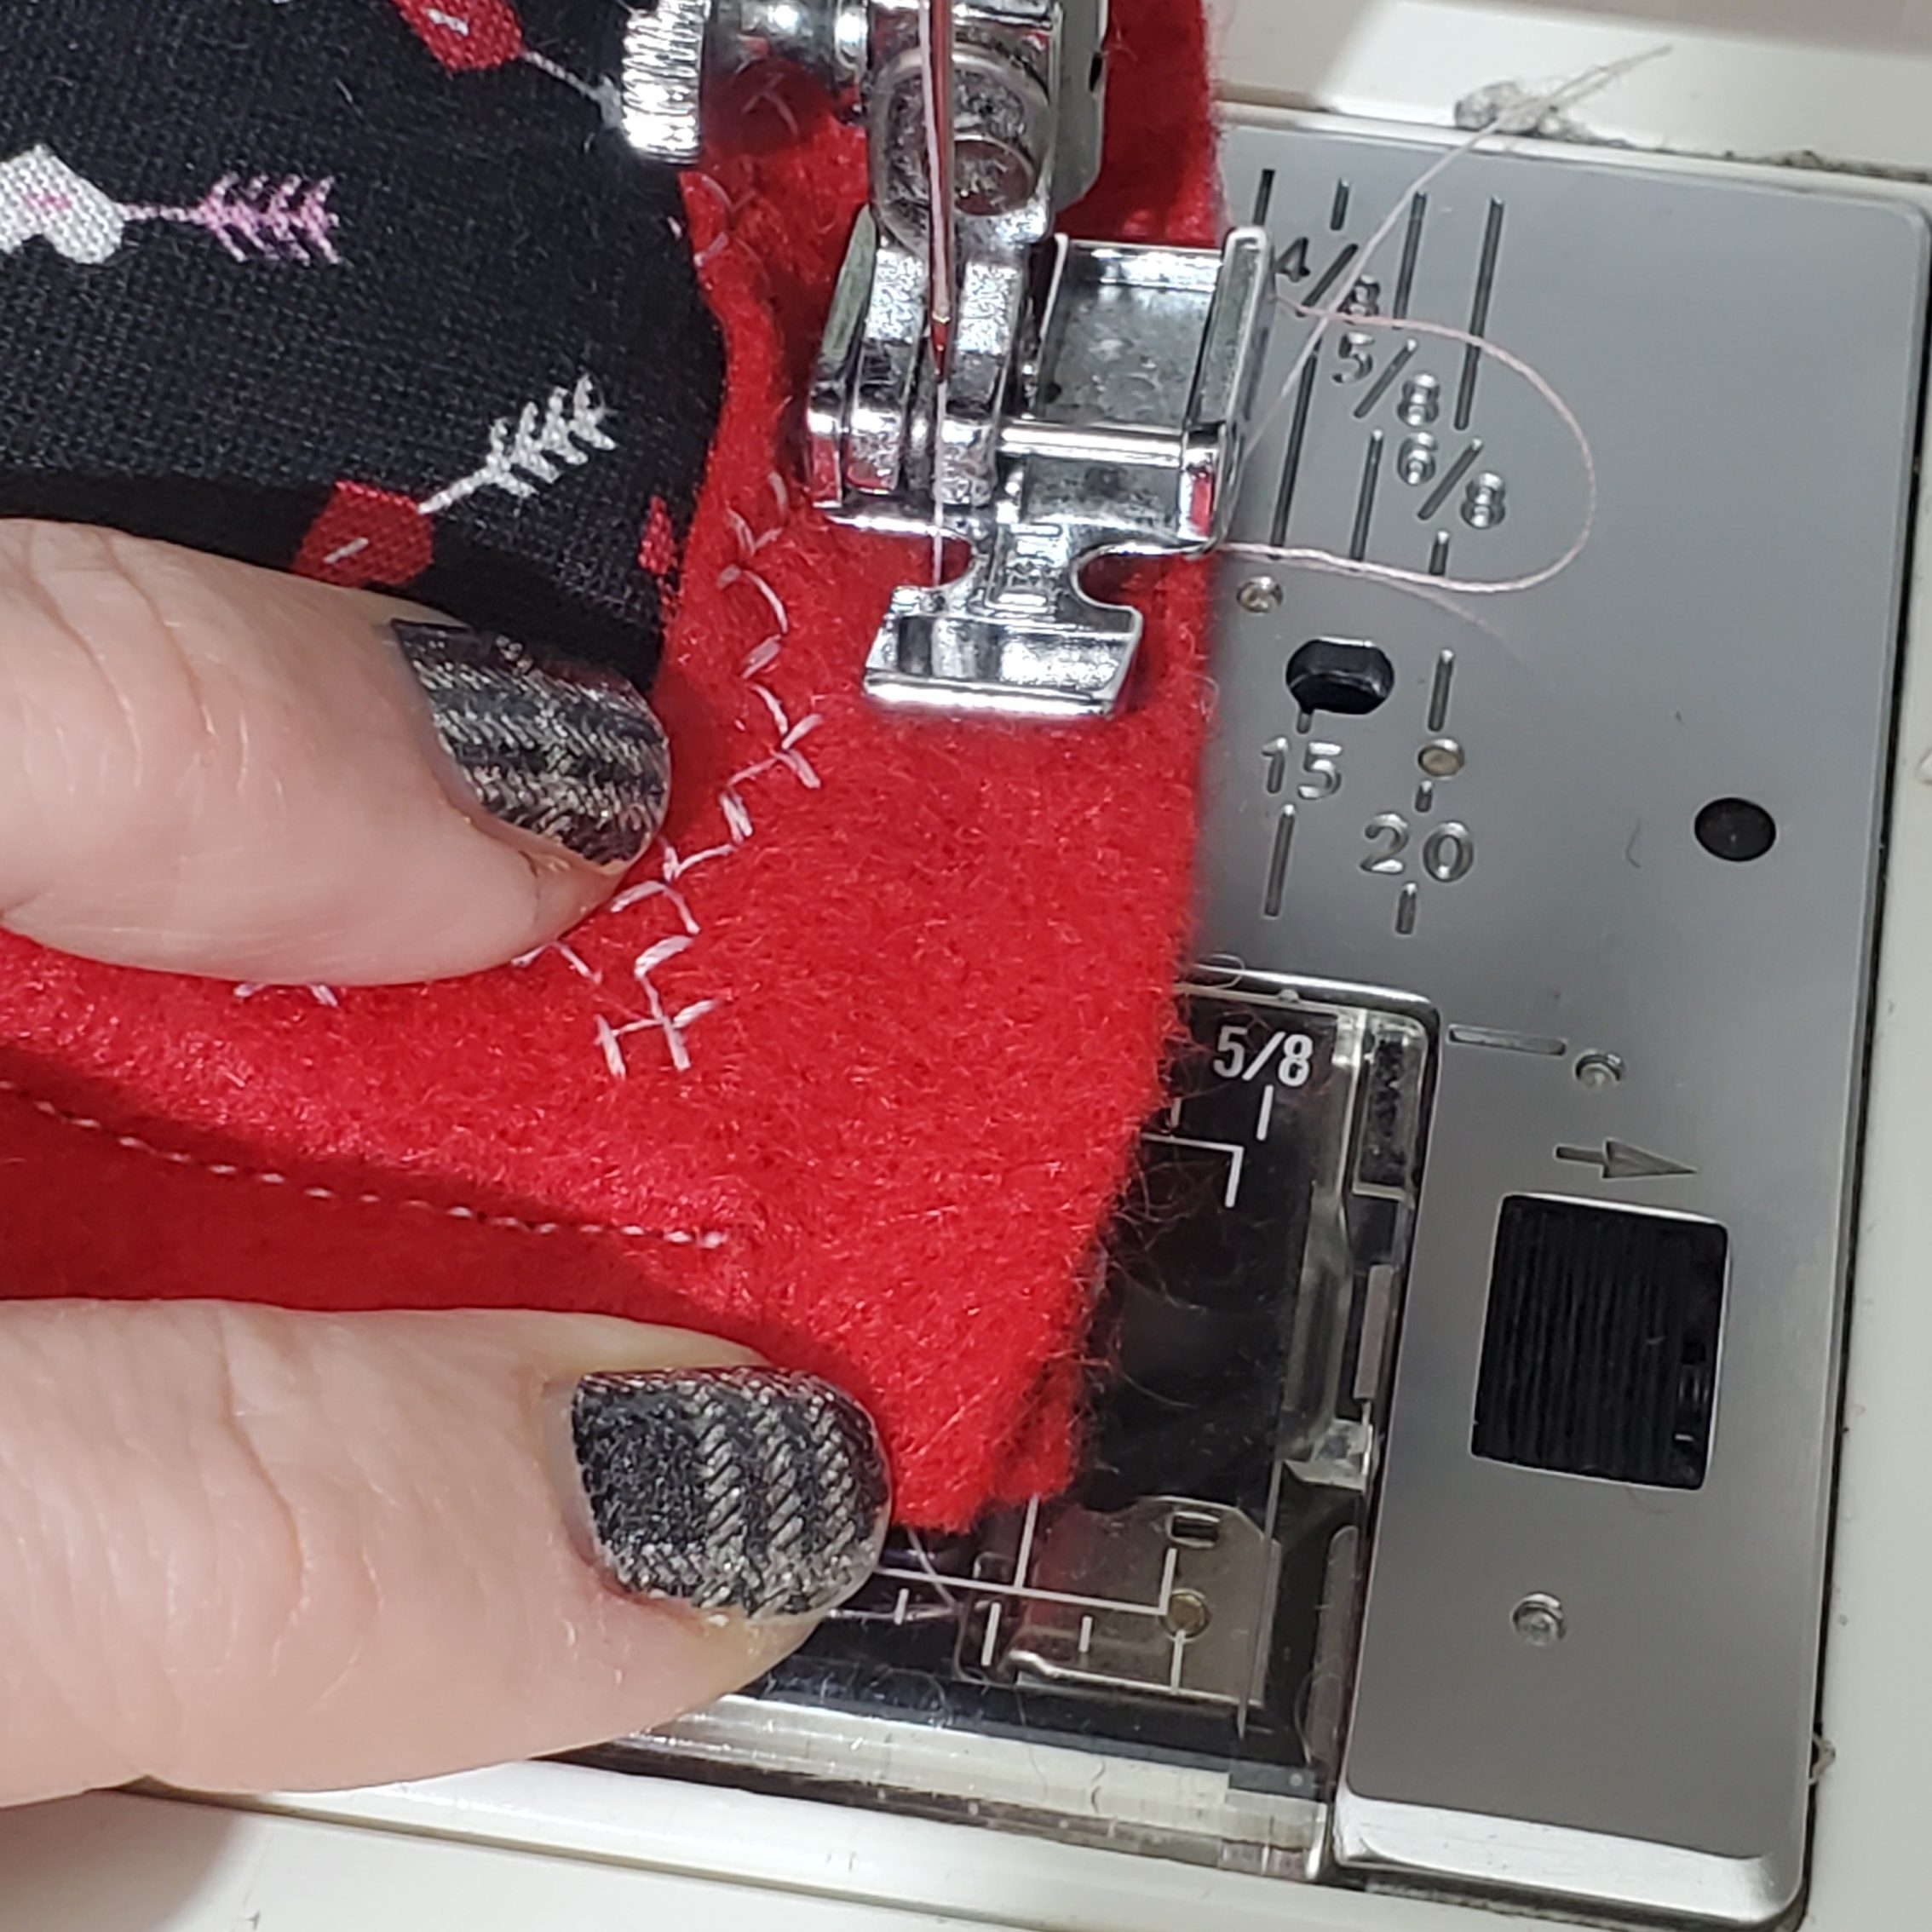
Now, place your top heart on top of your back heart, with the ribbon sandwiched in the middle. Line up your edges to be even and pin the 2 hearts in place.
Stitch around the perimeter of the heart, slightly pivoting if needed on the curved edges. I started at the bottom of the heart, 1/2″ up from the pointed end of the heart (you can get a better idea in the 2nd picture). I used a 1/2″ seam allowance. You can use whatever you like, just be consistent with it. Make sure to leave an opening, about 3″ long, if you want to stuff your hearts. If you don’t want to stuff them, sew it closed.
If you want to stuff your hearts, this is the point where you would do that. If you would rather leave it flat, that works too! Make sure (if you are filling it) that you stitch your opening shut when done.
And now you are done with your heart! Make however many you want to string on your banner.
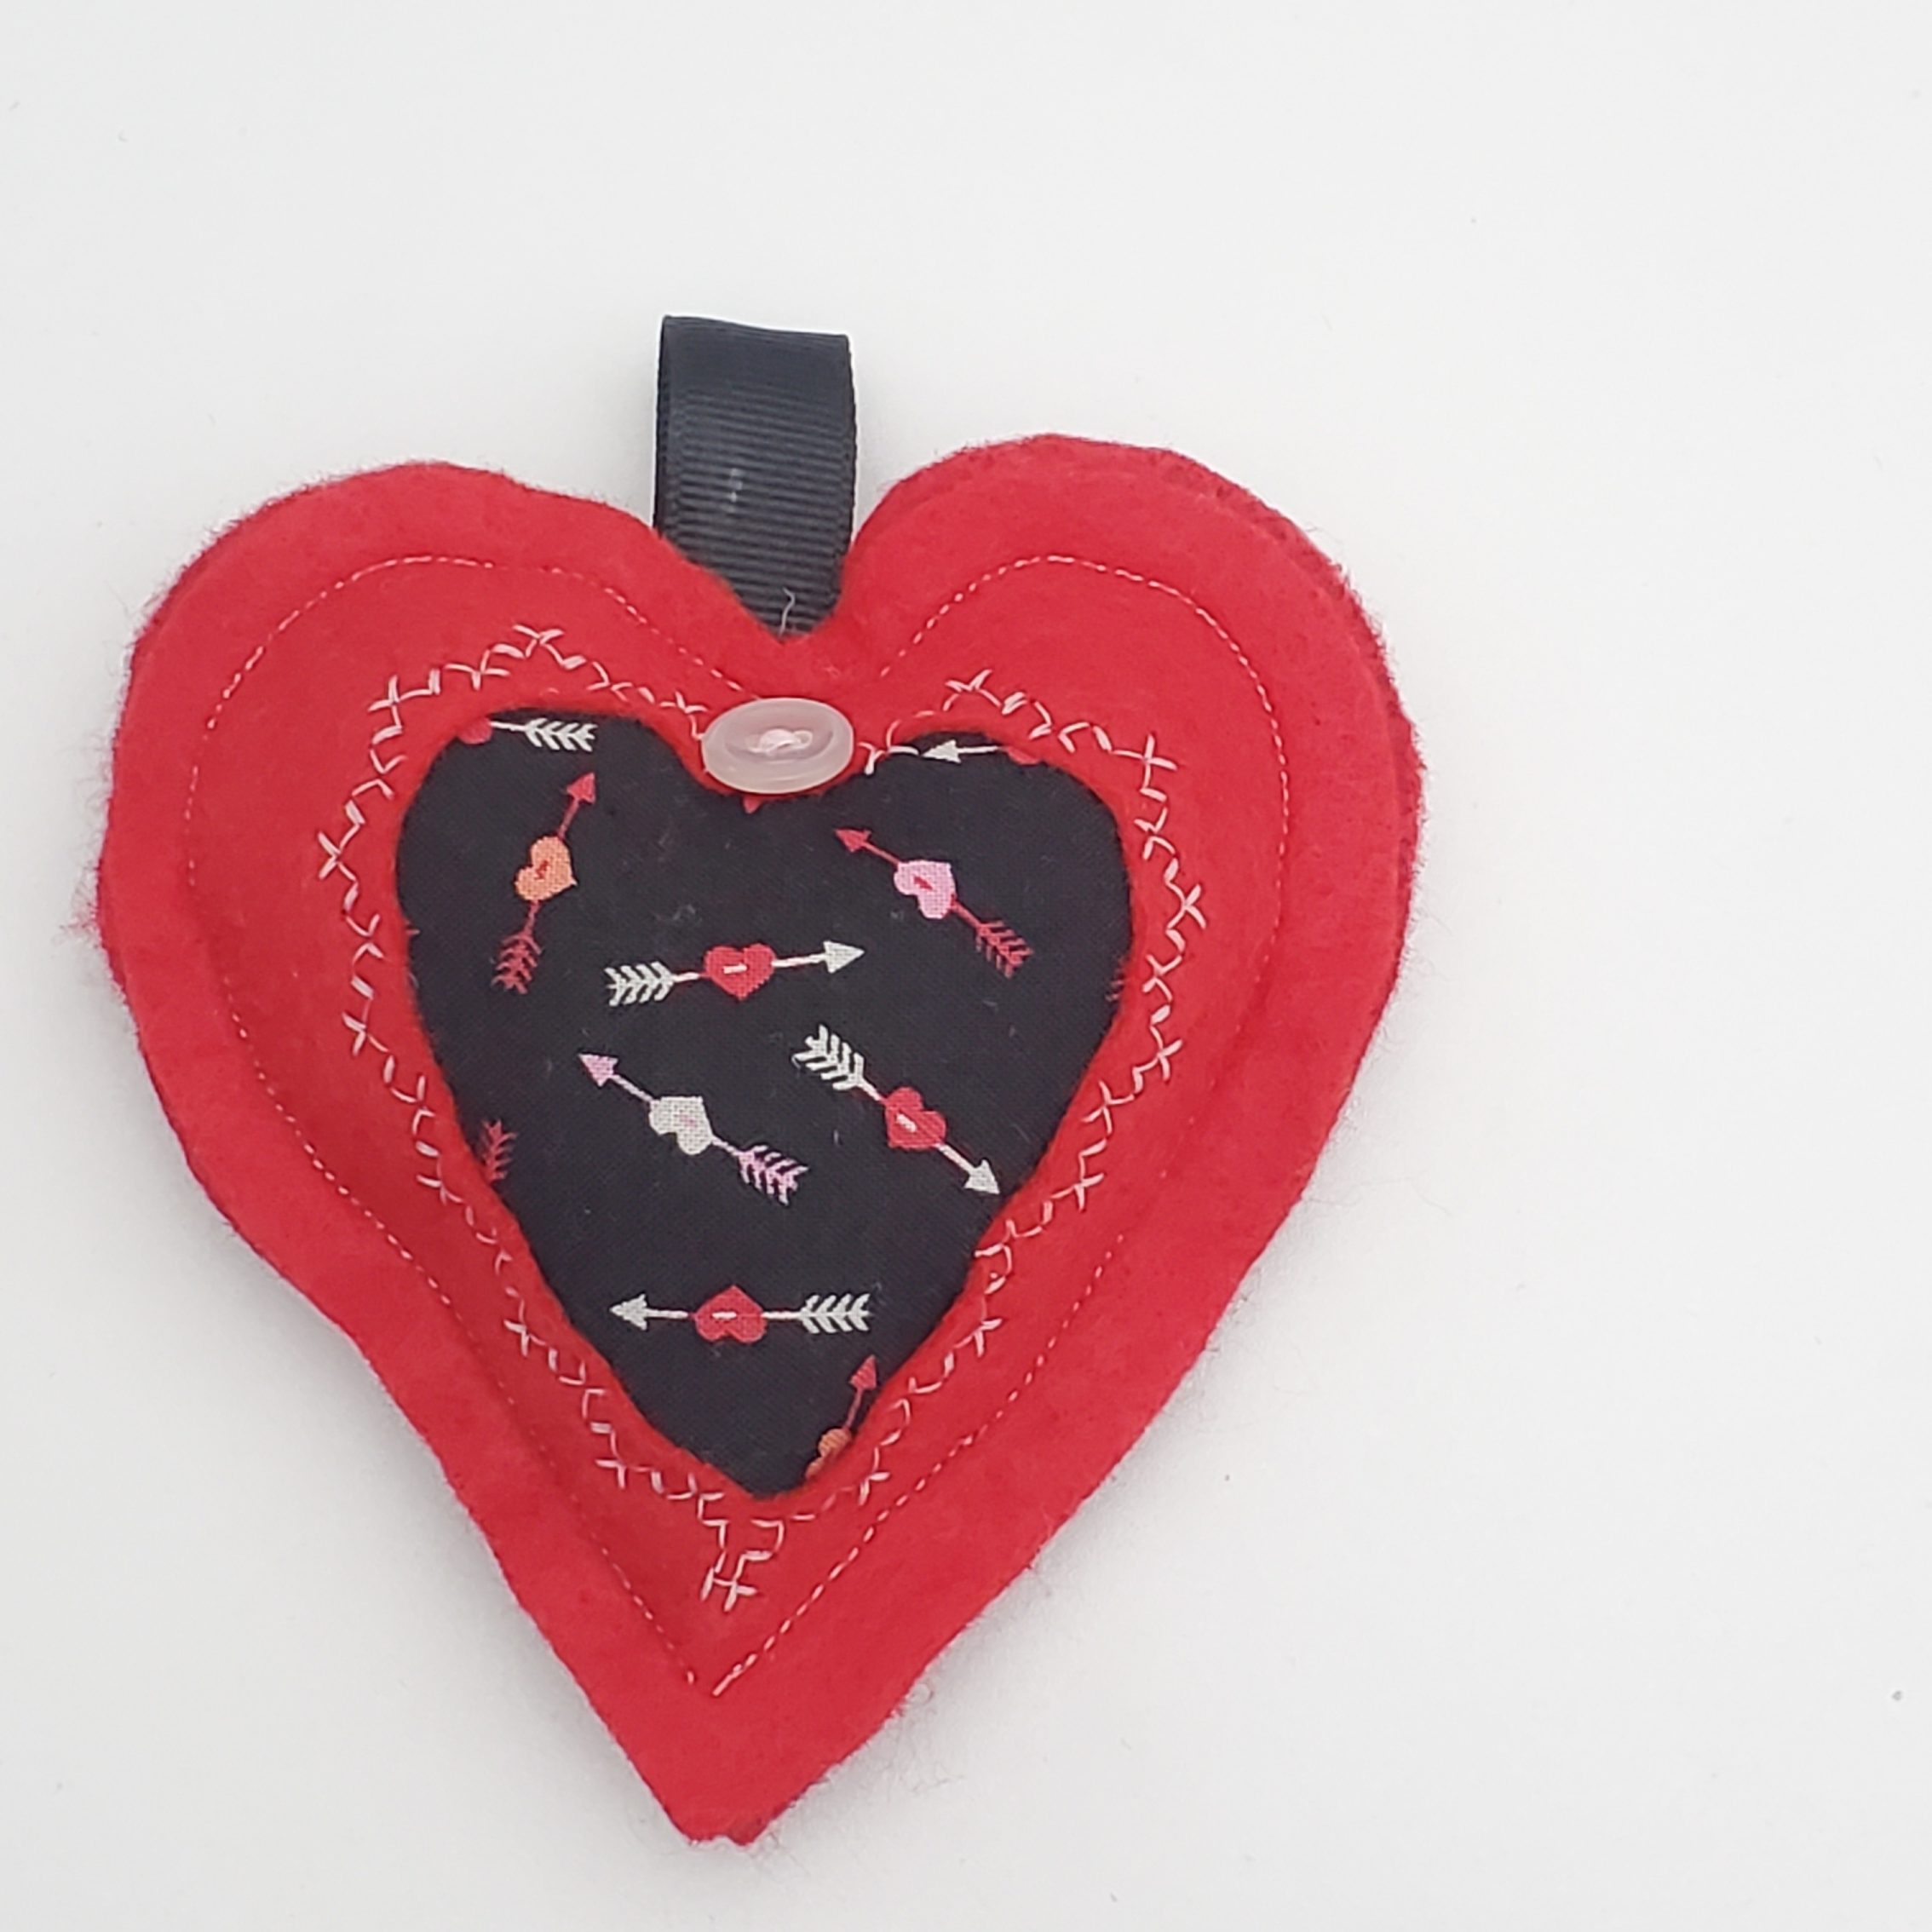
The last step is putting your hearts on a piece of twine or ribbon! And that’s it! You’re done!
Let me know how you did with this tutorial! I love hearing from you!
Things you might need
*Disclaimer: Sassy Cassy’s is an affiliate of Amazon.com. That means that I will get a small commission off of any purchases made through your clicks. Thank you for supporting my small business!
