
It’s a well-known fact that I am a fabric hoarder. I have a hard time throwing away any little scrap of fabric because I just know that I can use it for something! And being that I am a sewing teacher, there are always little projects that I save my scraps for. I’ve done a couple variations of bookmarks with my students, including this one here. I’ll often times cut up my scrap fabrics and organize them into project boxes: squares for quilted pillow covers, rectangles for headbands and scrunchies, remnants for backpacks, hexies (for quilting), bookmarks….and whatever else is left goes into a huge scrap bin in my sewing closet!
I prefer not to call myself a hoarder, though. I like to think of myself as resourceful and unwasteful. That’s my personality in general; I just hate wasting! I must have inherited that quality from my grandmother. Although she was a real life hoarder. Ha ha.
So now, on to the scrappy bookmark tutorial!
How To Make A Bookmark With Fabric Scraps
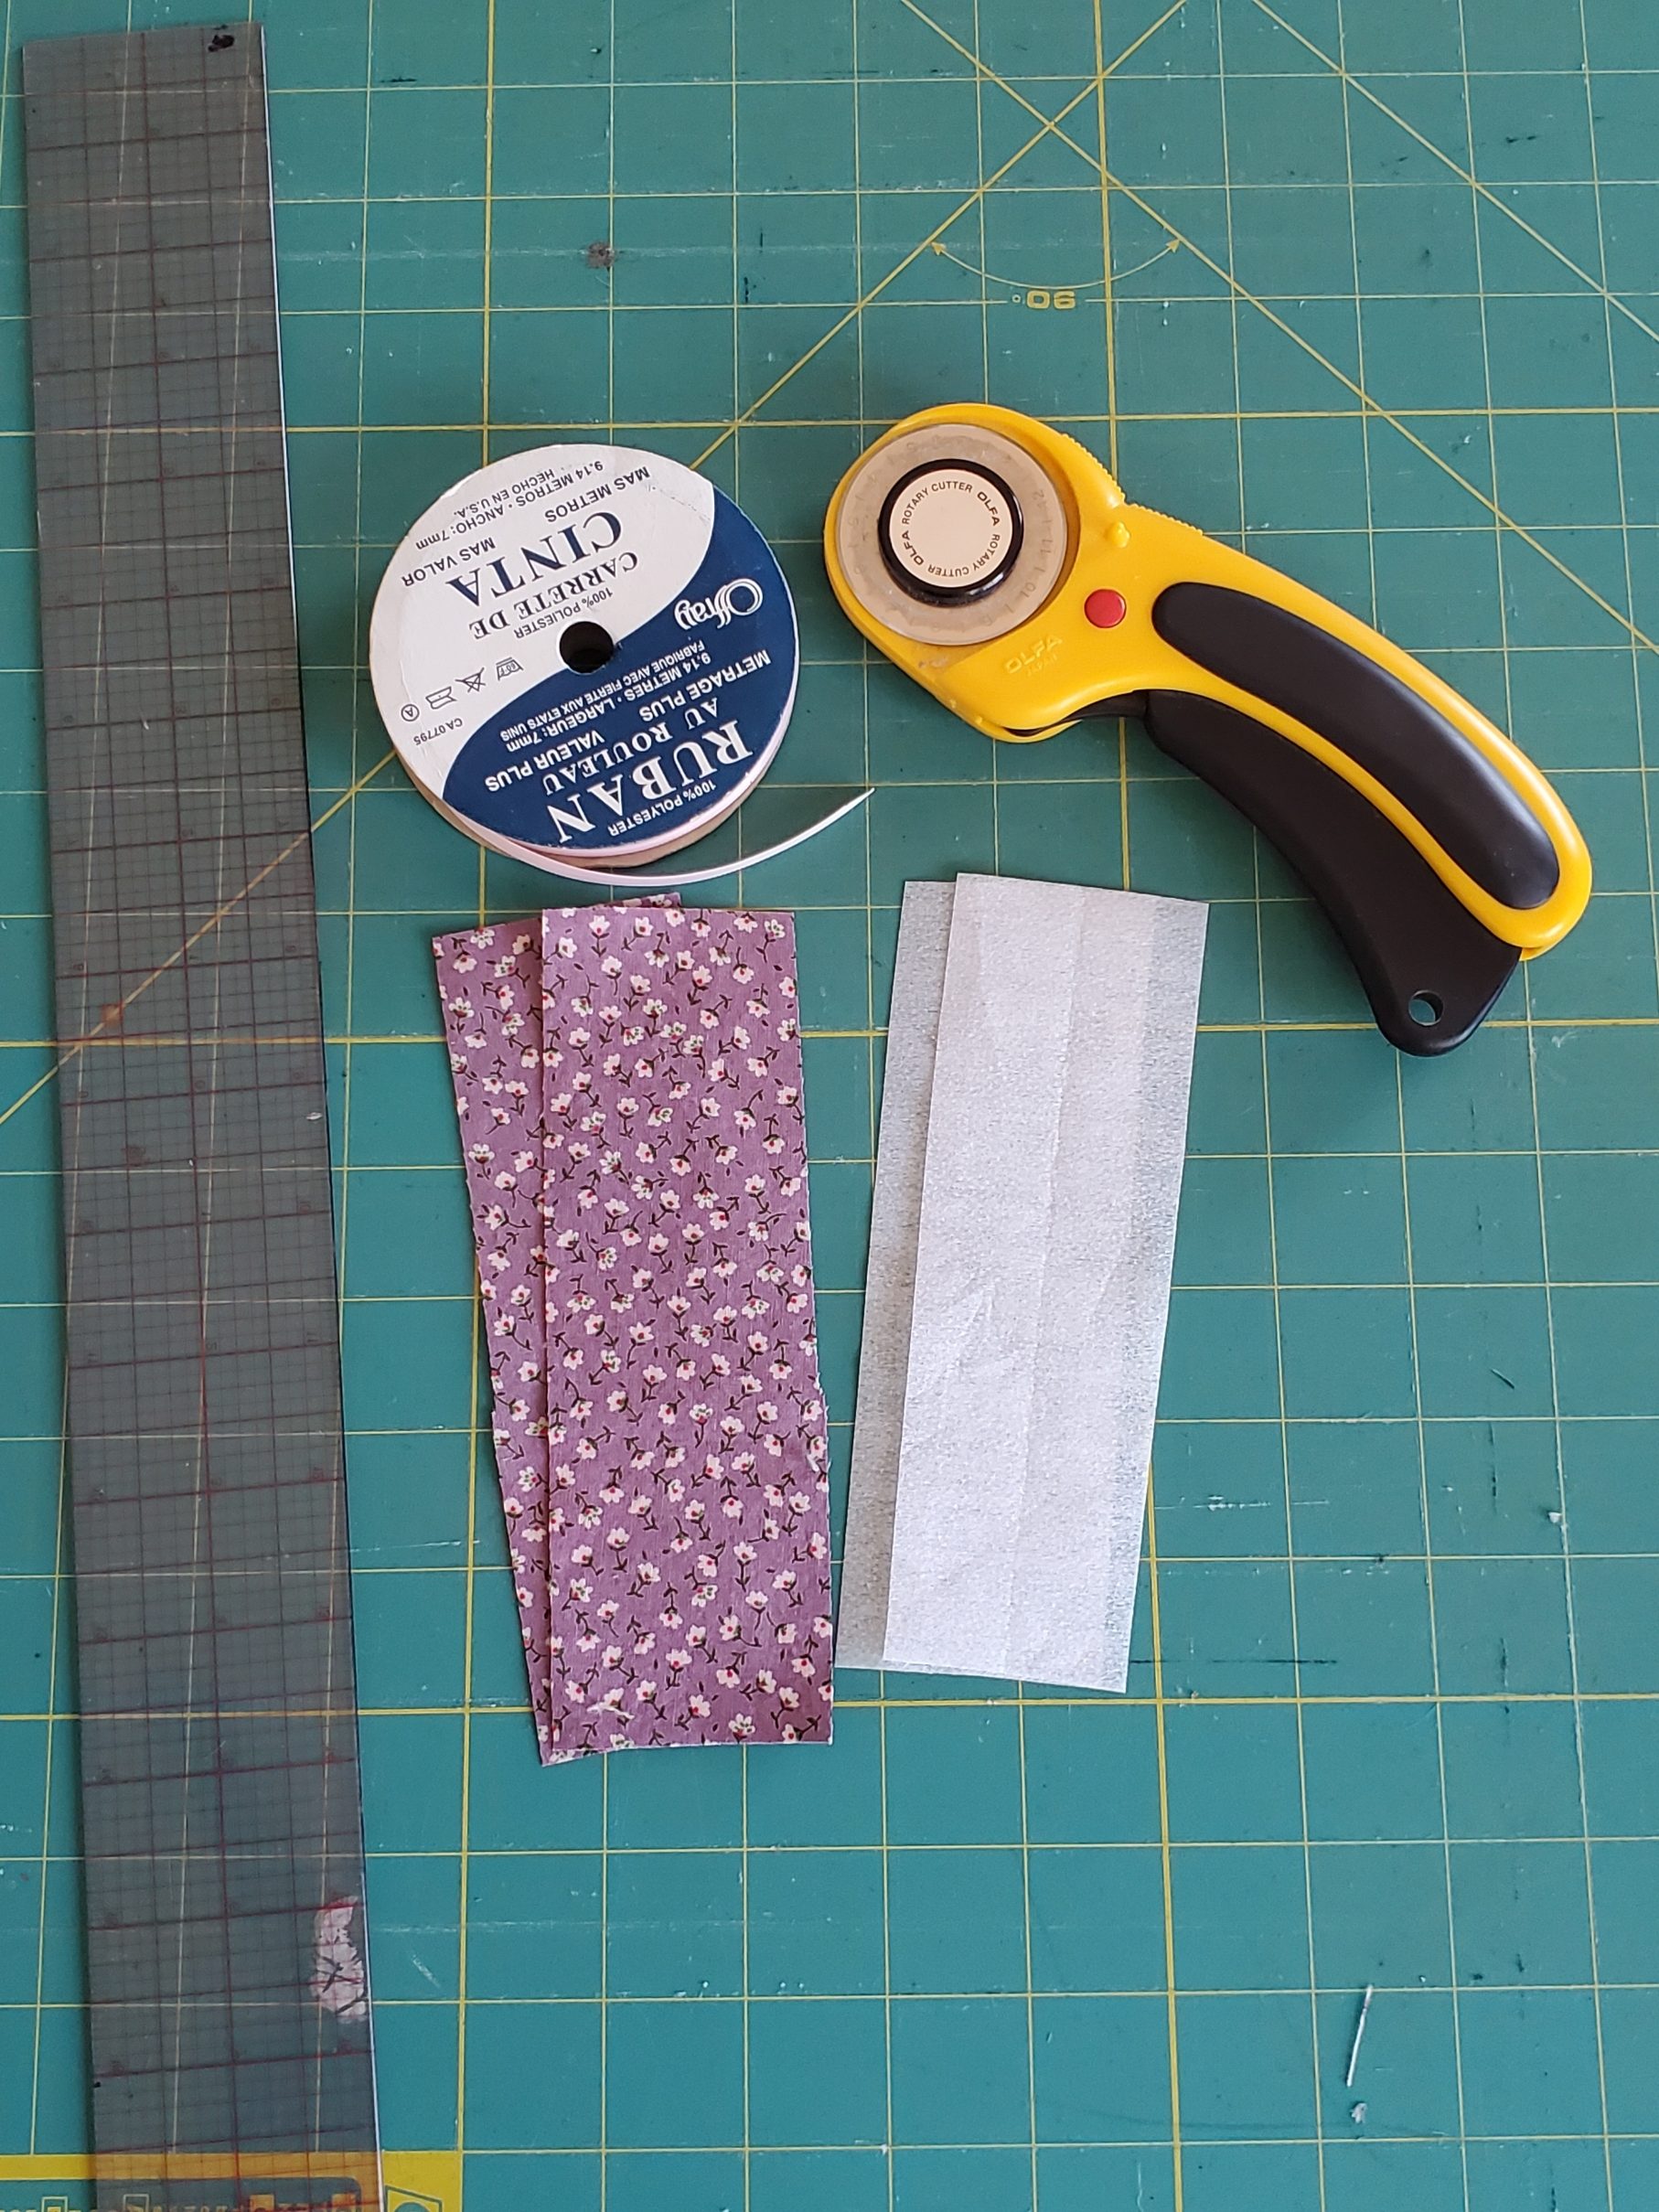
All you need for this project is:
- fabric scraps
- fusible interfacing scraps
- ribbon
- pinking shears (optional)
- rotary mat and cutter, or fabric scissors
You can check the end of this post for a shopping list or links to some of these items 🙂
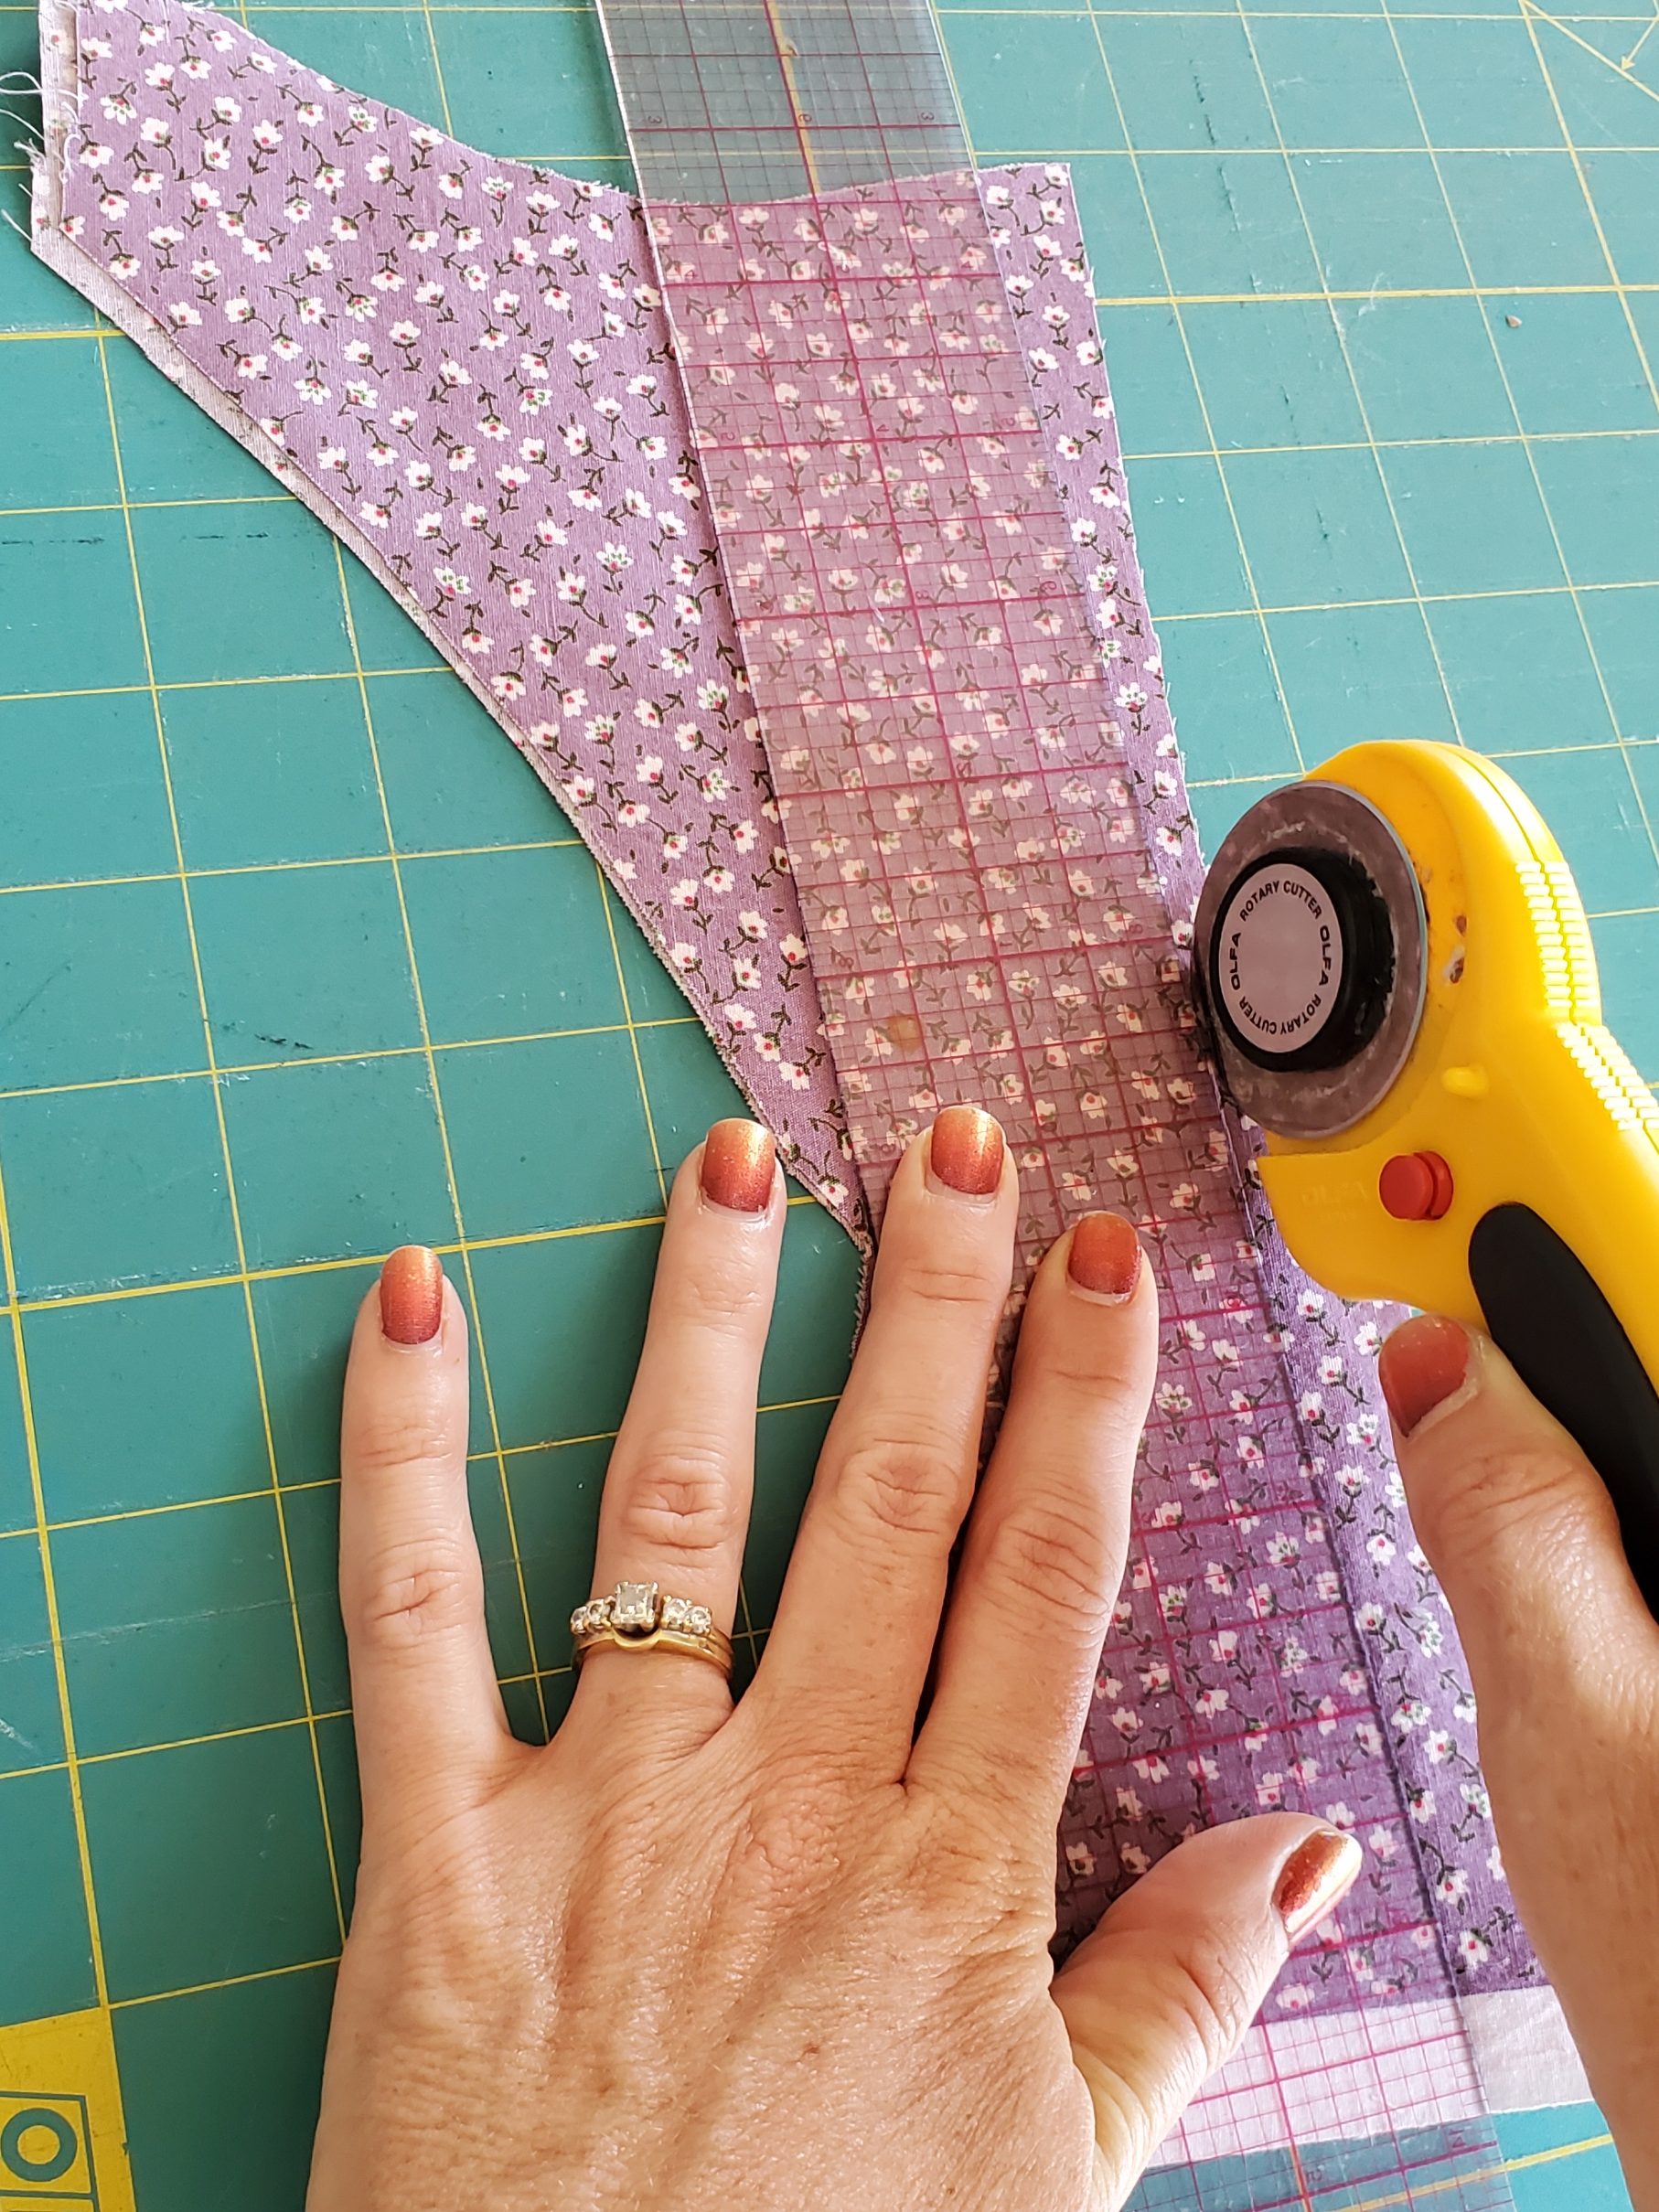
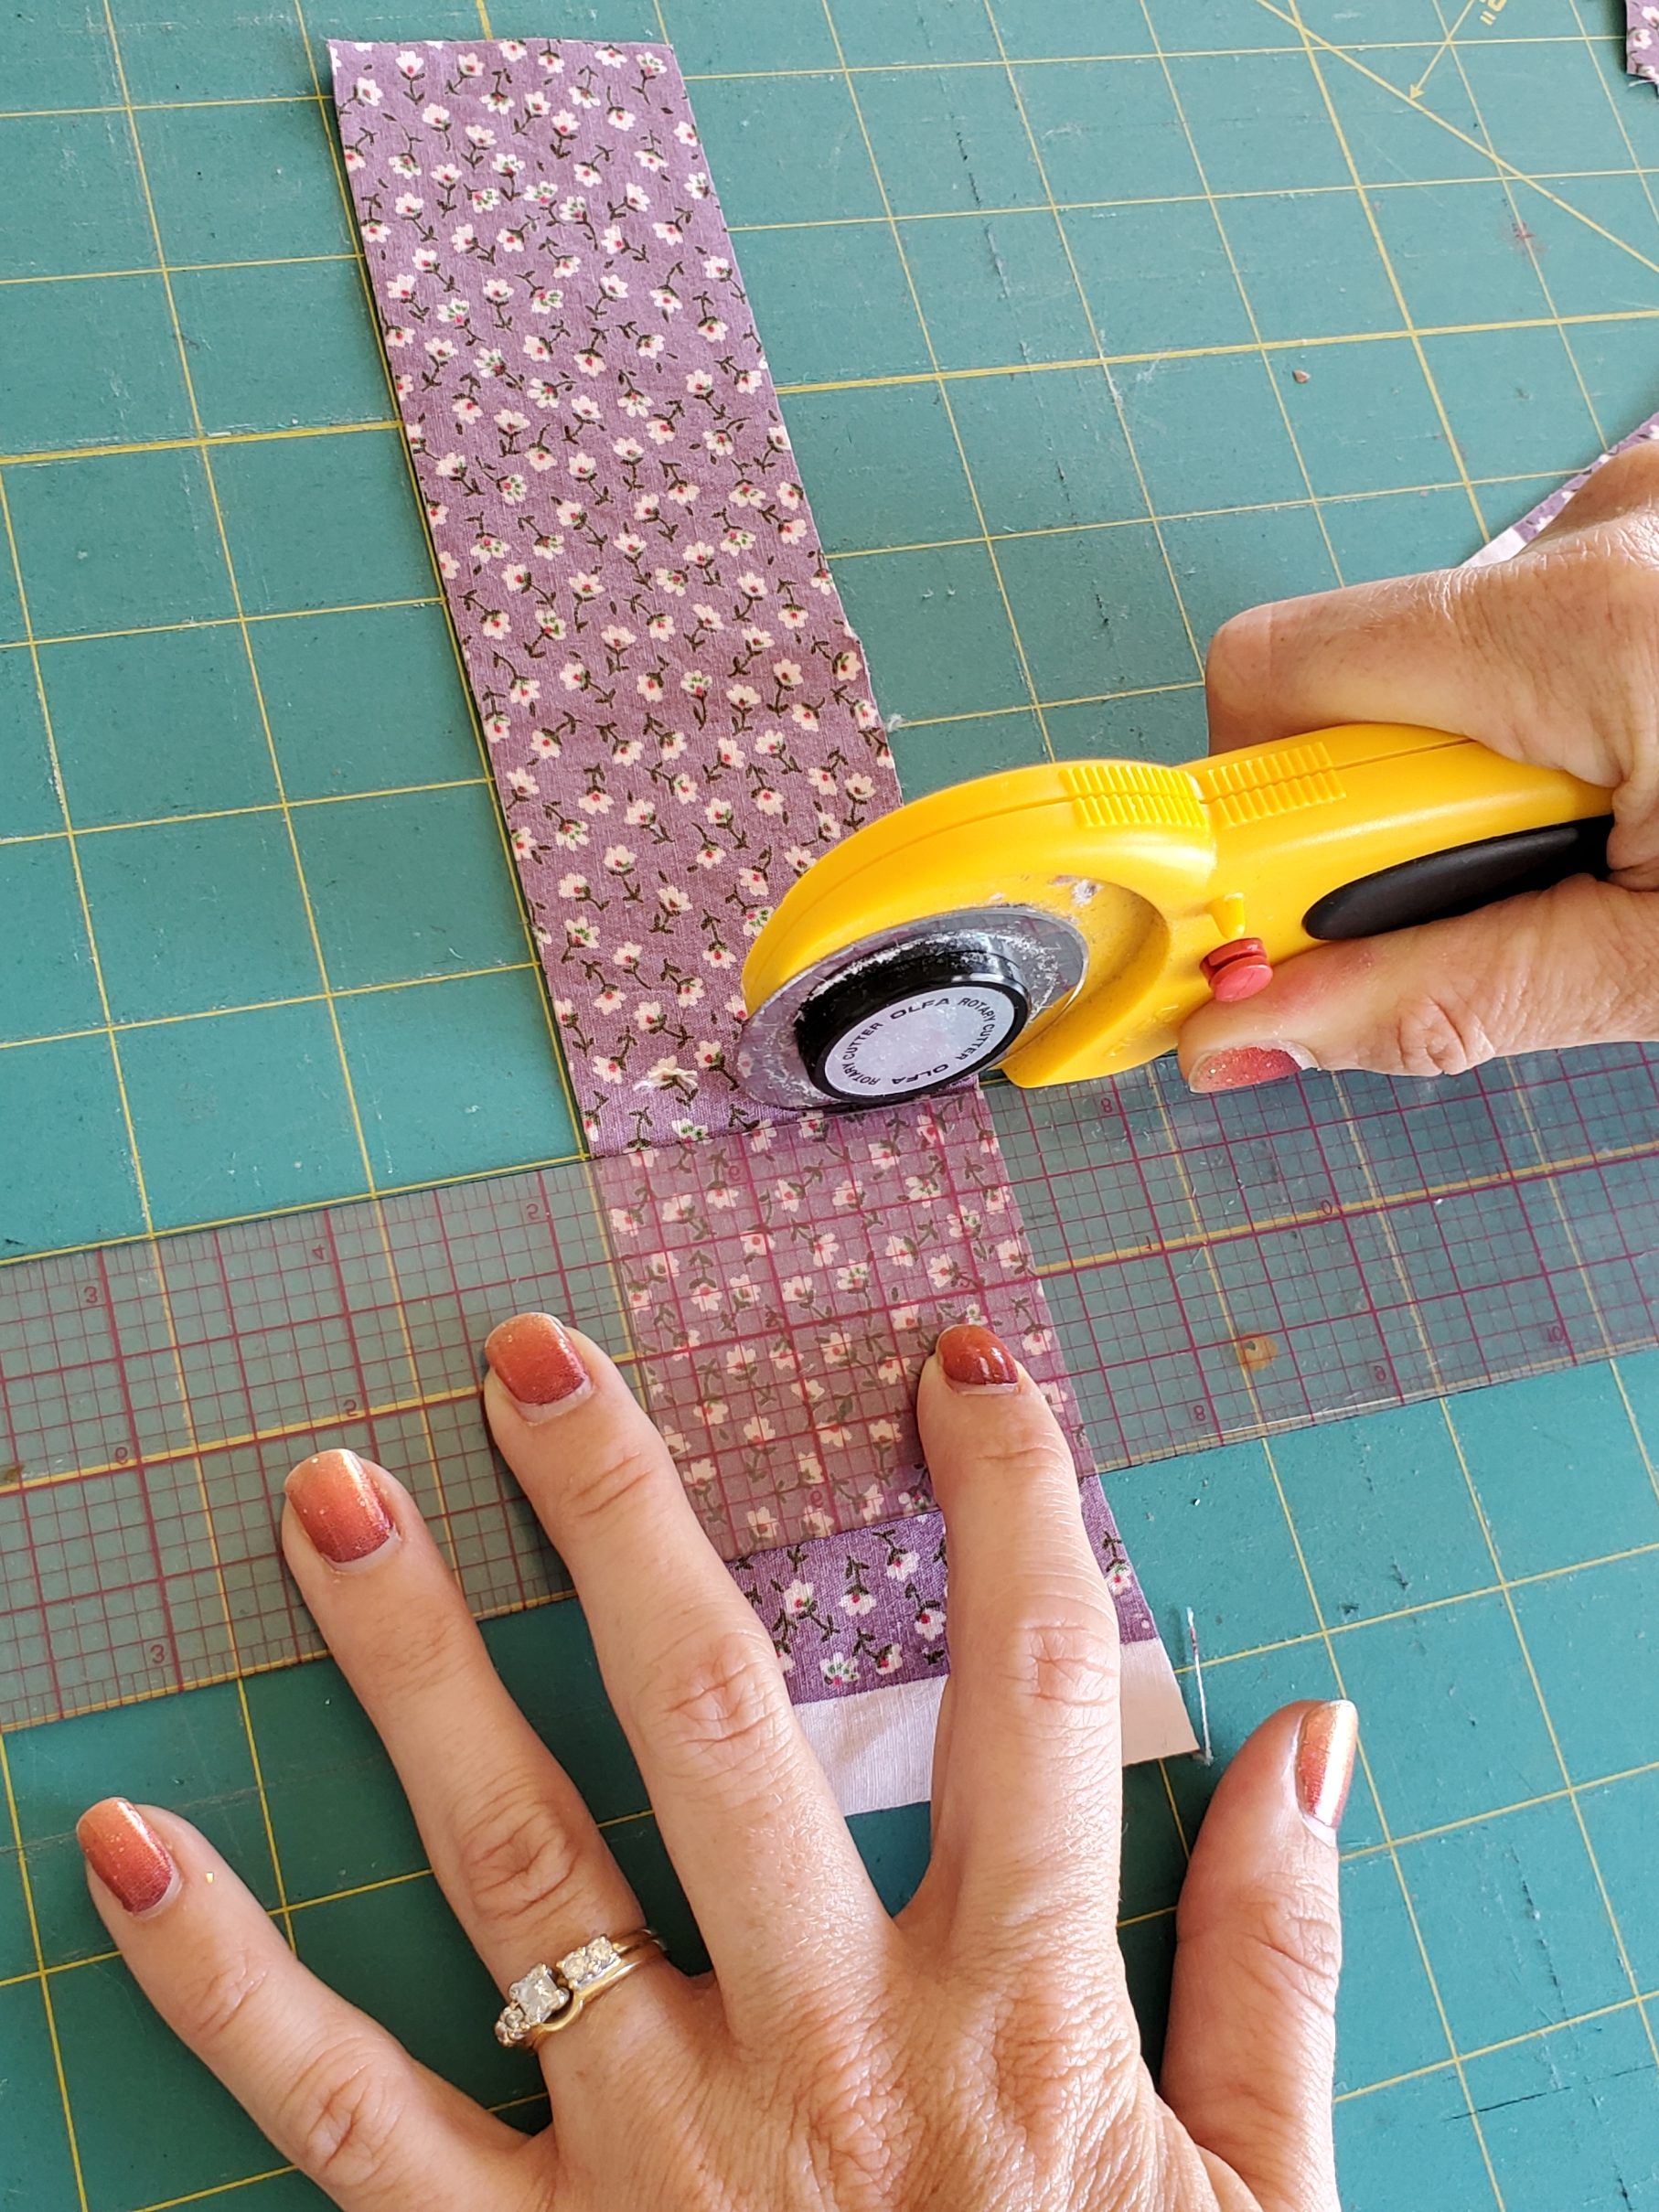
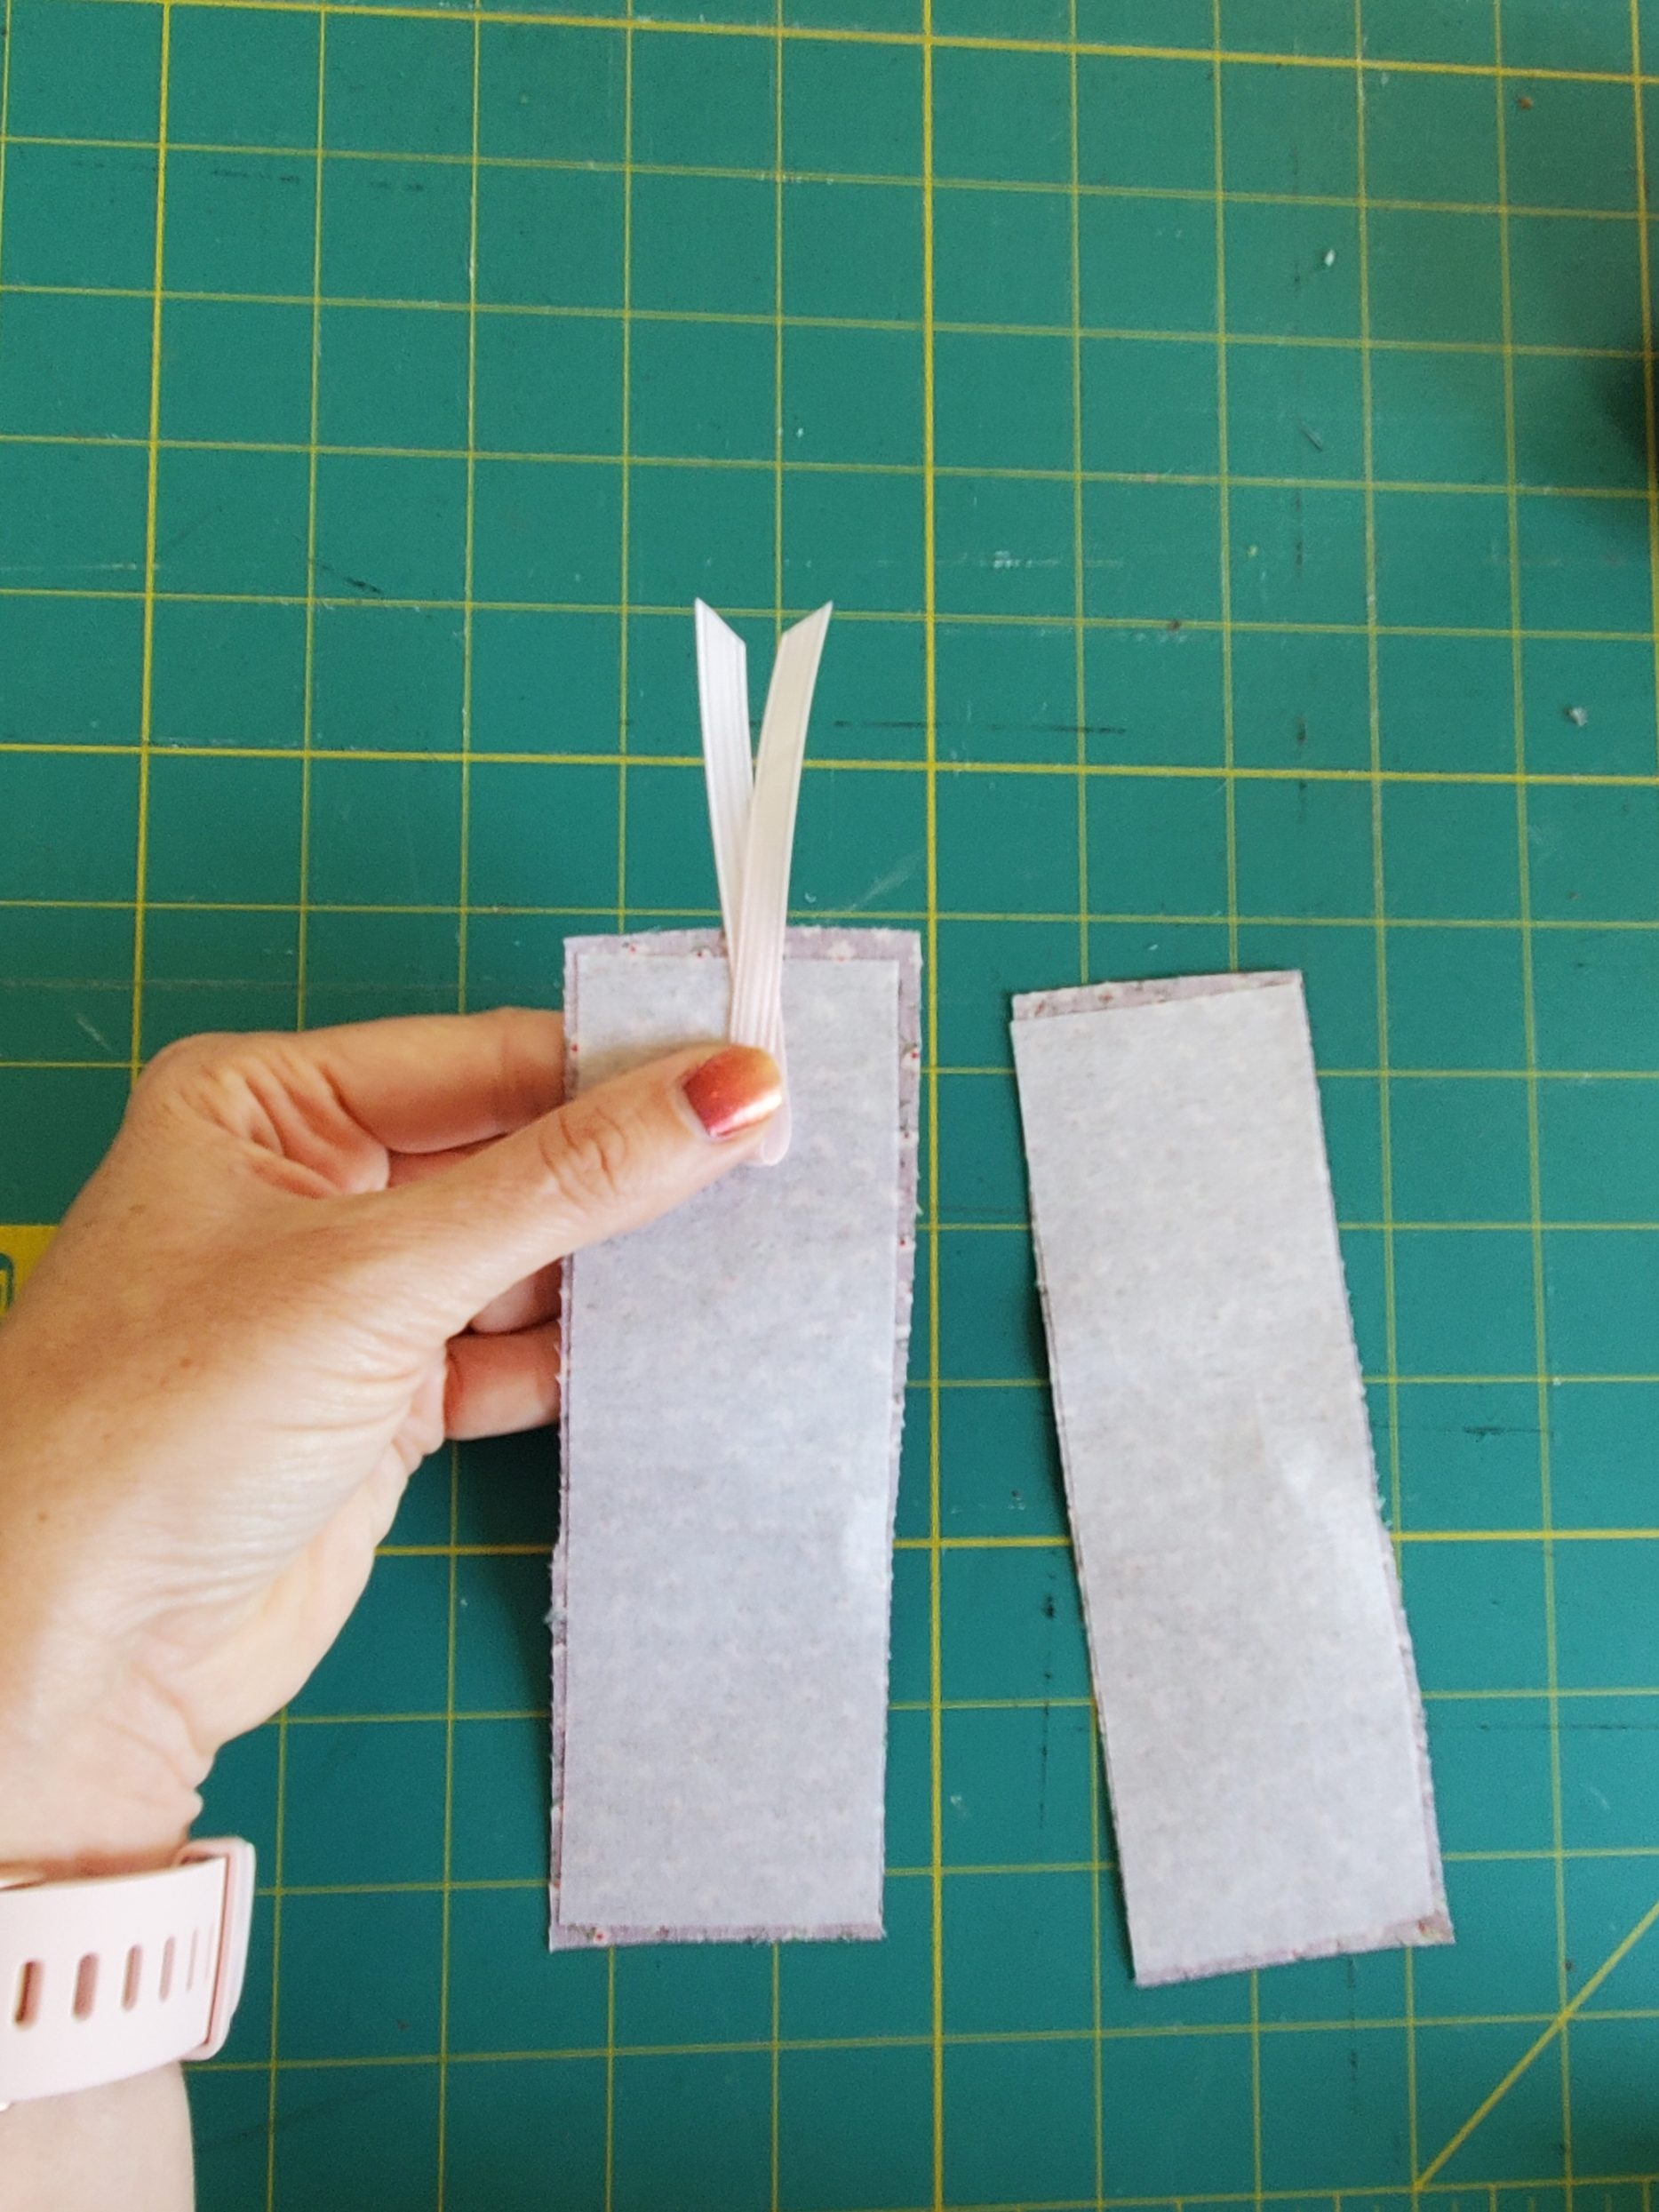
The first thing to do is to cut your scraps into rectangle pieces. You can make them whatever size you like. I cut mine 6″x 2″. You will need 2 pieces for each bookmark: a front and a back. I like to use a rotary mat and cutters; it makes cutting soooo much easier. But fabric scissors will do, too.
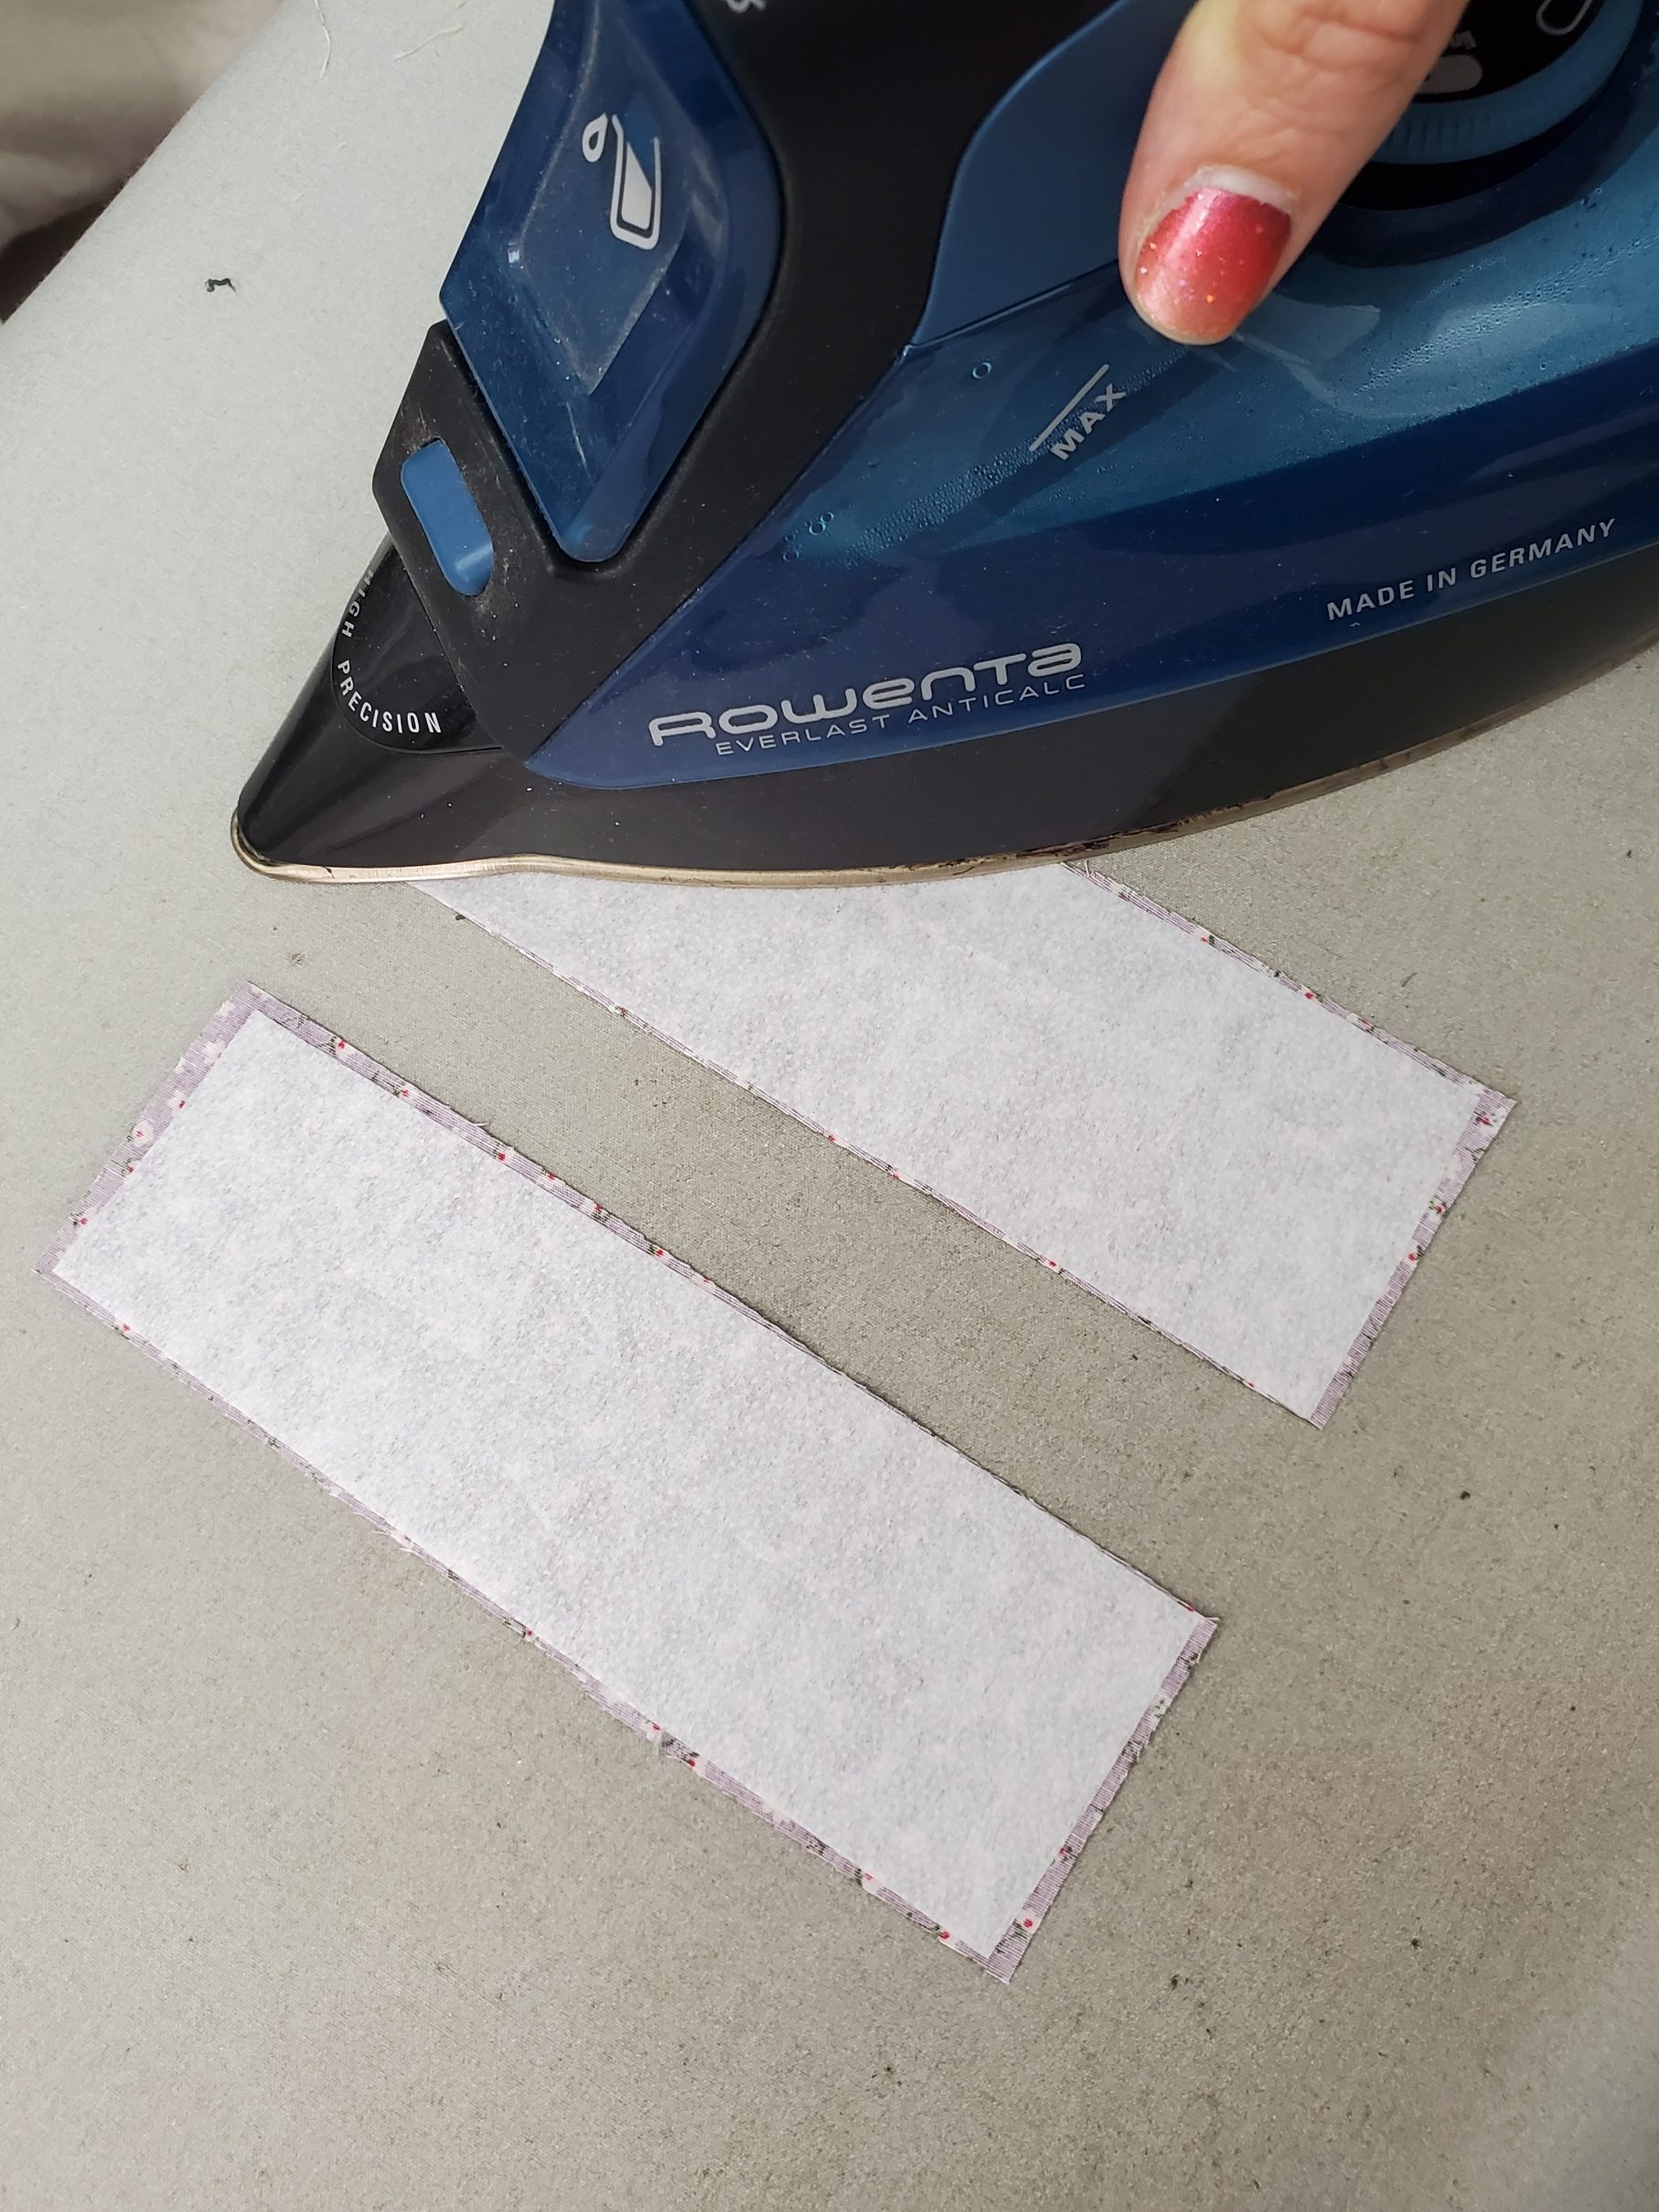
Cut 2 pieces of fusible interfacing slightly smaller than your bookmark pieces (you don’t want the interfacing to hang off the edges of the fabric.
Iron your fusible interfacing to the wrong side of your fabric pieces. Remember that the bumpy side of the interfacing is the resin (or glue), so that side faces down on top of your fabric. Otherwise you will have a gluey mess on your fabric.
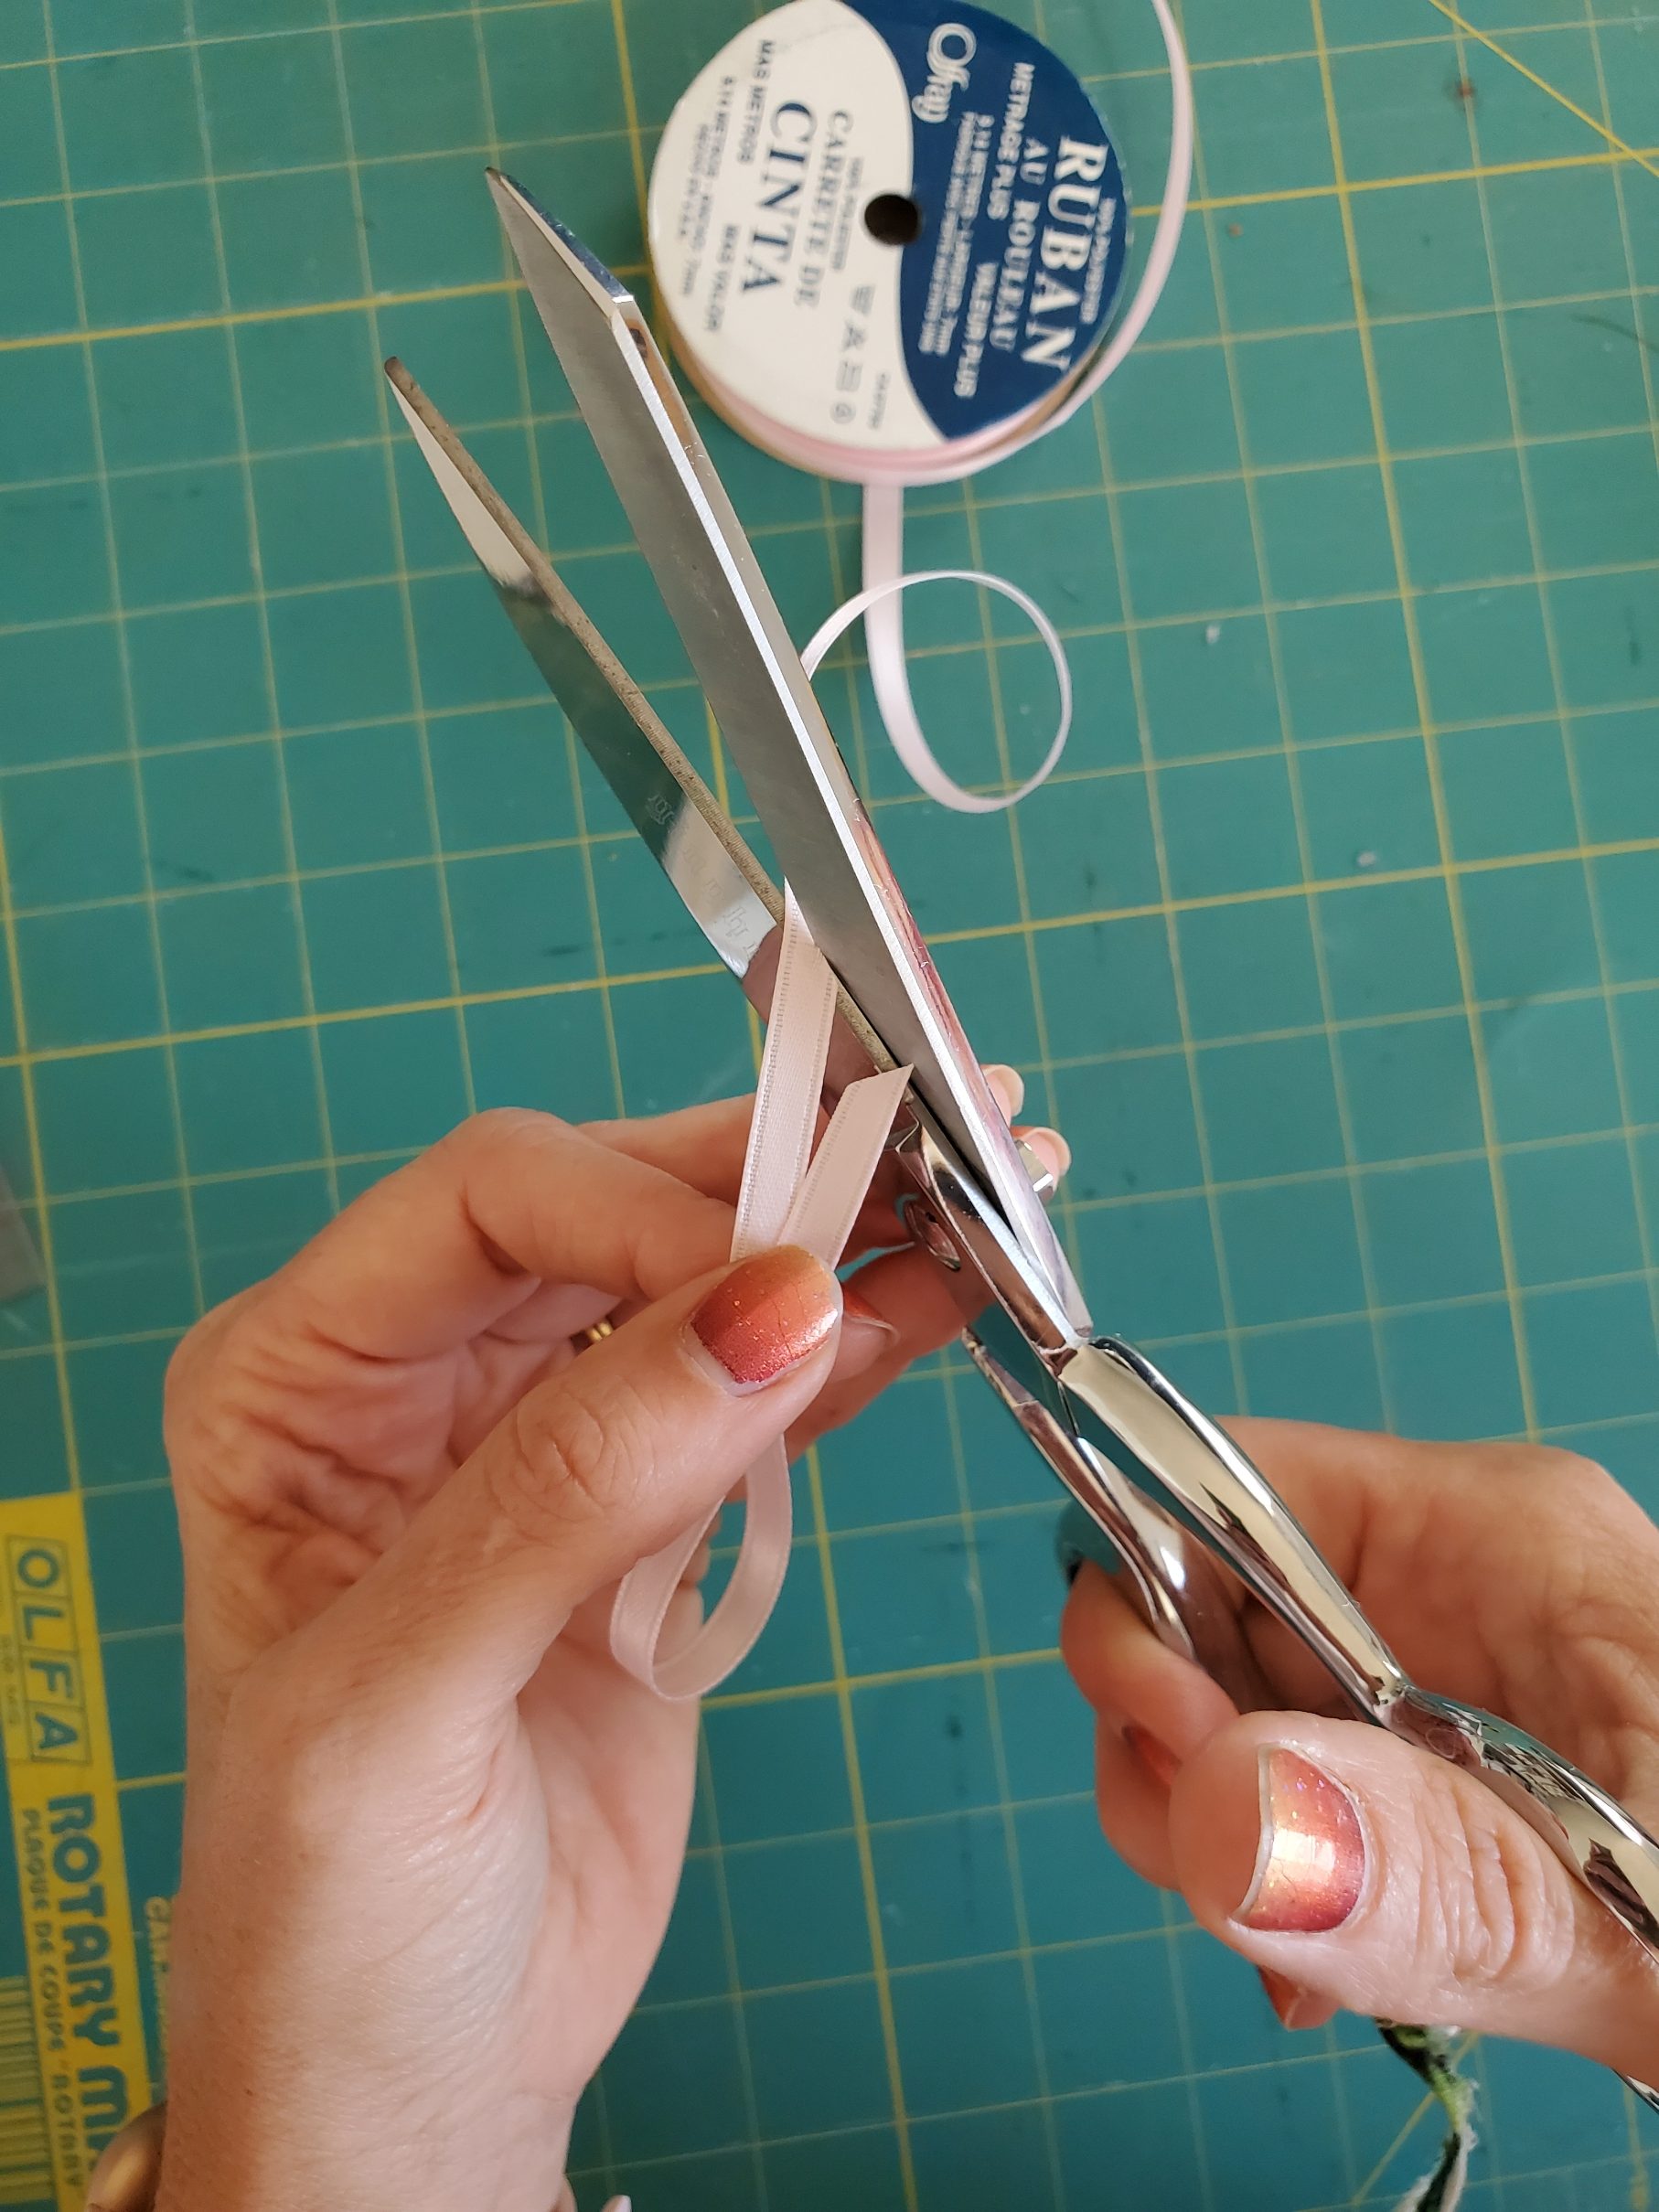
Cut a piece of ribbon to however long you want your bookmark tassle, times 2. For example, if I want my bookmark tassle to be 4″ long, I would cut my ribbon at 8″ (or 8 1/2″ to allow for the seam allowance). It doesn’t have to be an exact science.
You will then fold your ribbon in half, and sandwich it in-between your 2 fabric pieces at the top of your bookmark. Pin it in place, pinning both layers of the fabric as well as the ribbon.
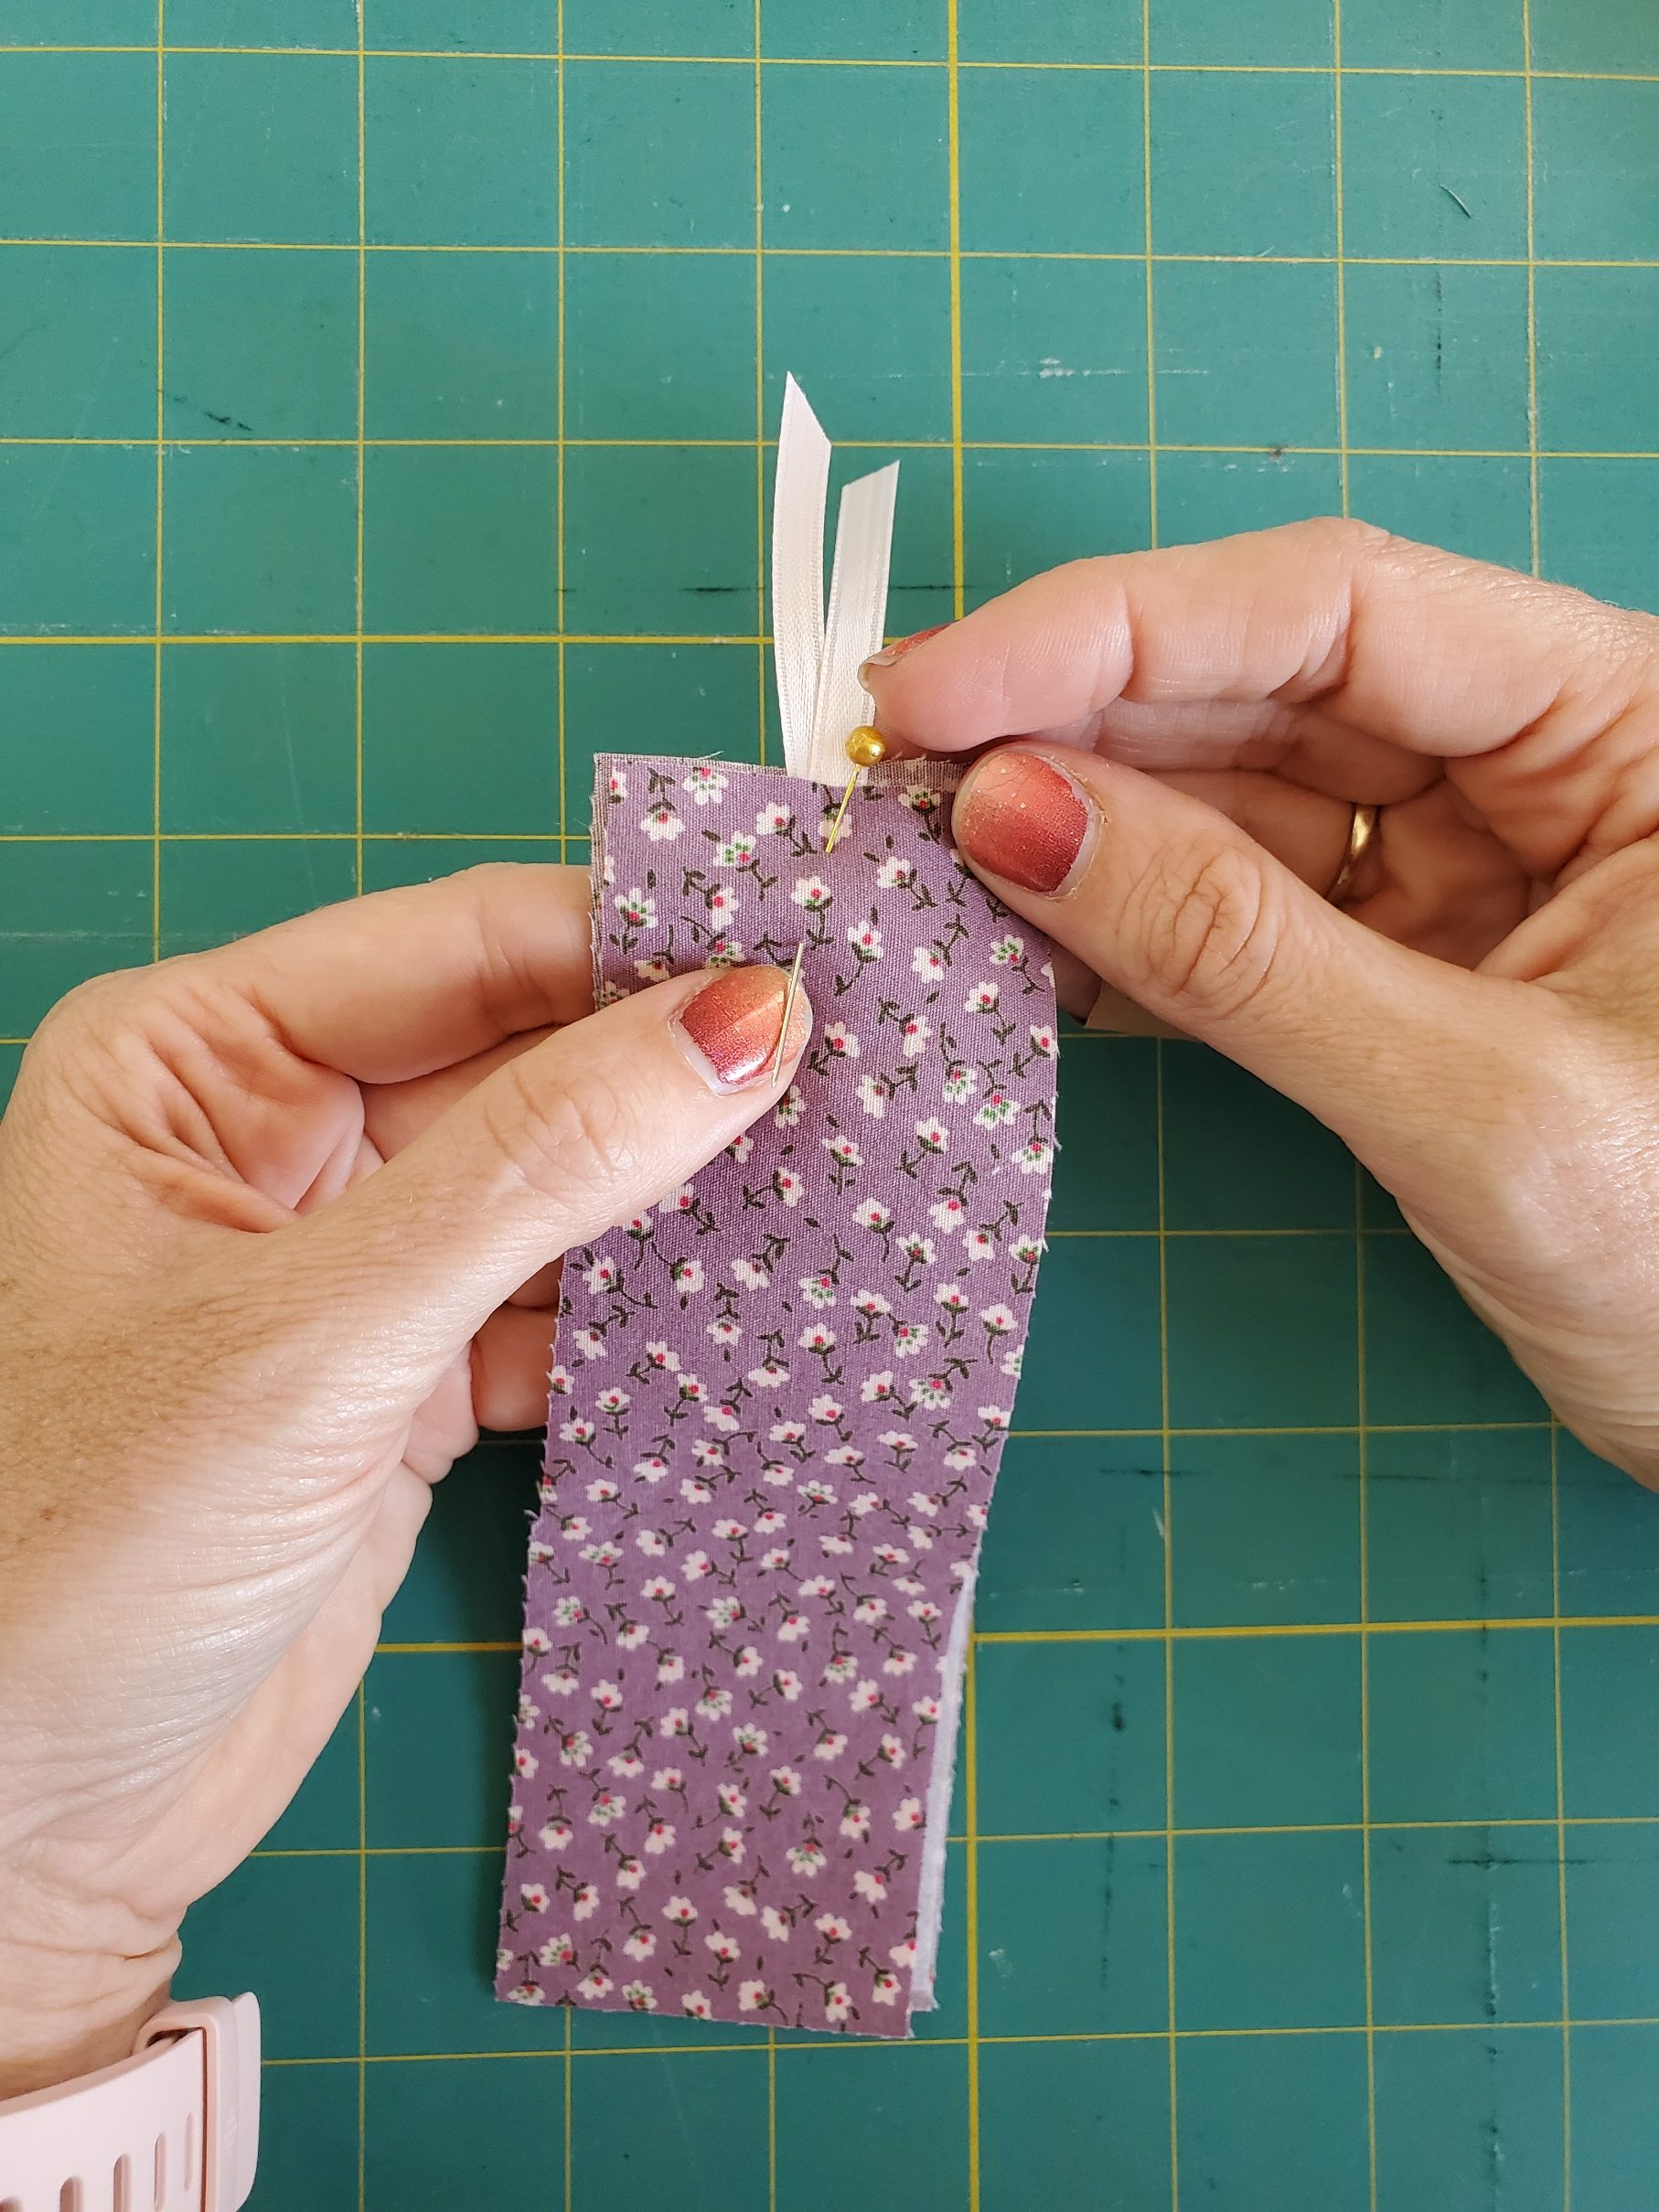
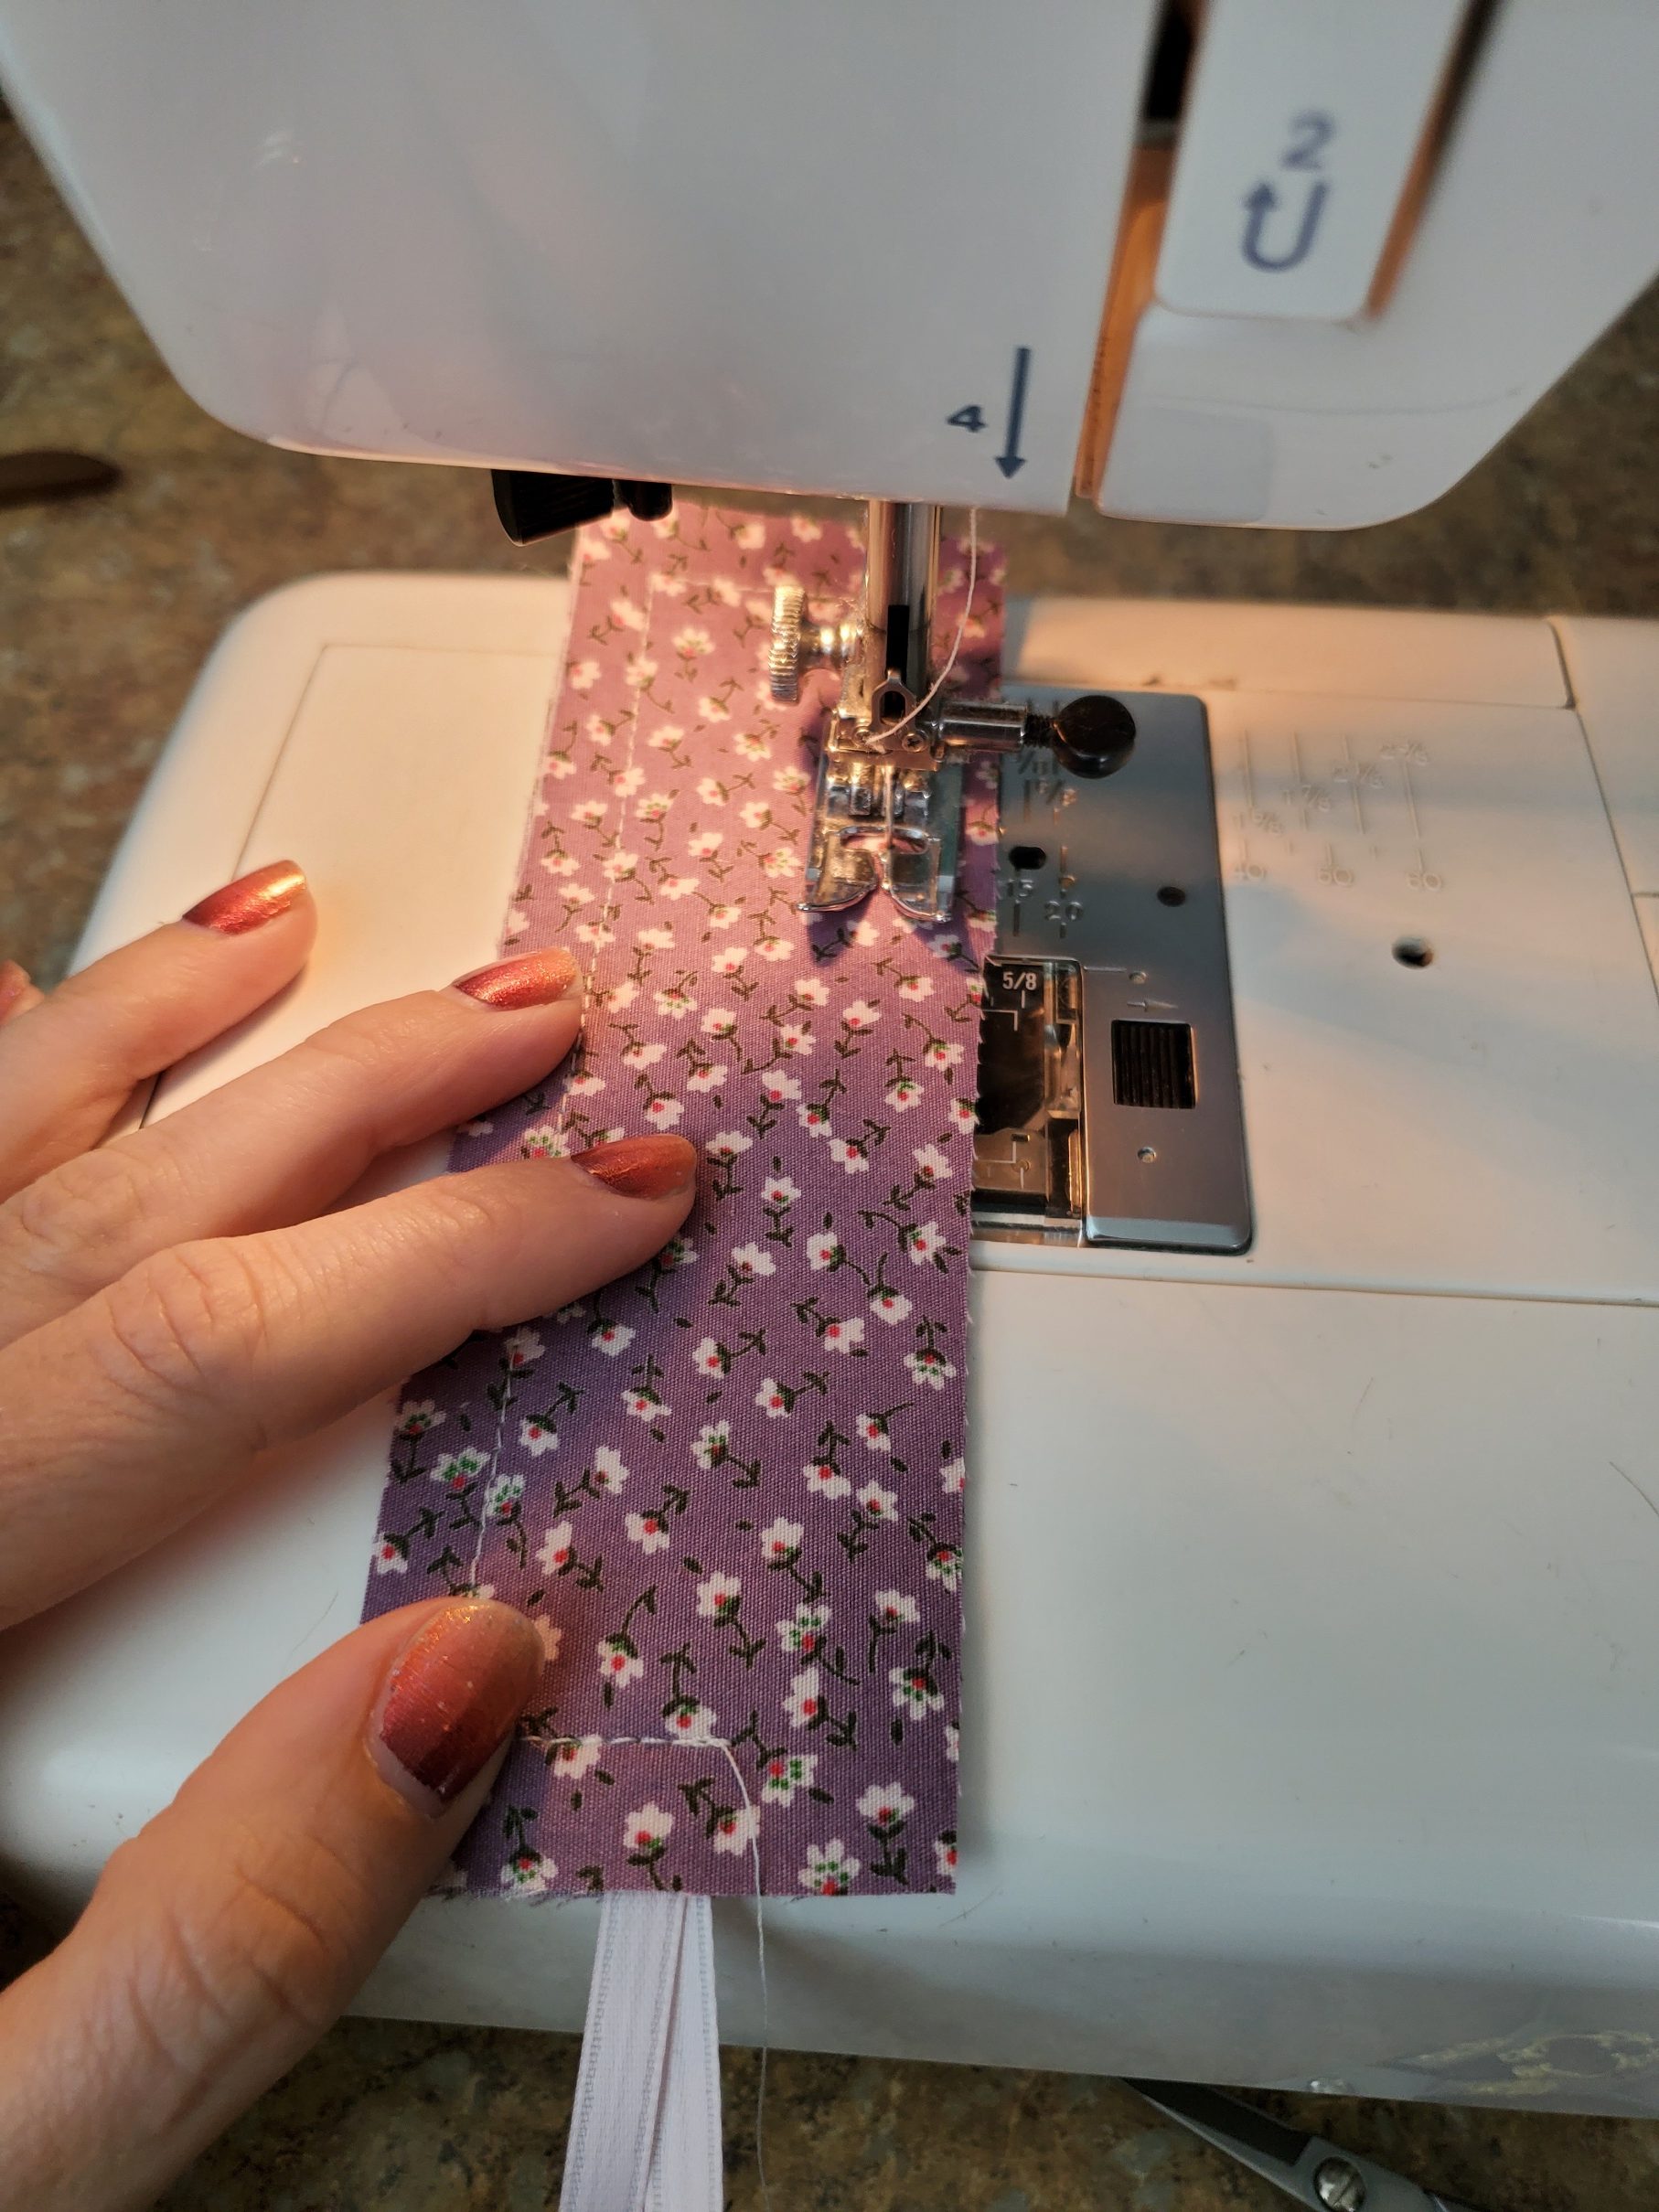
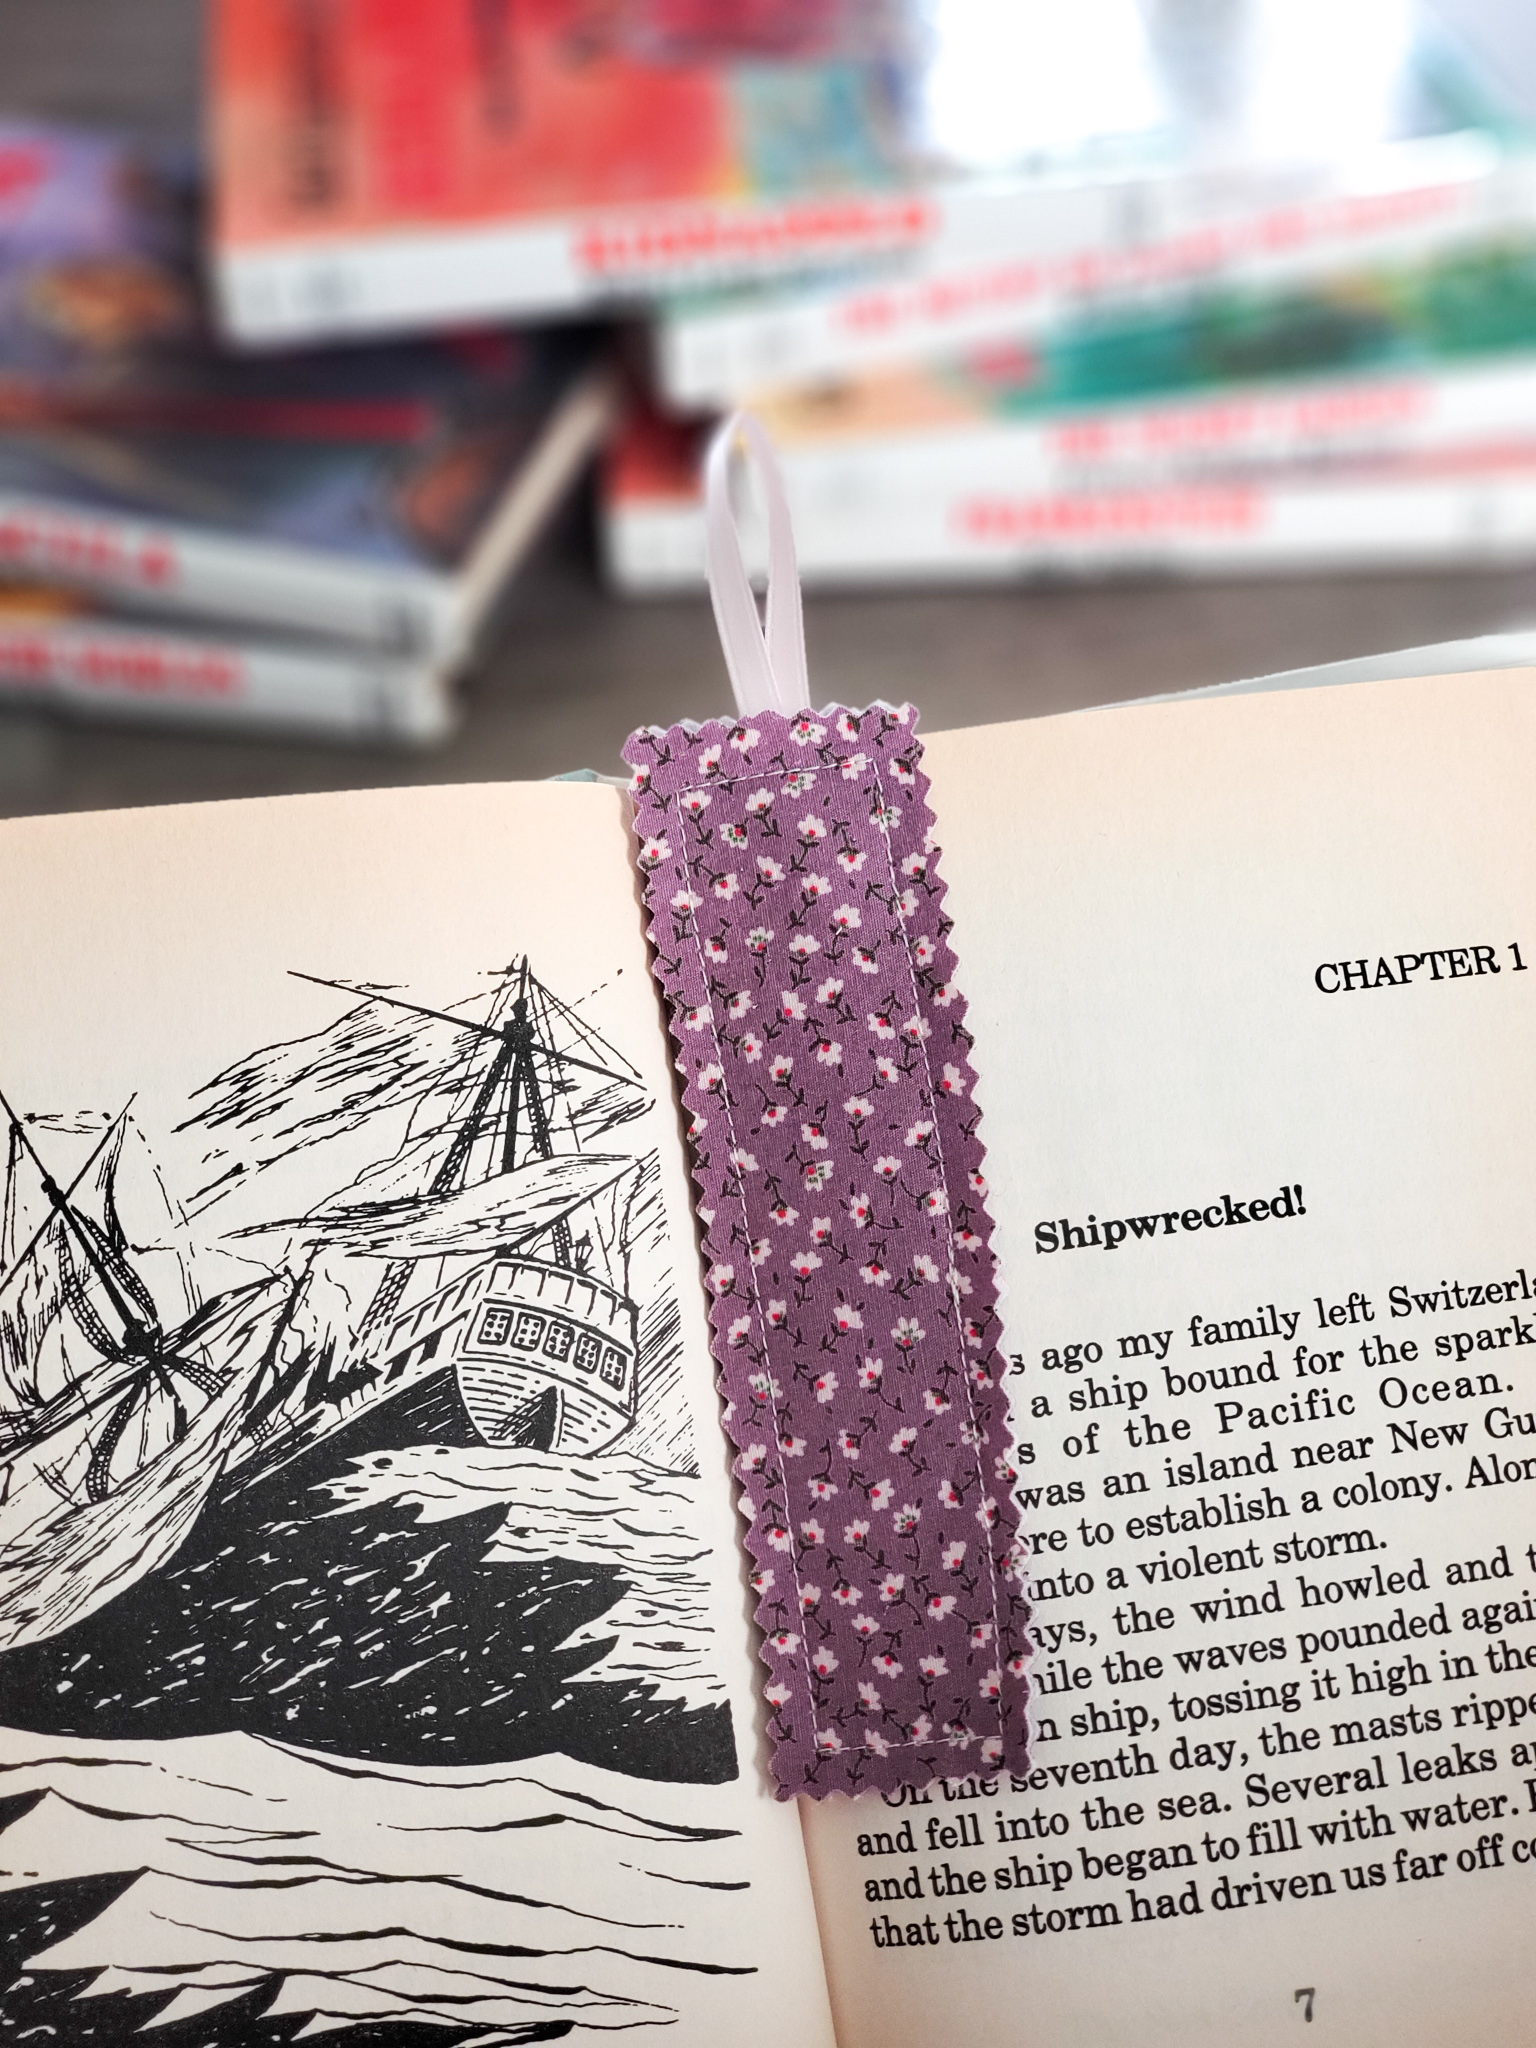
Line up your sides and bottom edges and add another pin at the bottom to hold the pieces in place. Sew around the perimeter of the bookmark, pivoting at the corners, using a 1/2″ seam allowance. I like to start at the top of the bookmark, near the ribbon, because I figure the backstitch will give the ribbon extra reinforcement 😉
If you want, you can cut around the bookmark (on the raw edges) with pinking shears. Pinking shears will help to keep your fabric from fraying. When you get to the top of the bookmark, you will have to cut one layer at a time, but you can cut both layers at the same time on the rest of the bookmark.

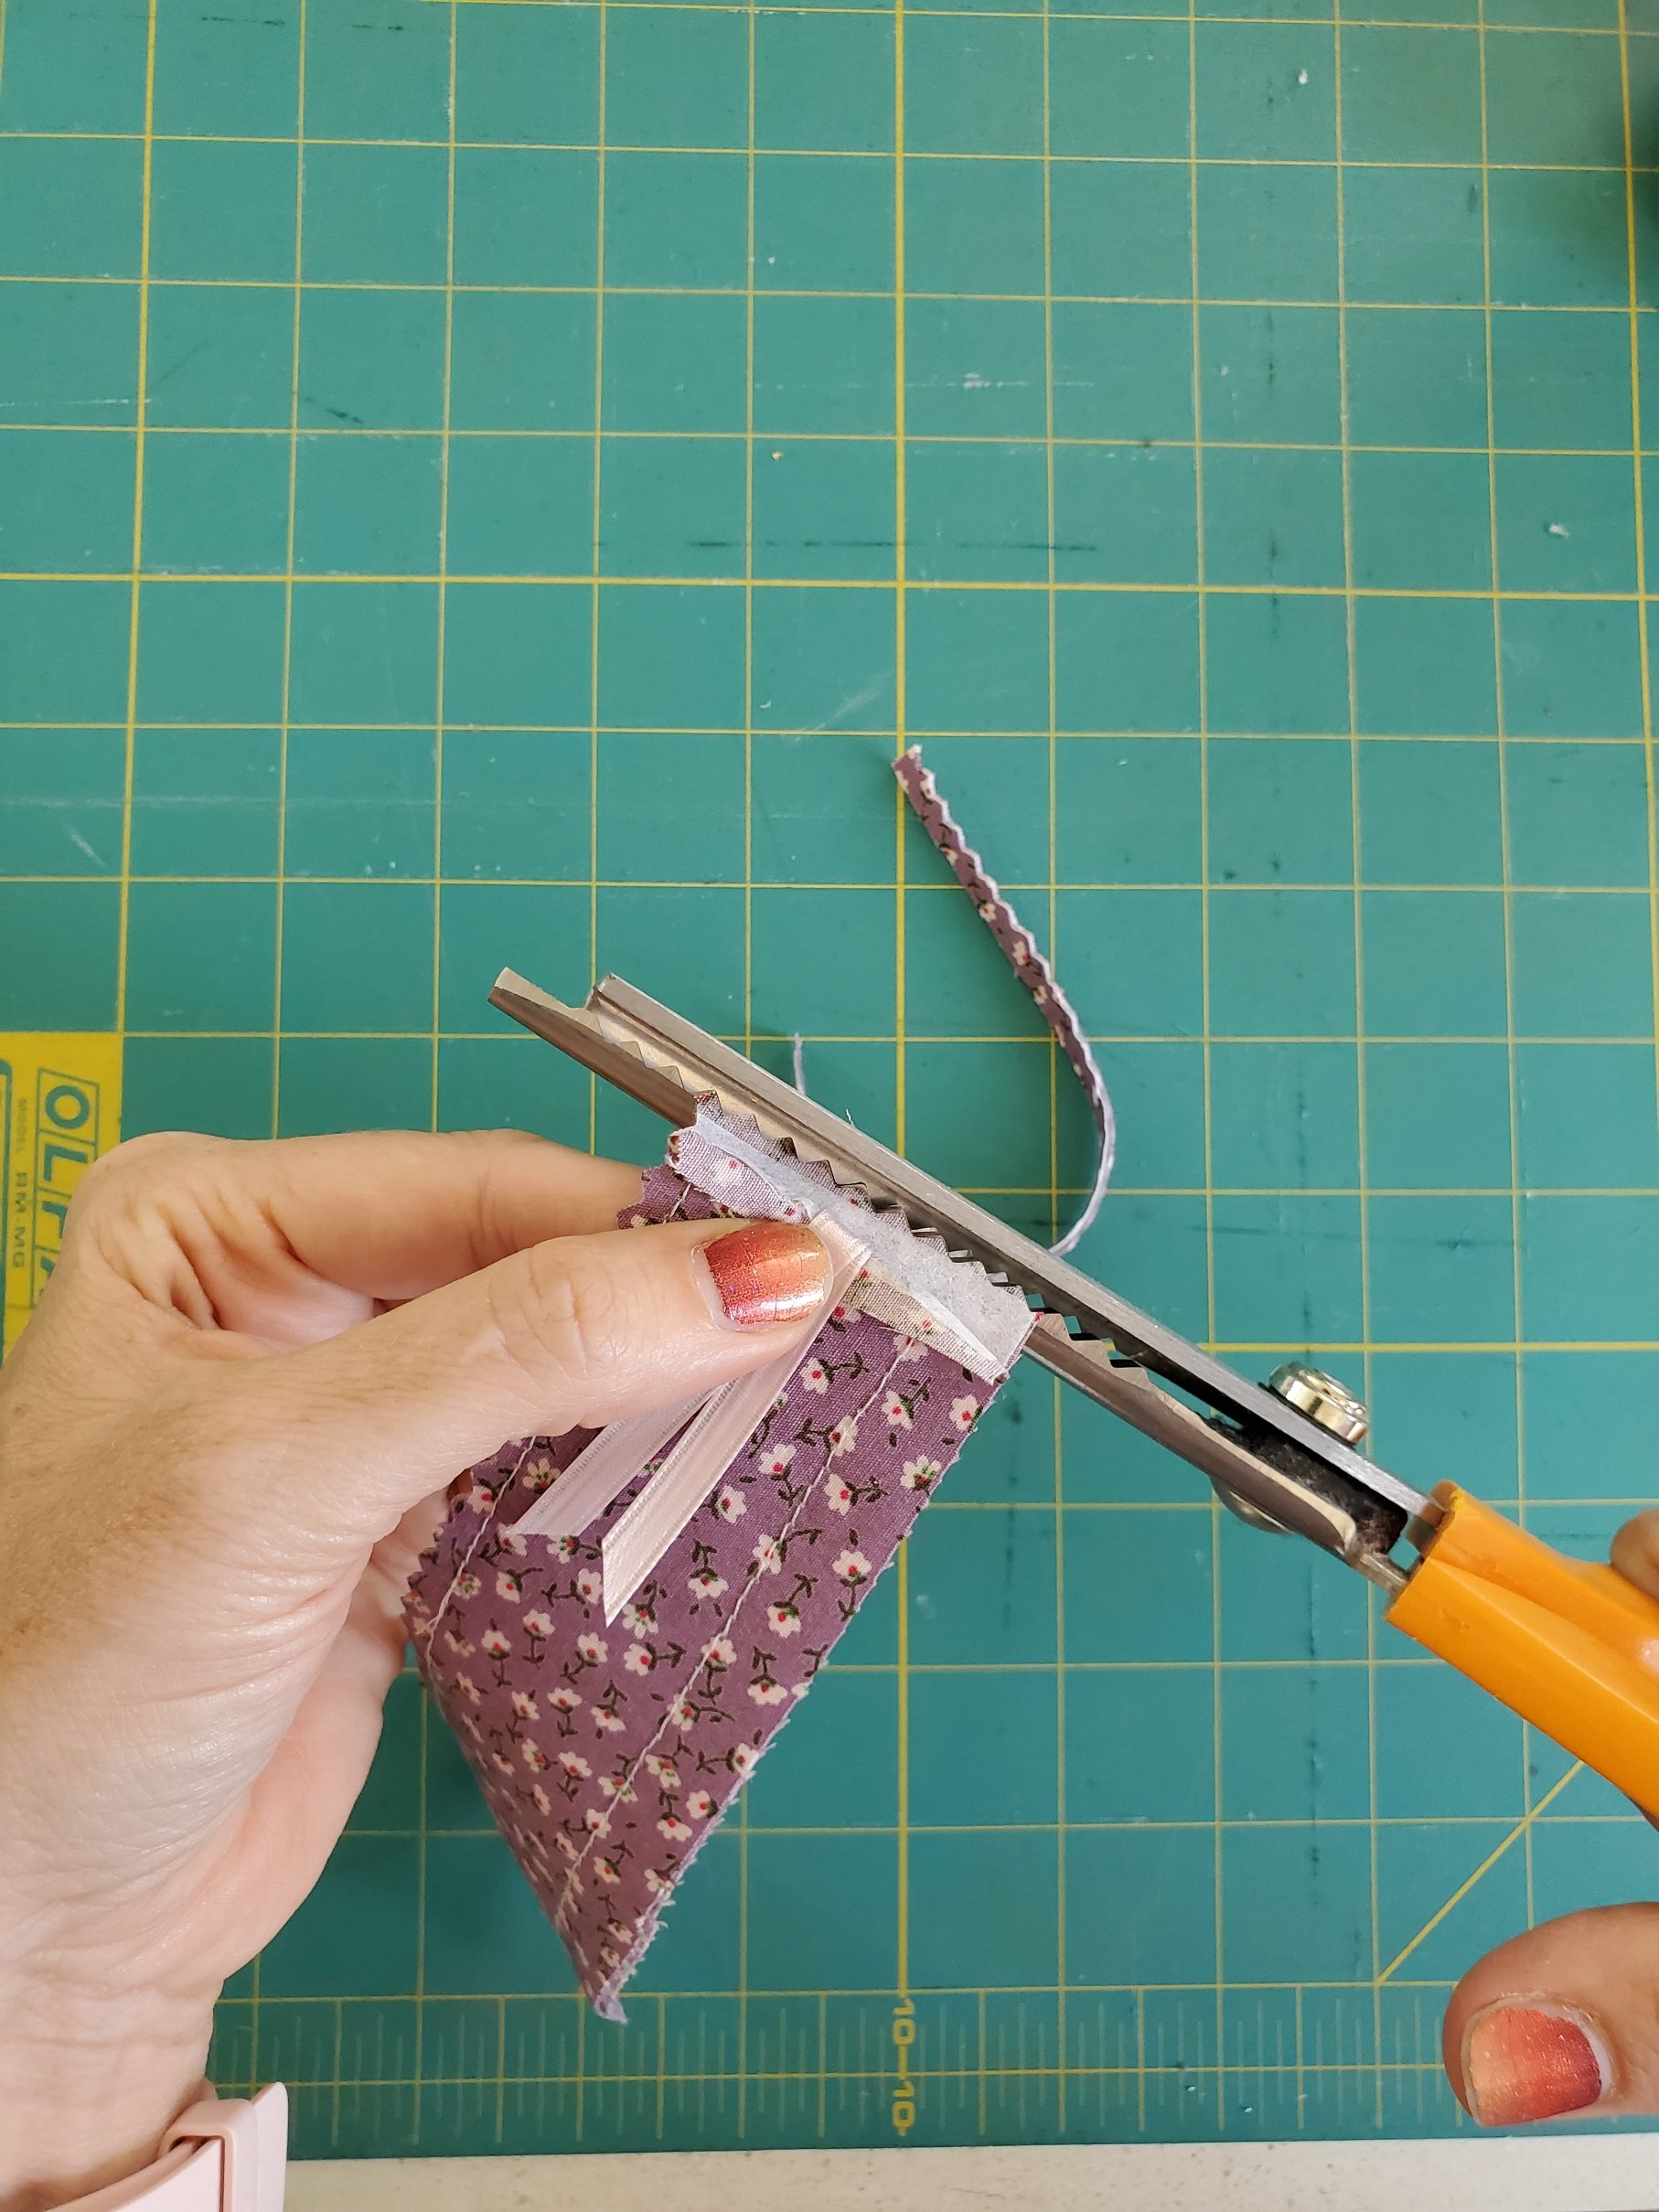
Some of my students preferred a frayed edge, and that’s okay too! Do whatever style you like!
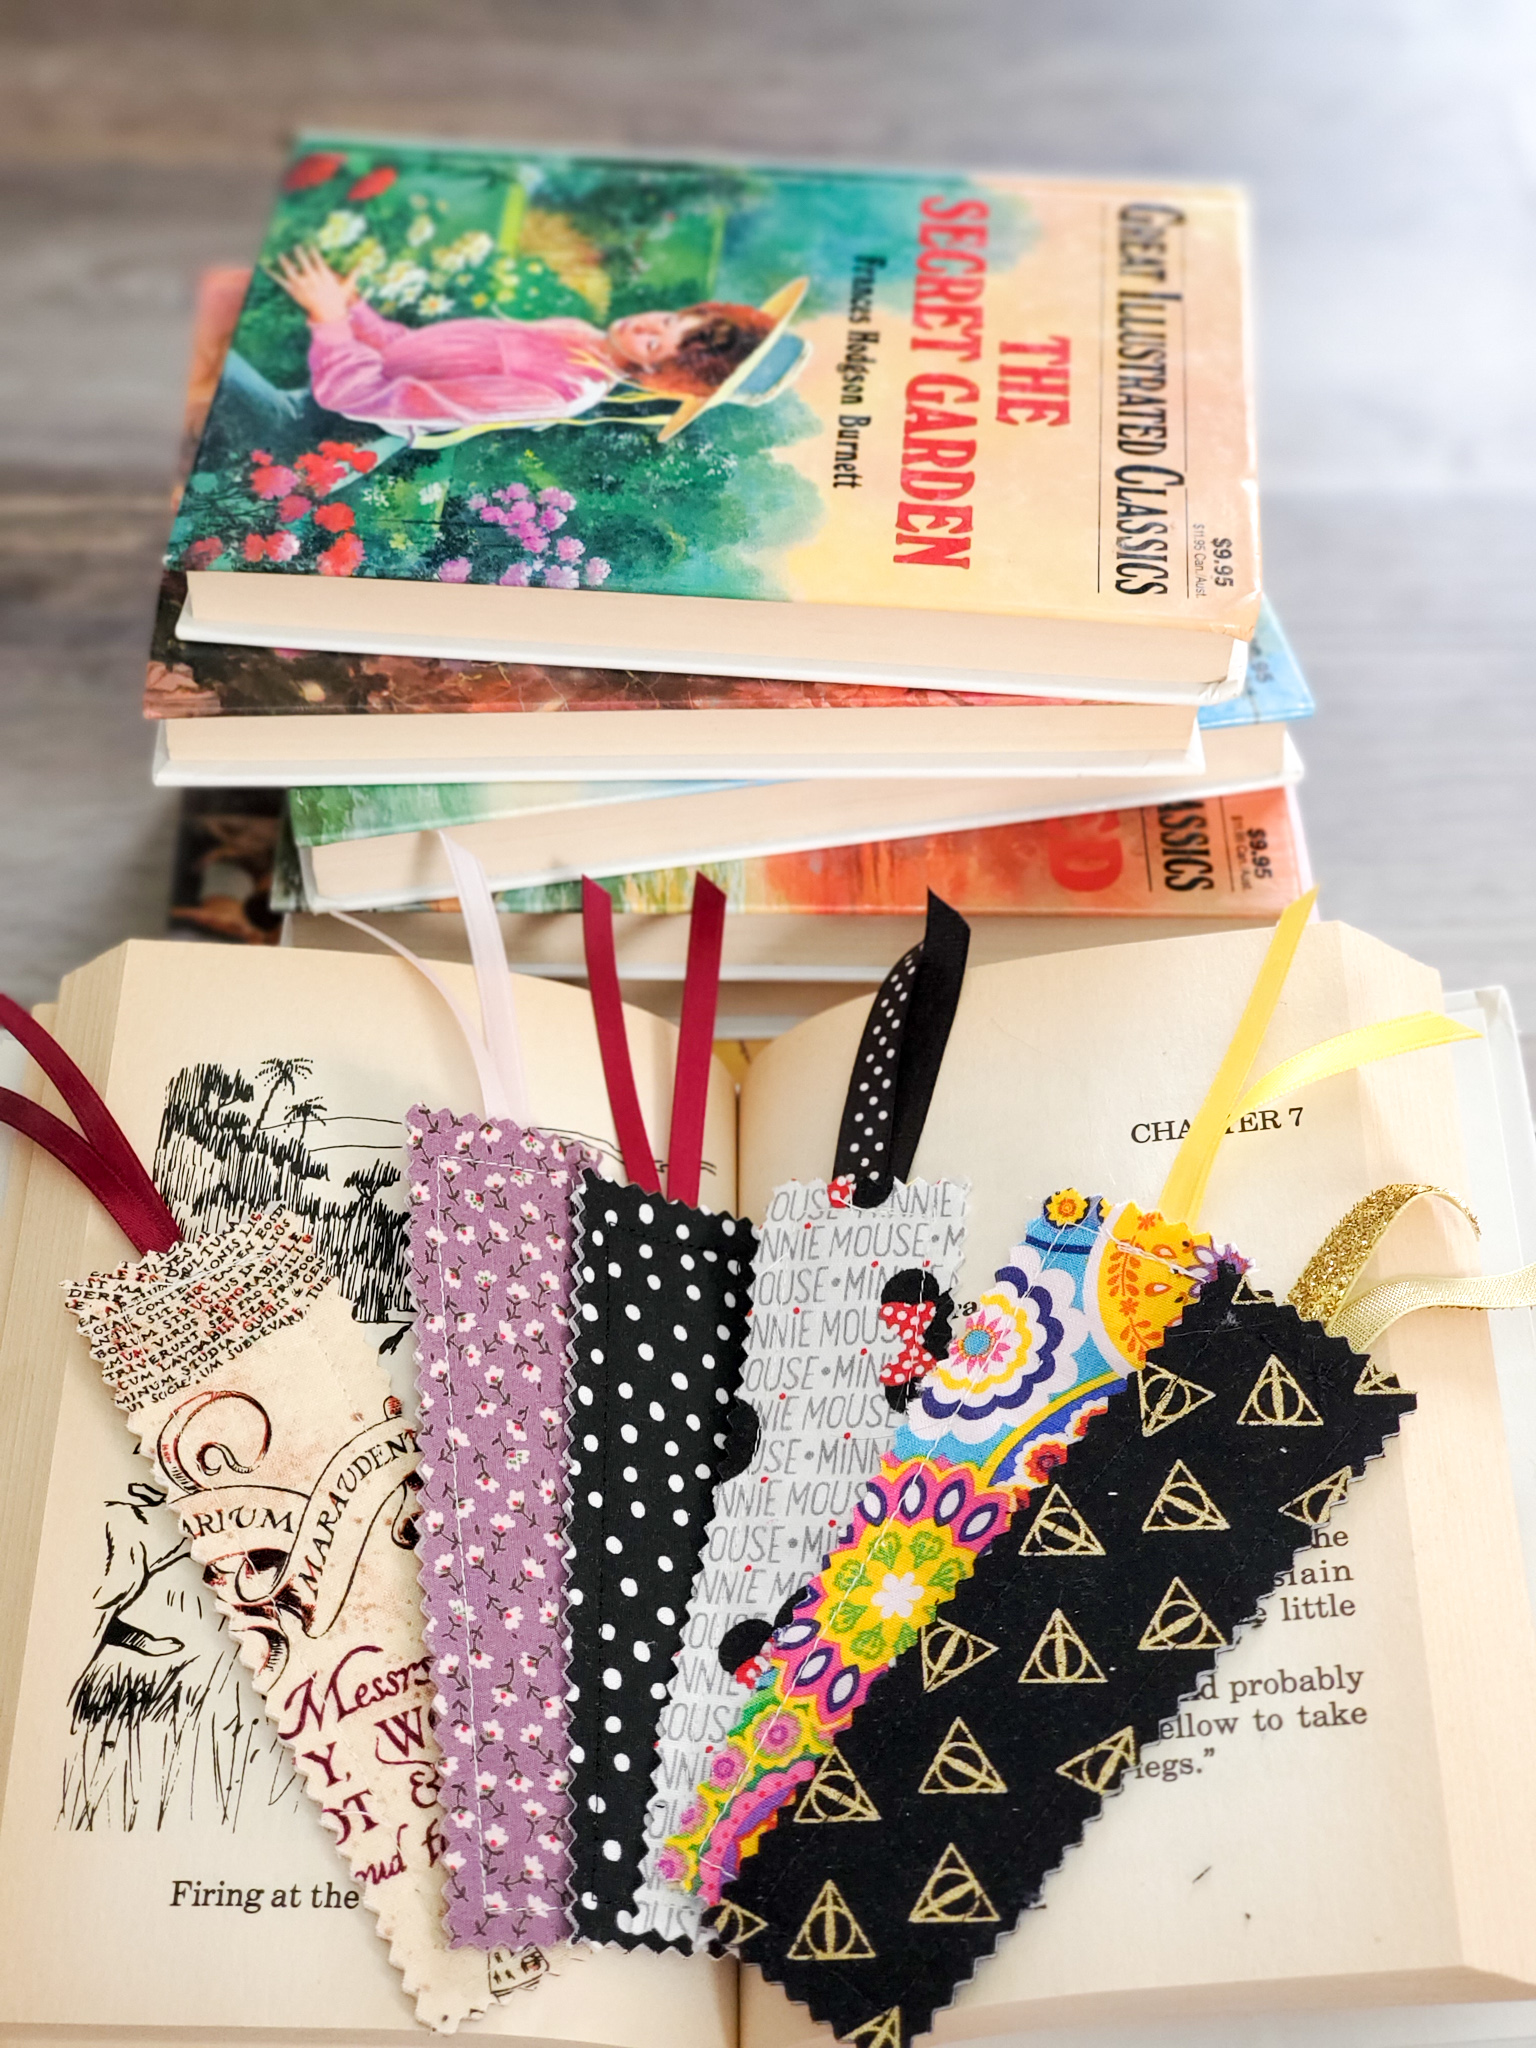
And that’s all there is to it!!
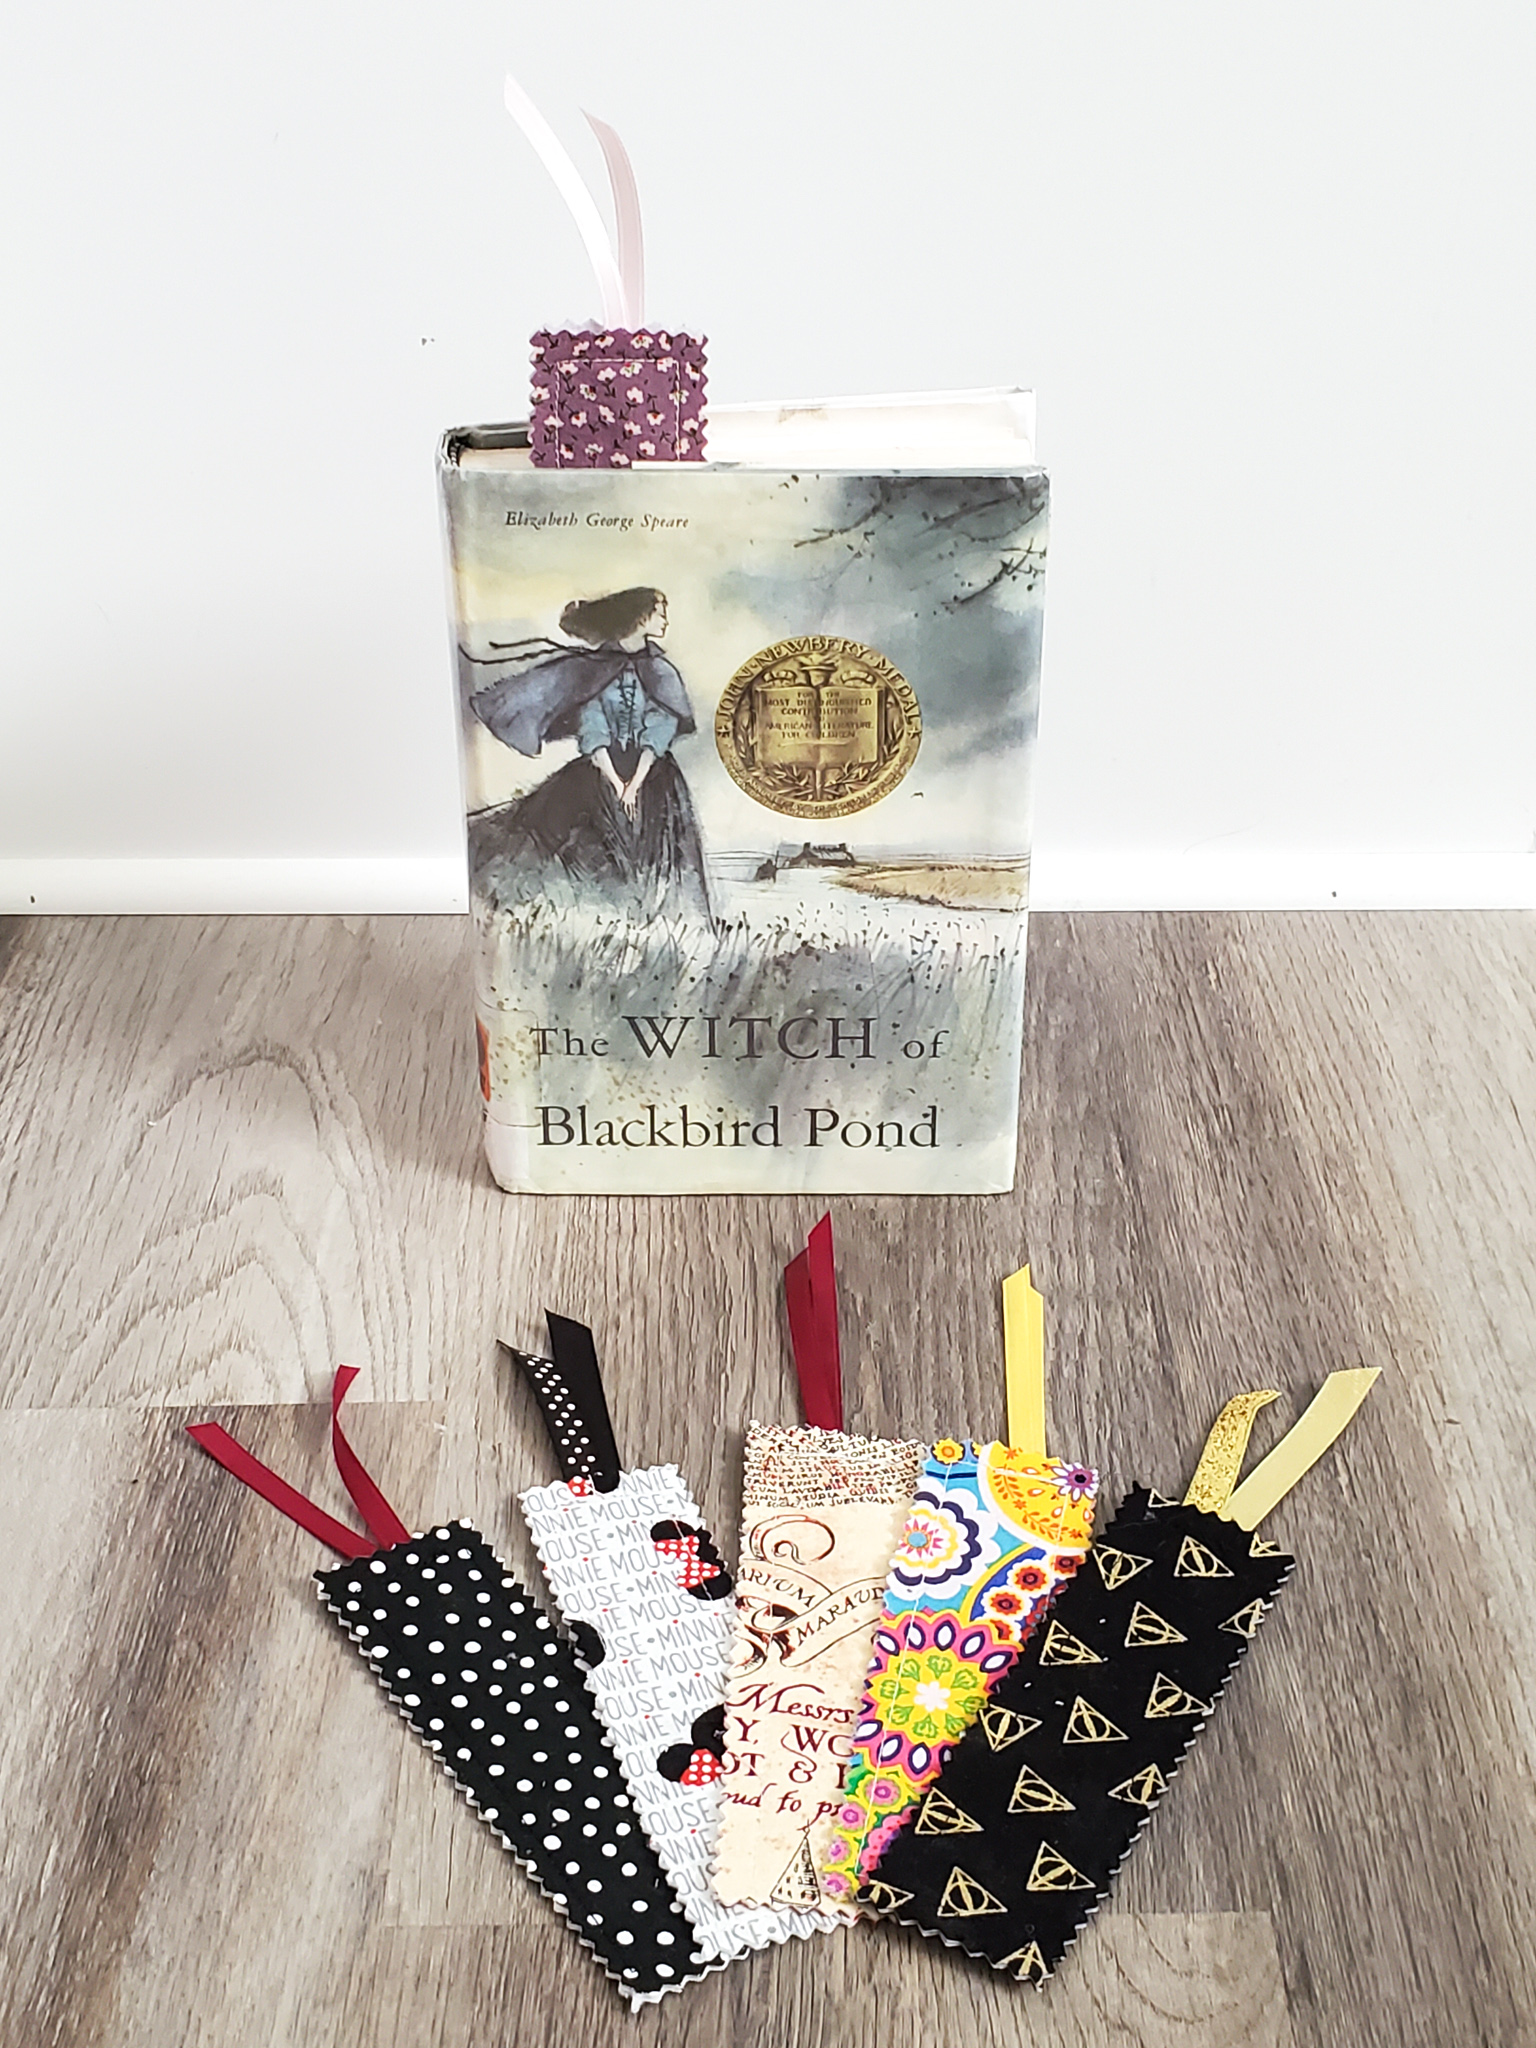
Scrappy bookmarks make great gifts! For all my fellow entrepreneurs out there, you could also make a bunch up to sell!

Things you might need for this project:


*Disclaimer: Sassy Cassy’s is an affiliate of Amazon.com. That means that I will get a small commission off of any purchases made through your clicks. Thank you for supporting my small business!
