
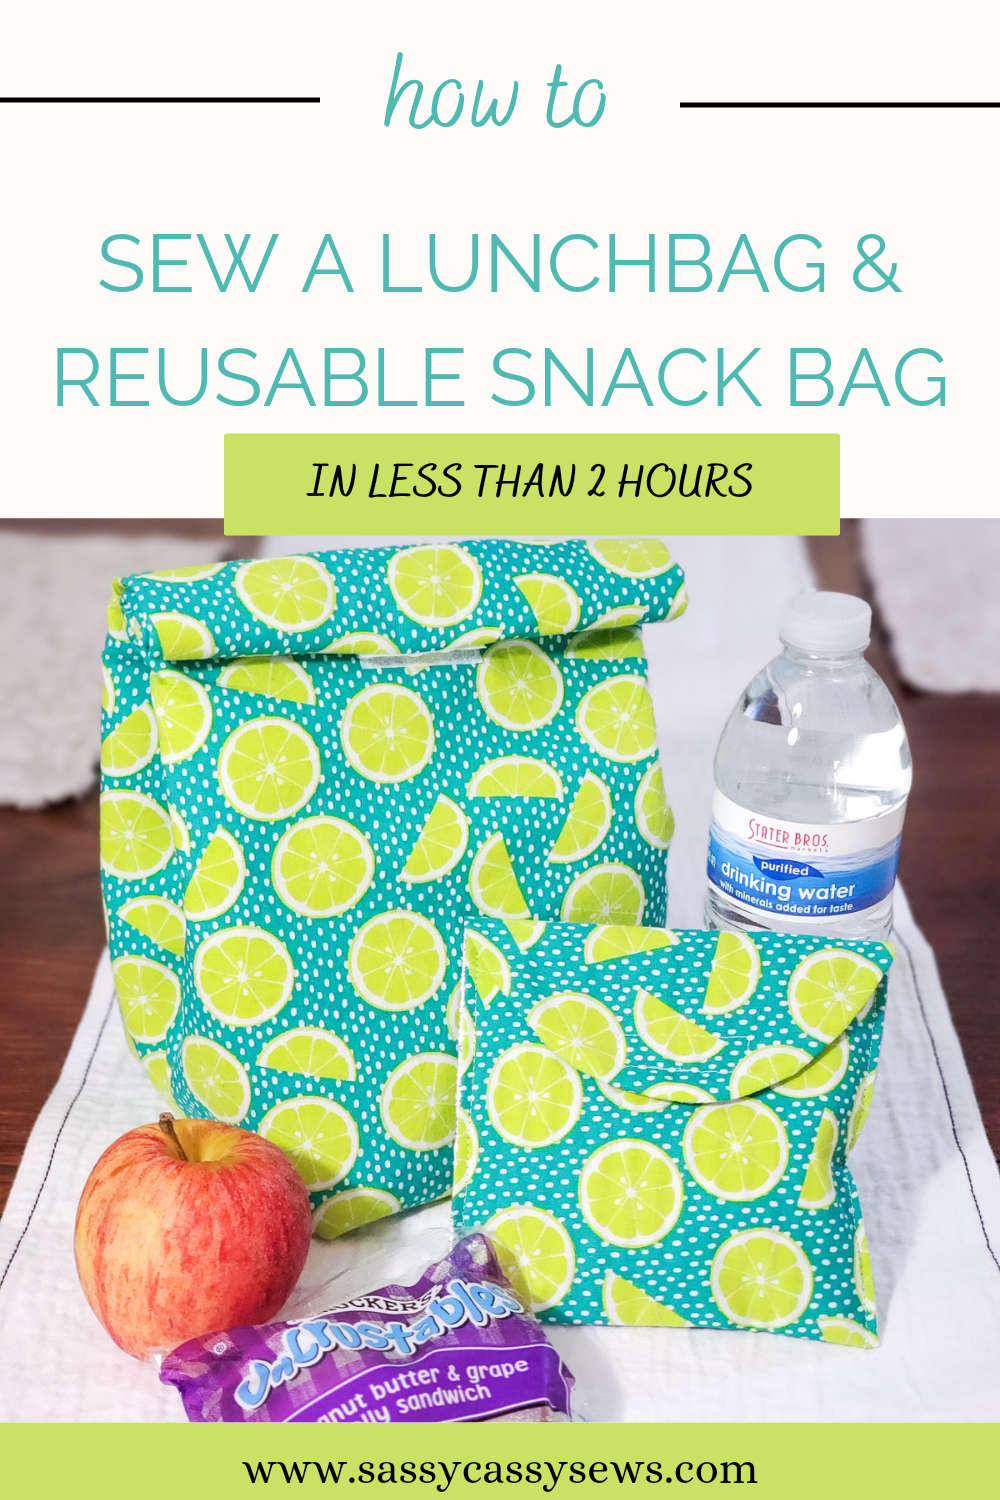
Happy Back-To-School!!
Remember the days when school didn’t start until after Labor Day? Those were the good ol’ days! Our kids have been back in school for a month now. Not sure whose bright idea it was to send them back during the hottest month of the year (insert eye-rolling emoji here). But, we are surviving. And it’s been a fun month of sewing for me! For the purpose of this blog post (since I didn’t post it when school really started) let’s just pretend that we are living in the good old days, when school started after Labor Day.
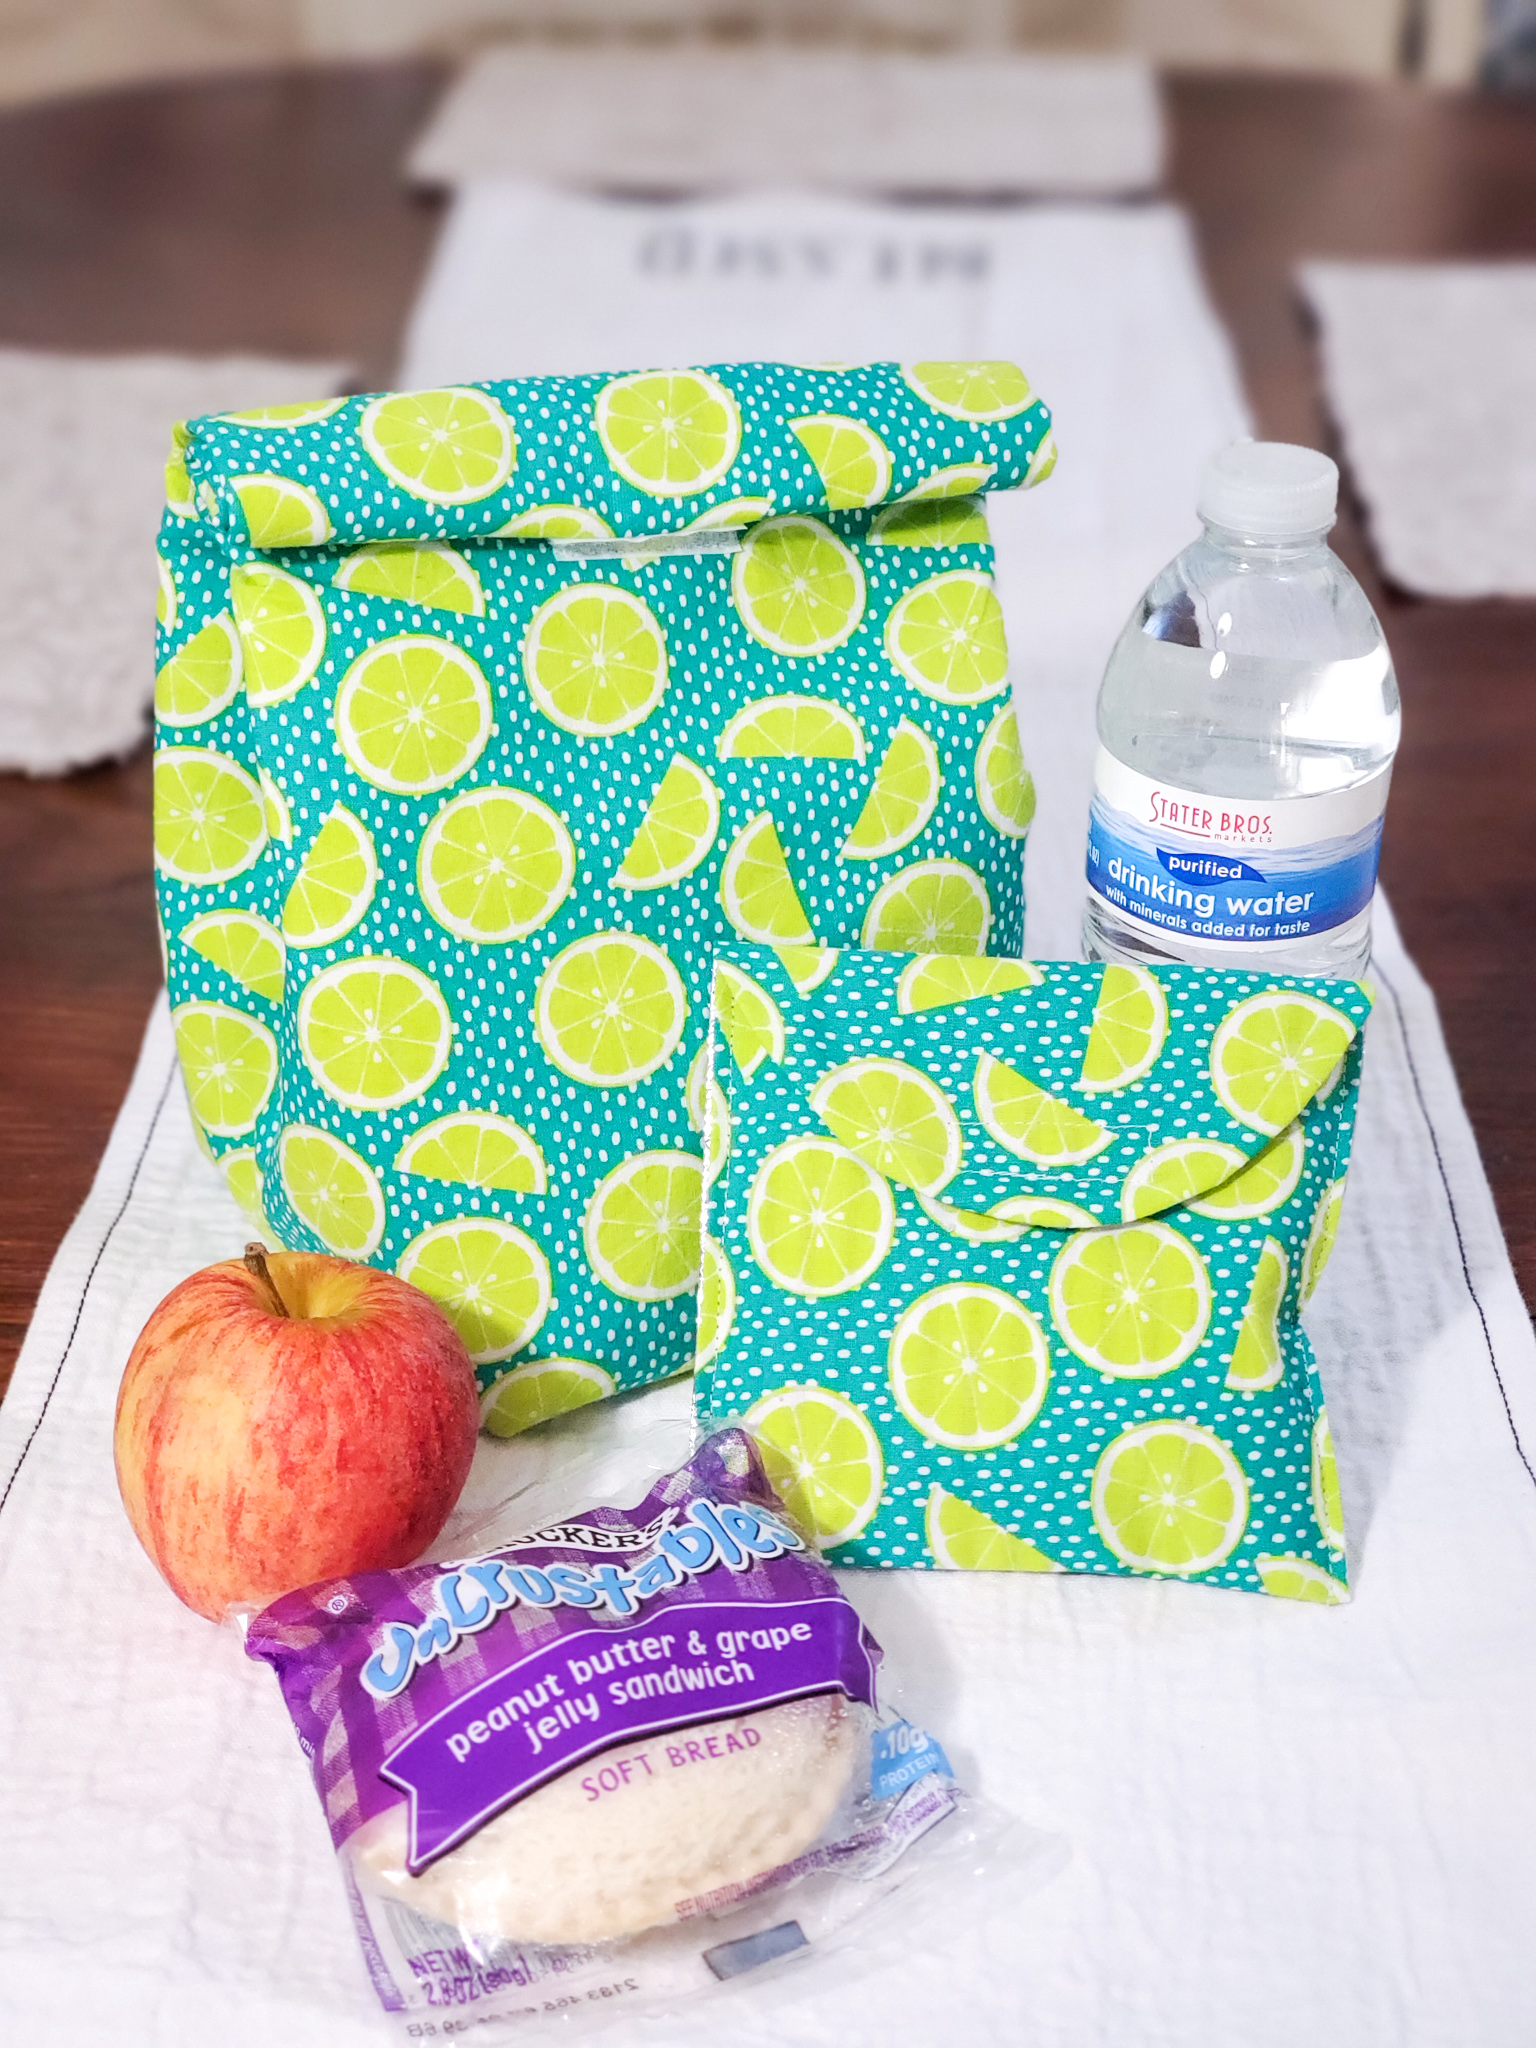
This year, I decided to offer two back-to-school workshop classes. I’ve been trying to incorporate more projects that the kids are requesting. One of my students asked for a class making covers for their notebooks, which we did (that tutorial is coming next!) A couple others wanted to learn how to make lunch bags. Ironically, neither of those kids signed up for the class, lol. But the tutorial was made and so I am posting it here to share with anyone who wants to try their hand at making a reusable lunch bag (or reusable snack bag!)
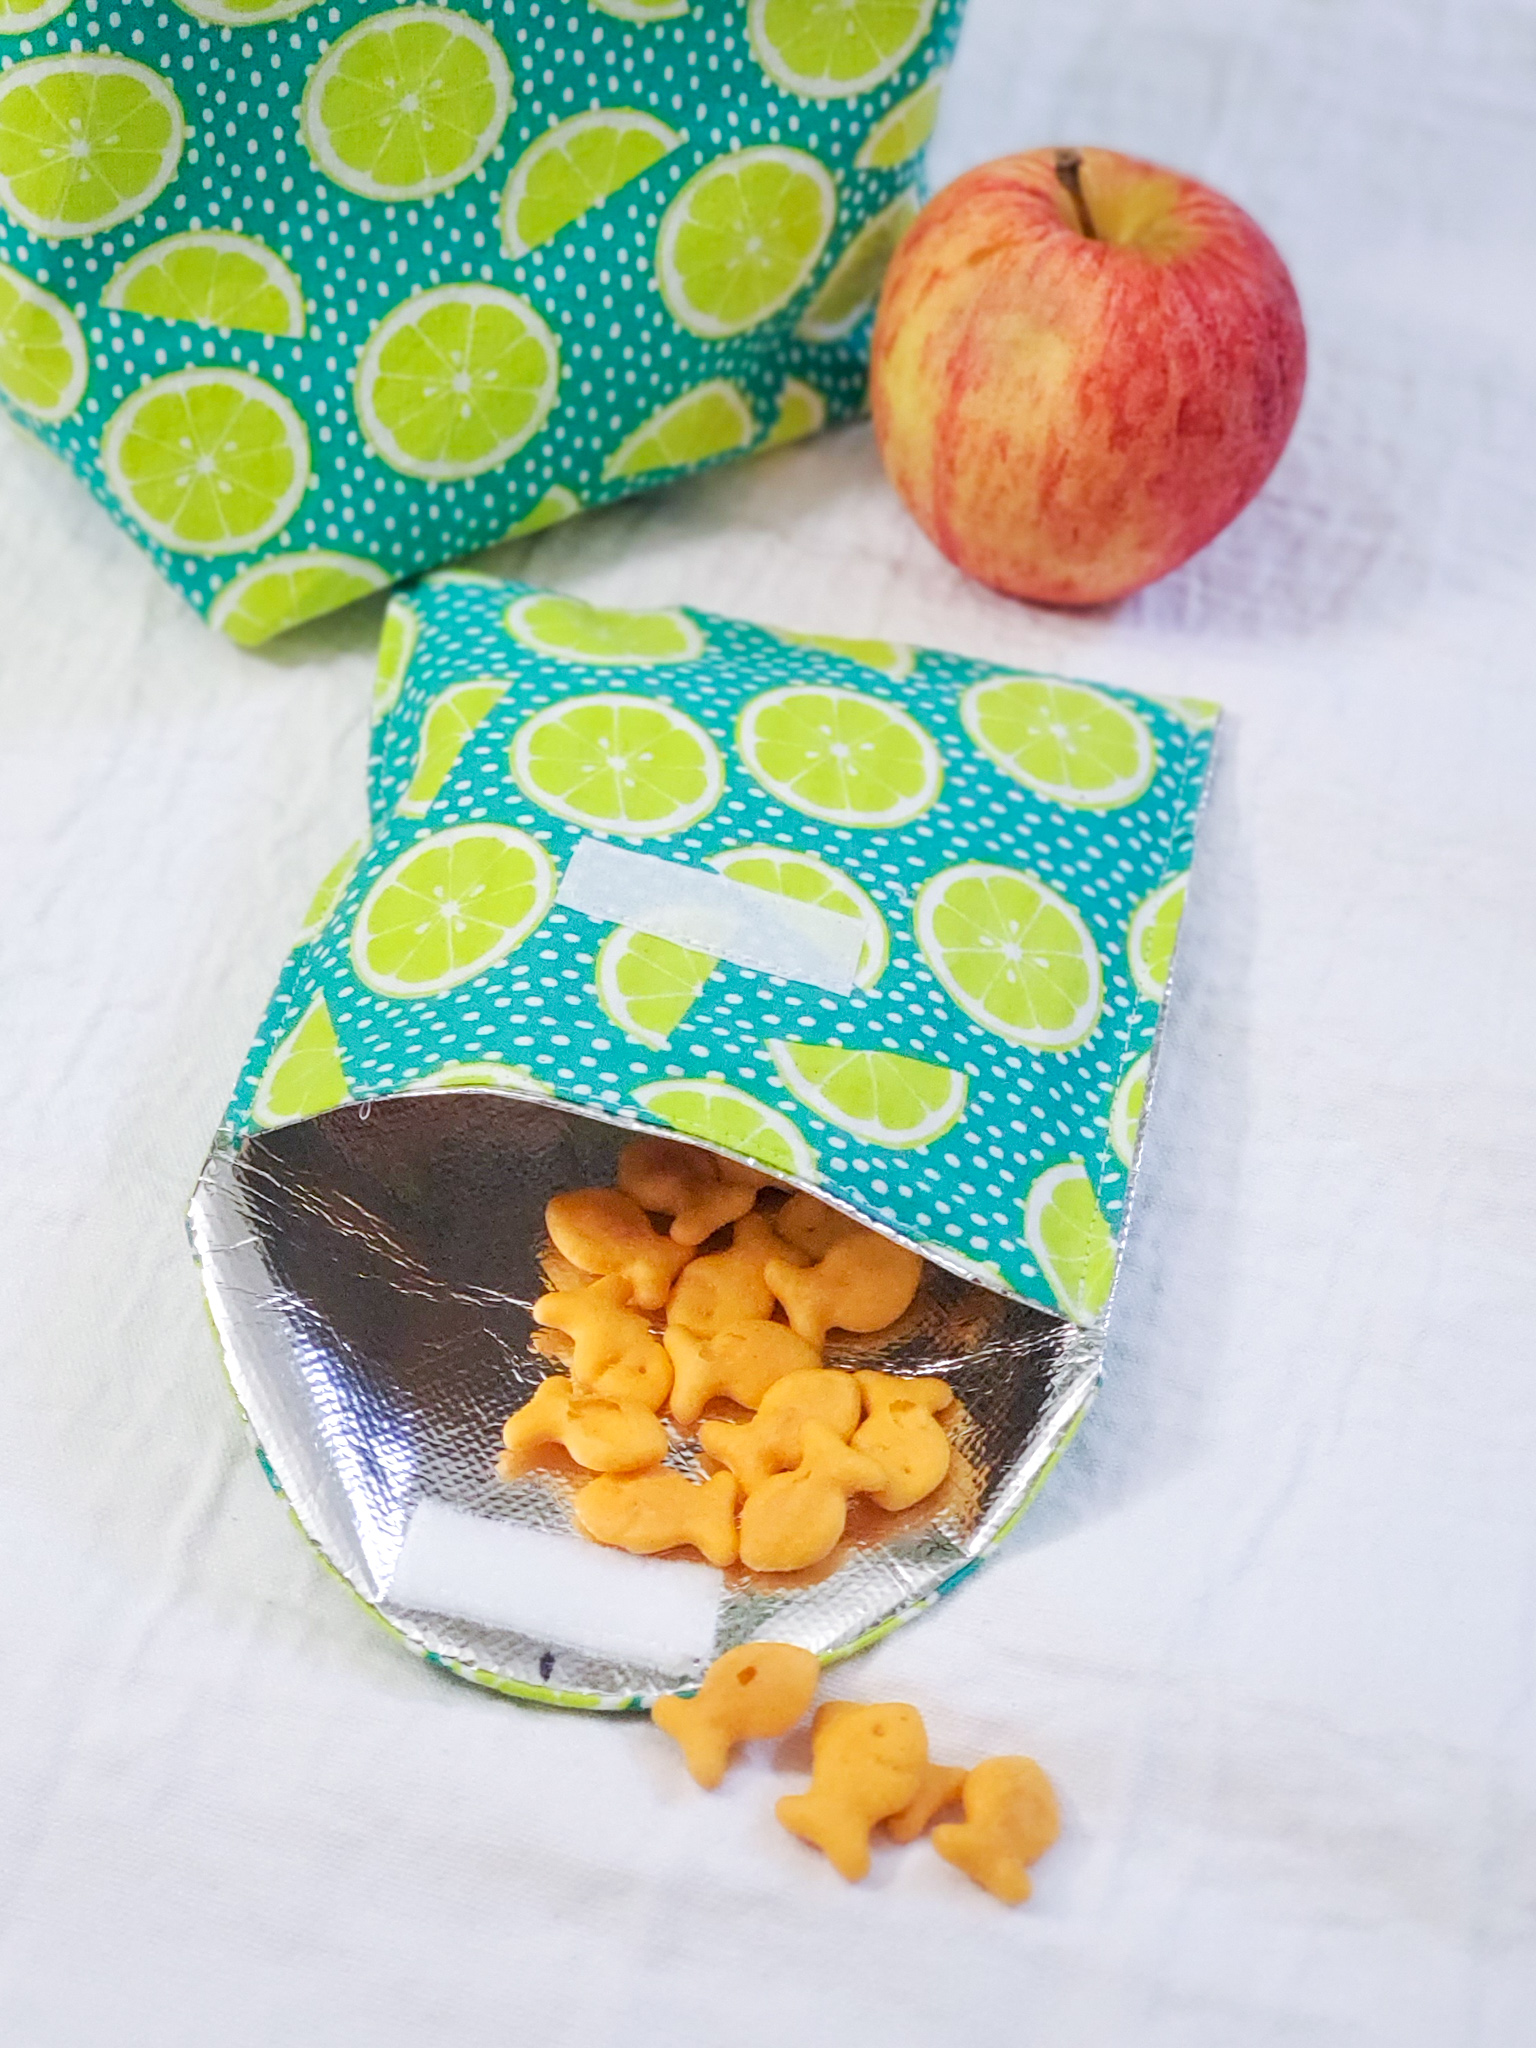
The snack bags are especially useful, in my opinion. I’ve been trying to be more conscious of my plastic use (and waste). My daughter is super passionate about environmental science and marine biology and all of that fun stuff, and she is constantly reminding us how we can help to save our earth. That’s a whole separate blog post for another day 😉 Truly, we would be better off as a whole if we cut down on the amount of plastics that we are littering the earth with. I’ve been trying to get my family to use reusable snack bags (or little containers) for their school lunches. Not only does it help the environment, but it also helps my budget!
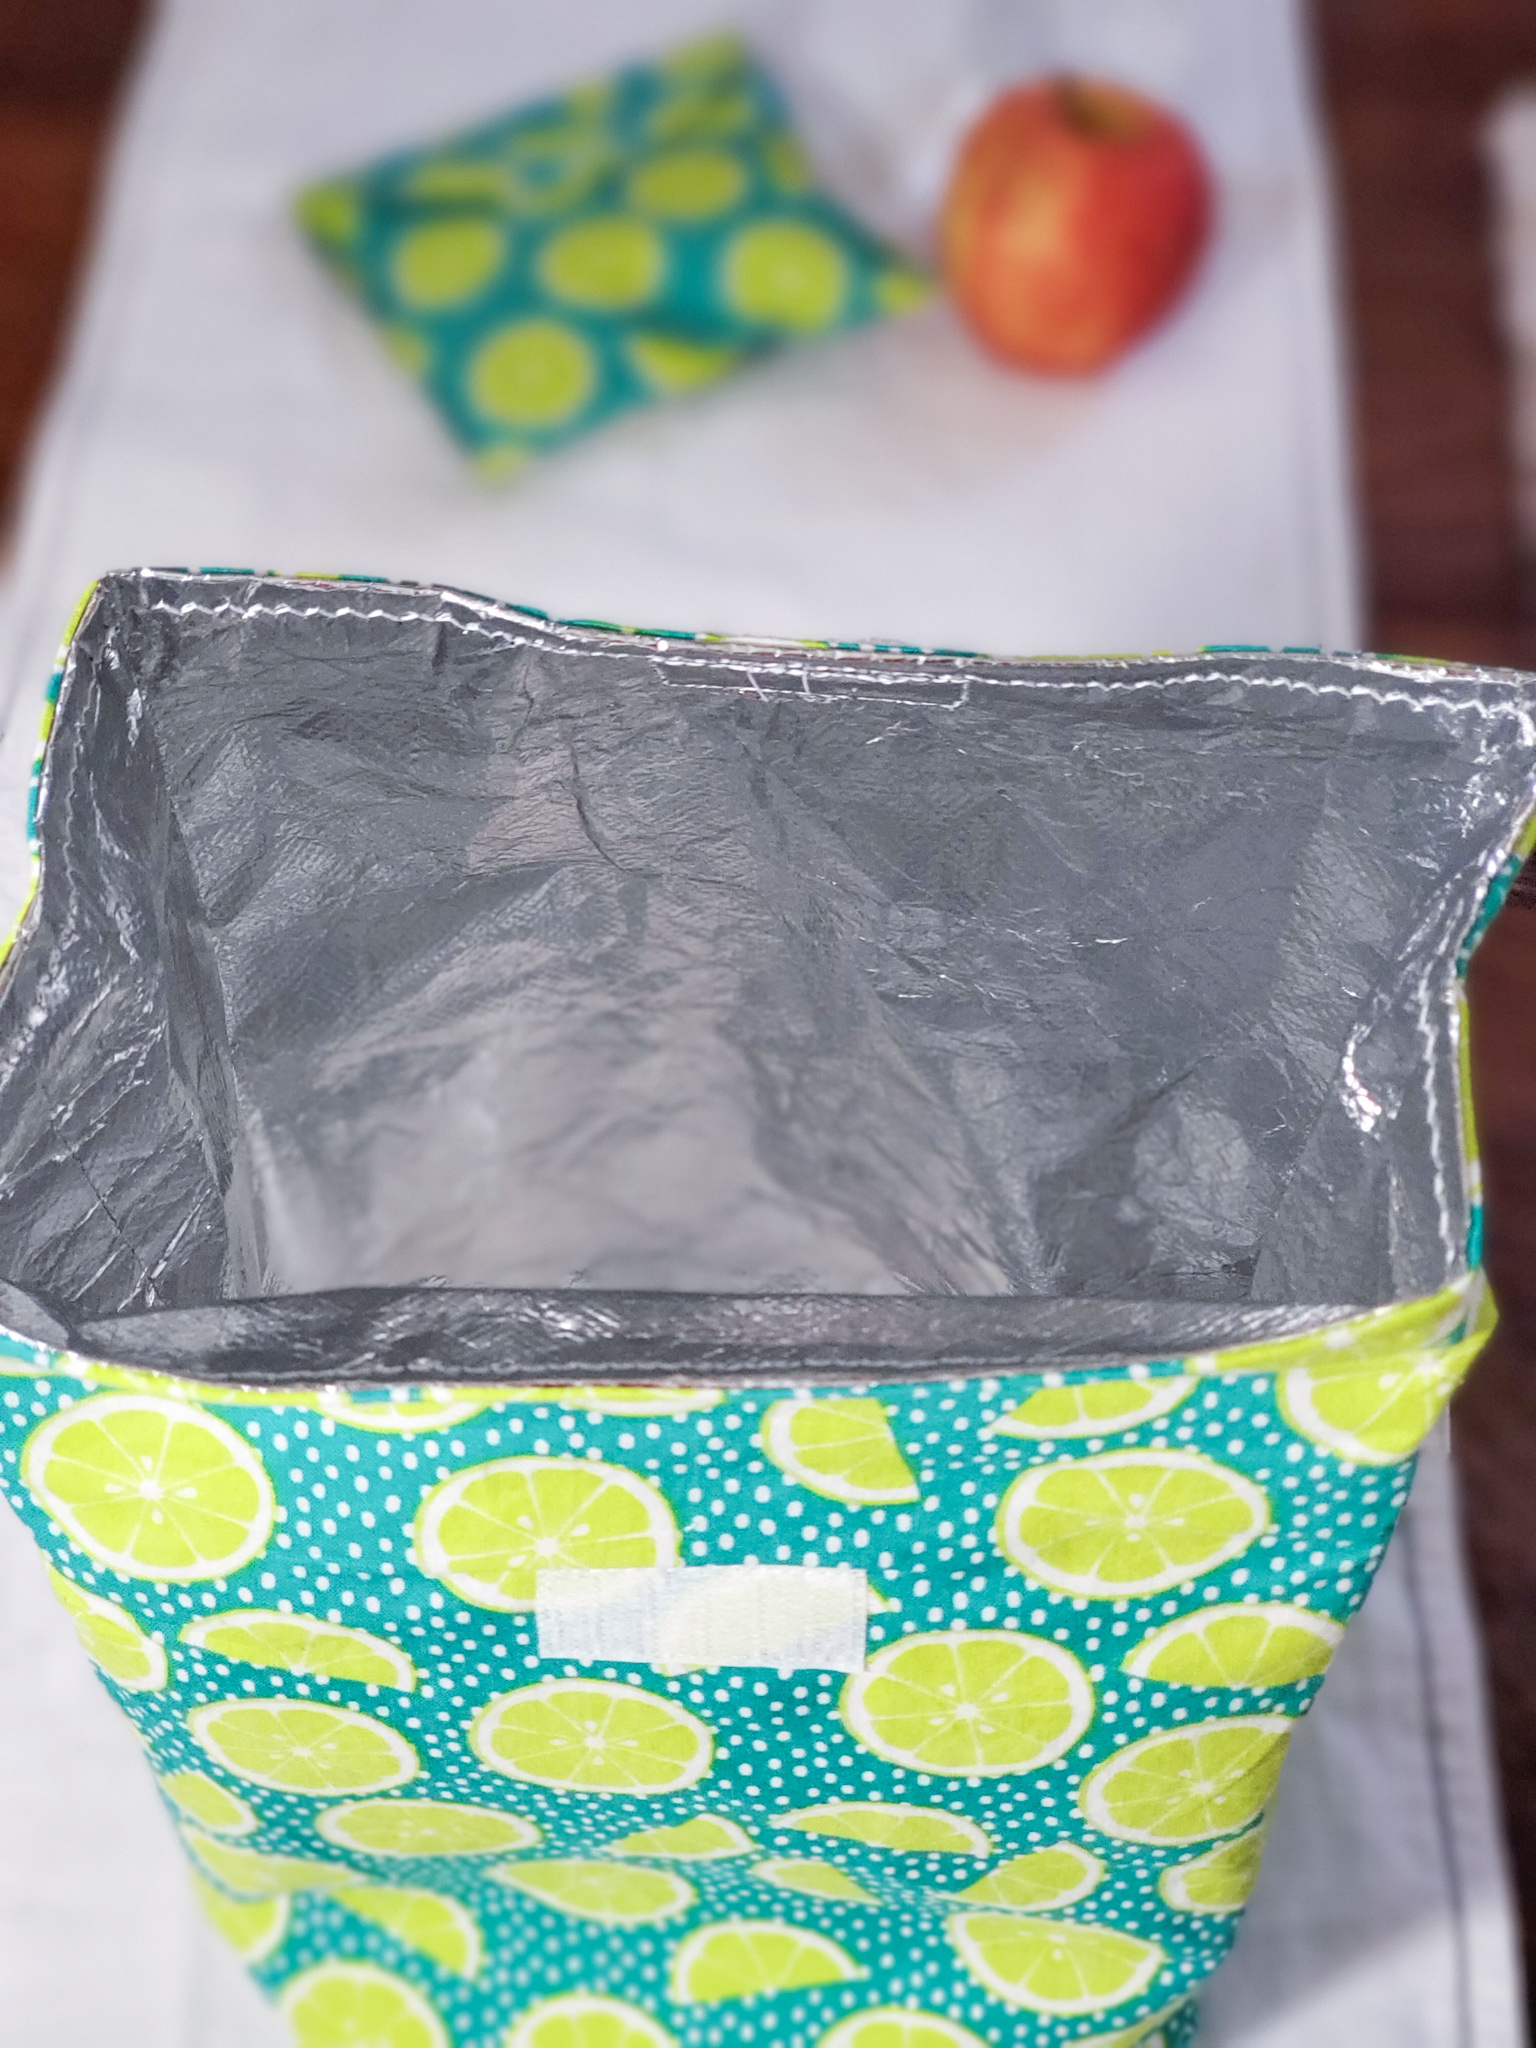
Both the reusable lunch bag and the reusable snack bags are lined with a special lining that I bought at Joann’s, called reusable bag fabric, which means they can easily be wiped cleaned, or thrown in a cold/warm, gentle wash cycle (air dry). This lining fabric keeps the outside of your lunch bag dry, and helps to keep the contents inside your bag cold or warm. One word of warning: it’s kind of a thin material, so handle it gently so that it doesn’t rip (especially when turning your bags at the end!)
This project is a pretty quick and easy make. I was able to whip both the lunch bag and the snack bag up in about an hour! It’s a fun afternoon project. And I know I always say it, but it could make a really fun gift! I actually whipped one up to raffle off with a gift certificate at one of my upcoming events for my non-profit. I love personalized gifts!
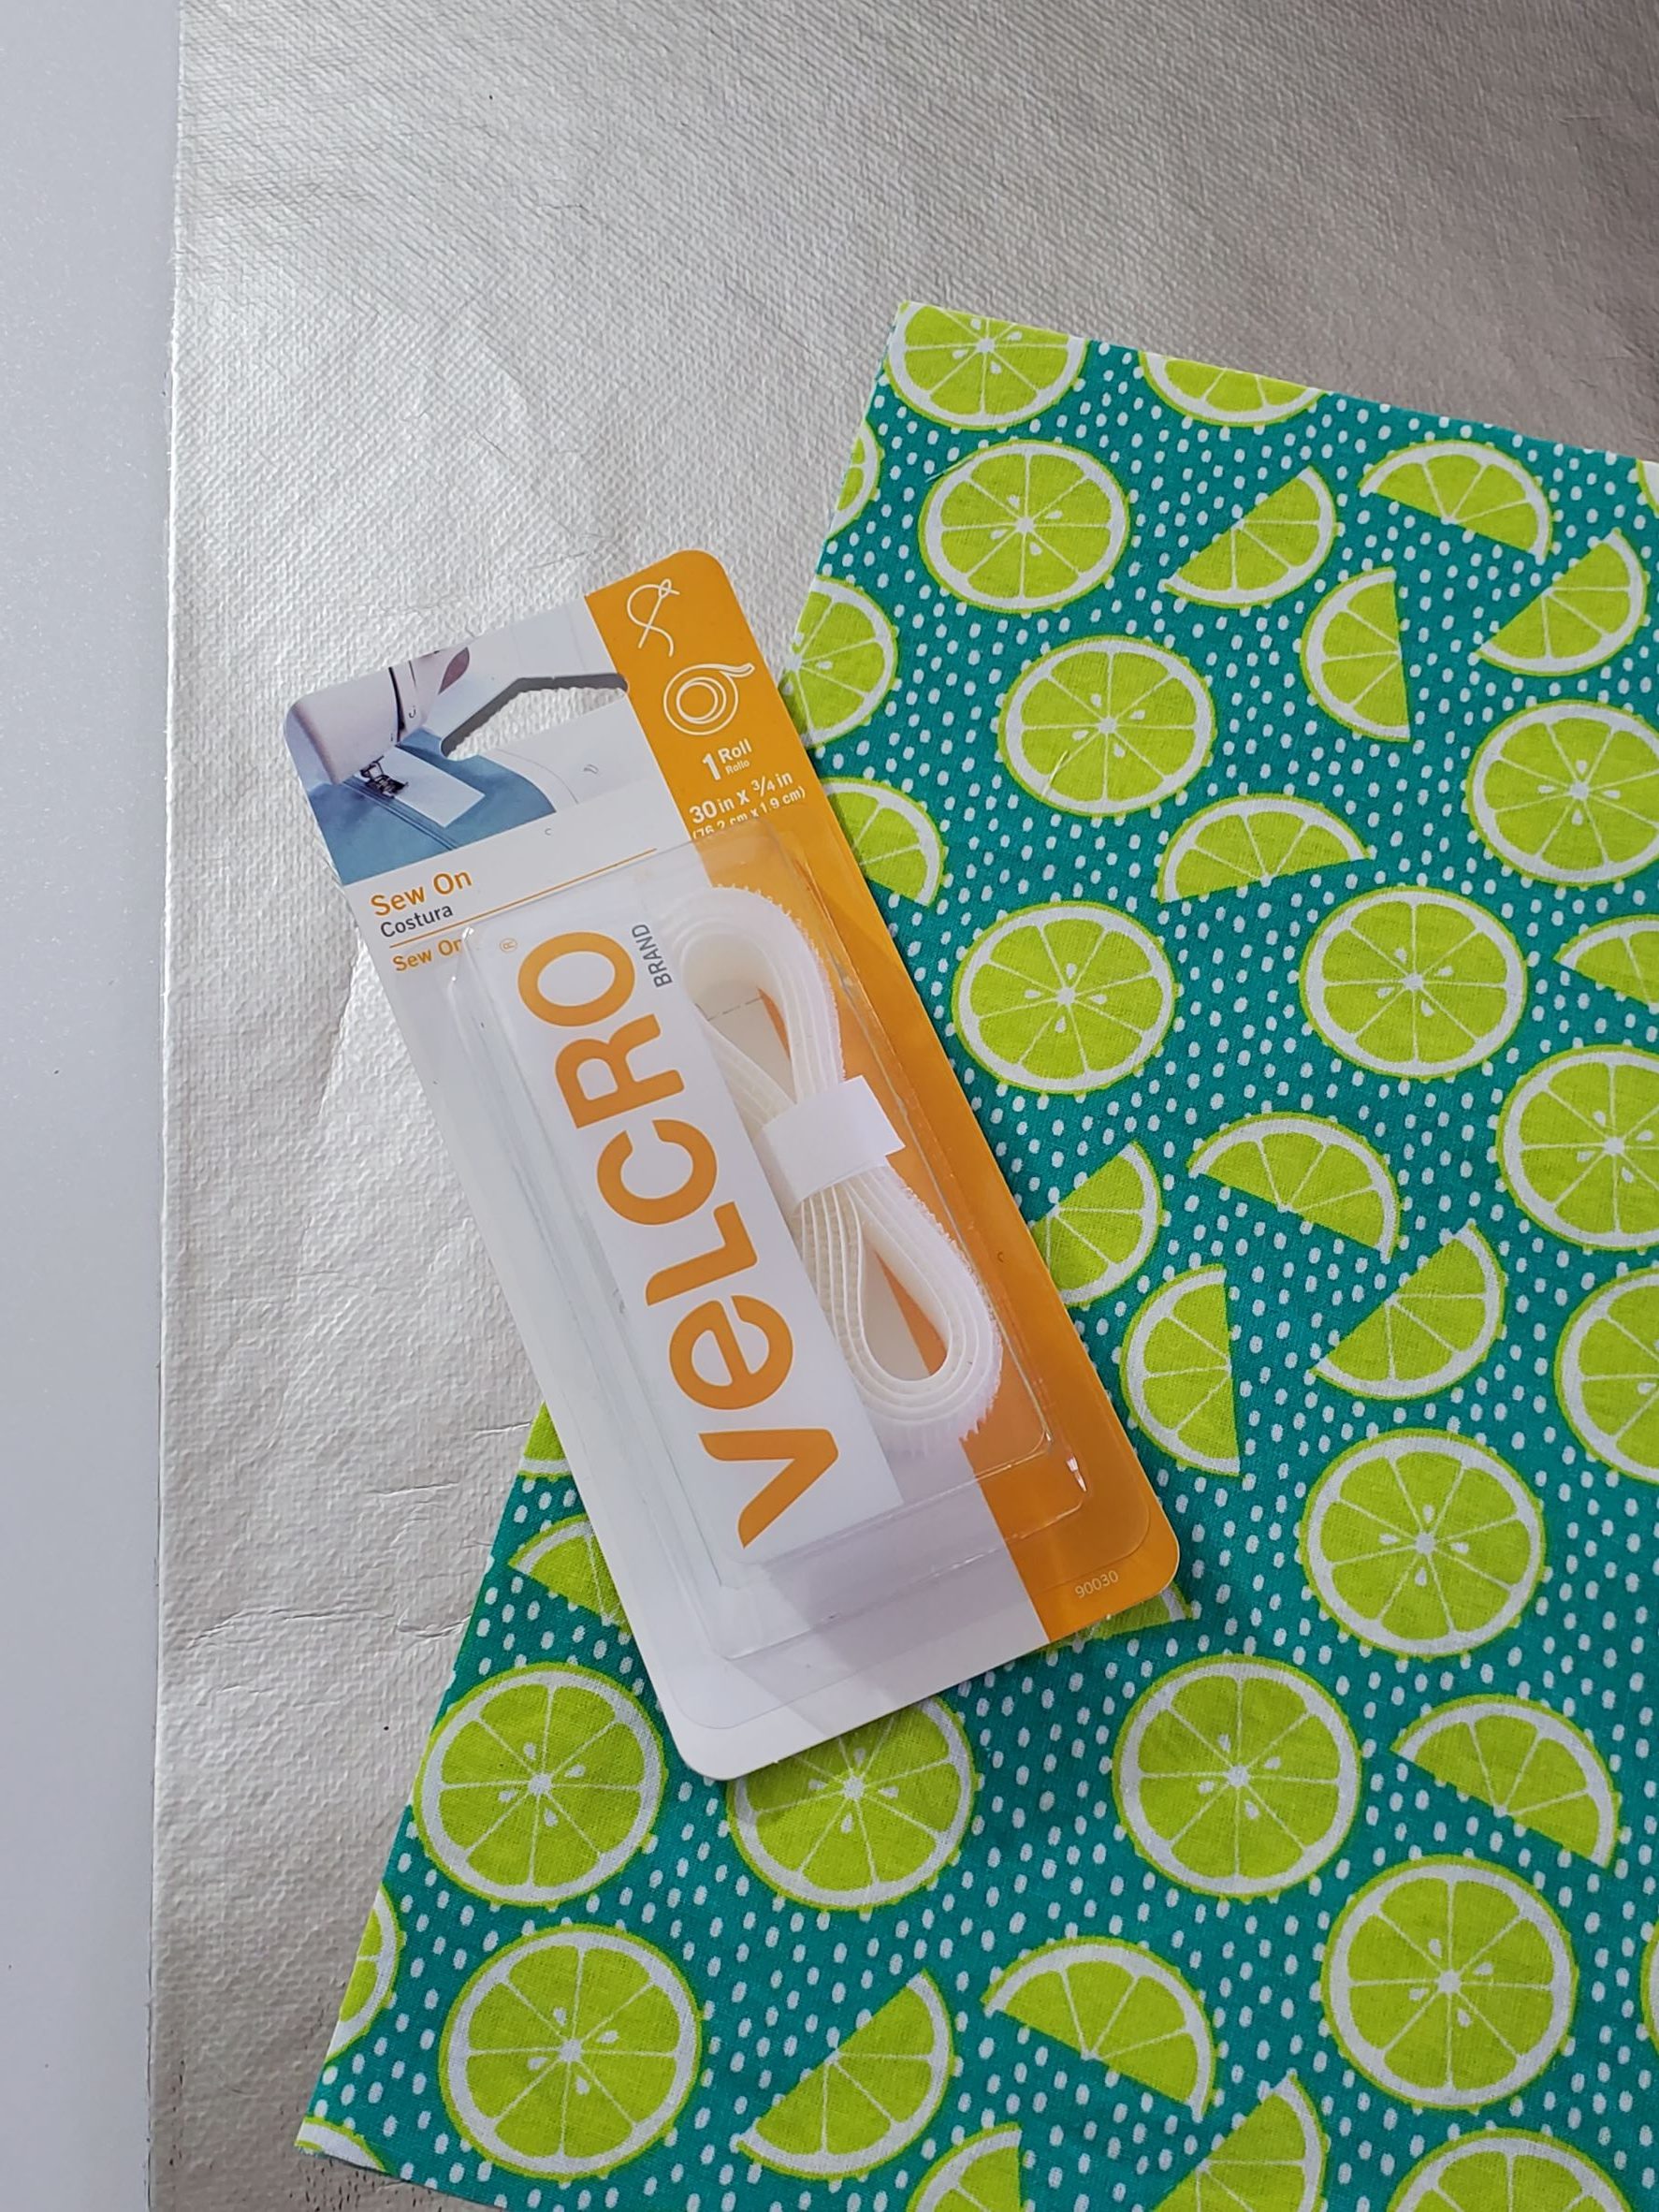
Materials Needed To Sew A Reusable Lunch Bag:
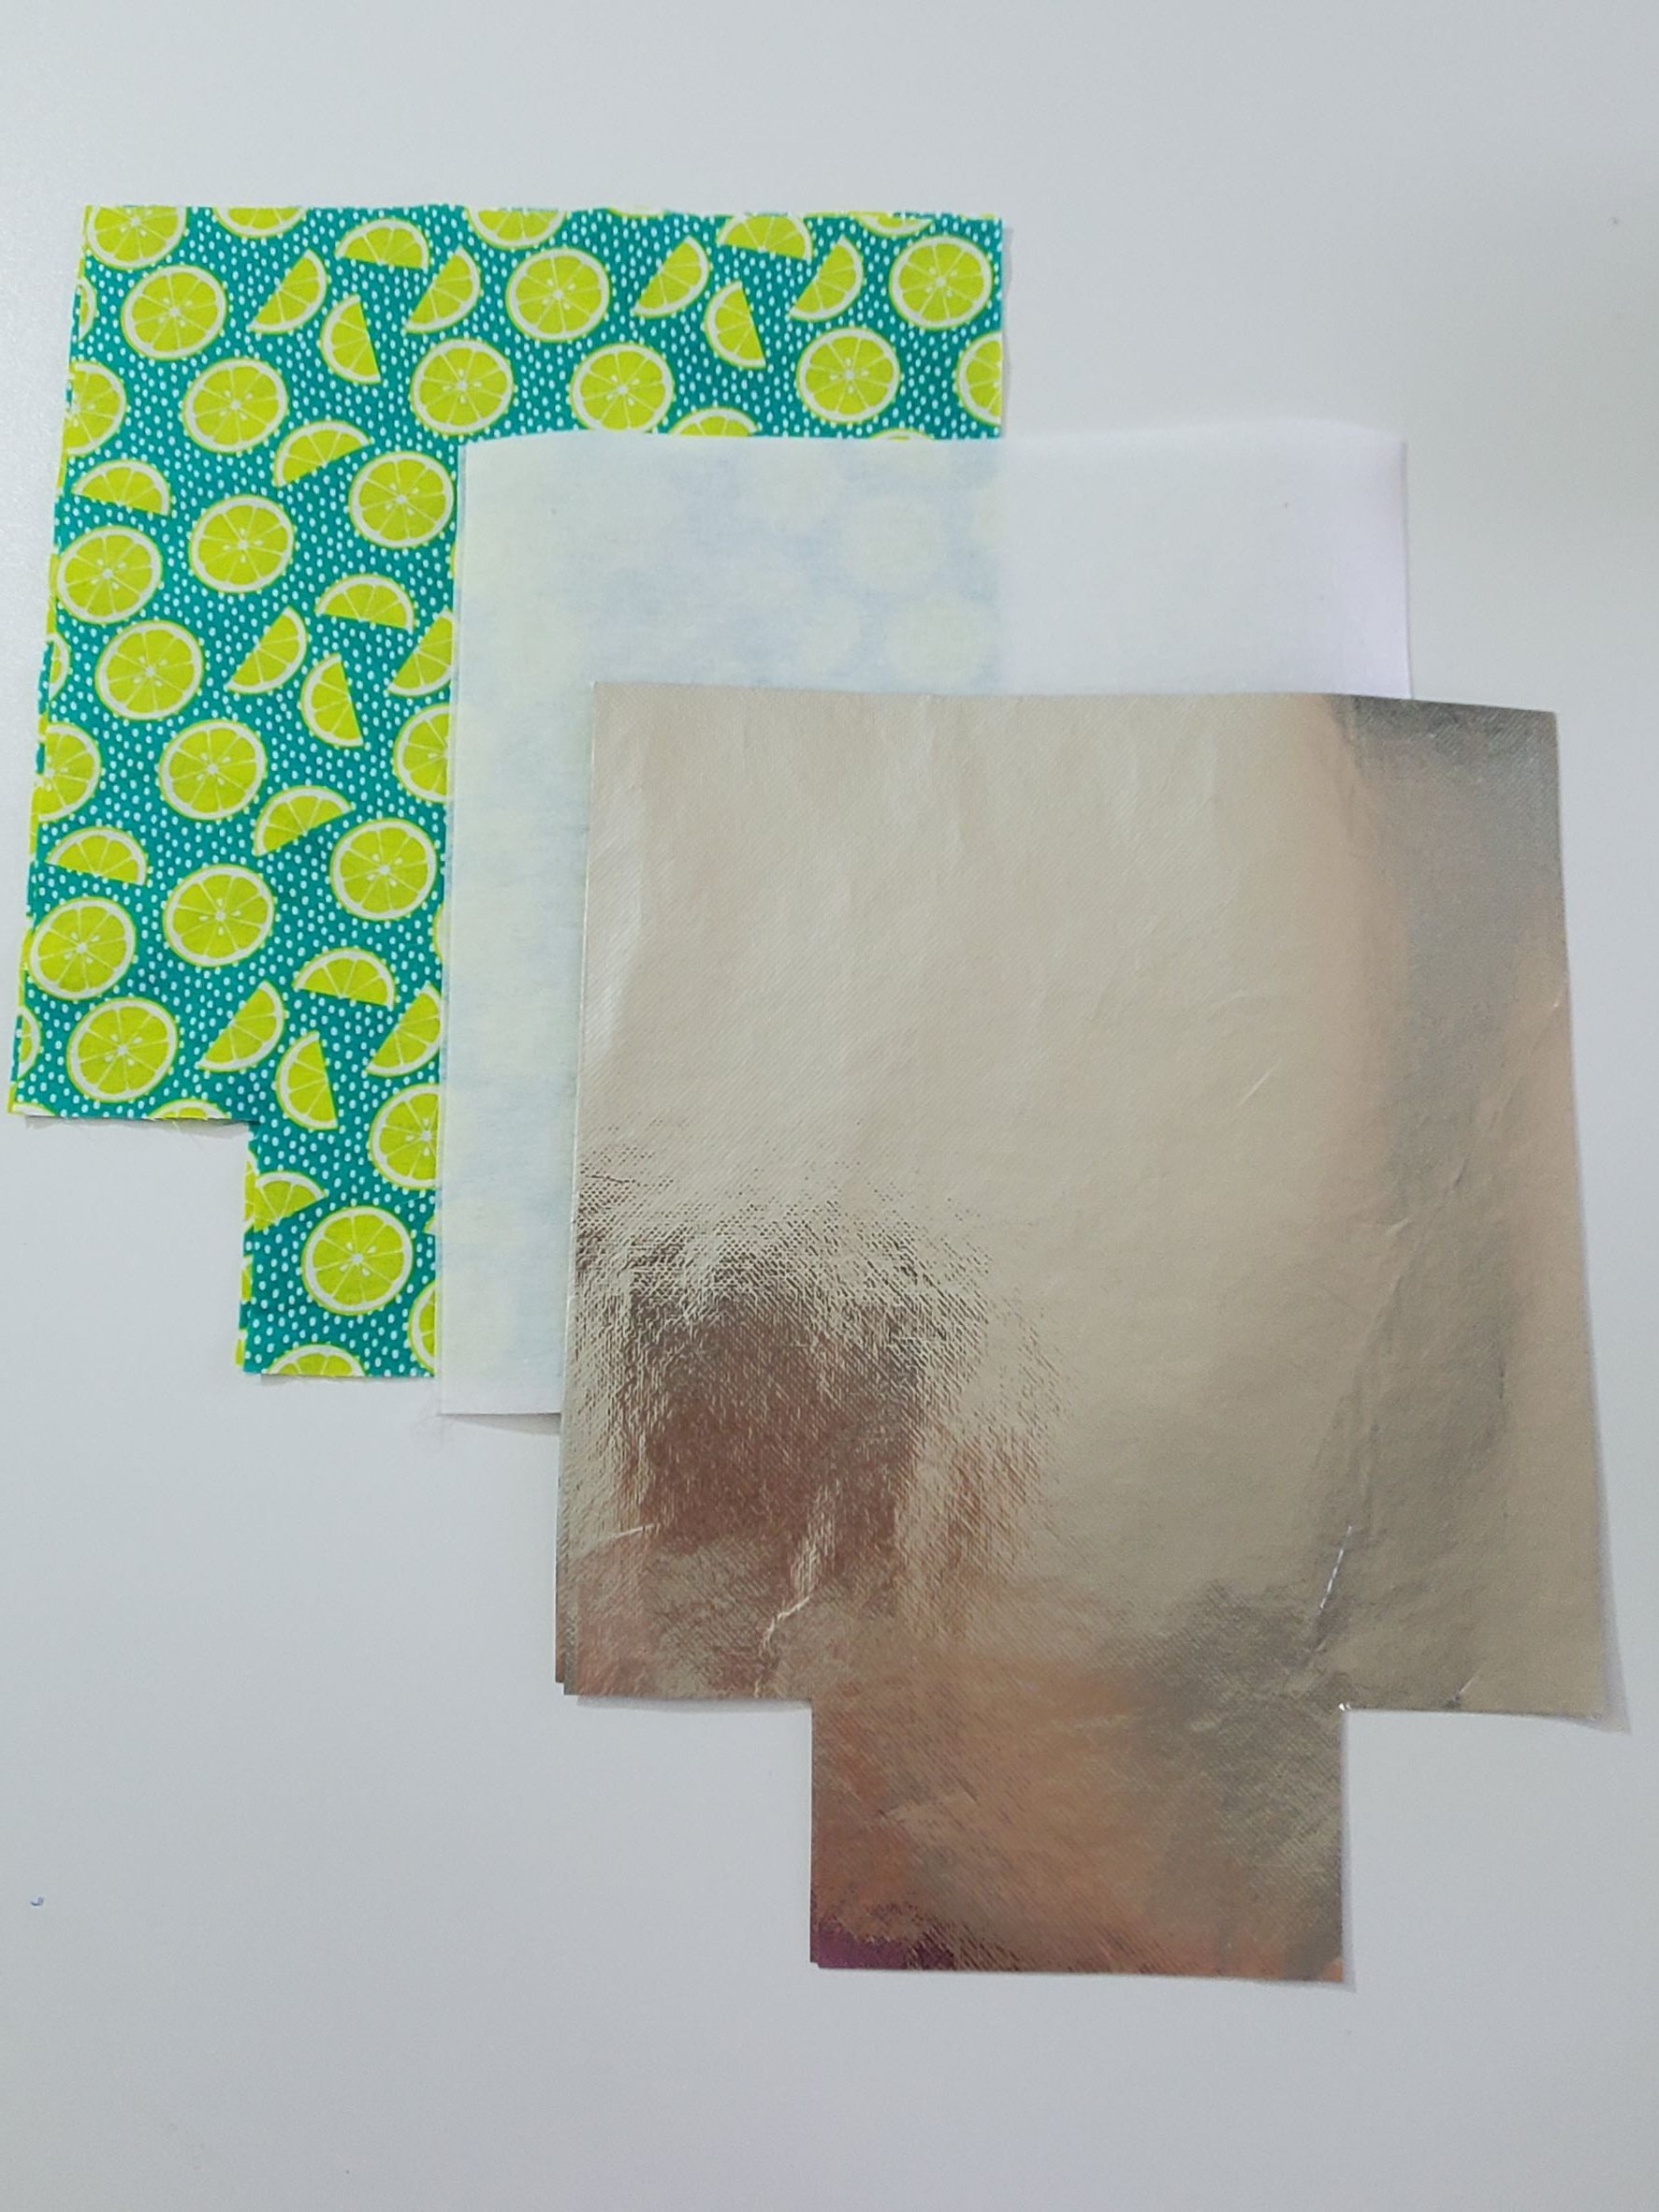
- 1/2 yard of cotton or canvas/duck cloth fabric
- 1/2 yard of reusable bag fabric
- 1/2 yard of heavy, sew-in interfacing (you can use iron-on interfacing if you can find a heavy weight)
- Strip of velcro (sew in)
- Pattern for snack bag (click here)
- Sewing clips (you will want these rather than pins due to the lining fabric)
For your convenience, I’ve linked some of these items at the end of this post!
Steps to Sew Your Reusable Lunch Bag
Cut out 2 rectangles measuring 15″ high by 12″ wide. On each of the bottom corners, cut out a 3″ square, as shown in the picture.
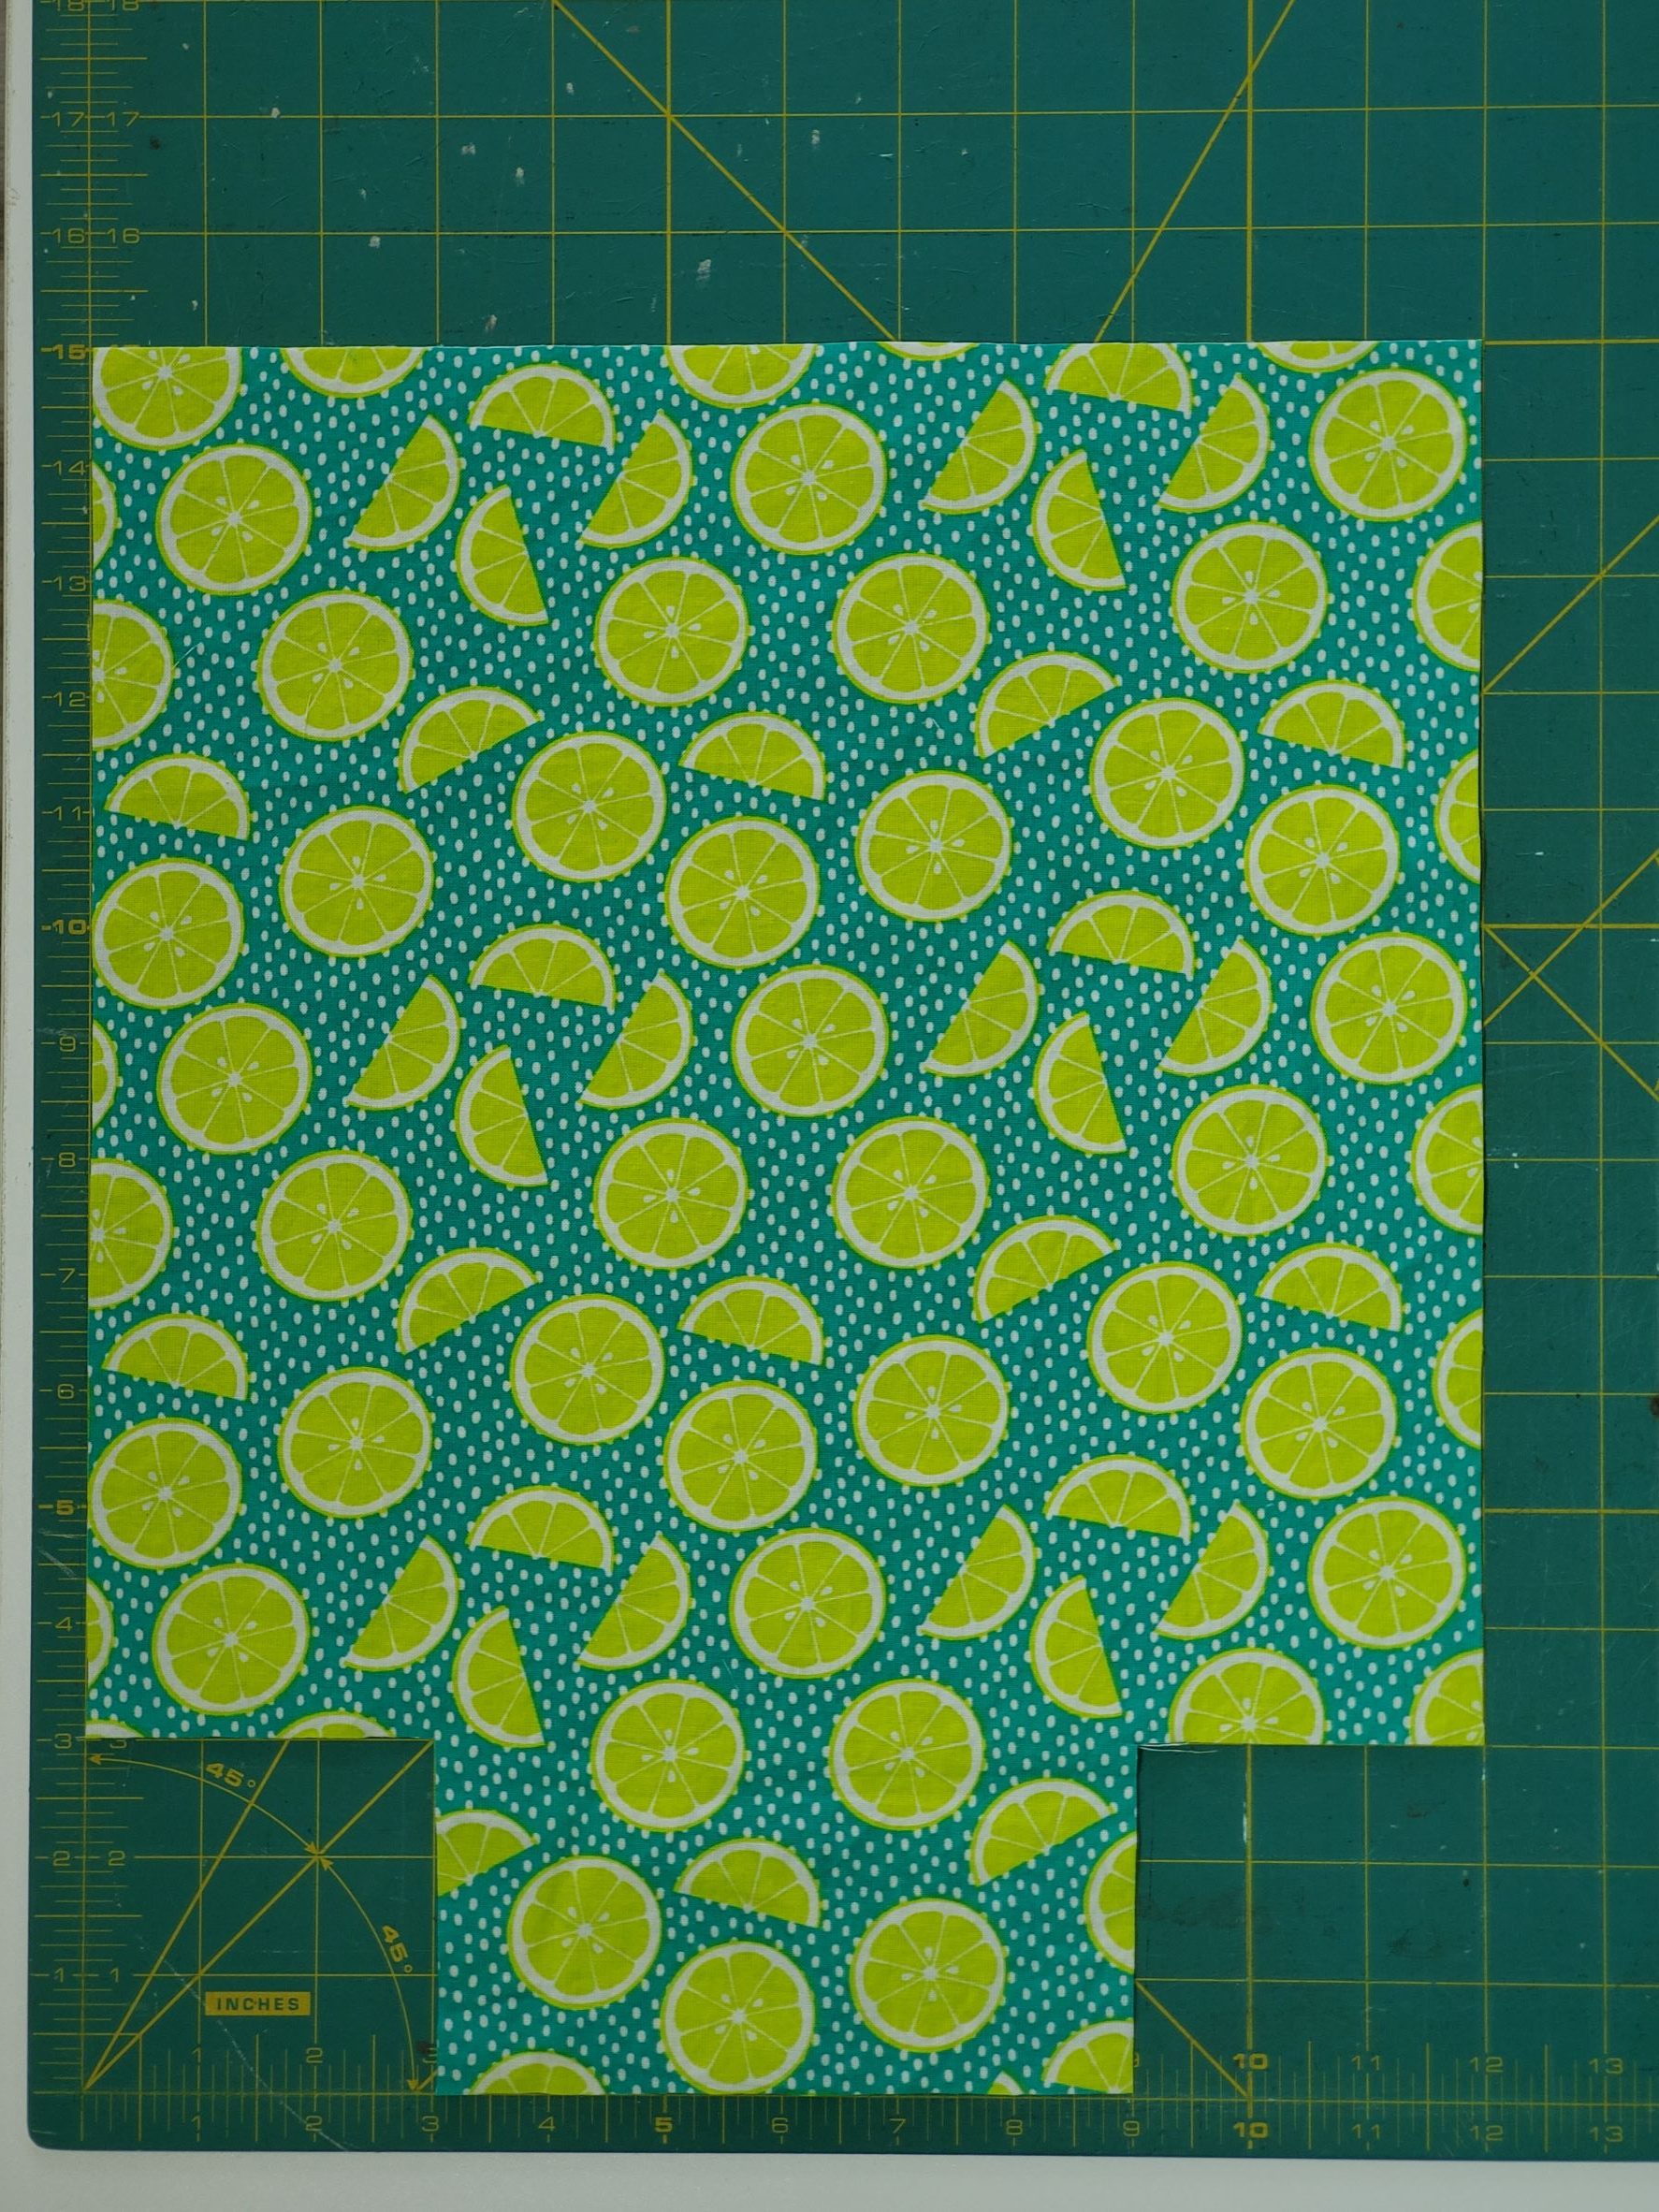
Repeat the same cuts for the lining and the interfacing, cutting 2 of each.
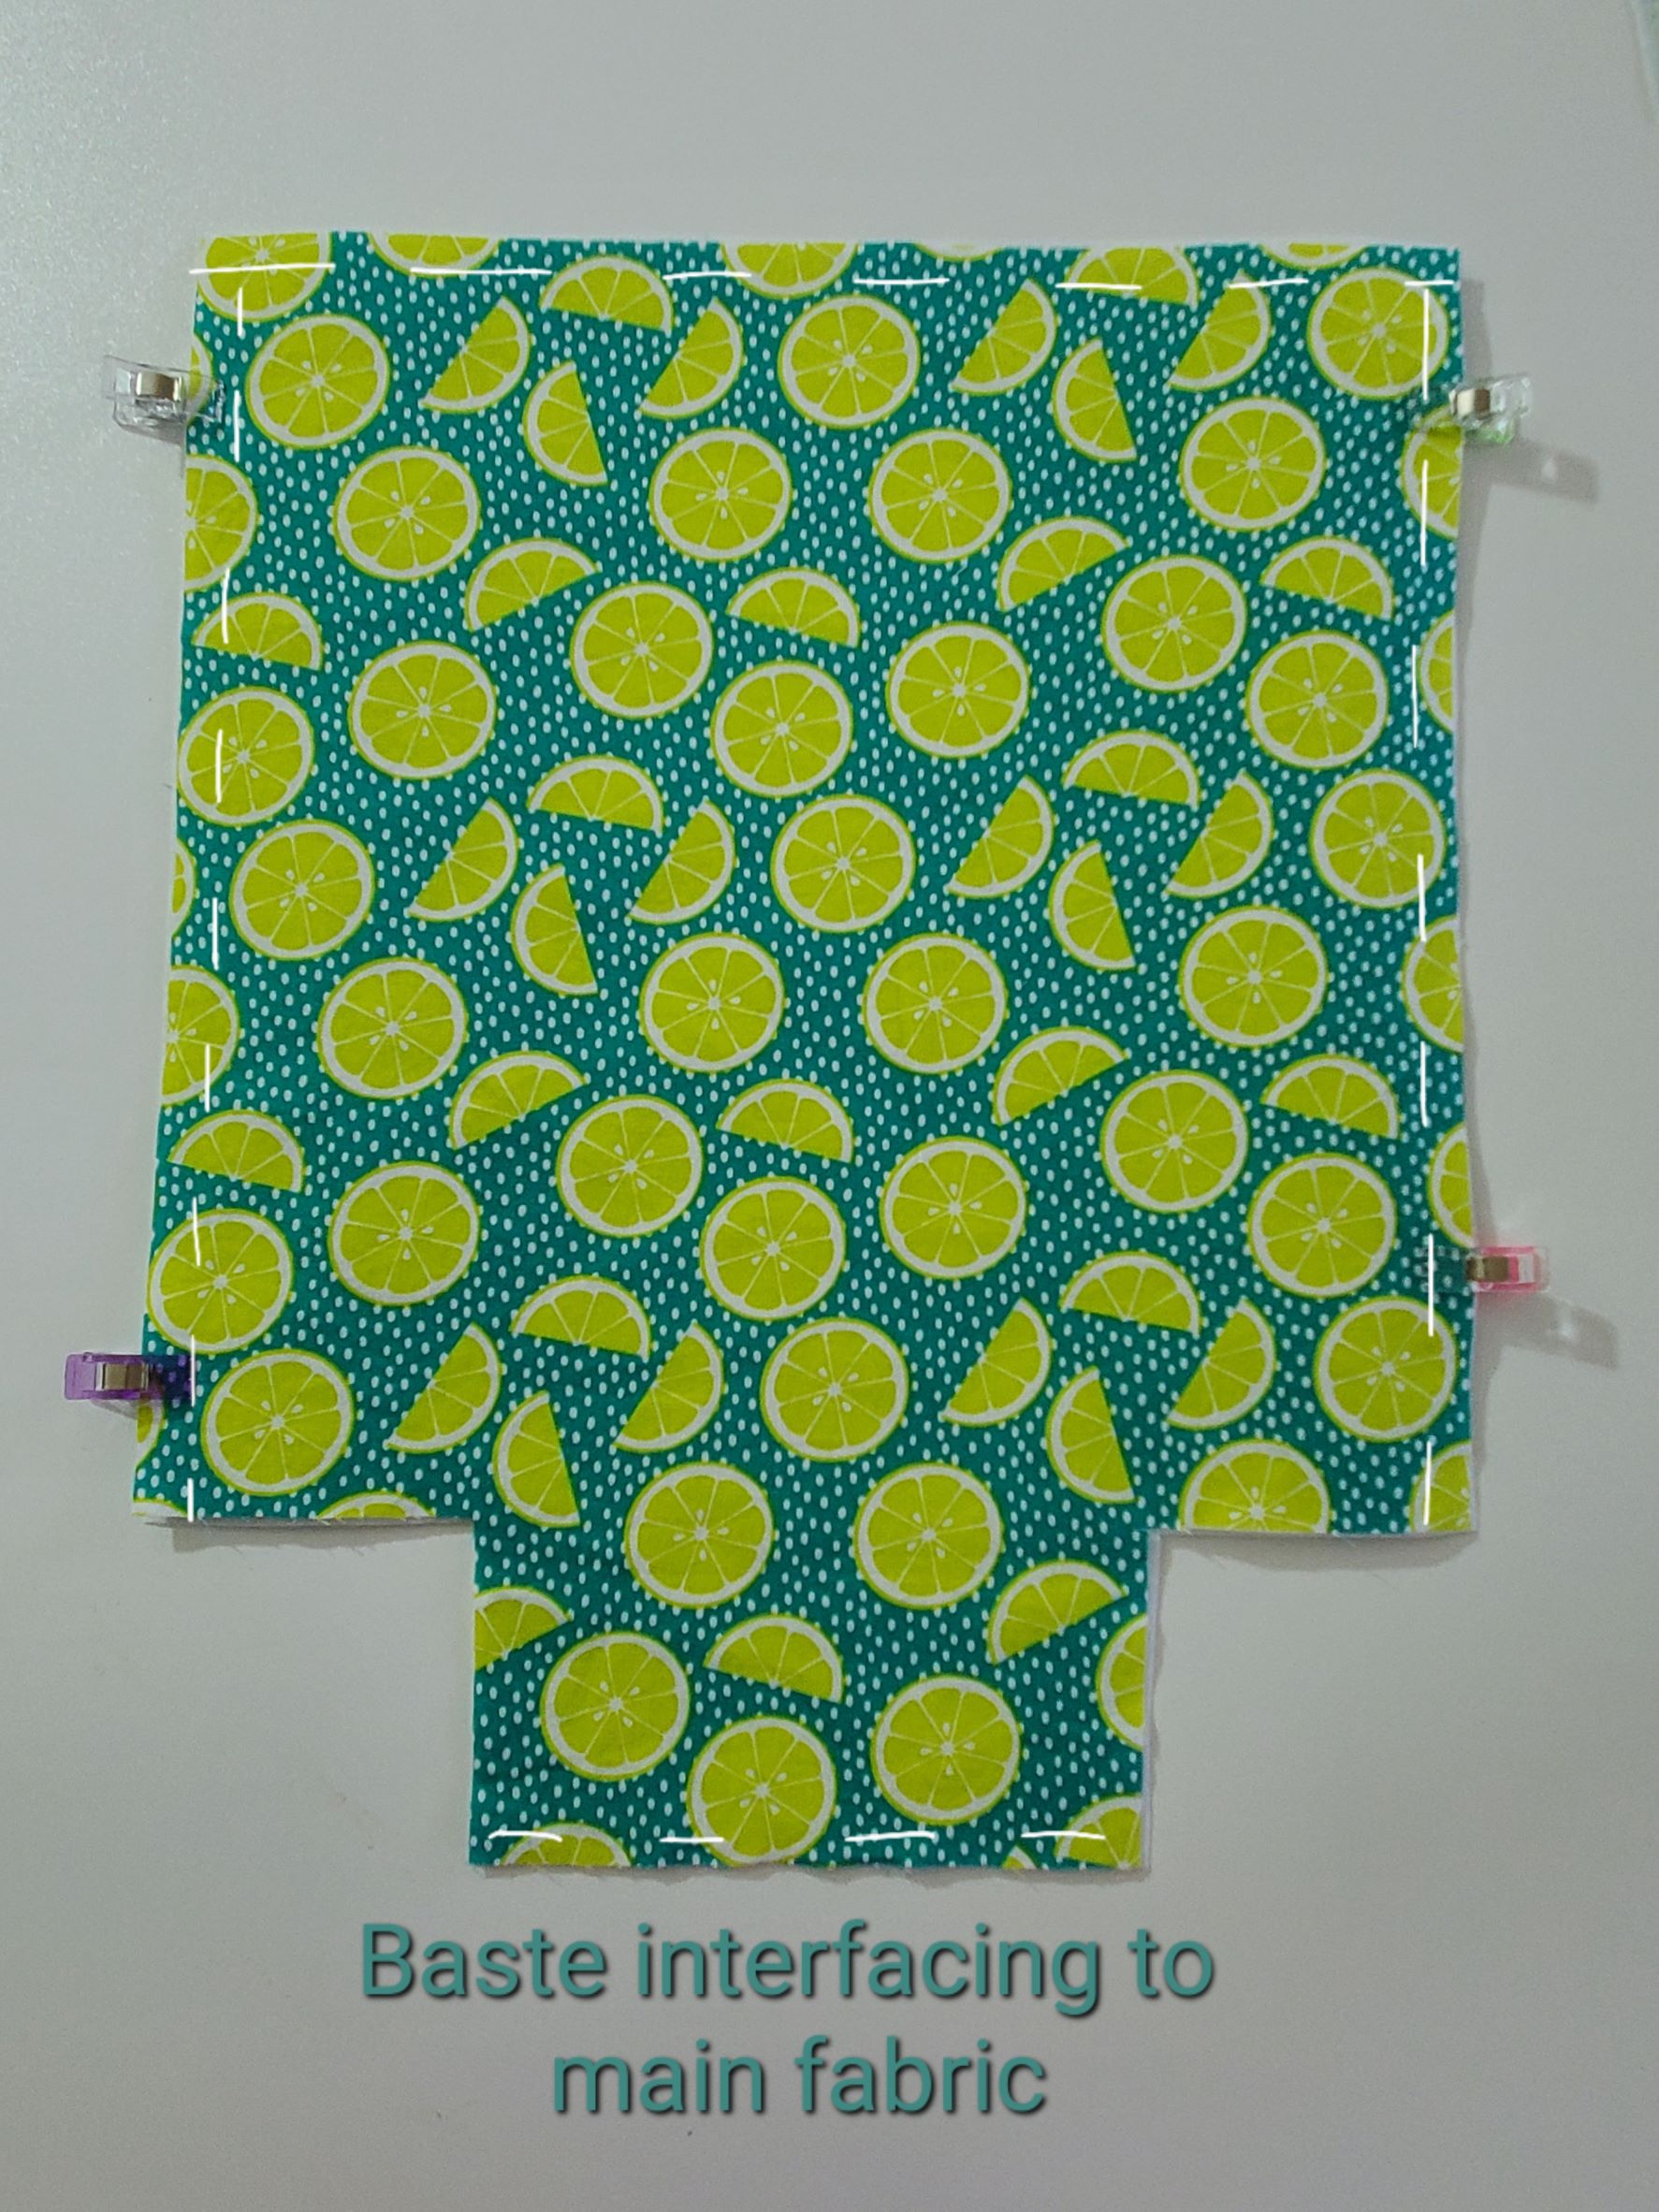
If you are using iron-on interfacing, place that on the wrong side of the outer fabric and press to fuse. If you are using sew in interfacing, place the wrong side of the outer lunch bag fabric on top of the interfacing pieces. Pin in place. Baste along the sides, the top, and the bottom of the bag. Repeat with the remaining outer fabric and interfacing piece.
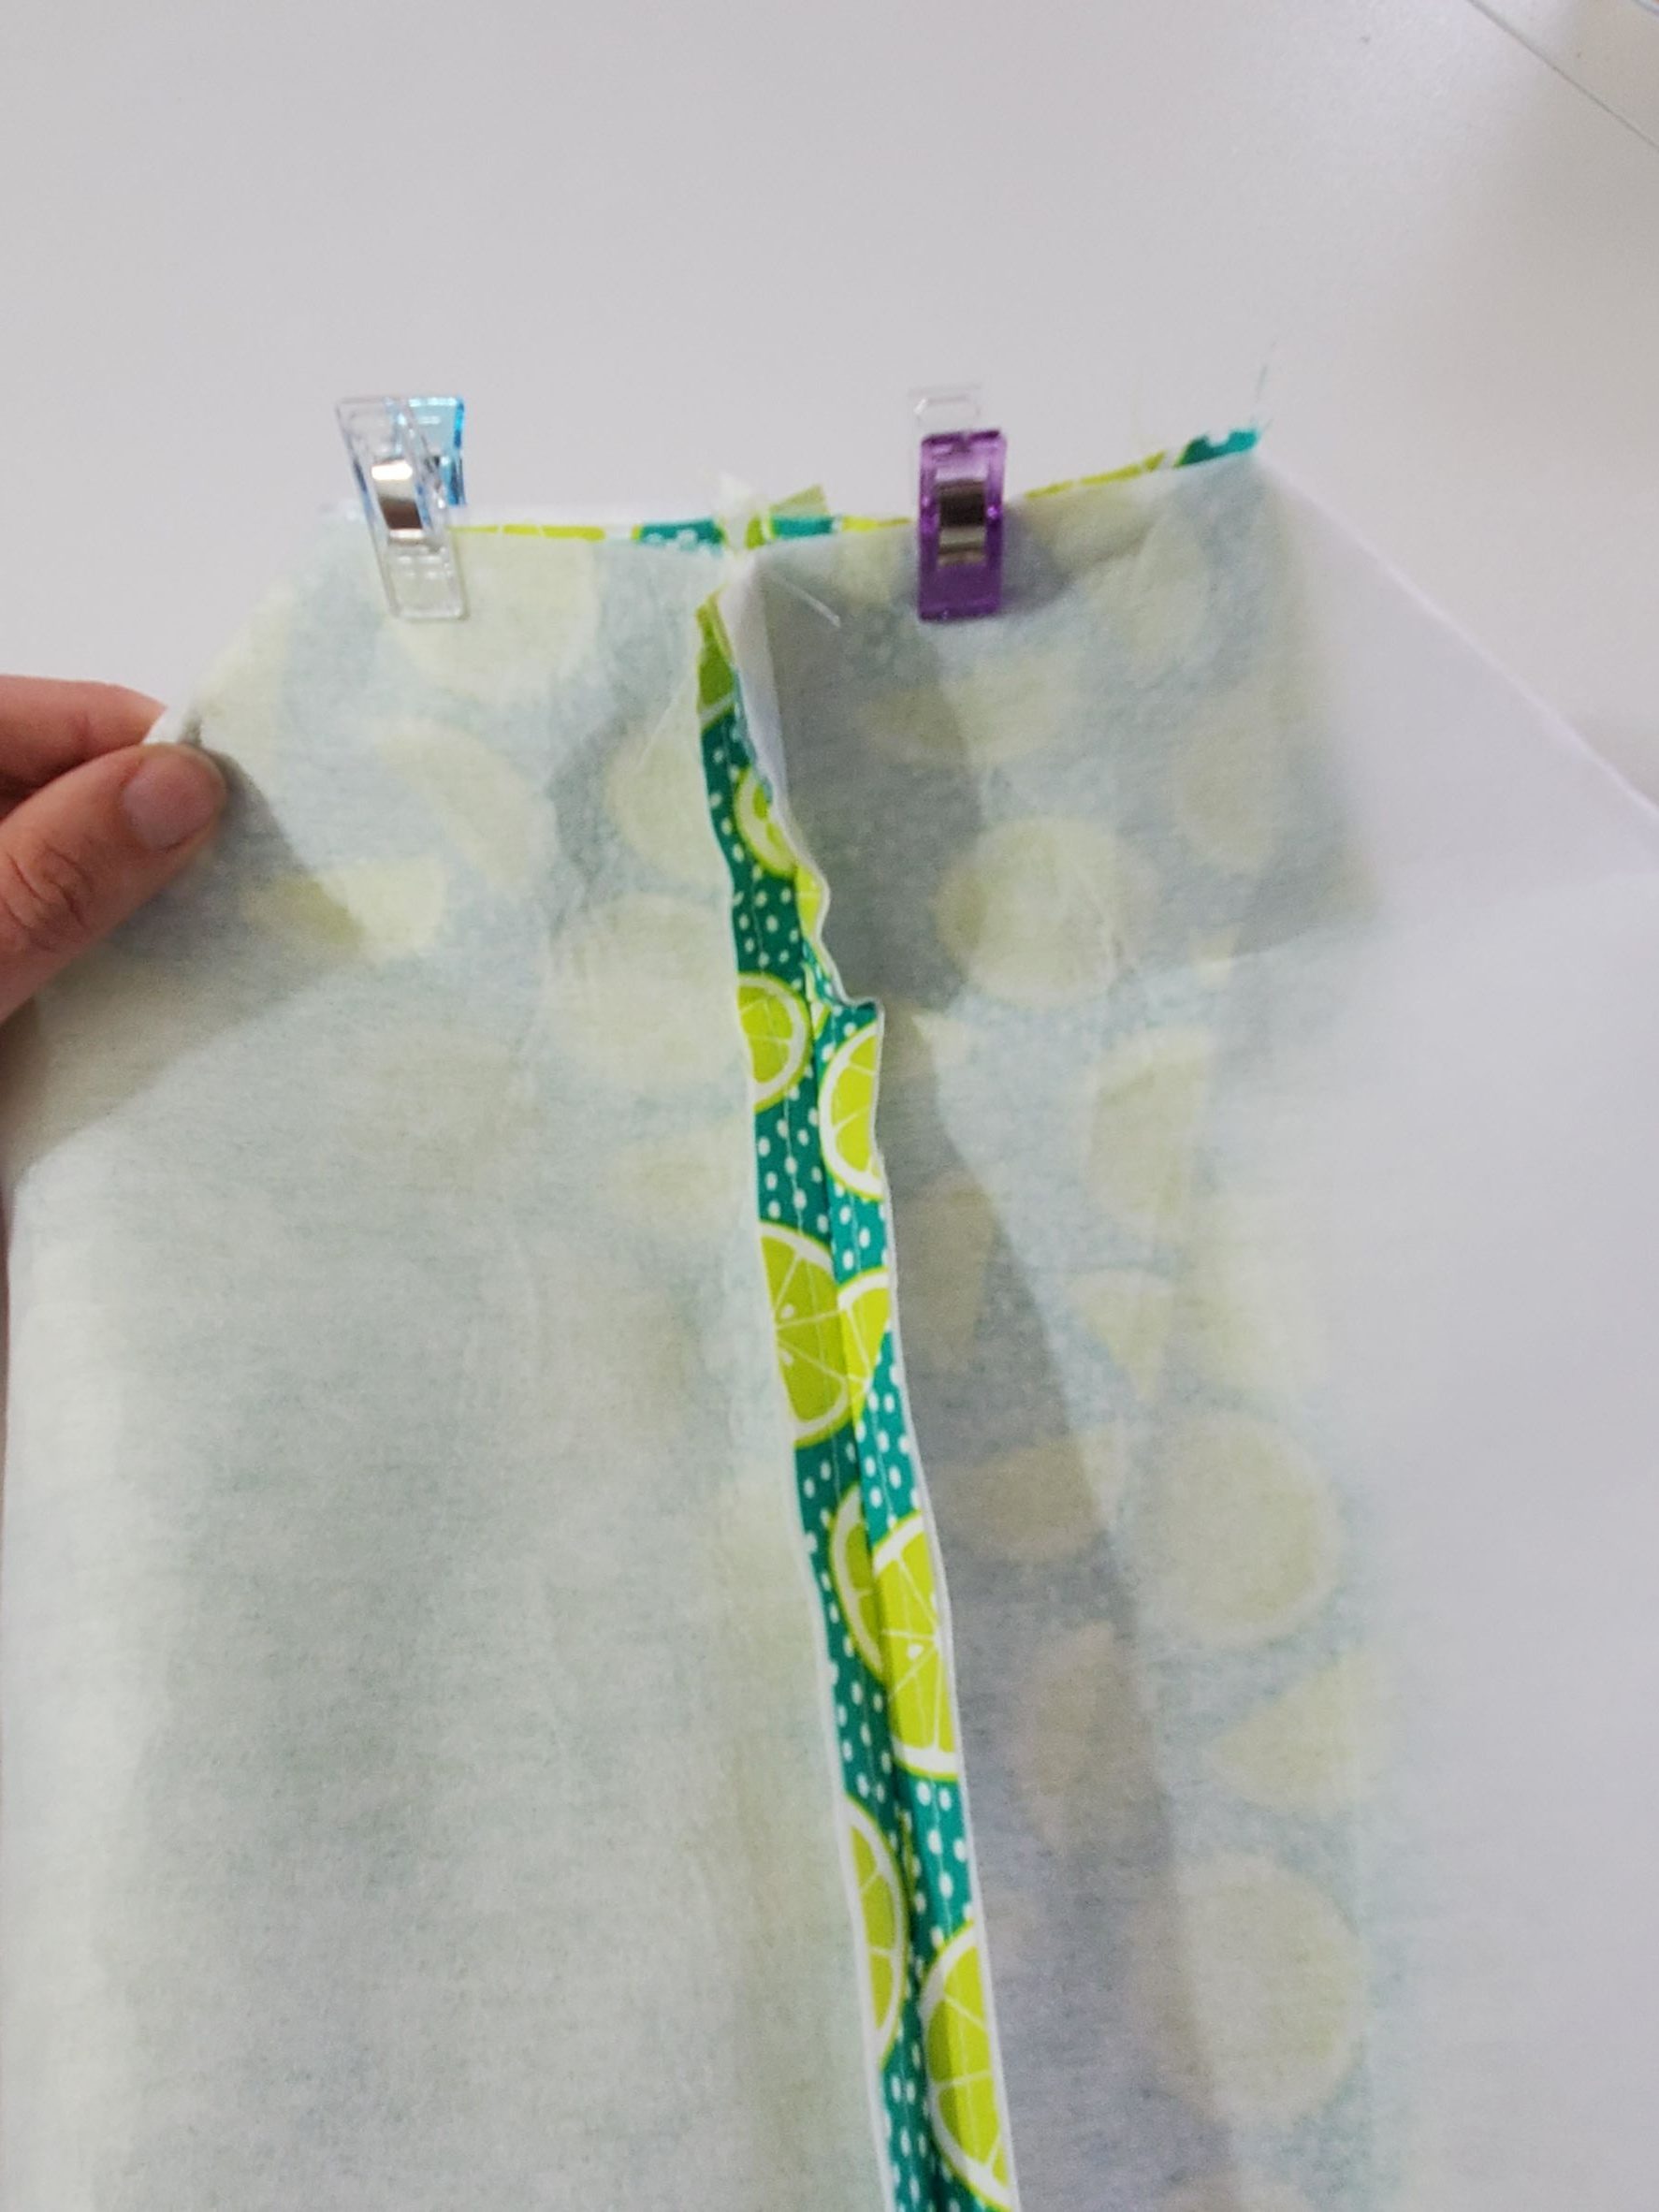
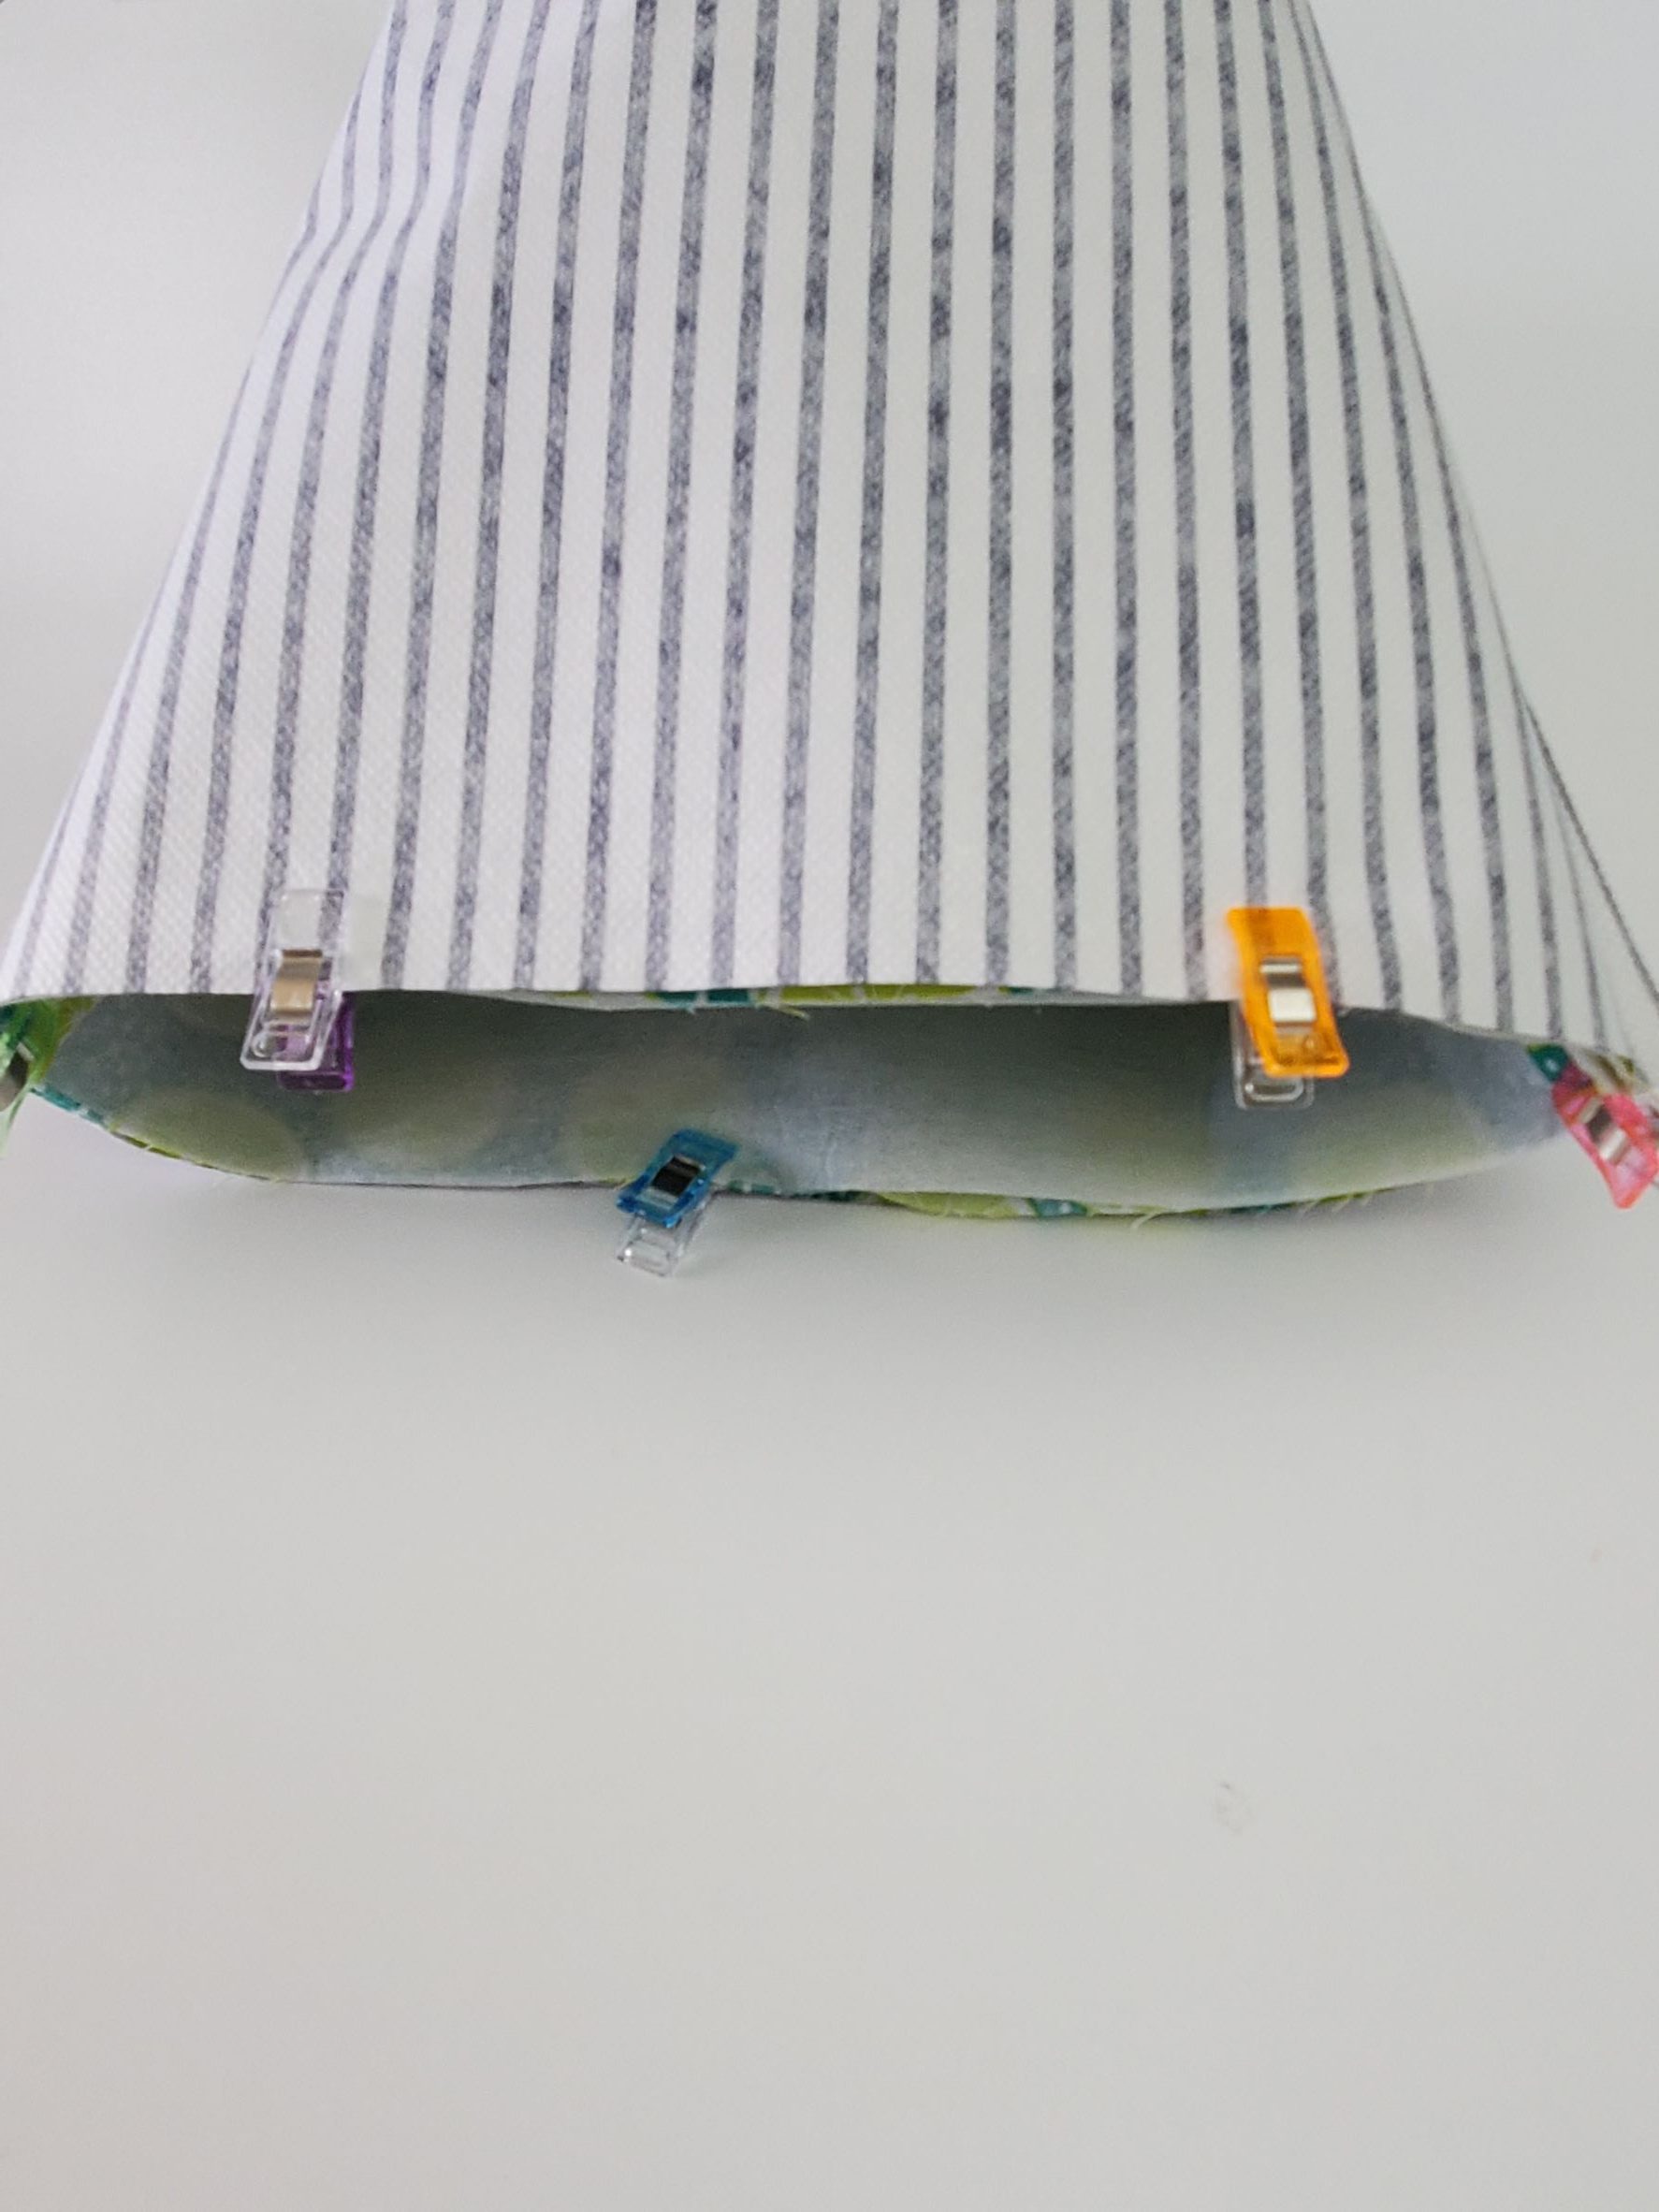
With right sides together, pin your bag pieces together. Stitch along the sides and the bottom, using a 1/2″ seam allowance. Do not sew the corners!
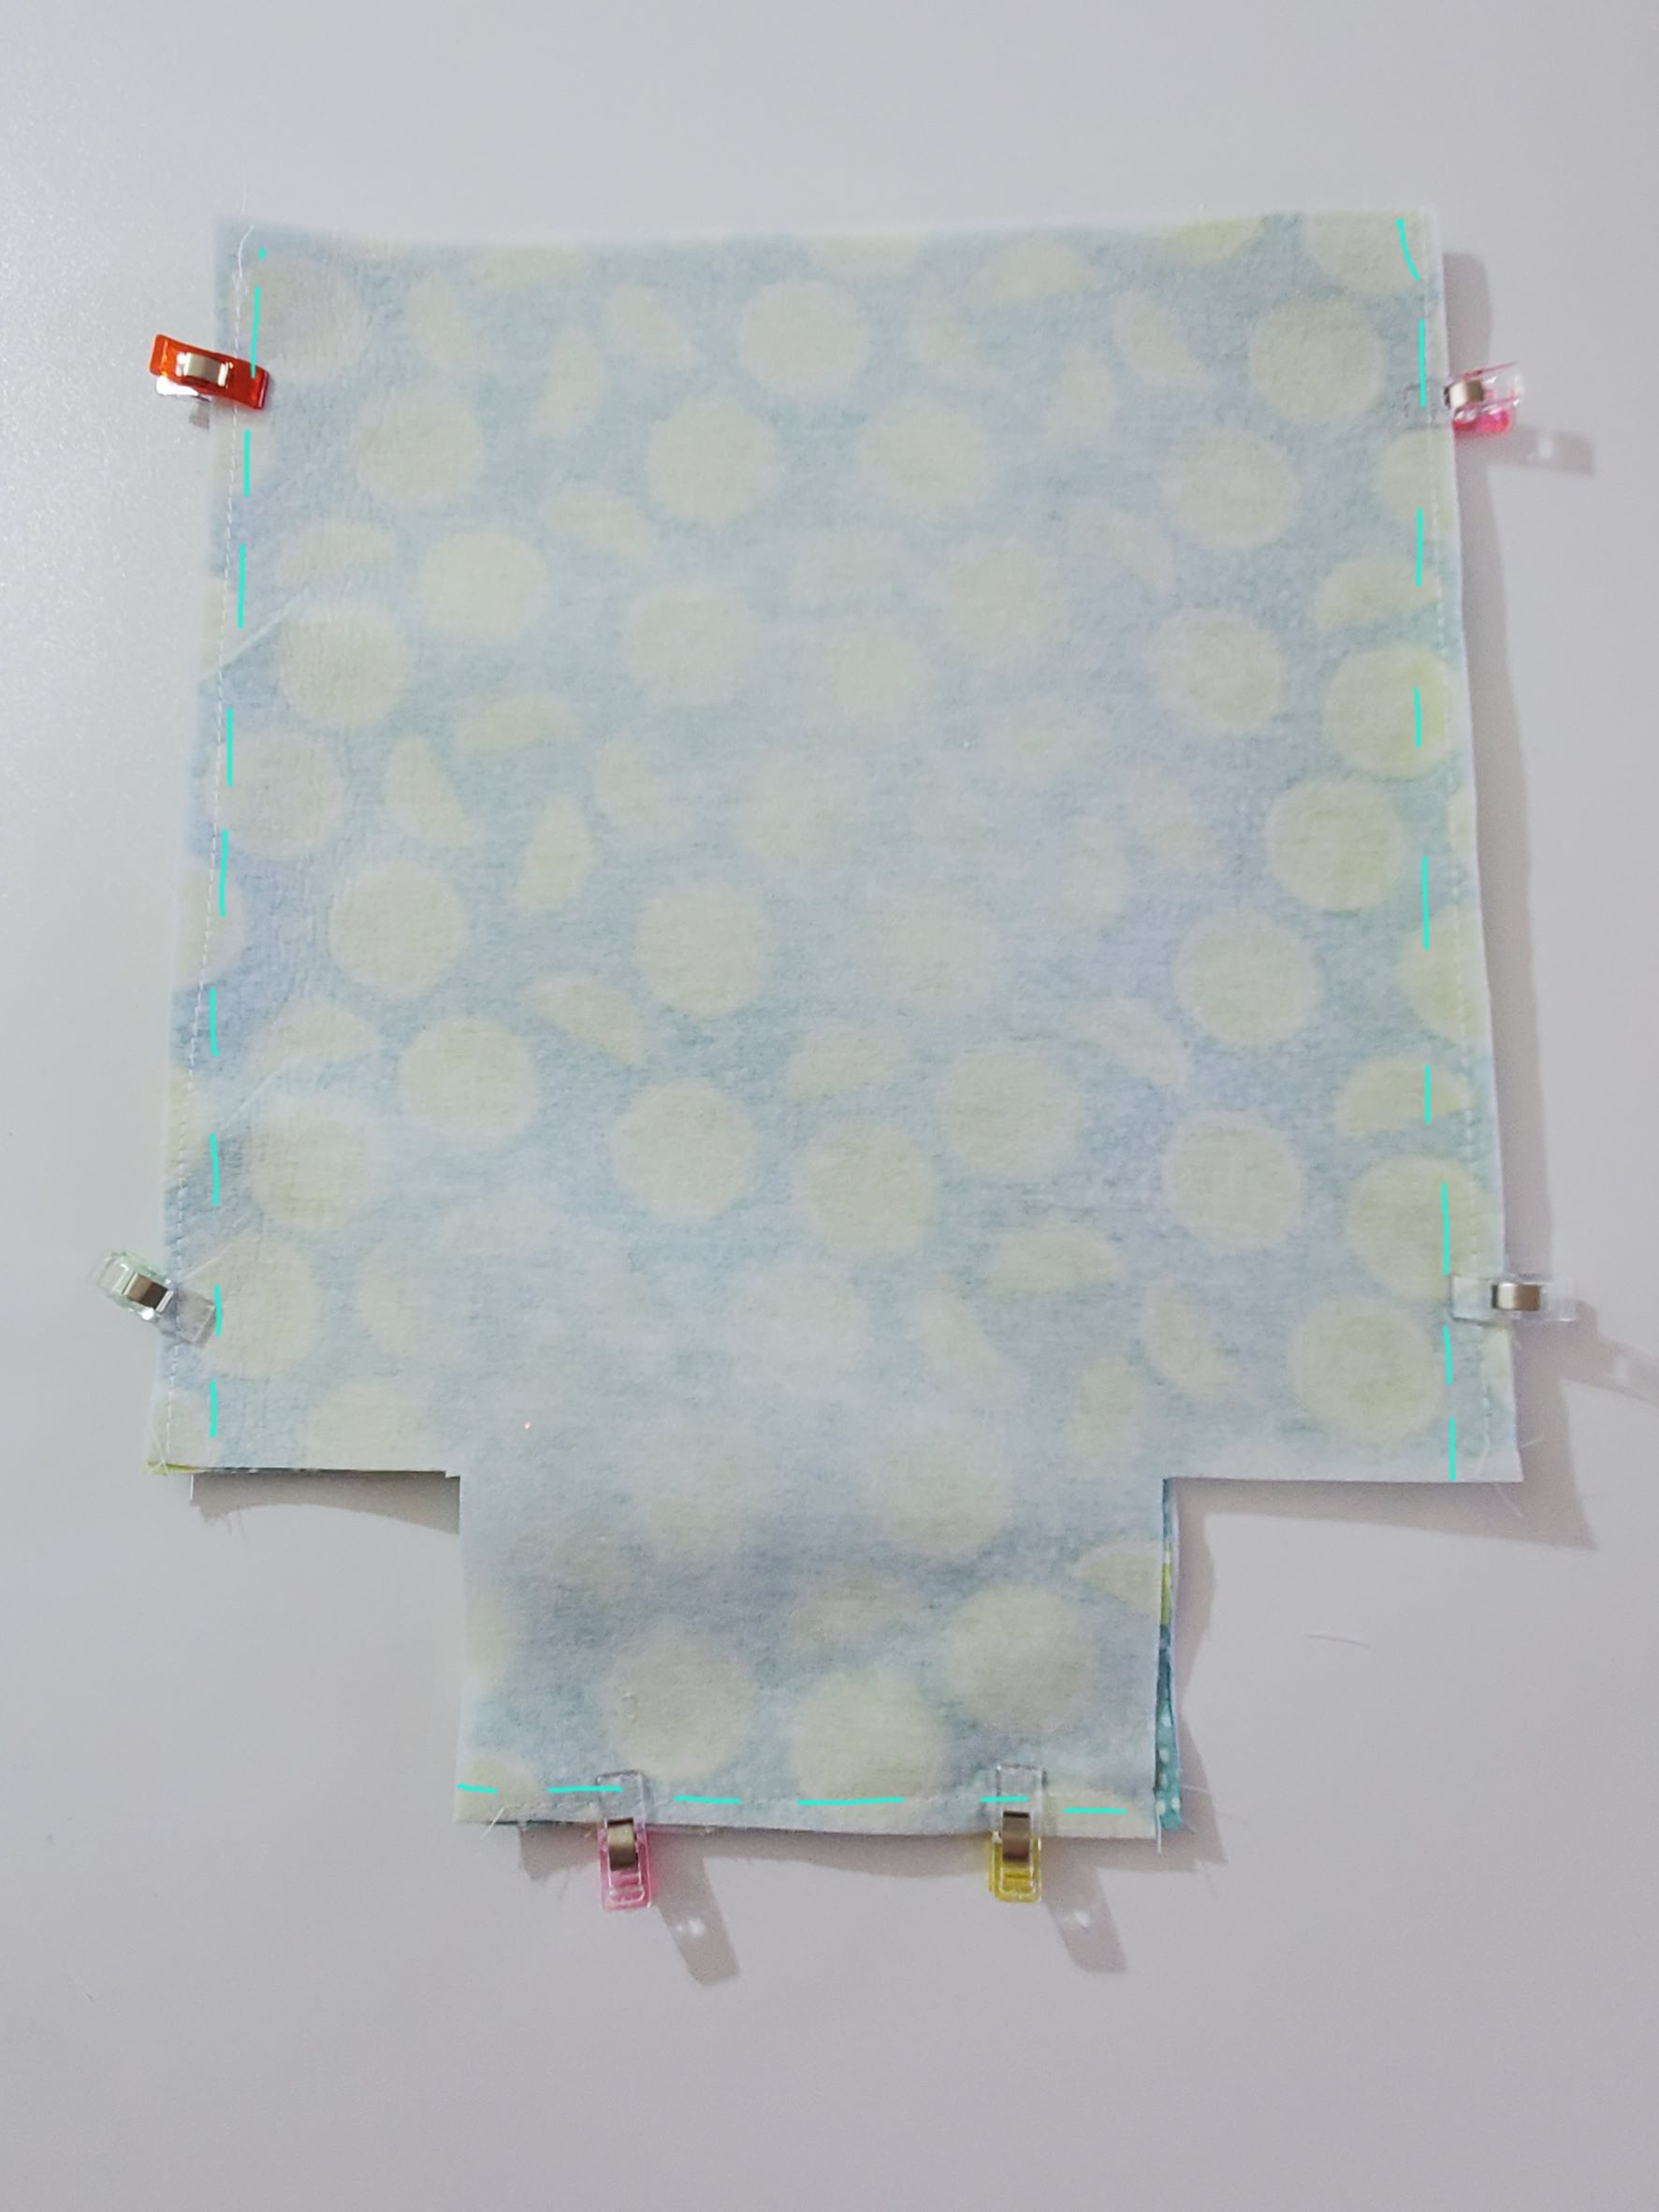
Iron your seam allowances open as best you can.
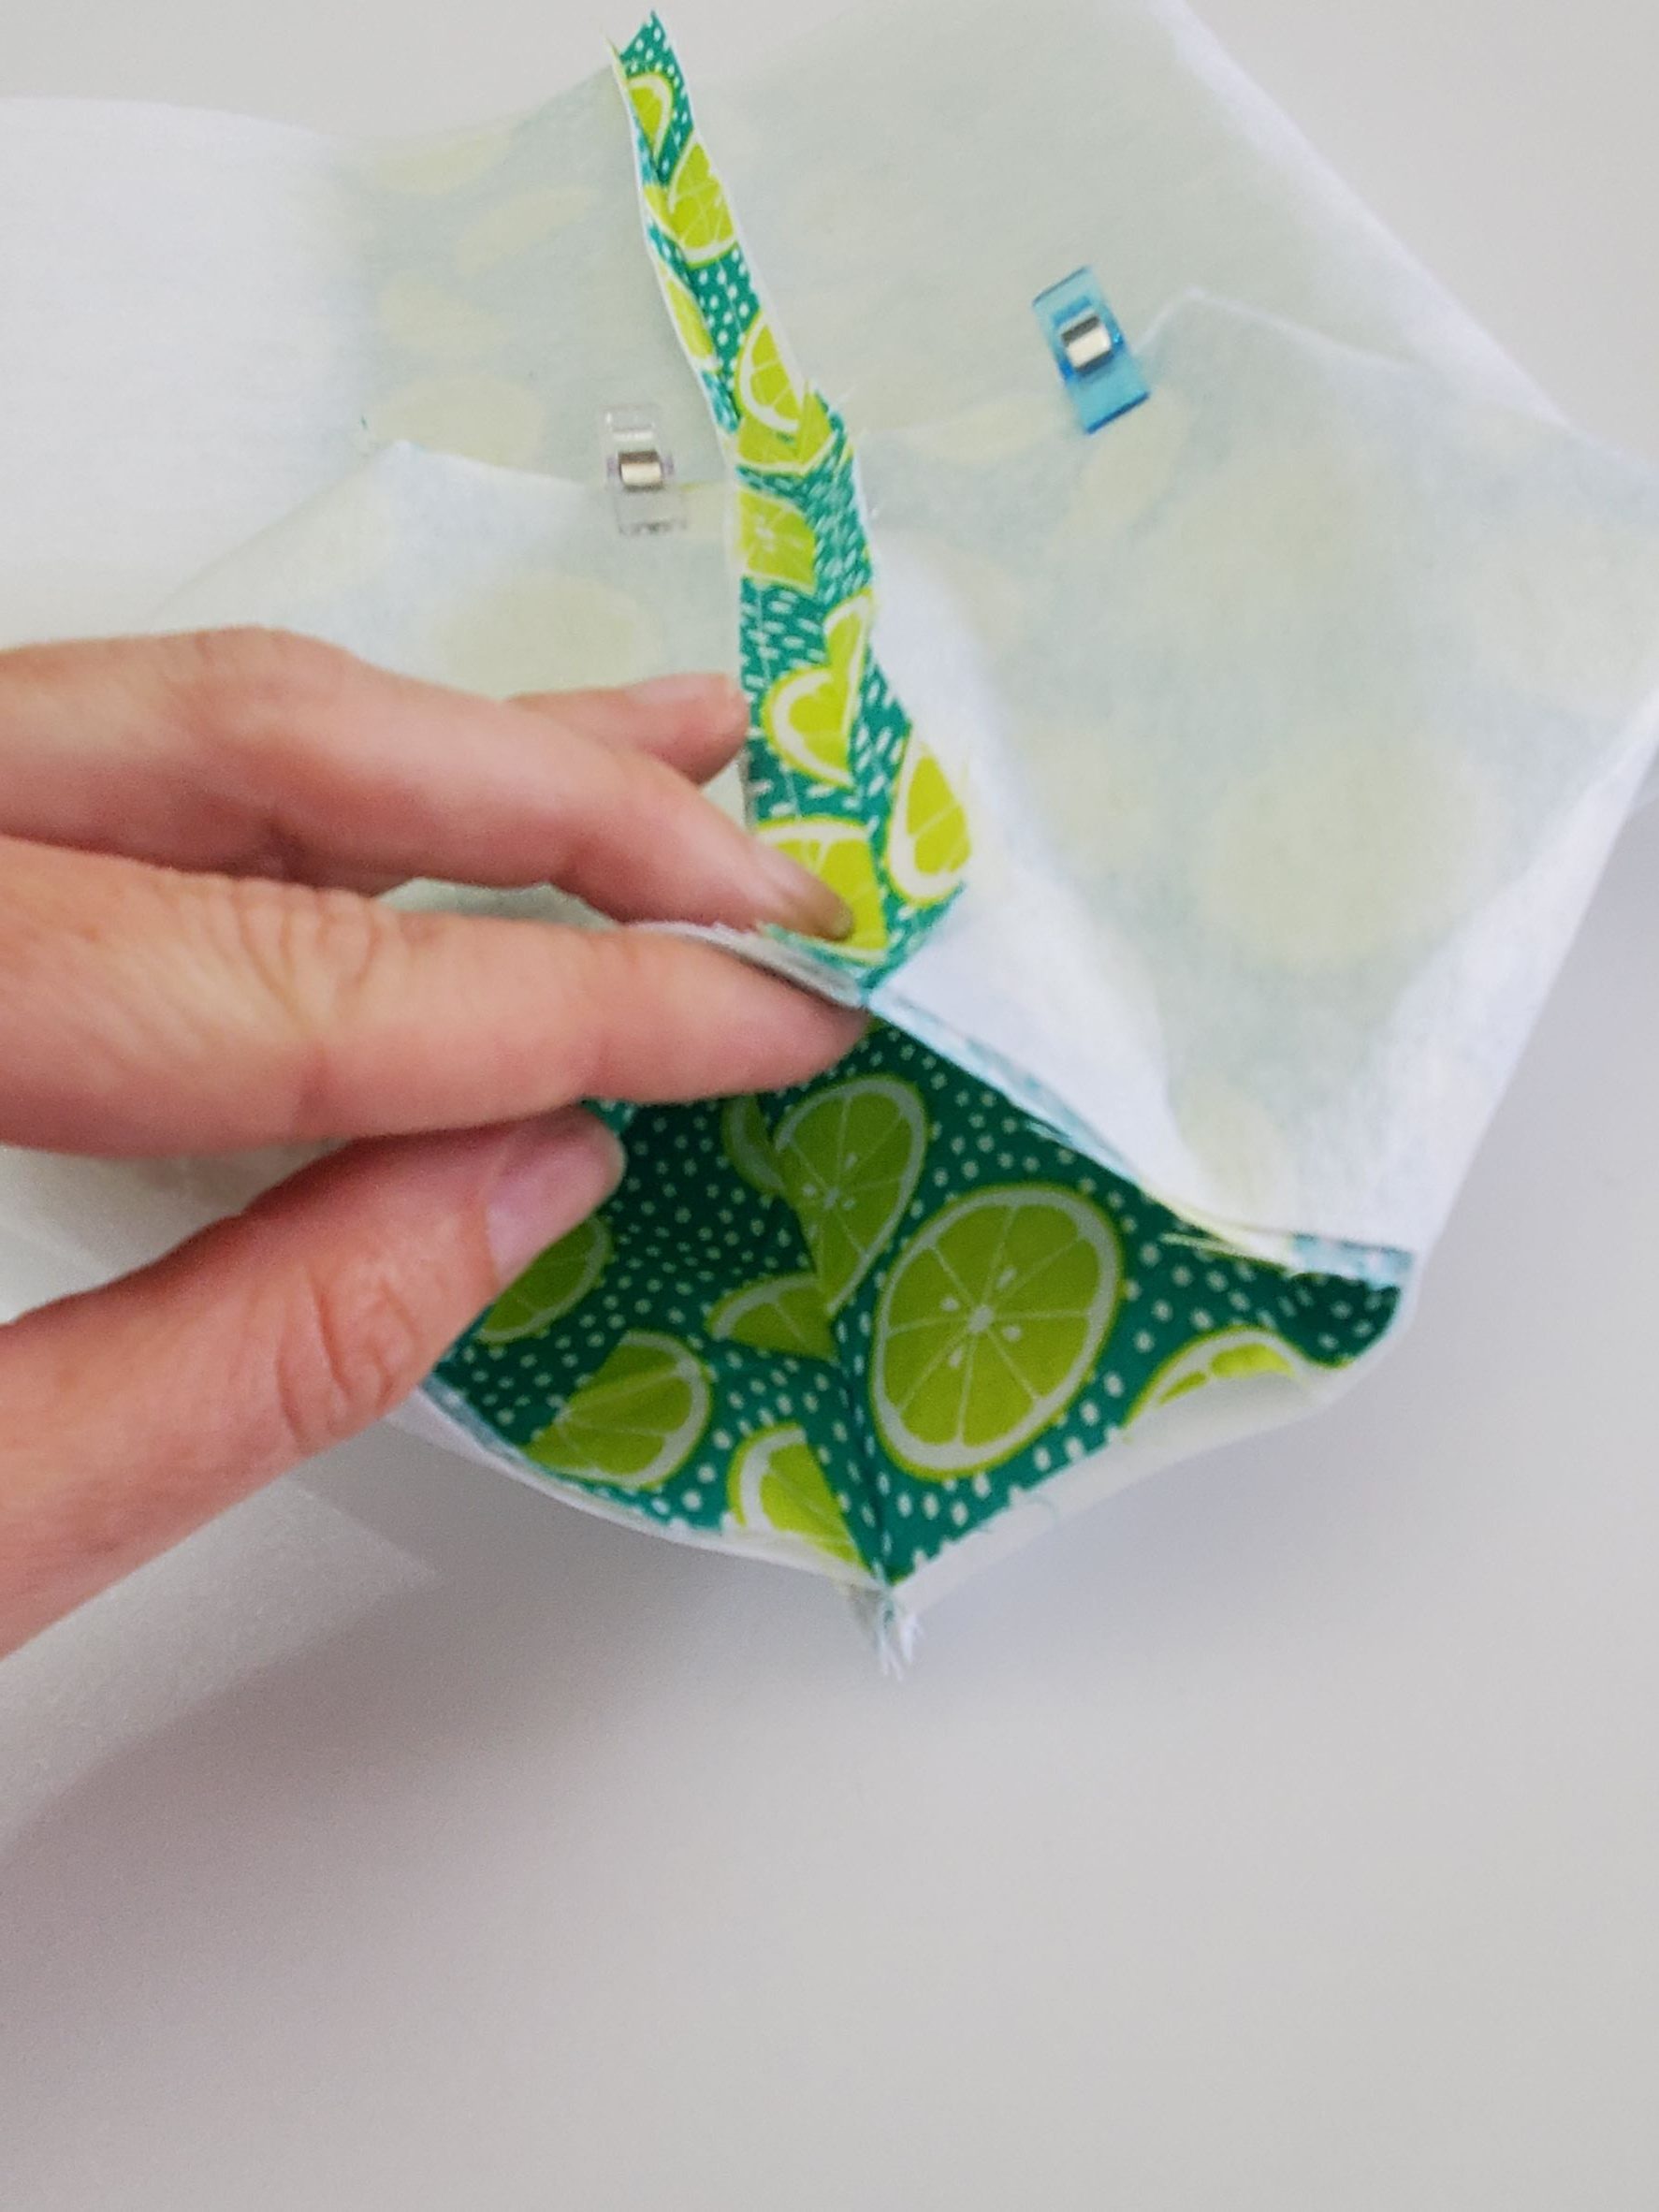
Now, to make the boxed corners. To do this, you are going to pinch the corners of your fabric and pull them out so that your side seam and your bottom seams are sitting right on top of each other, right sides together. If you can’t figure this part out by the pictures below, I made a video on another post that you can view by clicking here (scroll down to the video in the post).
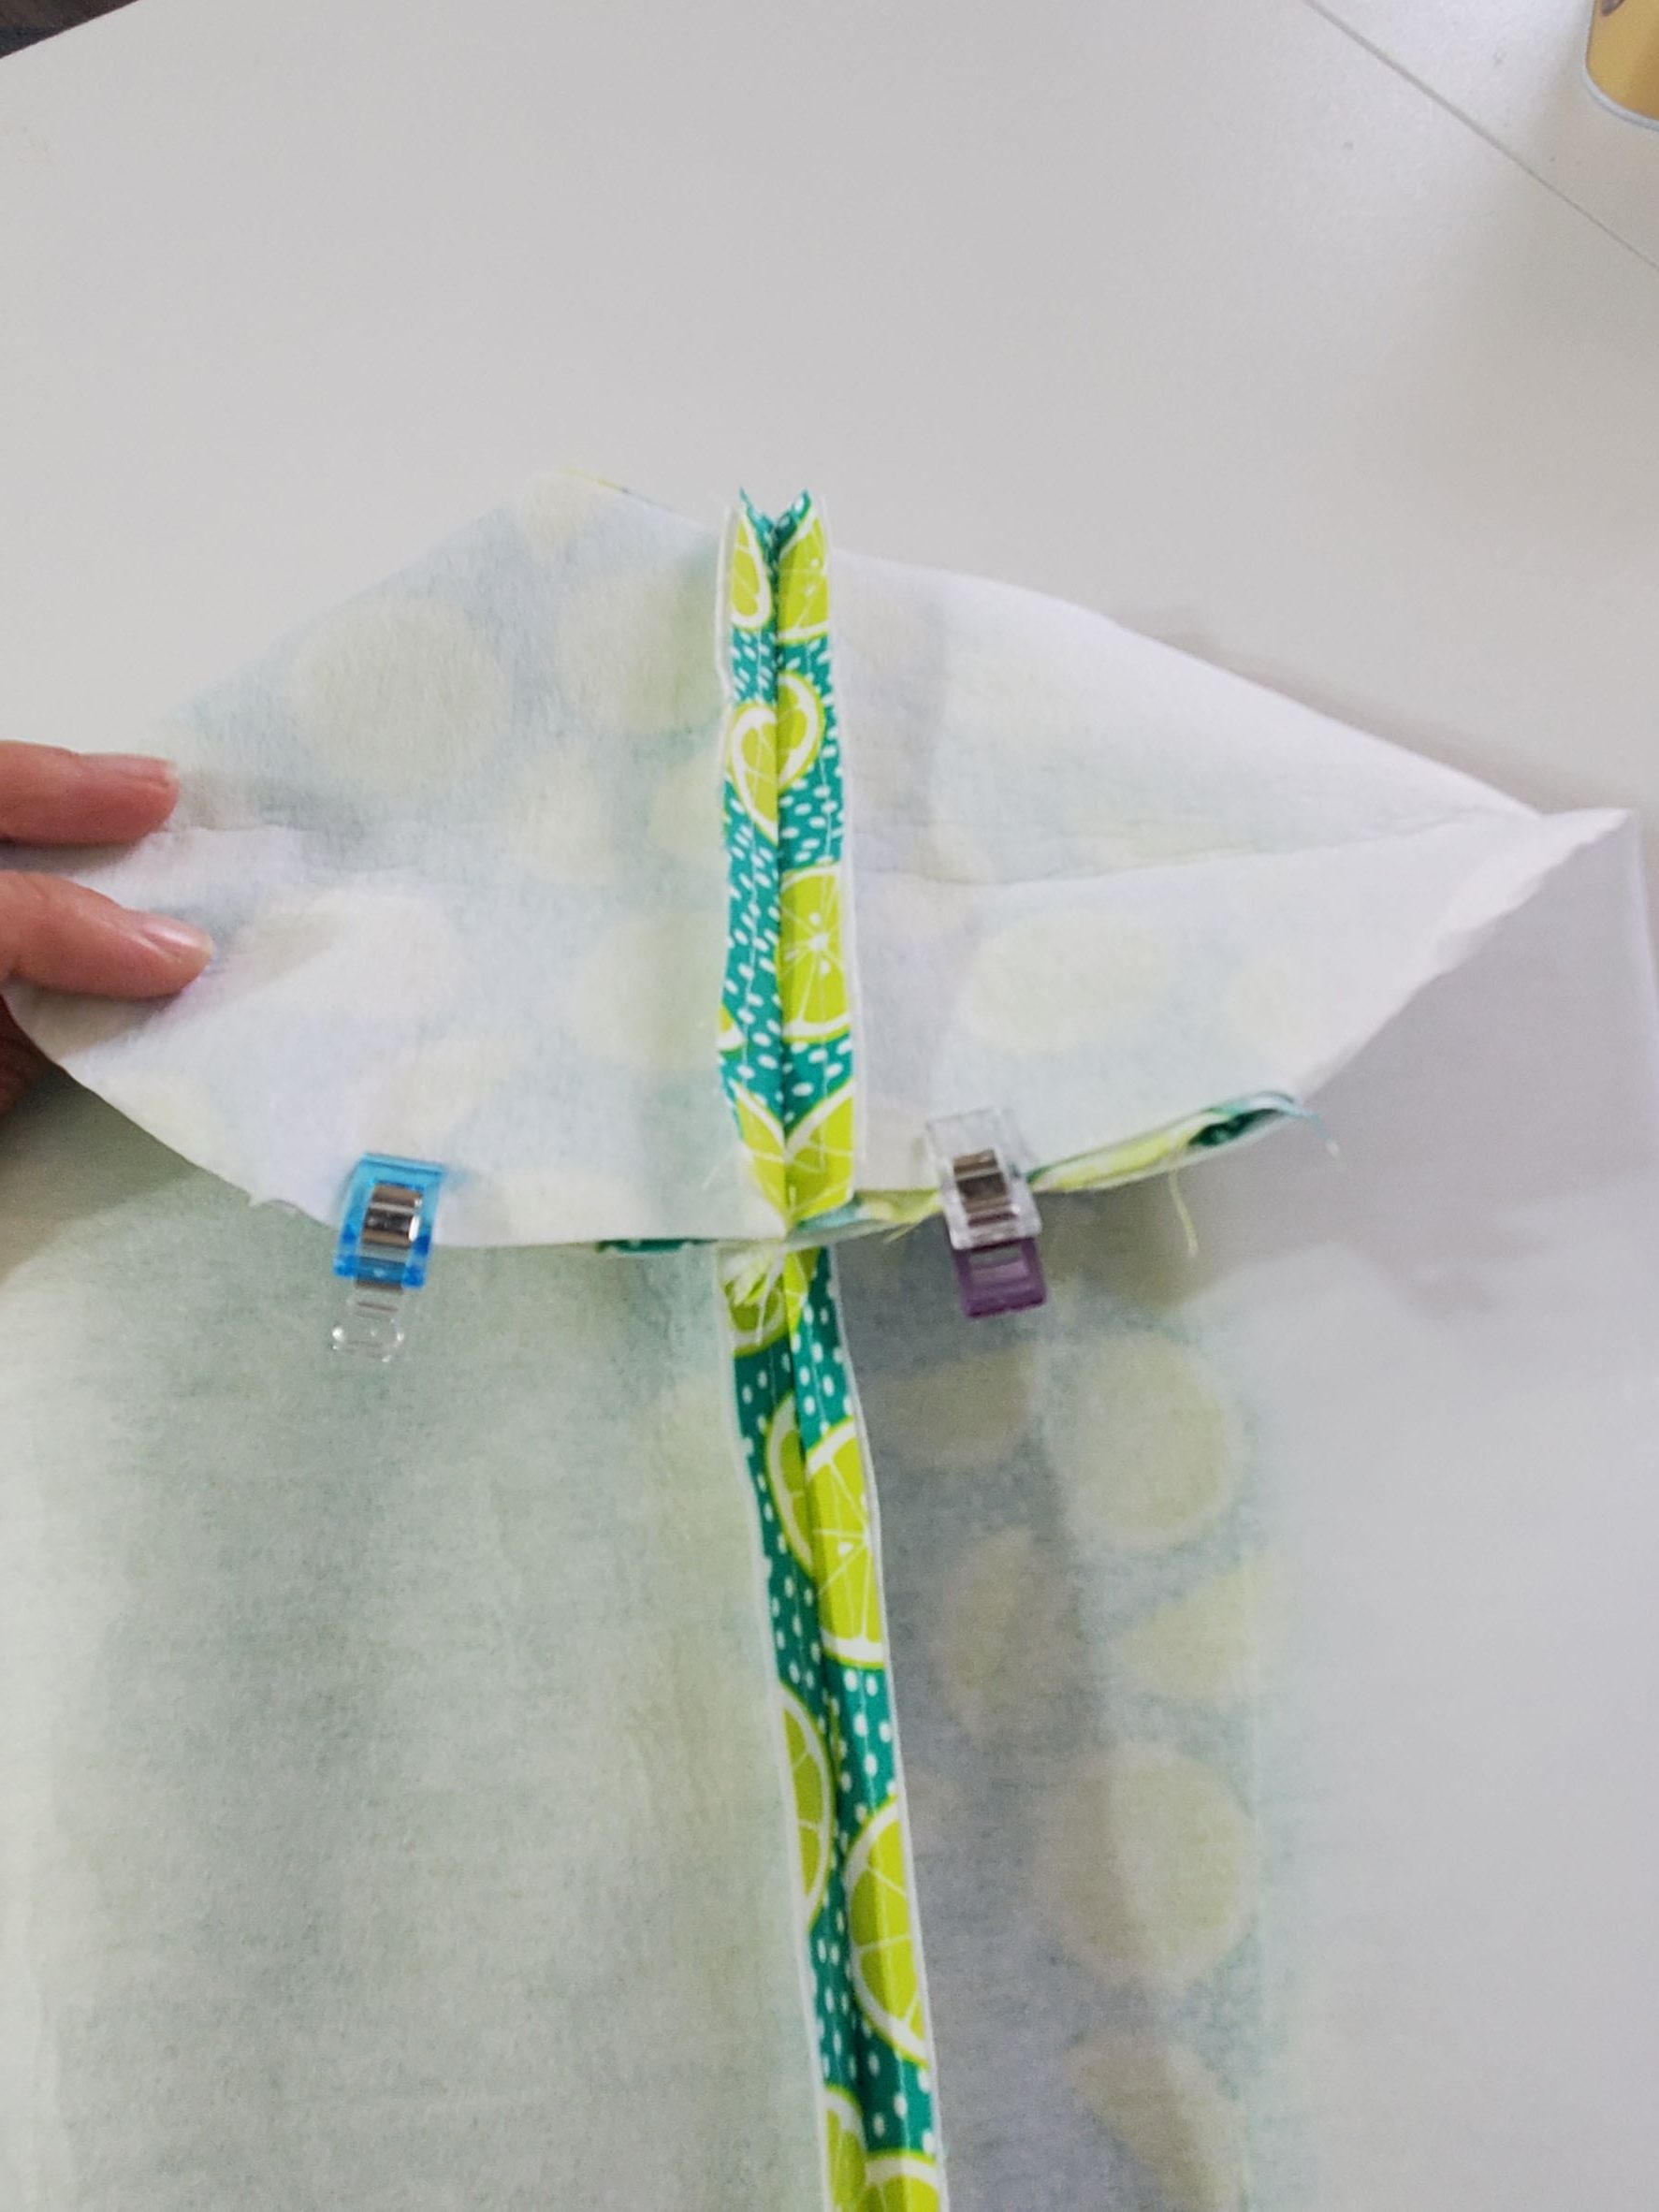
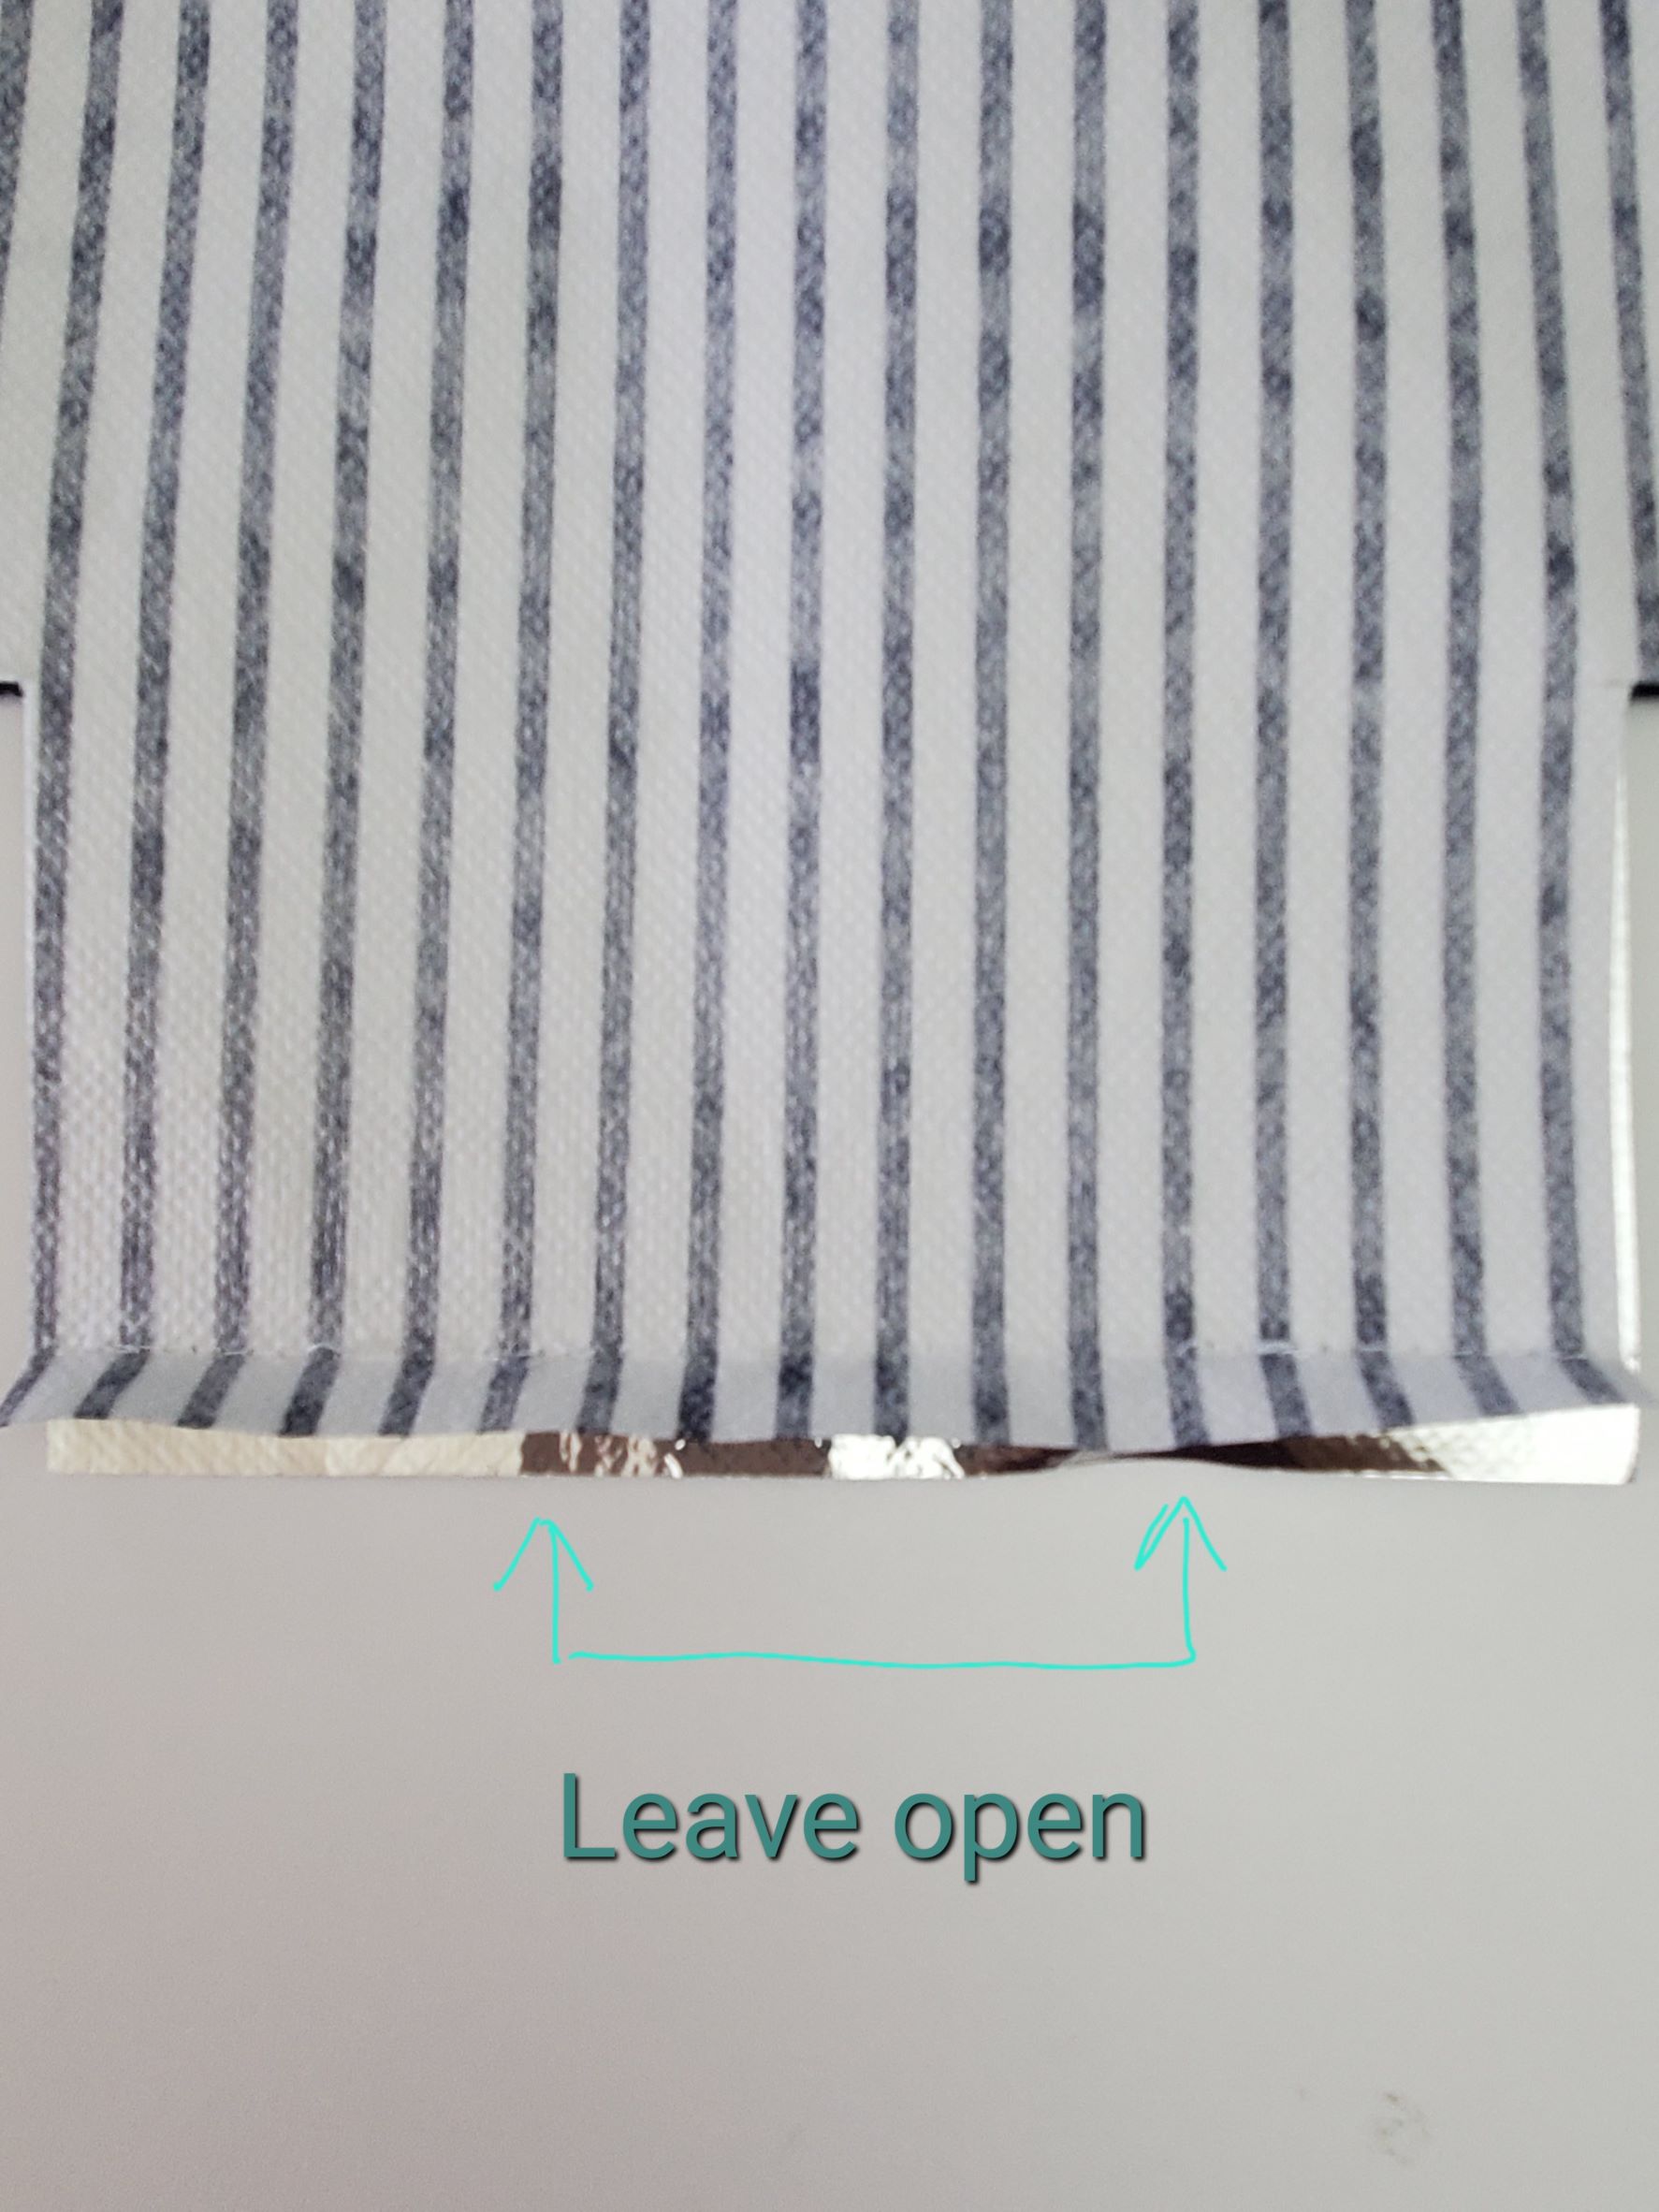
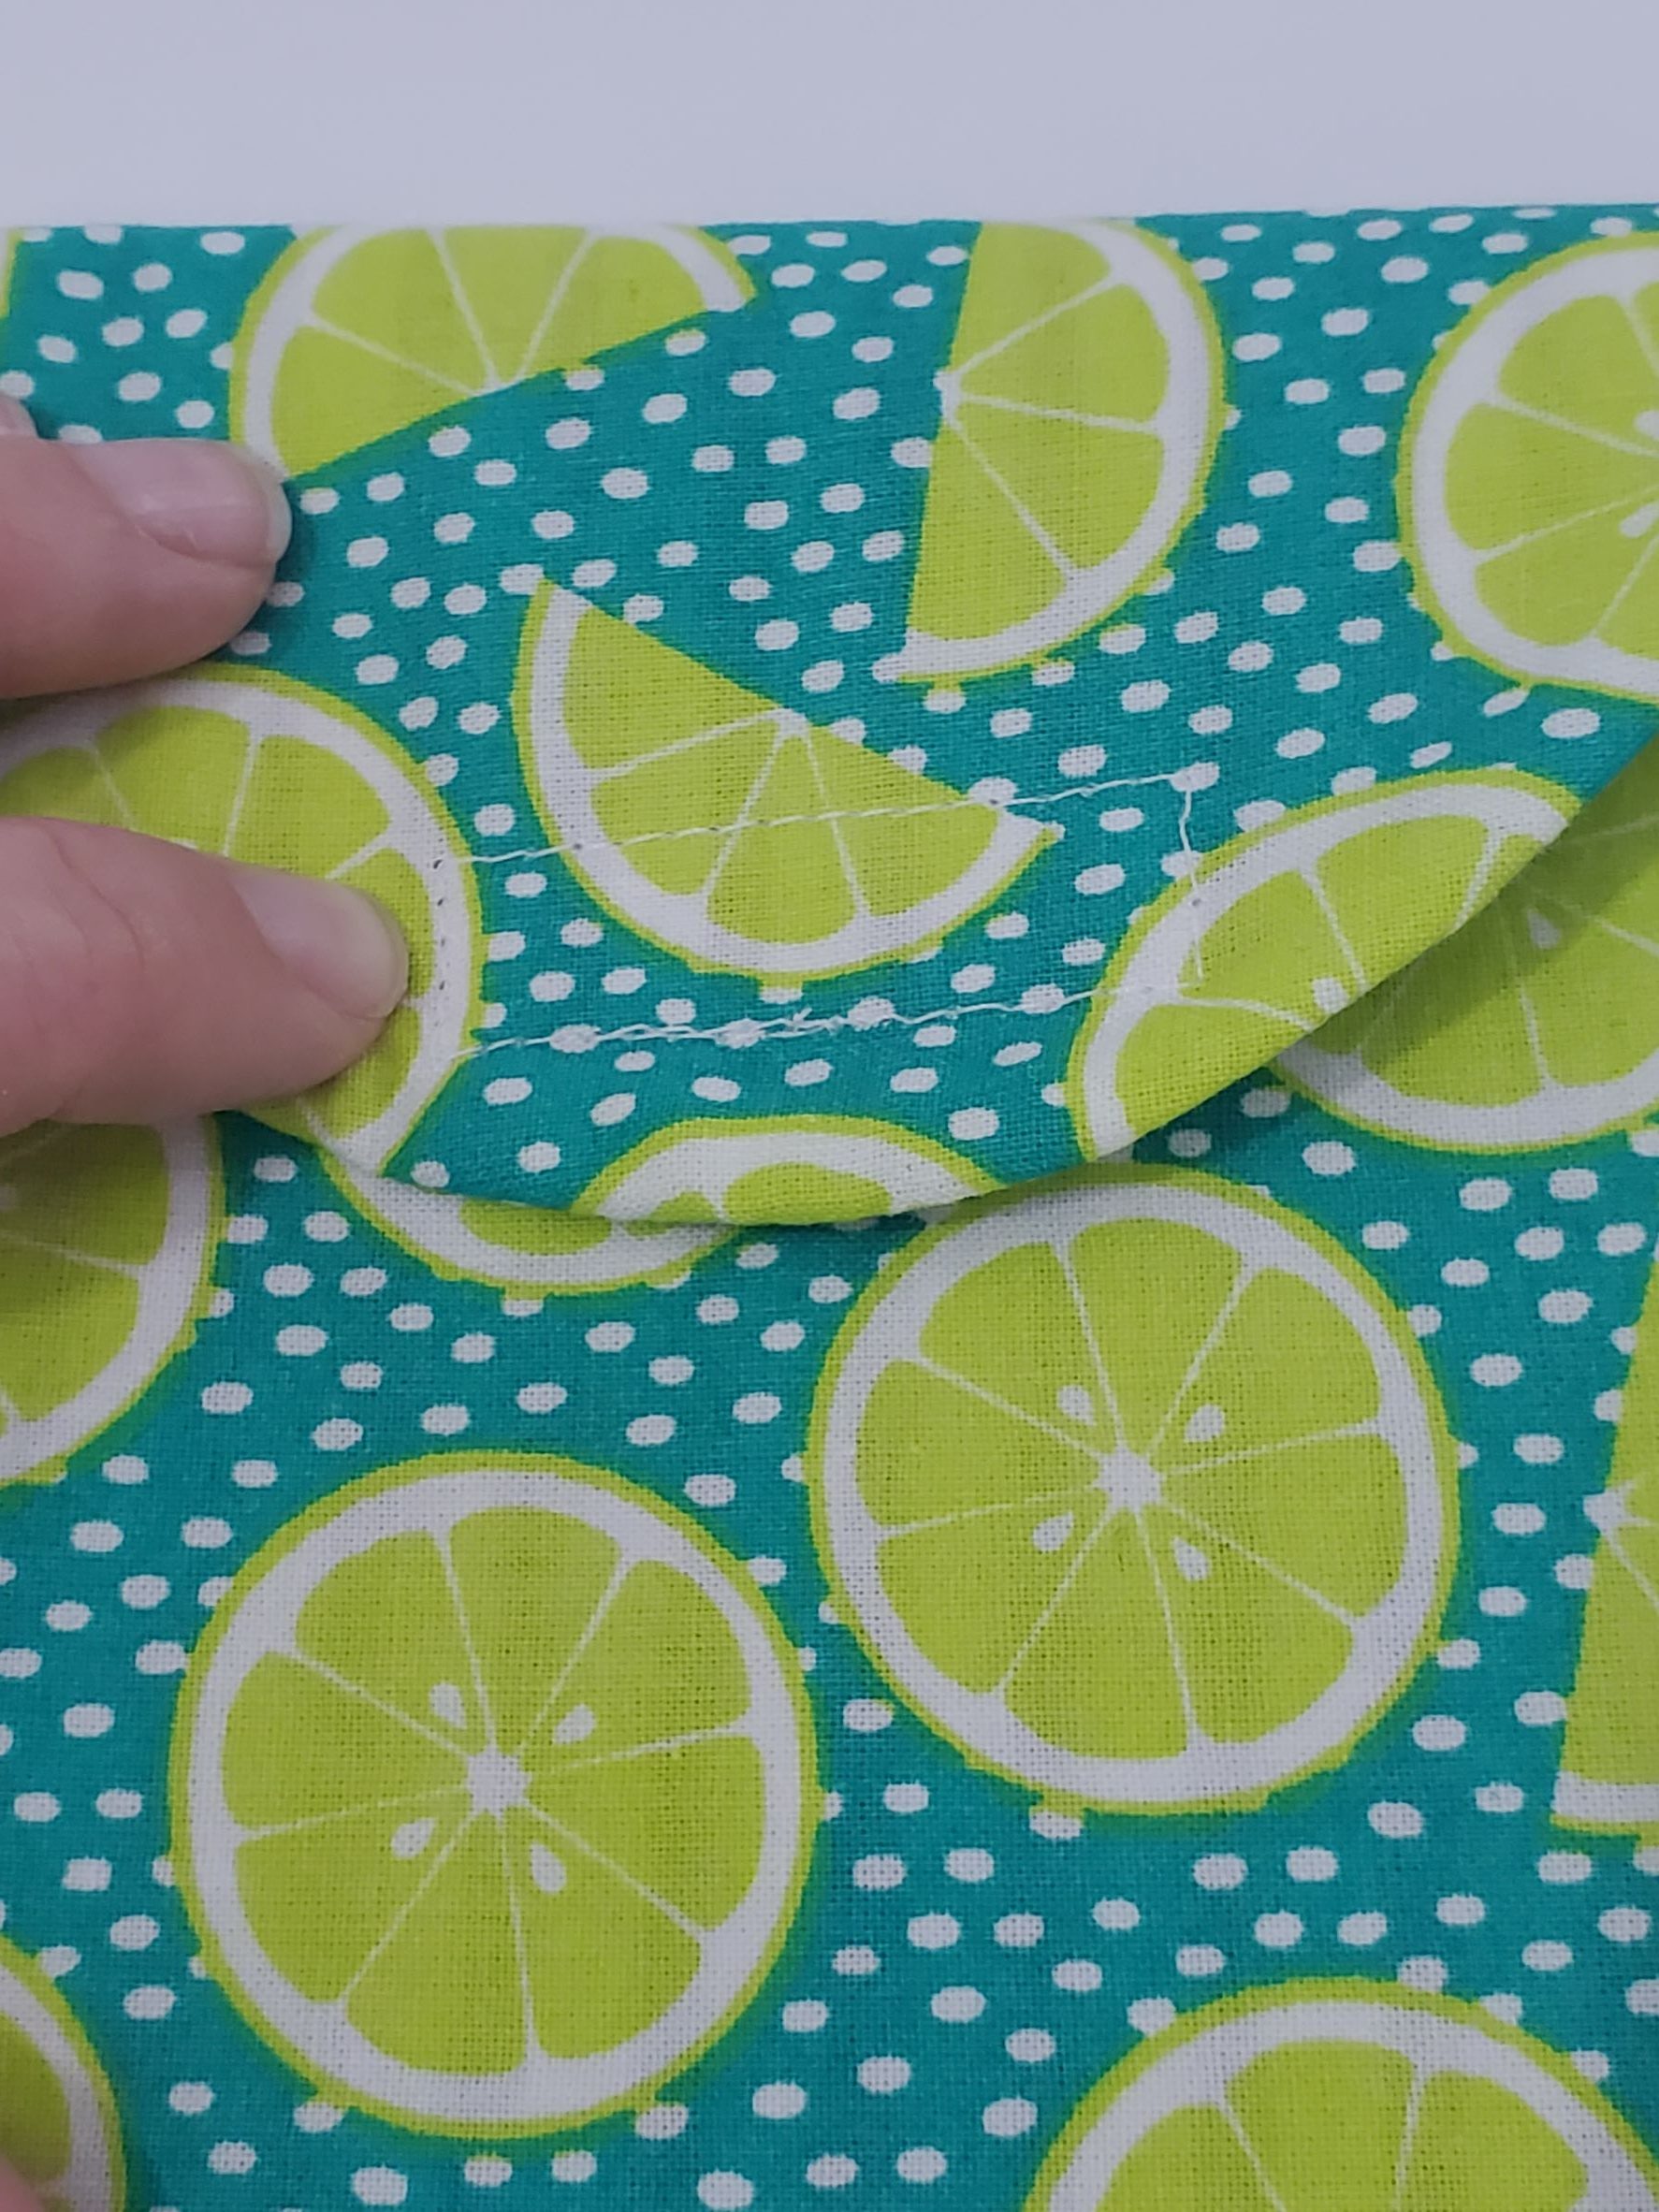
Repeat these steps with your lining pieces (minus the interfacing of course). However, on these pieces, leave an opening on the bottom part of the bag so that you can turn it when you’re finished.
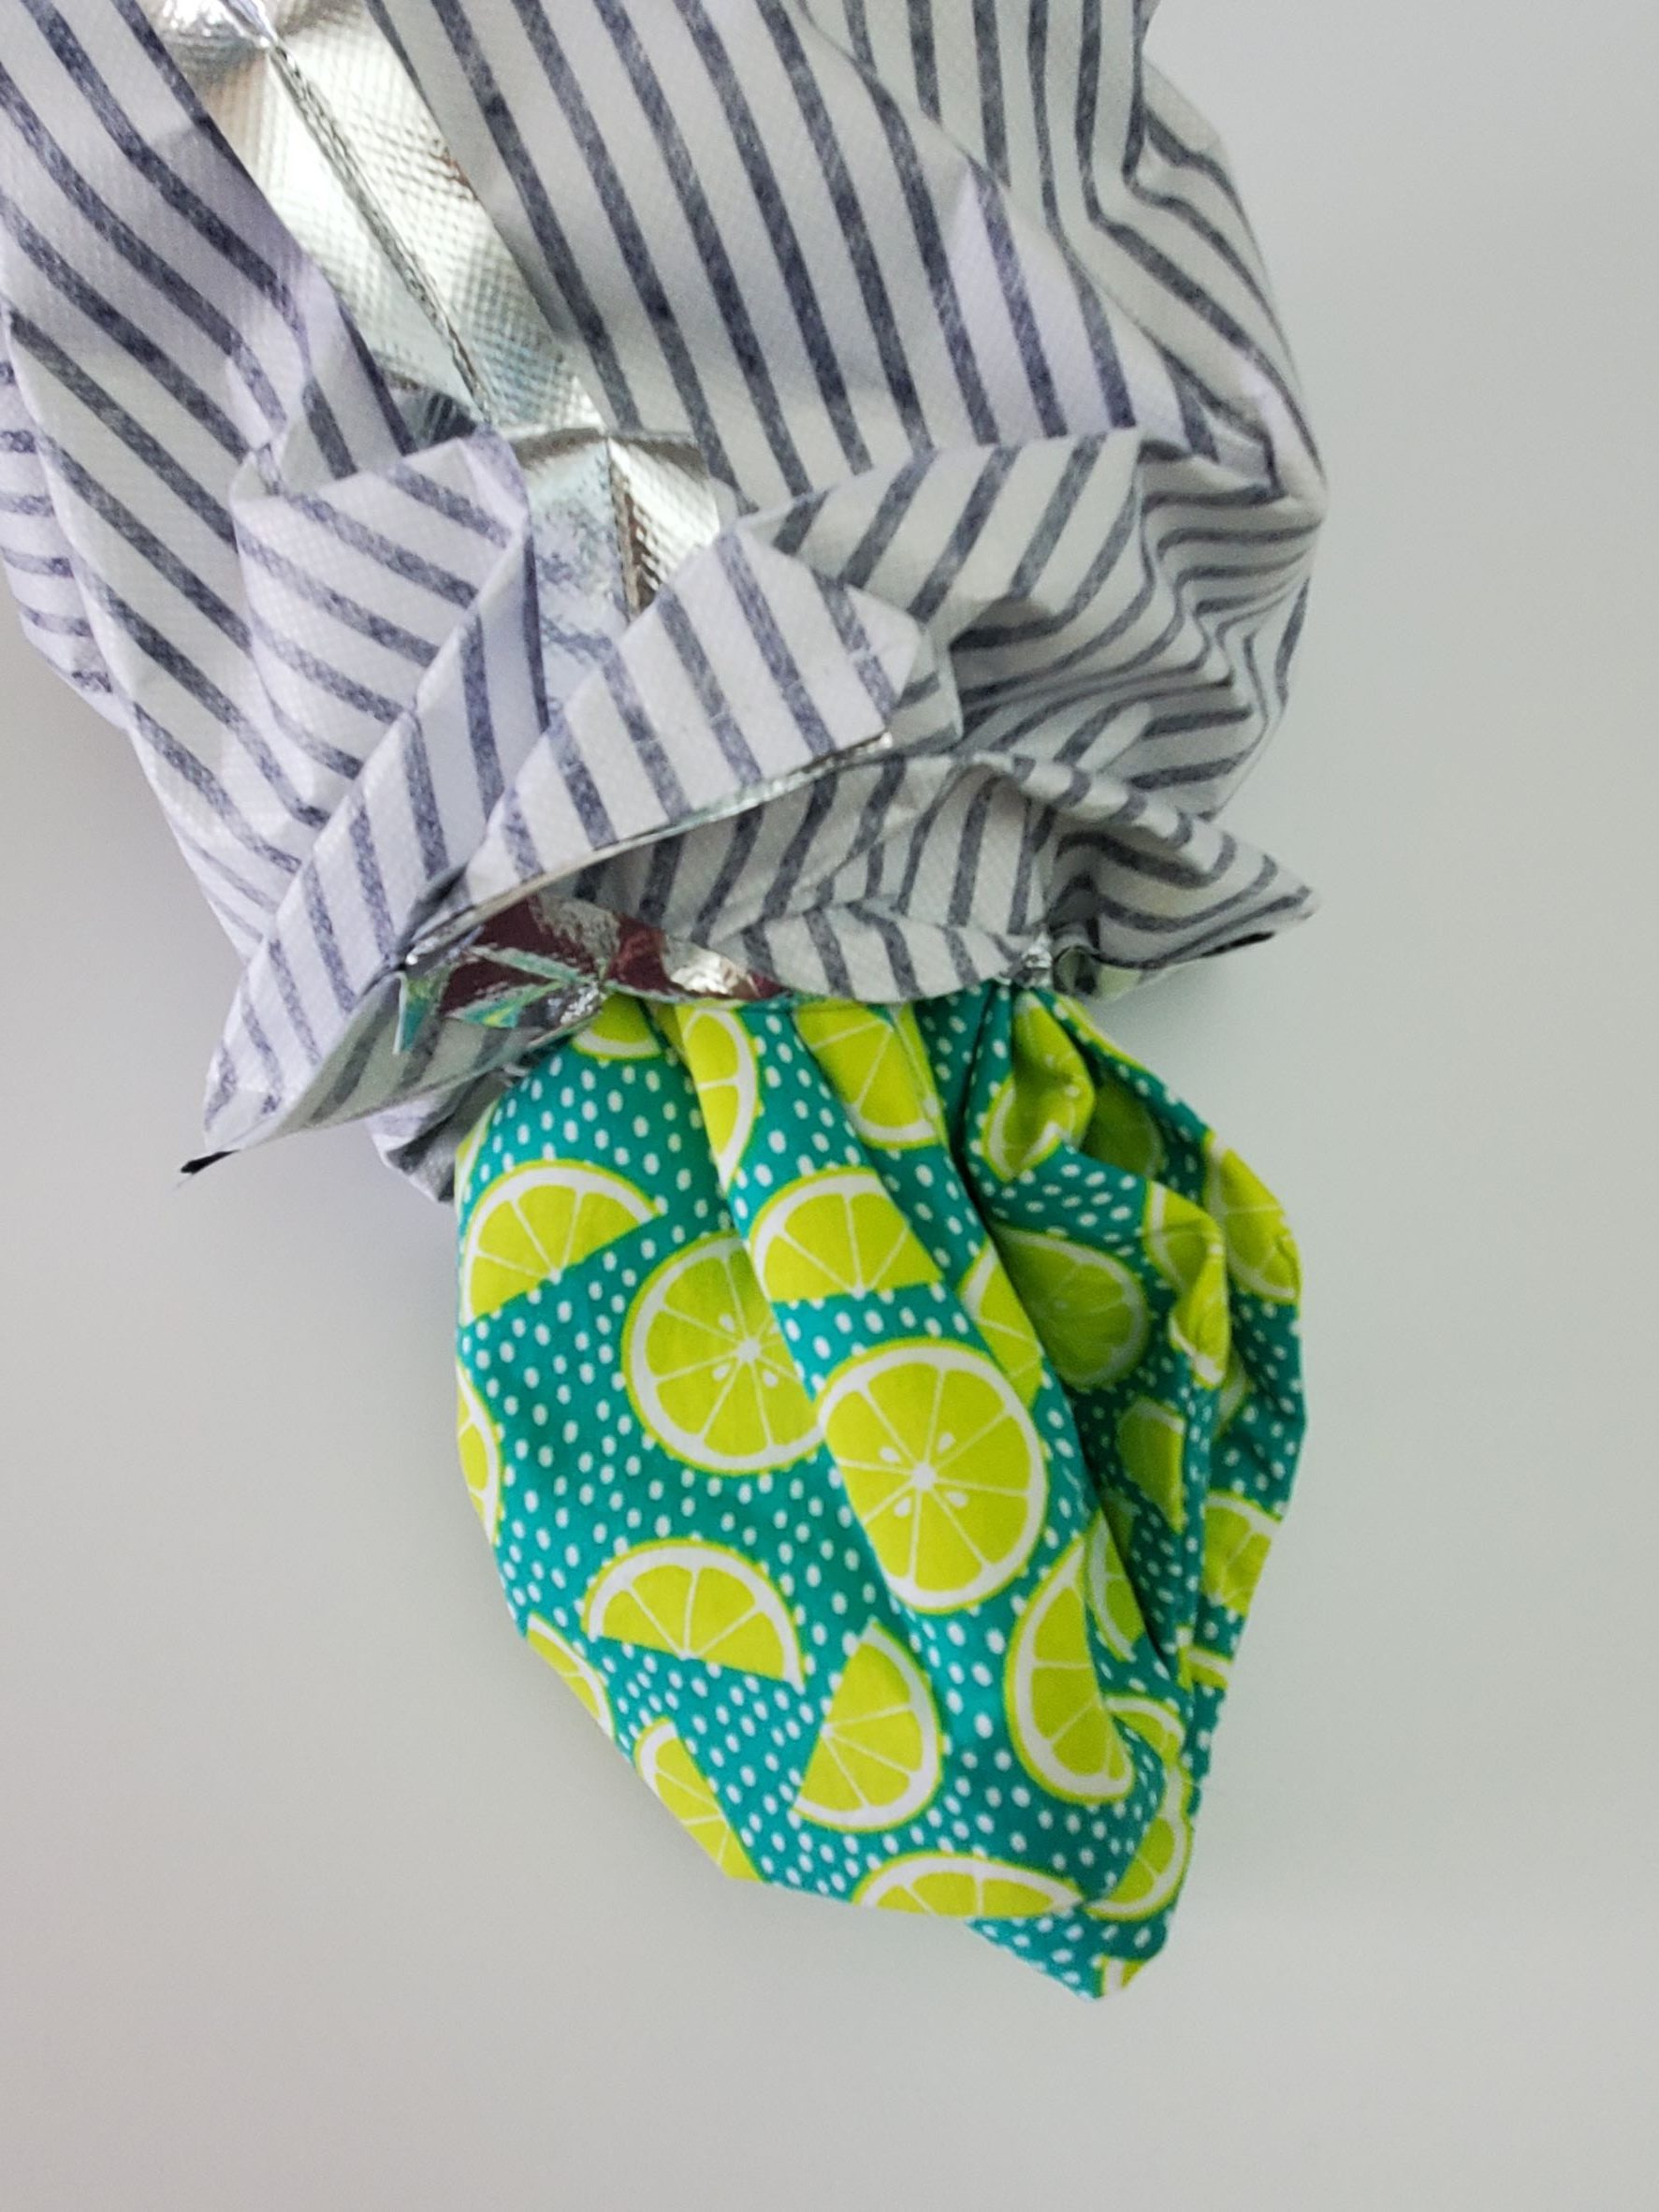
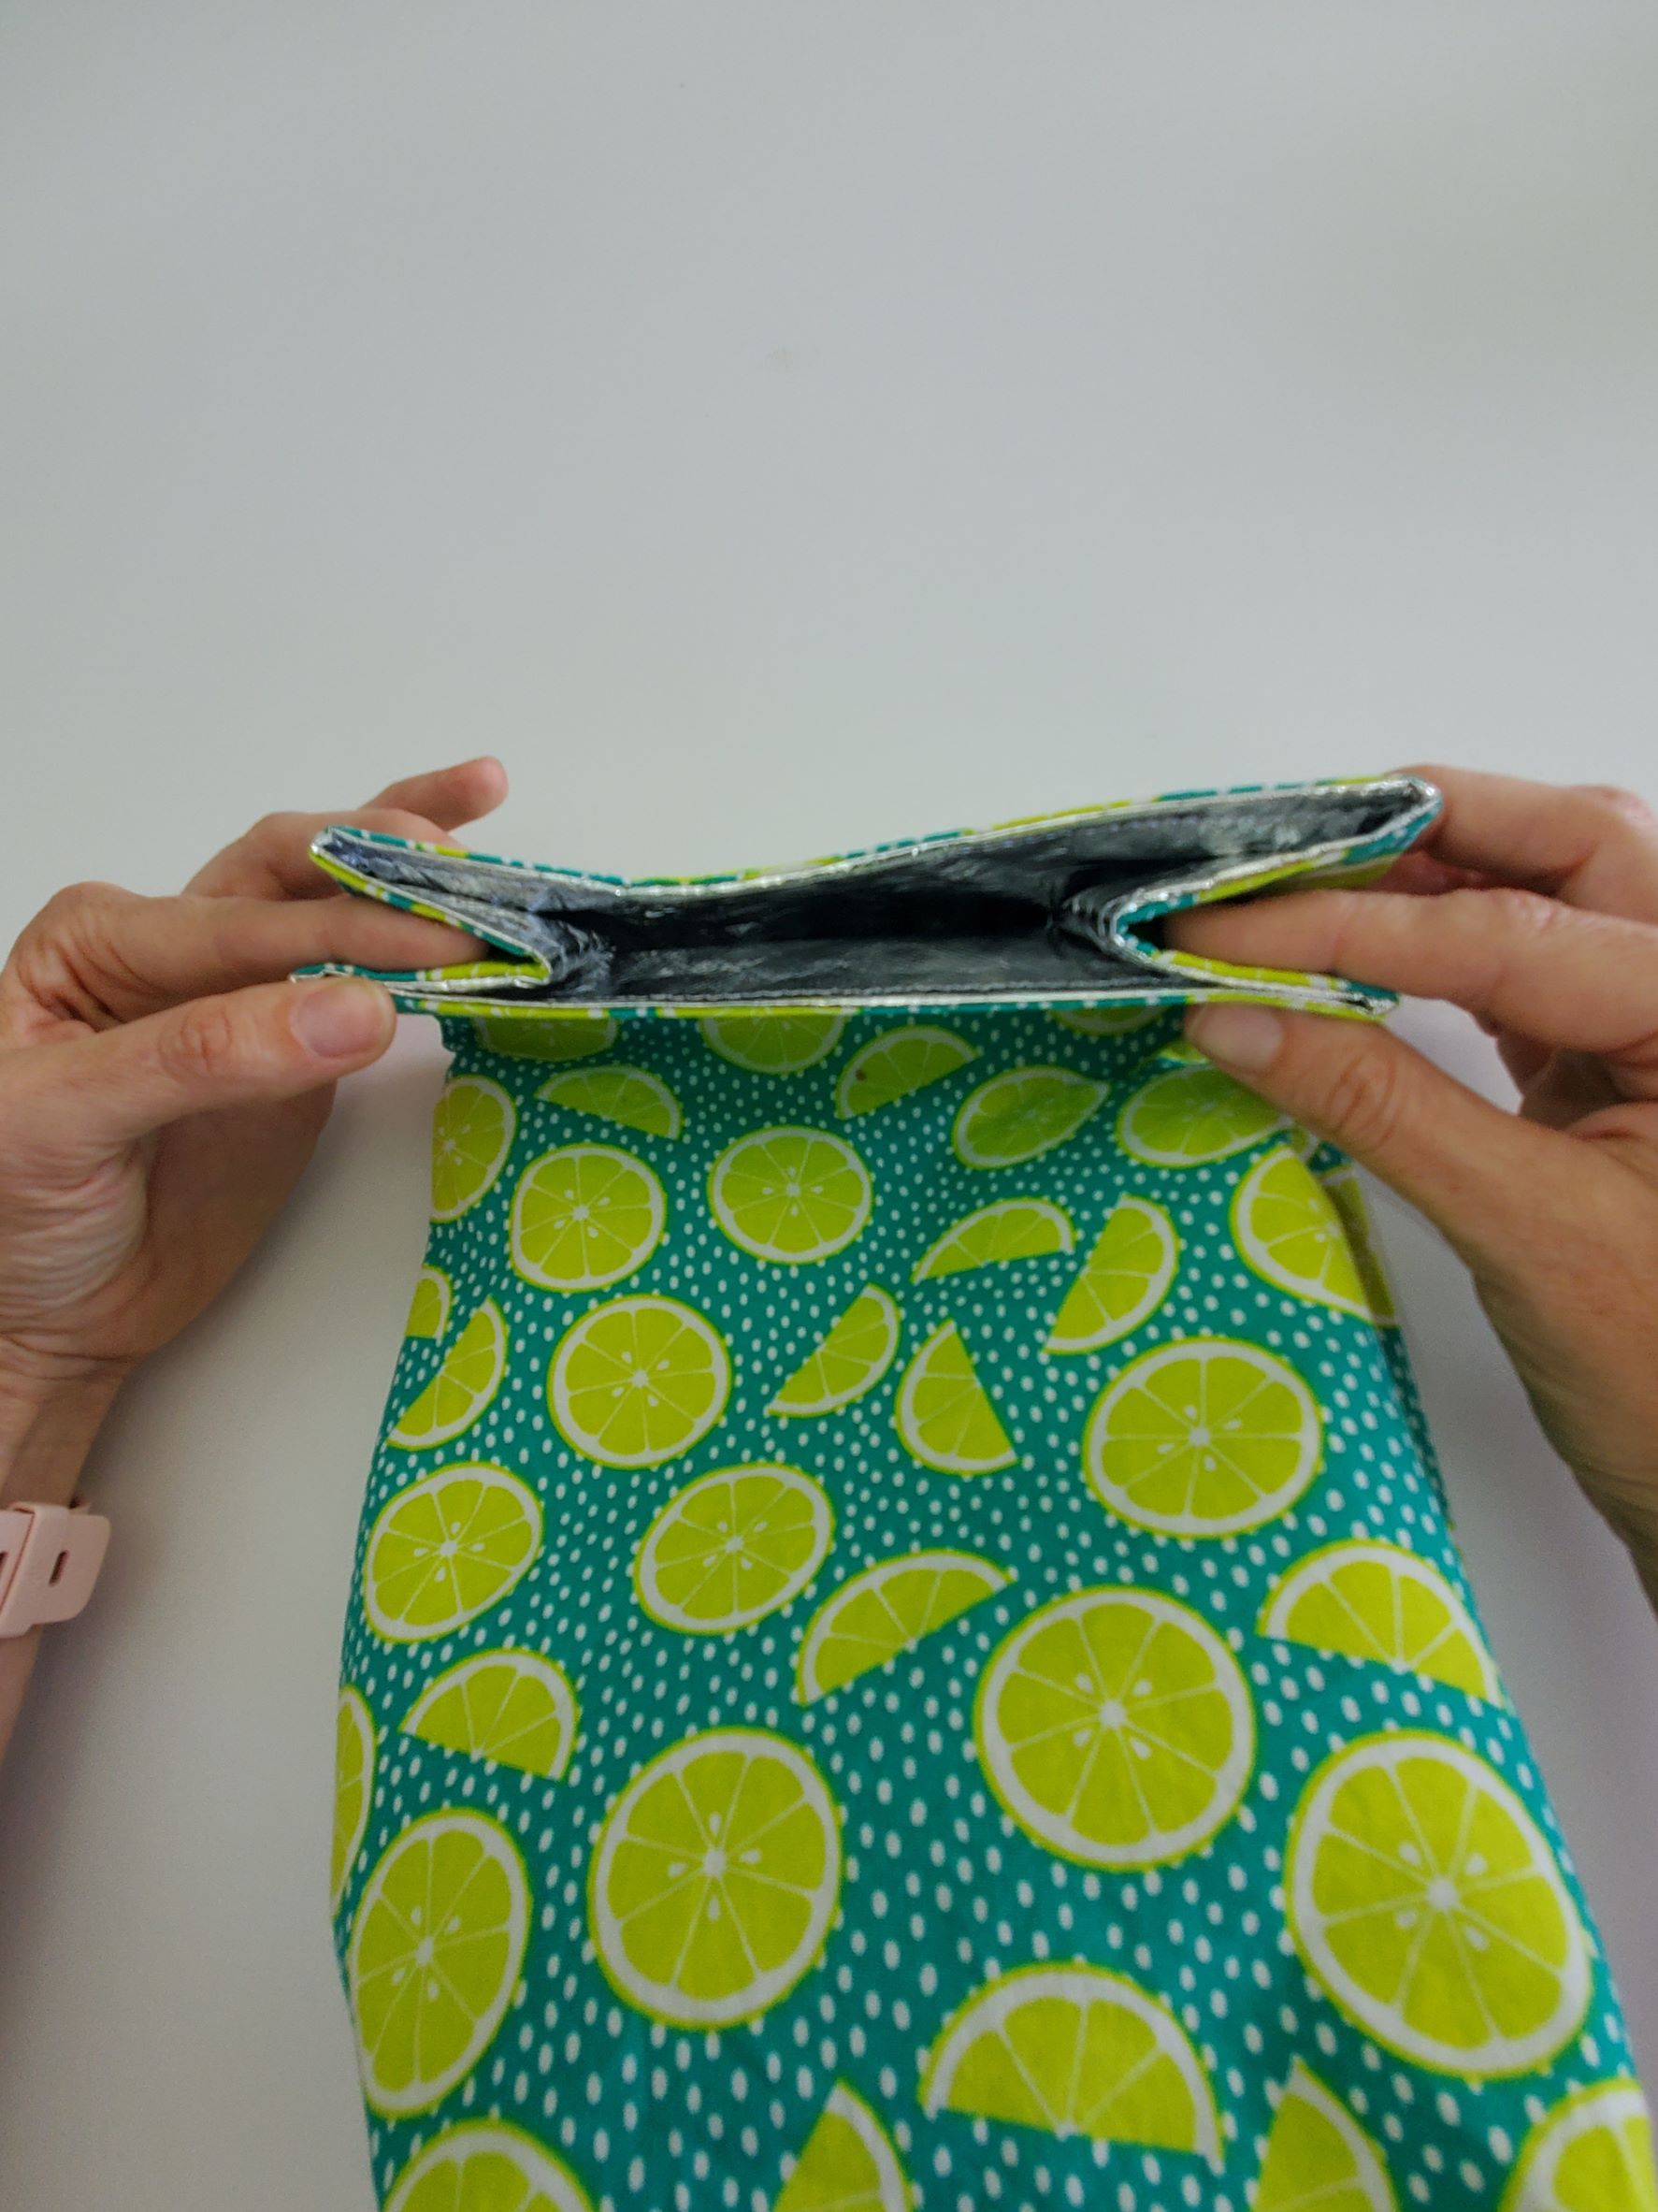
Turn your lunch bag (the outer fabric) right side out. Put it inside your lining piece so that right sides are facing each other. Line up your raw edges and clip around the perimeter of the bag. Stitch.
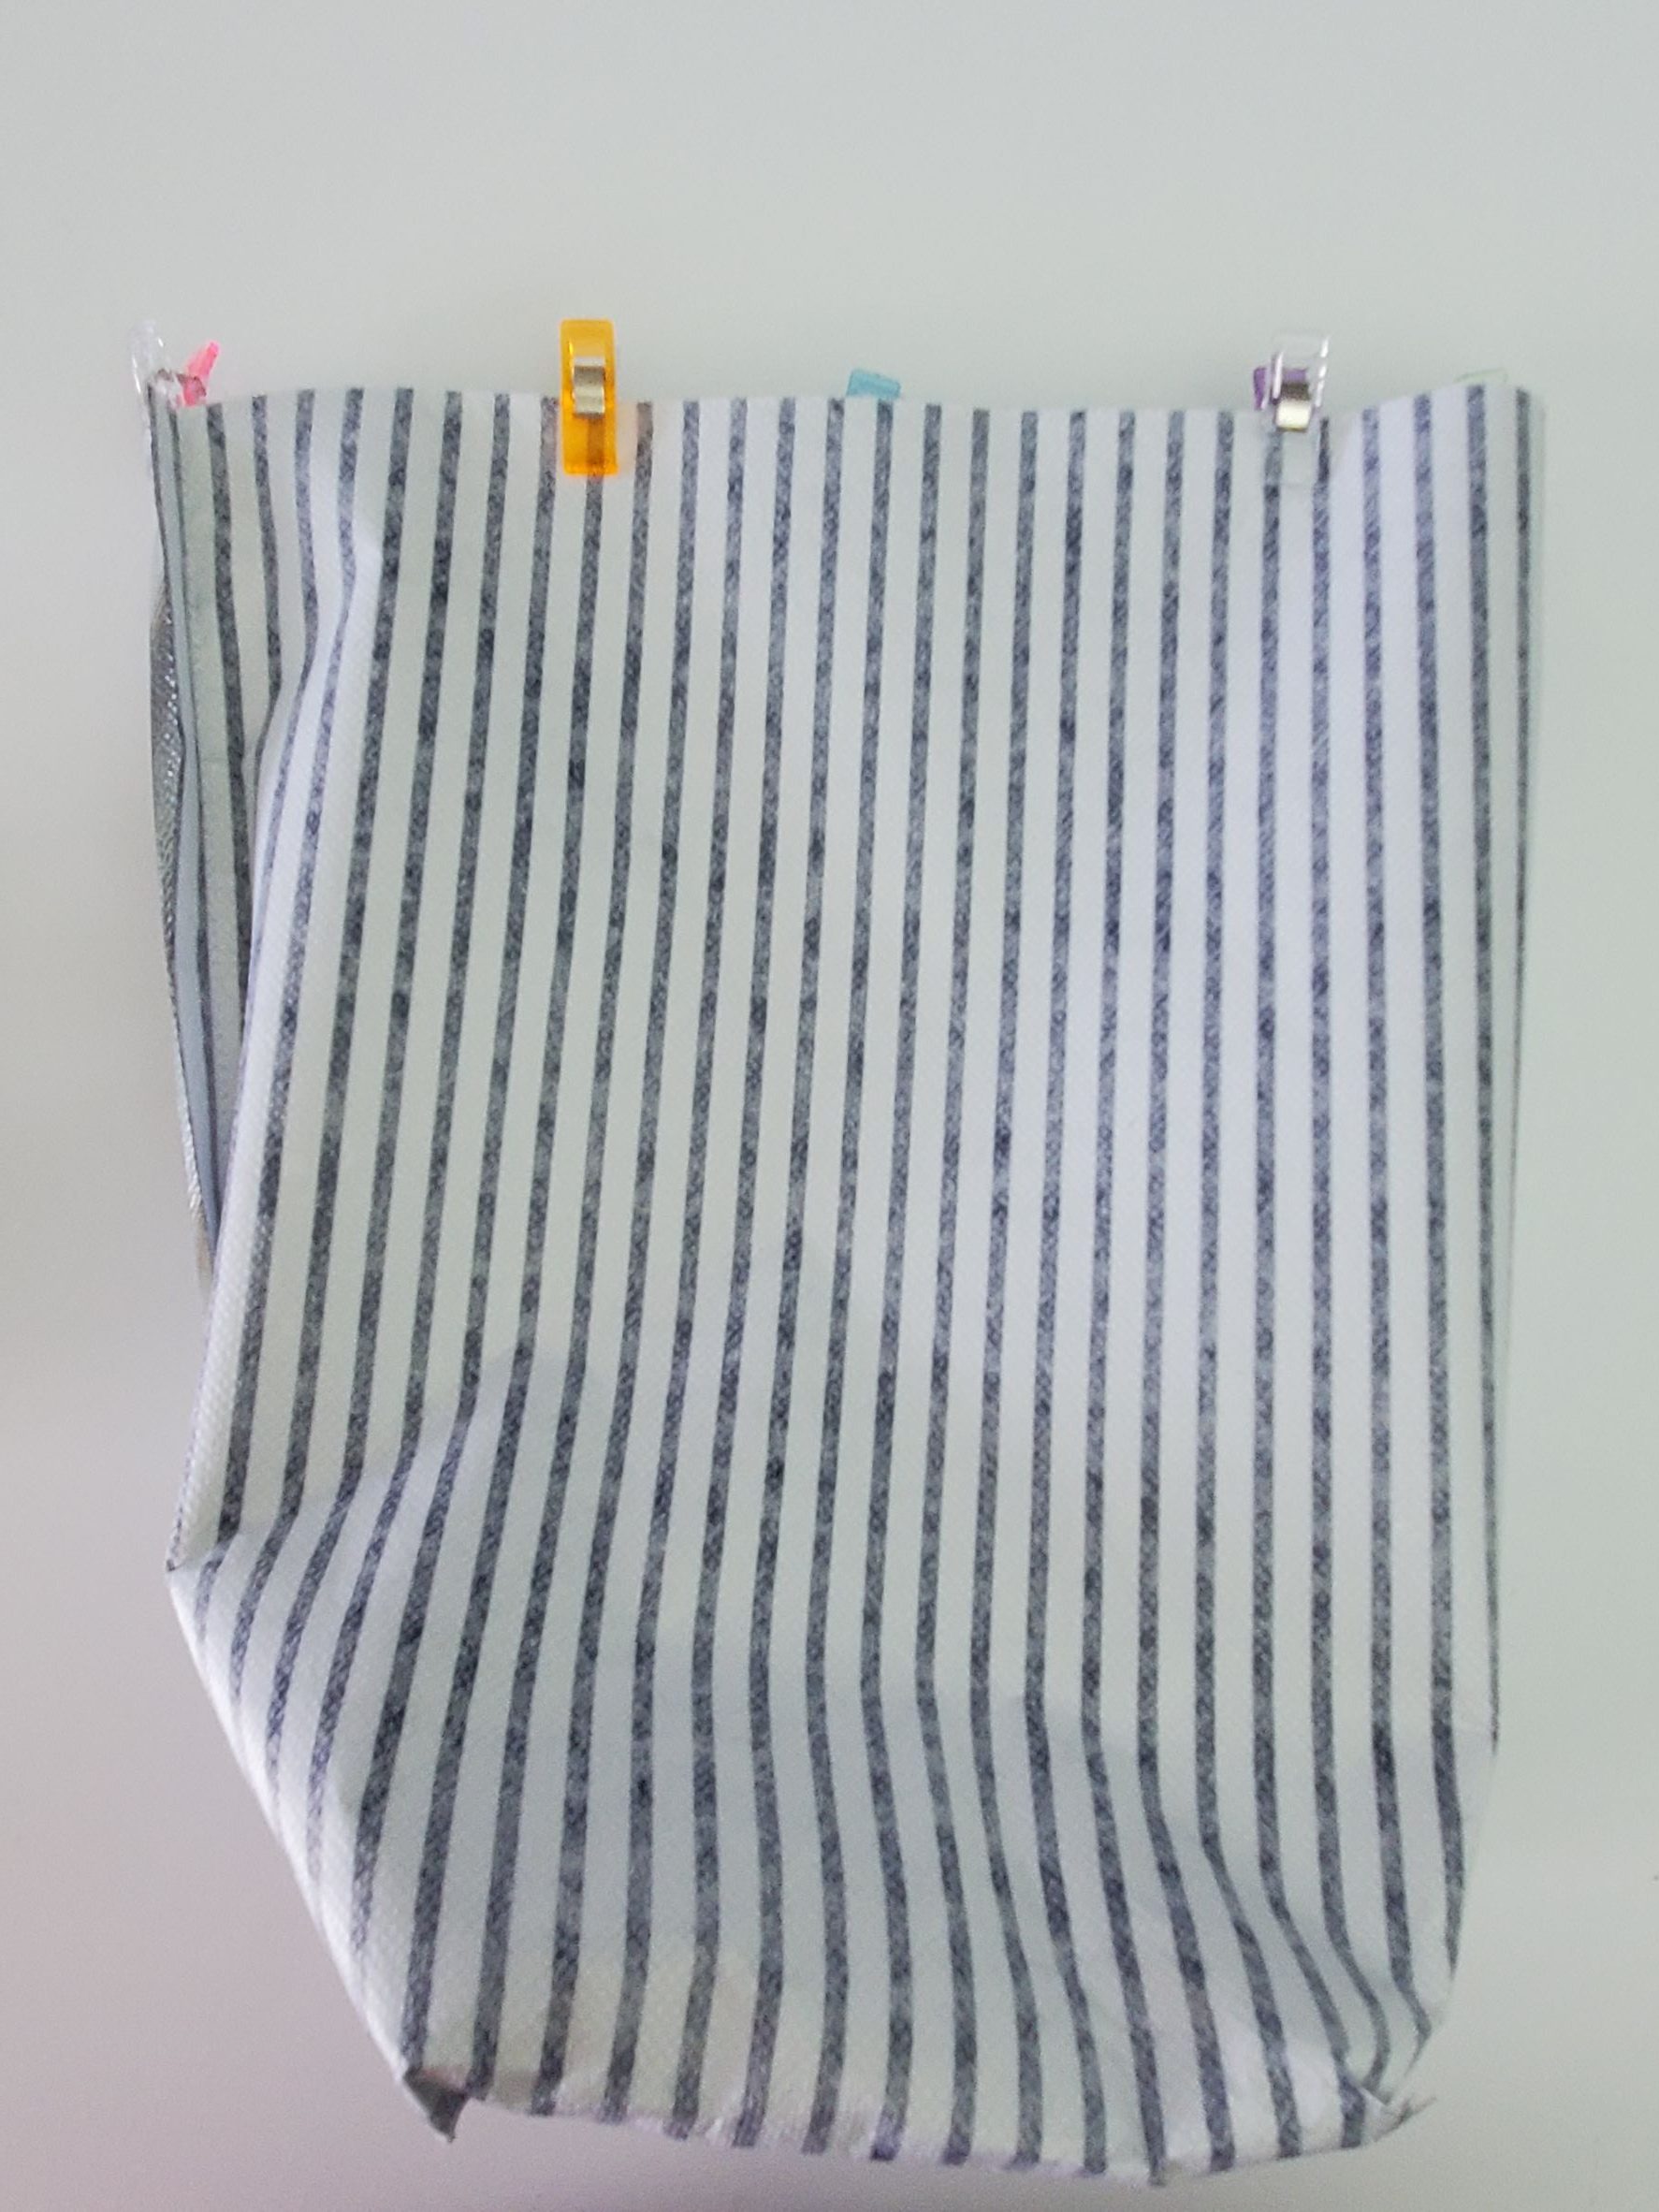
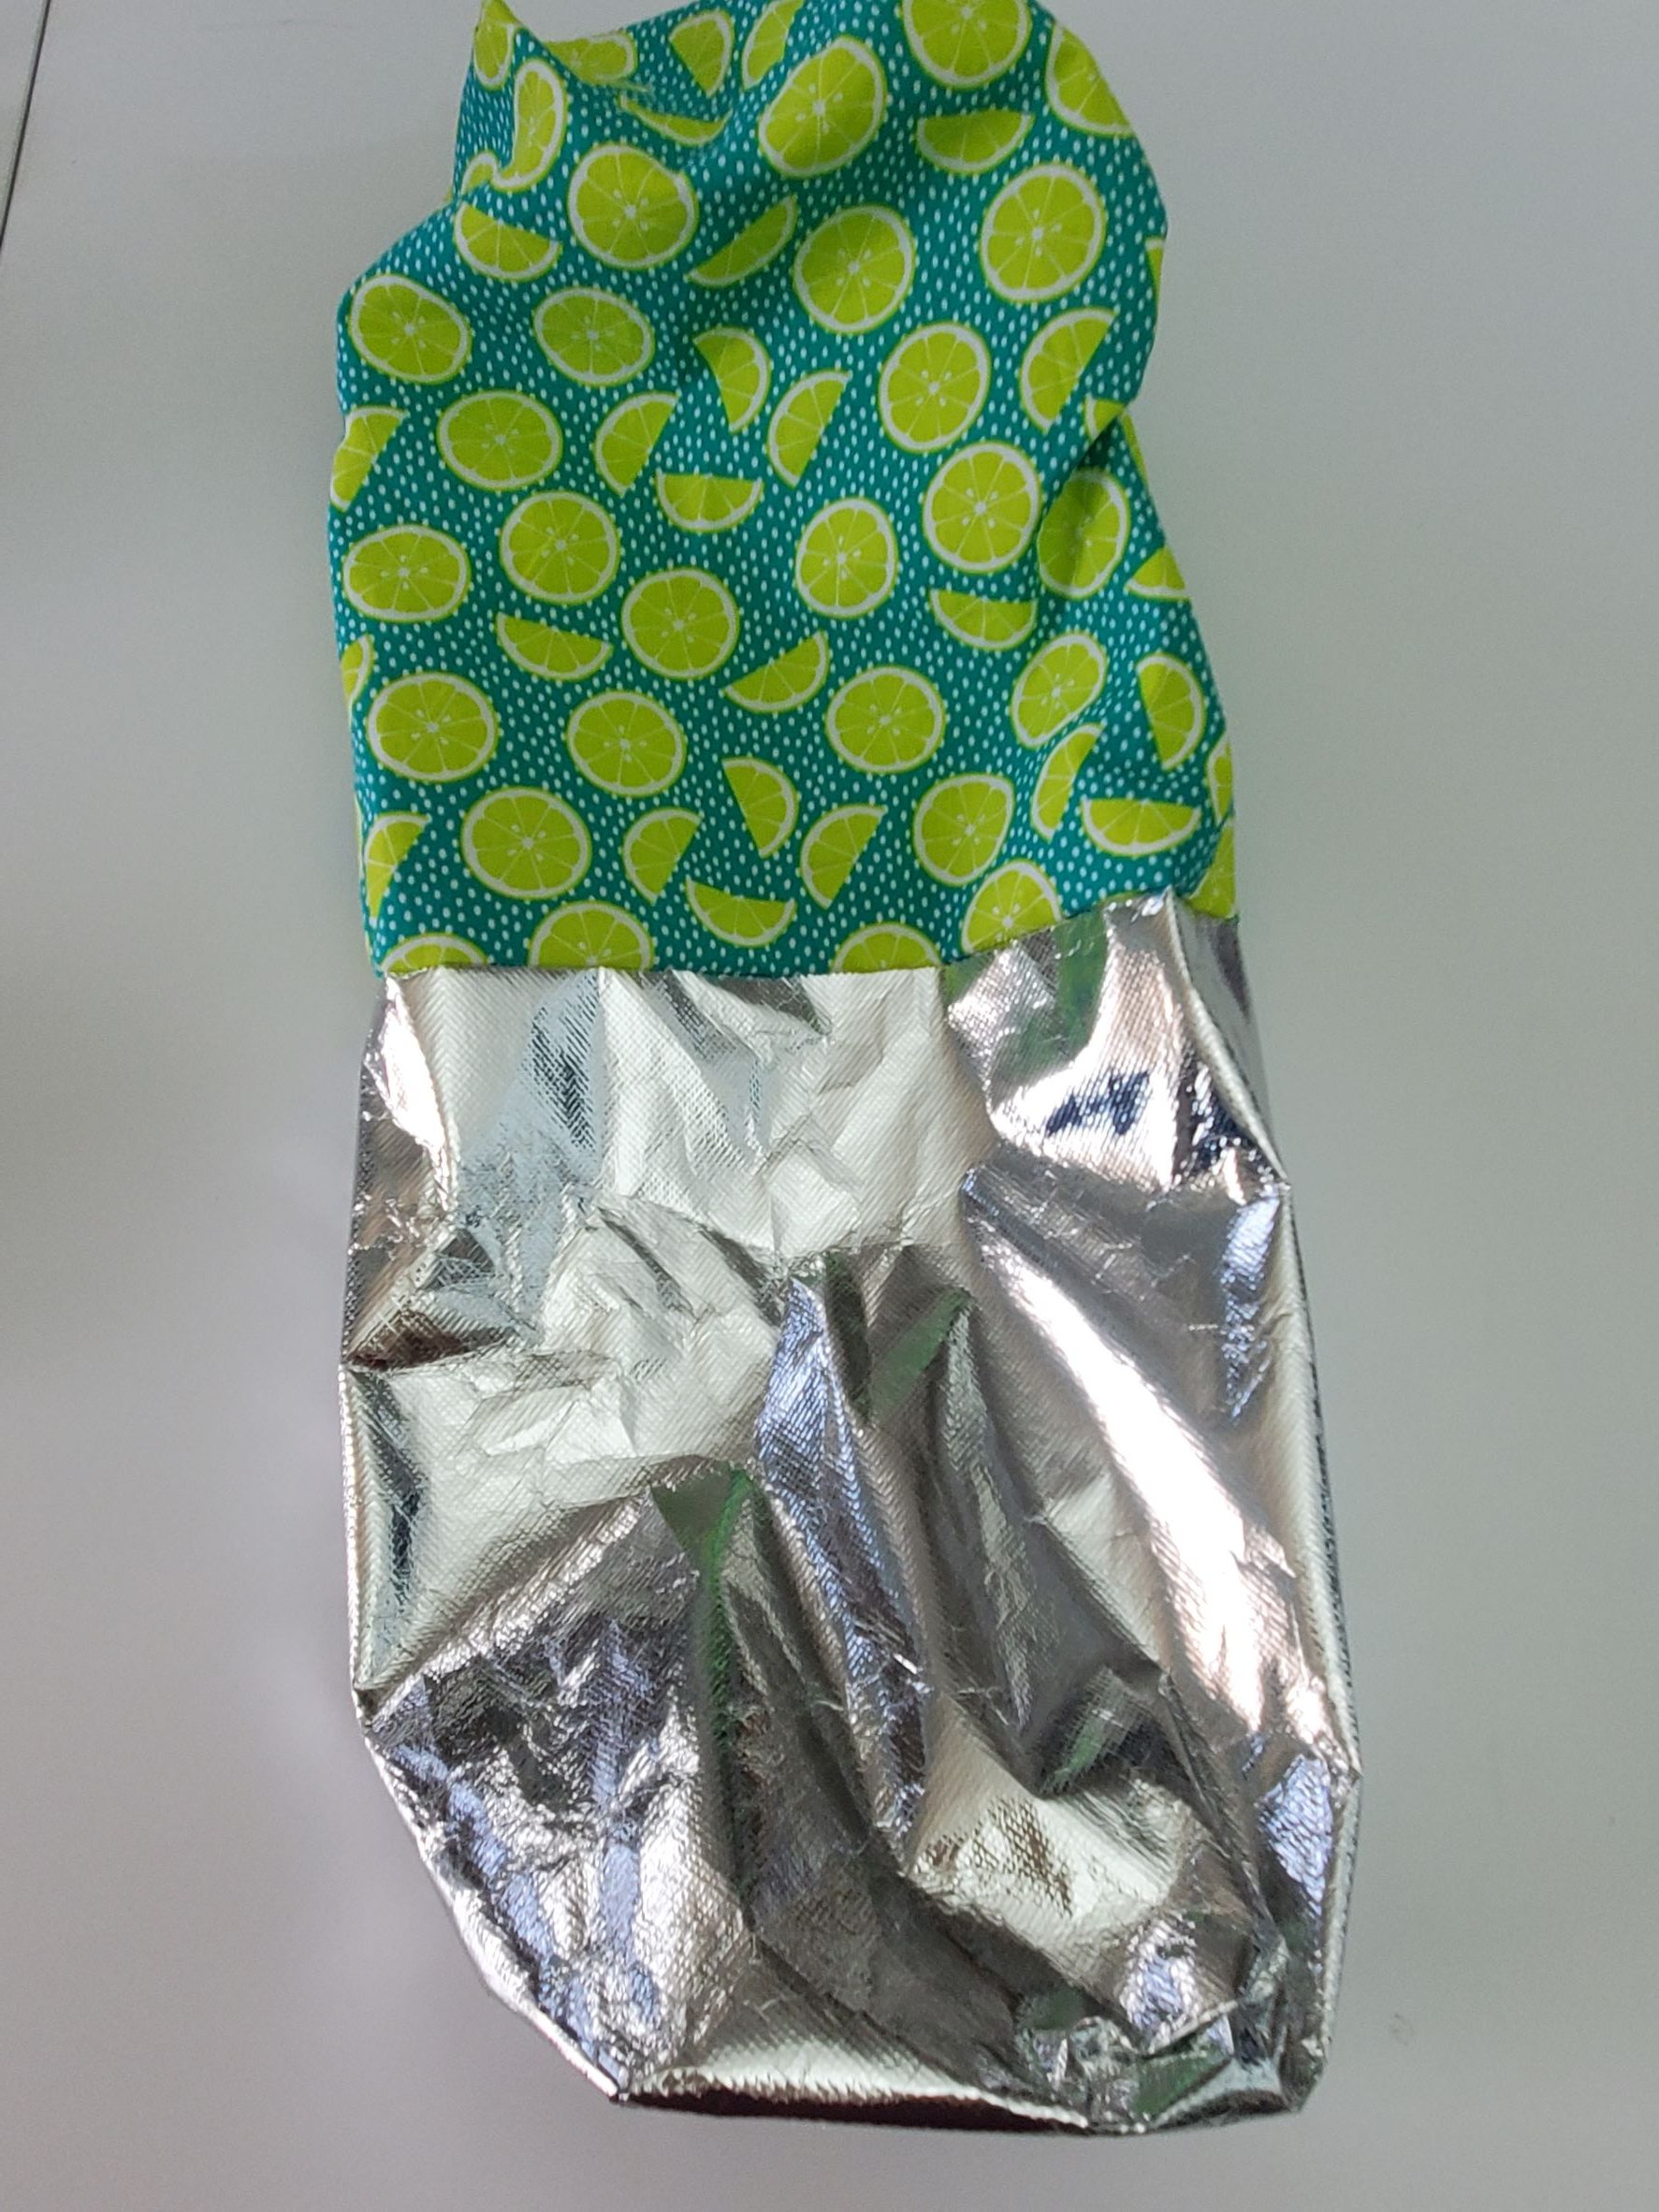
Now, very carefully, pull your main fabric through the opening on the lining.
Fold the raw edges of the lining (at the opening) inside the bag and stitch close to the folded edge.
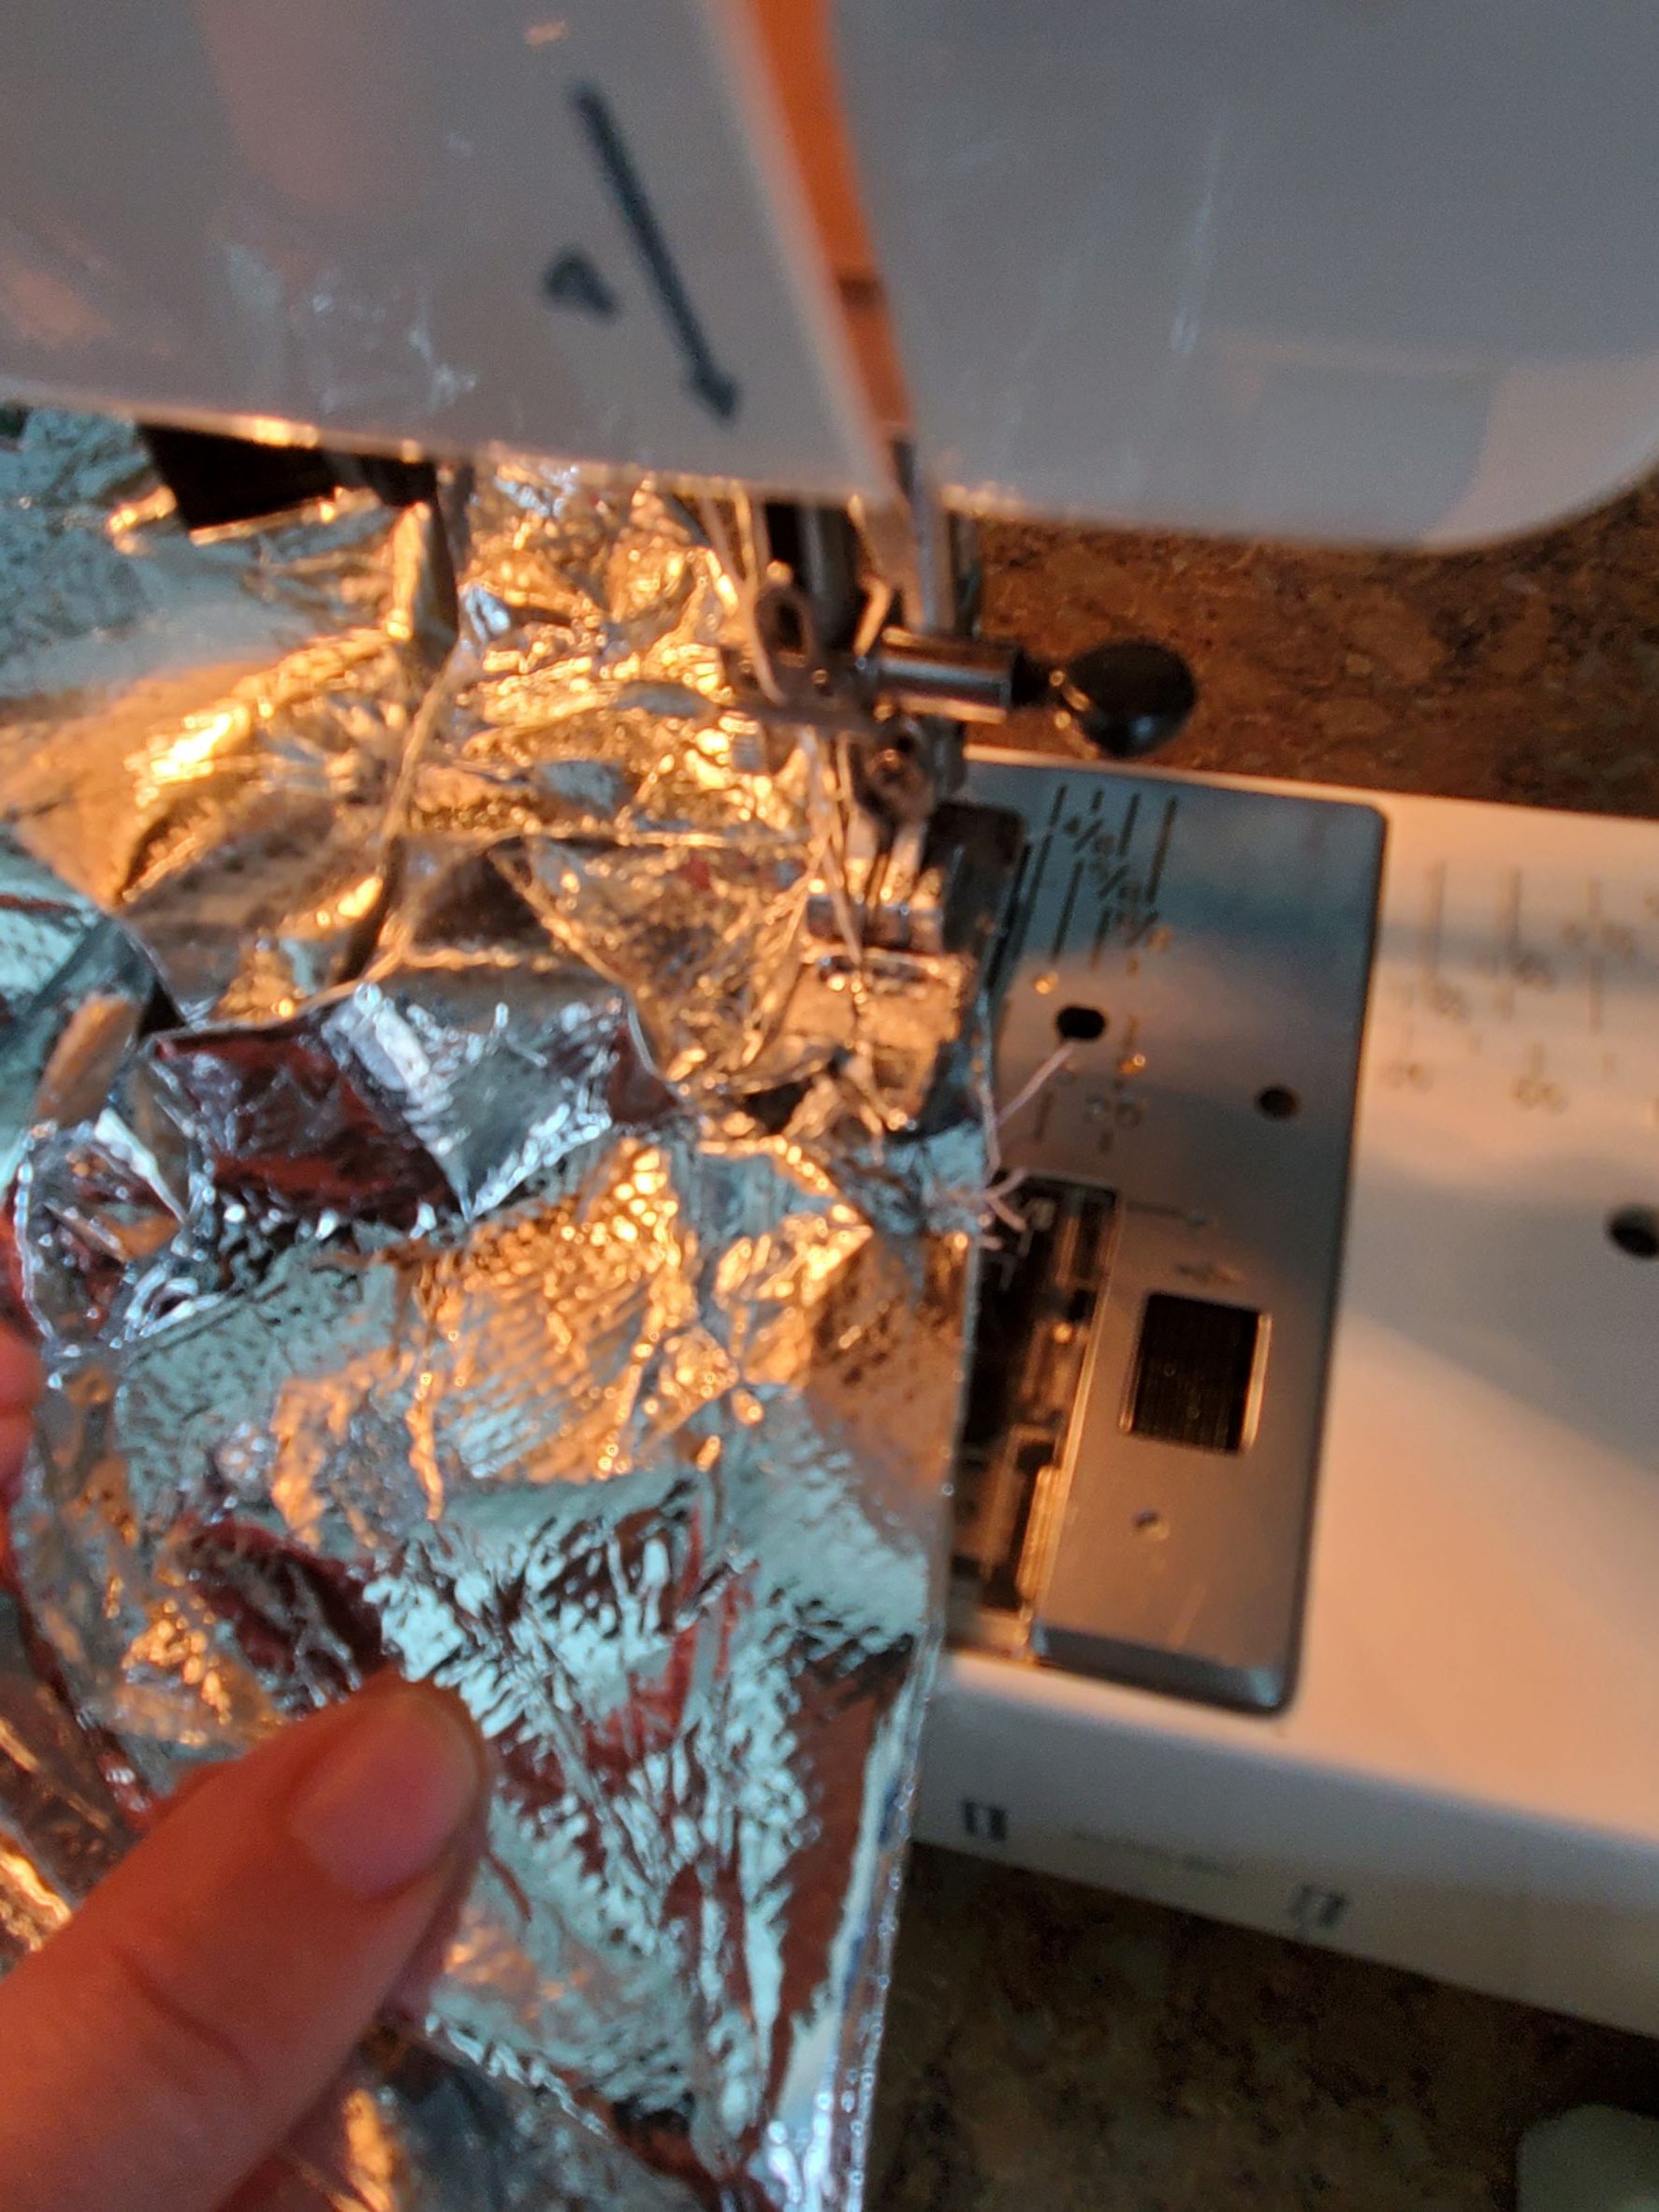
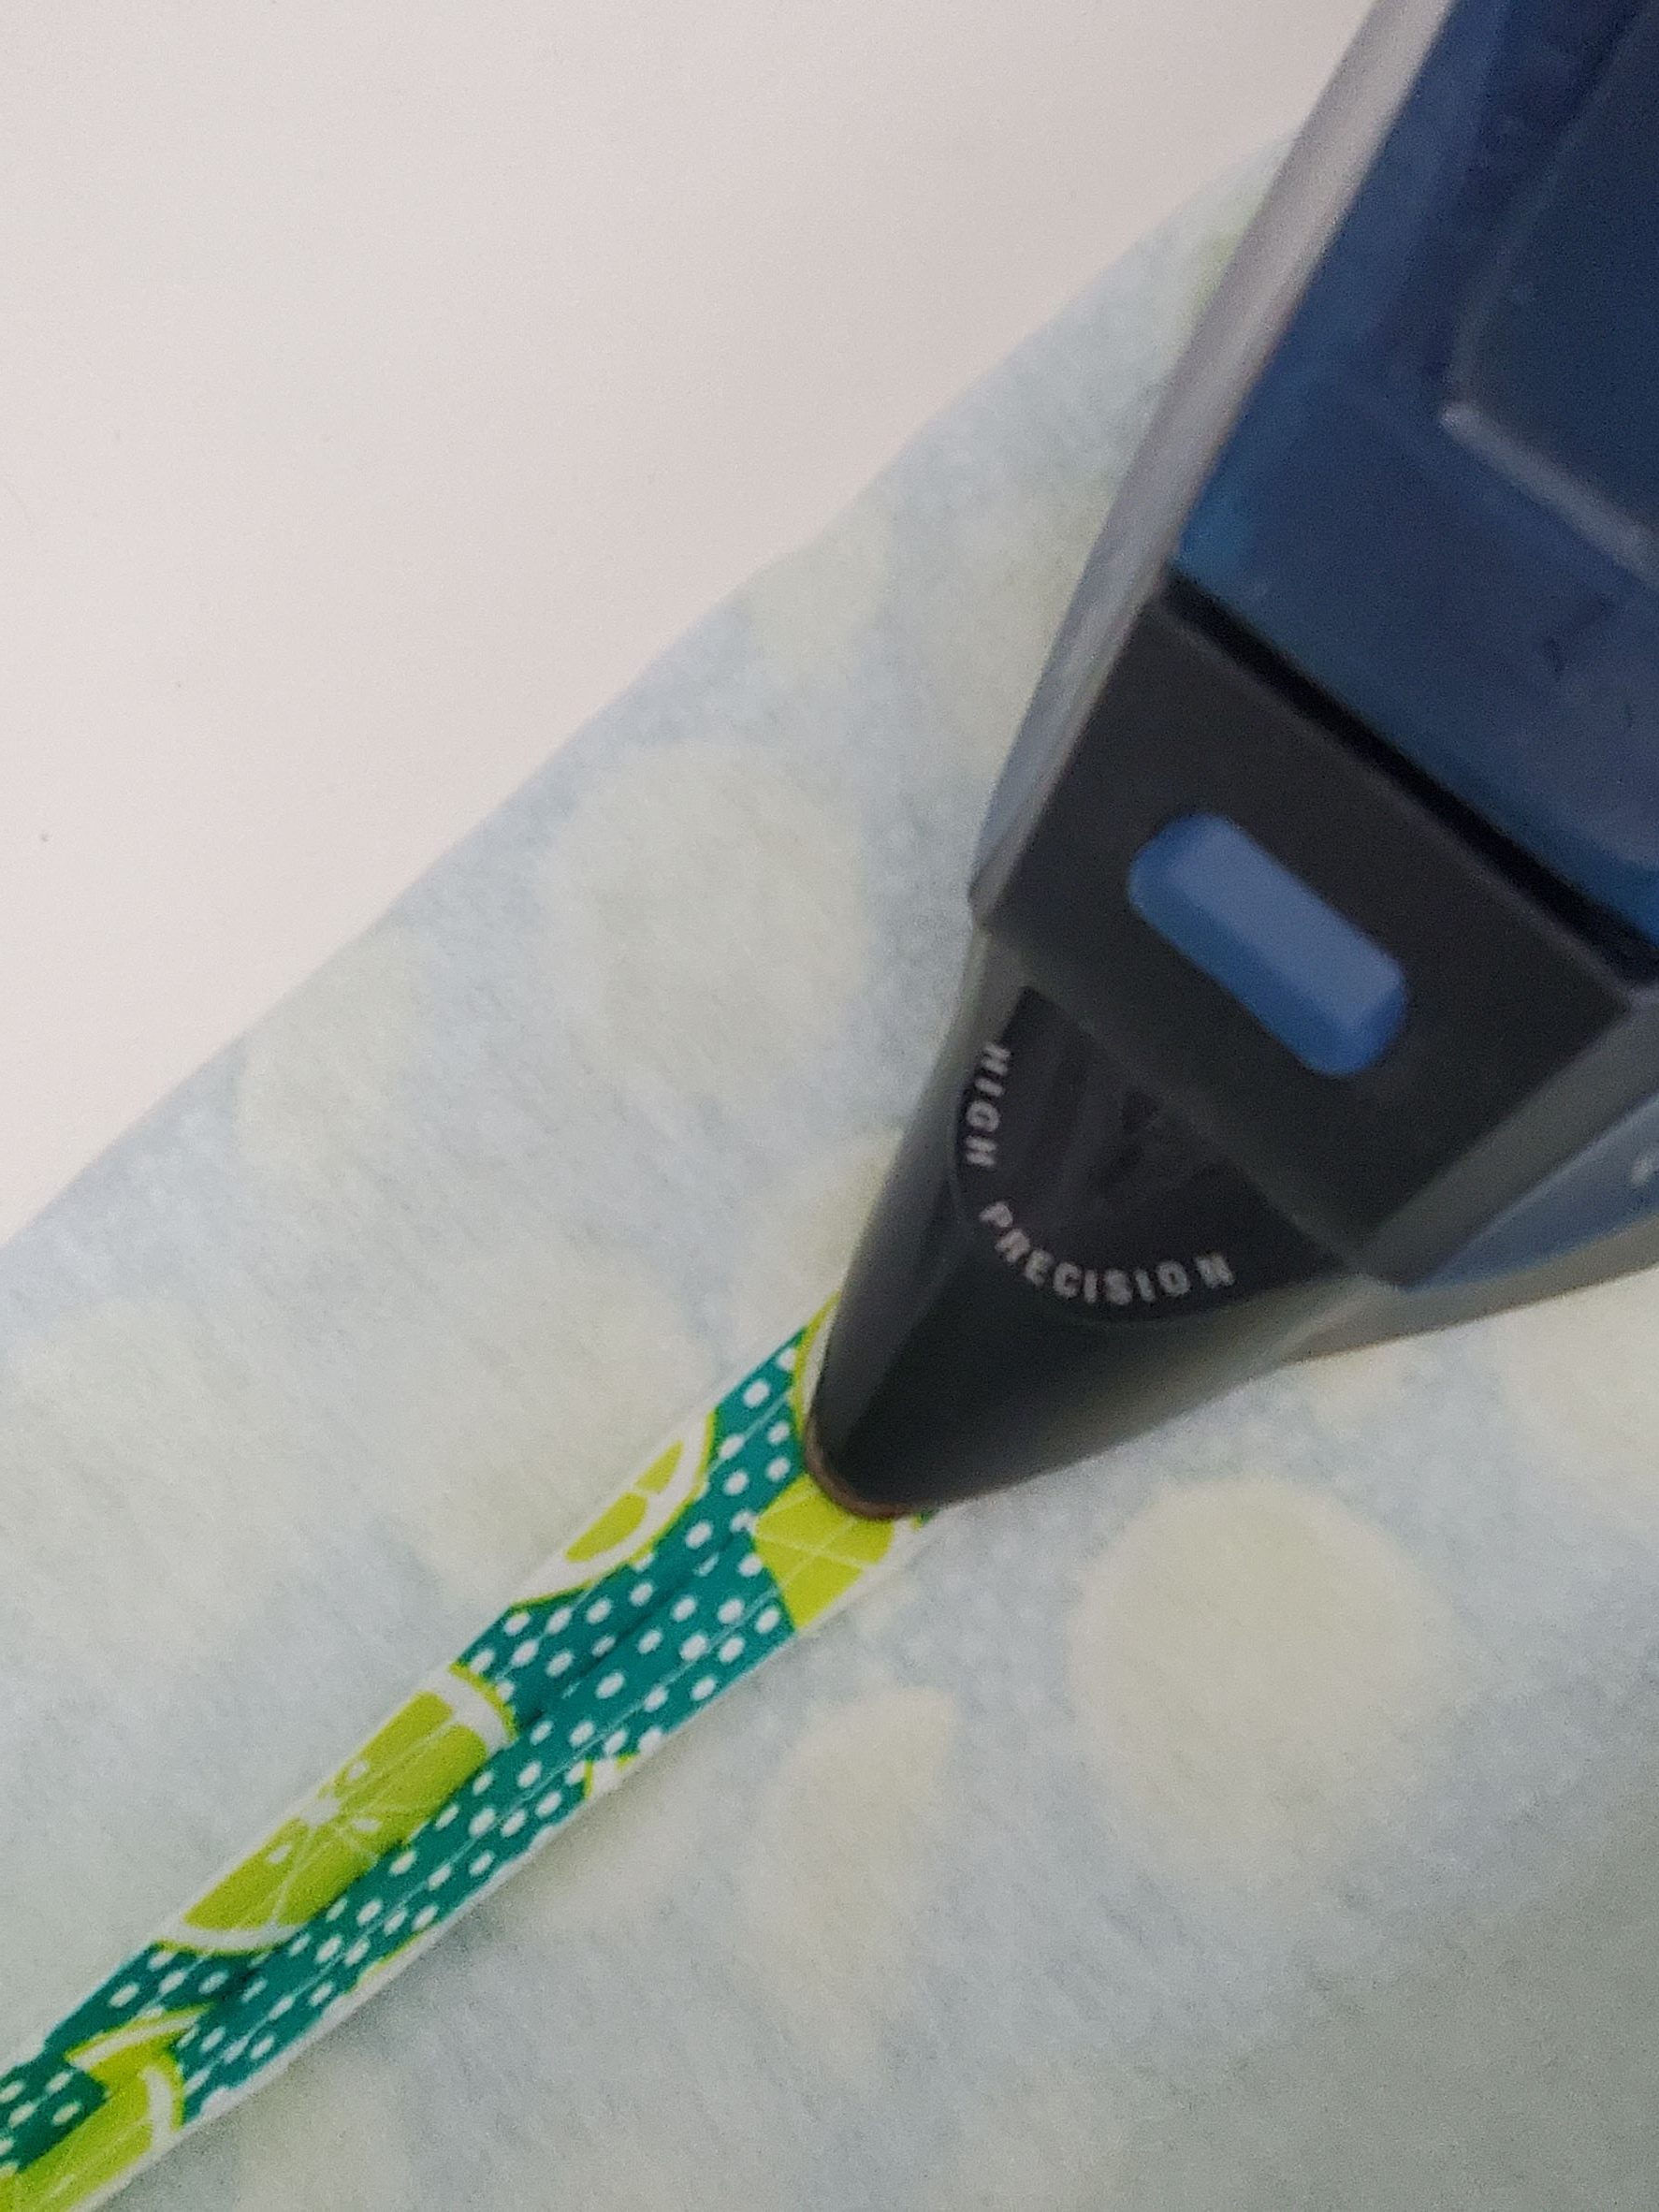
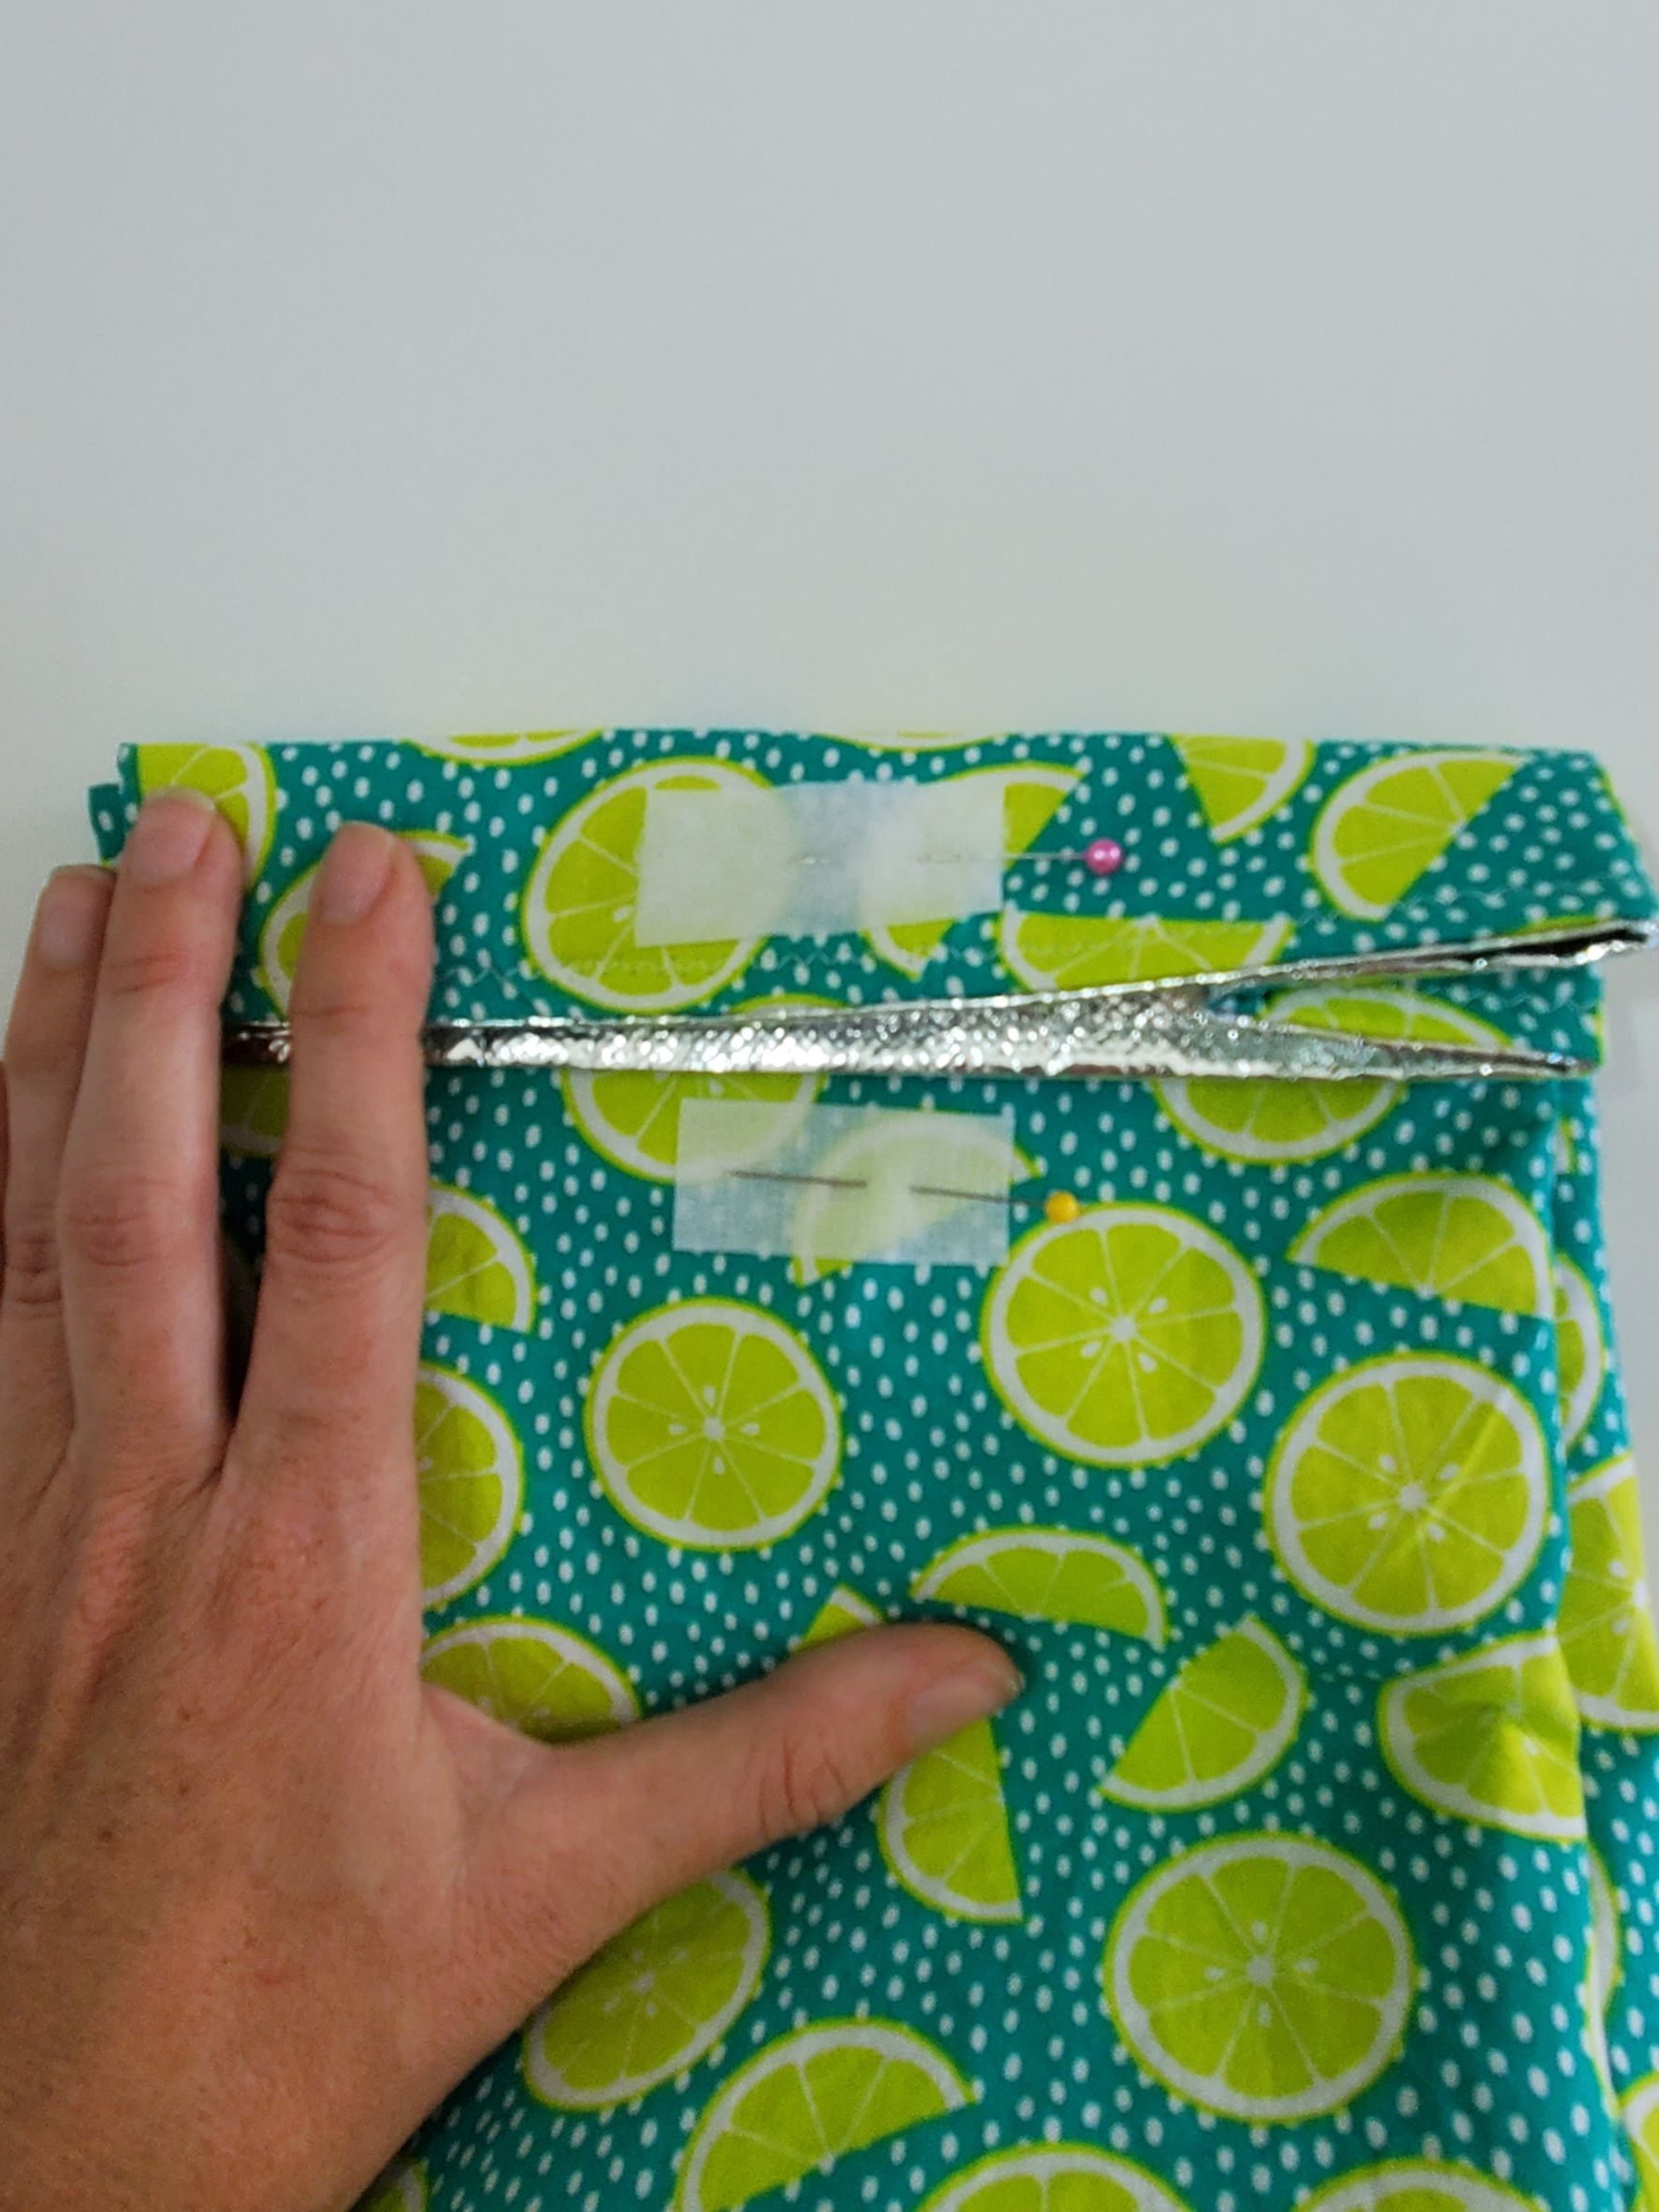
Tuck your lining inside the bag and press along the top of the bag. Make sure to press on the outside of the fabric rather than on the foil part. Honestly, I don’t know how much heat that fabric can handle. I did touch it with the iron and it didn’t melt, but better safe than sorry! Topstitch around the top of the bag. I forgot to take a picture of that step, but it’s pretty self-explanatory 😉
Now for the velcro. Mark a spot for your first piece of velcro about 1/2″ down from the top edge (doesn’t matter which side of the bag). Then, roll your bag down two times (just like you would a lunch sack) and mark the spot on your bag where that top mark touches. Also, just a note, I folded in the sides of my bag, kind of how the brown paper lunch sacks fold in on the sides. Look at the pictures and you’ll understand everything 🙂
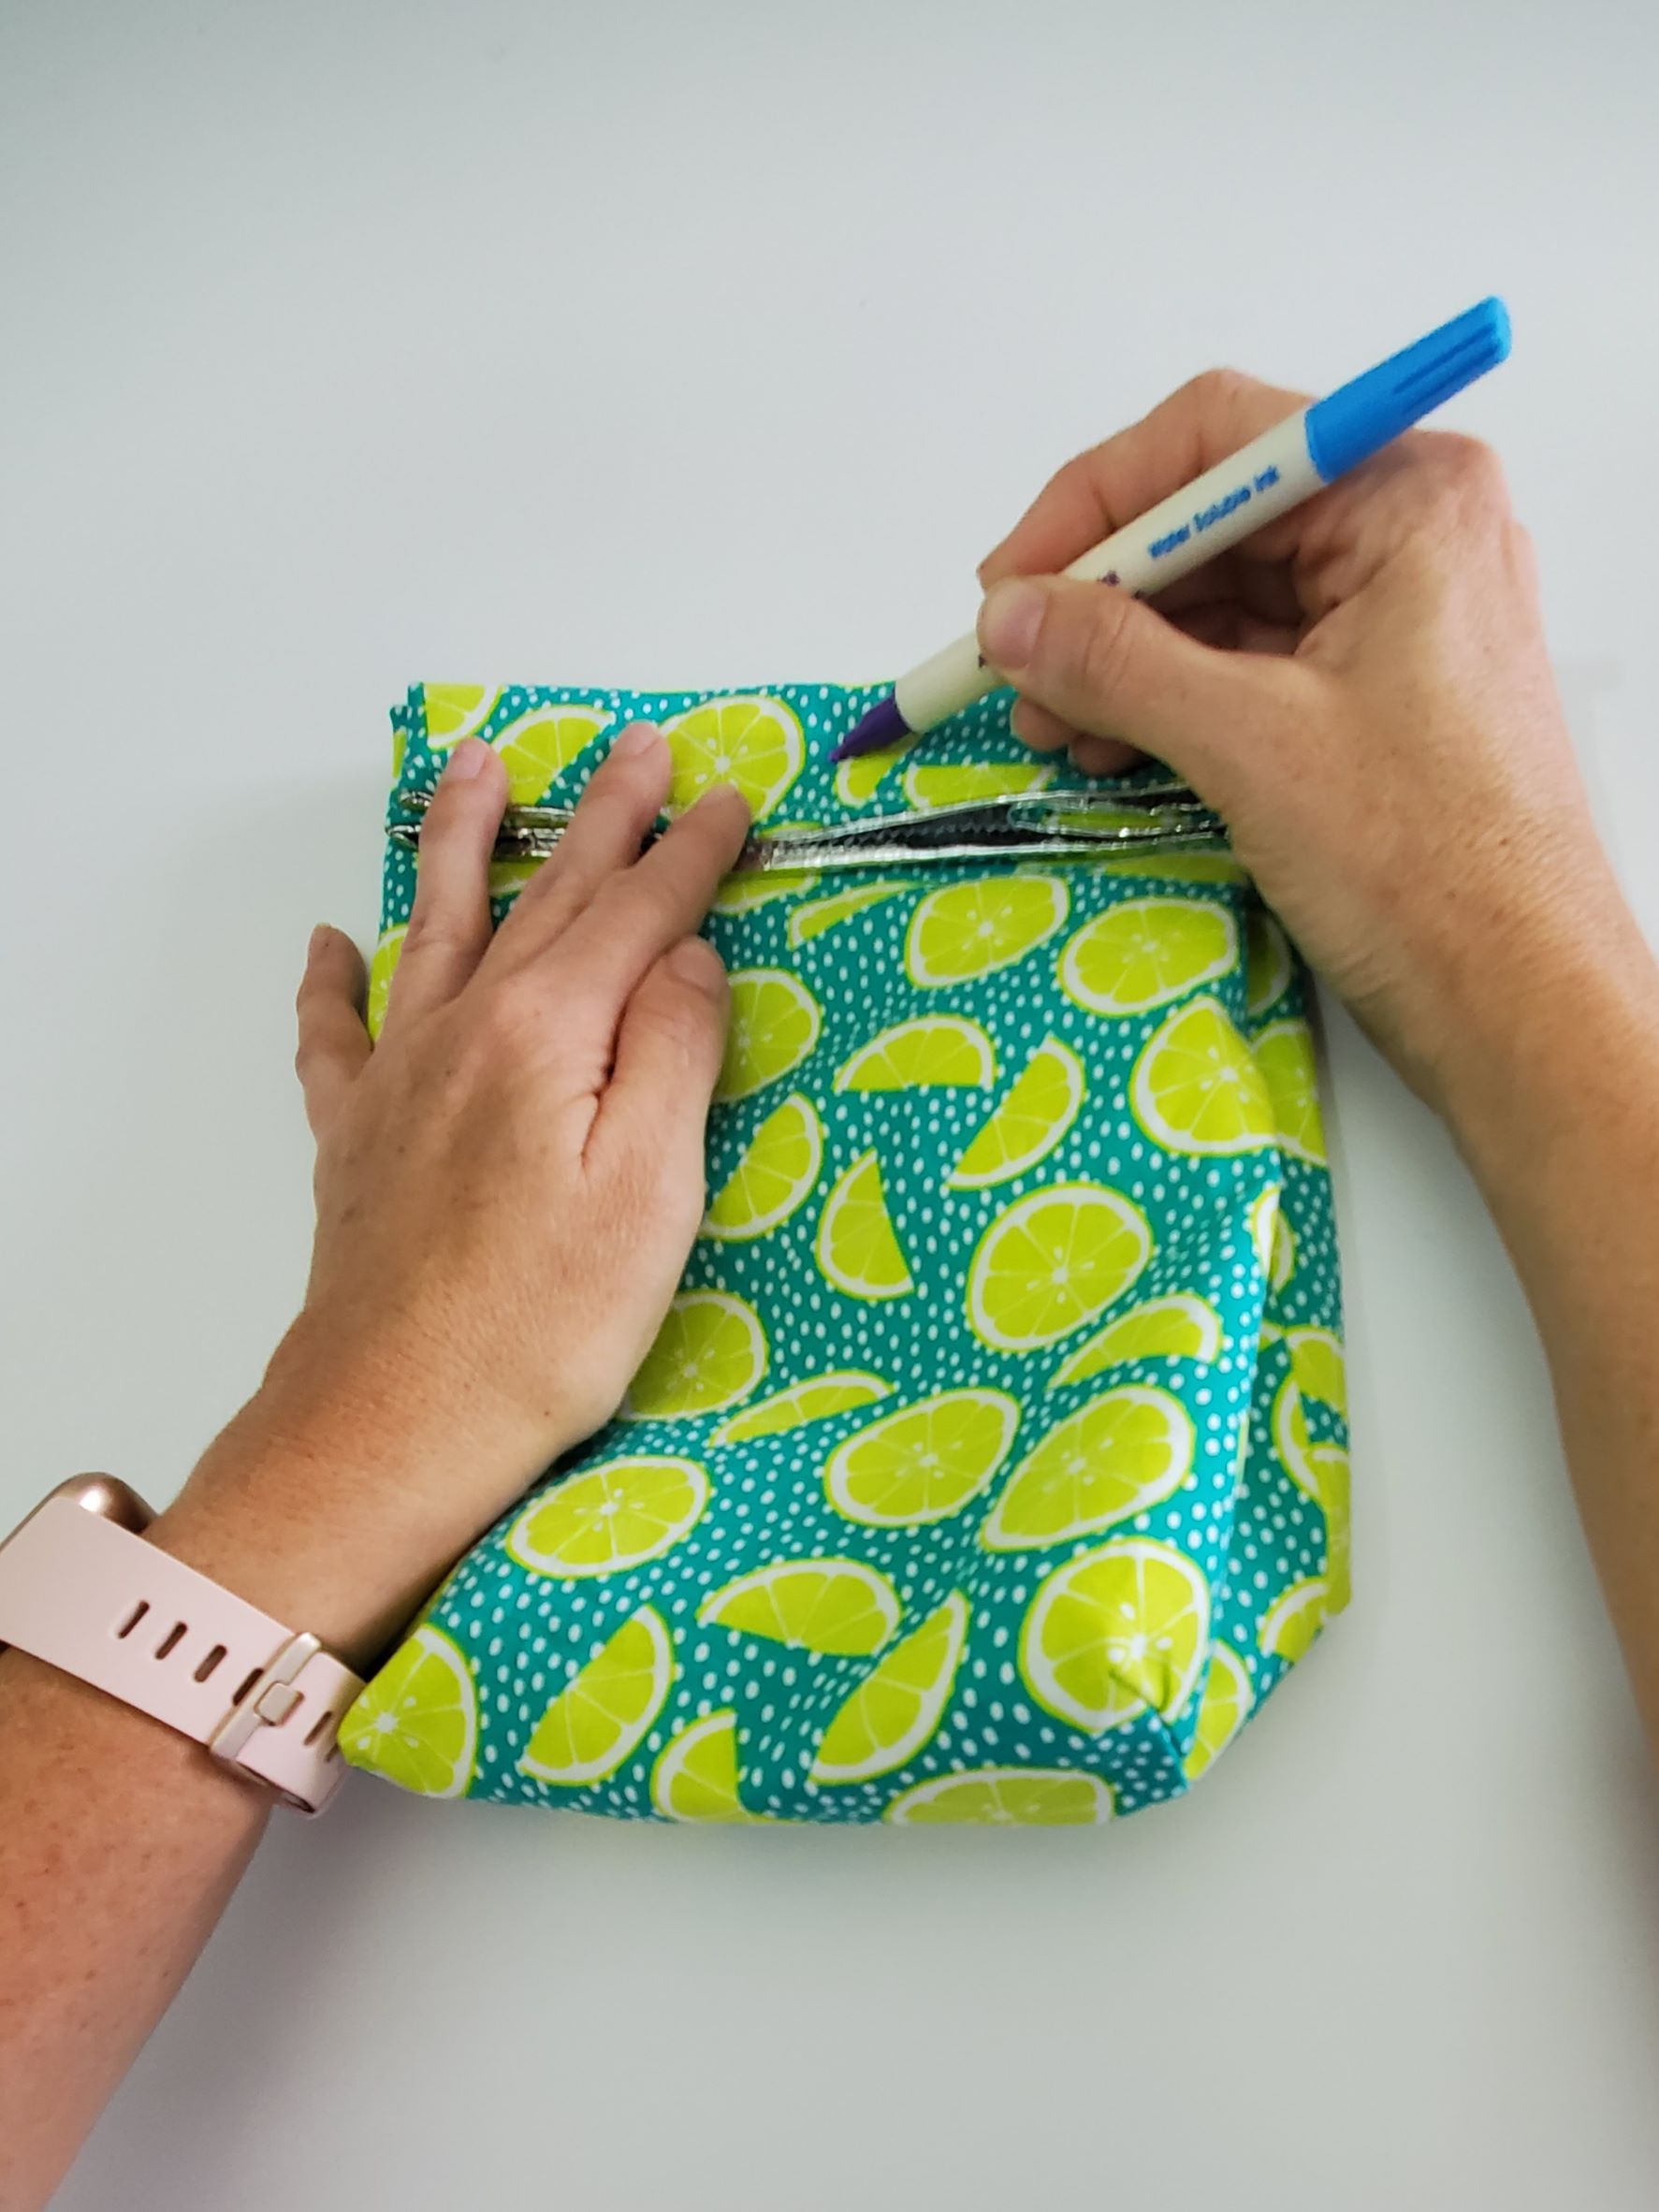
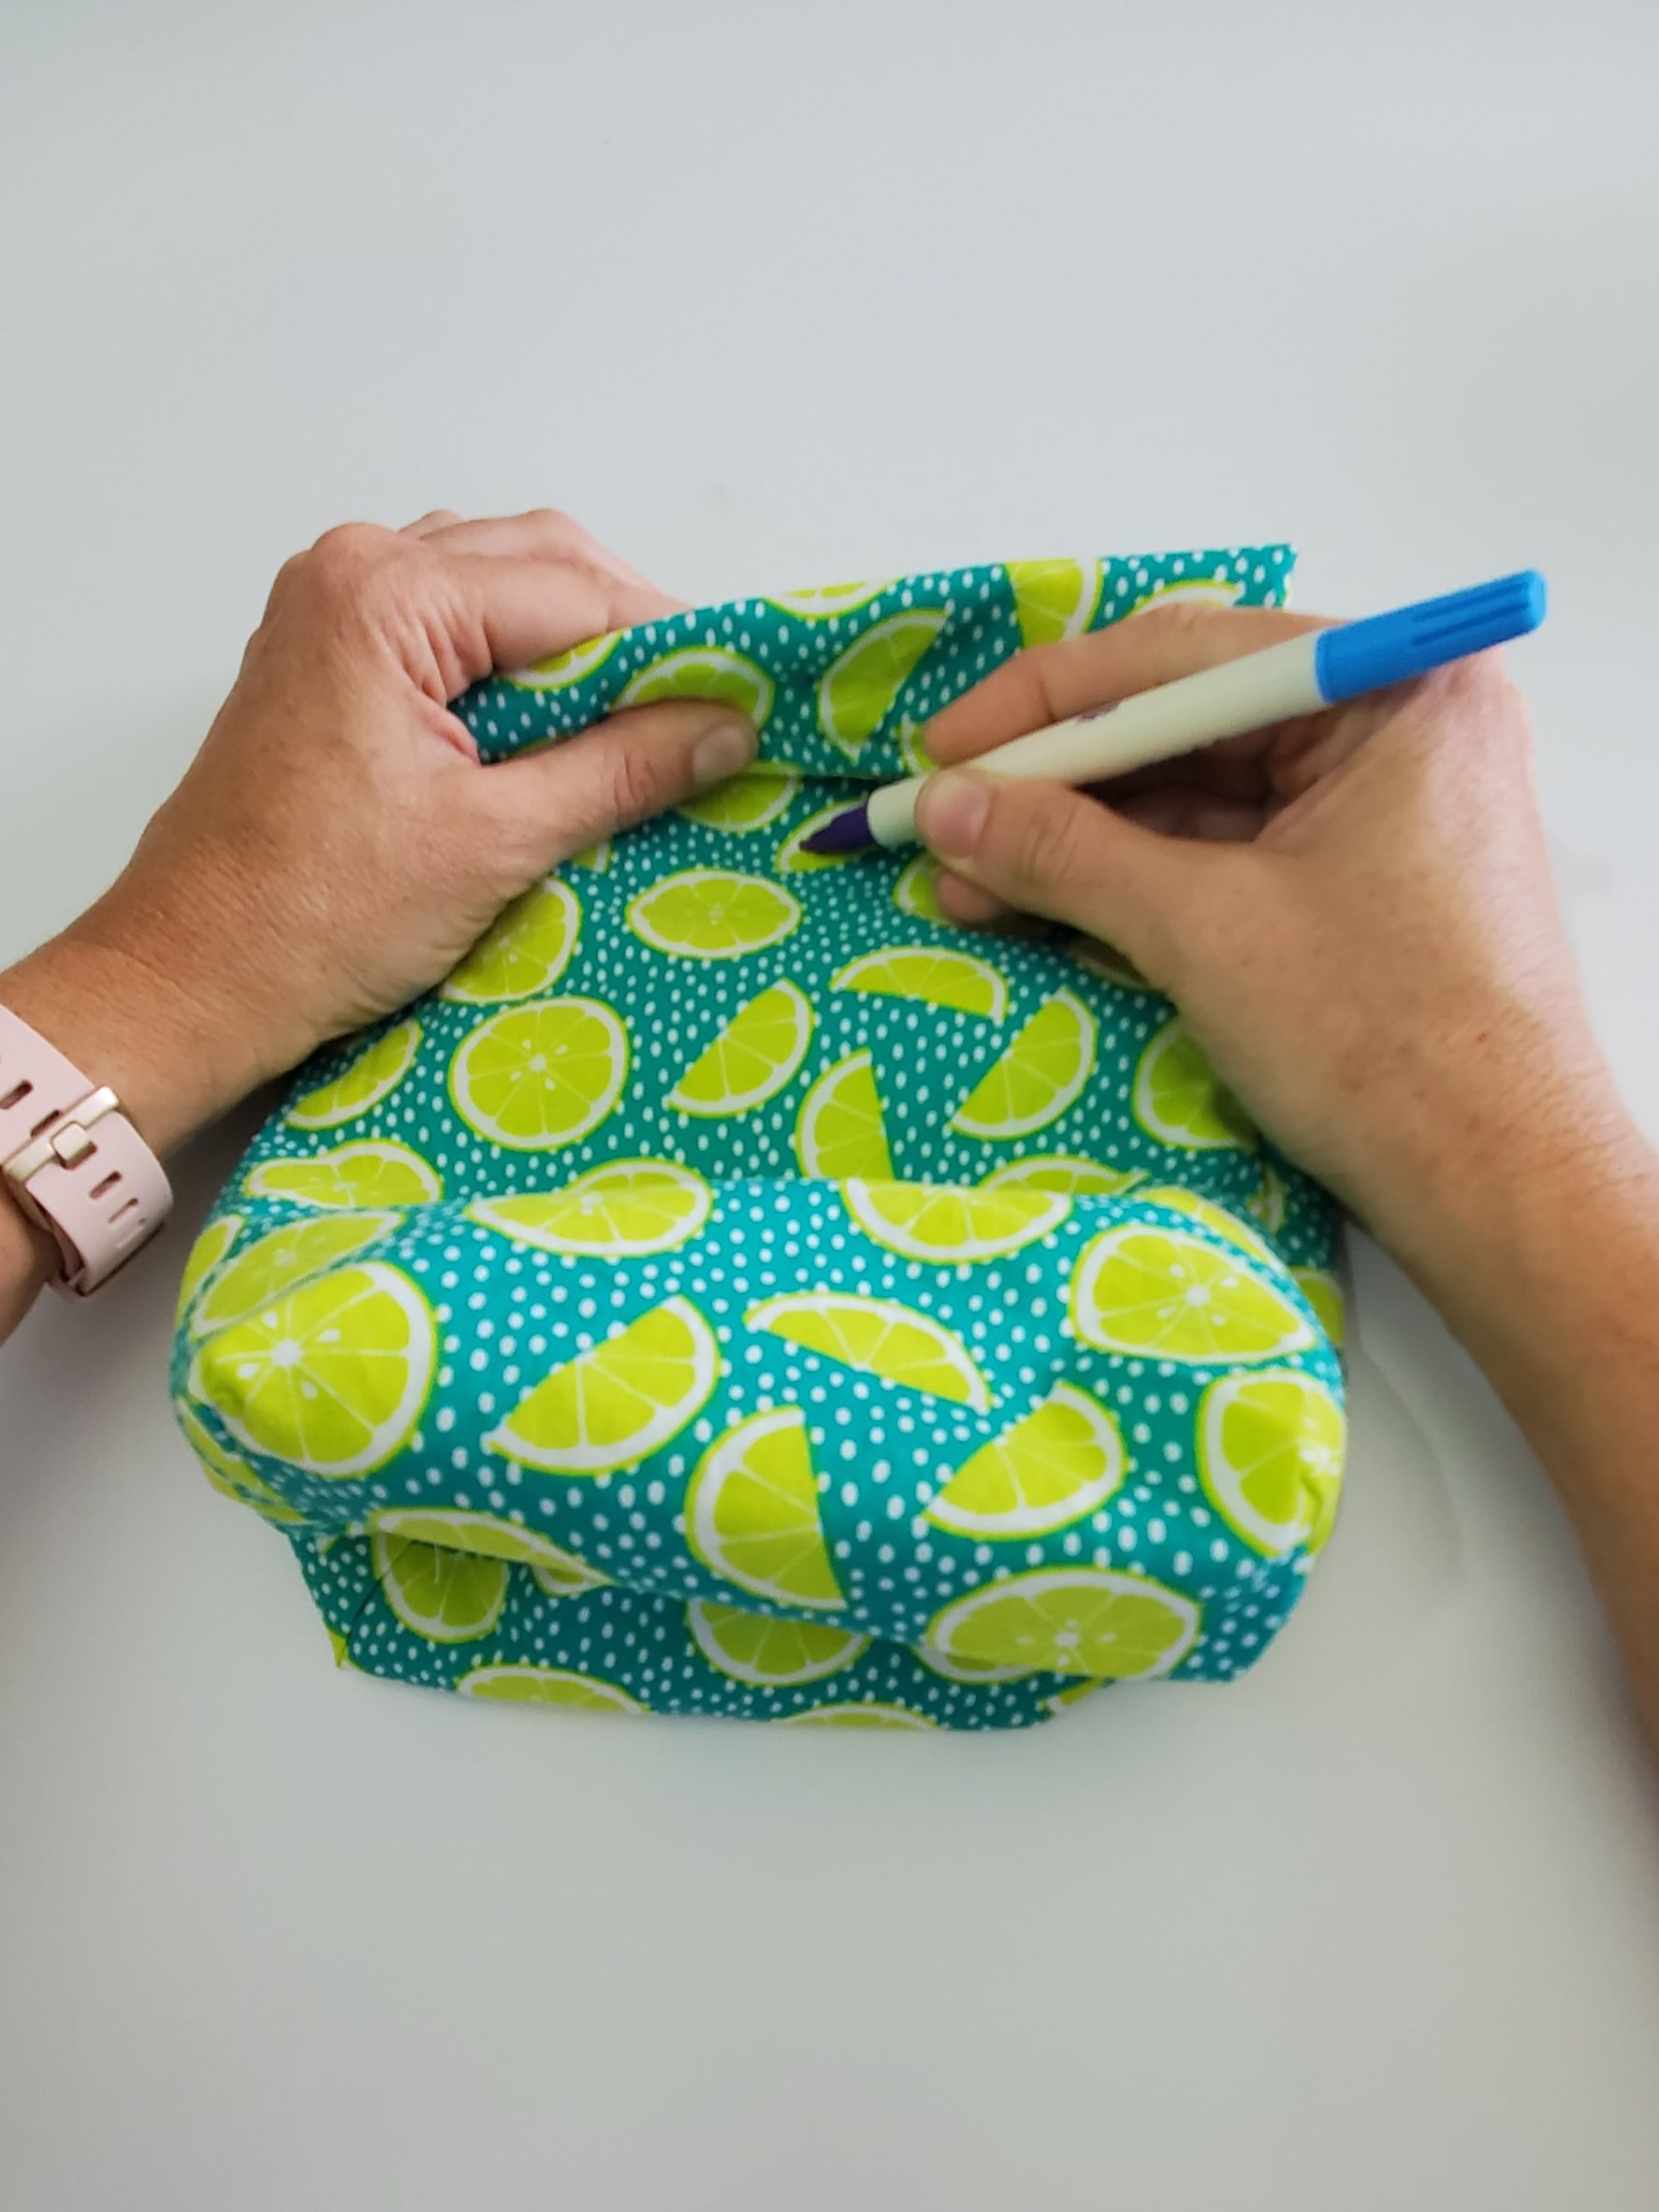
Place your velcro on your markings and stitch into place.
And that’s it! You are done with your lunch bag!!
Now, on to the snack bag. These are super quick to whip up!
Steps to Sew Your Reusable Snack Bag
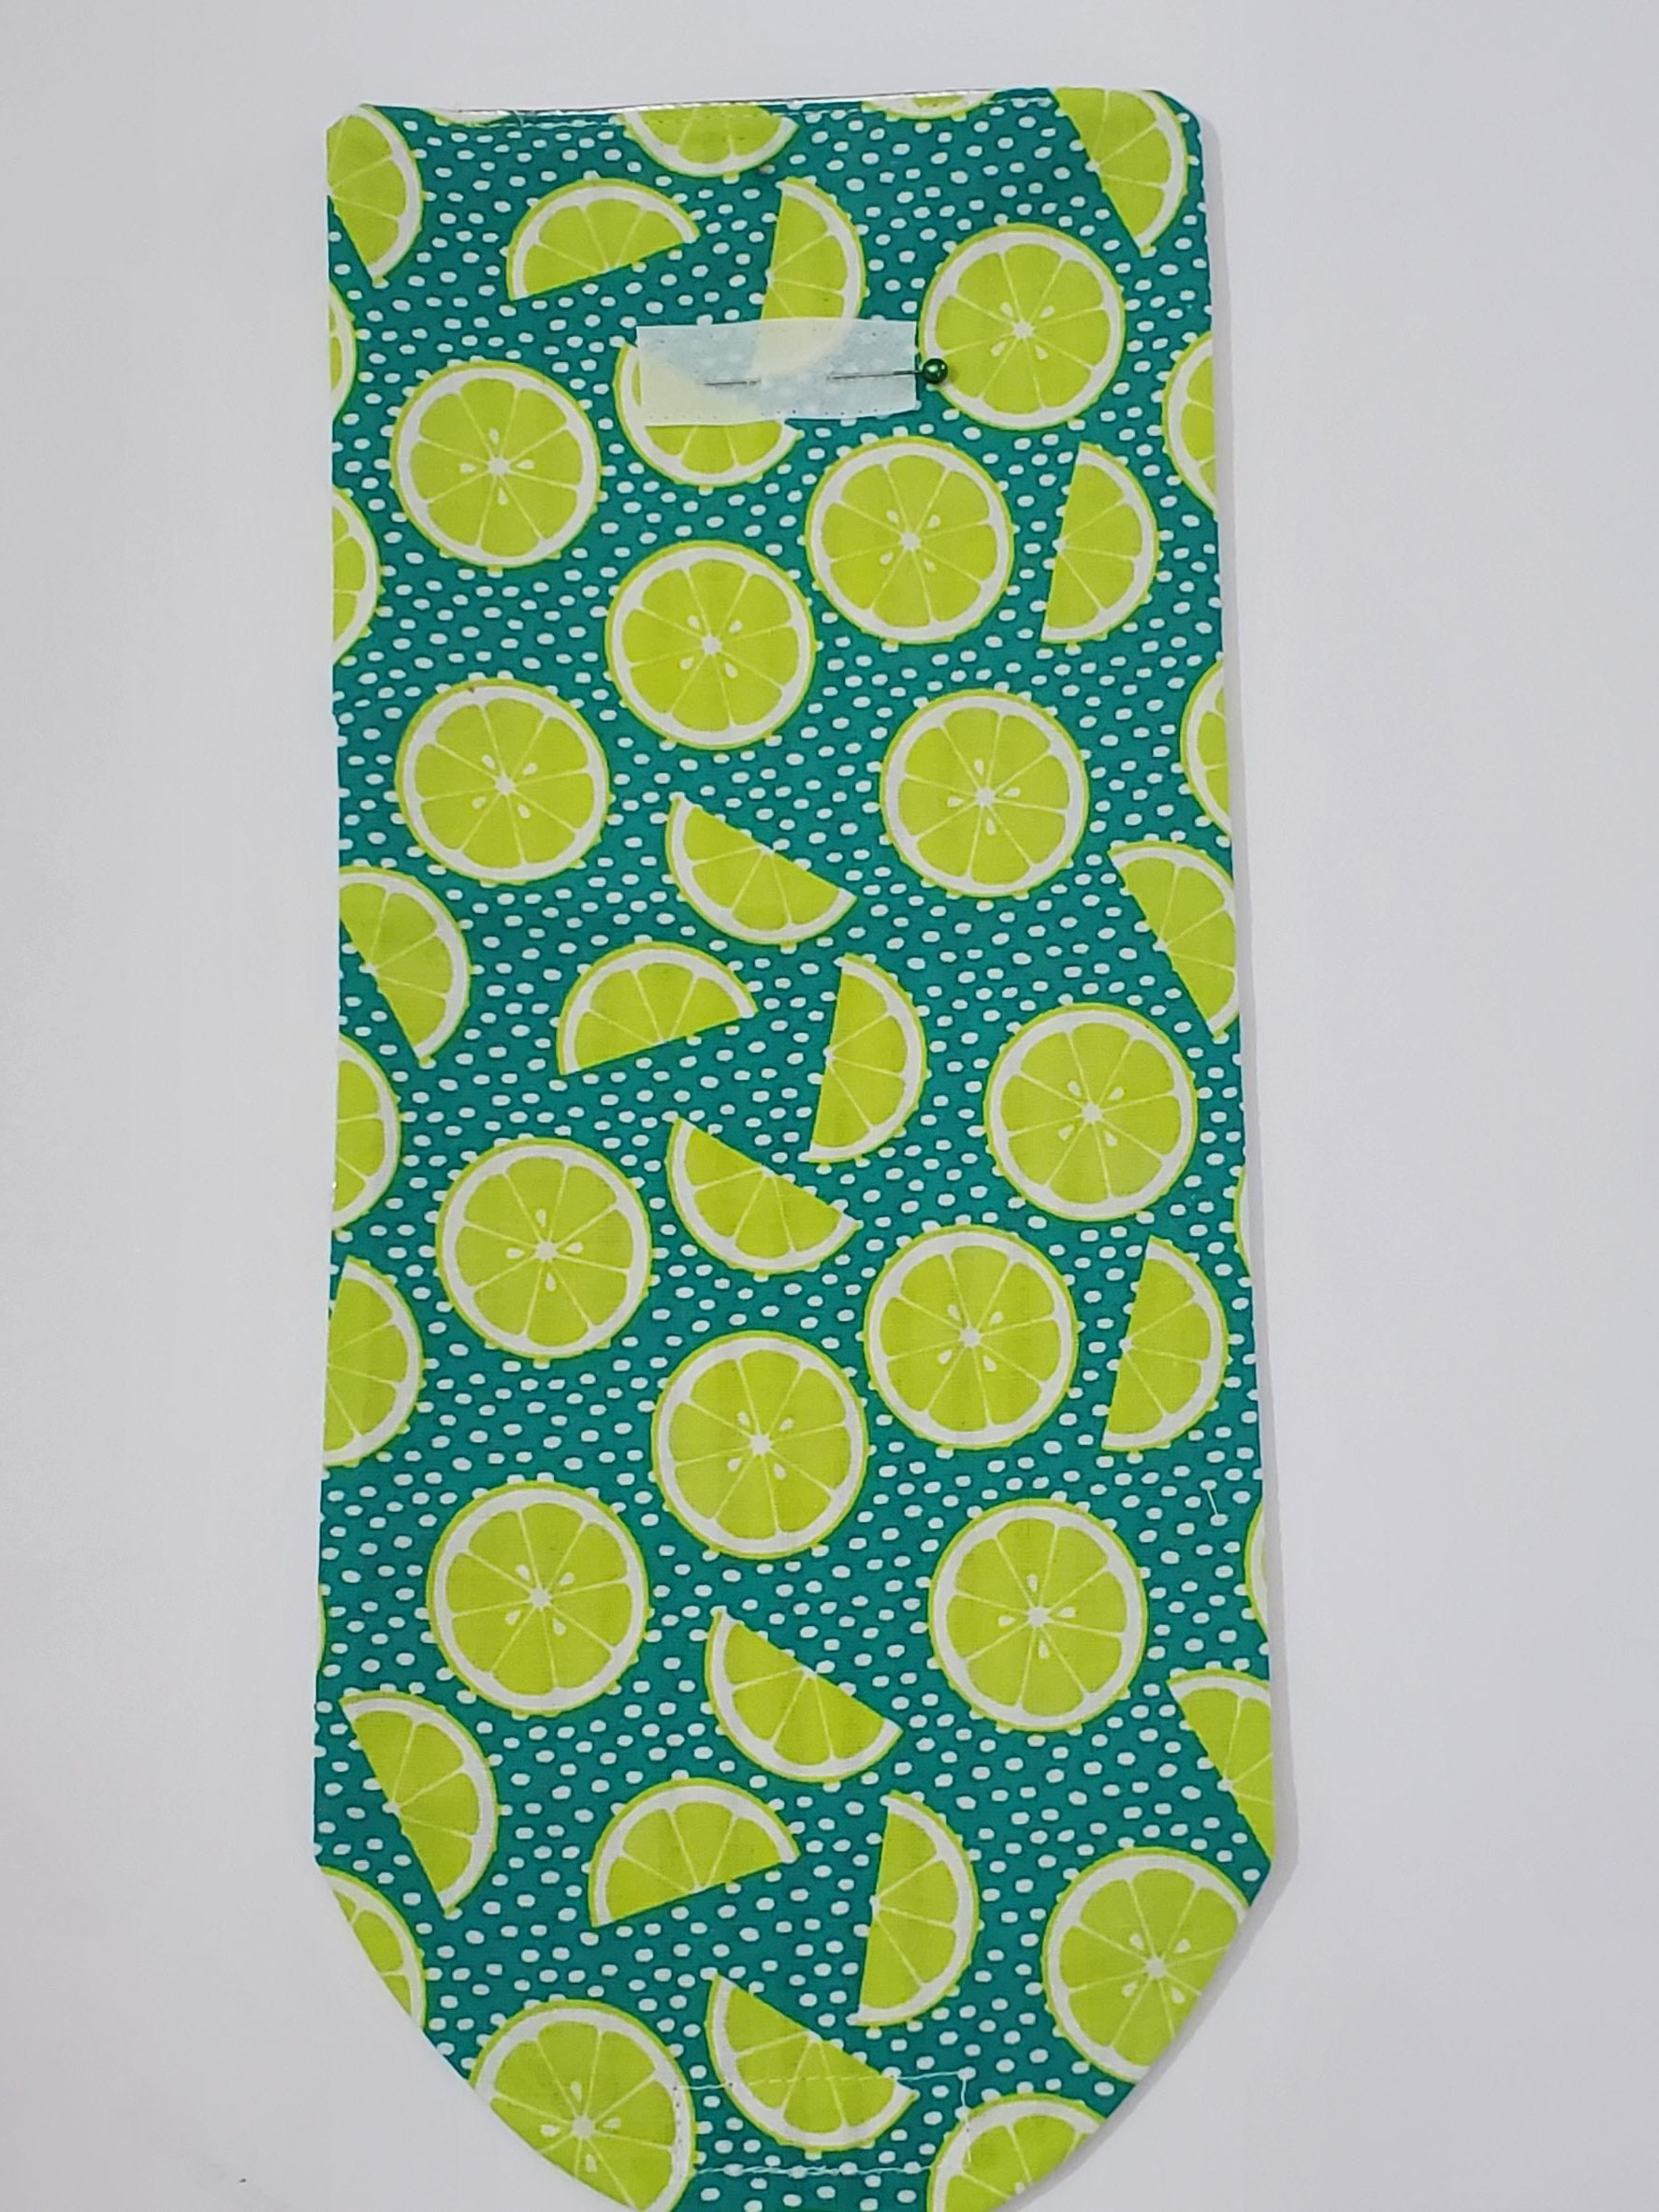
First, print out your snack bag pattern. It will print out on 2 pages. Place the line on page 2 on top of the line on page 1 and tape in place. Then, cut out your pattern on the outside lines. Disregard the part in my picture at the bottom where it says “hem allowance”. That won’t show up on your pattern when you print it because I made a small change. Carry on, it will all be alright 😉
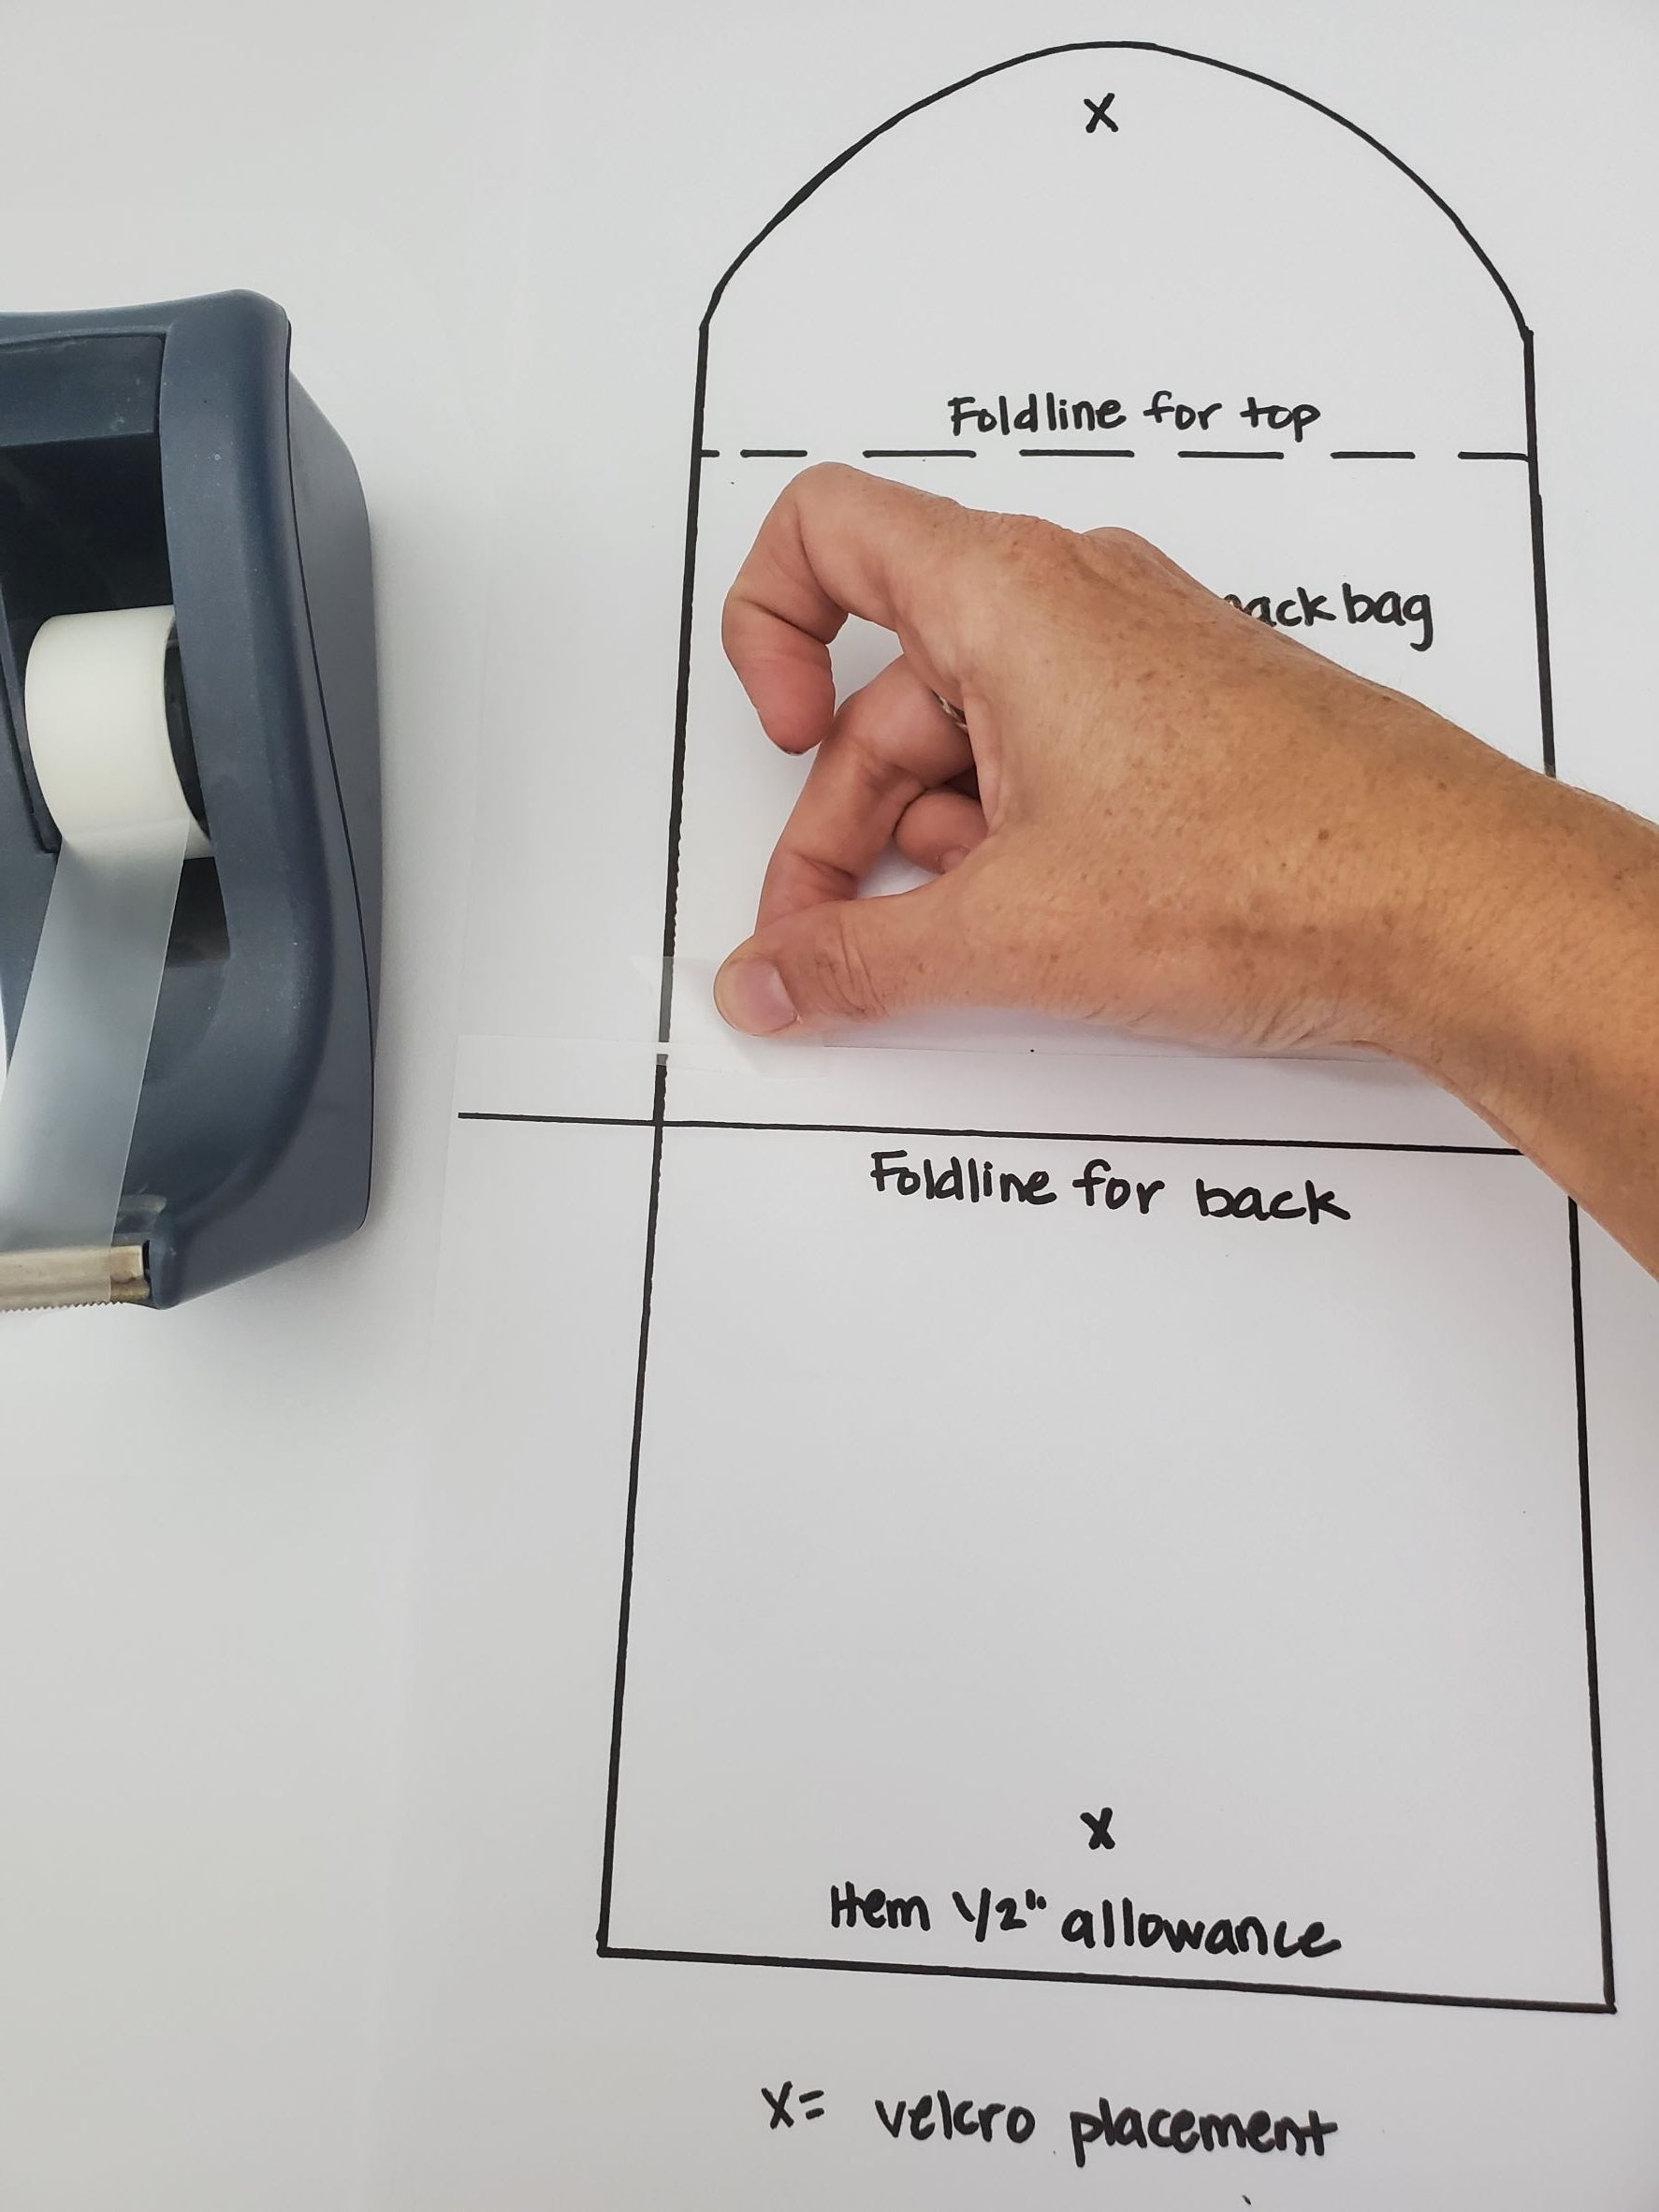
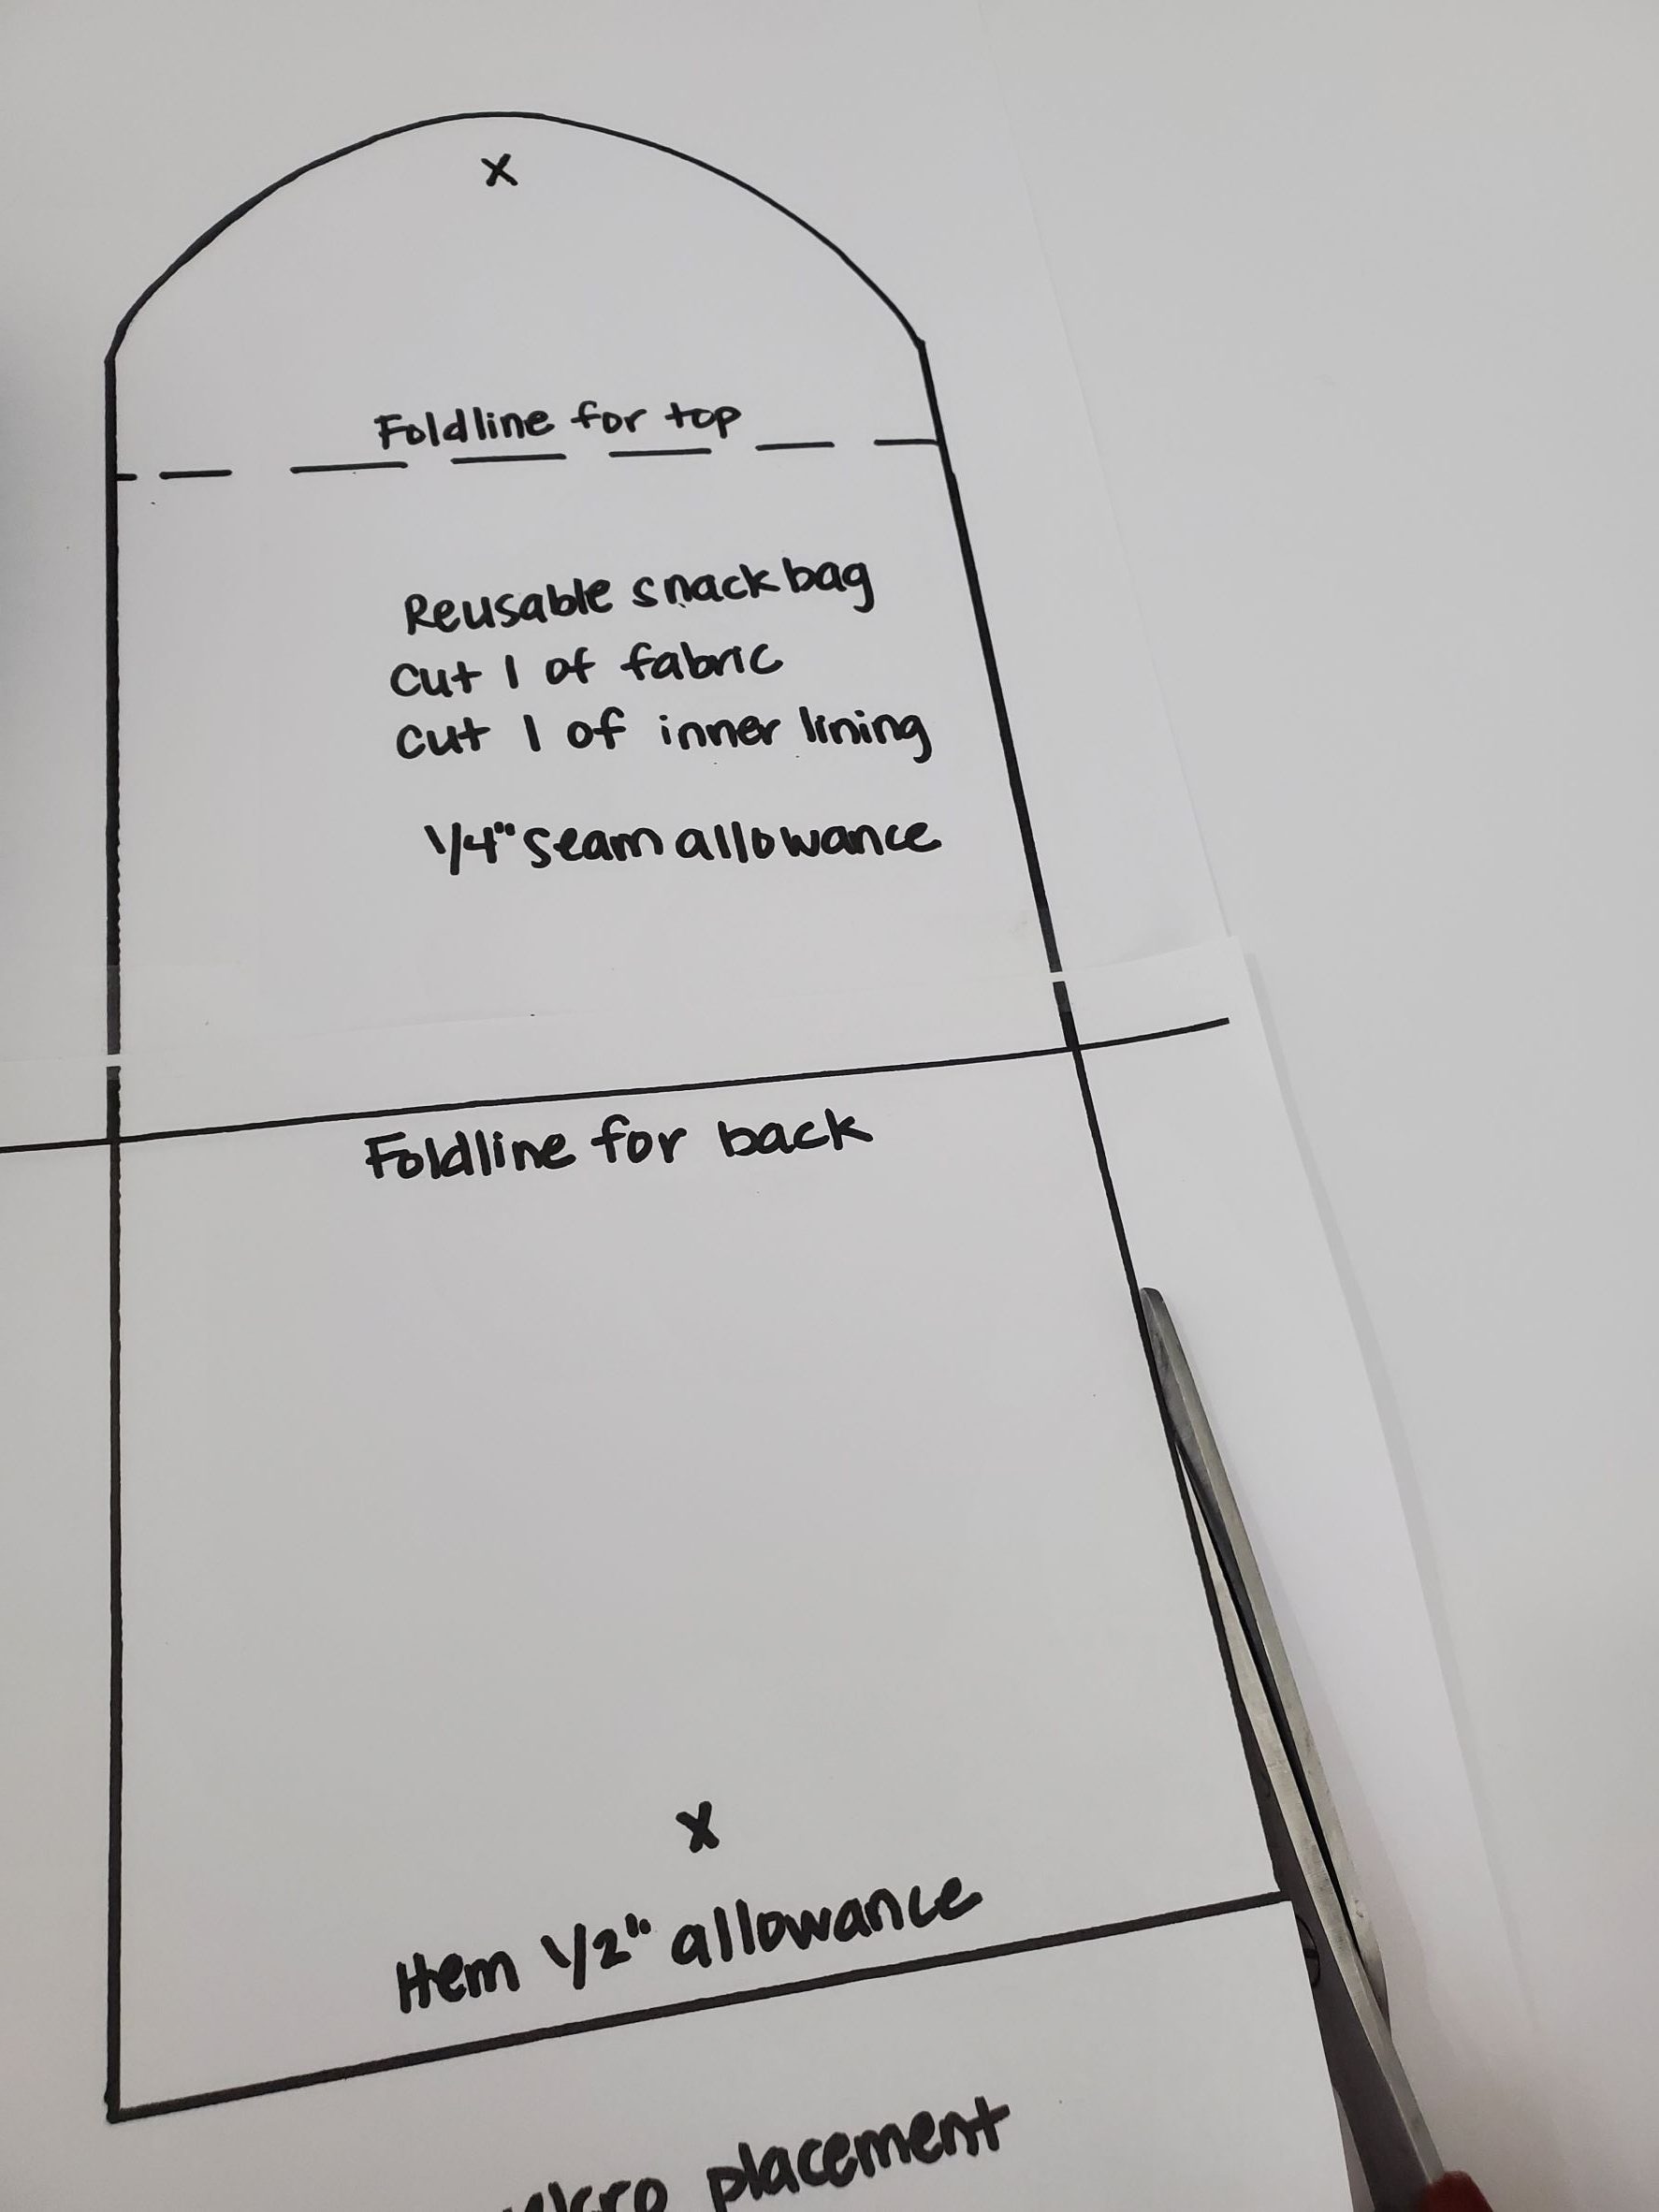
Cut out 1 outer fabric piece, and 1 lining piece. You can choose to interface or not to interface; the choice is up to you. For the bag in this tutorial, I did not interface and the bag is perfectly fine. Interfacing it will make it a little stiffer, so it just depends on what you want. (I did make other bags with the interfacing…and I can’t decide which ones I prefer! Ha ha). With a fabric pencil/pen, mark where your fold line is on the outer fabric (you can mark the sides without drawing an entire line across the fabric).
Place your outer bag piece to your lining, right sides together, and match all of your raw edges, clipping into place. Starting about 1/3 of the way in, on the bottom (straight) edge, begin your stitch, pivoting on the corners and stitching around the entire bag. Stop your stitching a few inches away from where you began, leaving an opening to turn the bag.
*Note: you are using a 1/4″ seam allowance on this project.
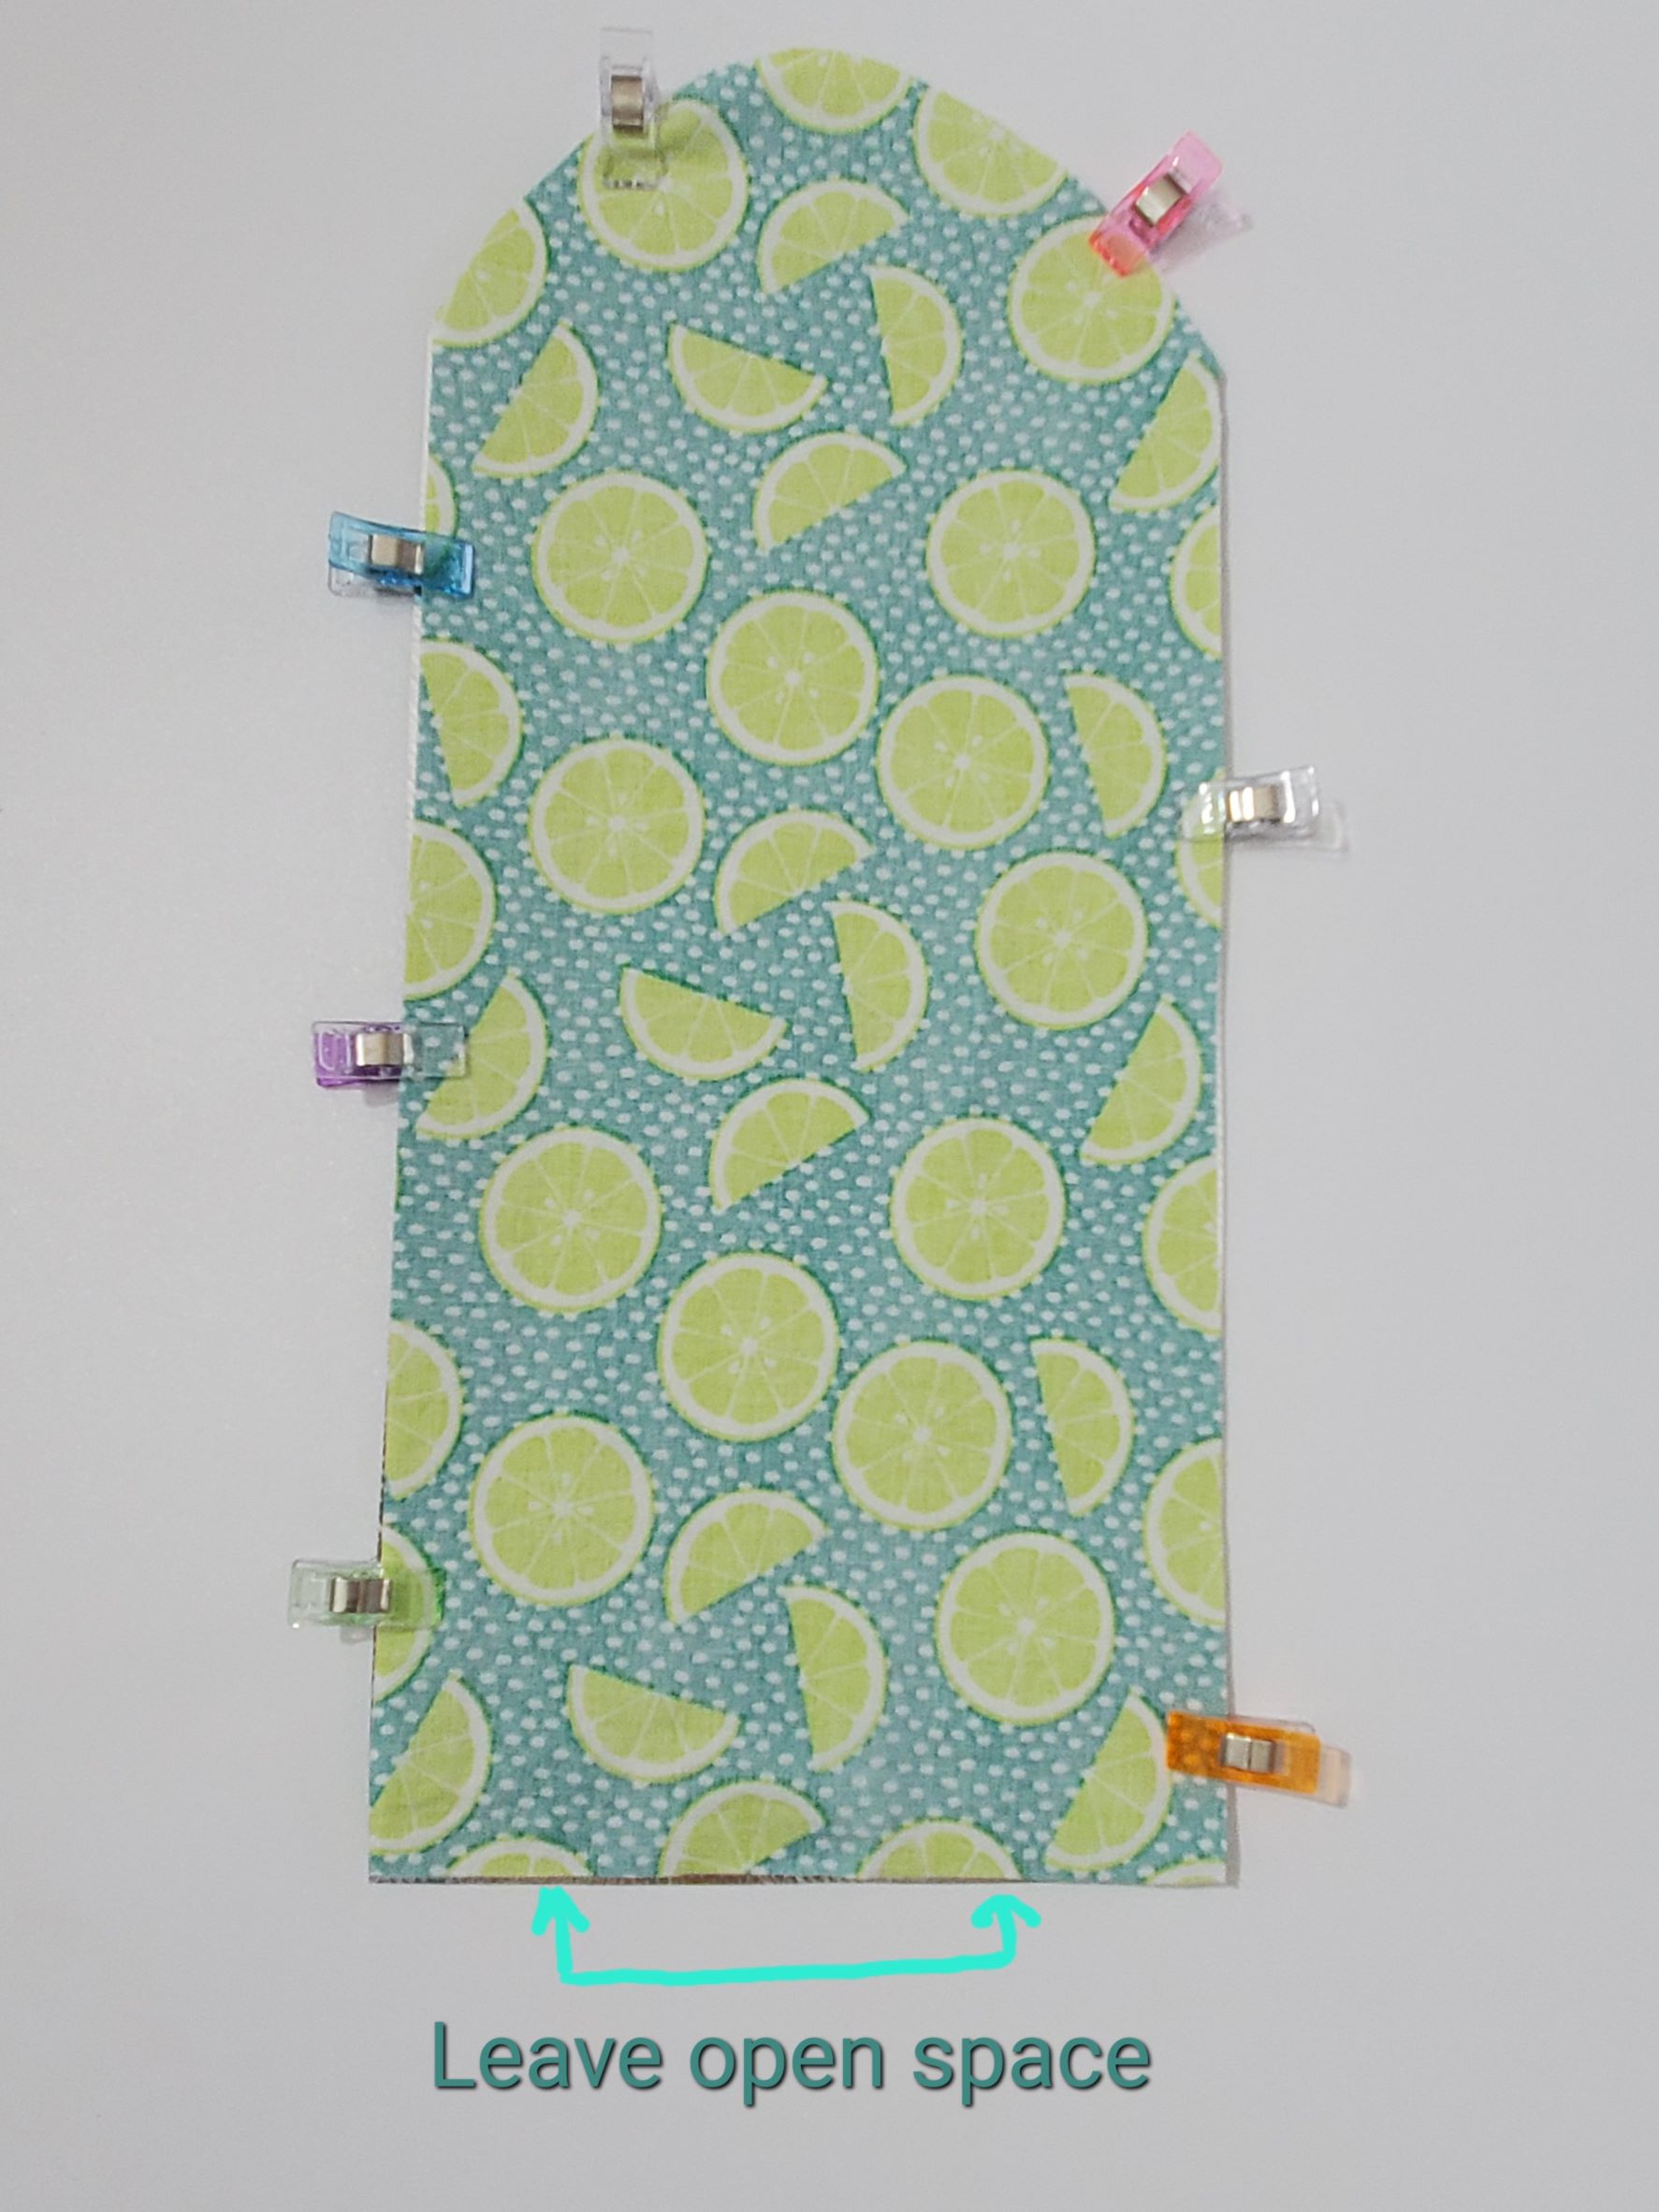
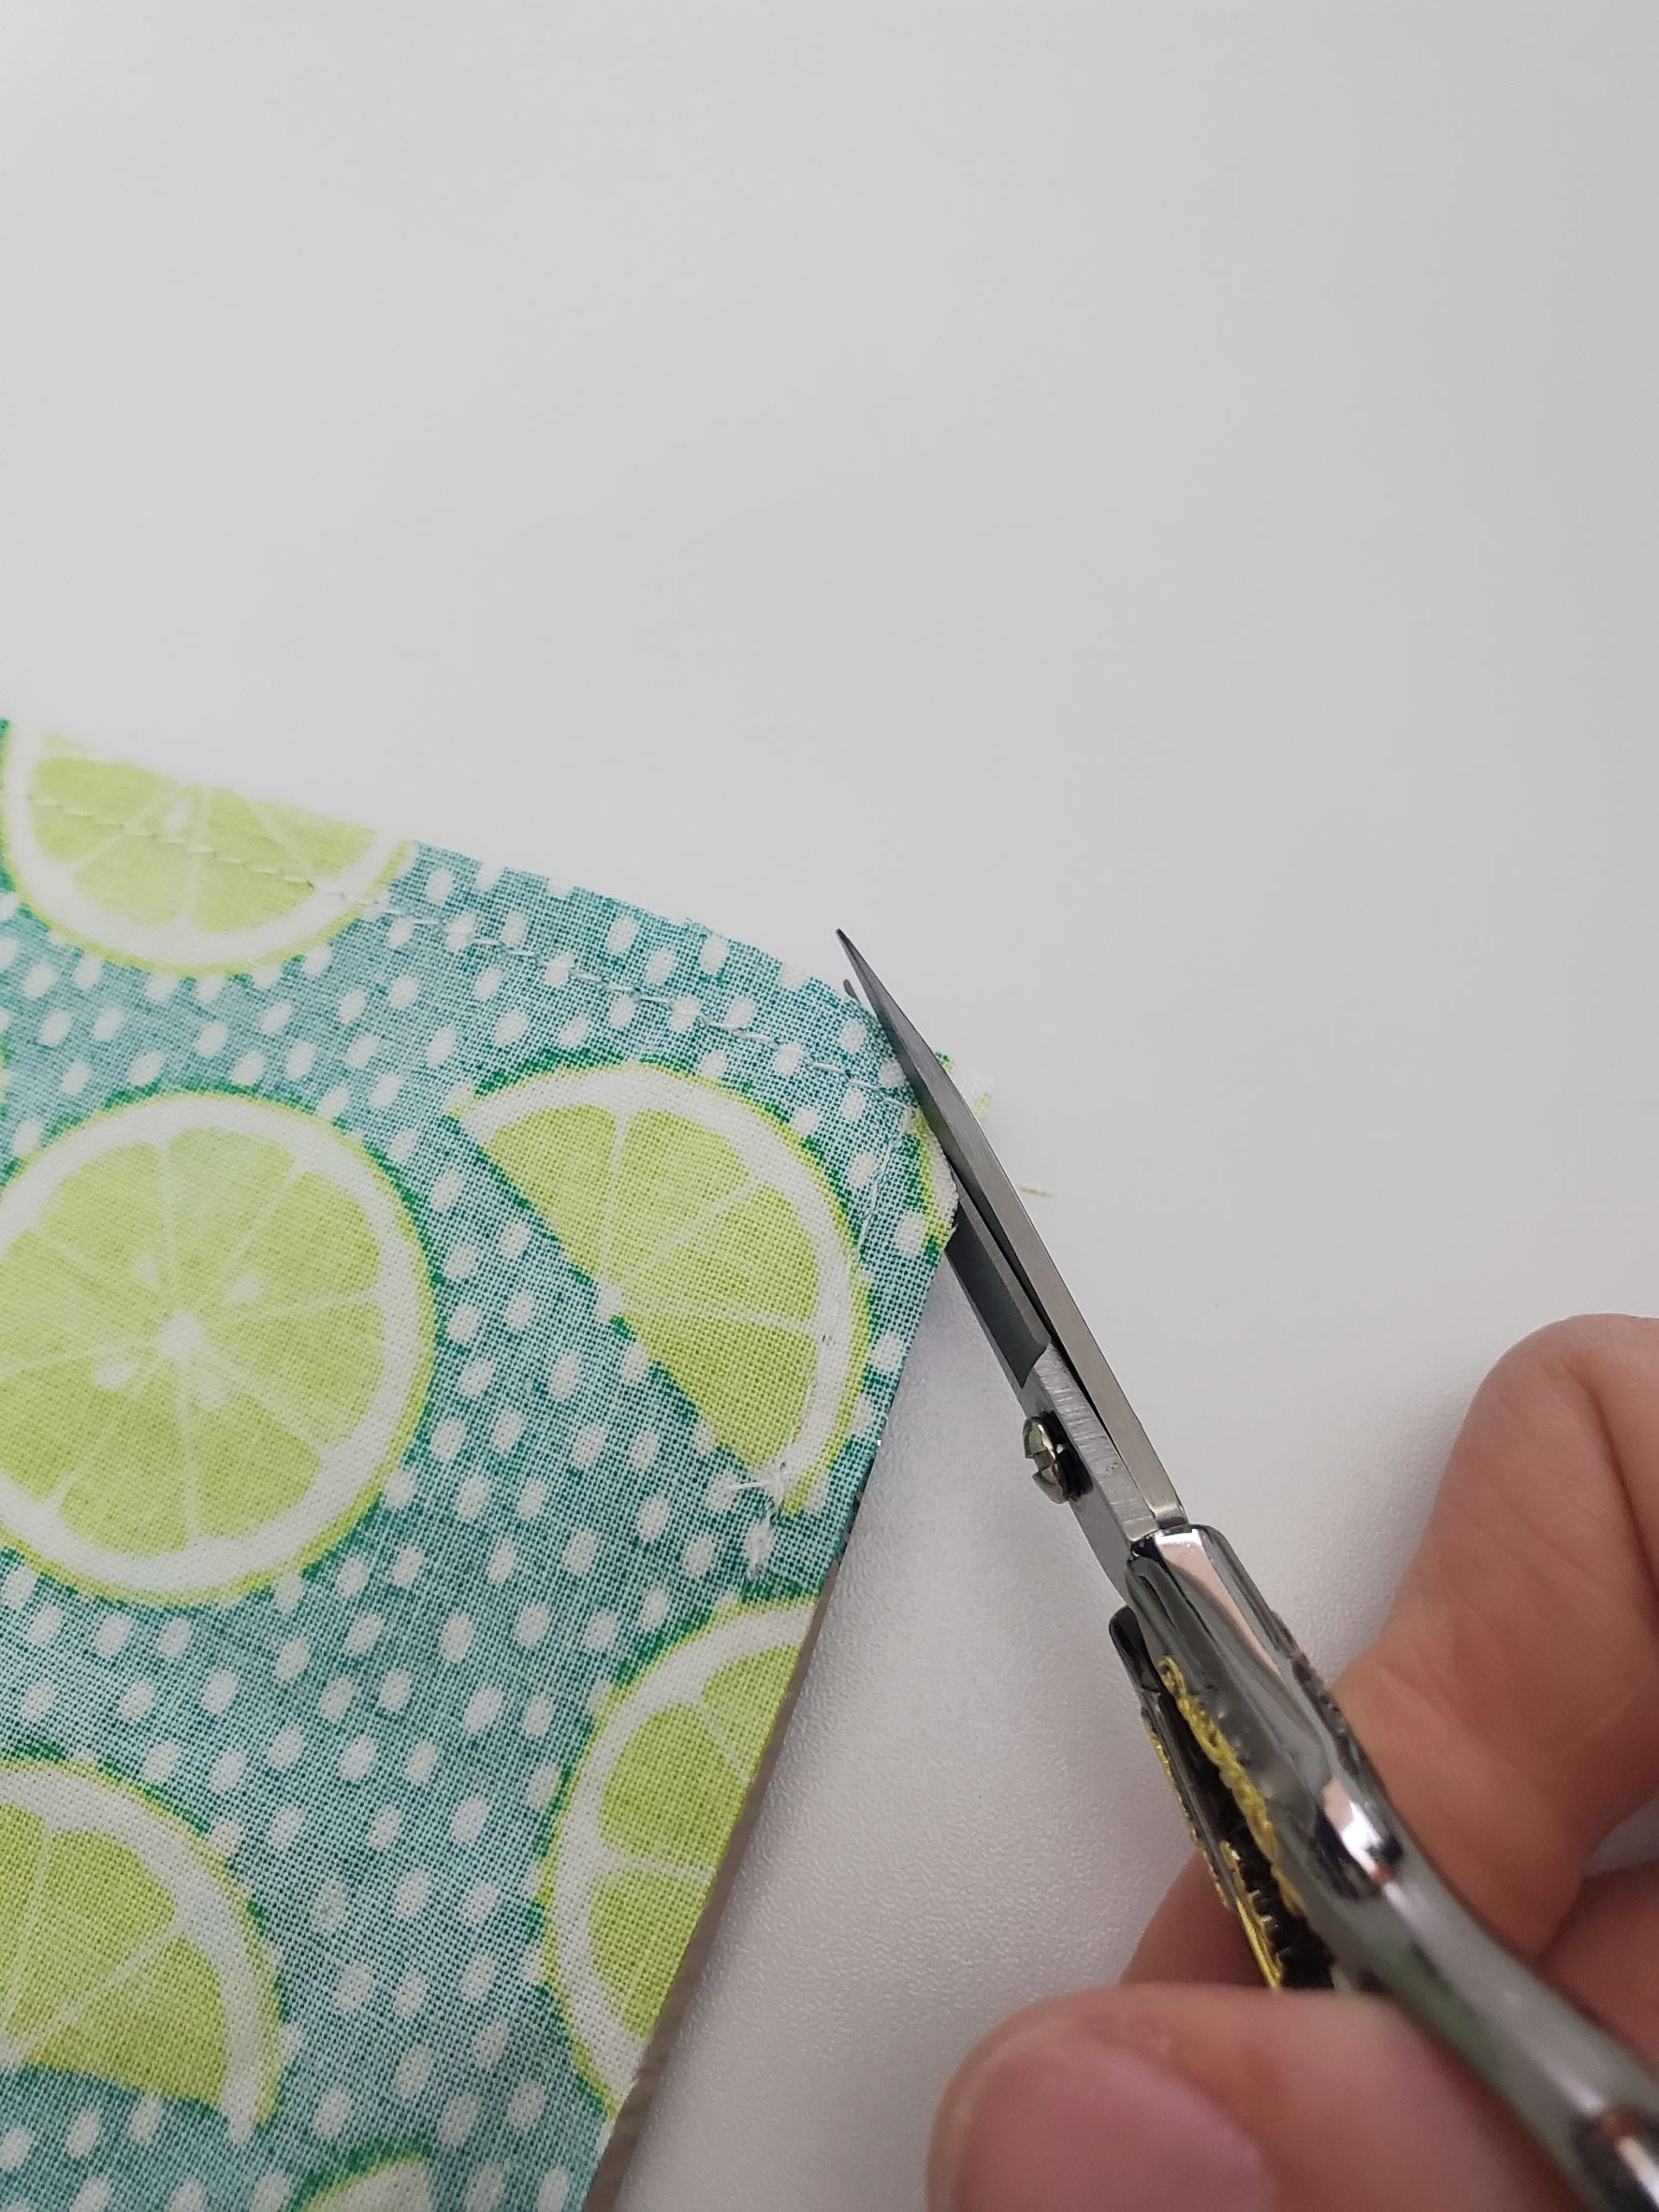
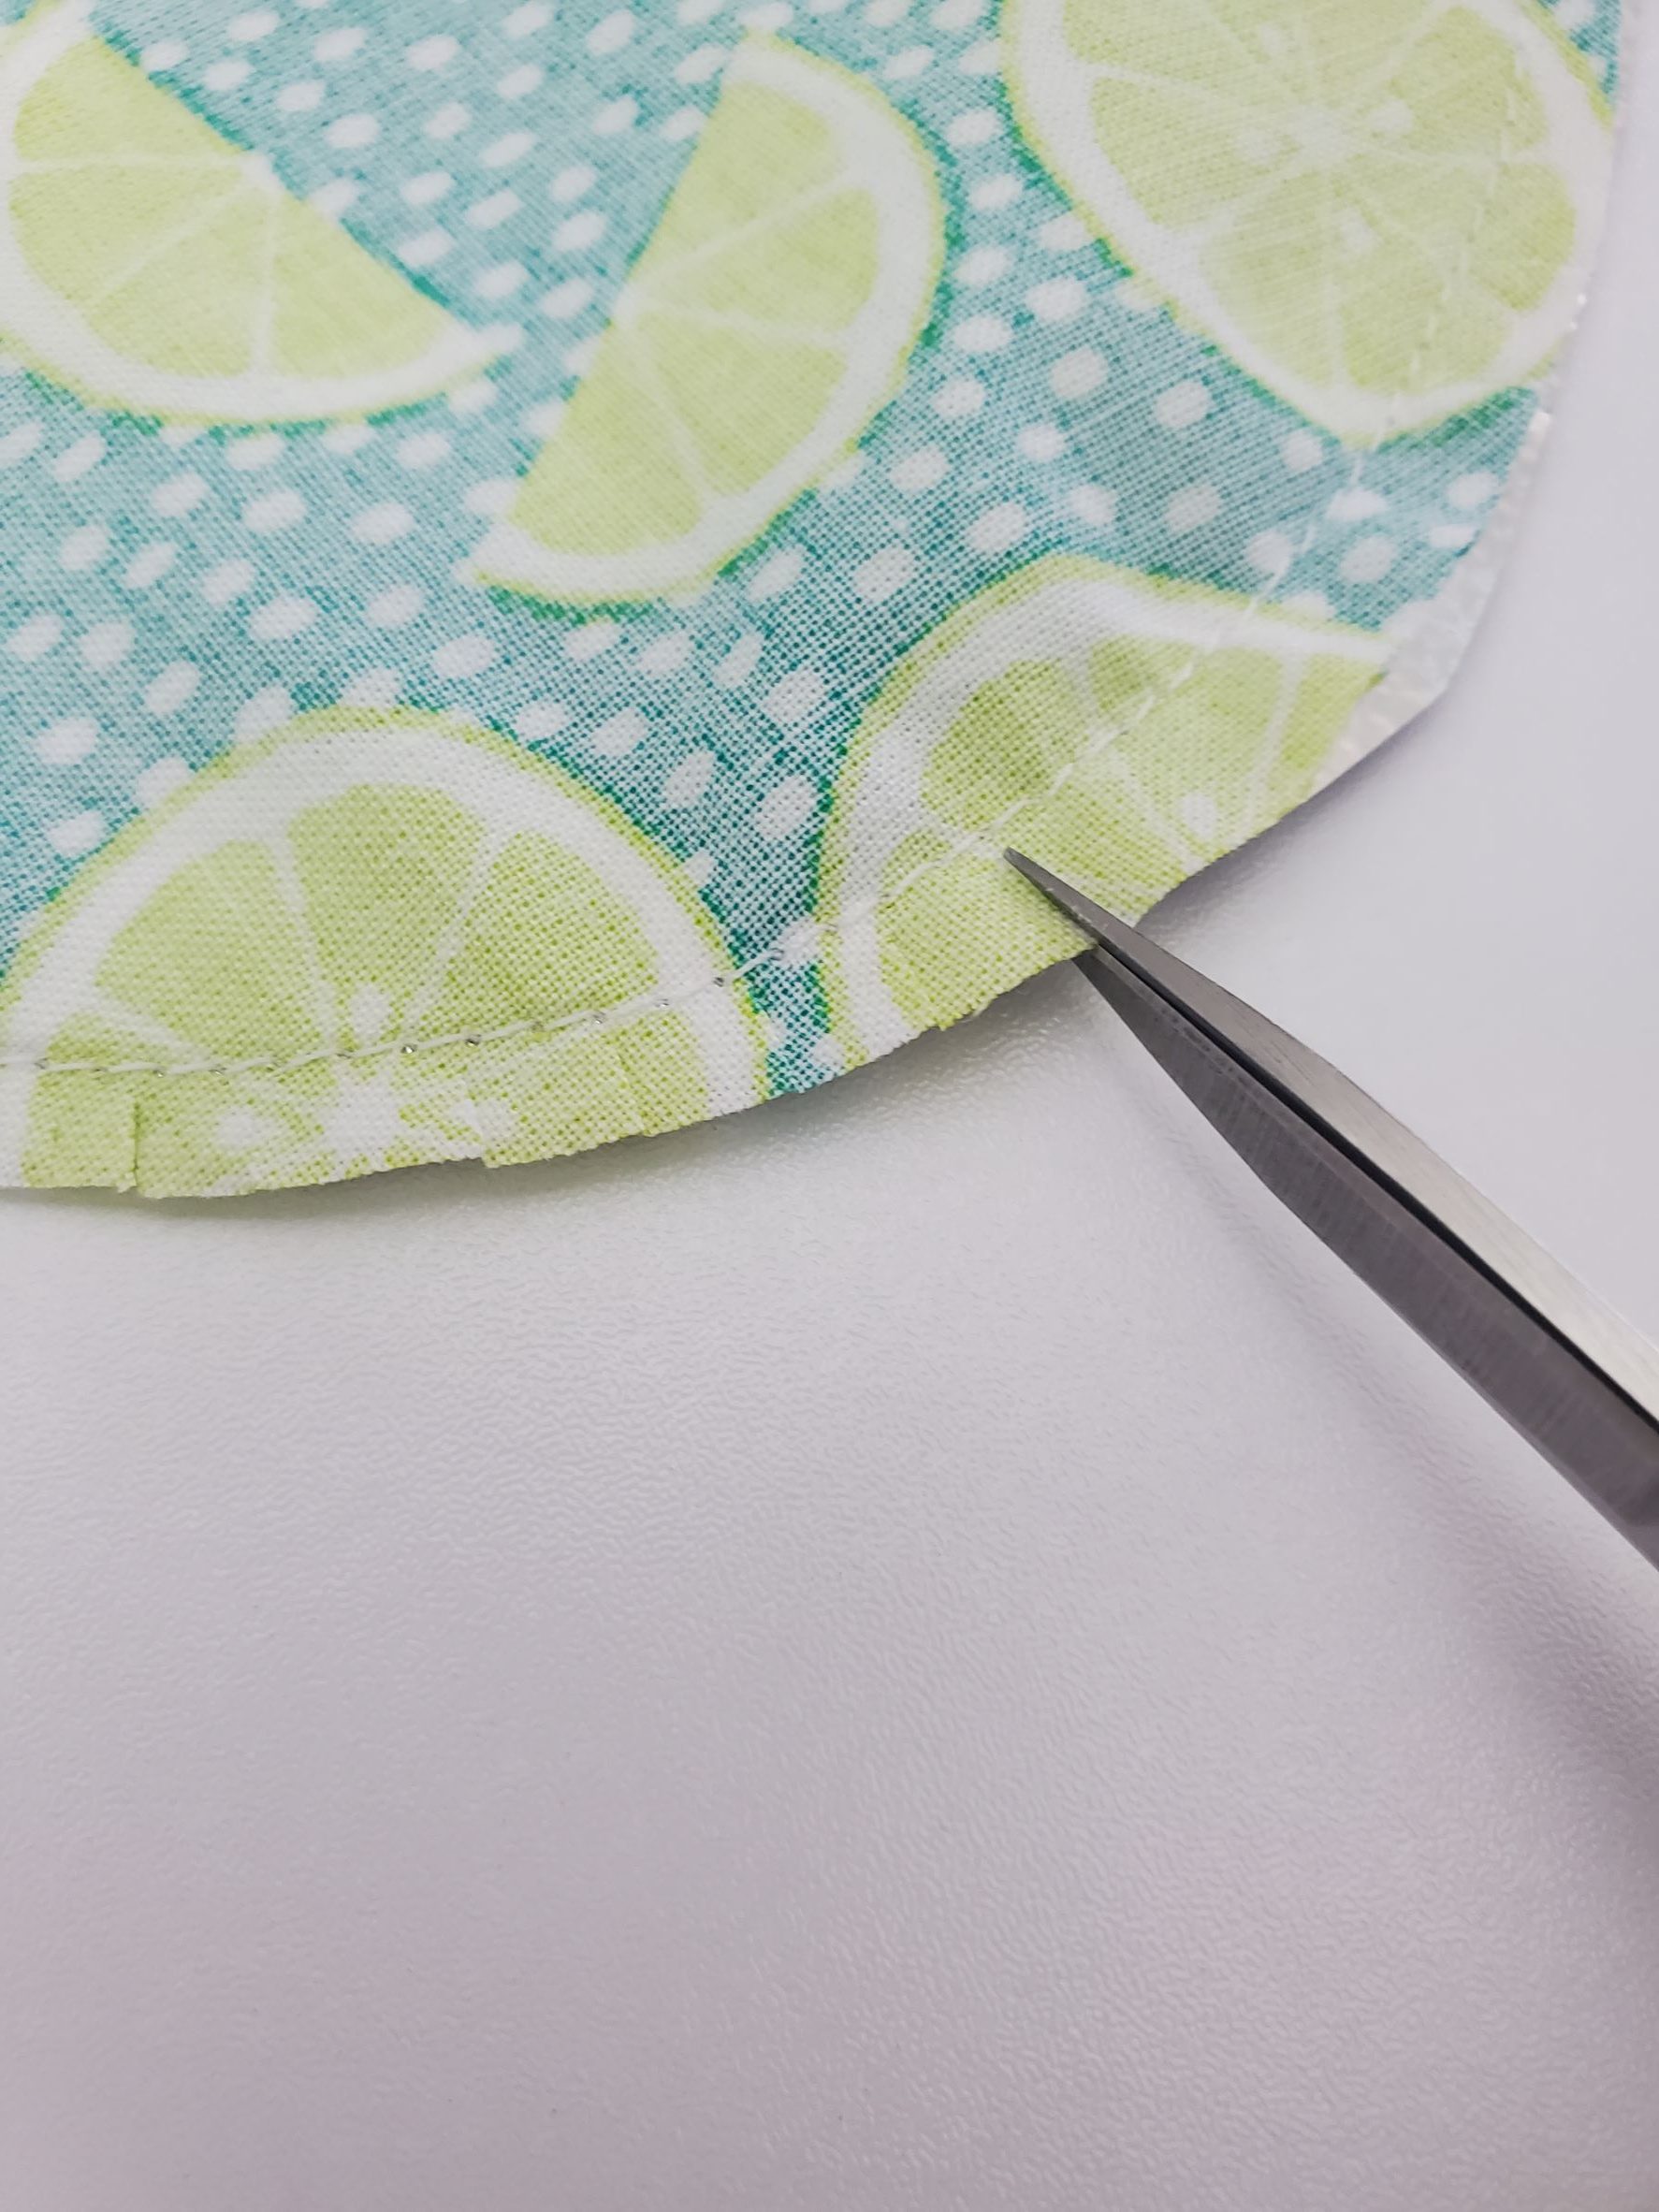
Clip your corners to reduce bulk when the bag is turned. On the top curved edge, clip to (but not through) the seam. This will help your curved edge to lay flat and not pull or twist funny.
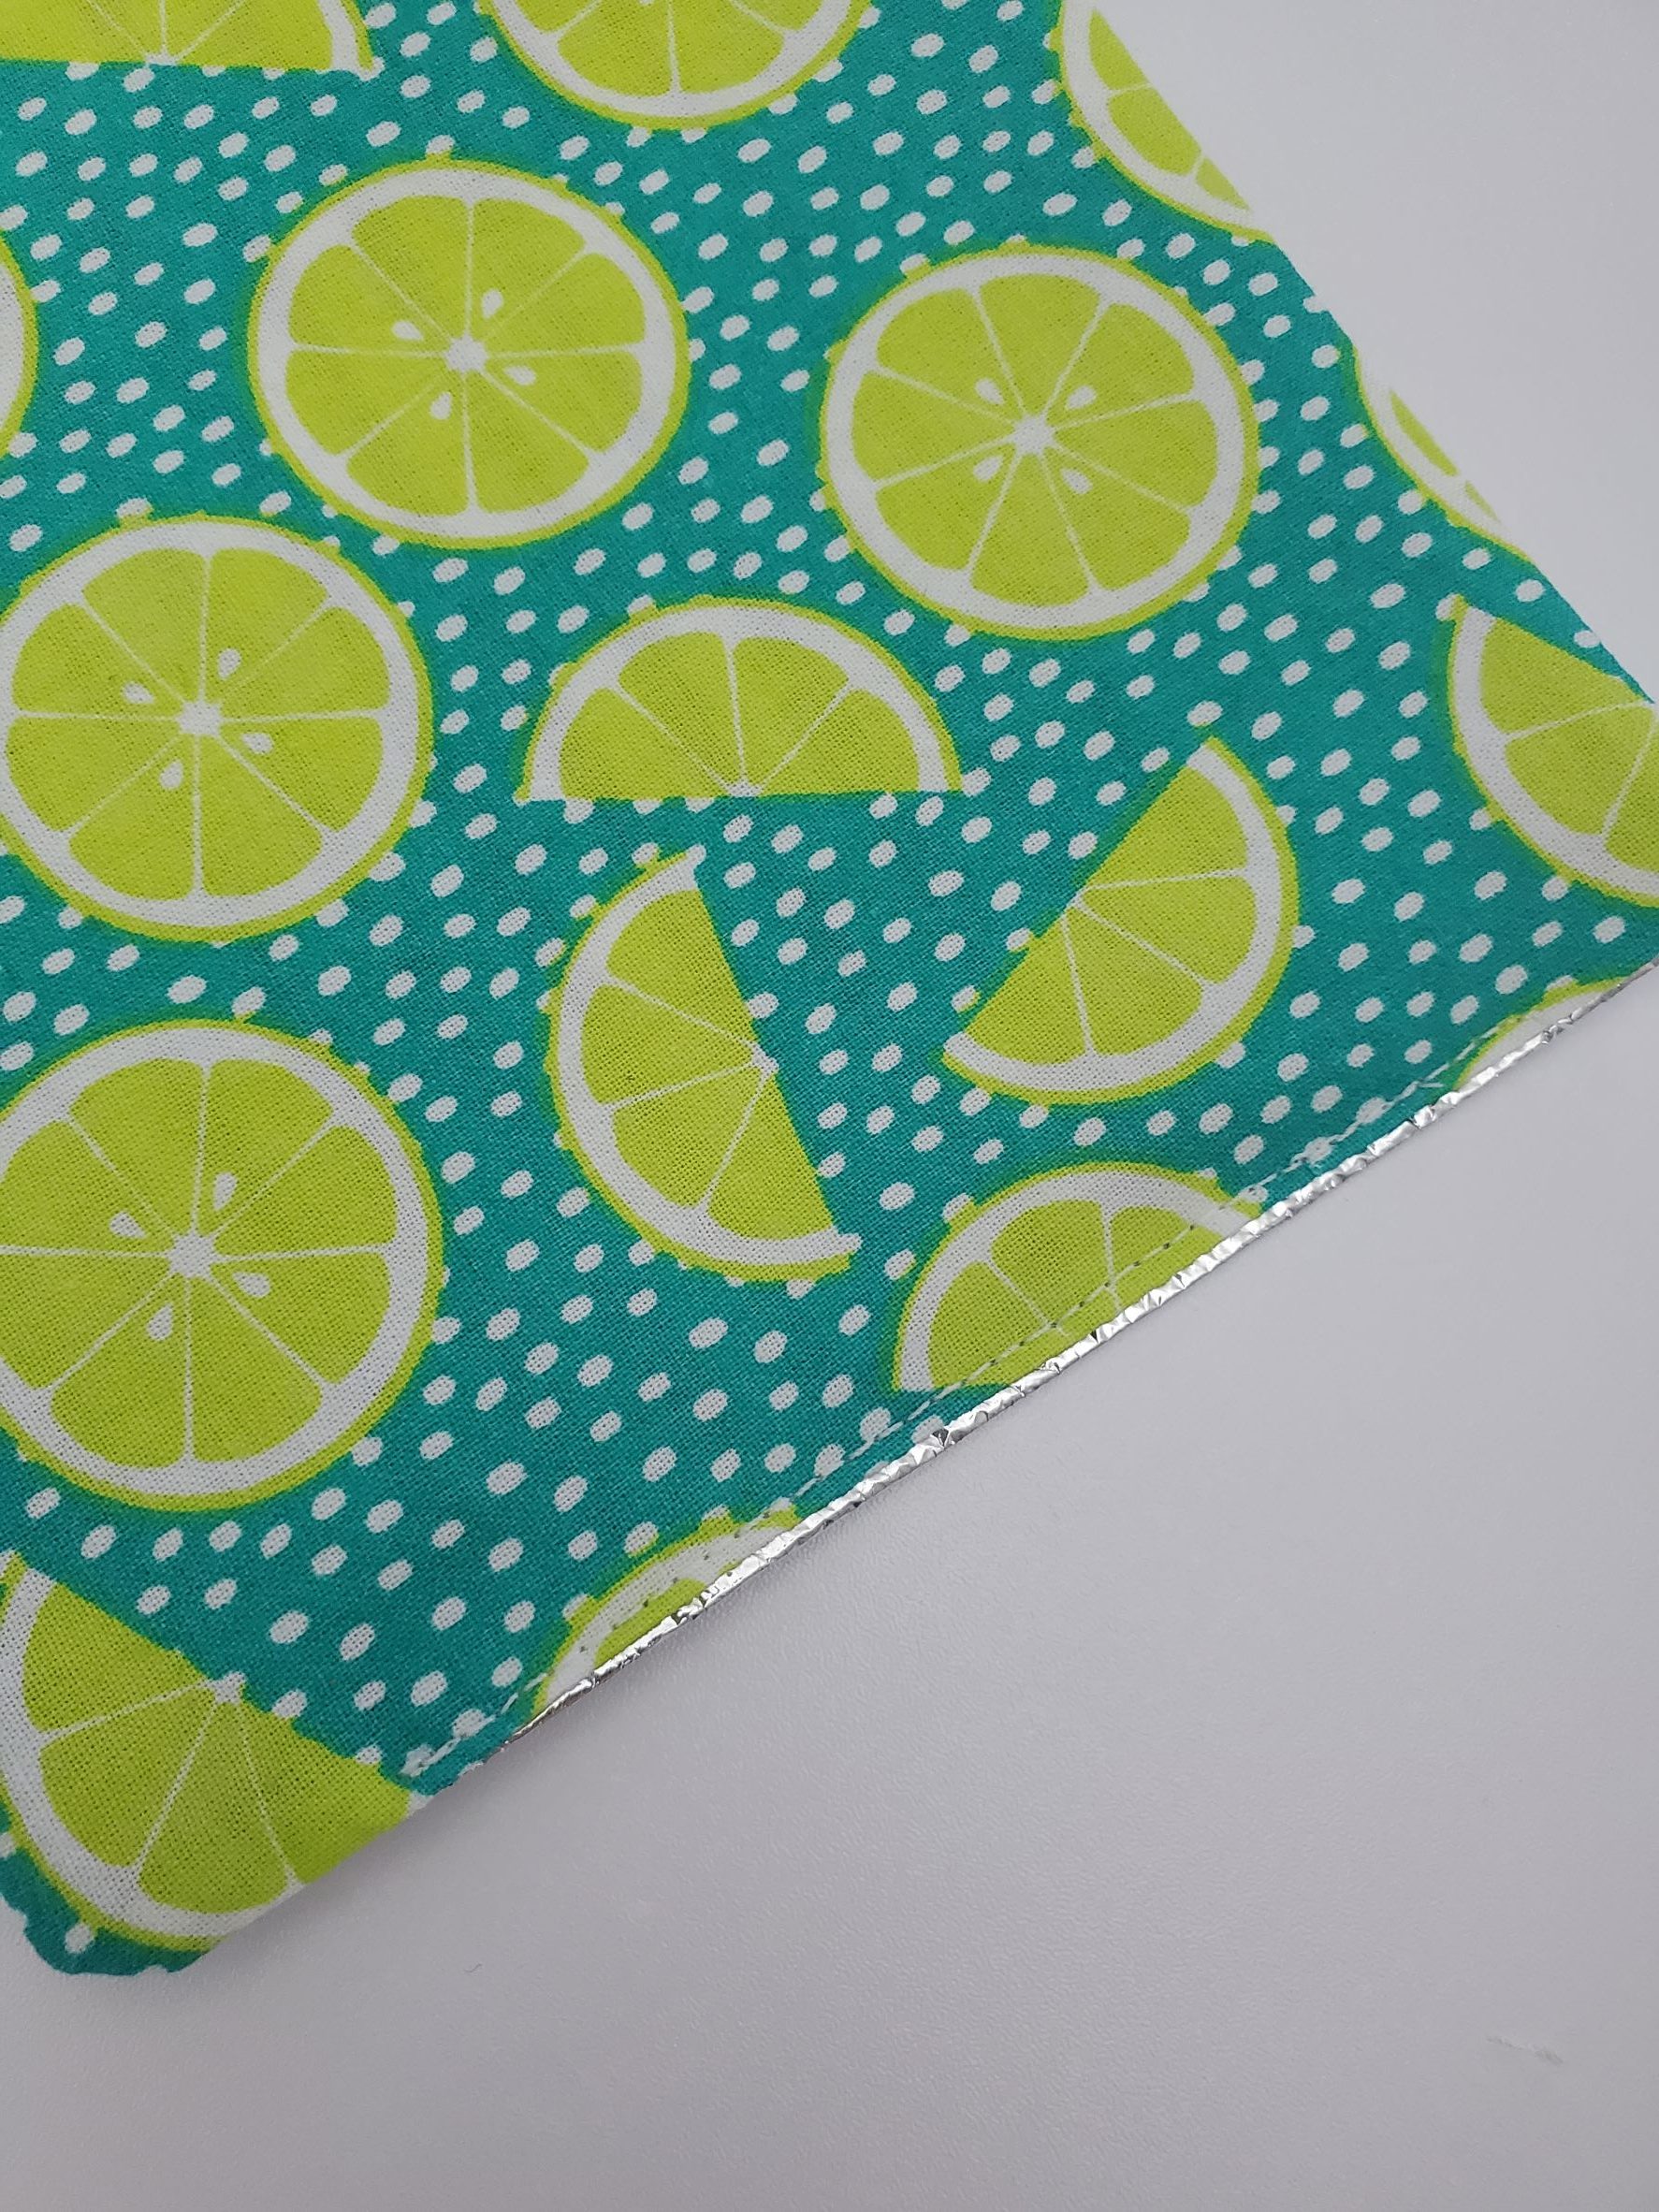
Very carefully, pull your bag through the lining. Fold the raw edges of the opening (at the bottom) to the inside, and stitch close to the folded edge. Press around the bag, on the fabric side (not the lining side).
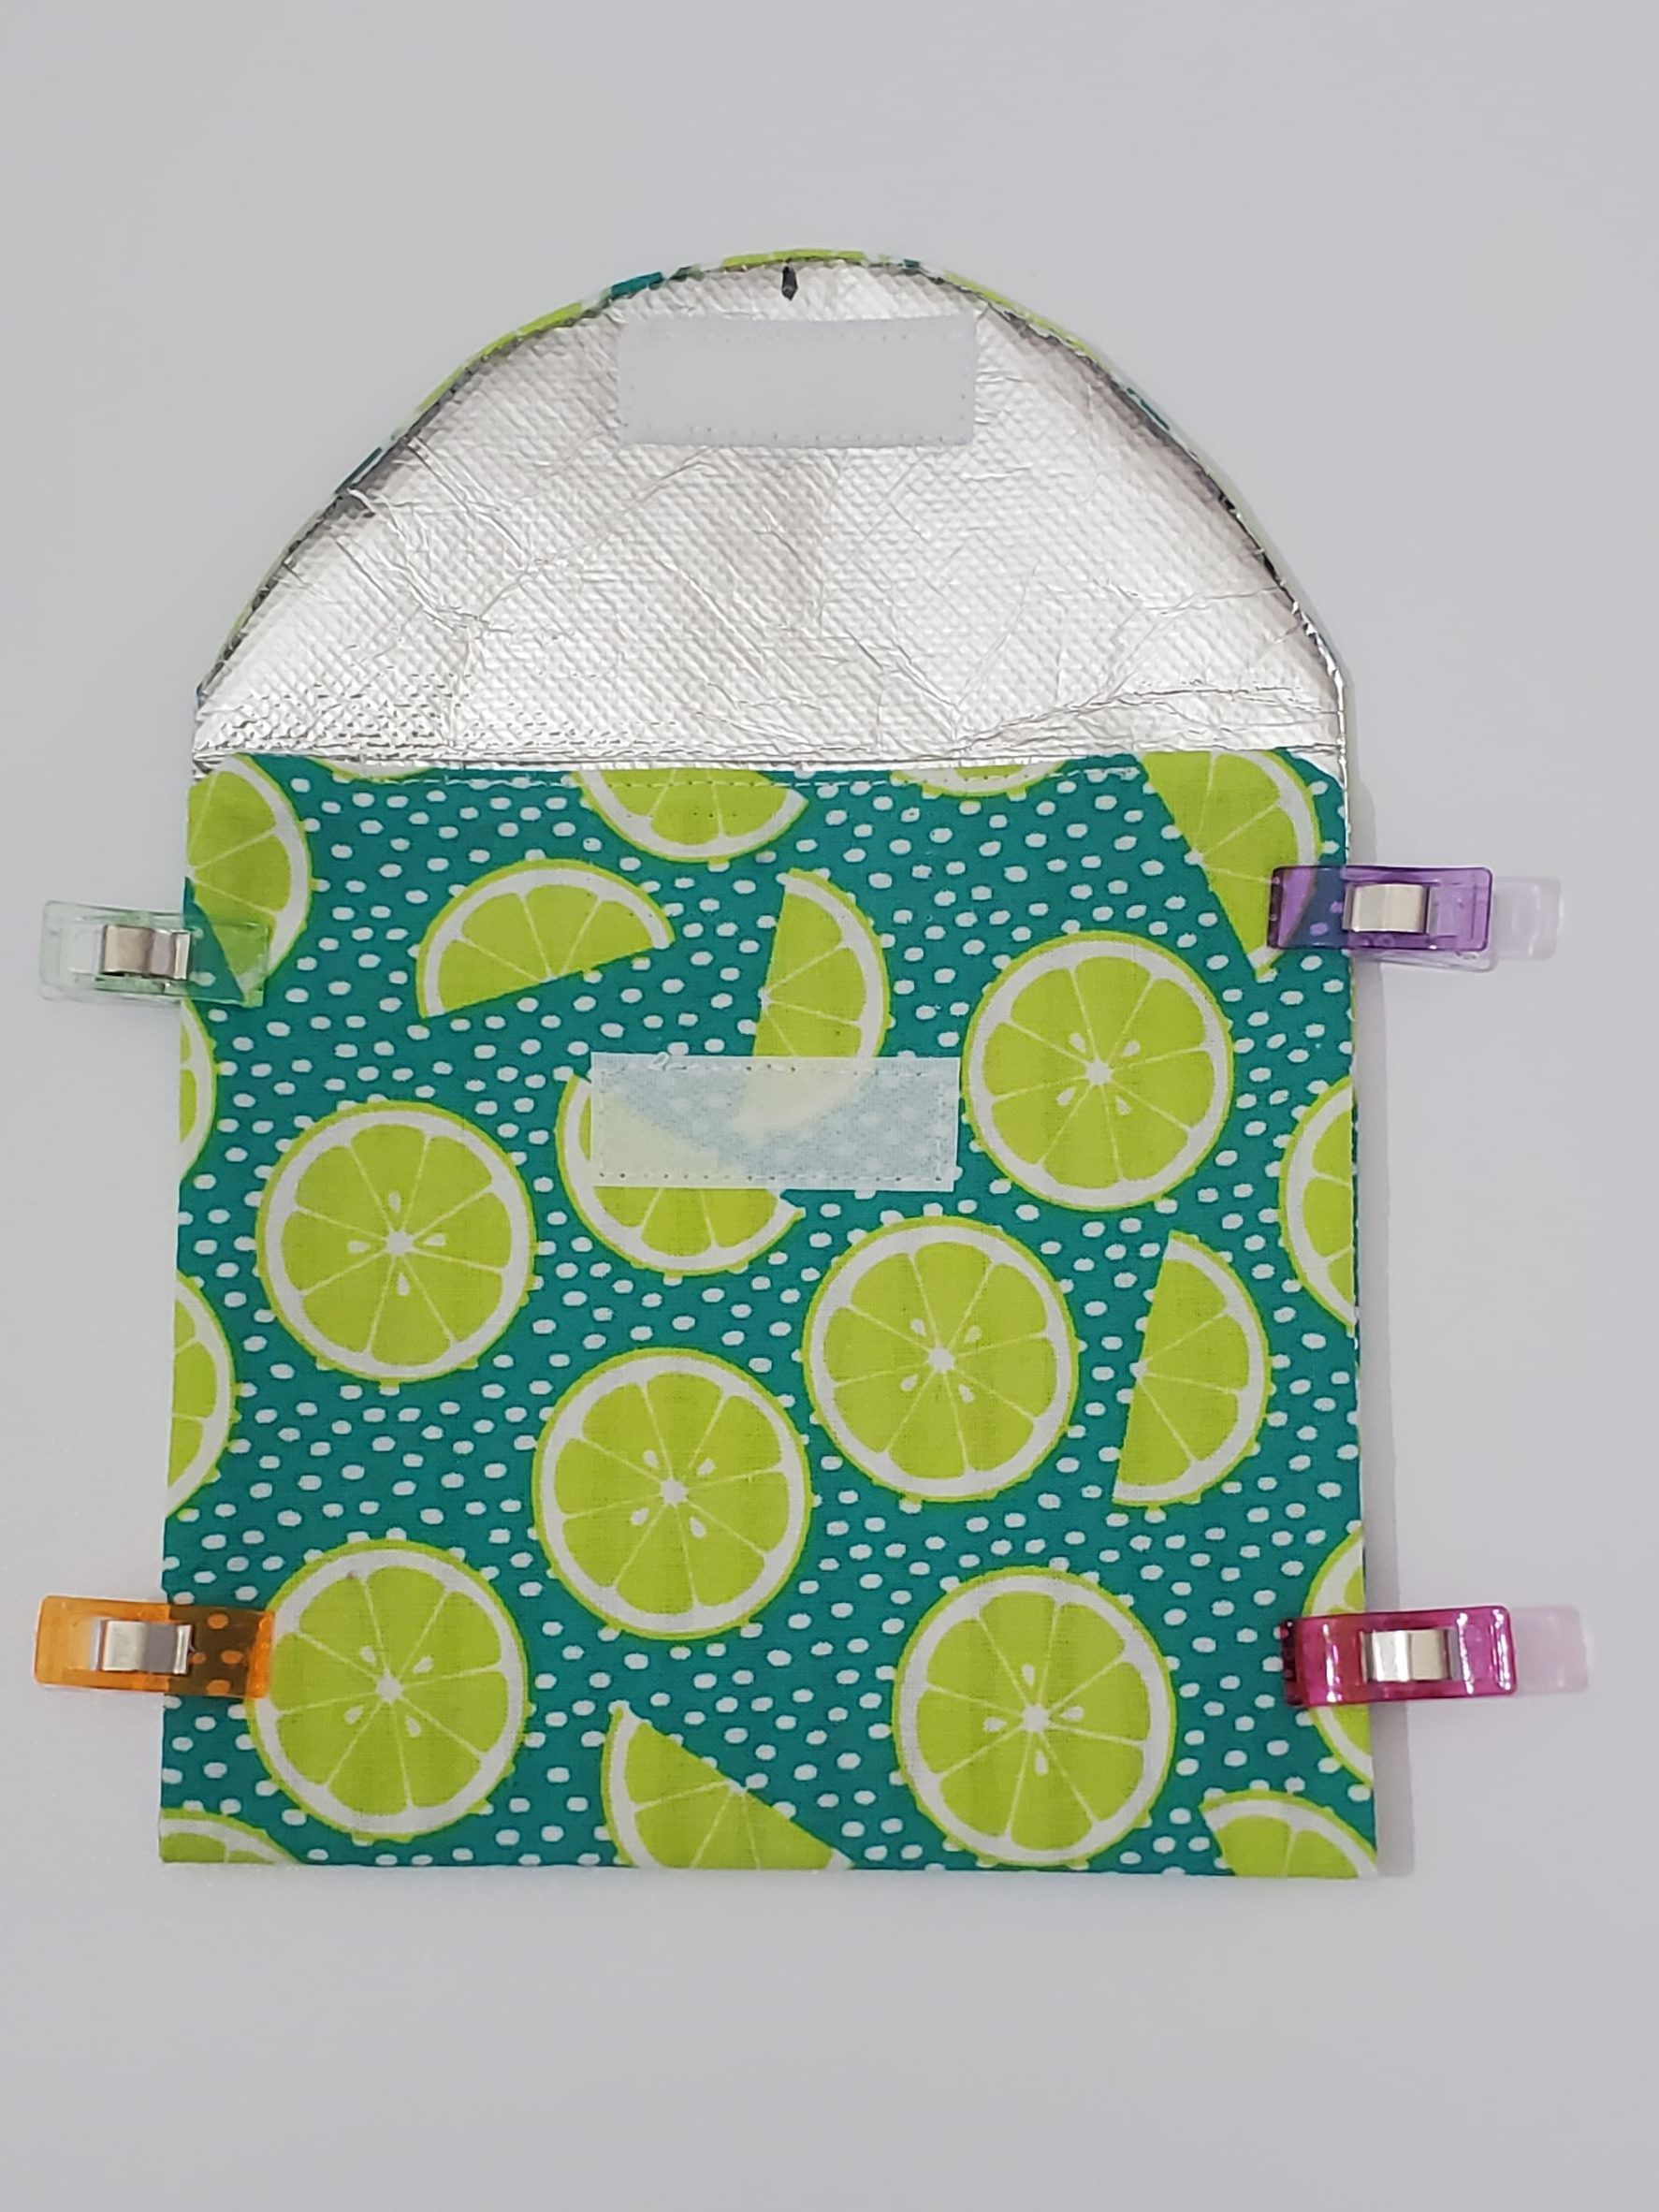
On the top flap (which is the curved edge) place a piece a velcro, about 2″ long, on the lining side. Stich around the velcro.
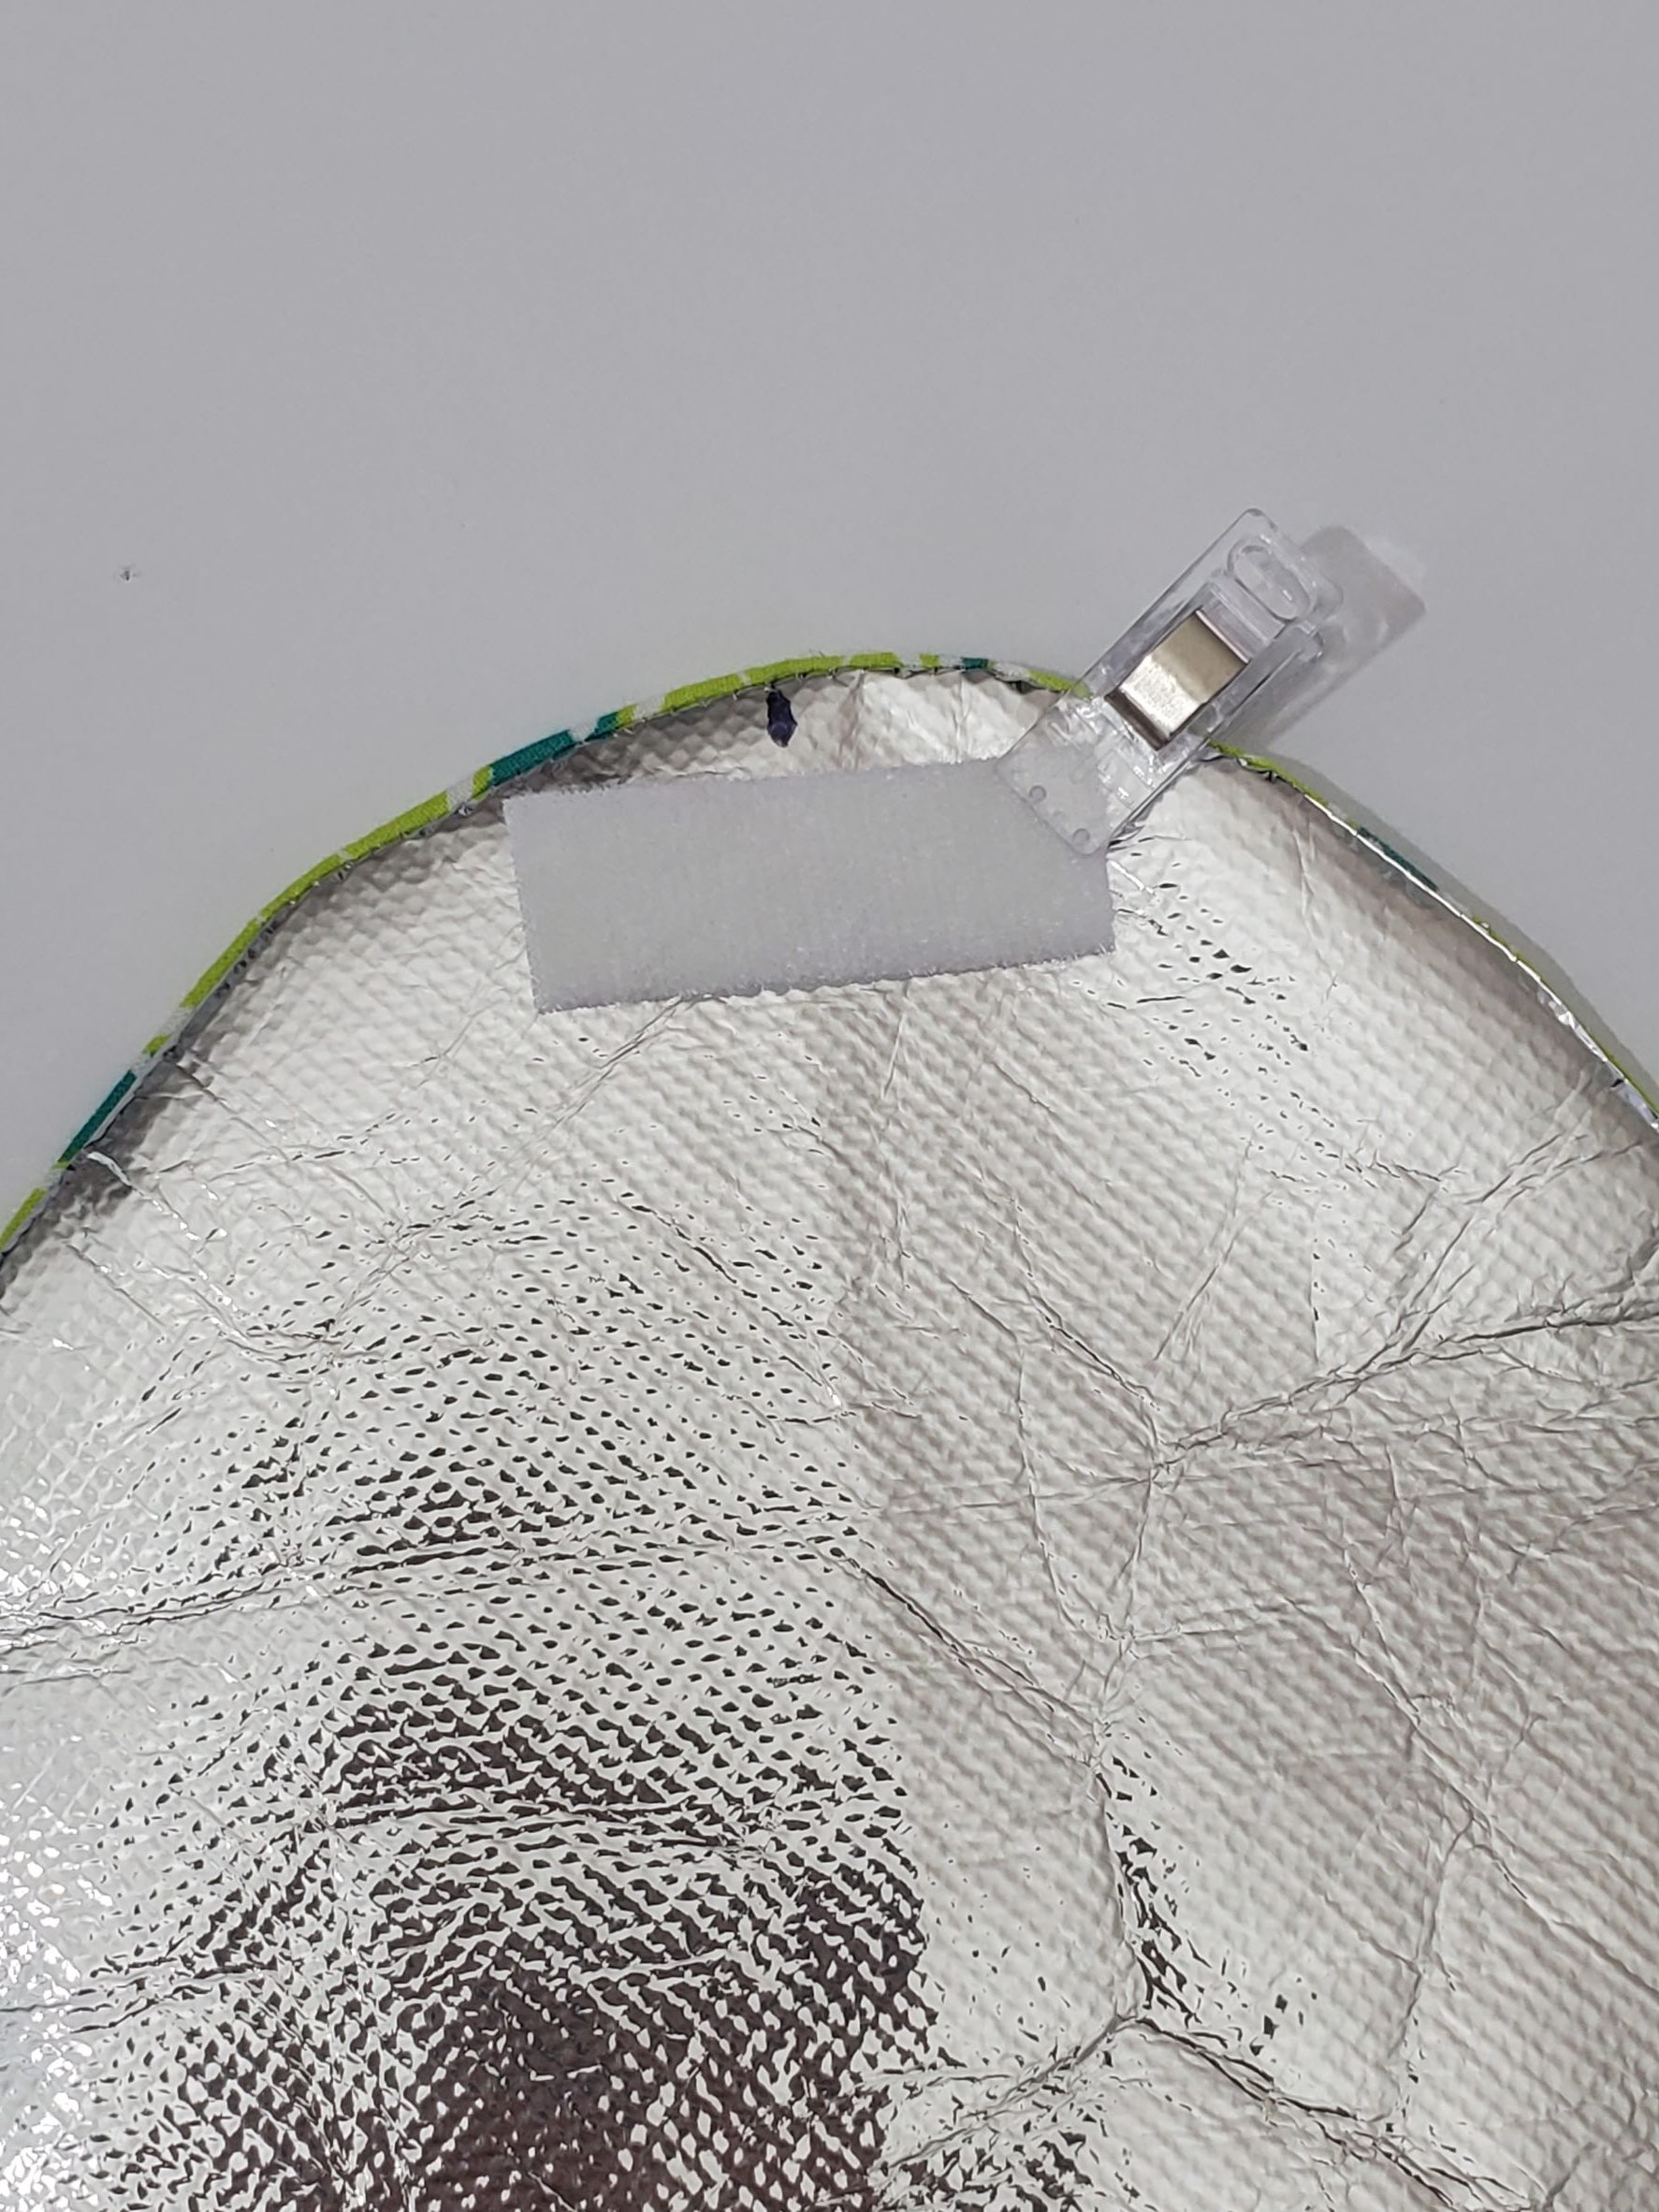
Fold your snack bag, on the fold line, from the bottom up towards the center. Then, fold your flap (with the velcro piece) over on top, and mark where the velcro hits the fabric. That is where your second velcro piece will go. Open the bag back up, pin your velcro in place (if needed) and stitch around the velcro.
Fold your bag in half, once again, on the fold line. Clip the sides in place and then stitch the sides.
And that’s it! Didn’t I tell you it was easy??
Now you have 2 projects done in less than 2 hours! Wasn’t that fun? Let me know how you liked this tutorial!!
Things you need for this project:


*Sassy Cassy’s is part of the Amazon Affiliate Program, which means that if you purchase Amazon items from this website, a small commission will be earned, at no extra cost to you.
