
Hello!!
It’s been way too long since I’ve posted my last tutorial. I have soooo many tutorials that I’ve recorded/photographed, but there seems to never be enough to post them all. I thought I might get caught up this summer, but between my sewing camps, private lessons and prepping for next school year, I haven’t made quite as much progress as I’d hoped. This is an ongoing goal for me: to keep my website and tutorials up to date!
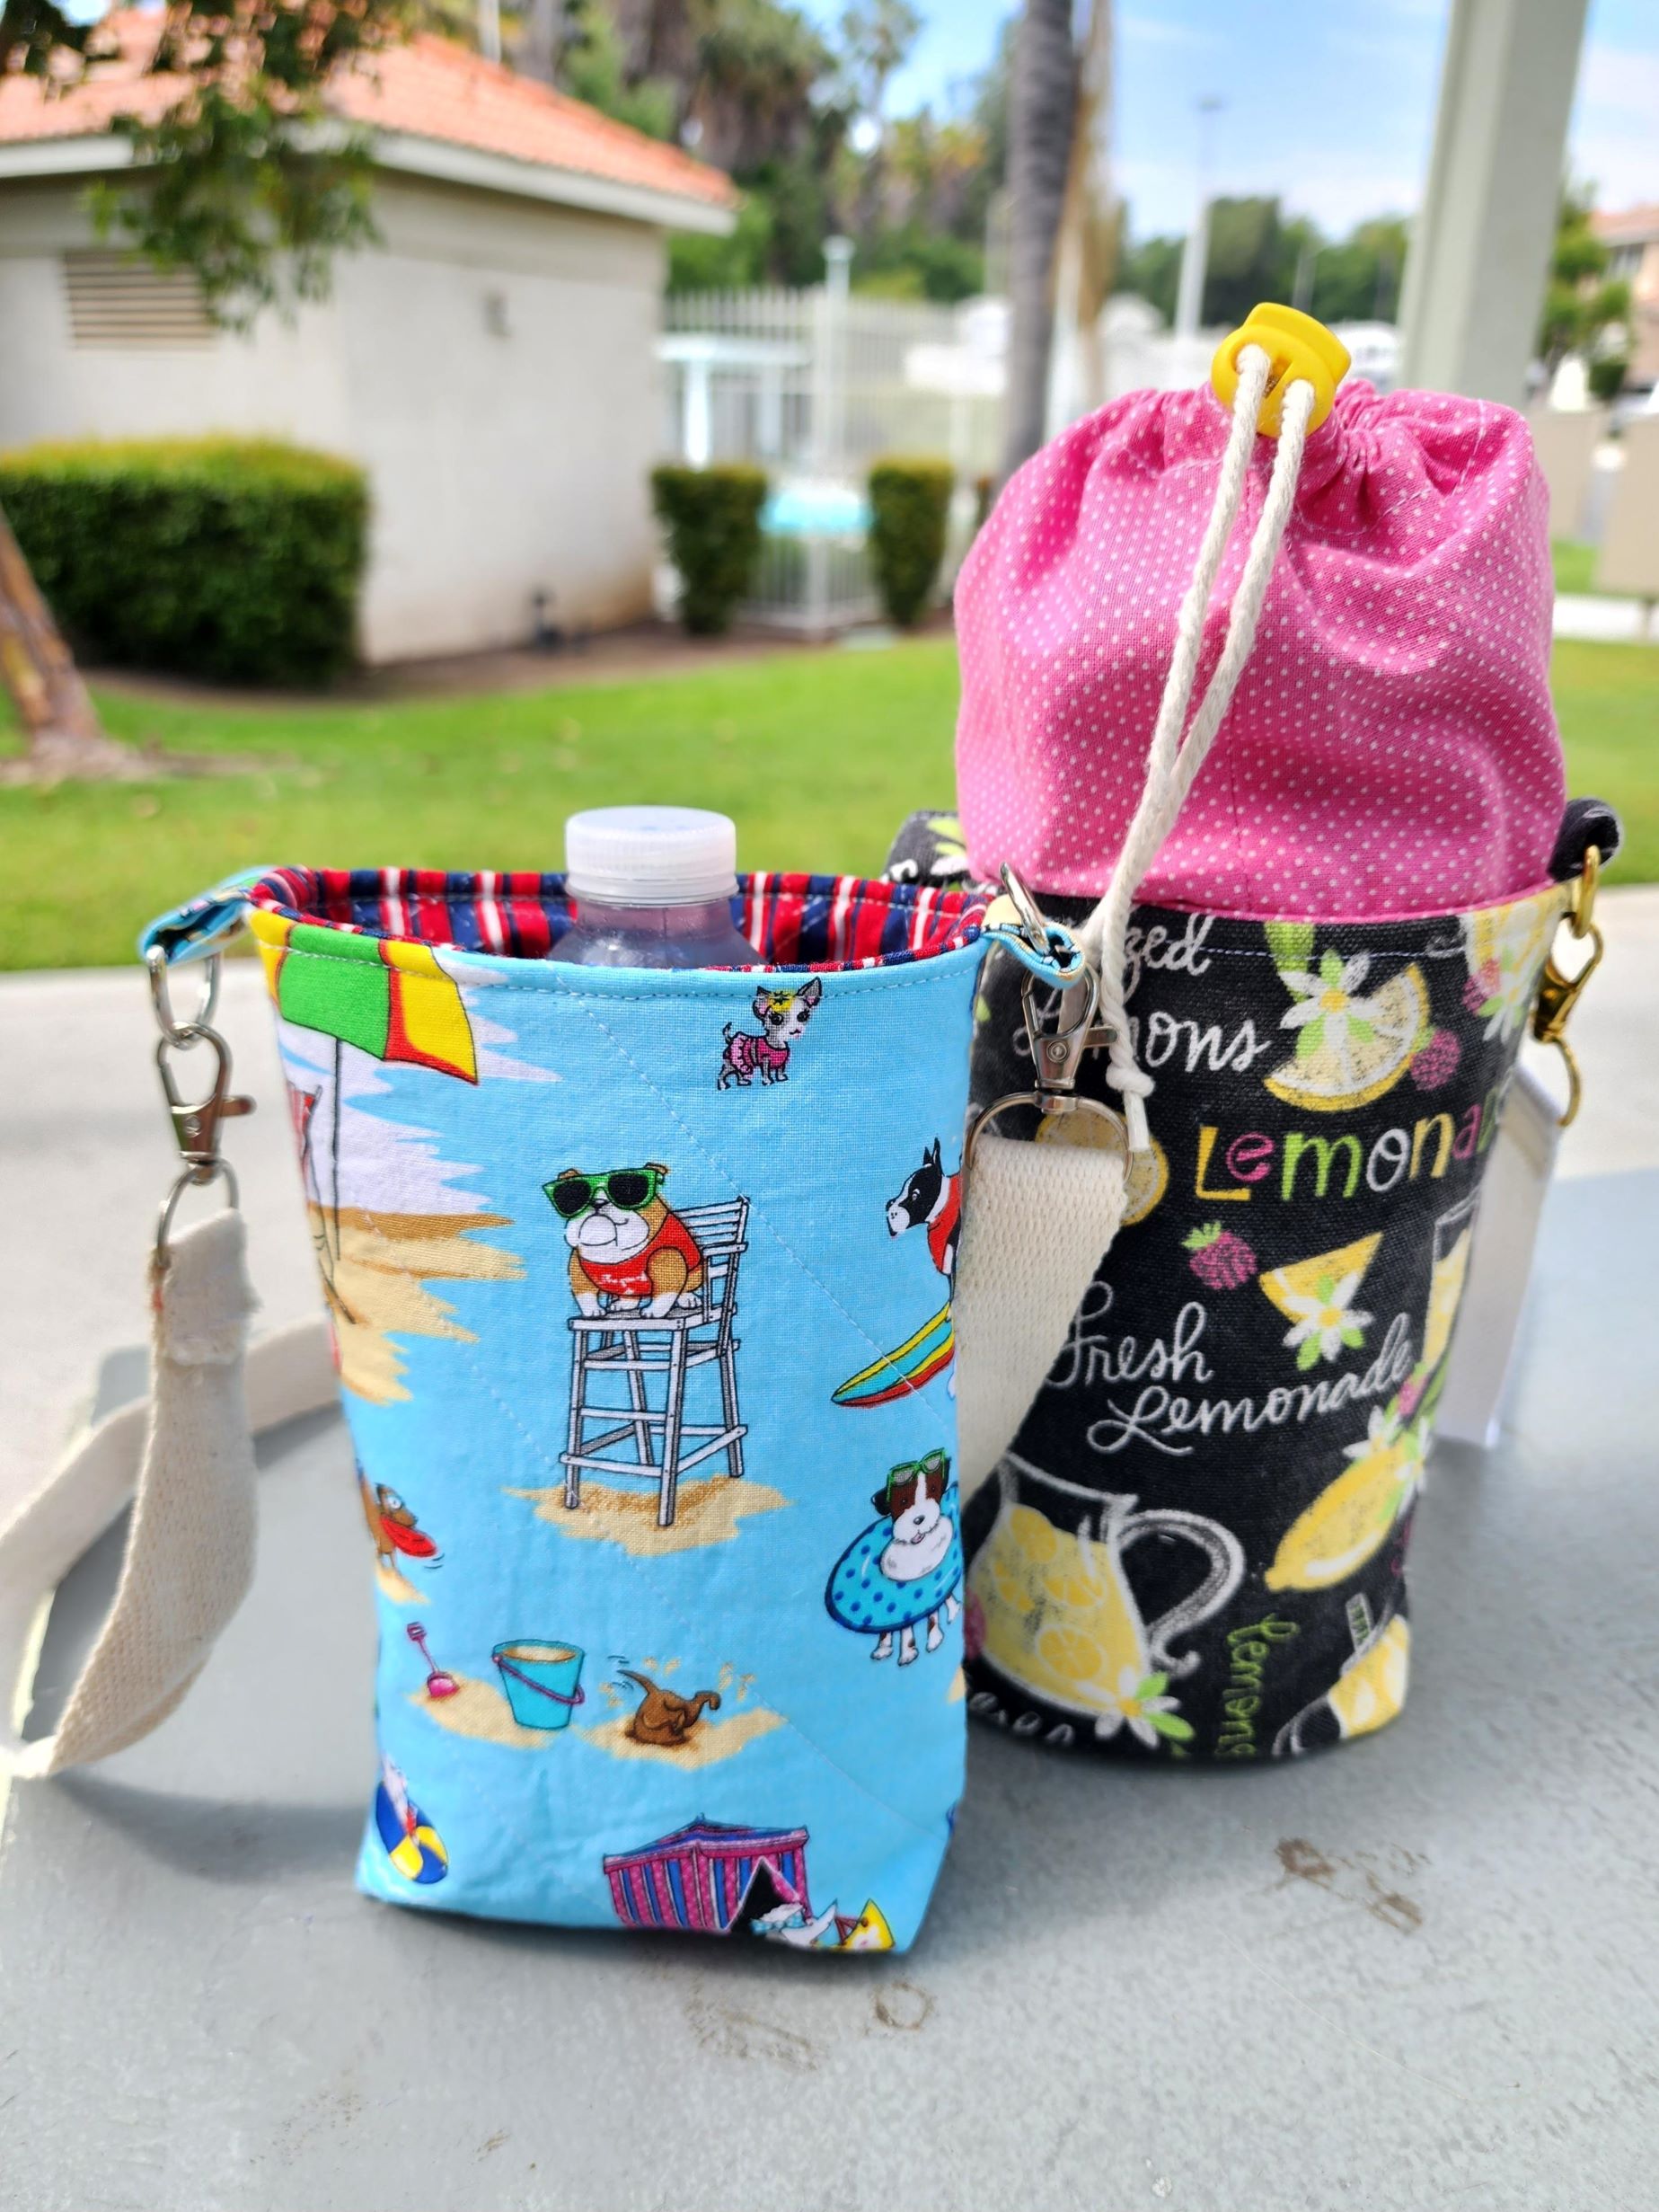
But finally, here I am today- sharing a fun, summery tutorial with you. Yay me! Last week I held my annual kid’s summer camp and one of the camp classes on the calendar was how to make a water bottle sling. I’ve been wanting to do a class like this for a while, and summer camp seemed like the perfect time to do it! It forced me to figure out a pattern and make up a couple of samples, which I did for my son and for me (my husband is asking for one now, so I’m gonna have to get busy making him one!)
There are lots of tutorials out there on how to make a water bottle sling, and there’s a lot of good ones, but I wanted one that would fit my 30 oz steel water bottle. A lot of them were small and would only fit a 16 oz plastic bottle. After doing some research on what others had done, I found a pattern that I liked that had a casing to make the height of the sling adjustable. The only problem was that it still wasn’t tall enough, or big enough around, for my 30 ouncer bottle. So, with that pattern as my inspiration, I created my own pattern to accommodate the size I wanted. This gives the option to comfortably fit smaller sizes (like your 16 oz plastic water bottles) all the way up to a 30 oz stainless steel water bottle!
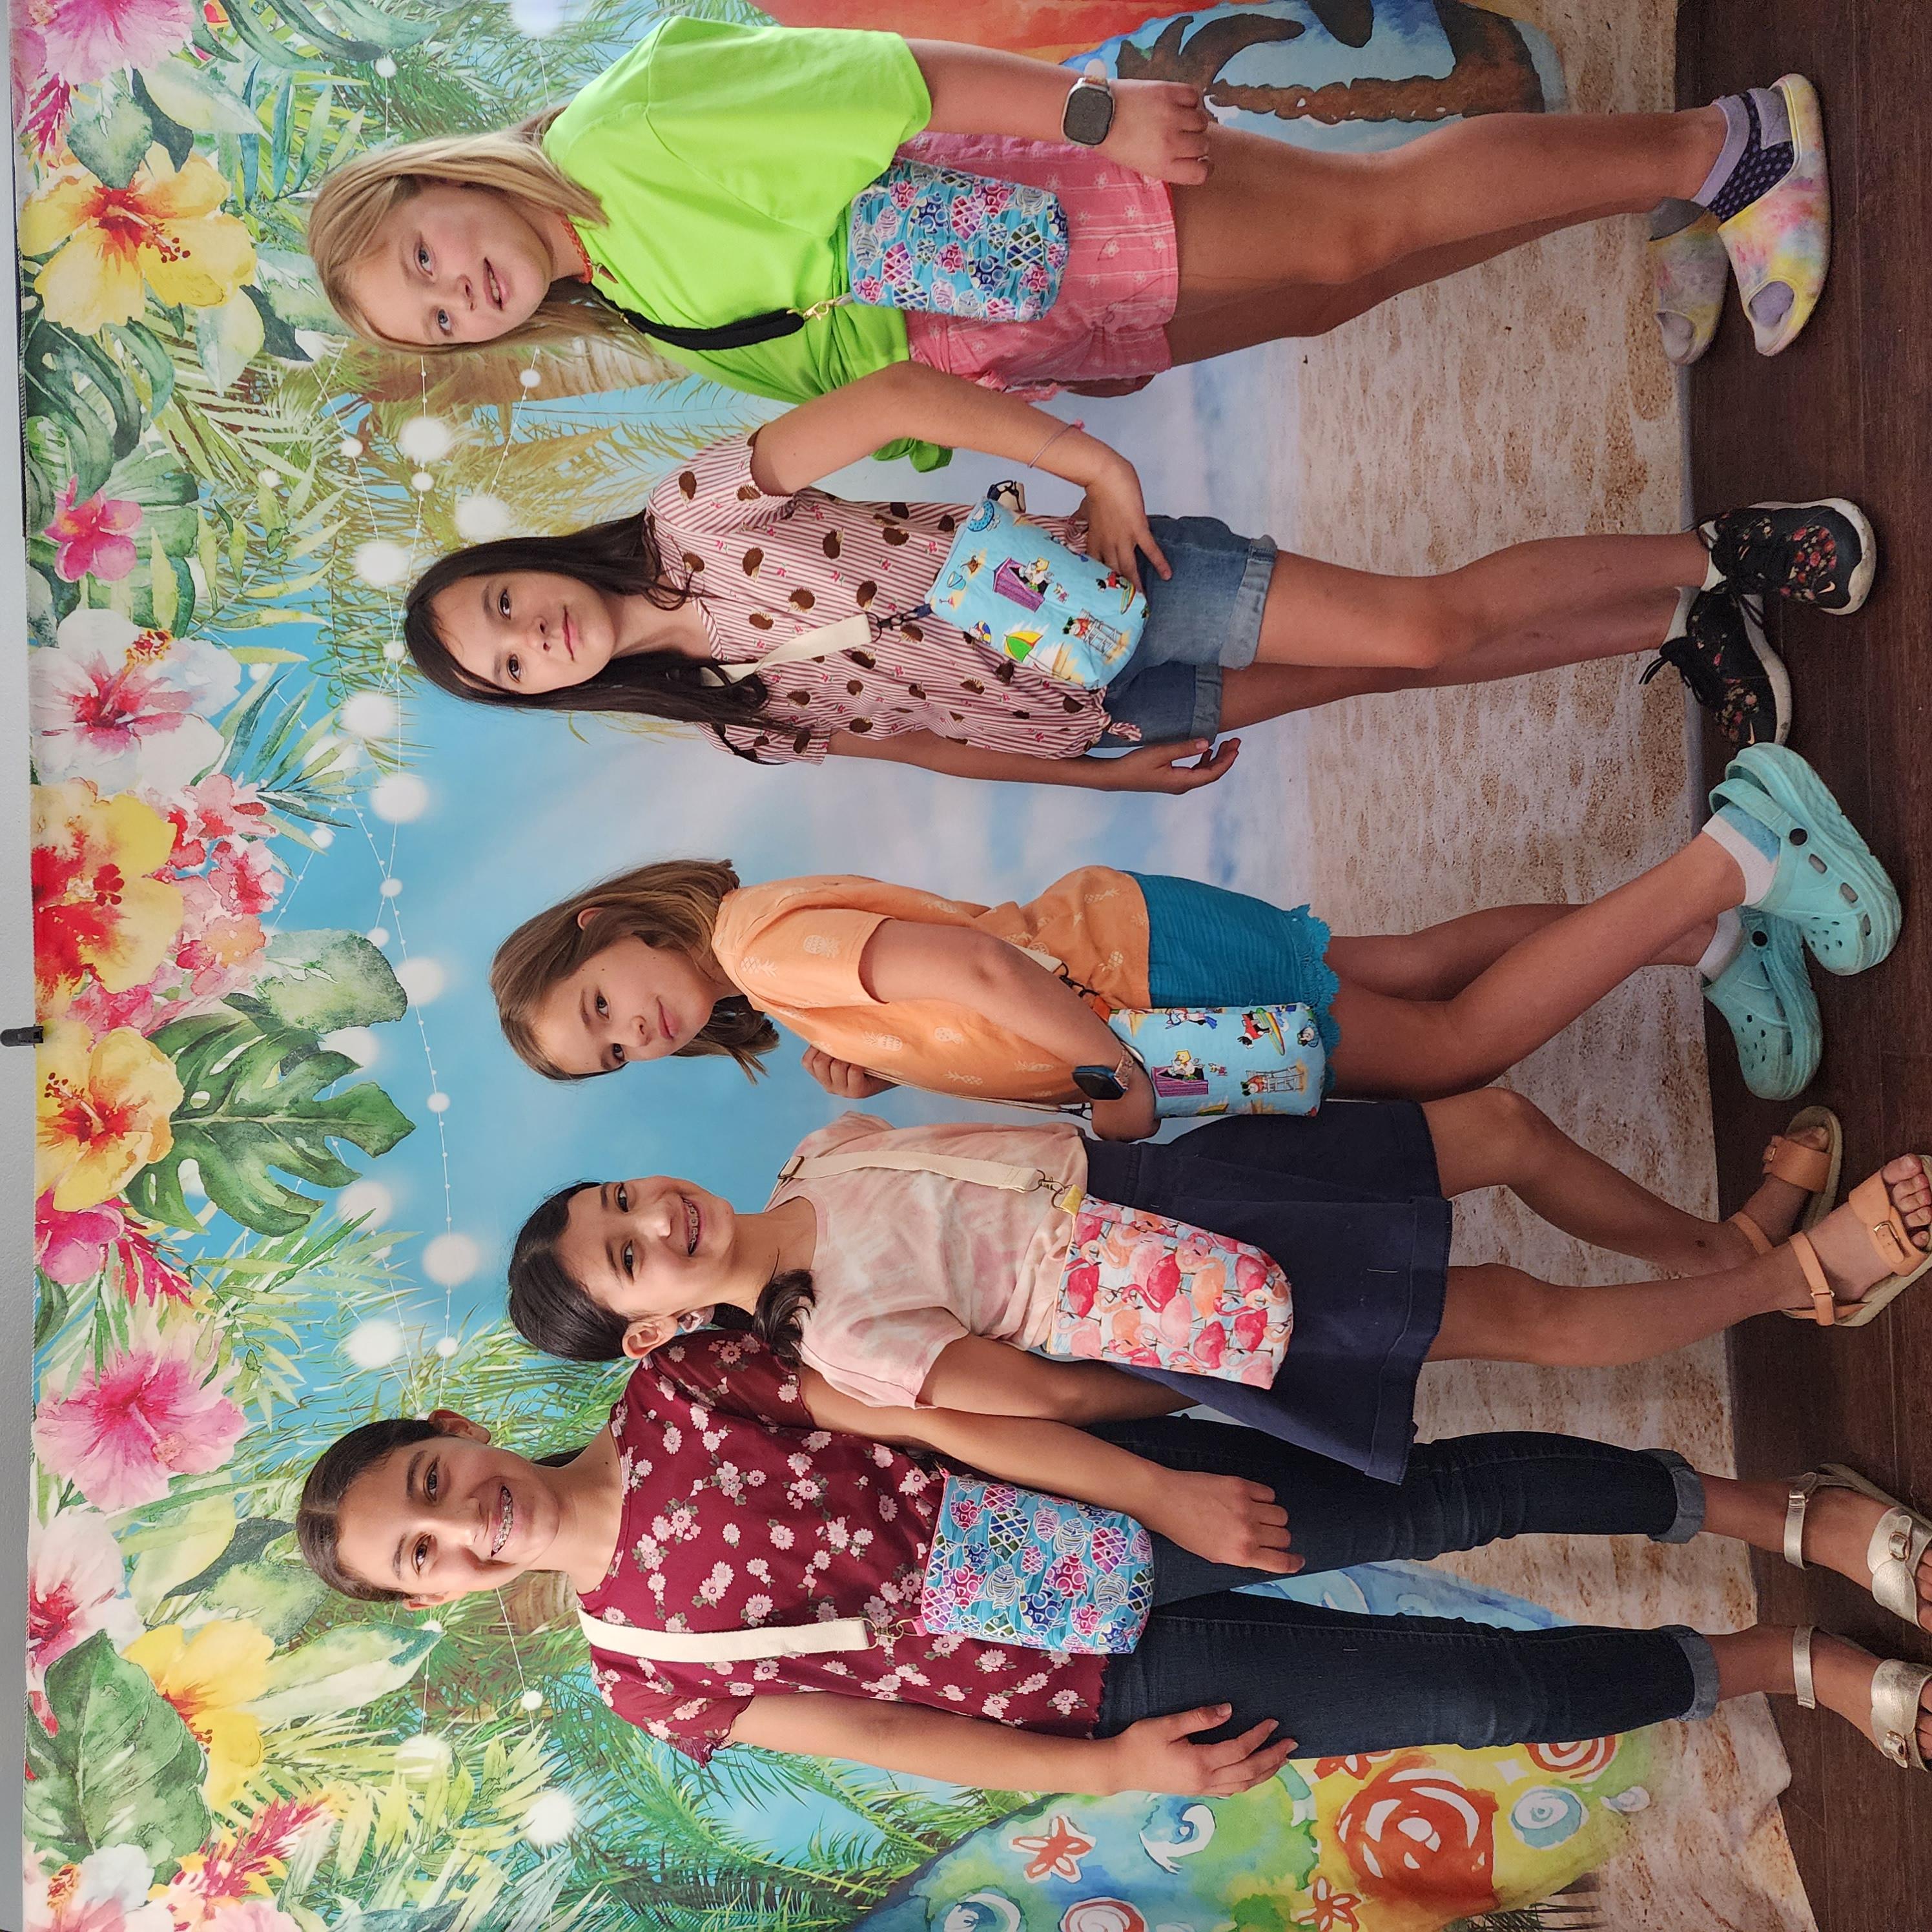
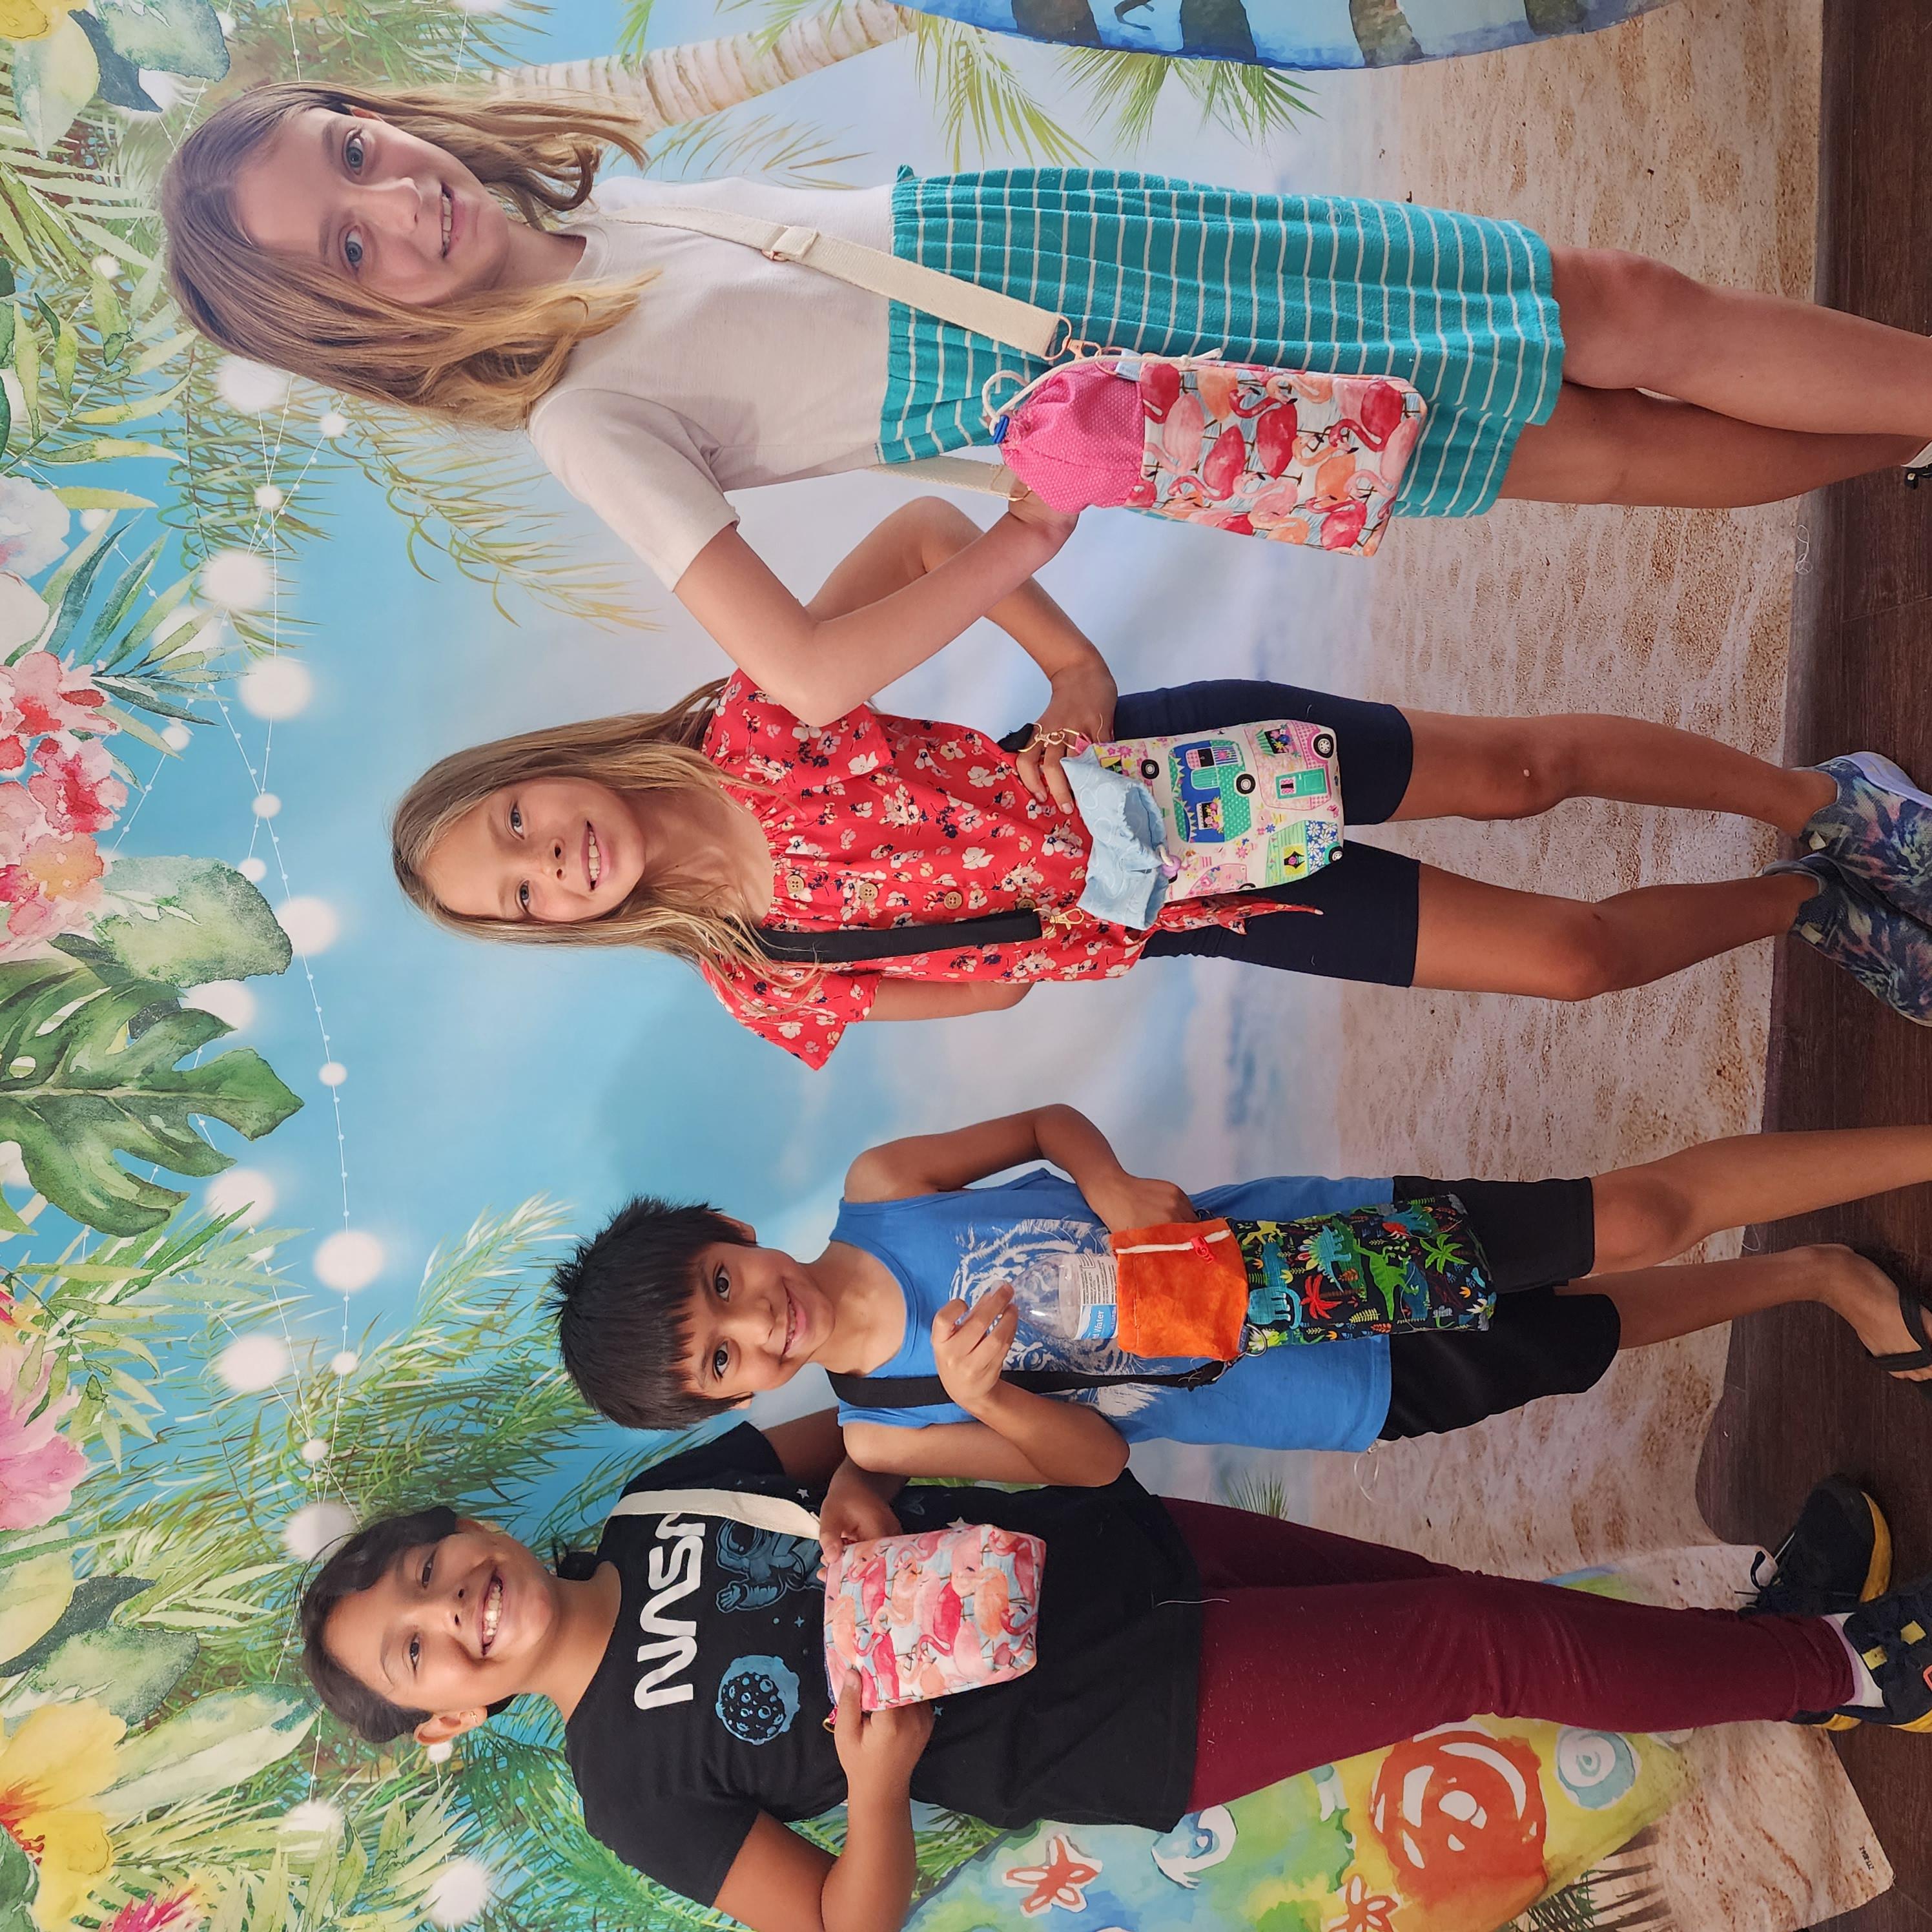
As you can see, the class was a huge hit; both time slots were filled. The kids absolutely loved this project. Didn’t they do a great job??
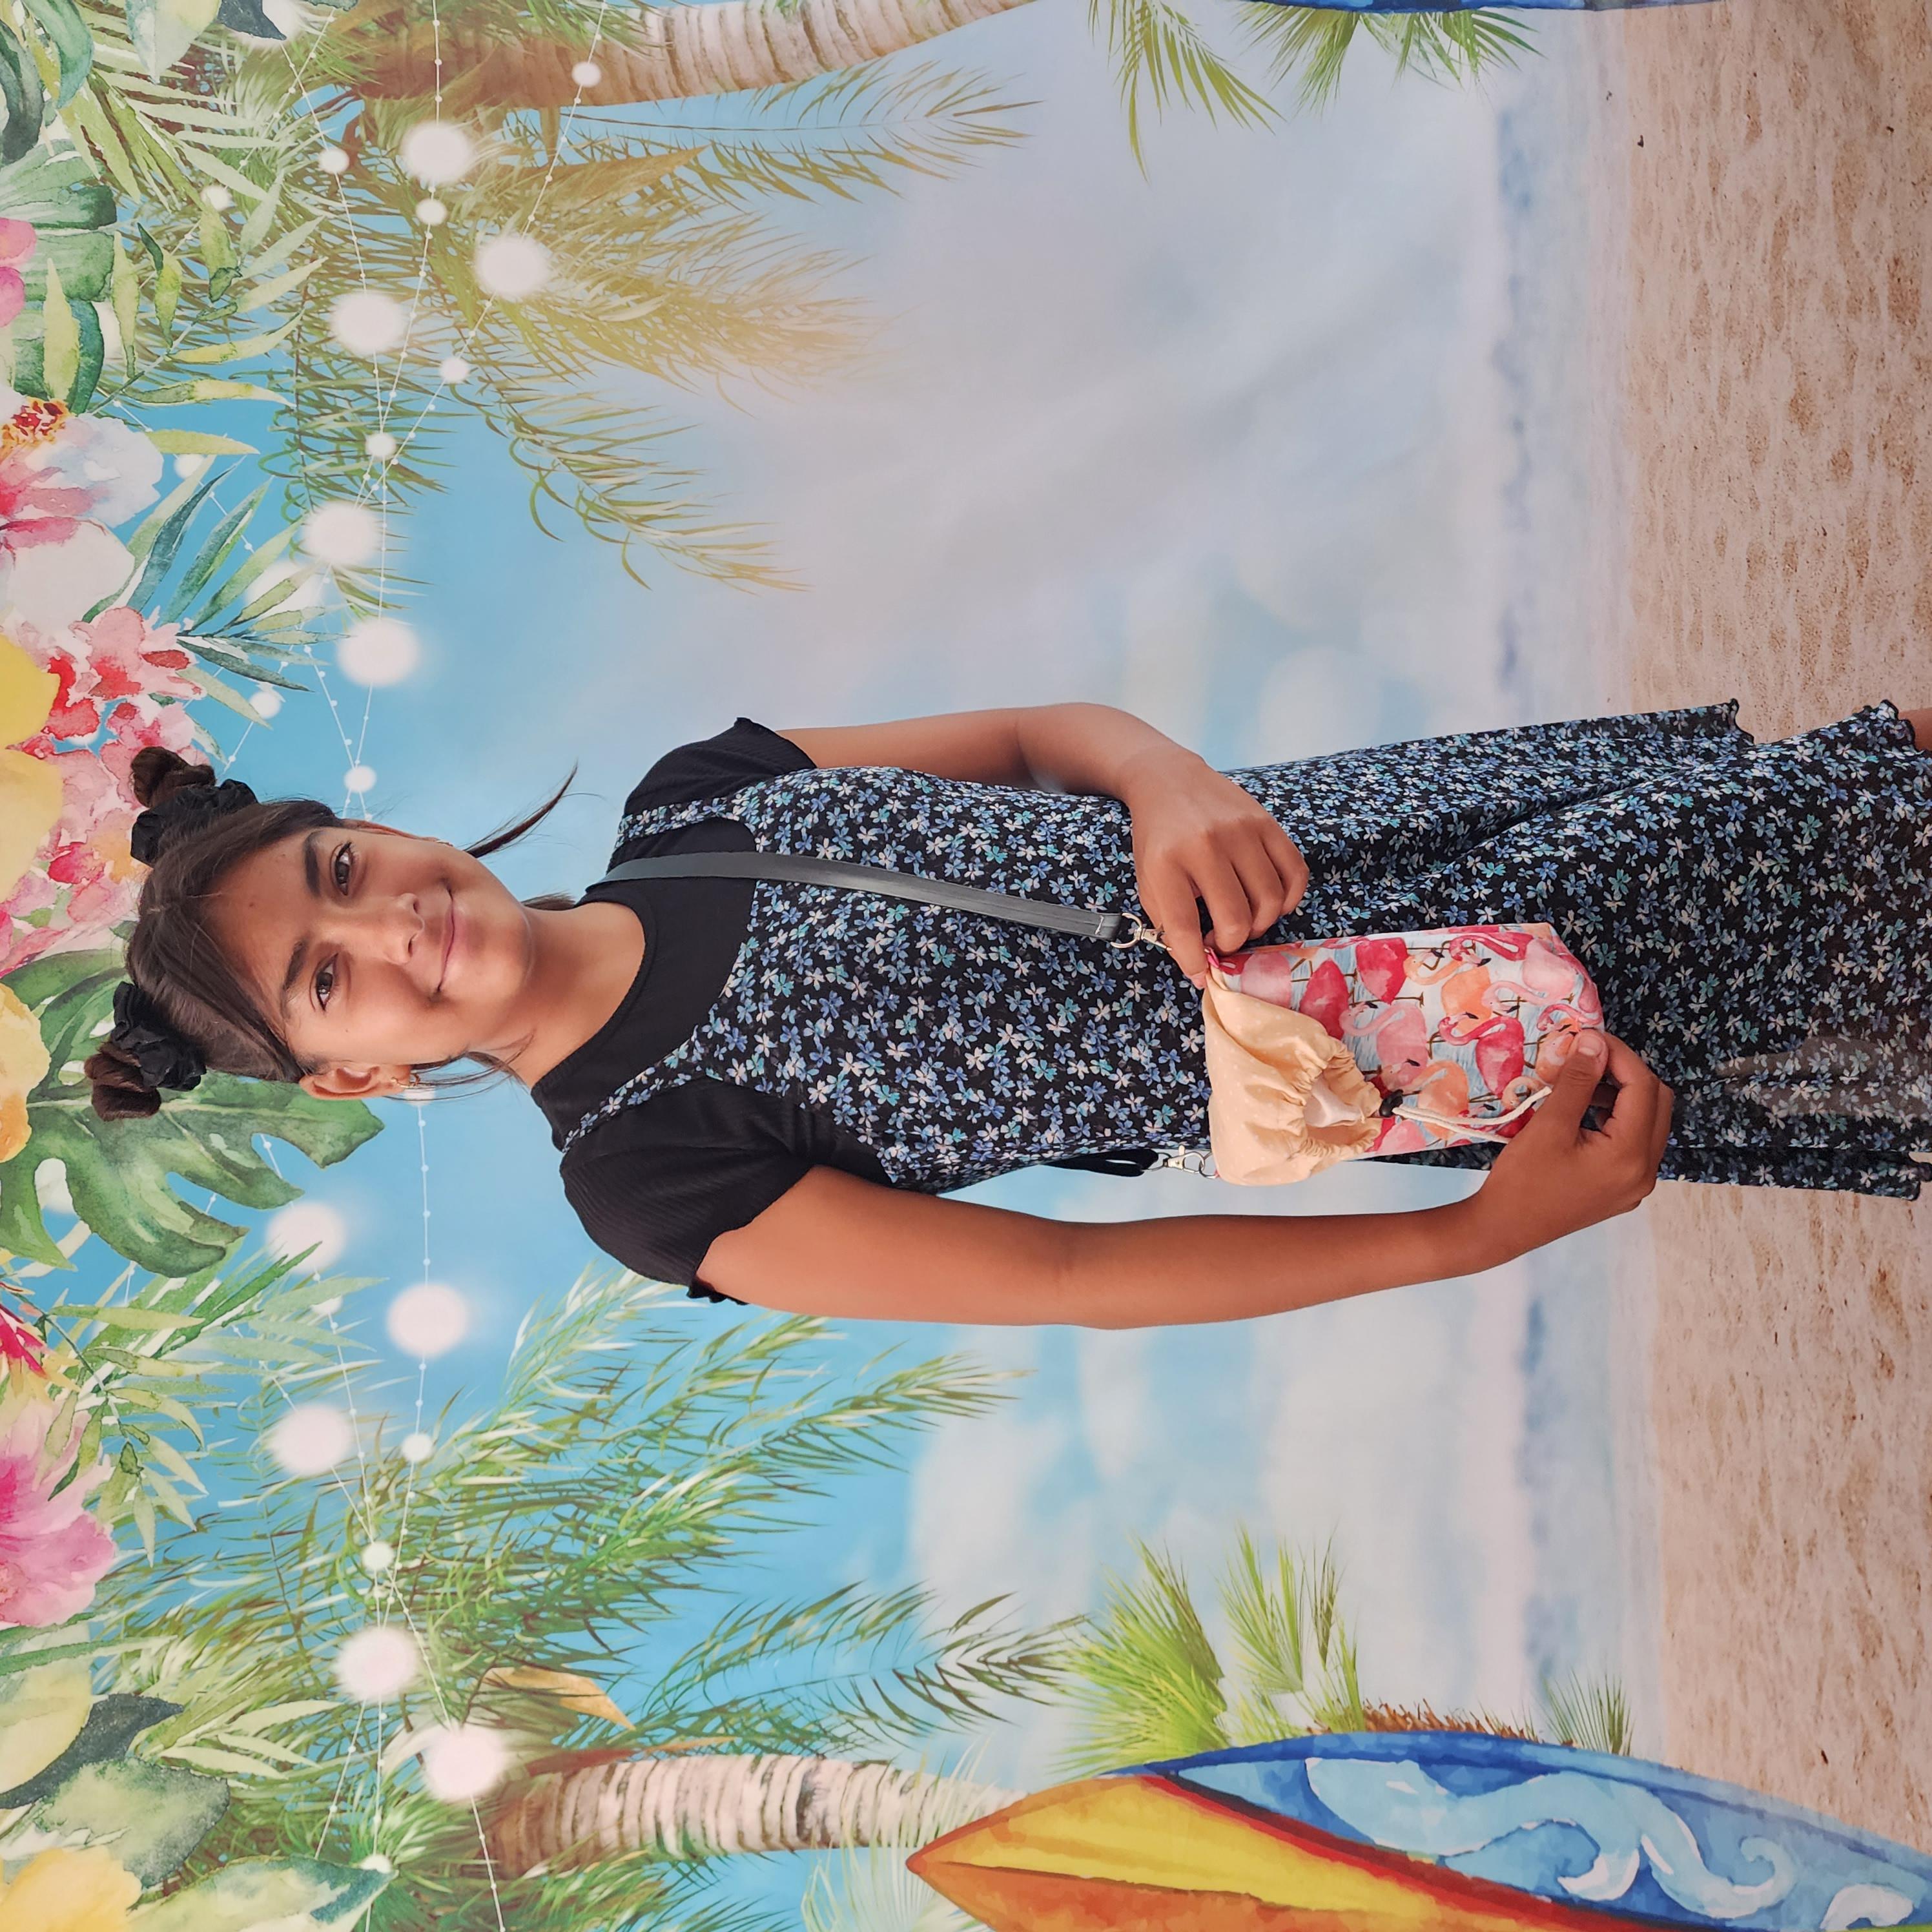
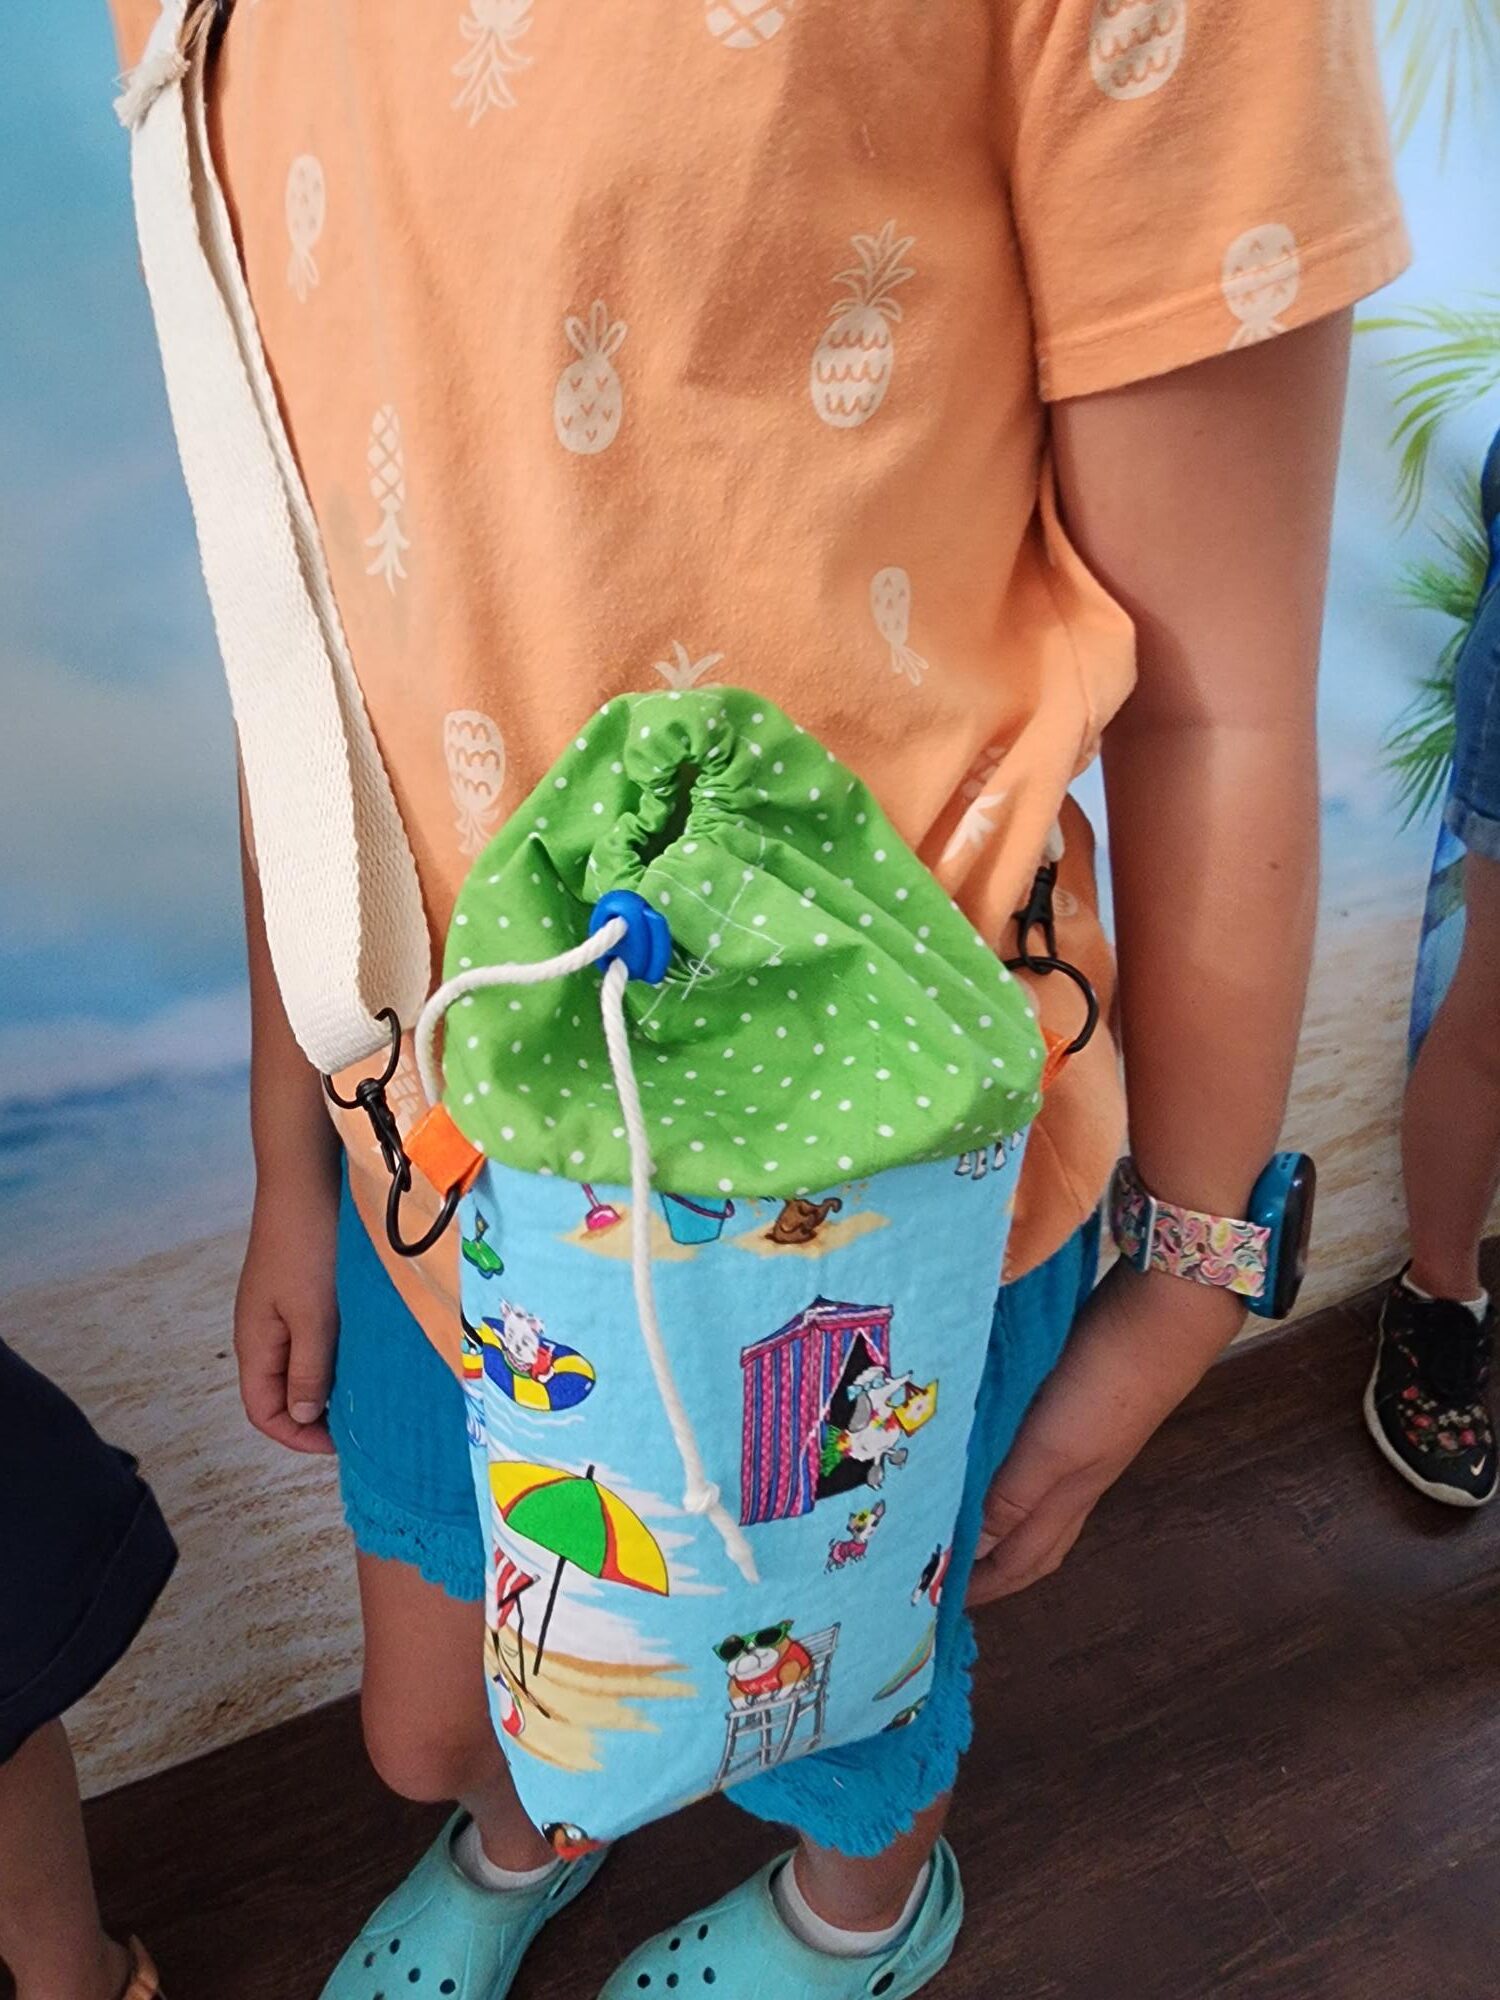
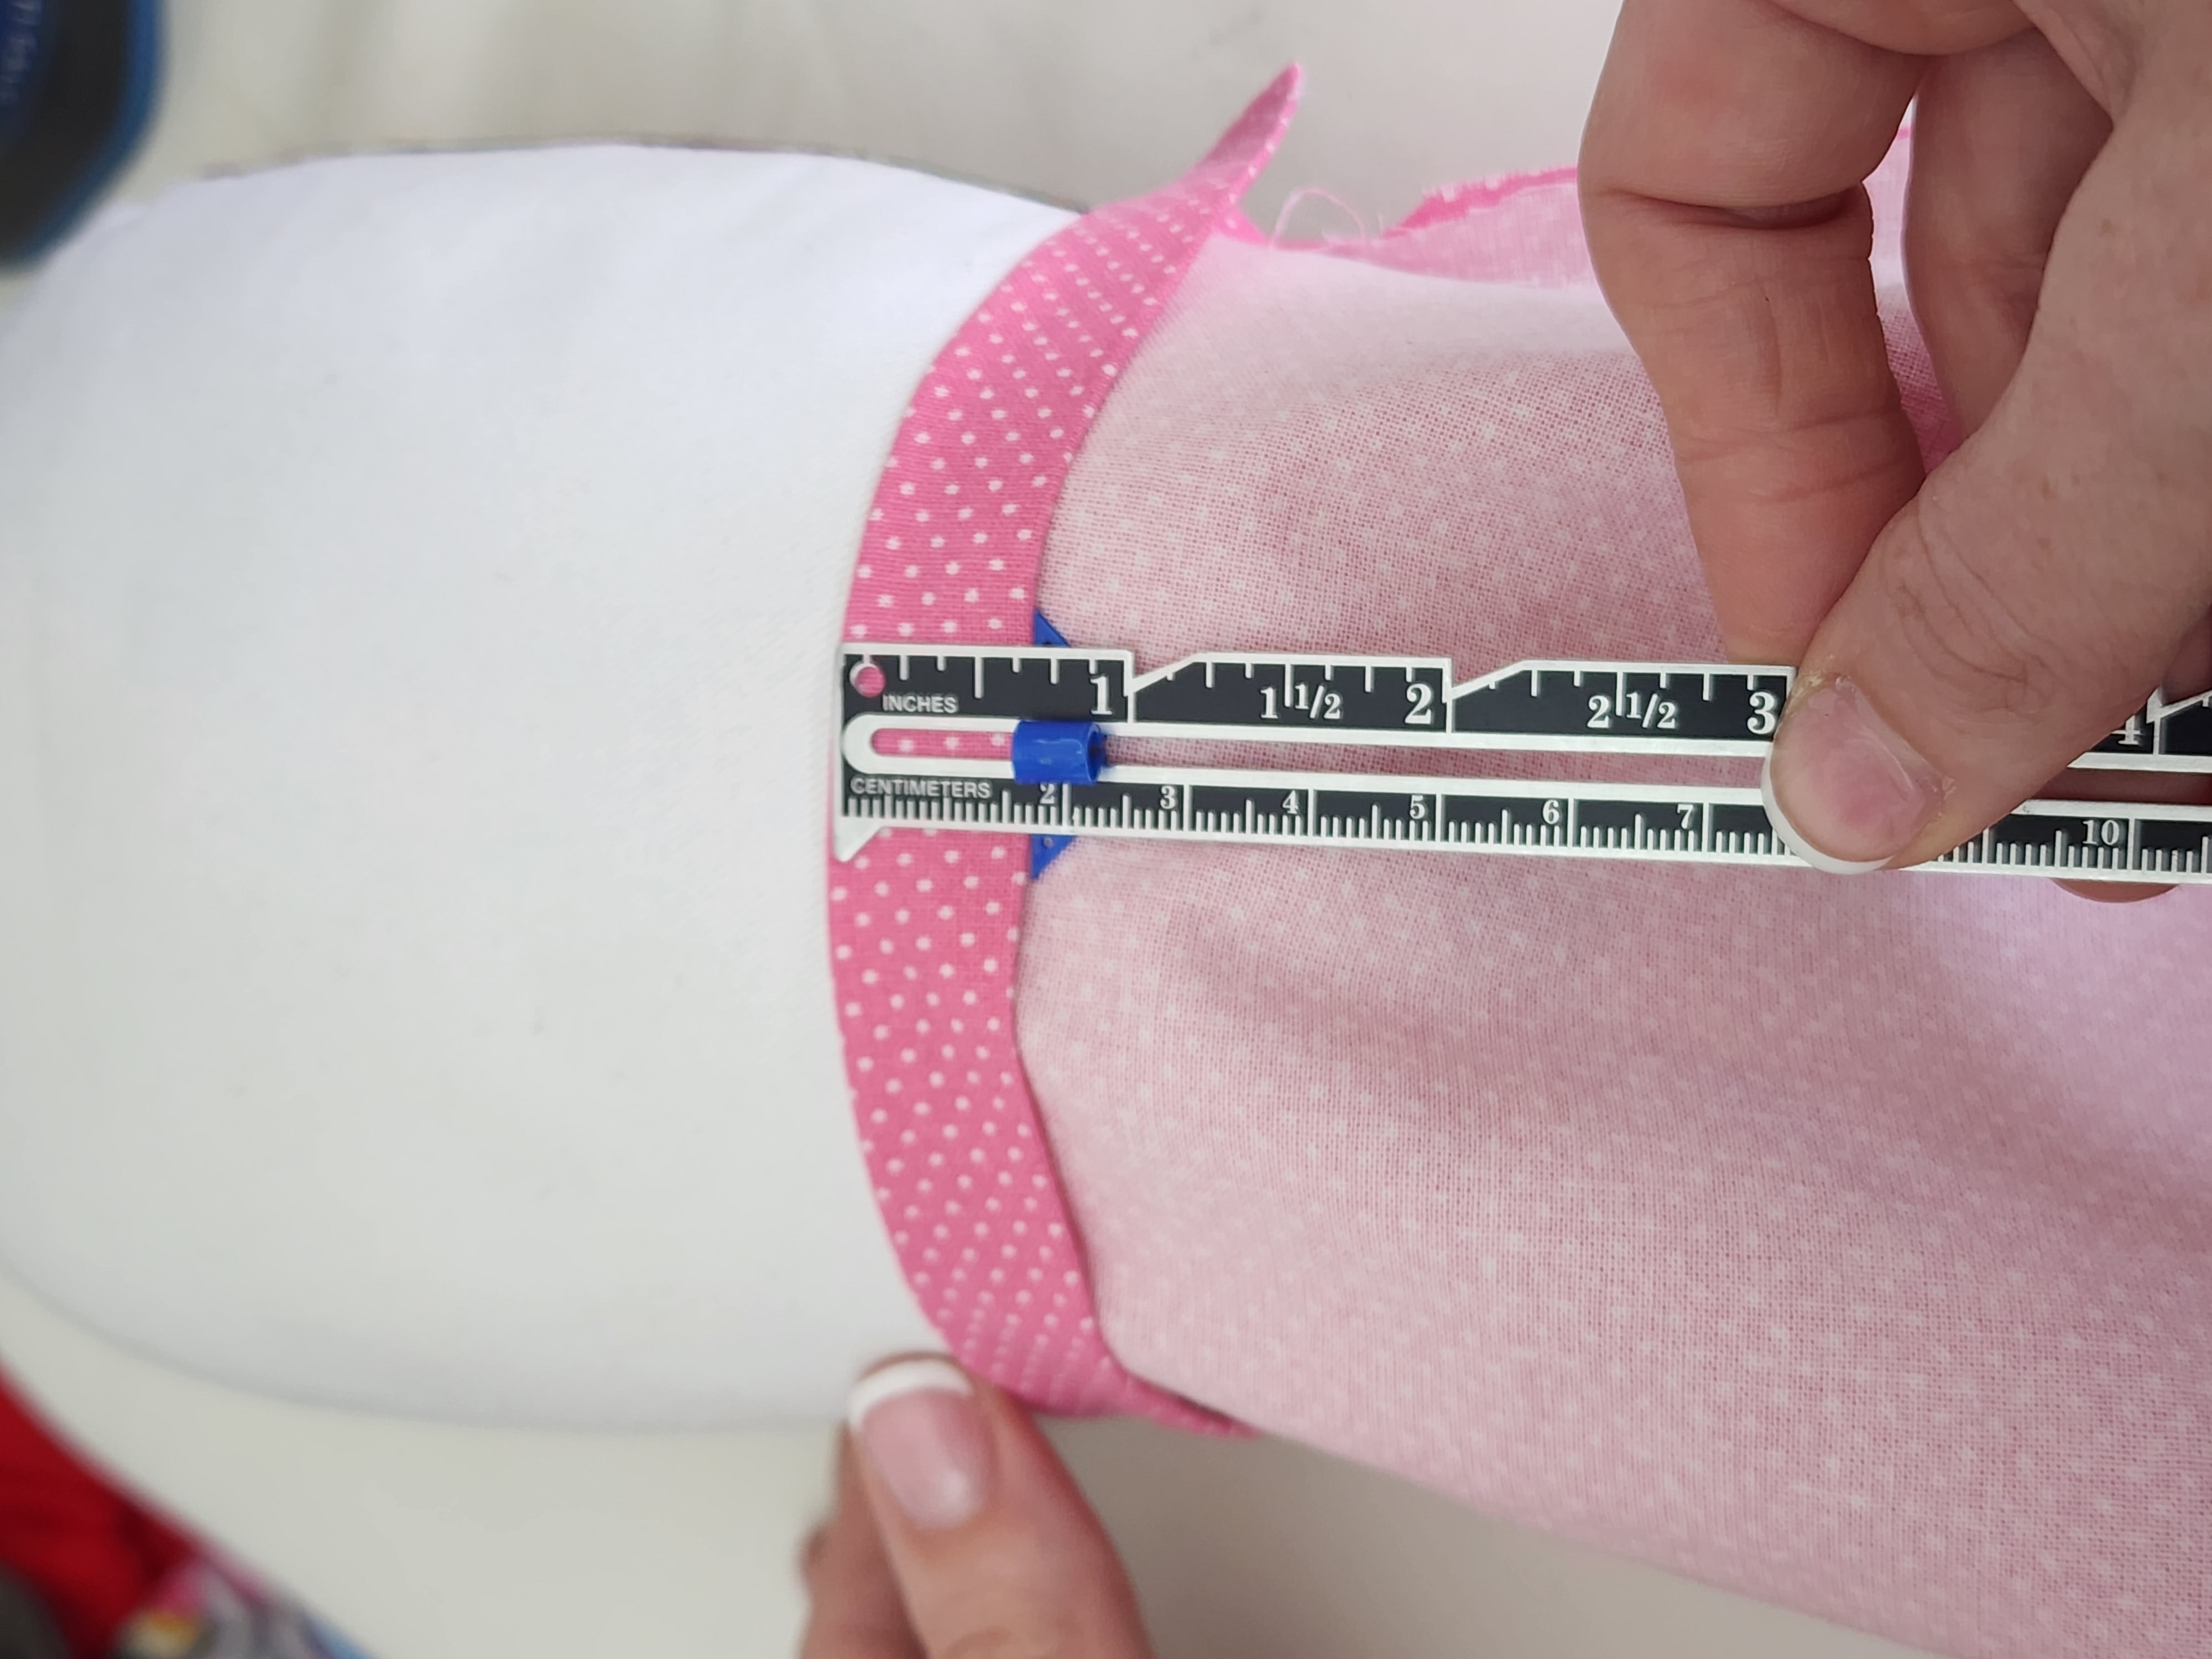
As you can see, the casing turns upwards to accommodate taller water bottles.
I’m very pleased with how my pattern turned out, and how well the kids did sewing this project!! Most of my students are beginners (I have a few who have consistently taken classes with me over the past year or two), so it goes to show you that this is a simple project that any beginning sewist can tackle!
Let’s get started!!
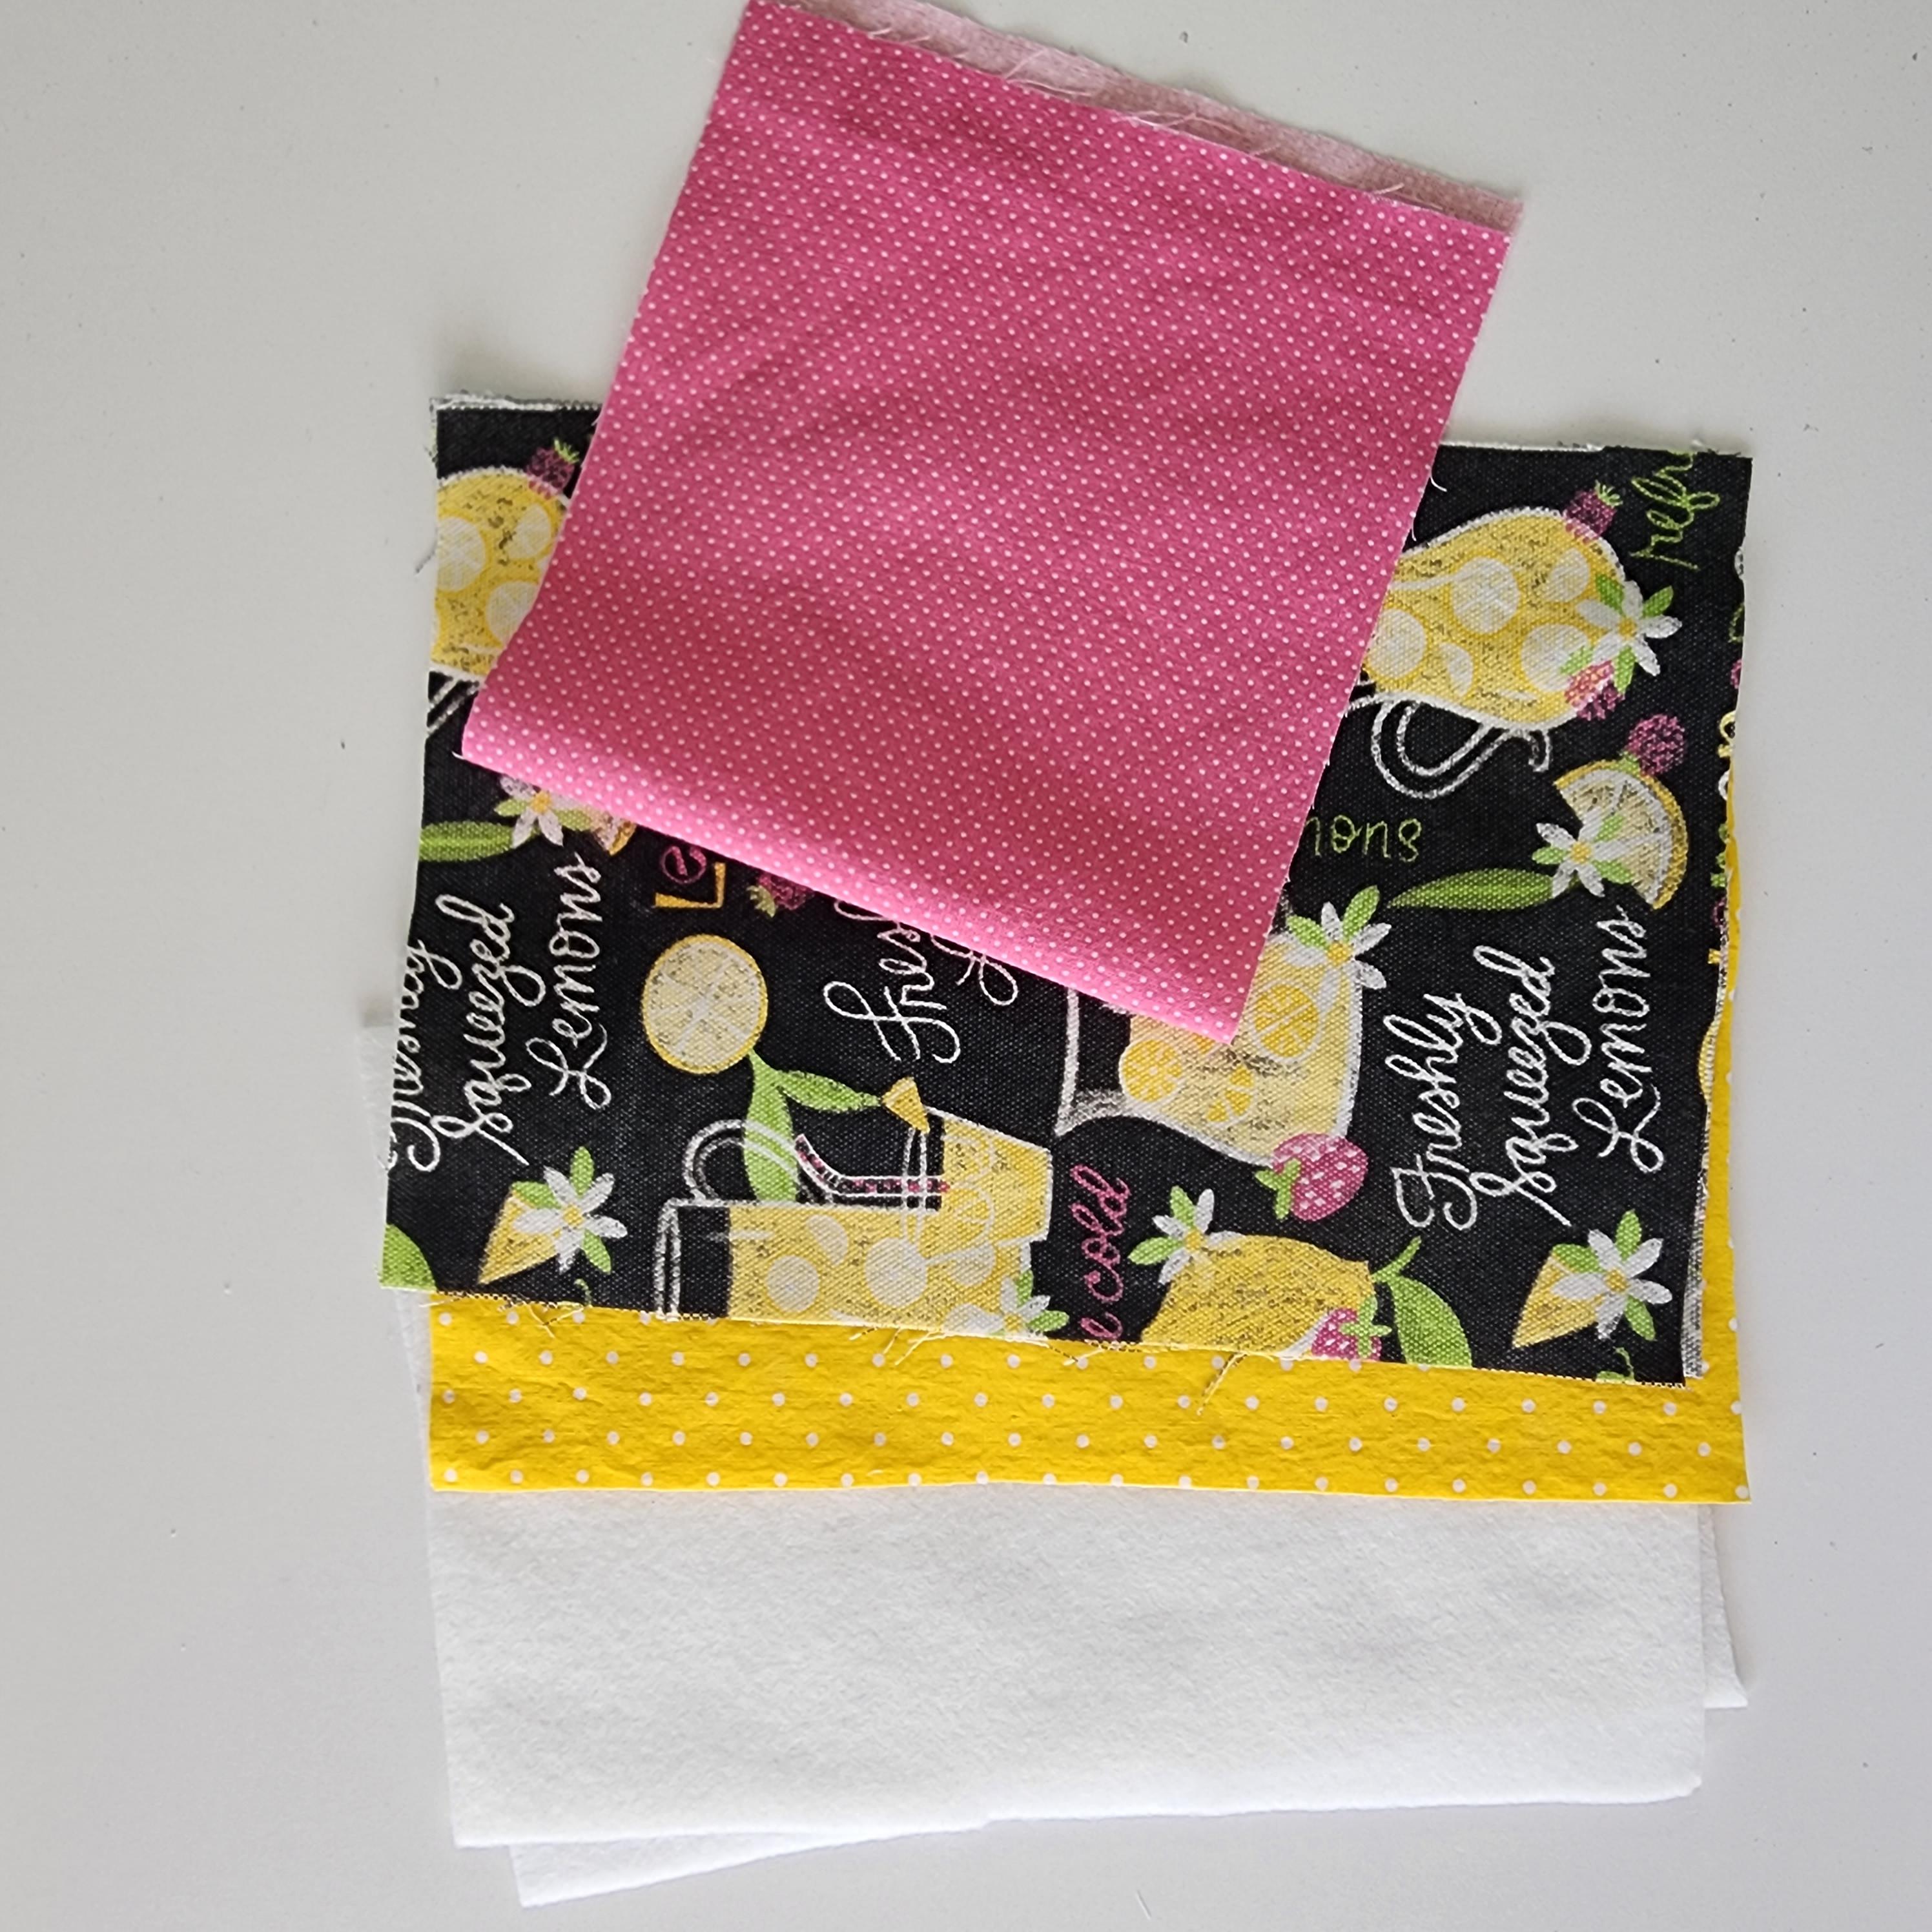
Materials Needed (I recommend using 100% woven cotton):
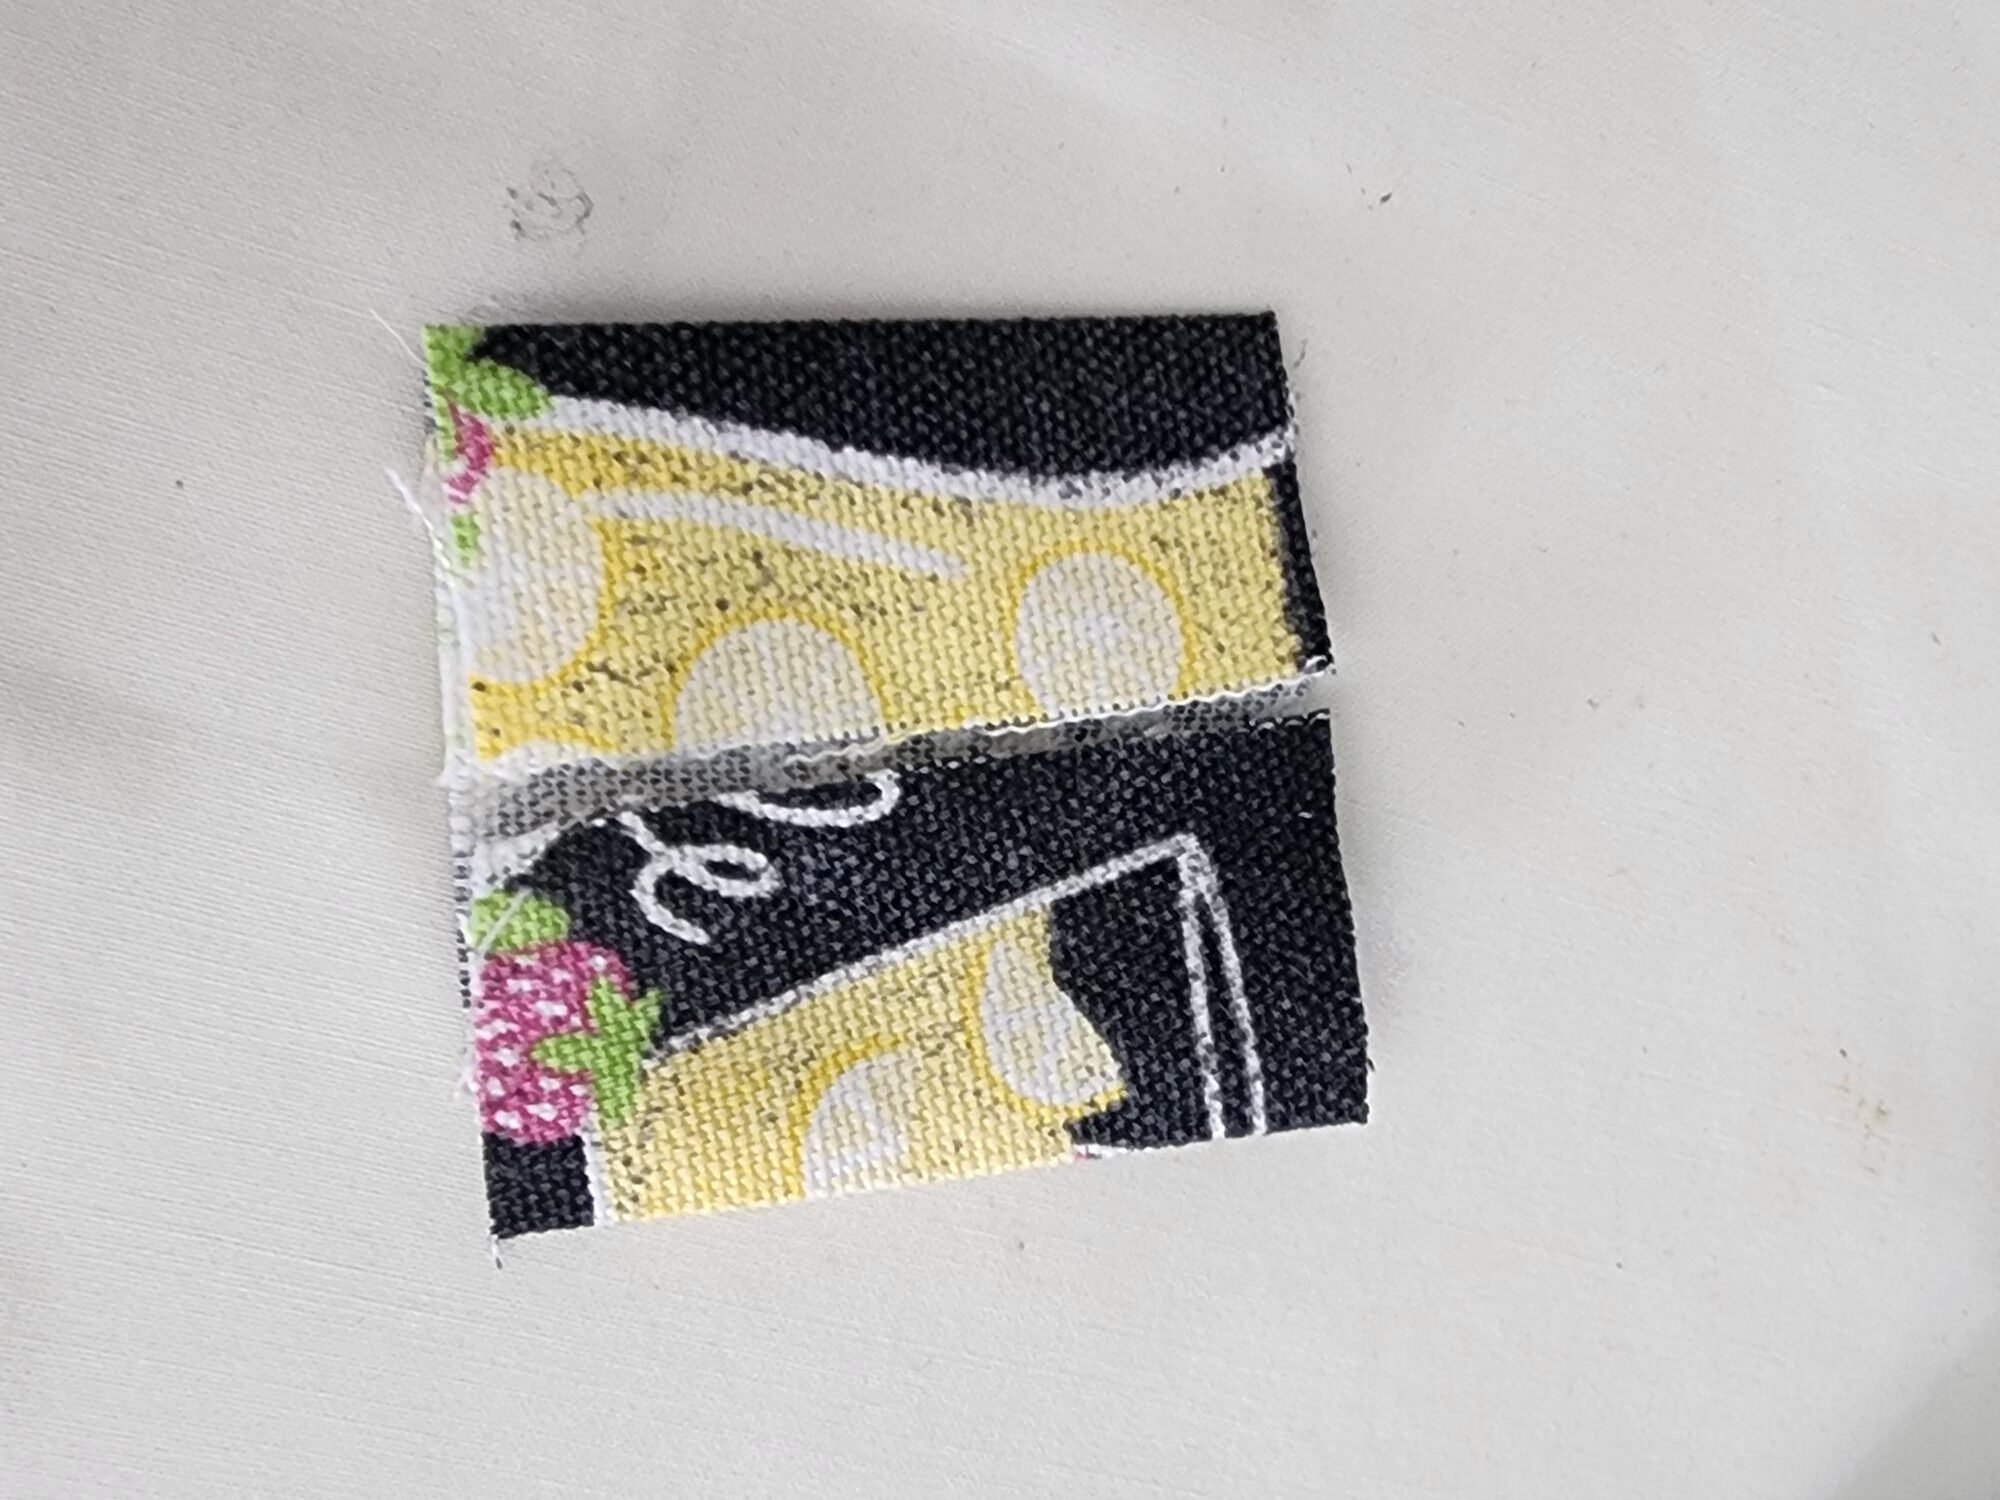
- 2 outer fabric pieces, 6 1/2″ x 9 3/8″ (you can follow the steps to cut below, or print the pattern here)
- 2 lining pieces, cut the same as above
- 2 fusible fleece, cut same as above
- 1 drawstring cover piece: 6″ x 13″
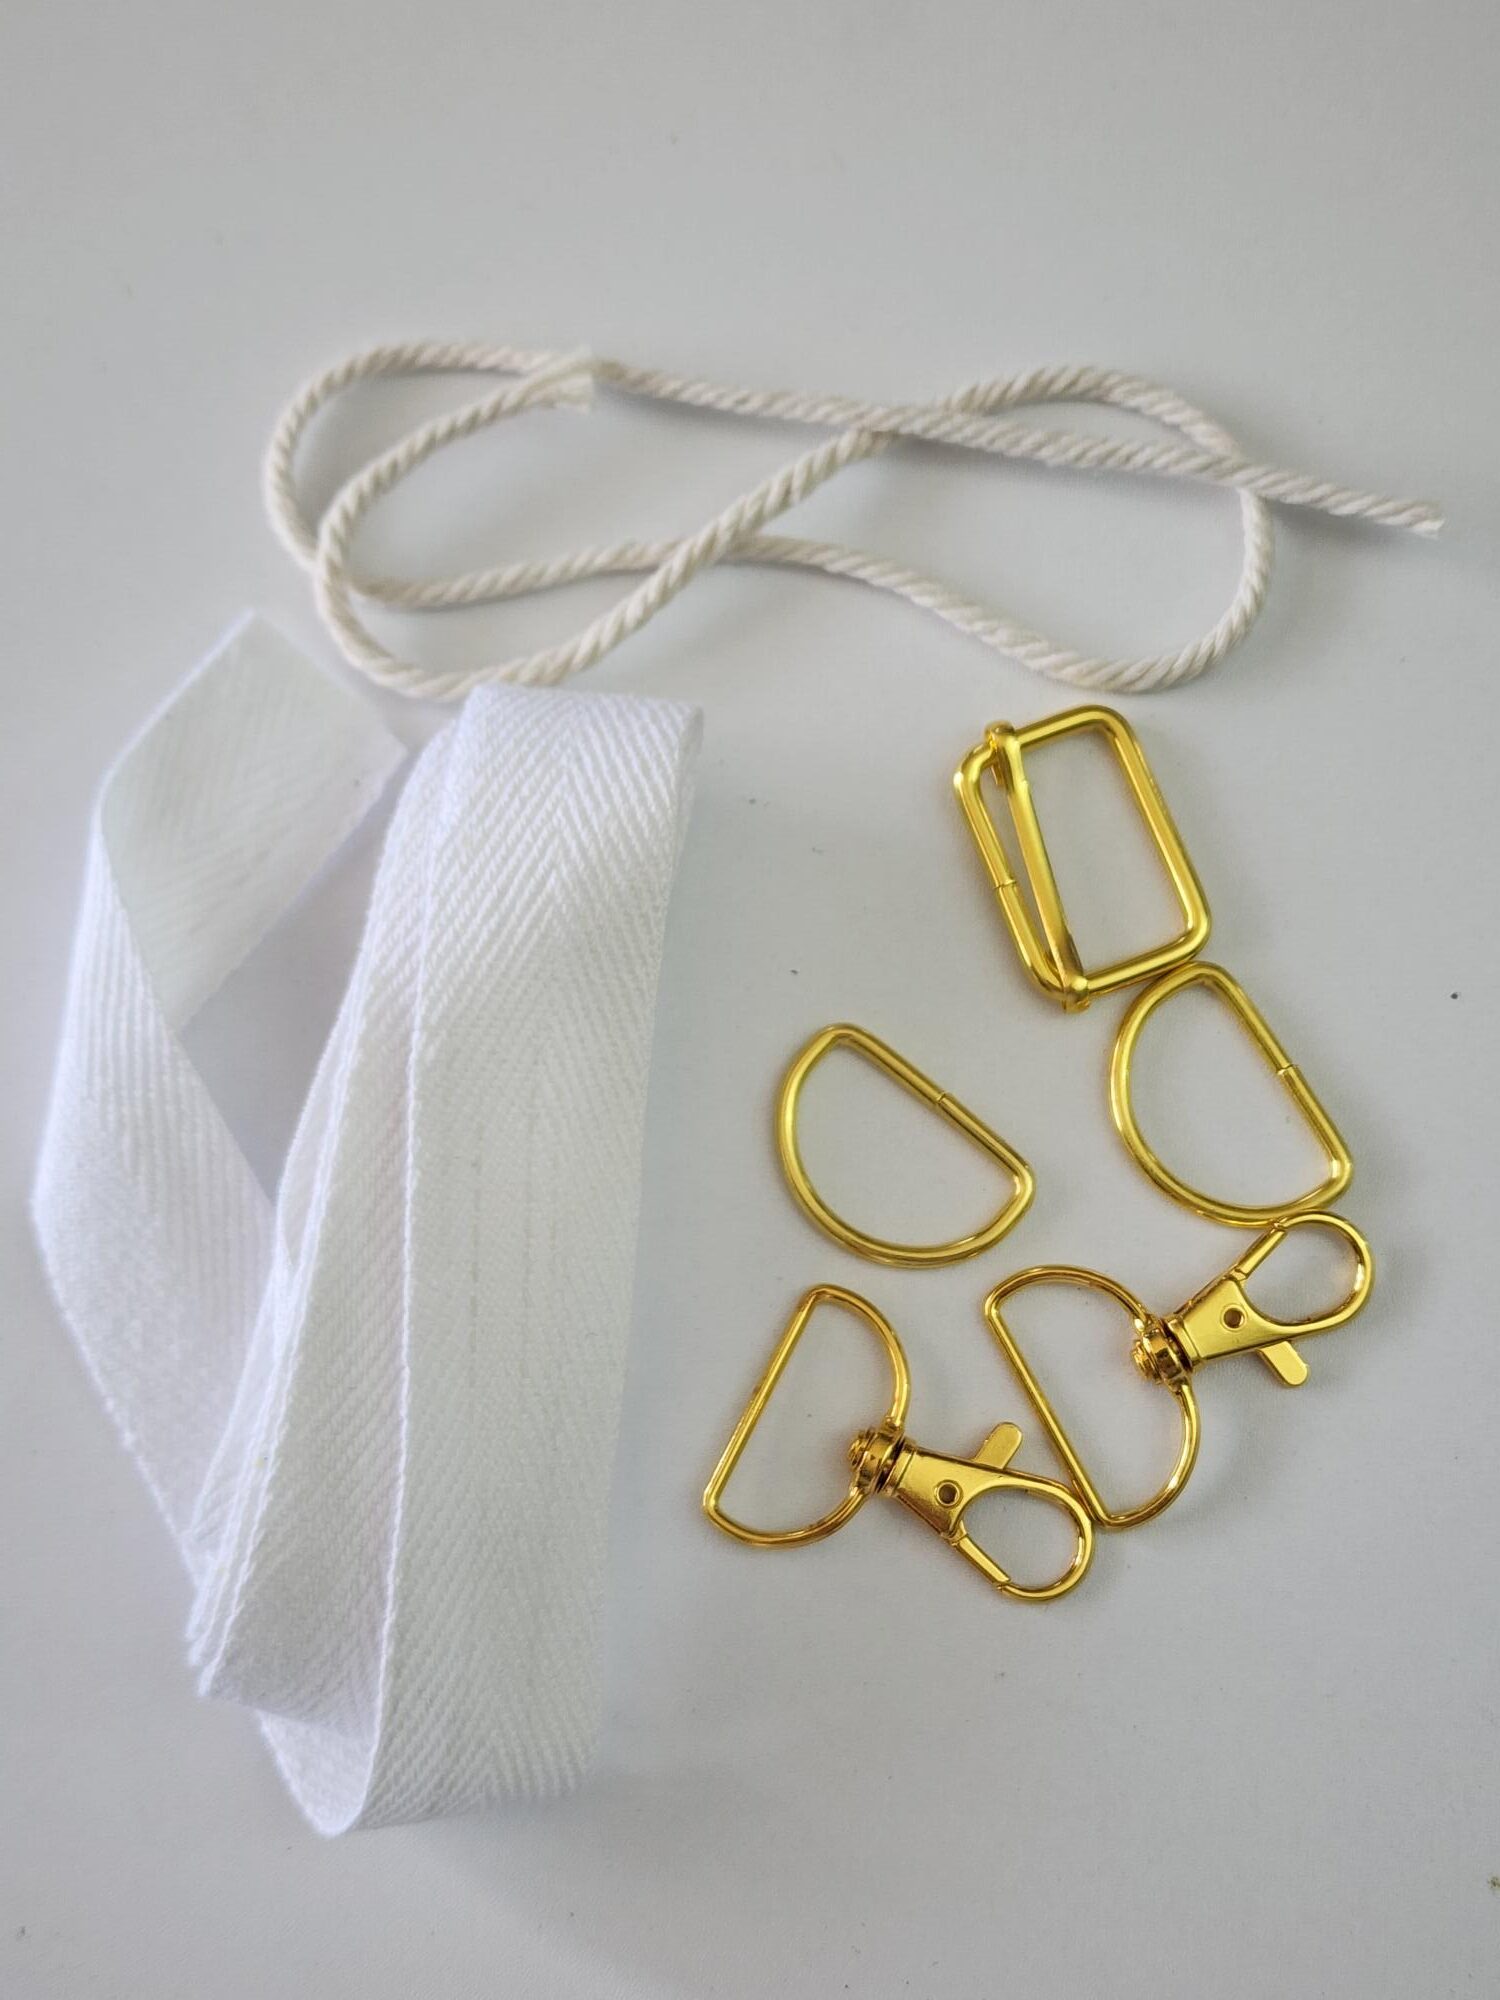
- 2 loops for D-rings, 2″ x 4″
- 1″ webbing, 45″ long (strap)
- Cording, cut 18″ long
- 2 swivel hooks, 1″
- 2 D-rings, 1″
- 1 bag/purse slider, 1″
- 1 cord lock
**For your convenience, I have linked the products I used for the hardware/notions at the end of this post, which includes pictures so that you can see what I’m talking about 😉 Just a note: I had a hard time finding 1″ rings and hooks at Joann’s. You can use smaller swivel hooks/d-rings/sliders, BUT your webbing needs to be the same size. I could only find 1″ webbing at Joann’s, so it was frustrating trying to find all the right sizes which is why I ended up ordering online. Also, a lot of this is cheaper through my links. You will probably spend the same amount of money, if not more, to buy each of the hardware pieces individually as you will on a pack of 56 pieces (see my links on the material list). It’s a WAY better deal and you can always use the extra hooks and rings for other crafts, if you only plan to make one water bottle sling.
Steps To Sewing Your Water Bottle Sling:
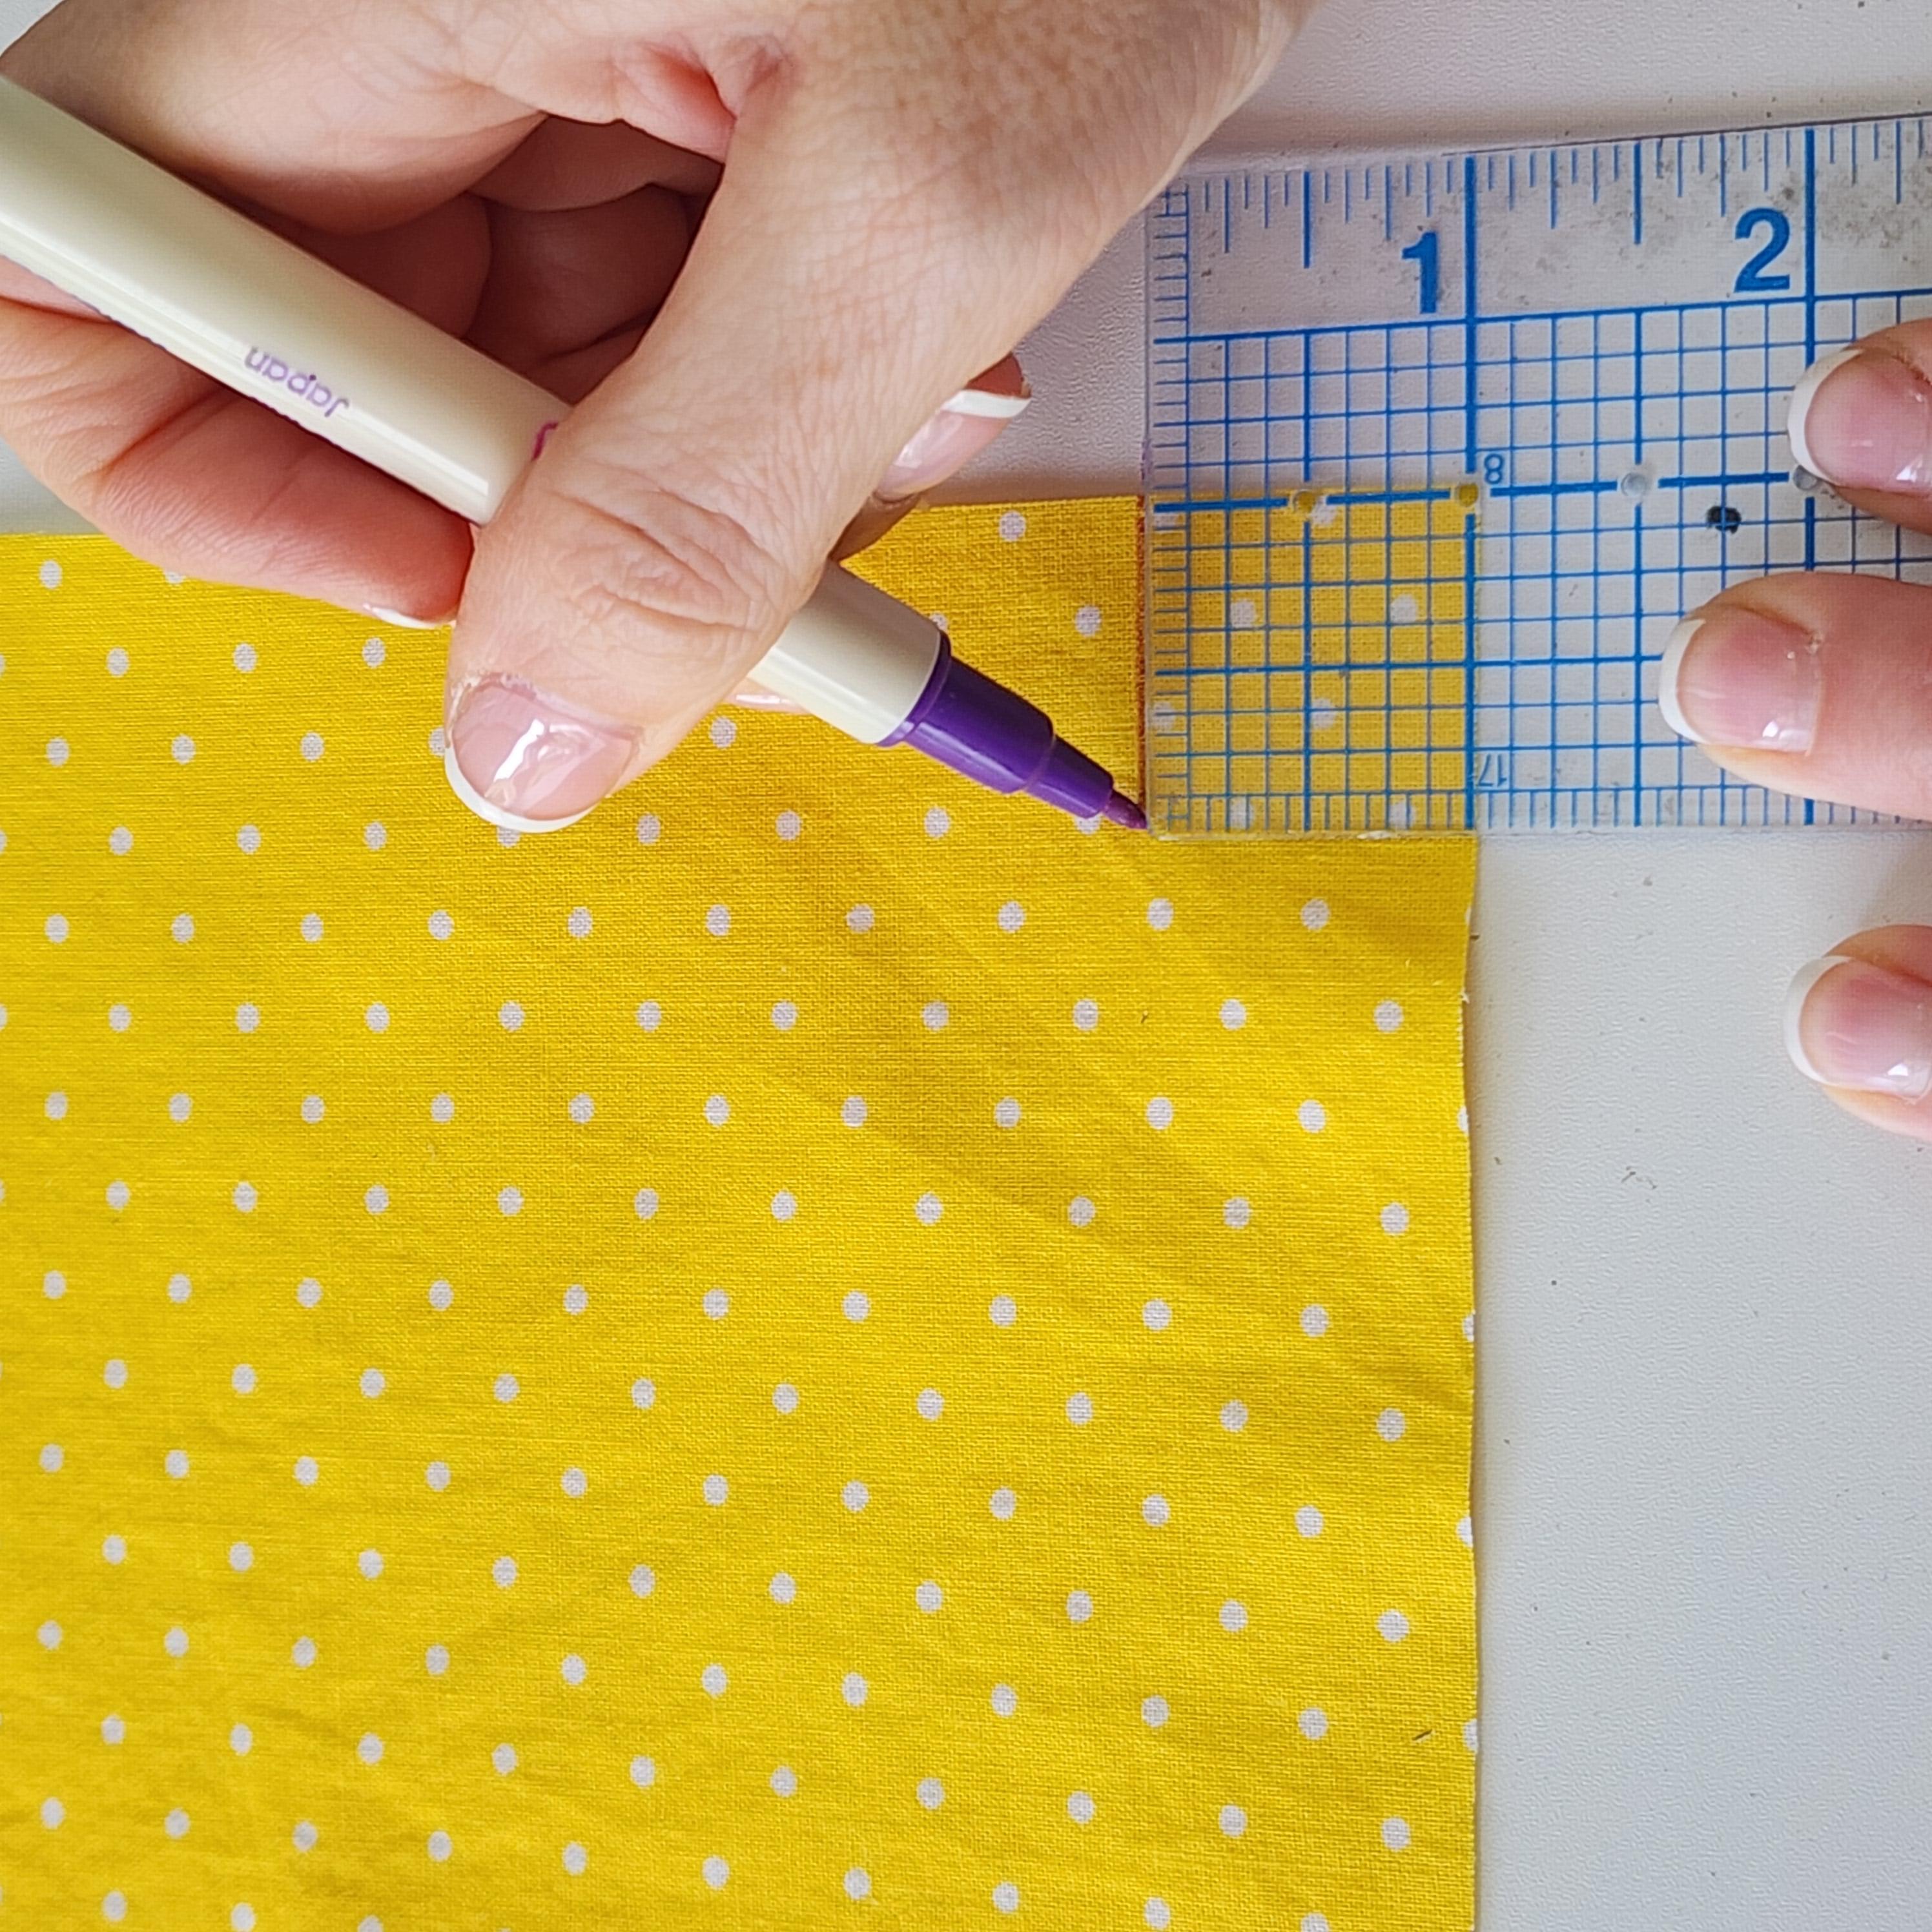
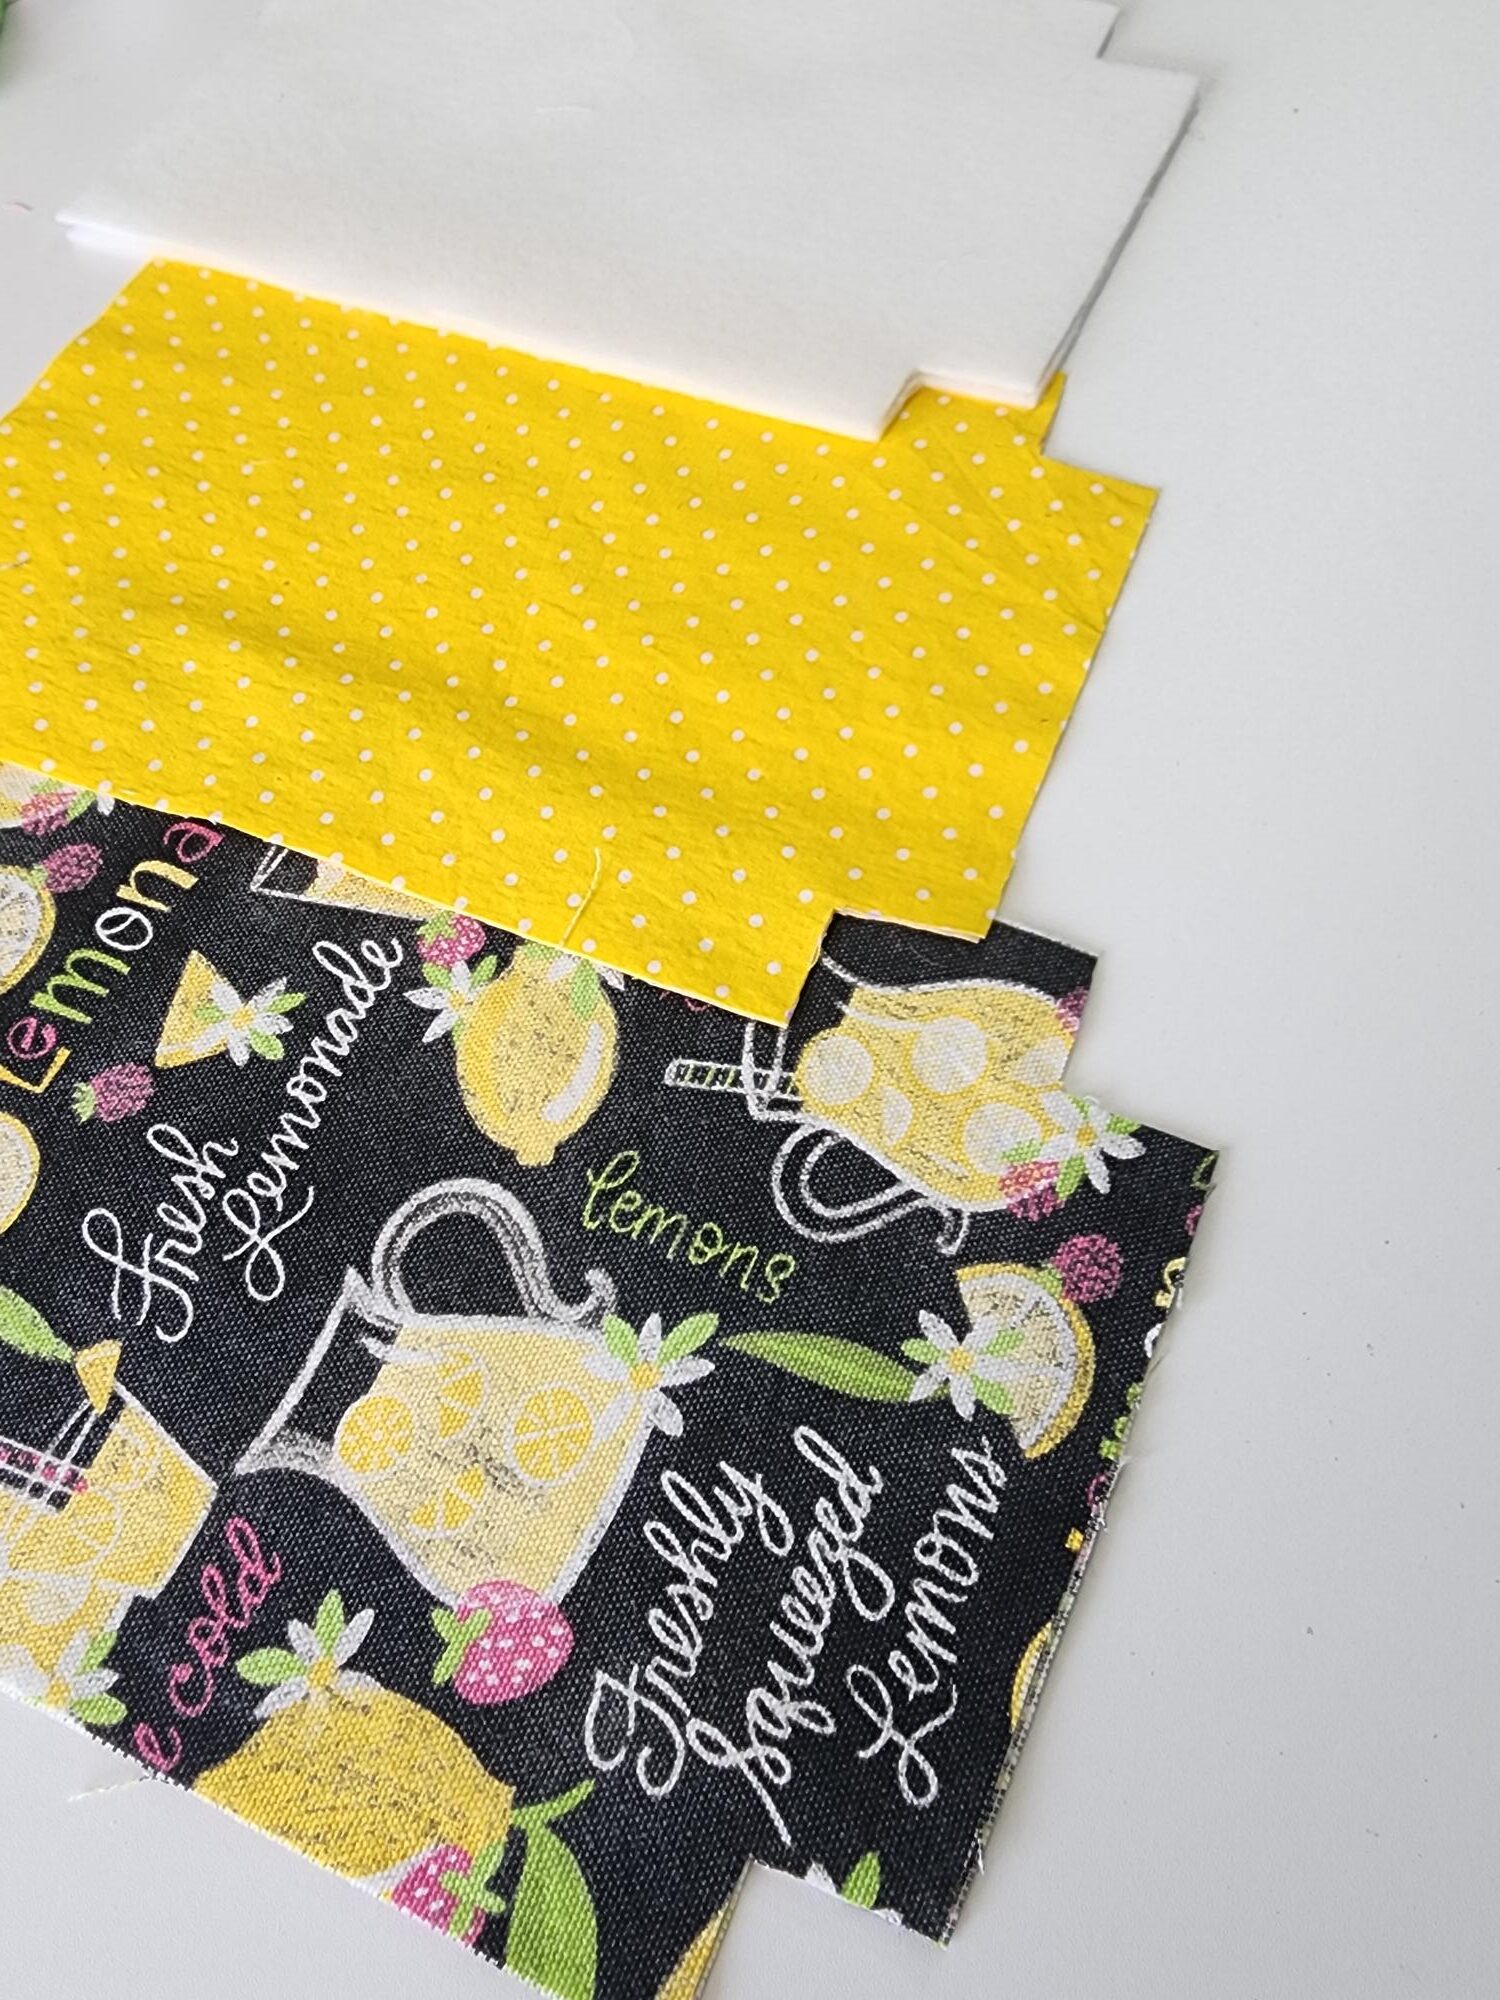
First, cut out your pieces to the sizes listed above. For the outer, lining and fleece pieces, you have 2 options:
- Print out my pattern HERE. Make sure to print “actual size” (the 1″ square will measure exactly 1″ if you print the pattern size correctly).
- Cut out the sizes I listed, and then cut out a 1″ square from the bottom corners
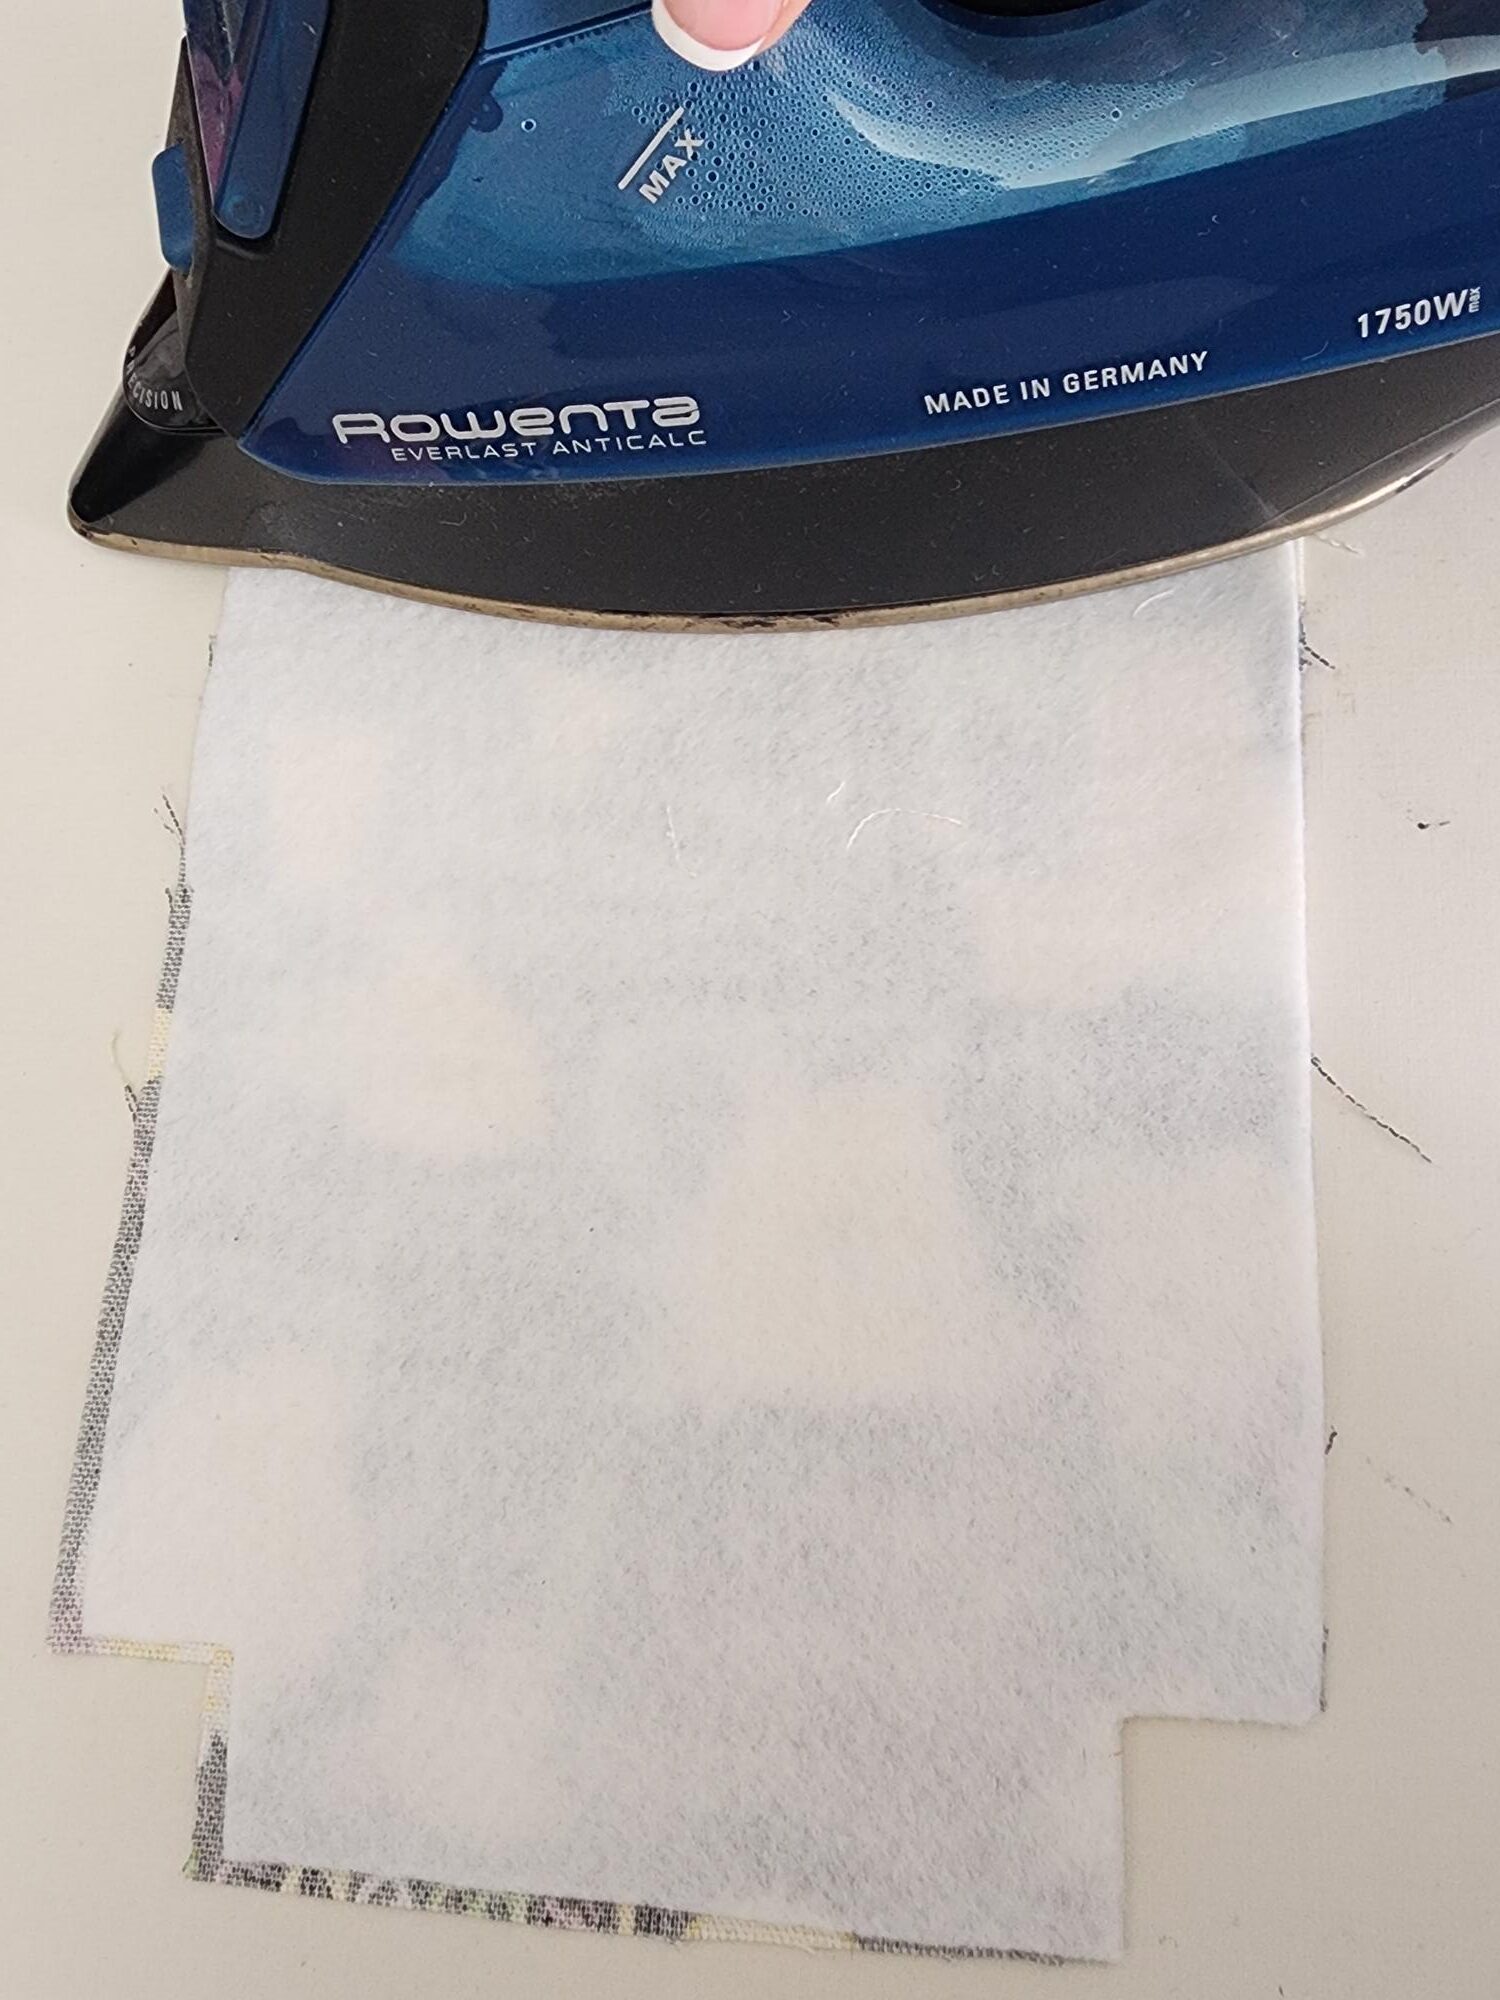
Interface the wrong sides of your outer pieces of your water bottle sling with your fusible fleece interfacing, according to your interfacing instructions. Remember not to use steam; steam on interfacing can warp your interfacing and shrink it up.
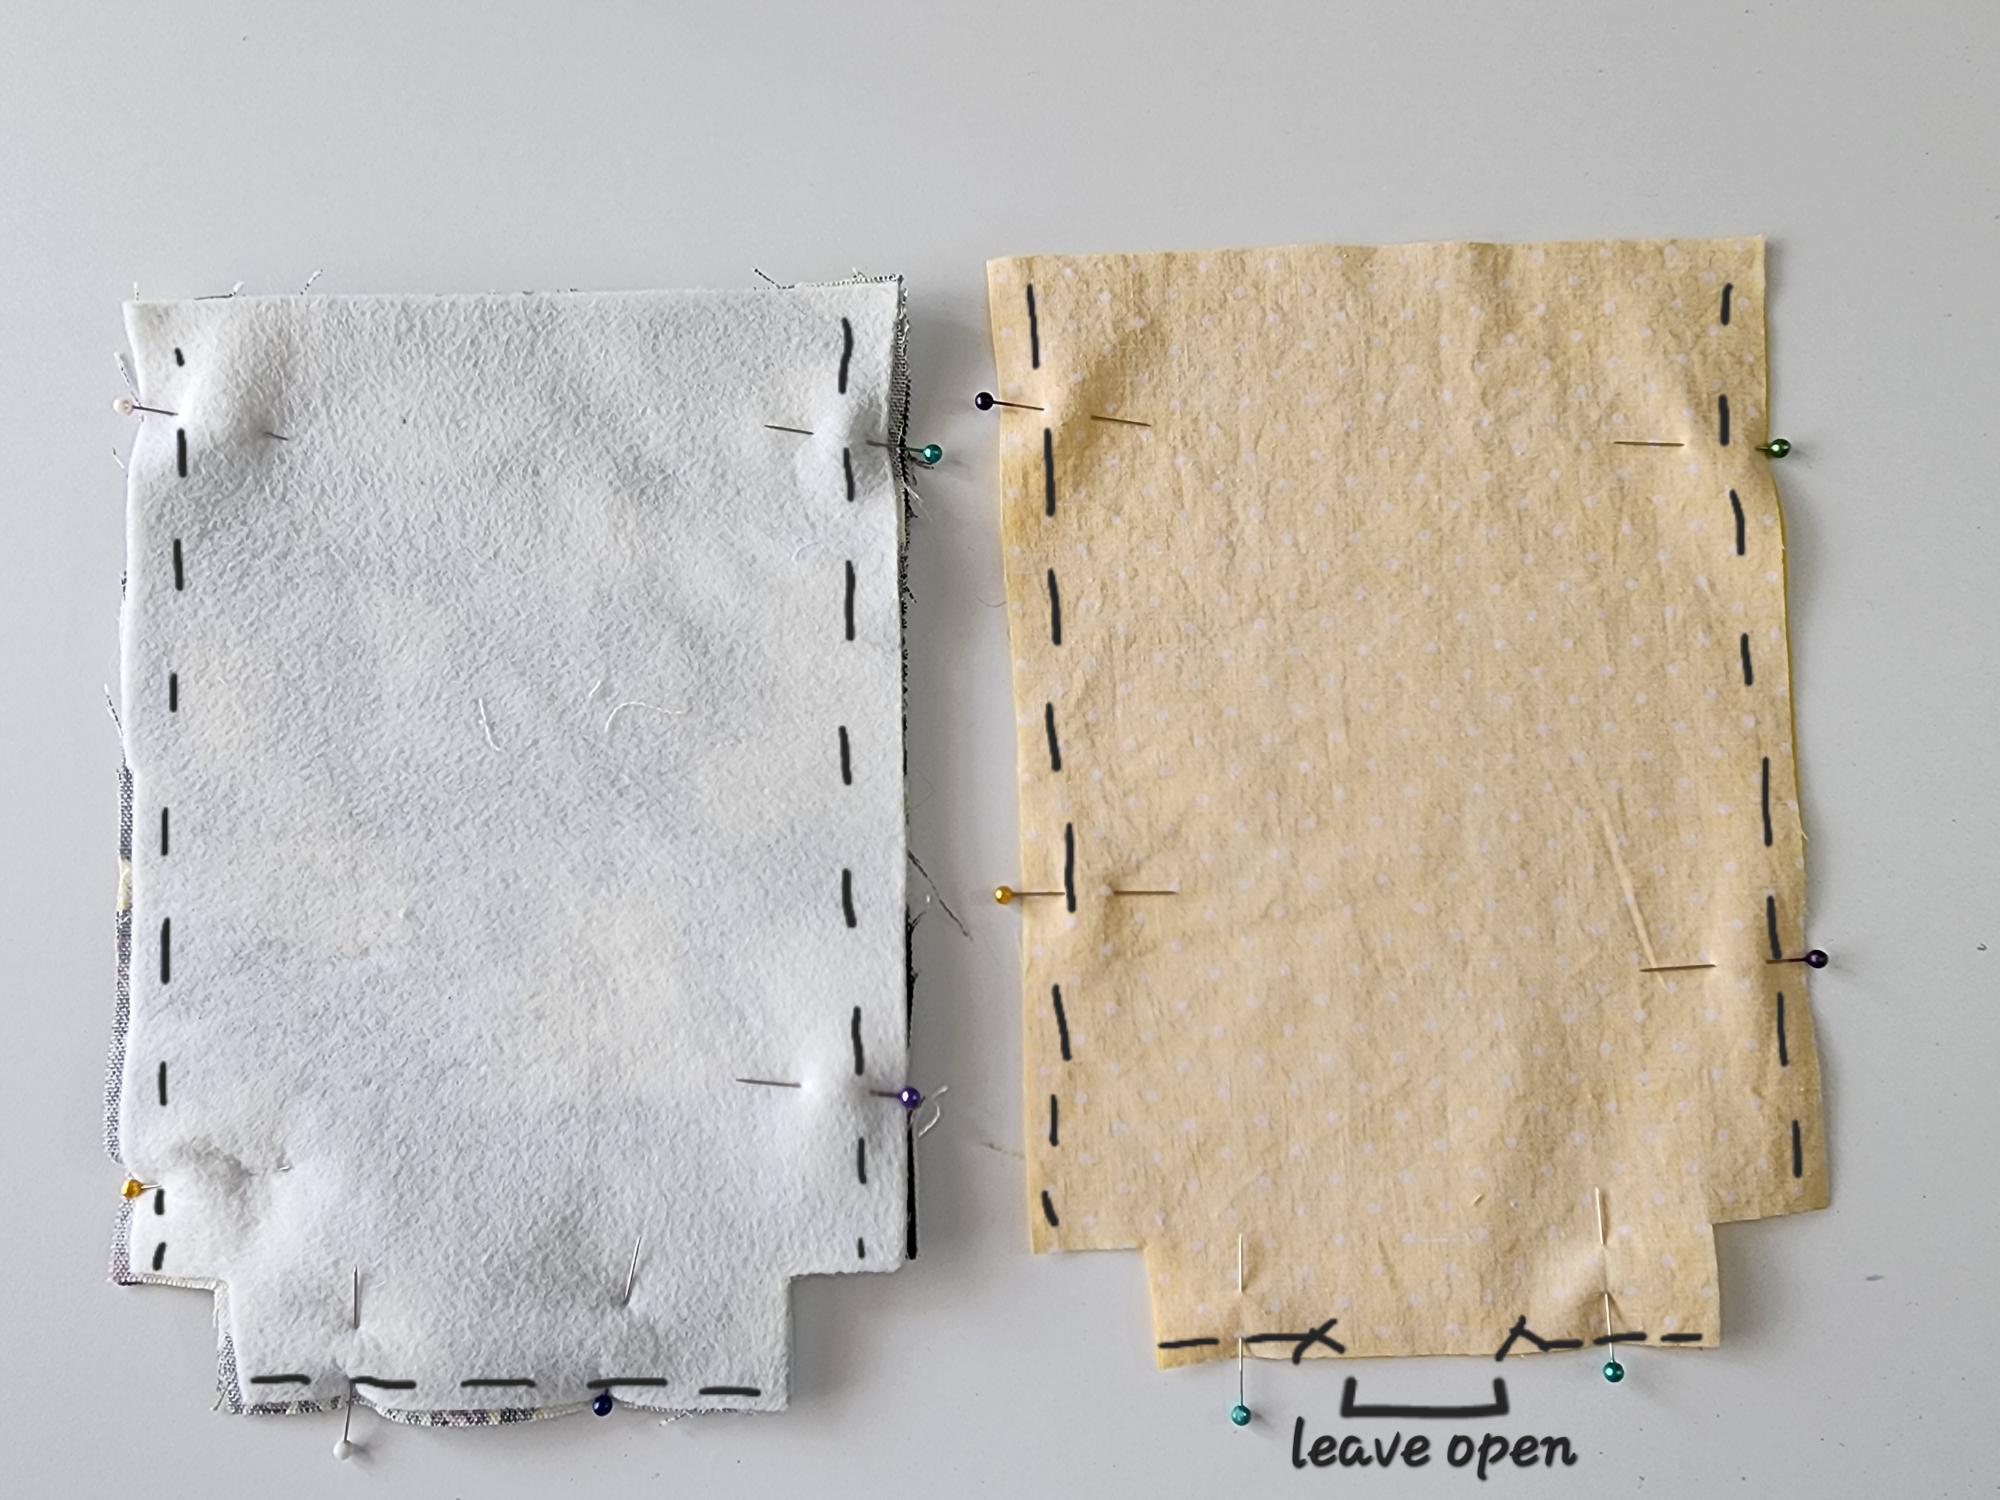
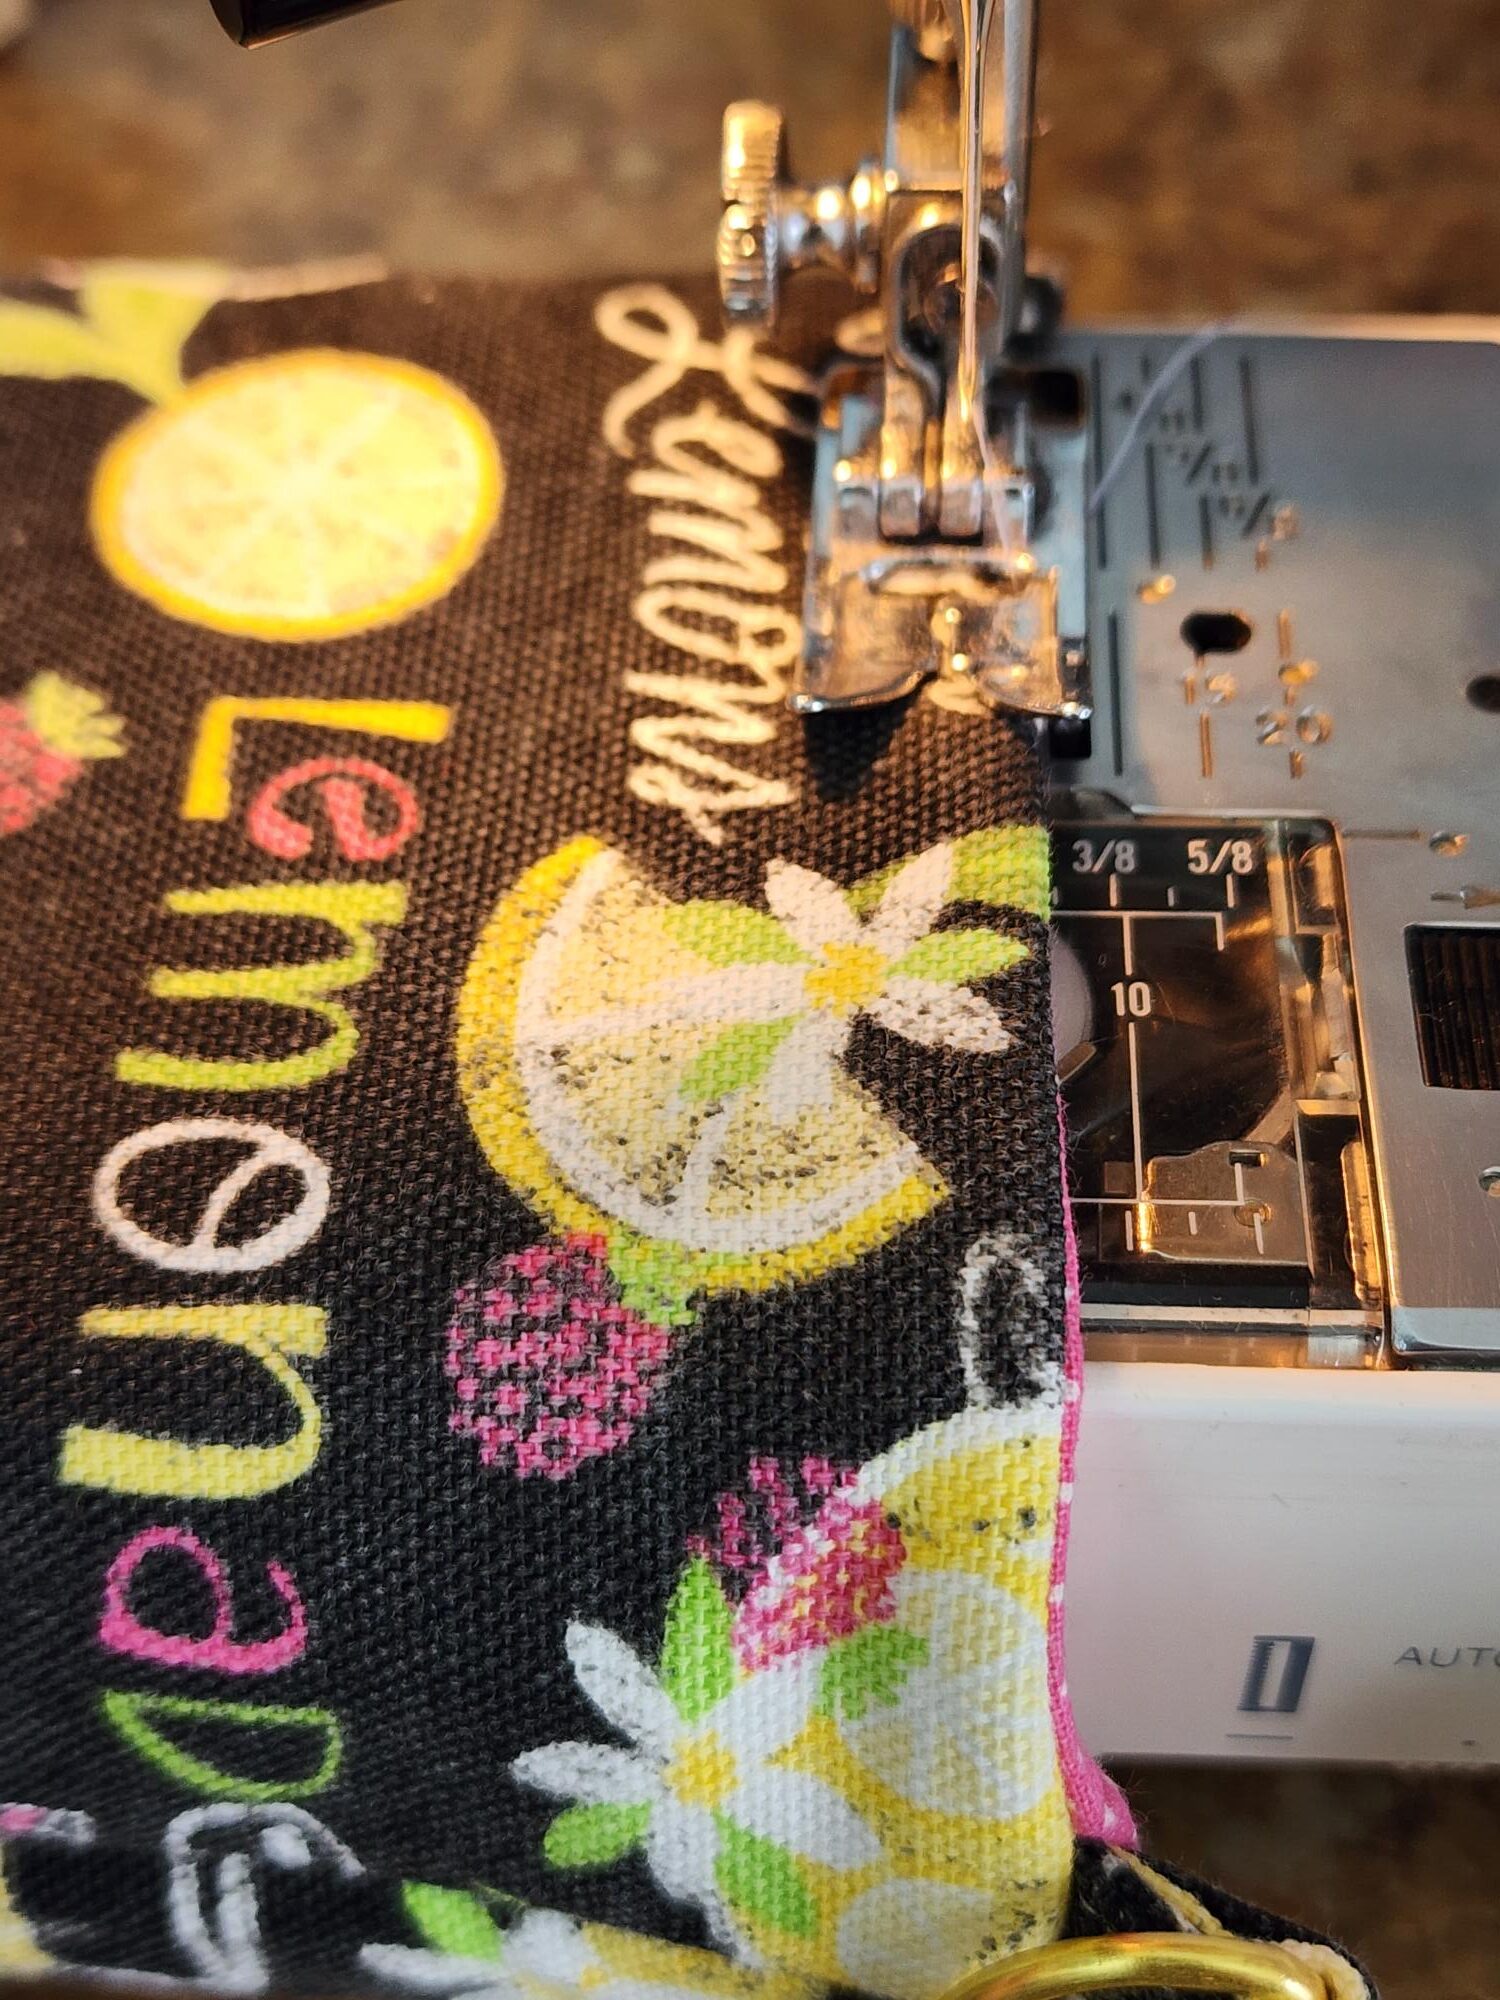
With right sides together, pin your two outer pieces together along the sides and the bottom. Stitch, using a 3/8″ seam allowance (you will be using this seam allowance on the entire project, unless otherwise noted). DO NOT pivot at the corners to sew. You are only sewing the sides and the bottom seam. We will deal with those corners later.
Repeat this process with your water bottle lining fabric exactly the same way, EXCEPT, leave an opening on the bottom seam (to turn your water bottle sling right side out later on).
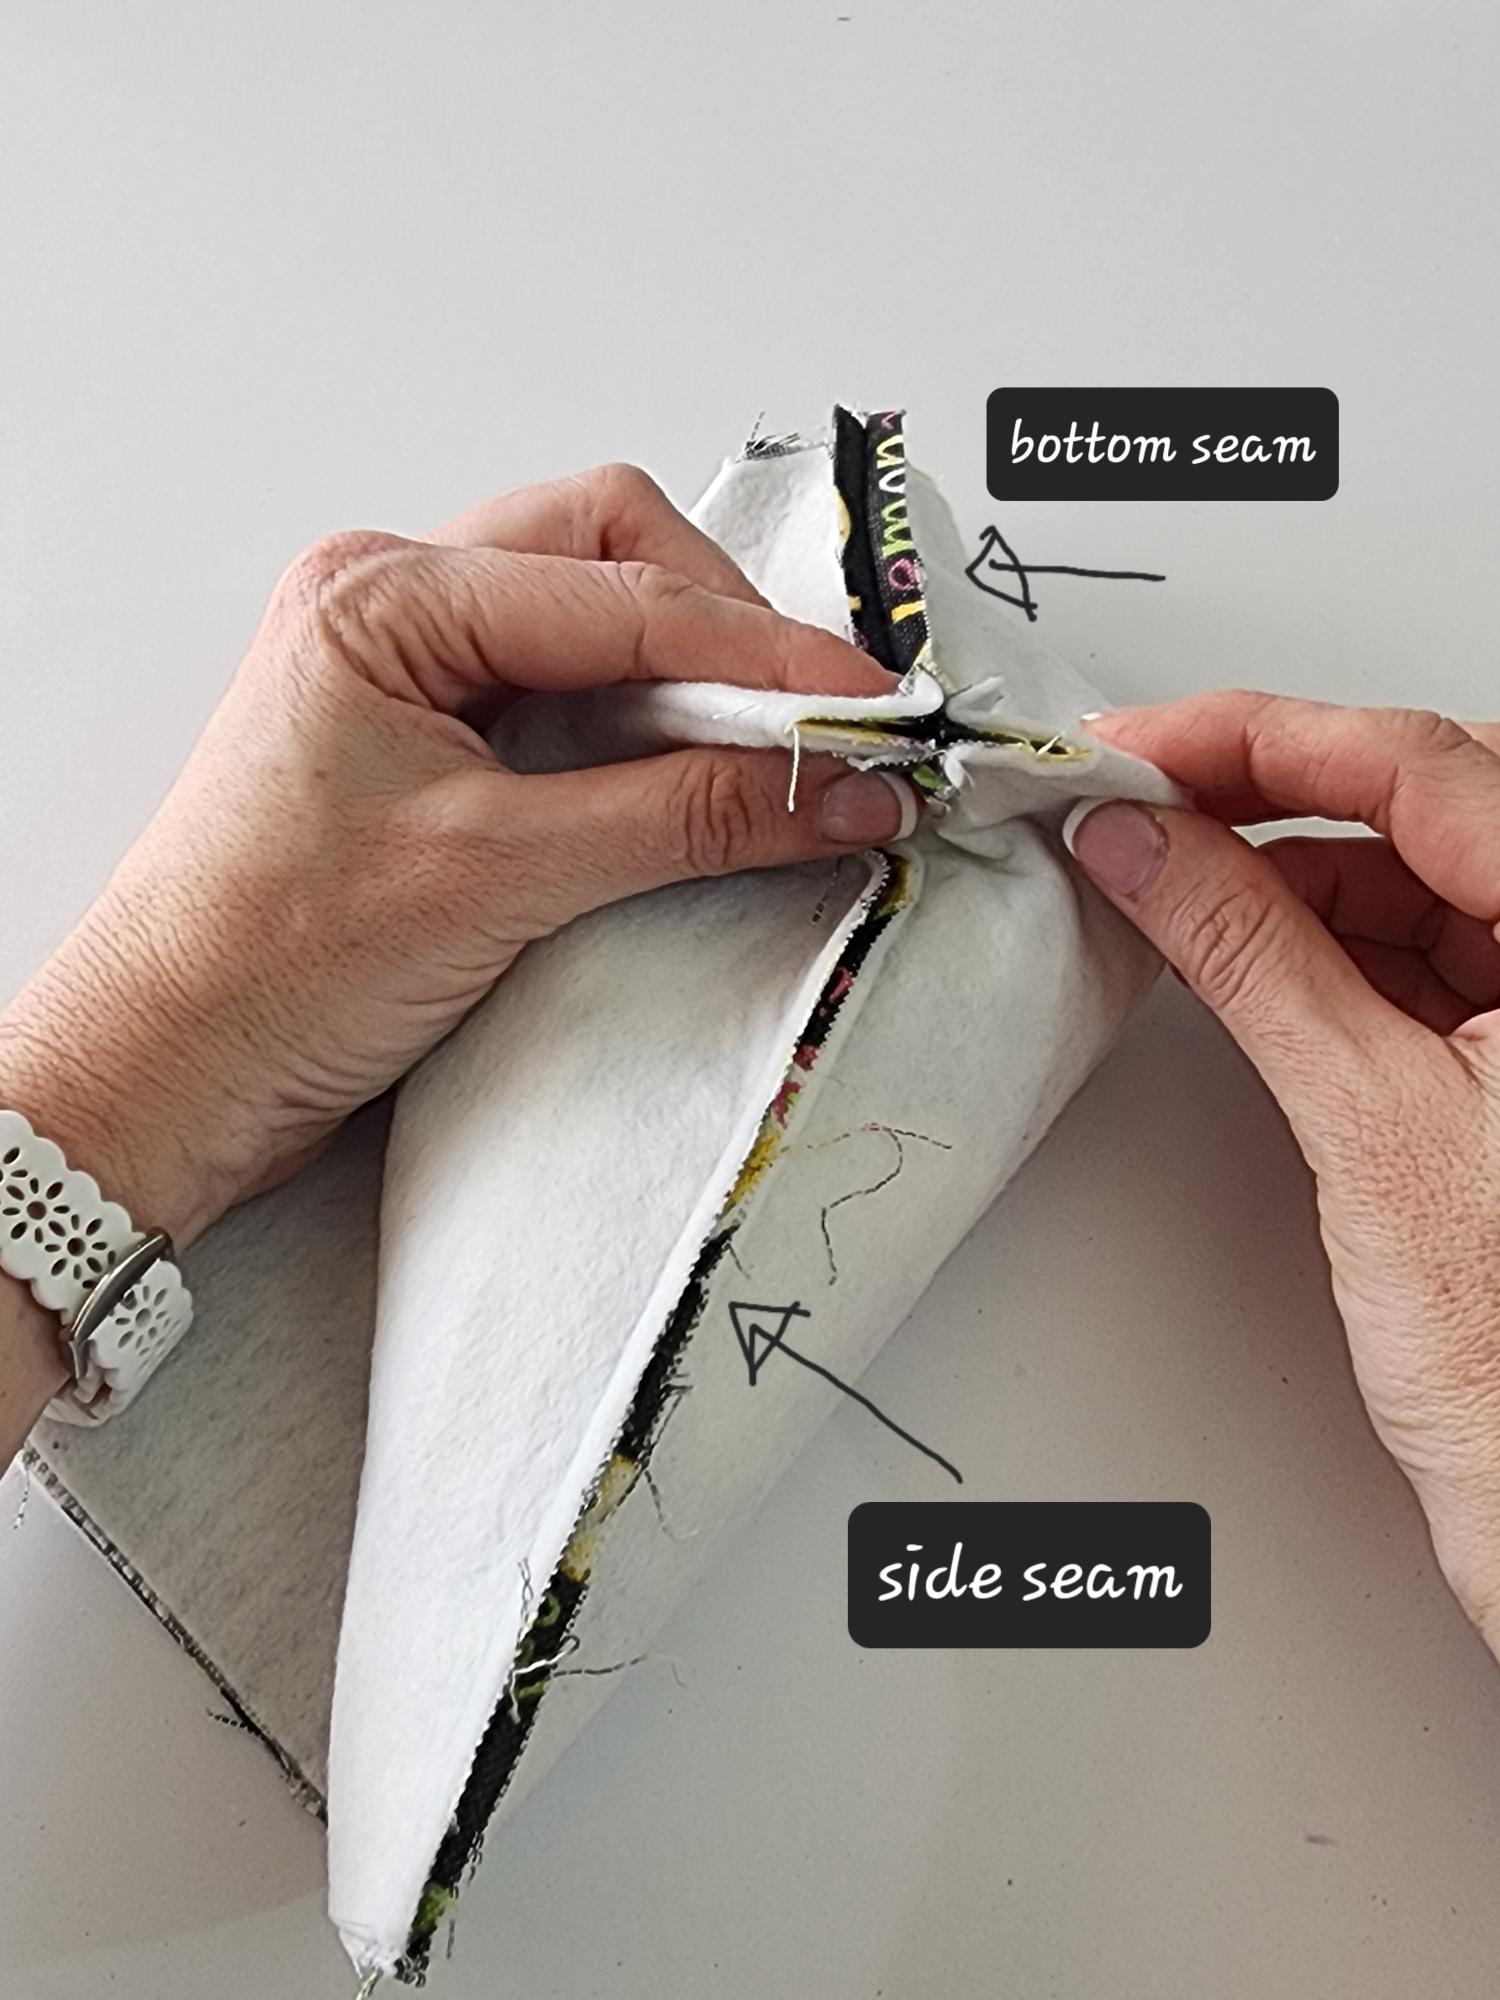
Now, you will stitch your boxed edges. This is always a little tricky to try and explain, but hopefully between my explanation and my picture, you’ll understand.
On the inside of the corner (on that bottom corner that you notched out), pinch both sides of the fabric (front and back) and pull out the corners. This will bring the bottom seam and the side seam to lay on top of each other, as you can see in the picture. Pin your seam, and then stitch across, keeping the edge of your seam on the 3/8″ seam allowance. If this is still too confusing to figure out, don’t fret; I’ve got you! I made a video on how to do this on another tutorial, which you can find HERE. It might be easier to see the steps in action! (Scroll down past the 6th picture to see the video).
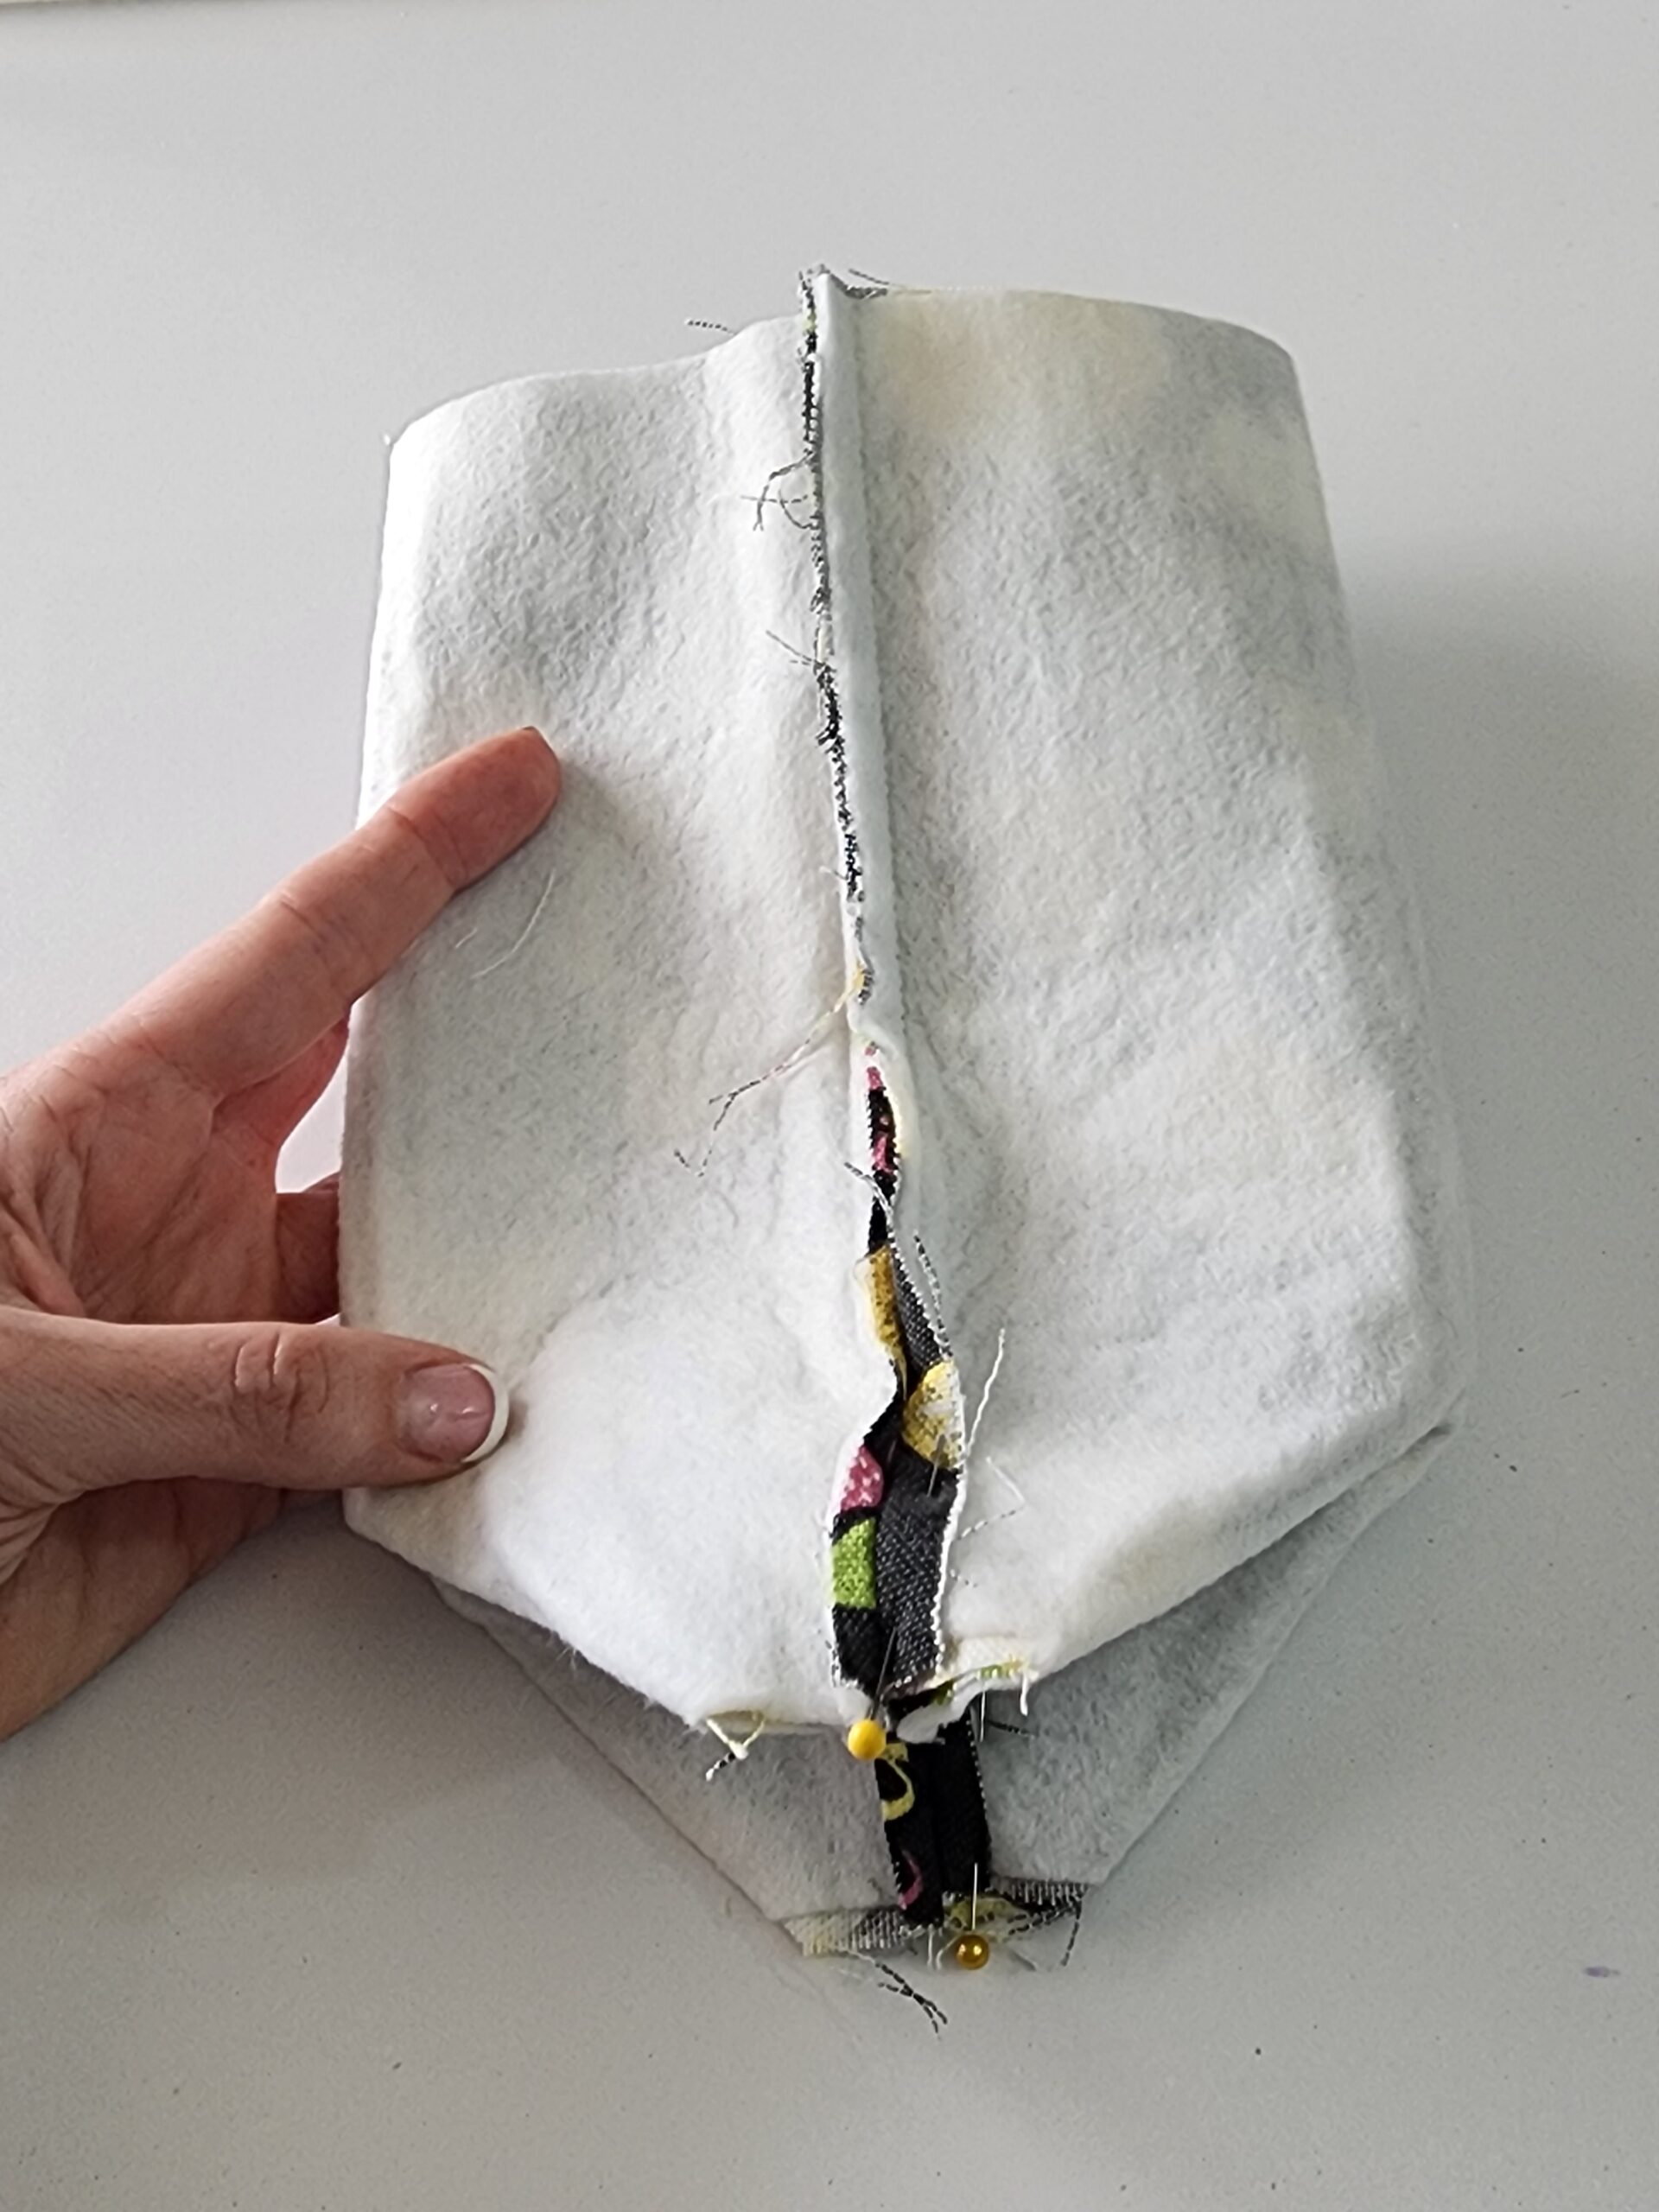
Turn your outer water bottle sling pieces right side out and set aside for later.
*Note: It may be helpful in later steps to iron open your seam allowances. I know it’s a little tricky because of the size of the pieces you are working on, but if you can at least iron open the seam allowances on the top edges of your lining and your outer pieces, it will help you later when assembling all of the pieces together.
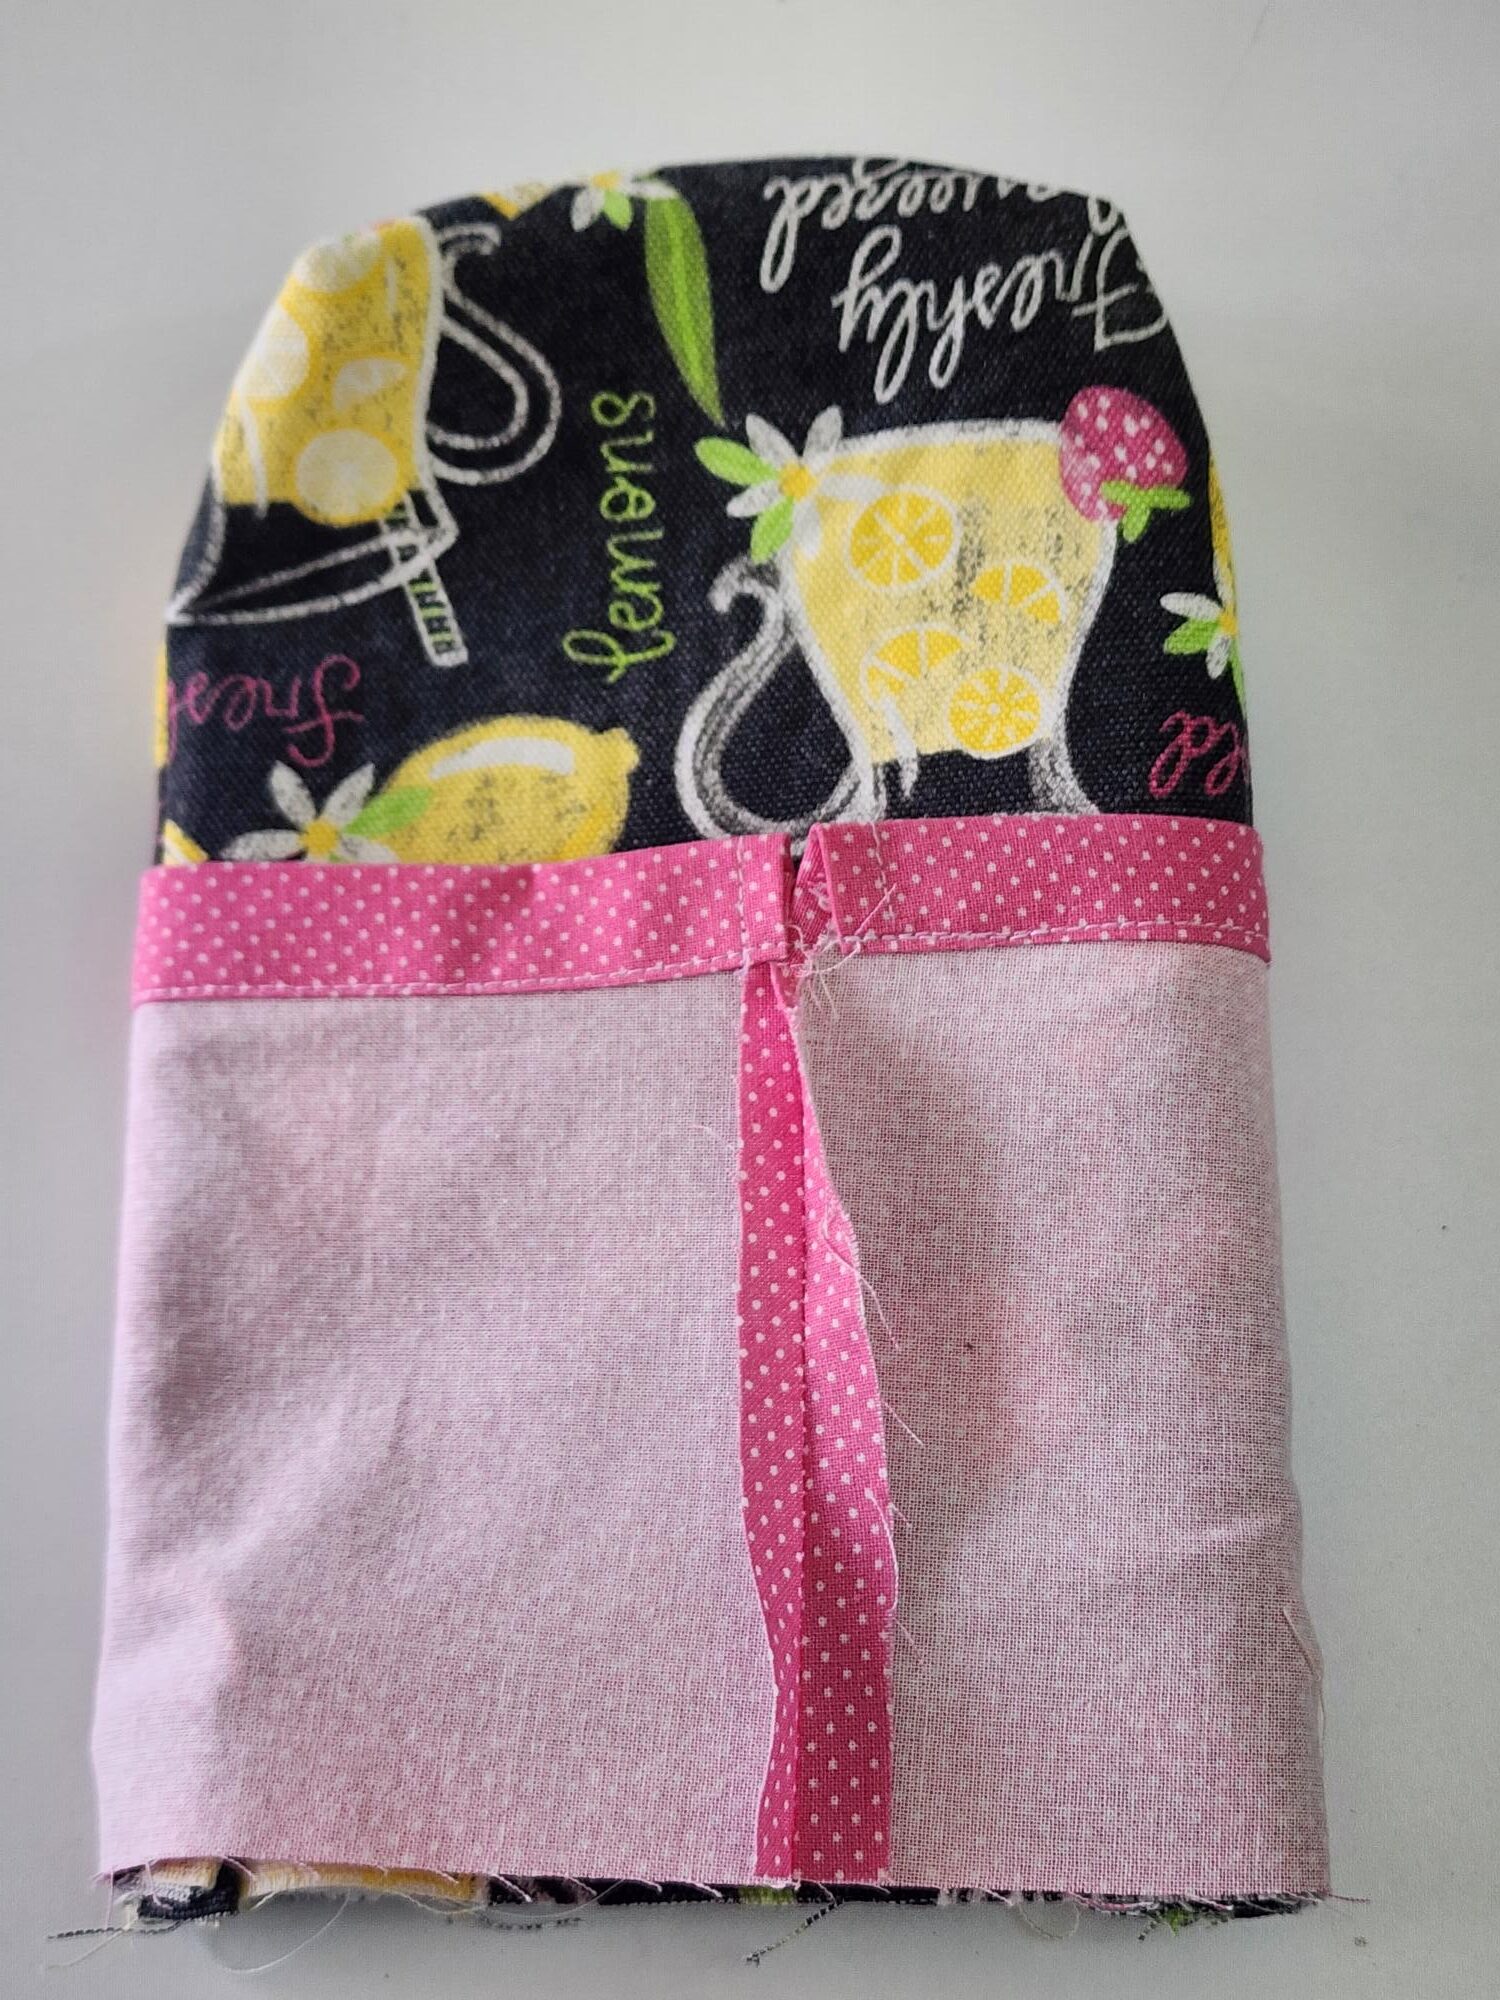
Time to work on your top casing piece!
First, fold your fabric in half (your fabric will now measure 6 x 6 1/2″) and pin along the short edge on the side. Measure 2″ down from the top and mark it with a dot. From the bottom, stitch all the way up to that dot. Don’t forget to backstitch at the dot!! (I forgot to mark my dot for the picture, so just pretend there’s a dot 2″ down from the top).

Take your fabric to the iron and press open the seam. You will also be pressing down the top part, past the dot, that you did not stitch. Press it at 3/8″ as well (I told my students to treat it like you sewed all the way up to the top when pressing that seam open).
You now want to hem down that open seam. You can either leave it folded as is, or you can fold under the seam one more time for a finished edge. You aren’t going to see the seam, as it’s going to be inside your casing, so you are perfectly fine to keep it ironed at the 3/8″ and not fold it under again. Starting at the top edge on one side, stitch down to where your dot is (or a couple stitches past that), pivot and sew across the seam, and pivot again going up the next side. You aren’t following a seam allowance on this part; you are stitching close to the raw edge. You’ve just created a hem on your casing!
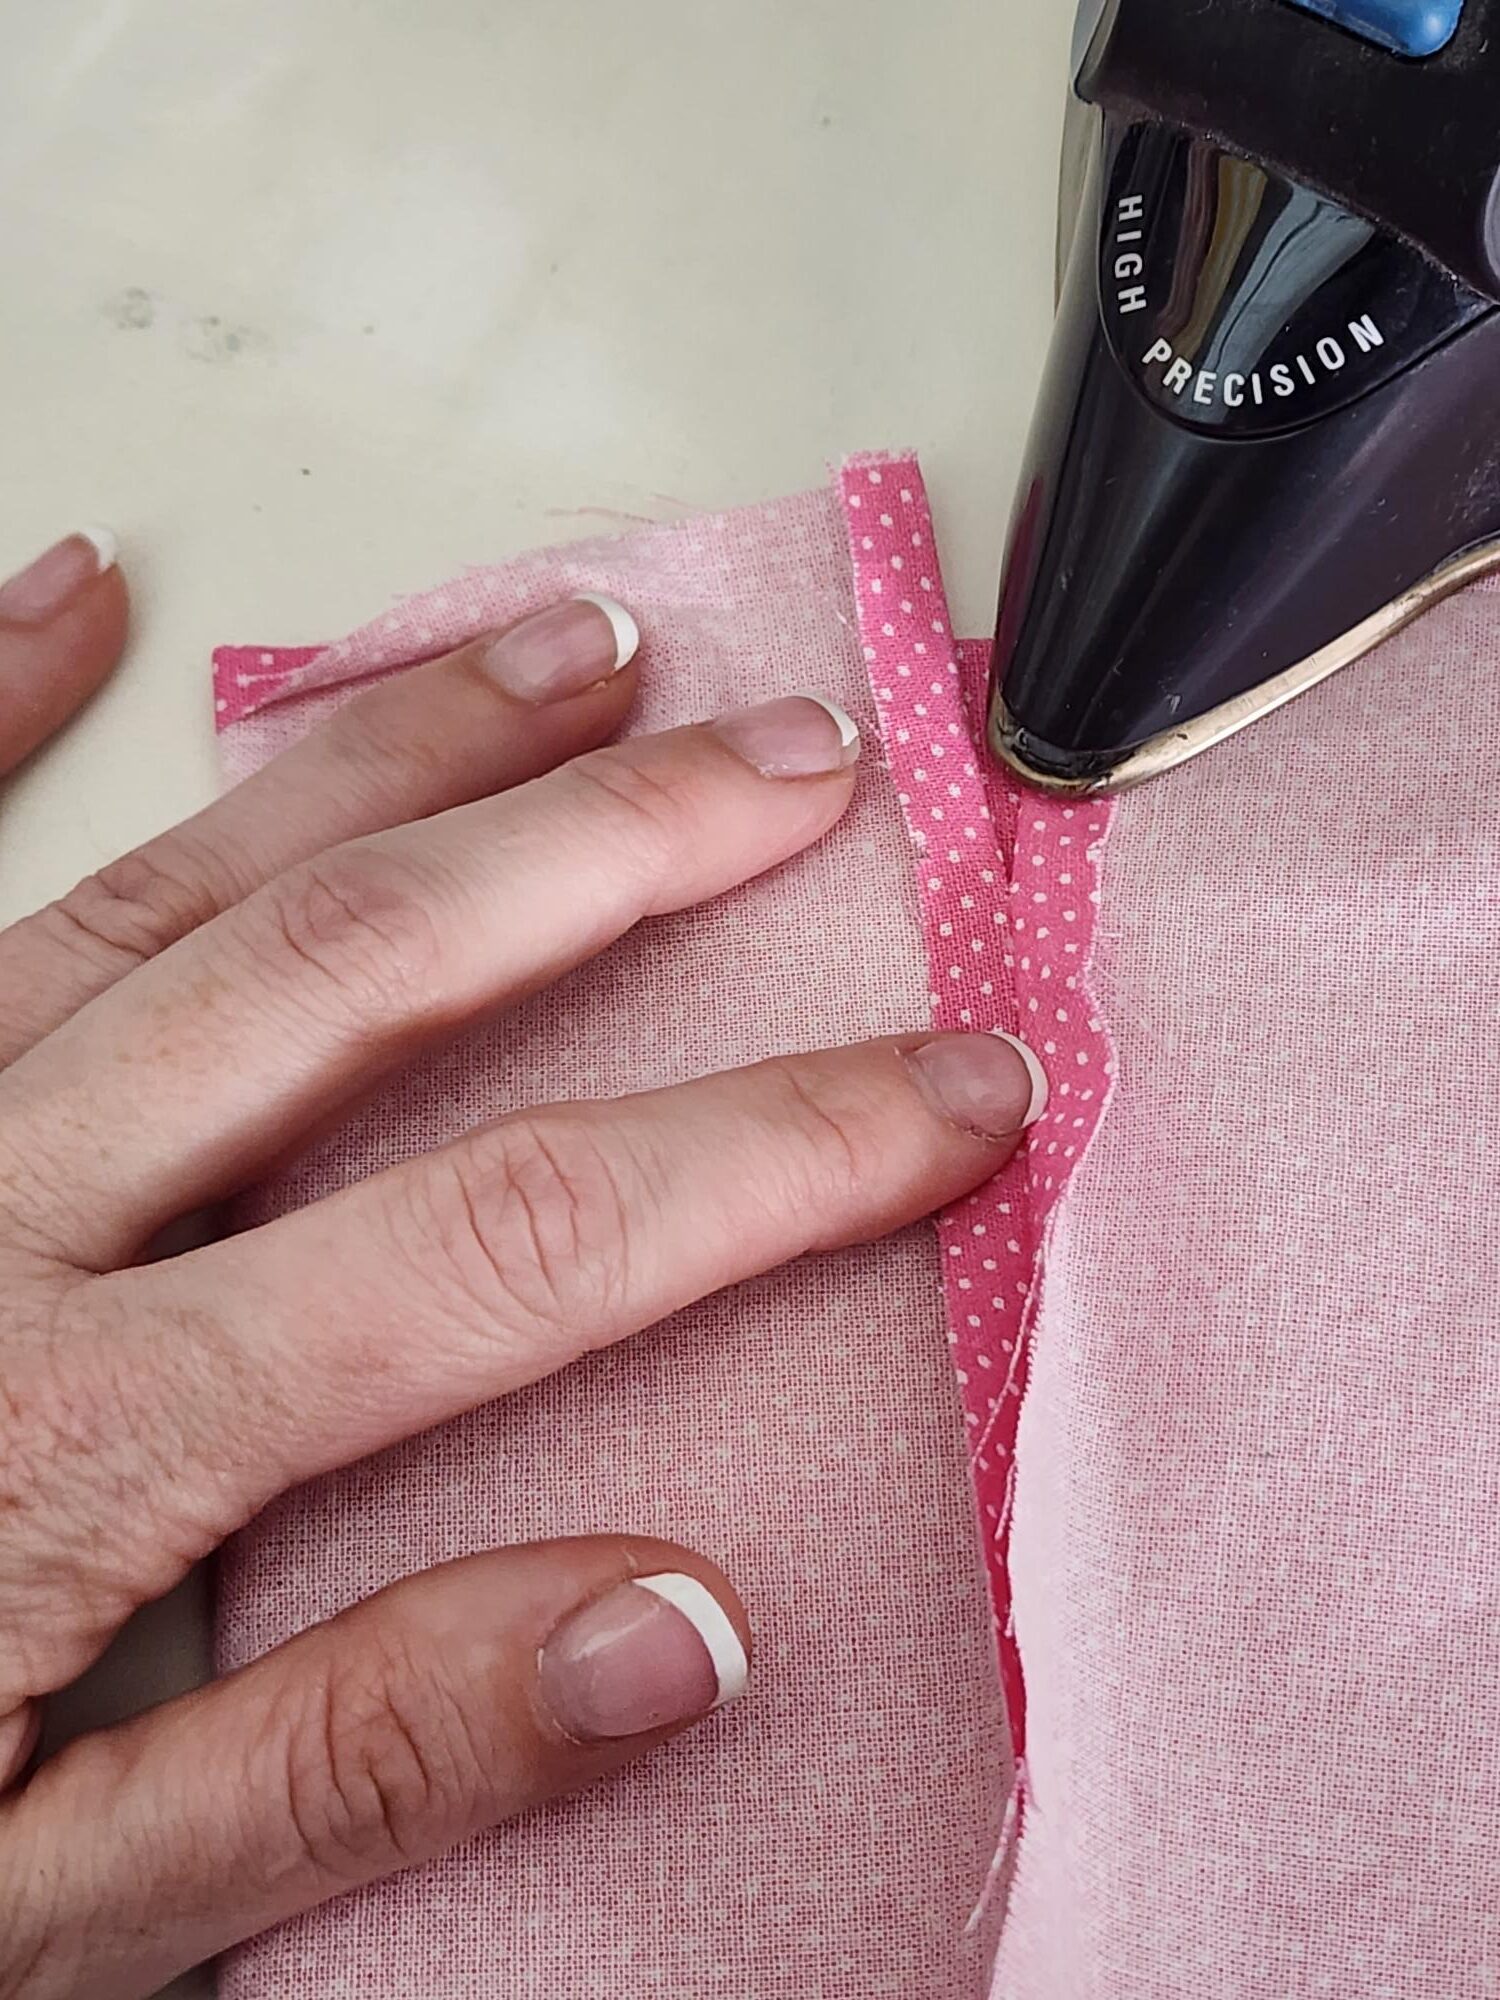
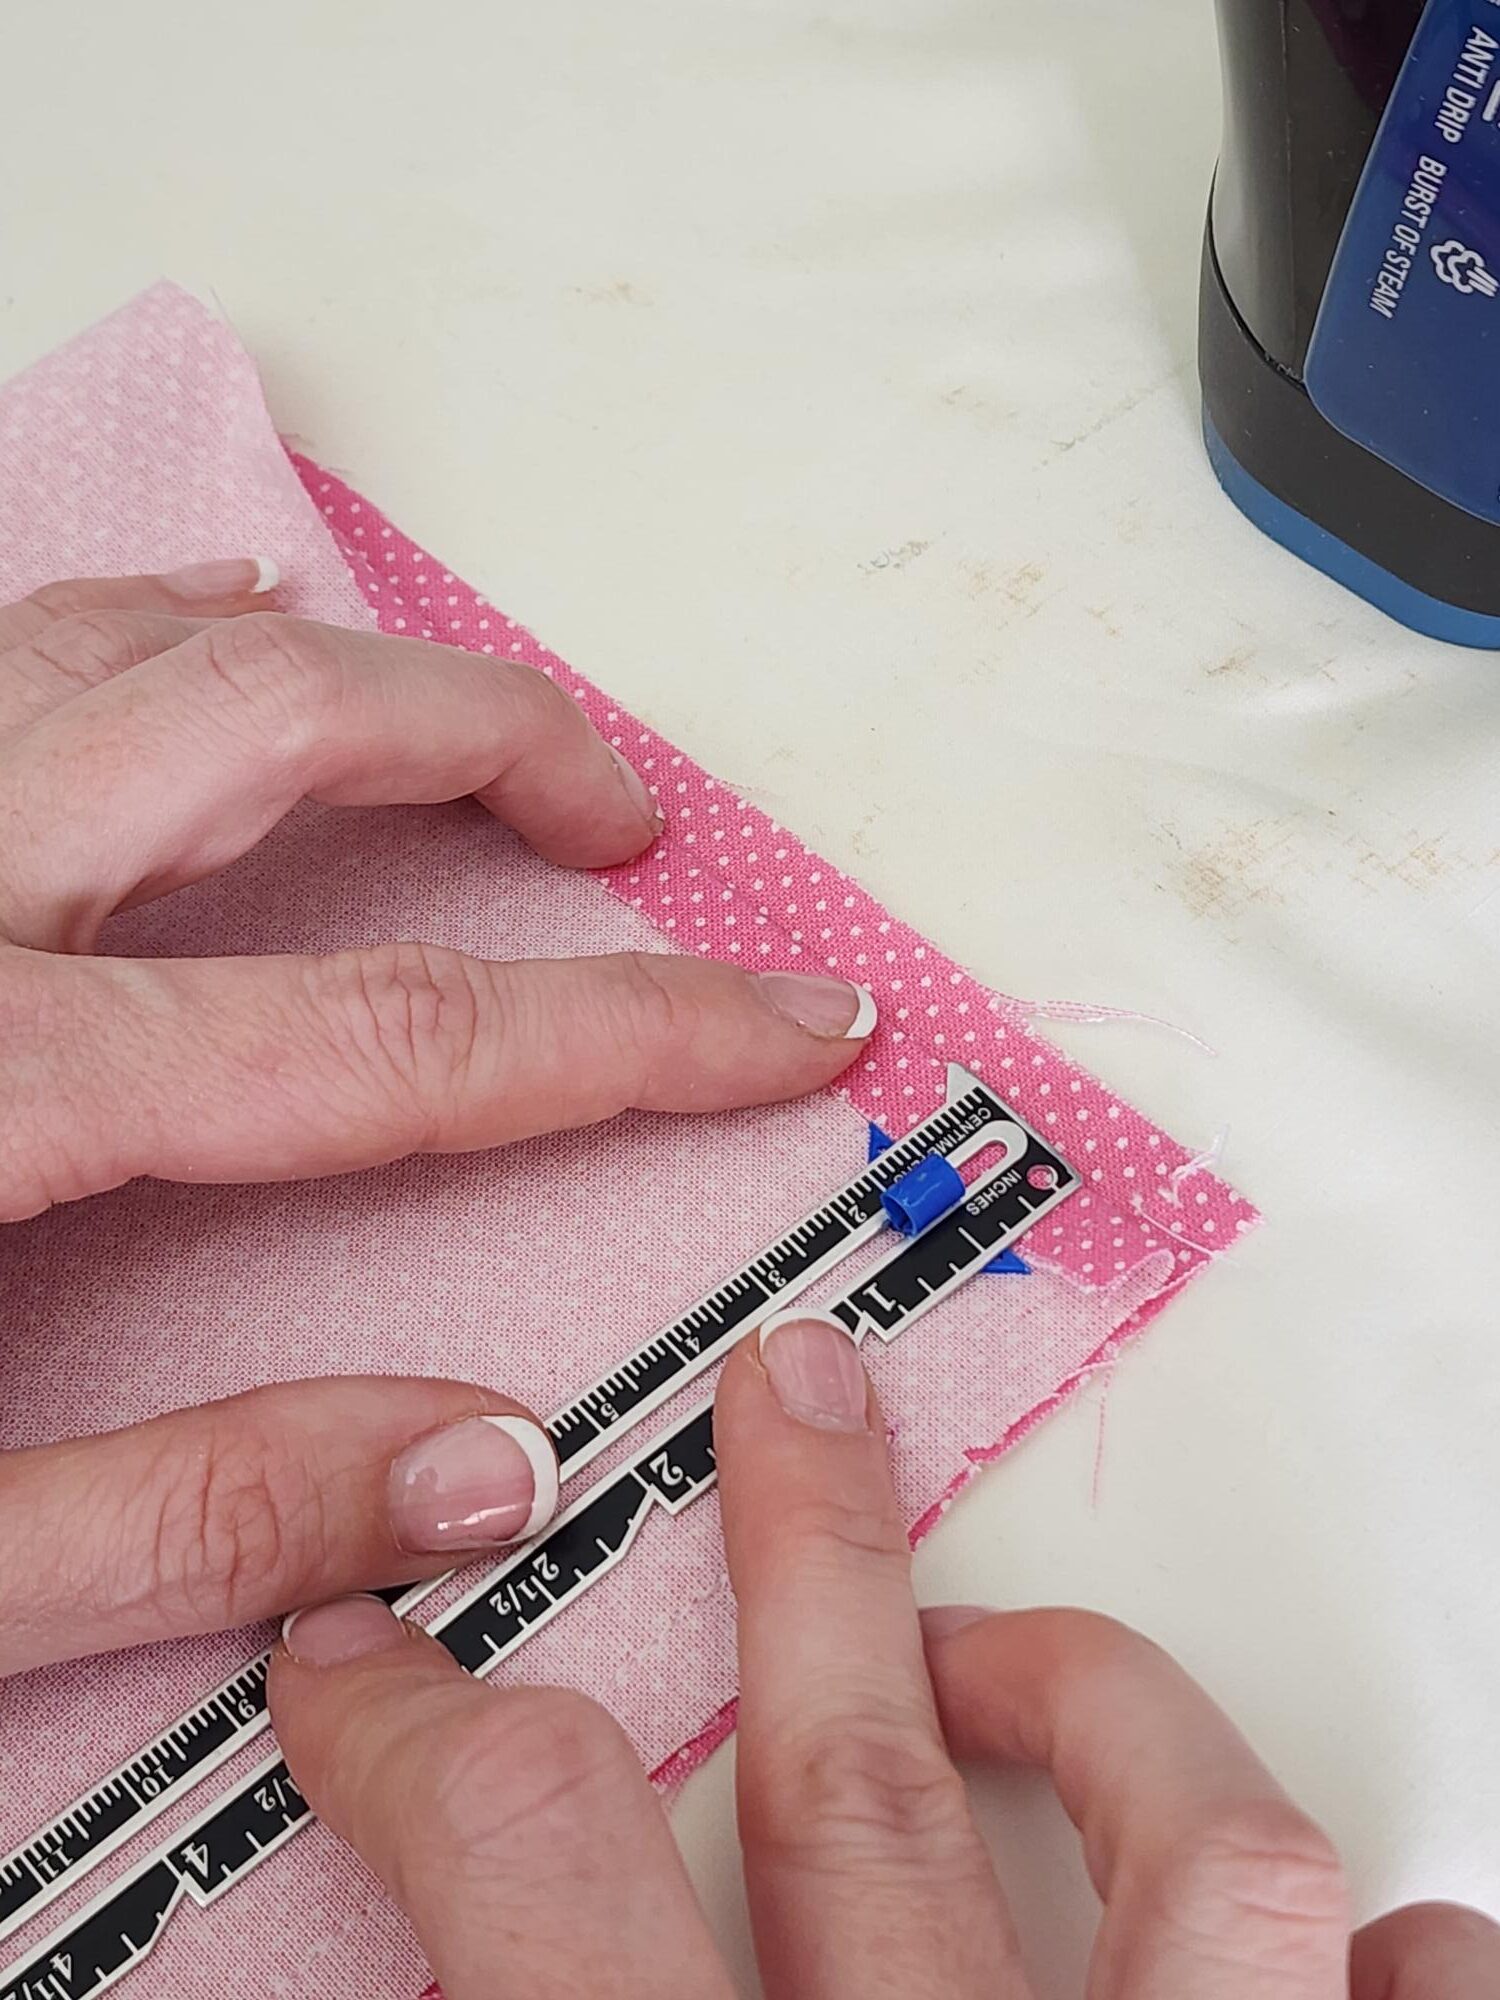
Now we will create the actual casing. On the top edge (where your seam is open and hemmed), fold your raw edge 3/8″ (using your seam gage ruler) and press. Fold again at 5/8″ and press. Starting at one of your open ends, stitch close to the bottom folded edge until you get around to your other open end. You are leaving the sides open to put your casing through later.

![]()
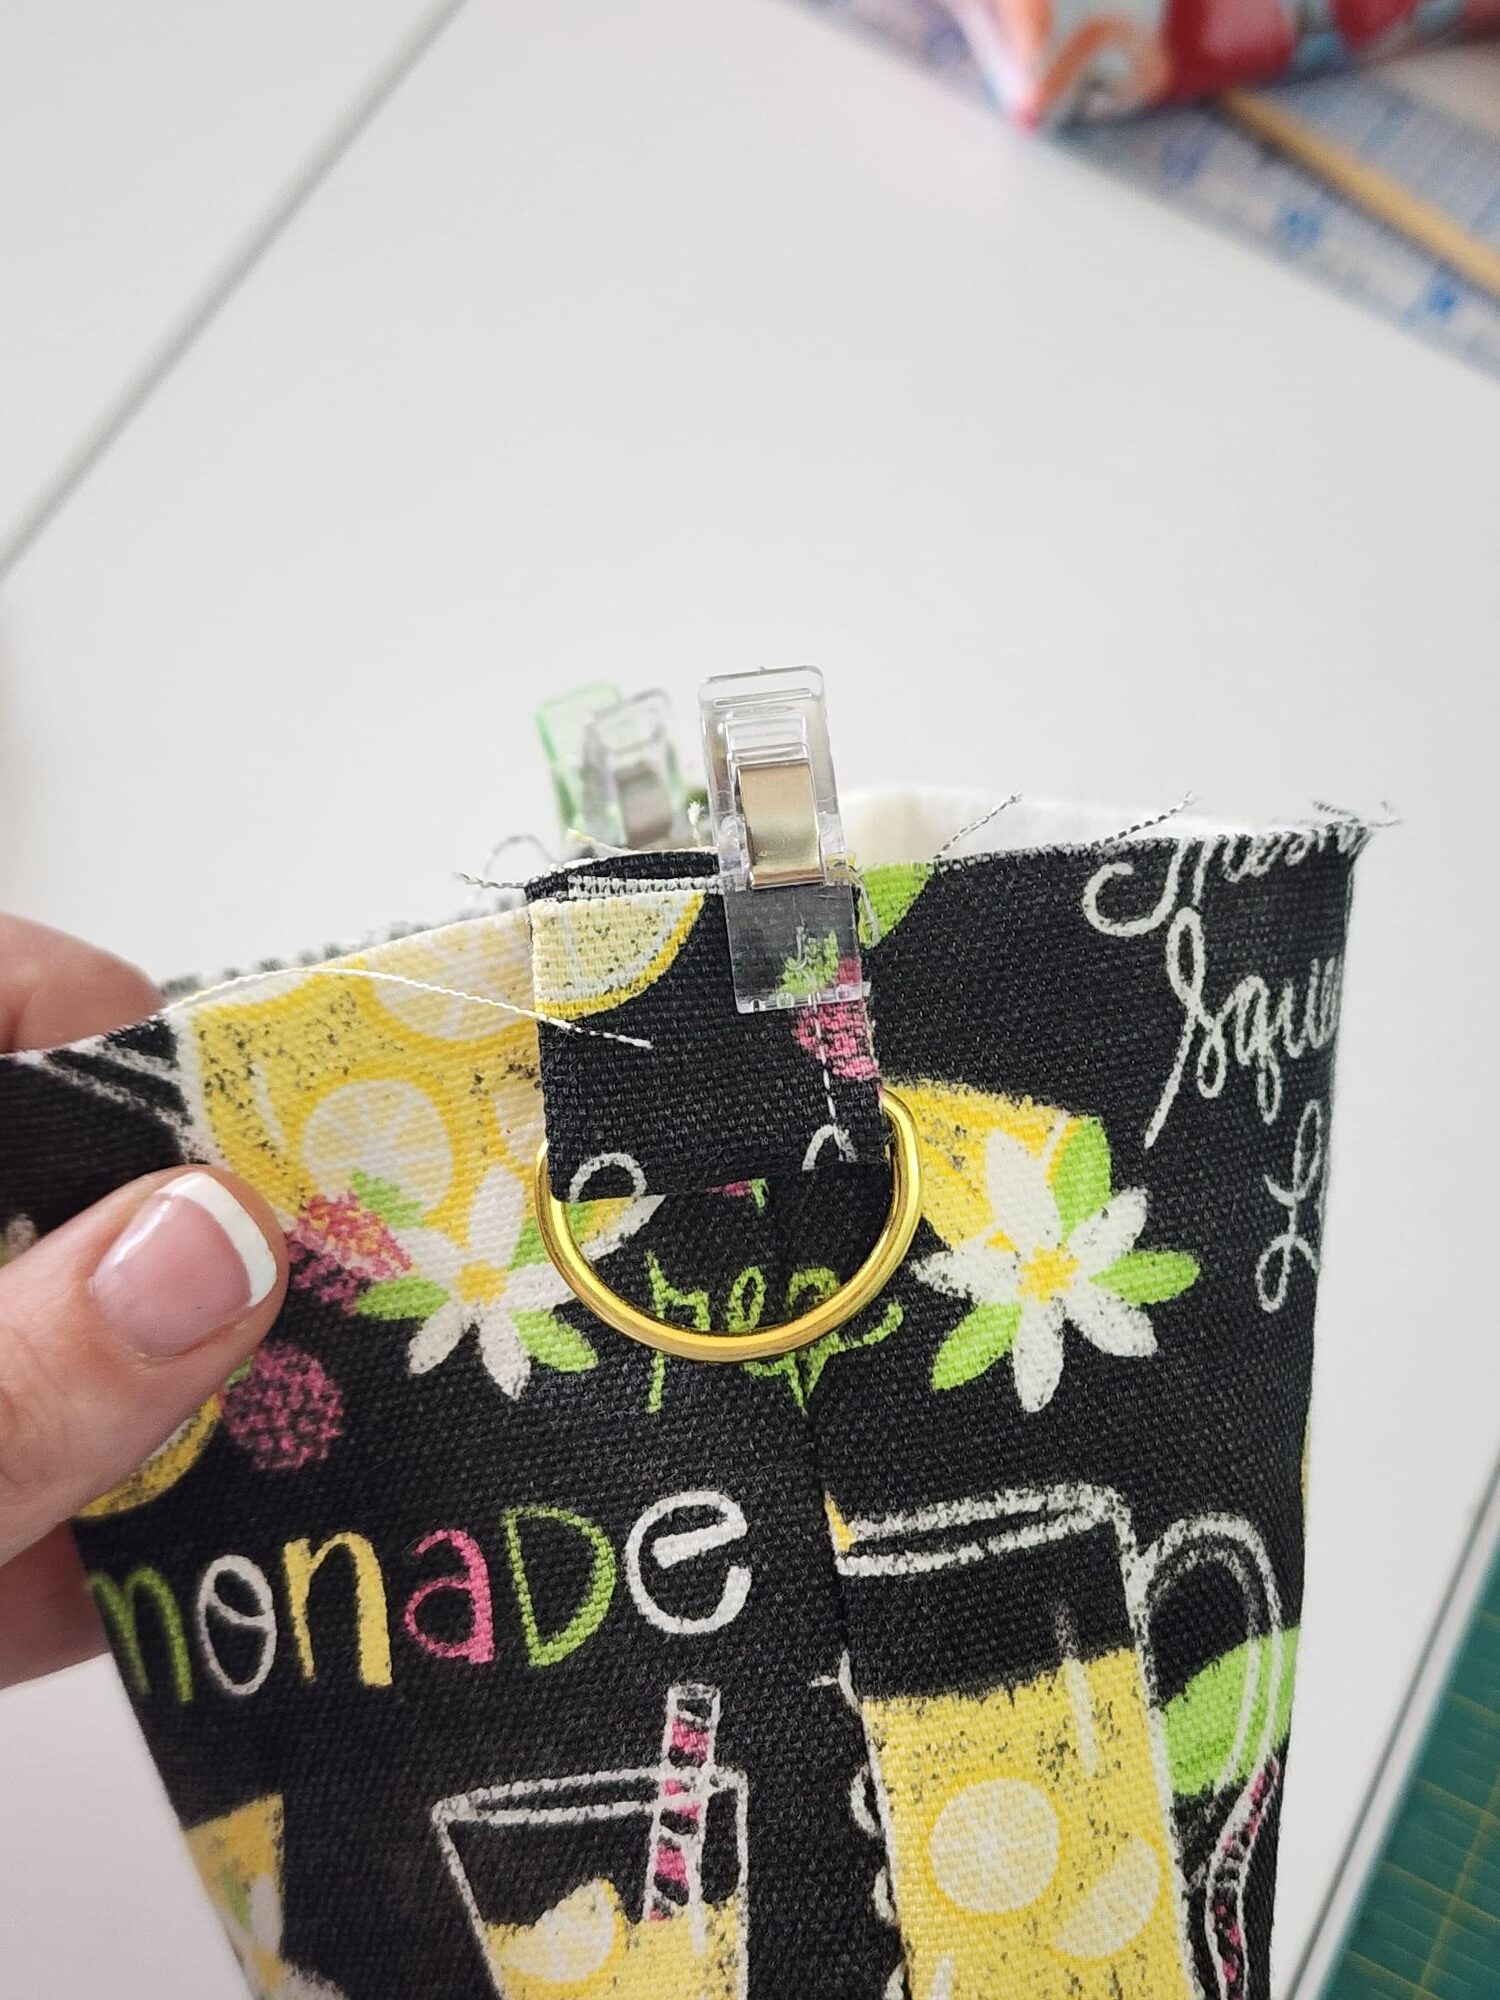
Create your tab pieces
Fold your tab pieces in half so that they now measure 2″ x 2″ and press. Then, bring in your raw edges to the crease you just created and press on the folded edges. Make sure not to iron out the original crease you created.

Fold in half, using the first crease you created. Press. Pin those folded edges together and stitch 1/8″ away from the edge.

Place your D rings inside the tabs you just created, folding so that your raw edges are even, and baste 1/4″ away from the raw edges. Then, center your tabs on the side seams of your outer water bottle sling pieces, matching the raw edges of both pieces. Baste in place.
Time to assemble your water bottle sling!
First, you will put your outer water bottle piece (which is turned right side out) inside your casing piece (which is still inside out). Remember that you are matching raw edges; your hemmed casing should not be matching your top edge. Also, make sure that your casing opening is in the center of the outer water bottle piece, in-between the 2 side seams.
Next, place these 2 pieces inside your lining, matching raw edges along the top, and also matching the side seams of your lining to your outer water bottle side seams.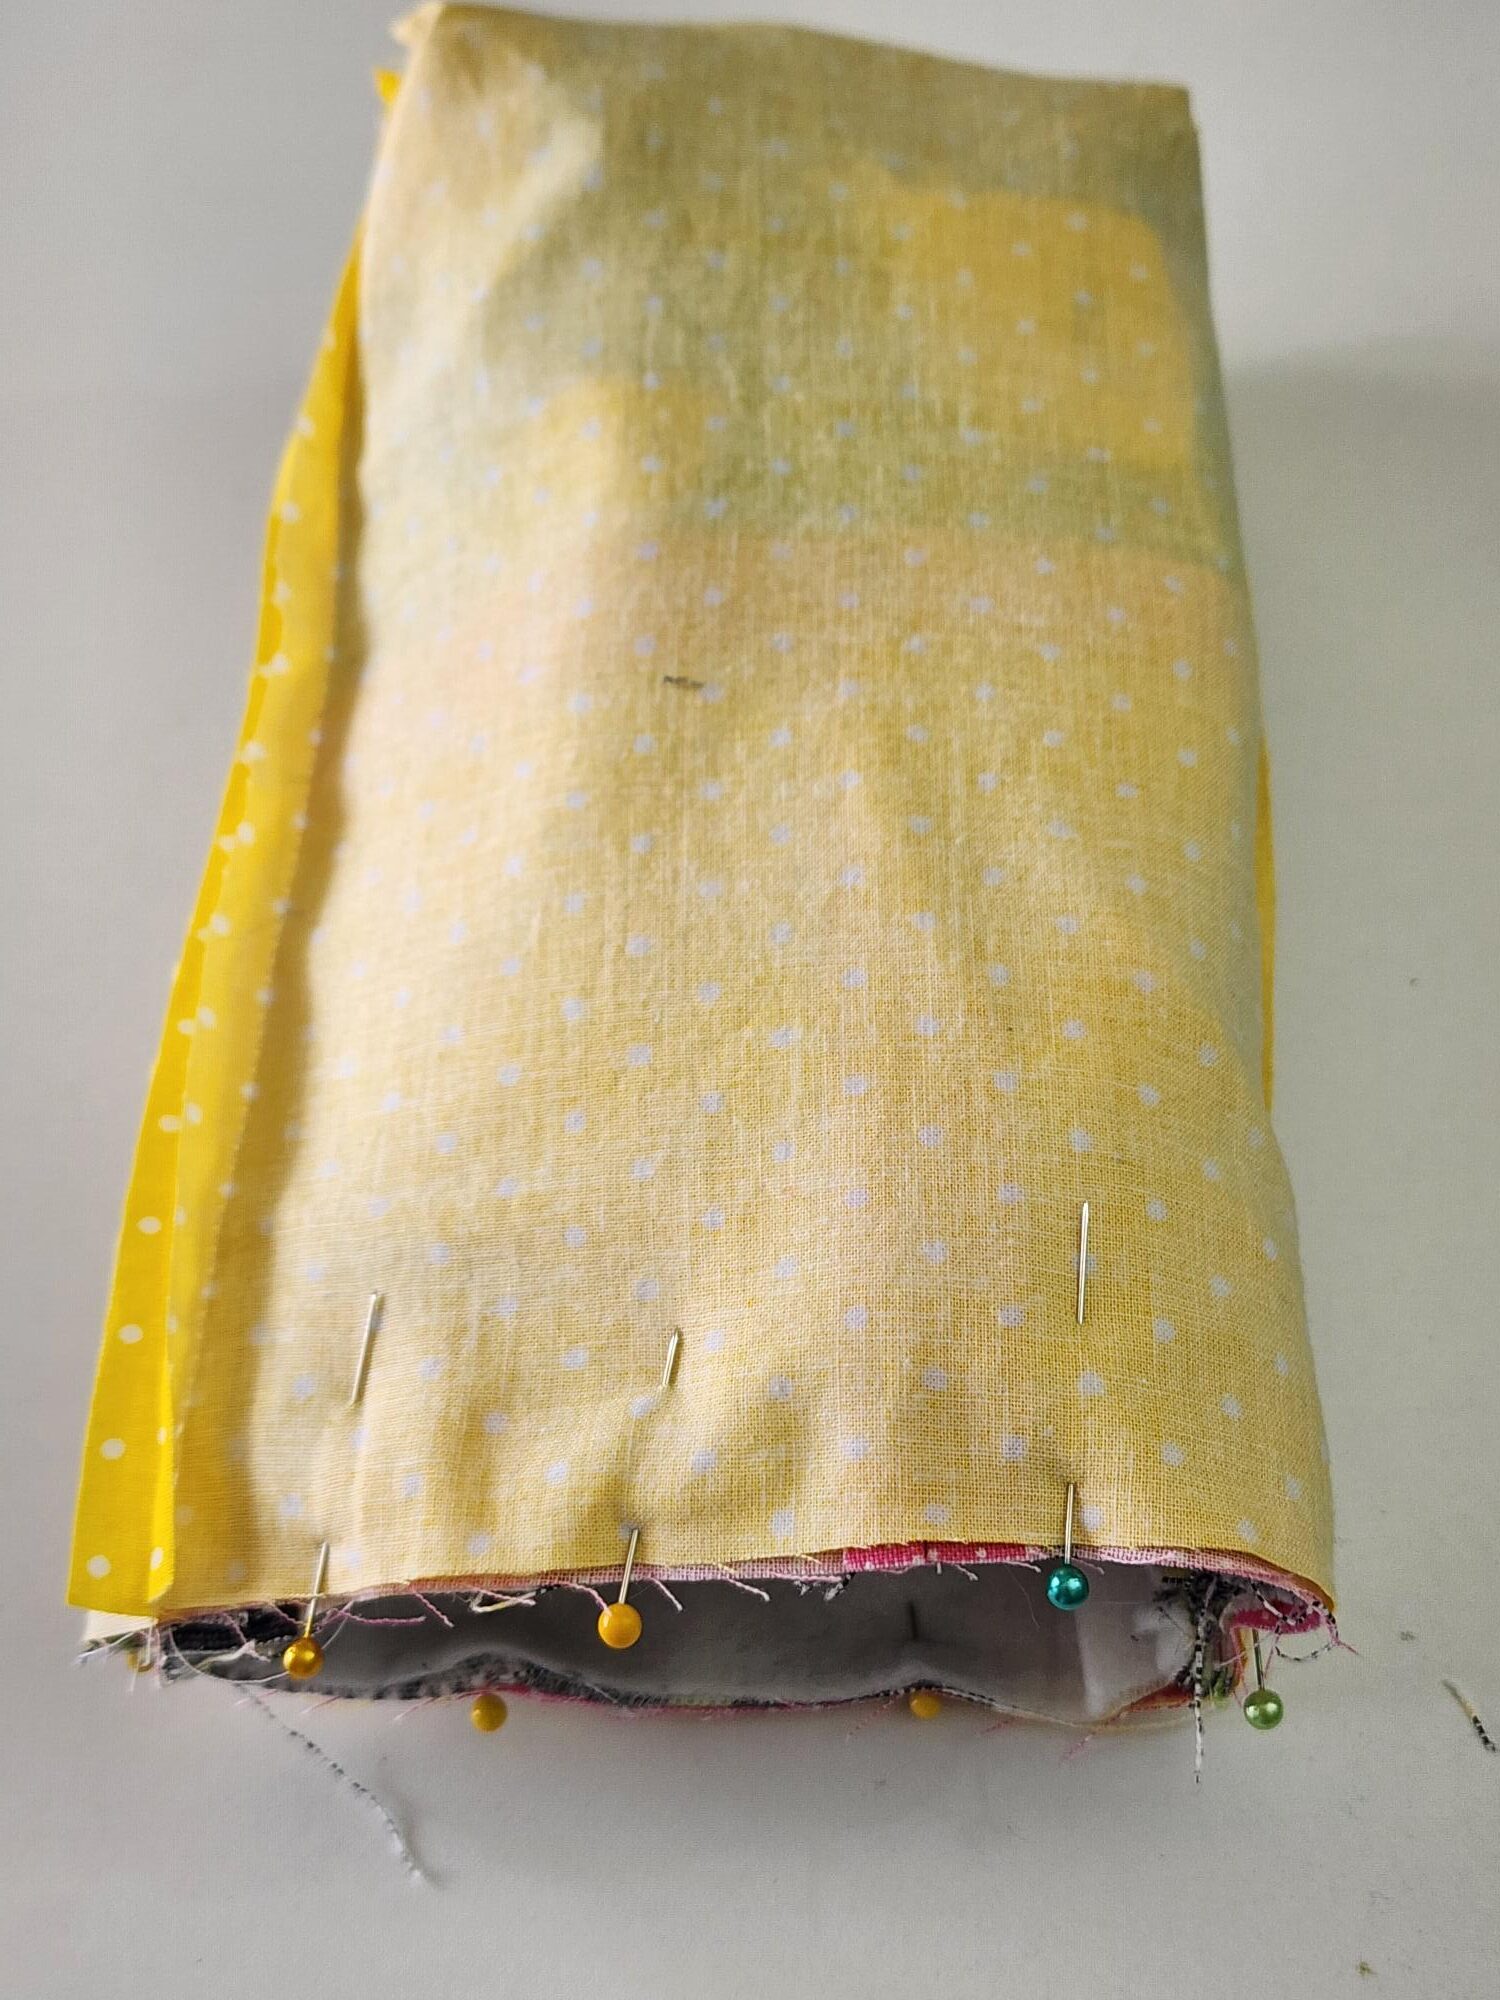
Stitch all the way around the top. I always remind my students that you do not have to back-stitch when stitching a round piece because you will eventually get back to the beginning where you started and stitch on top of that stitch for 4-5 stitches. That counts as your backstitch (so long as you make sure you are exactly on top of those stitches!) I didn’t get a picture of this step (sorry!)
Carefully pull your fabric through the lining piece. Fold your seam allowances of your lining to the inside and stitch close to the edge, stiching the lining shut.
Fold your lining and casing to the inside of your water bottle sling and press along the top edge. Then, add a top stitch around the top, approximately 1/8″-1/4″ away from the edge. This will help to keep the lining tucked in to the inside of the water bottle sling.
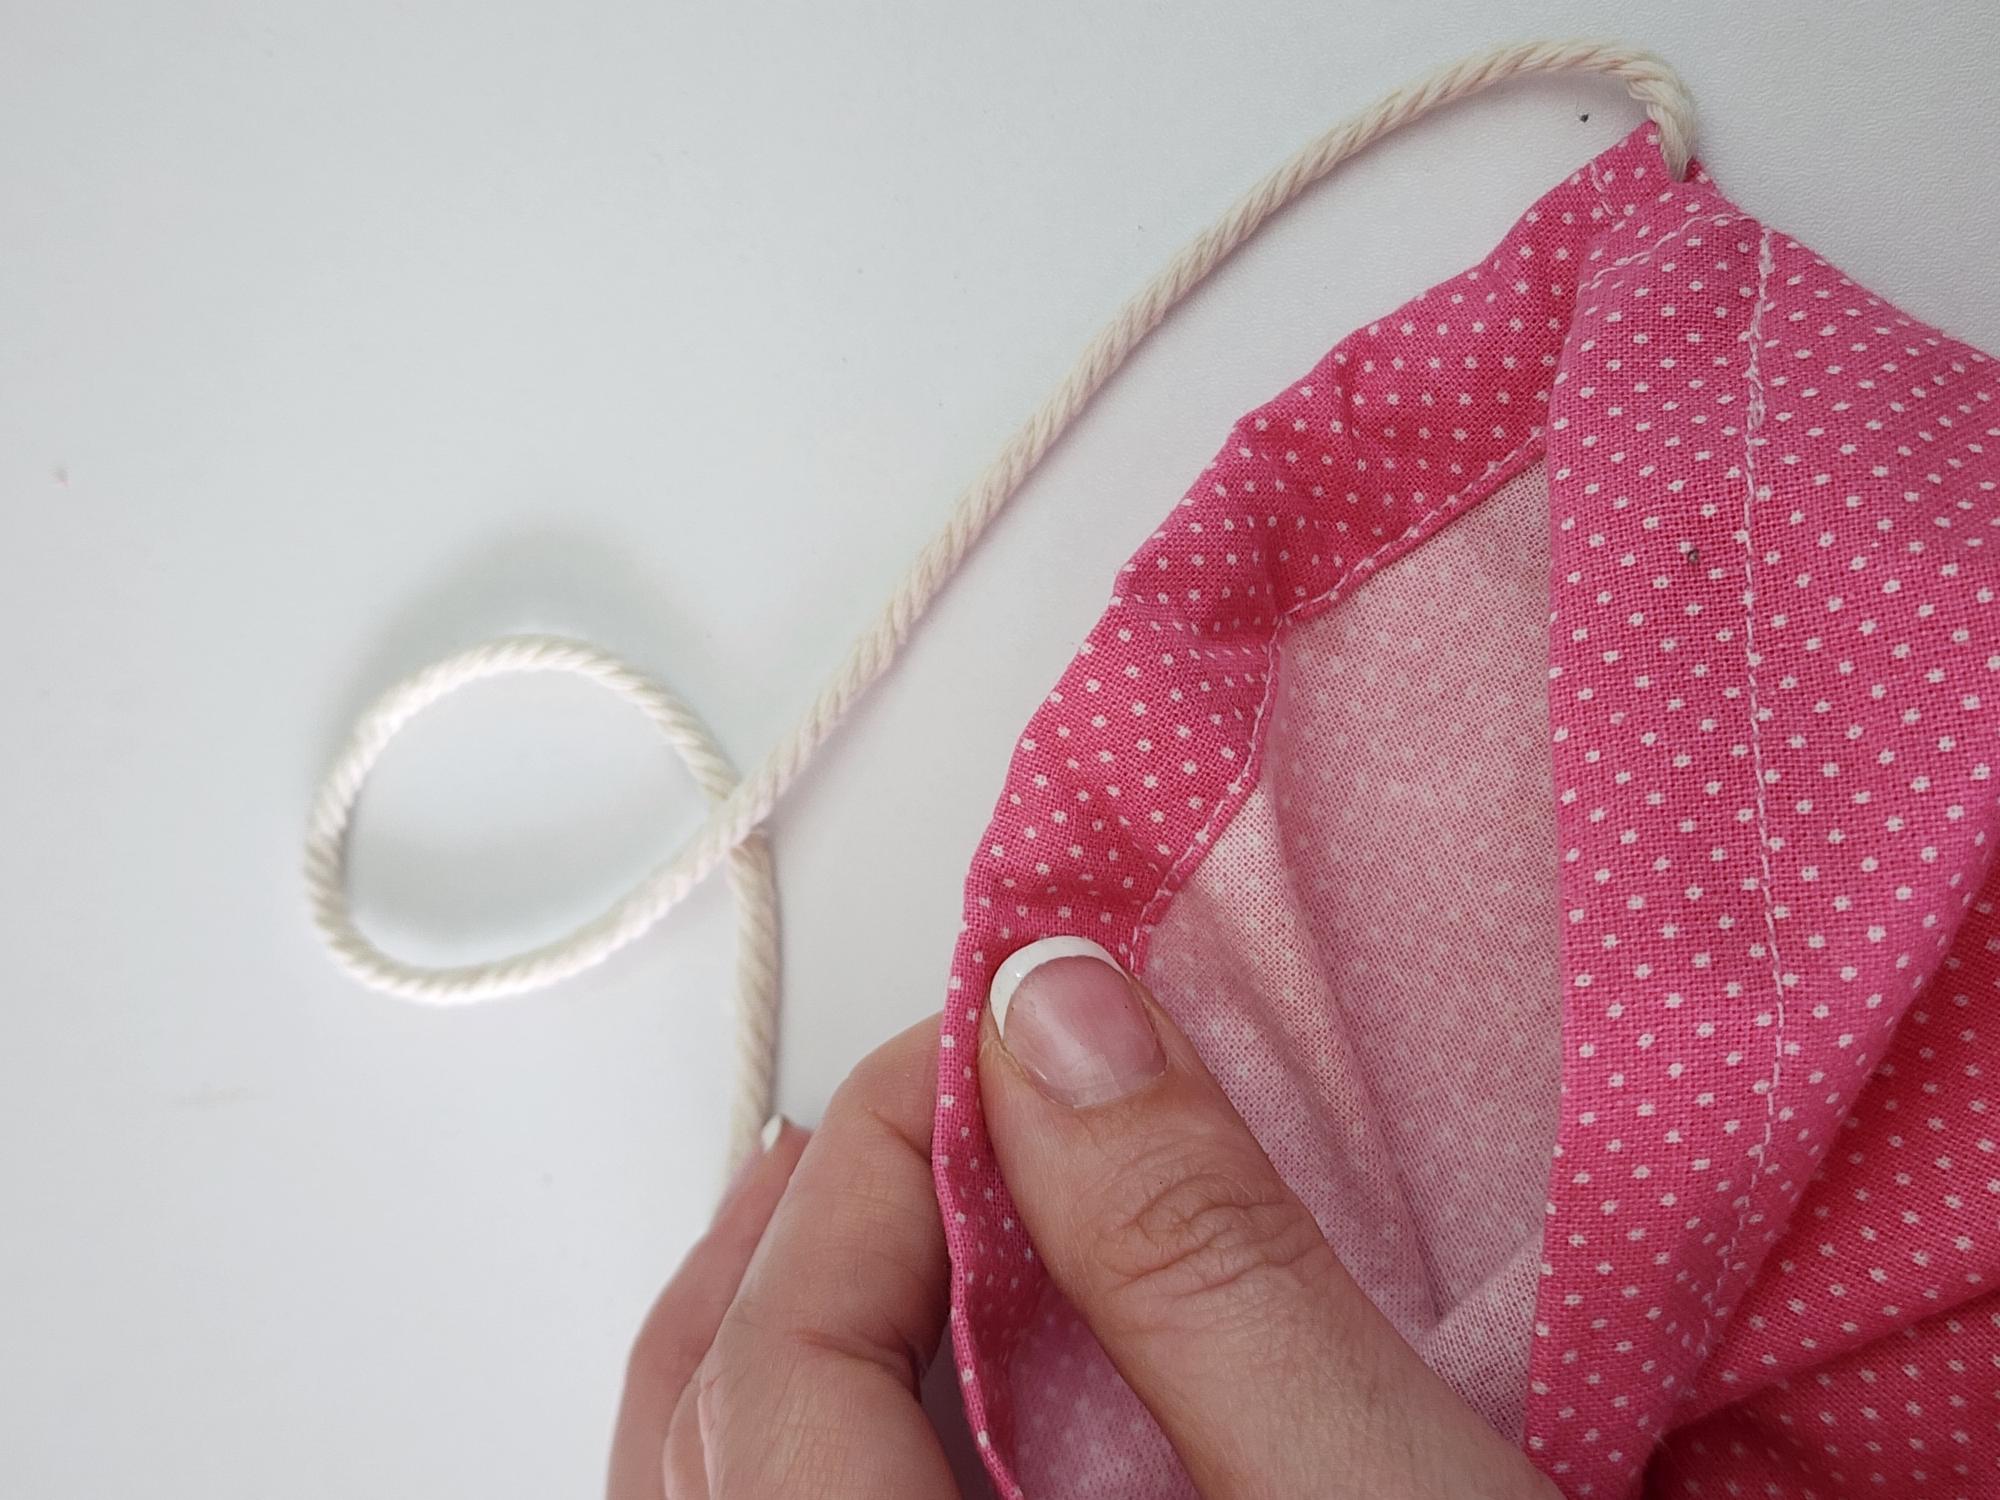
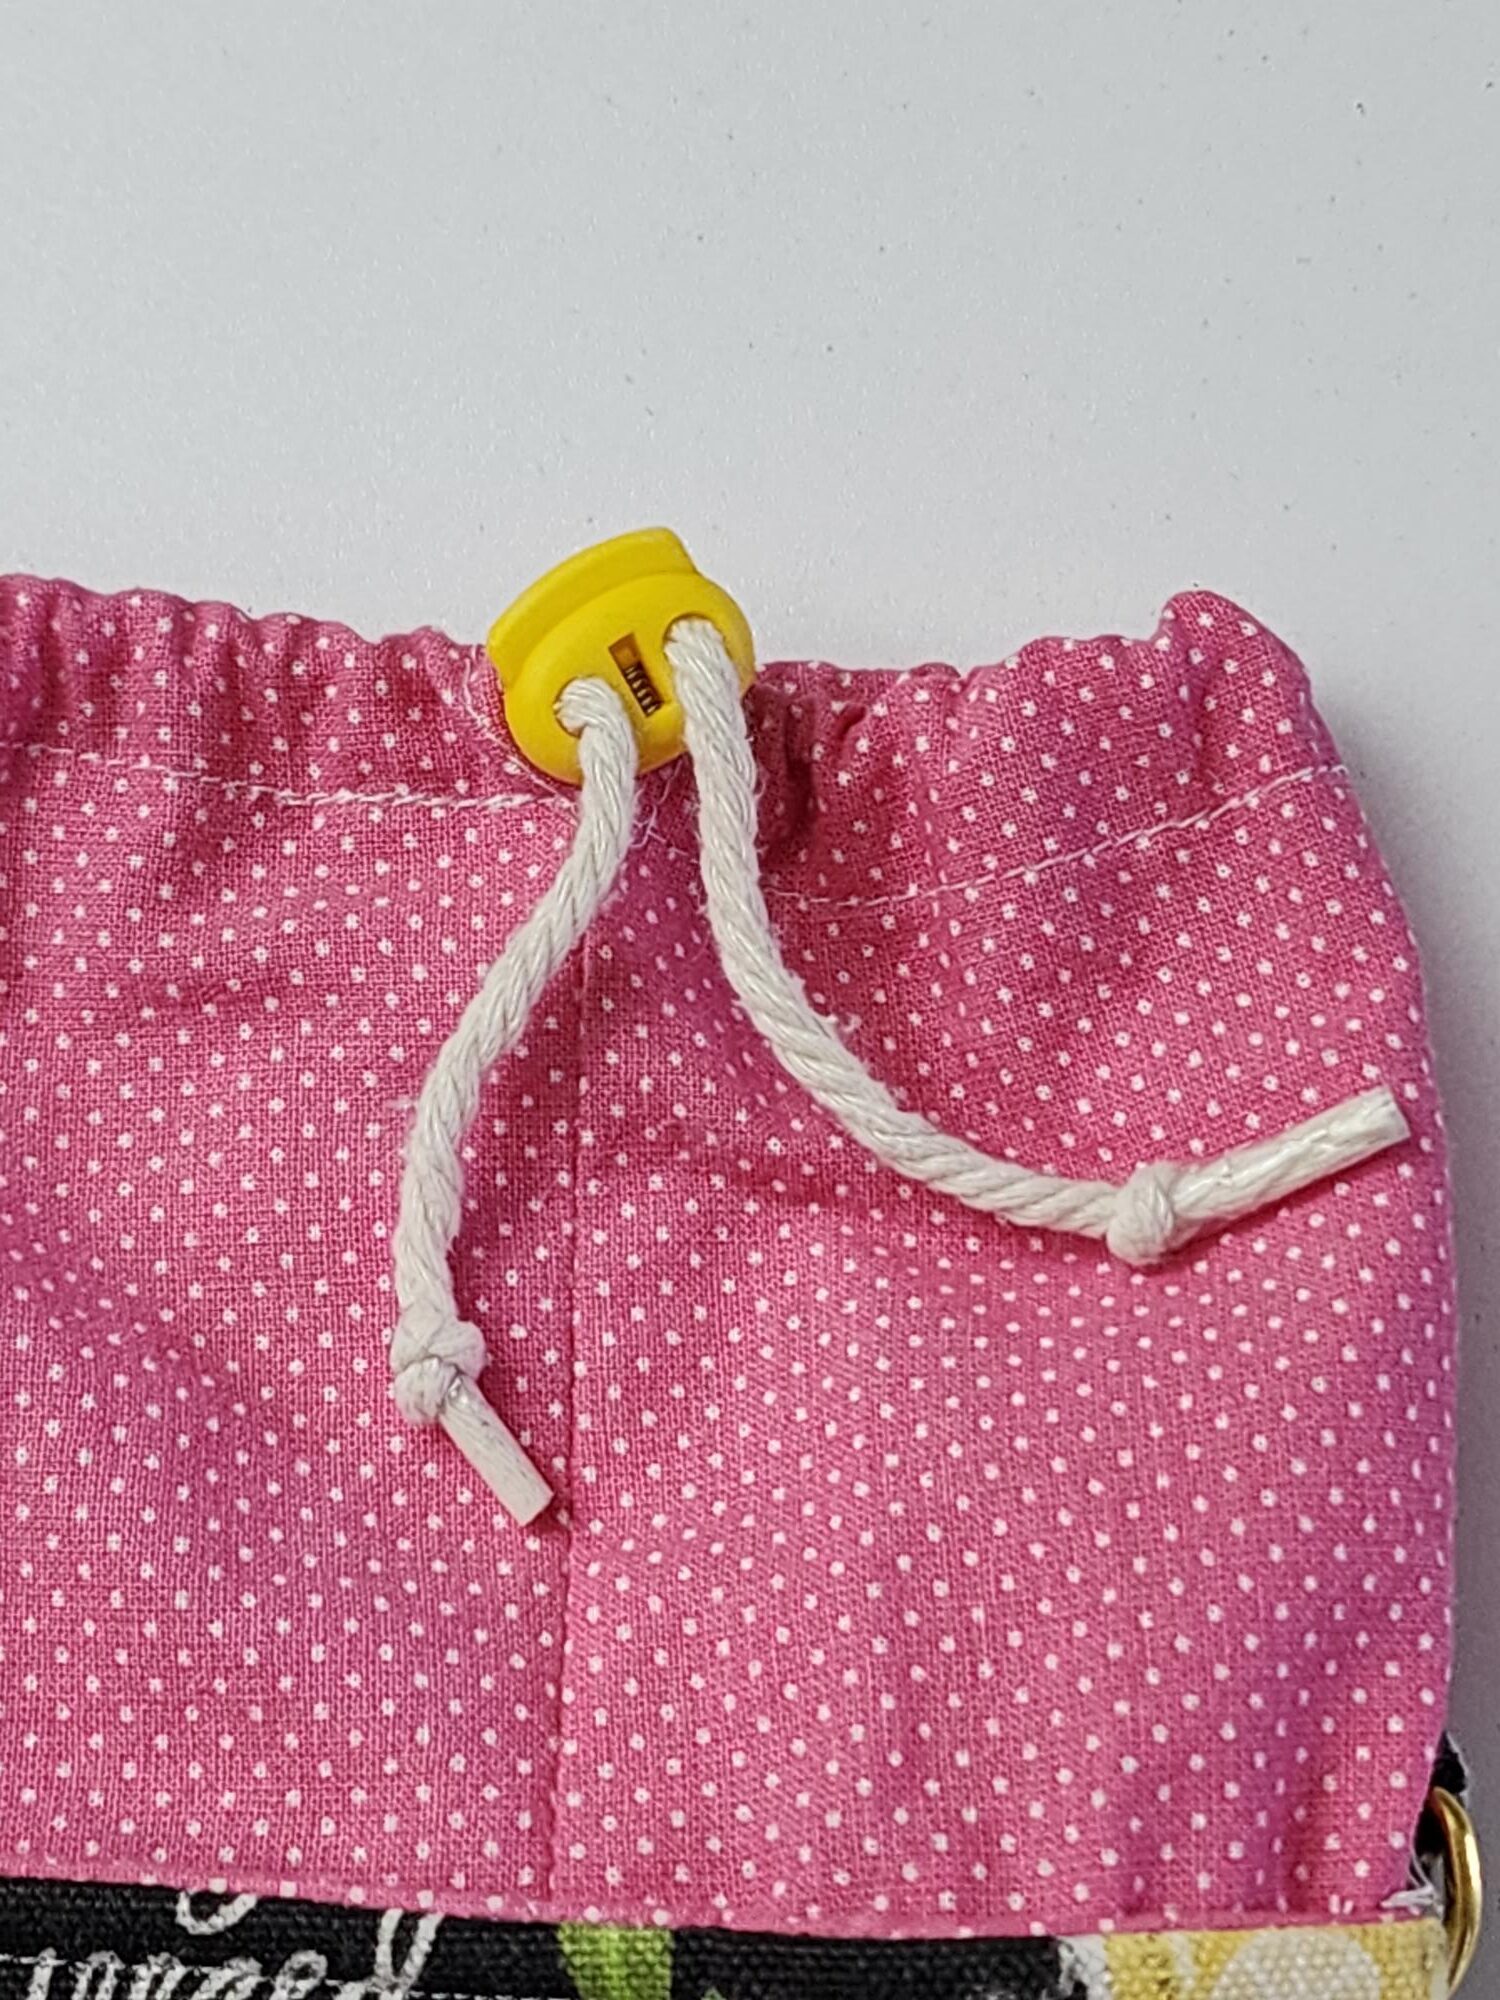
With your 18″ cording, place a safety pin on one end, and push it through your casing, from one end to the other.
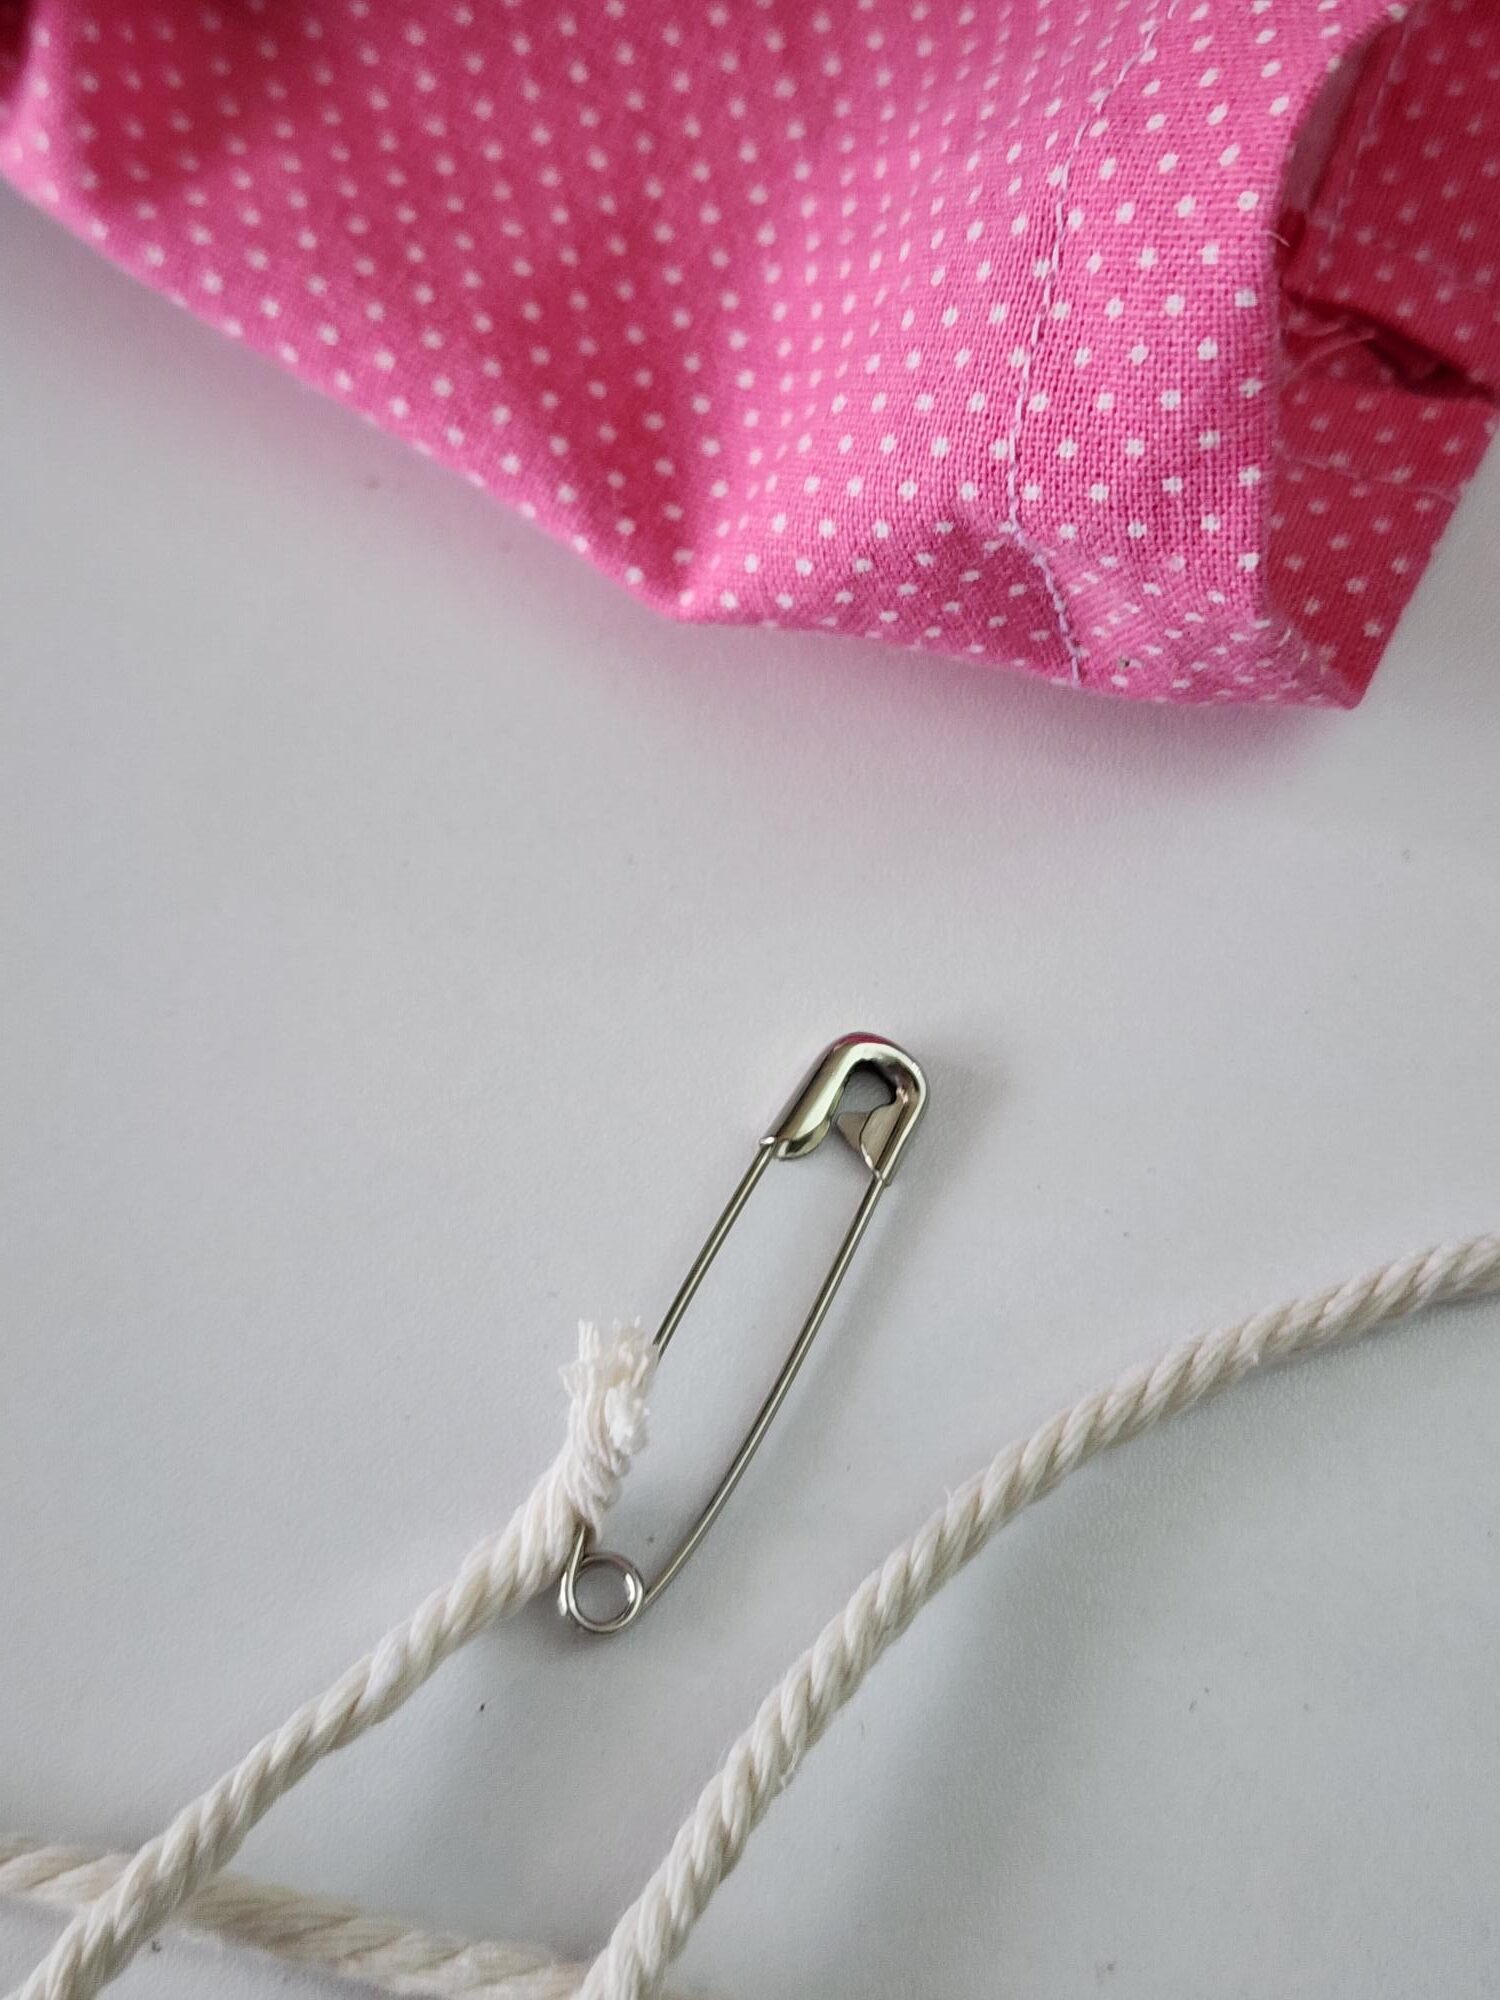
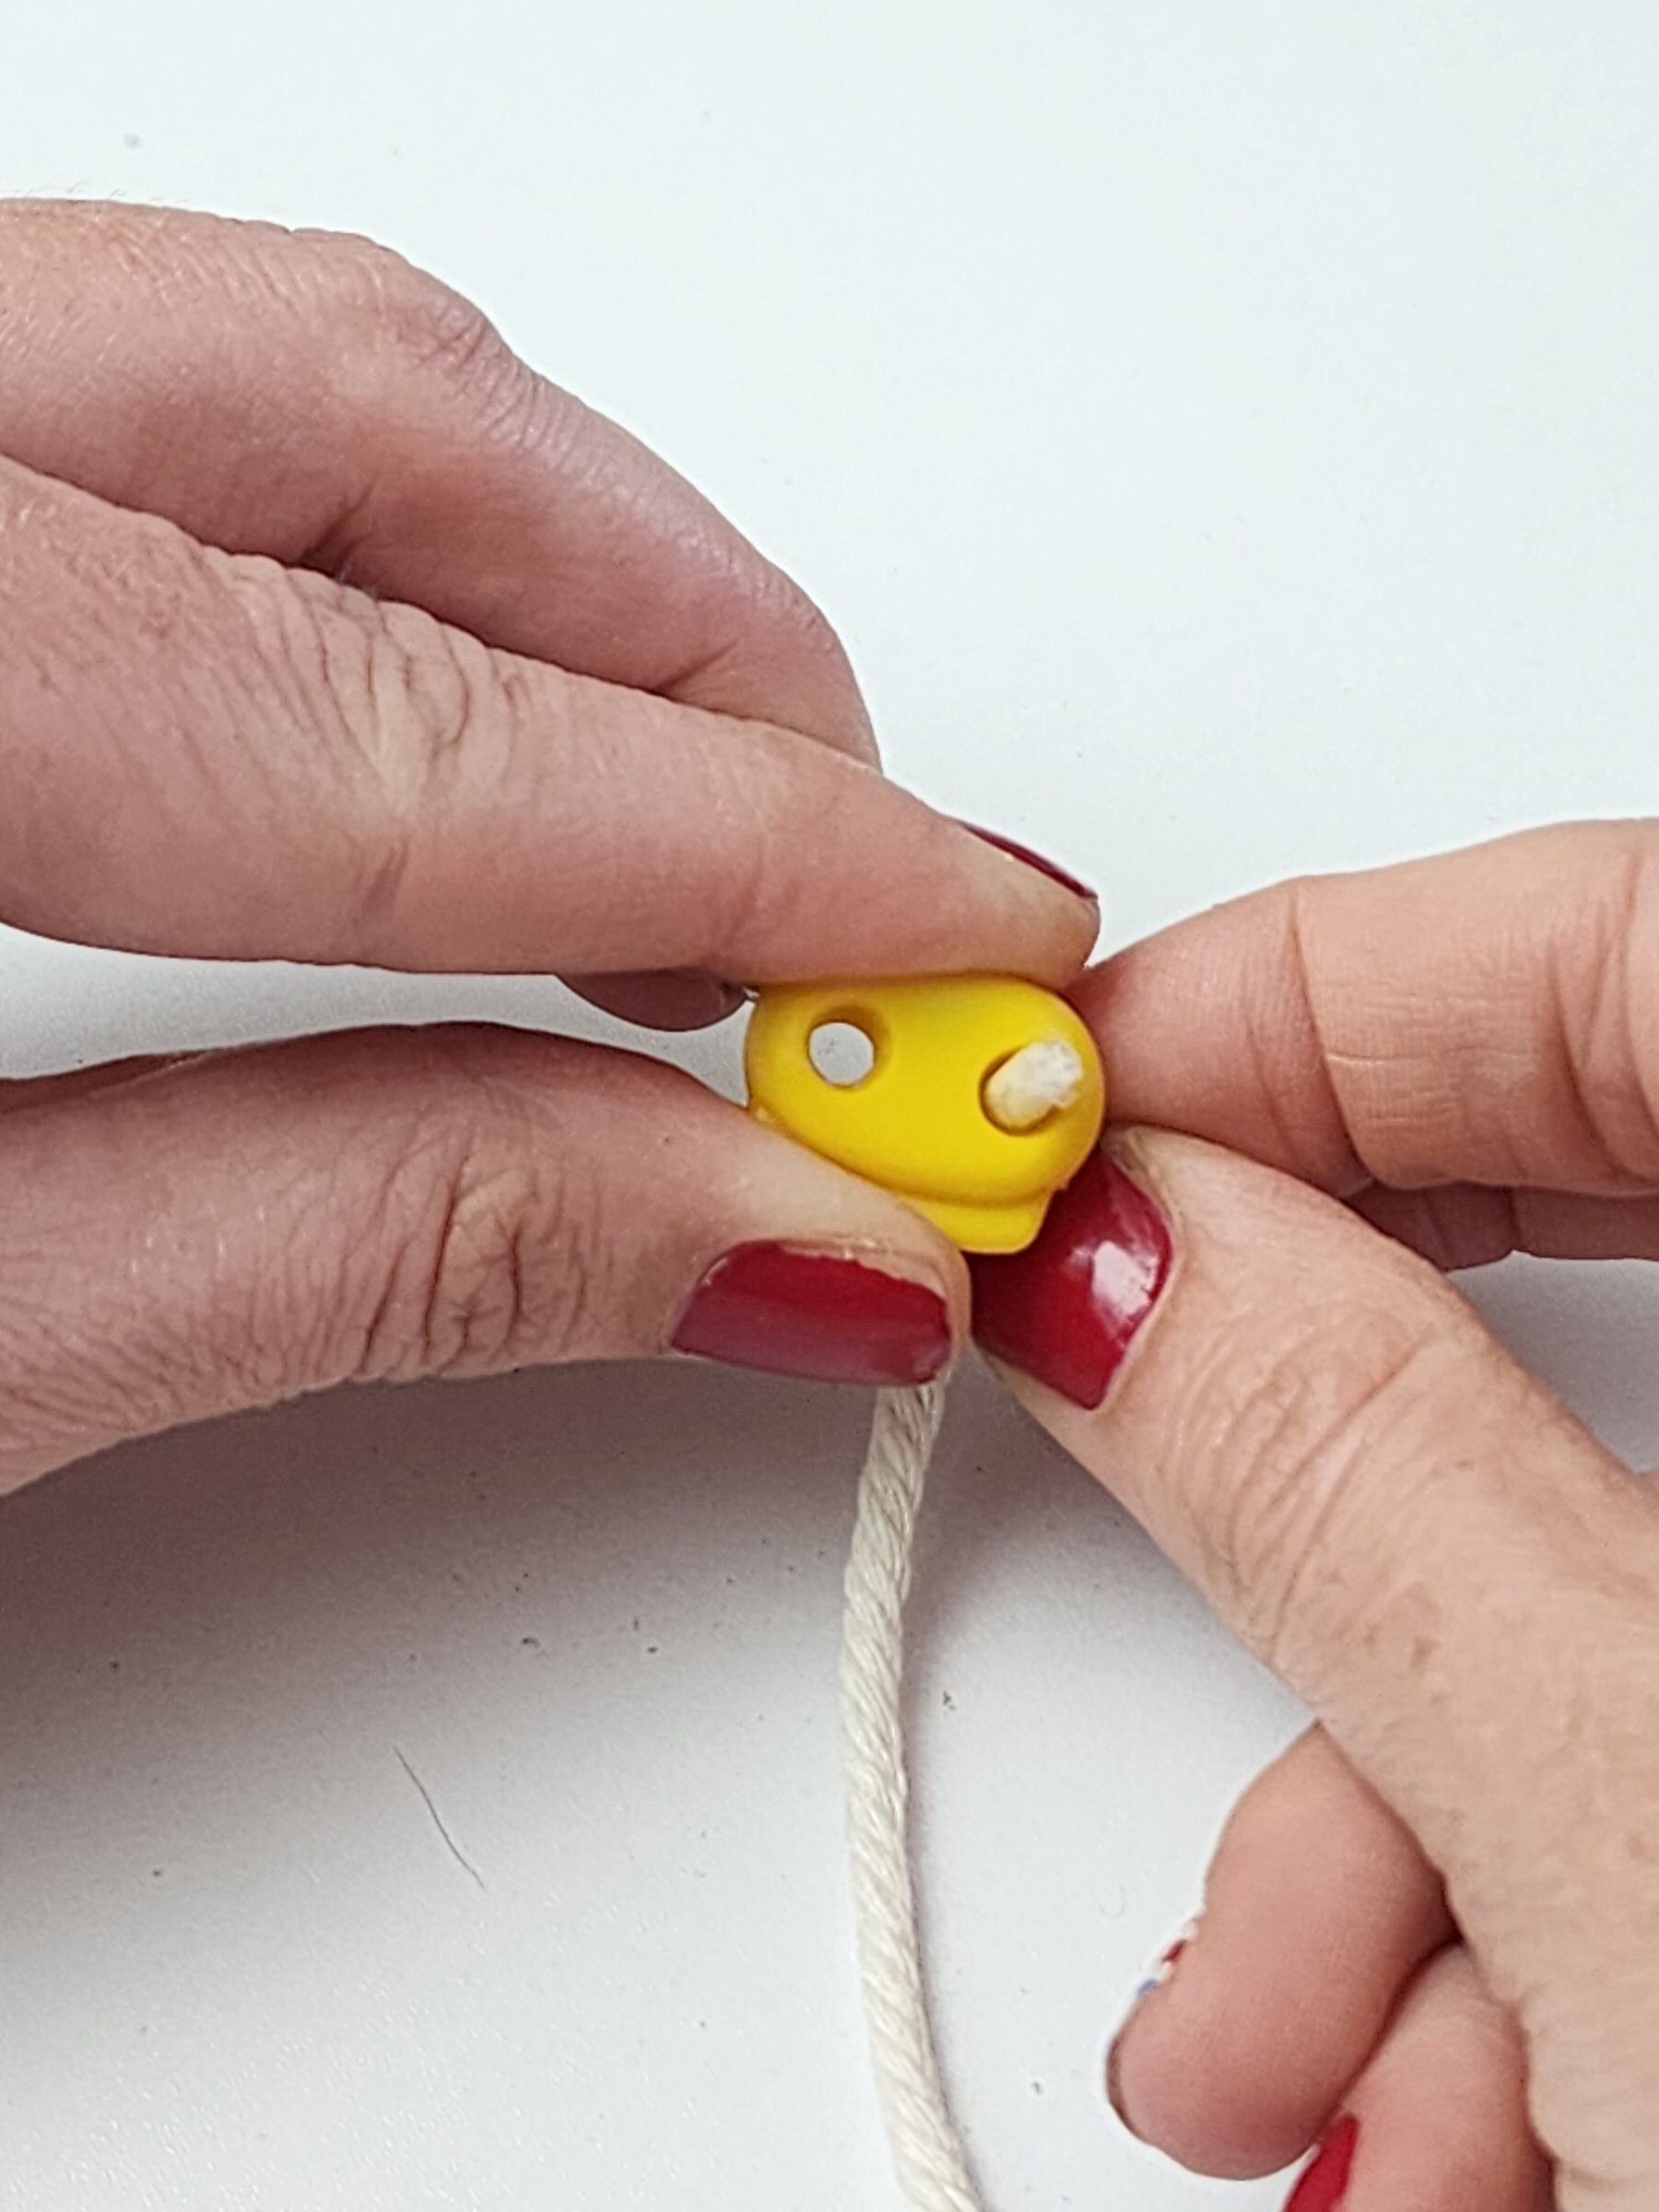
To attach your cord lock, simply press down on the lock and thread your cording through the holes. Tie an end on the end so that the cording can’t be easily pulled back through. Pro tip: I wrap scotch tape on the end of the cording to help it go through the opening easier.
The last step is making your strap!
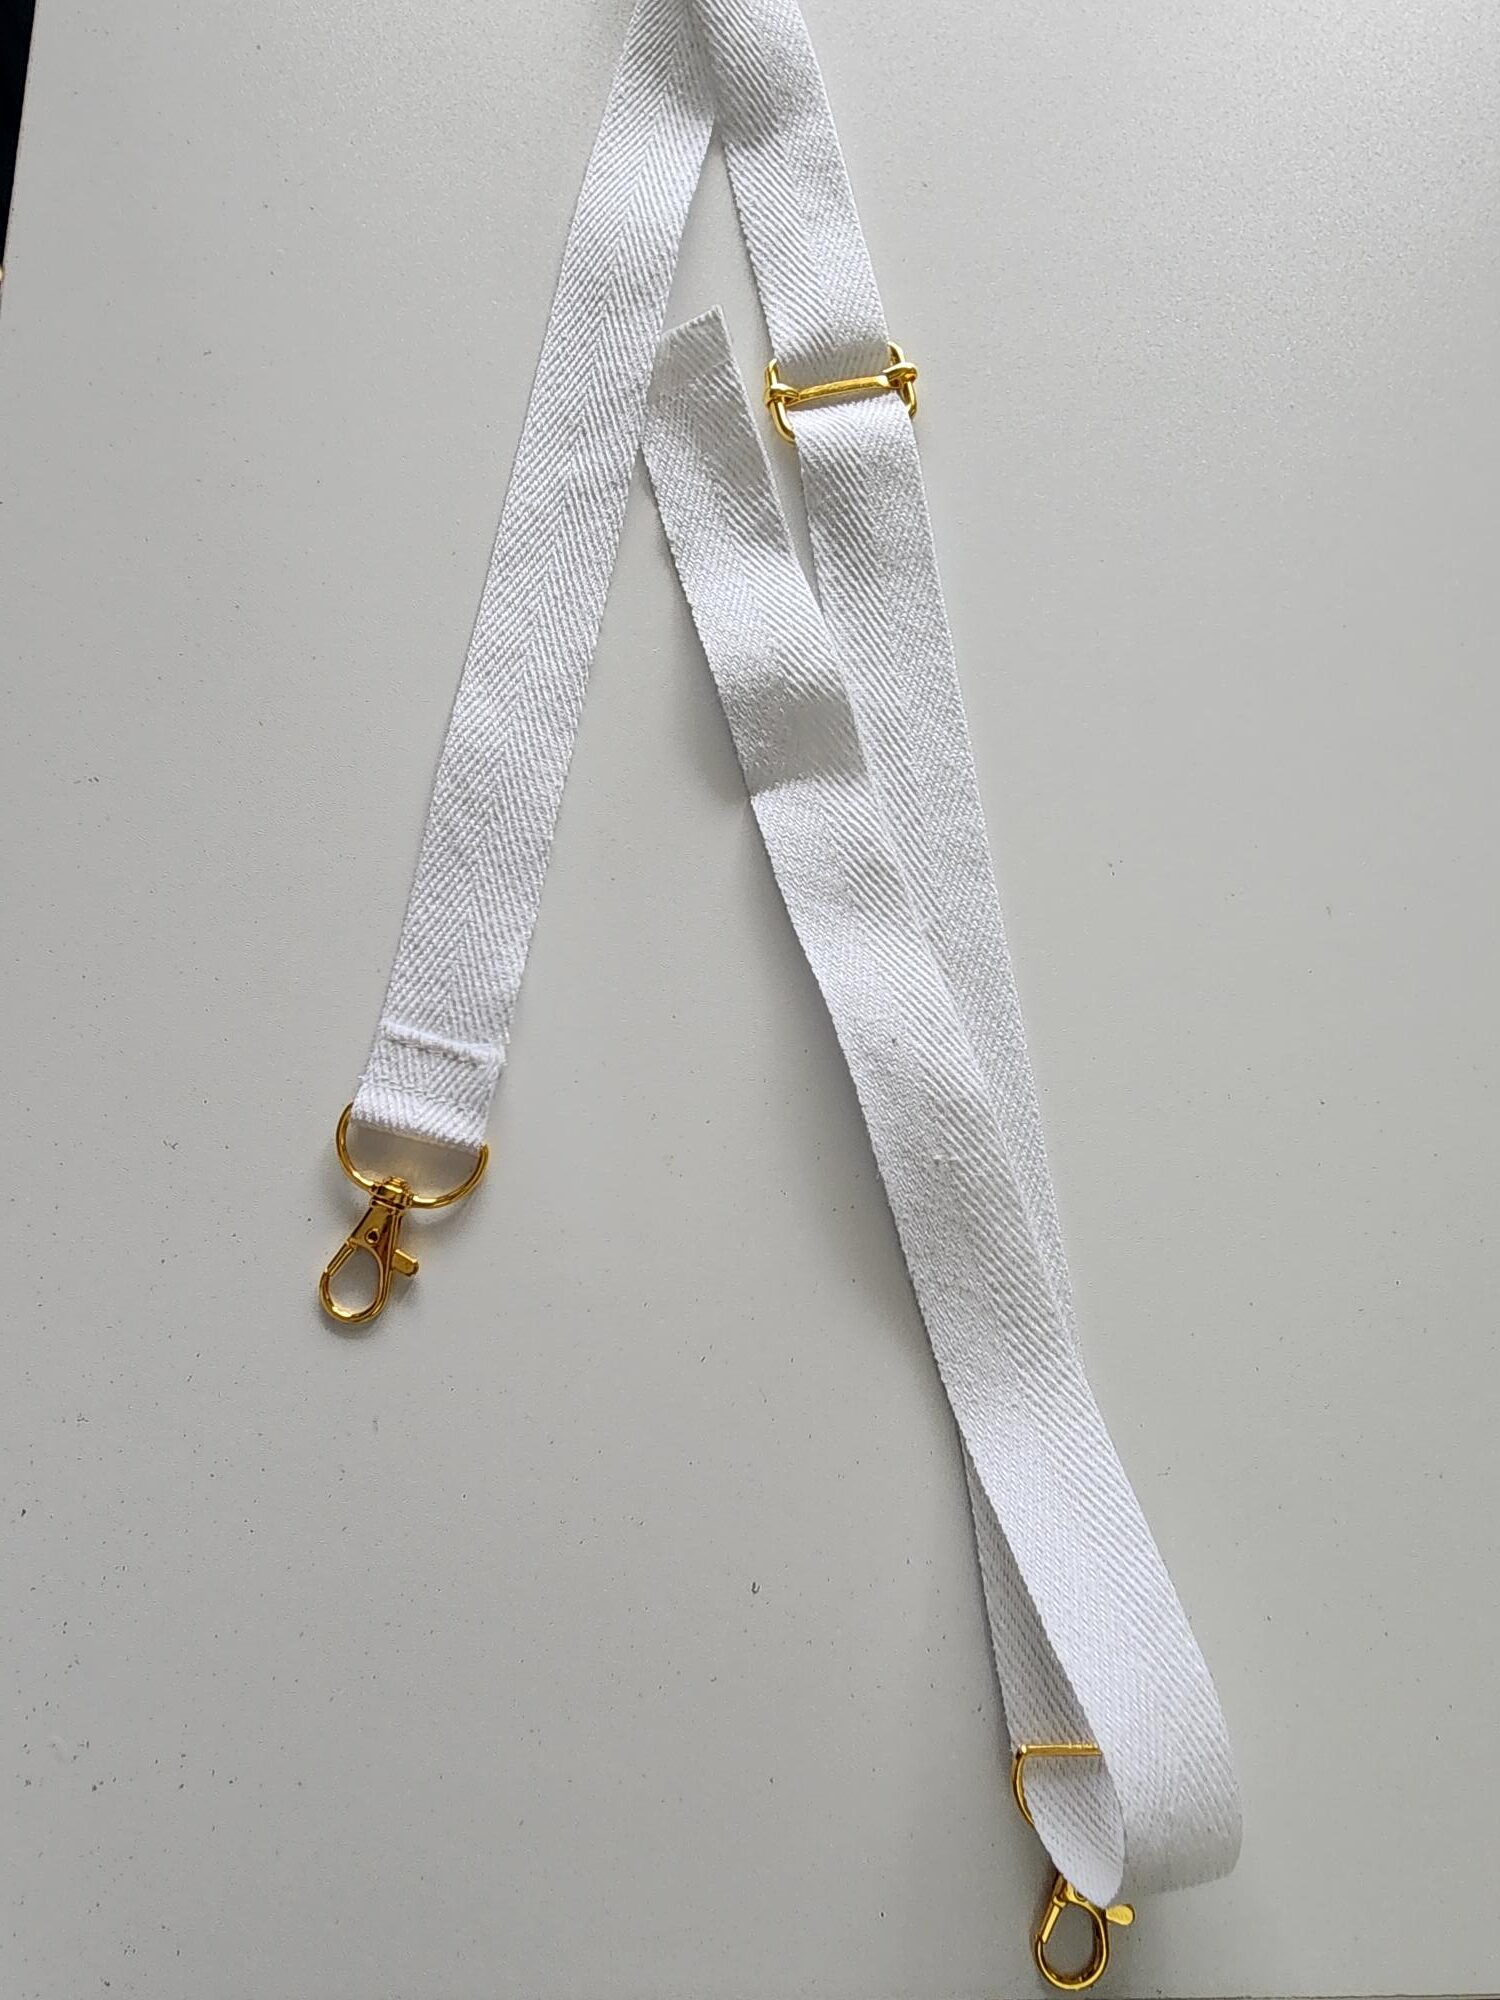
Slip one edge of your webbing through one of your swivel hooks. Fold the webbing over and stitch close to the edge of the folded over piece. I always add a second stitch line for extra security.

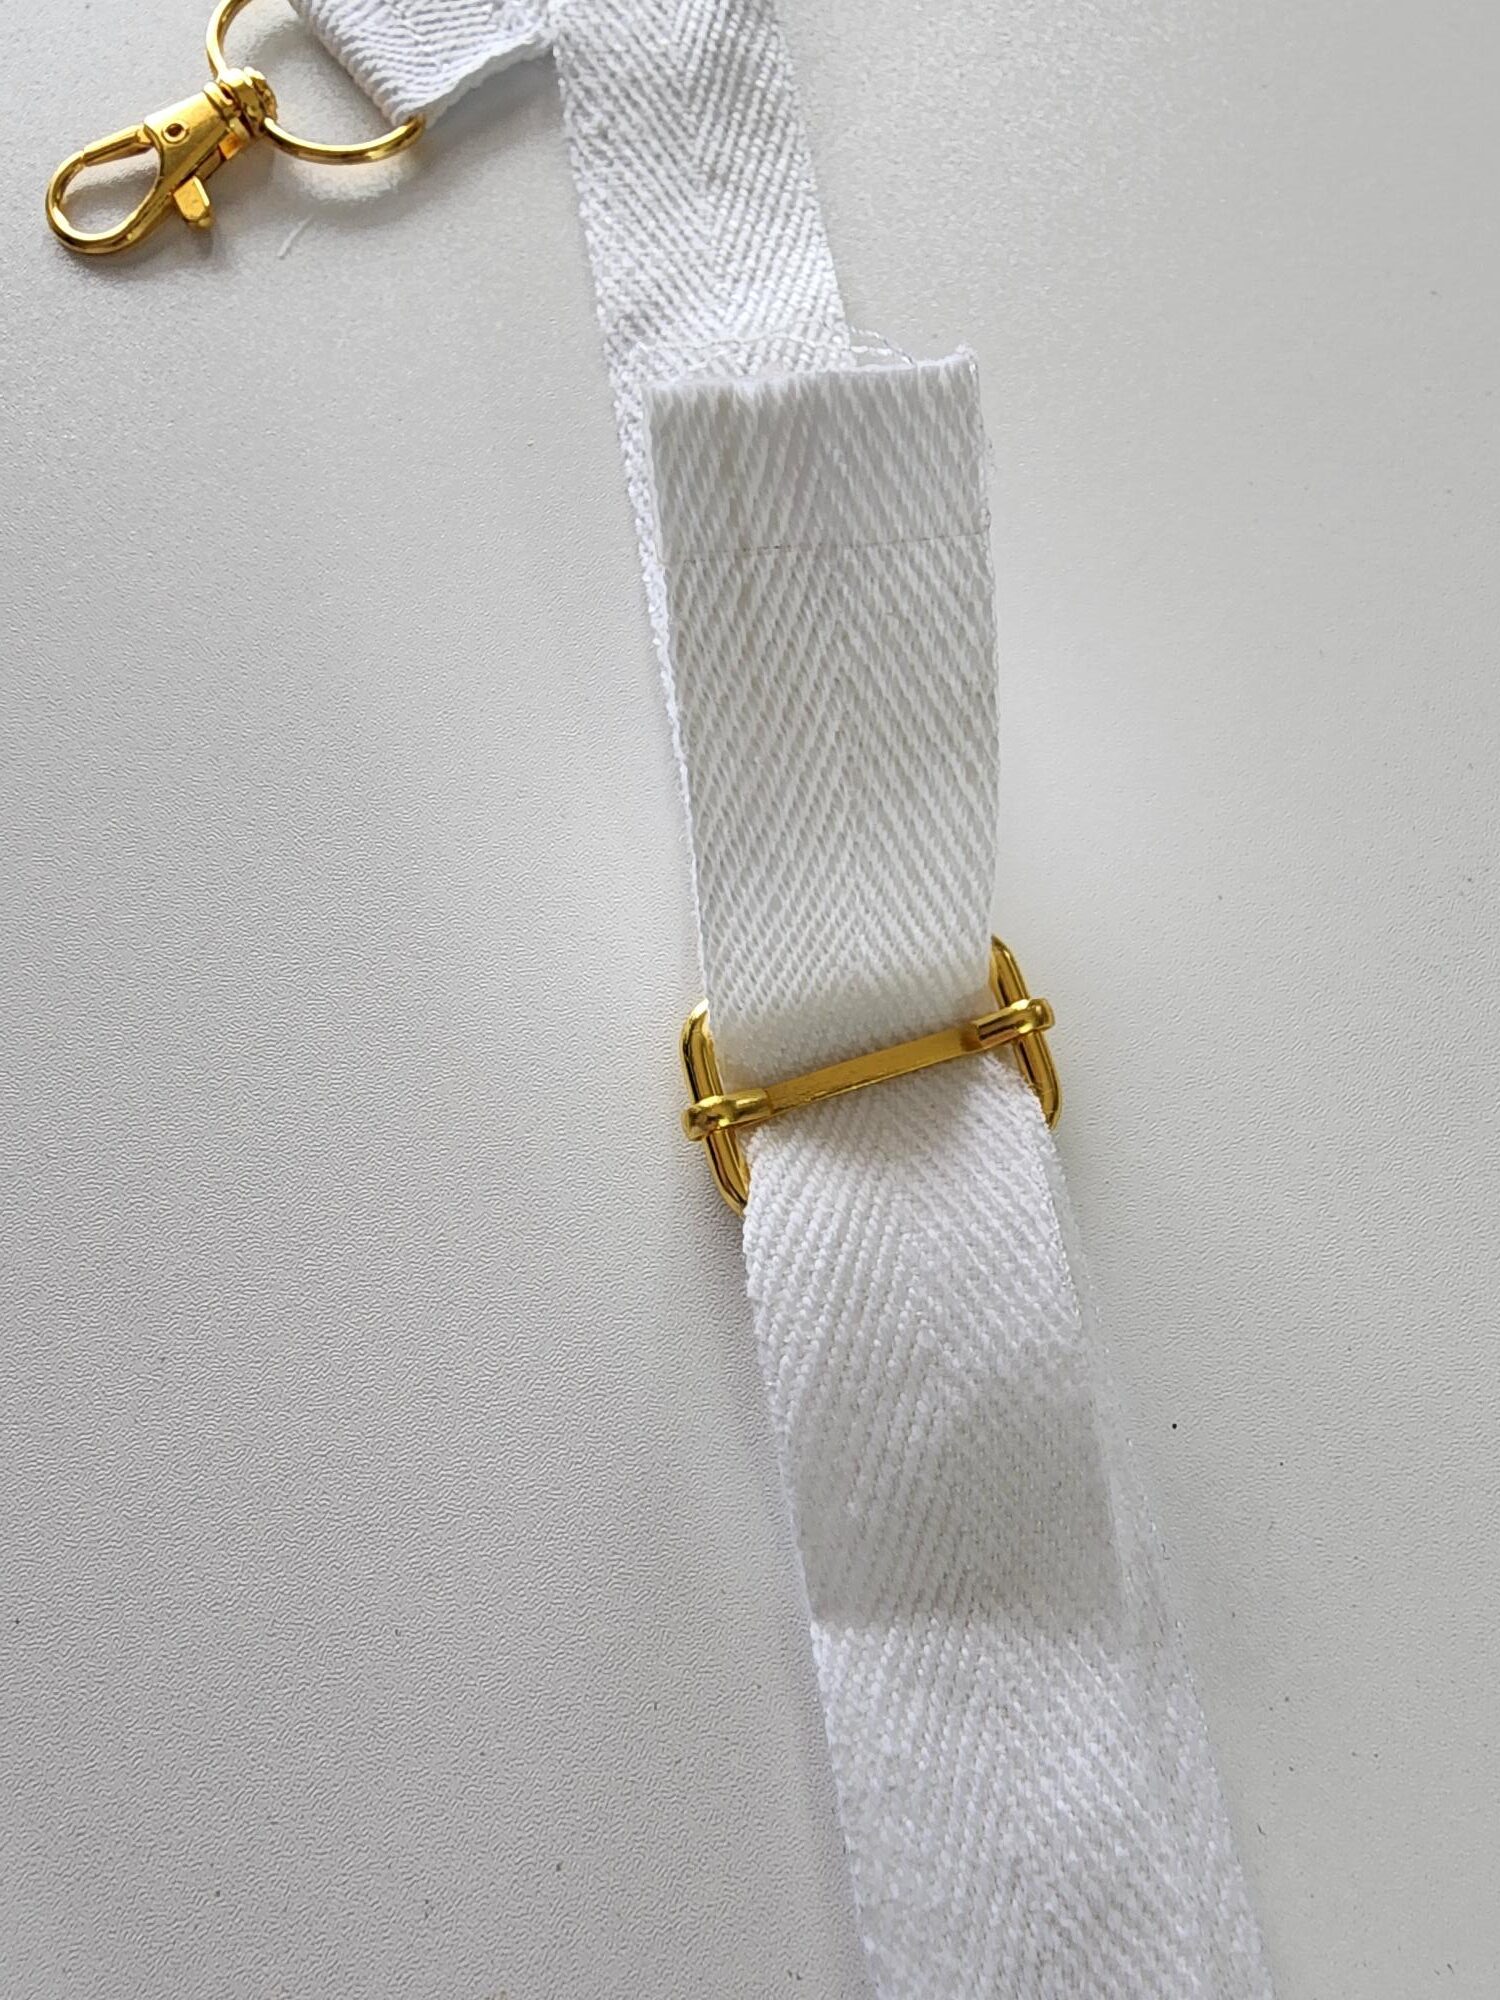
Pull the other end of your webbing through your slider. Move your slider to the middle of the webbing, and then slip your second swivel hook through the webbing.
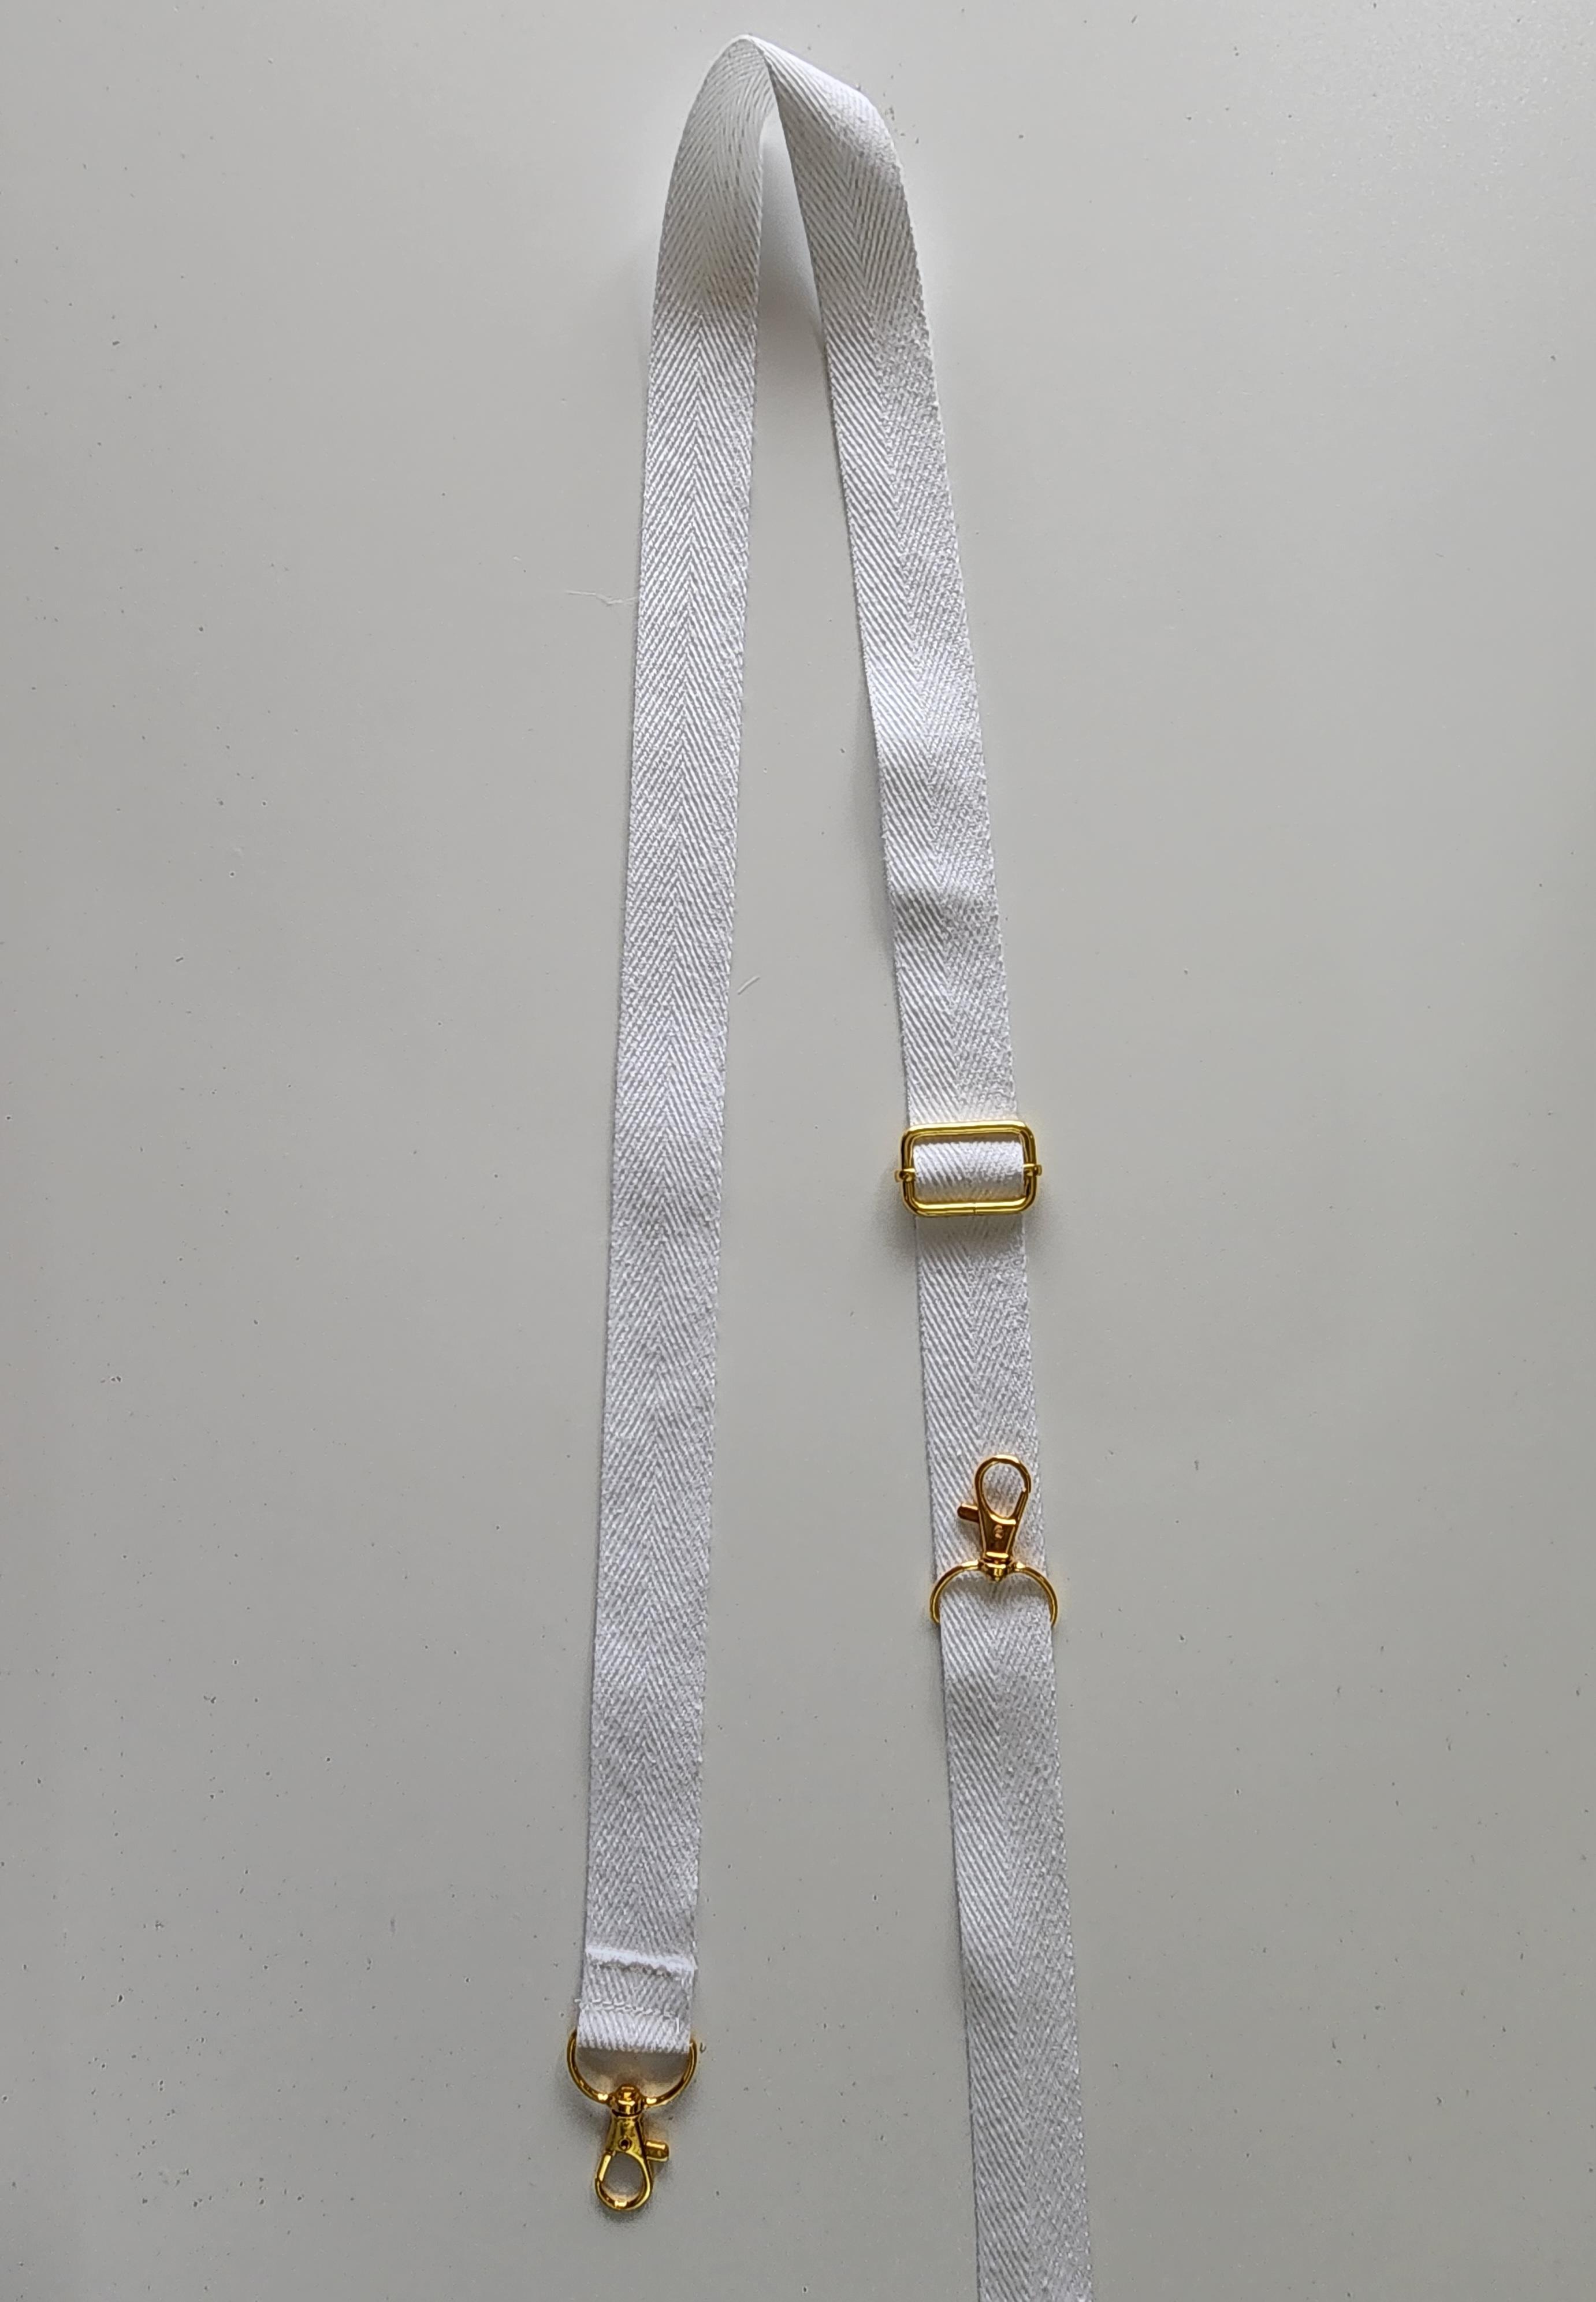
Wrap your webbing back over to the slider. Go under that center piece again, and fold the webbing back towards the strap that you just put your second slider through. Stitch in place.
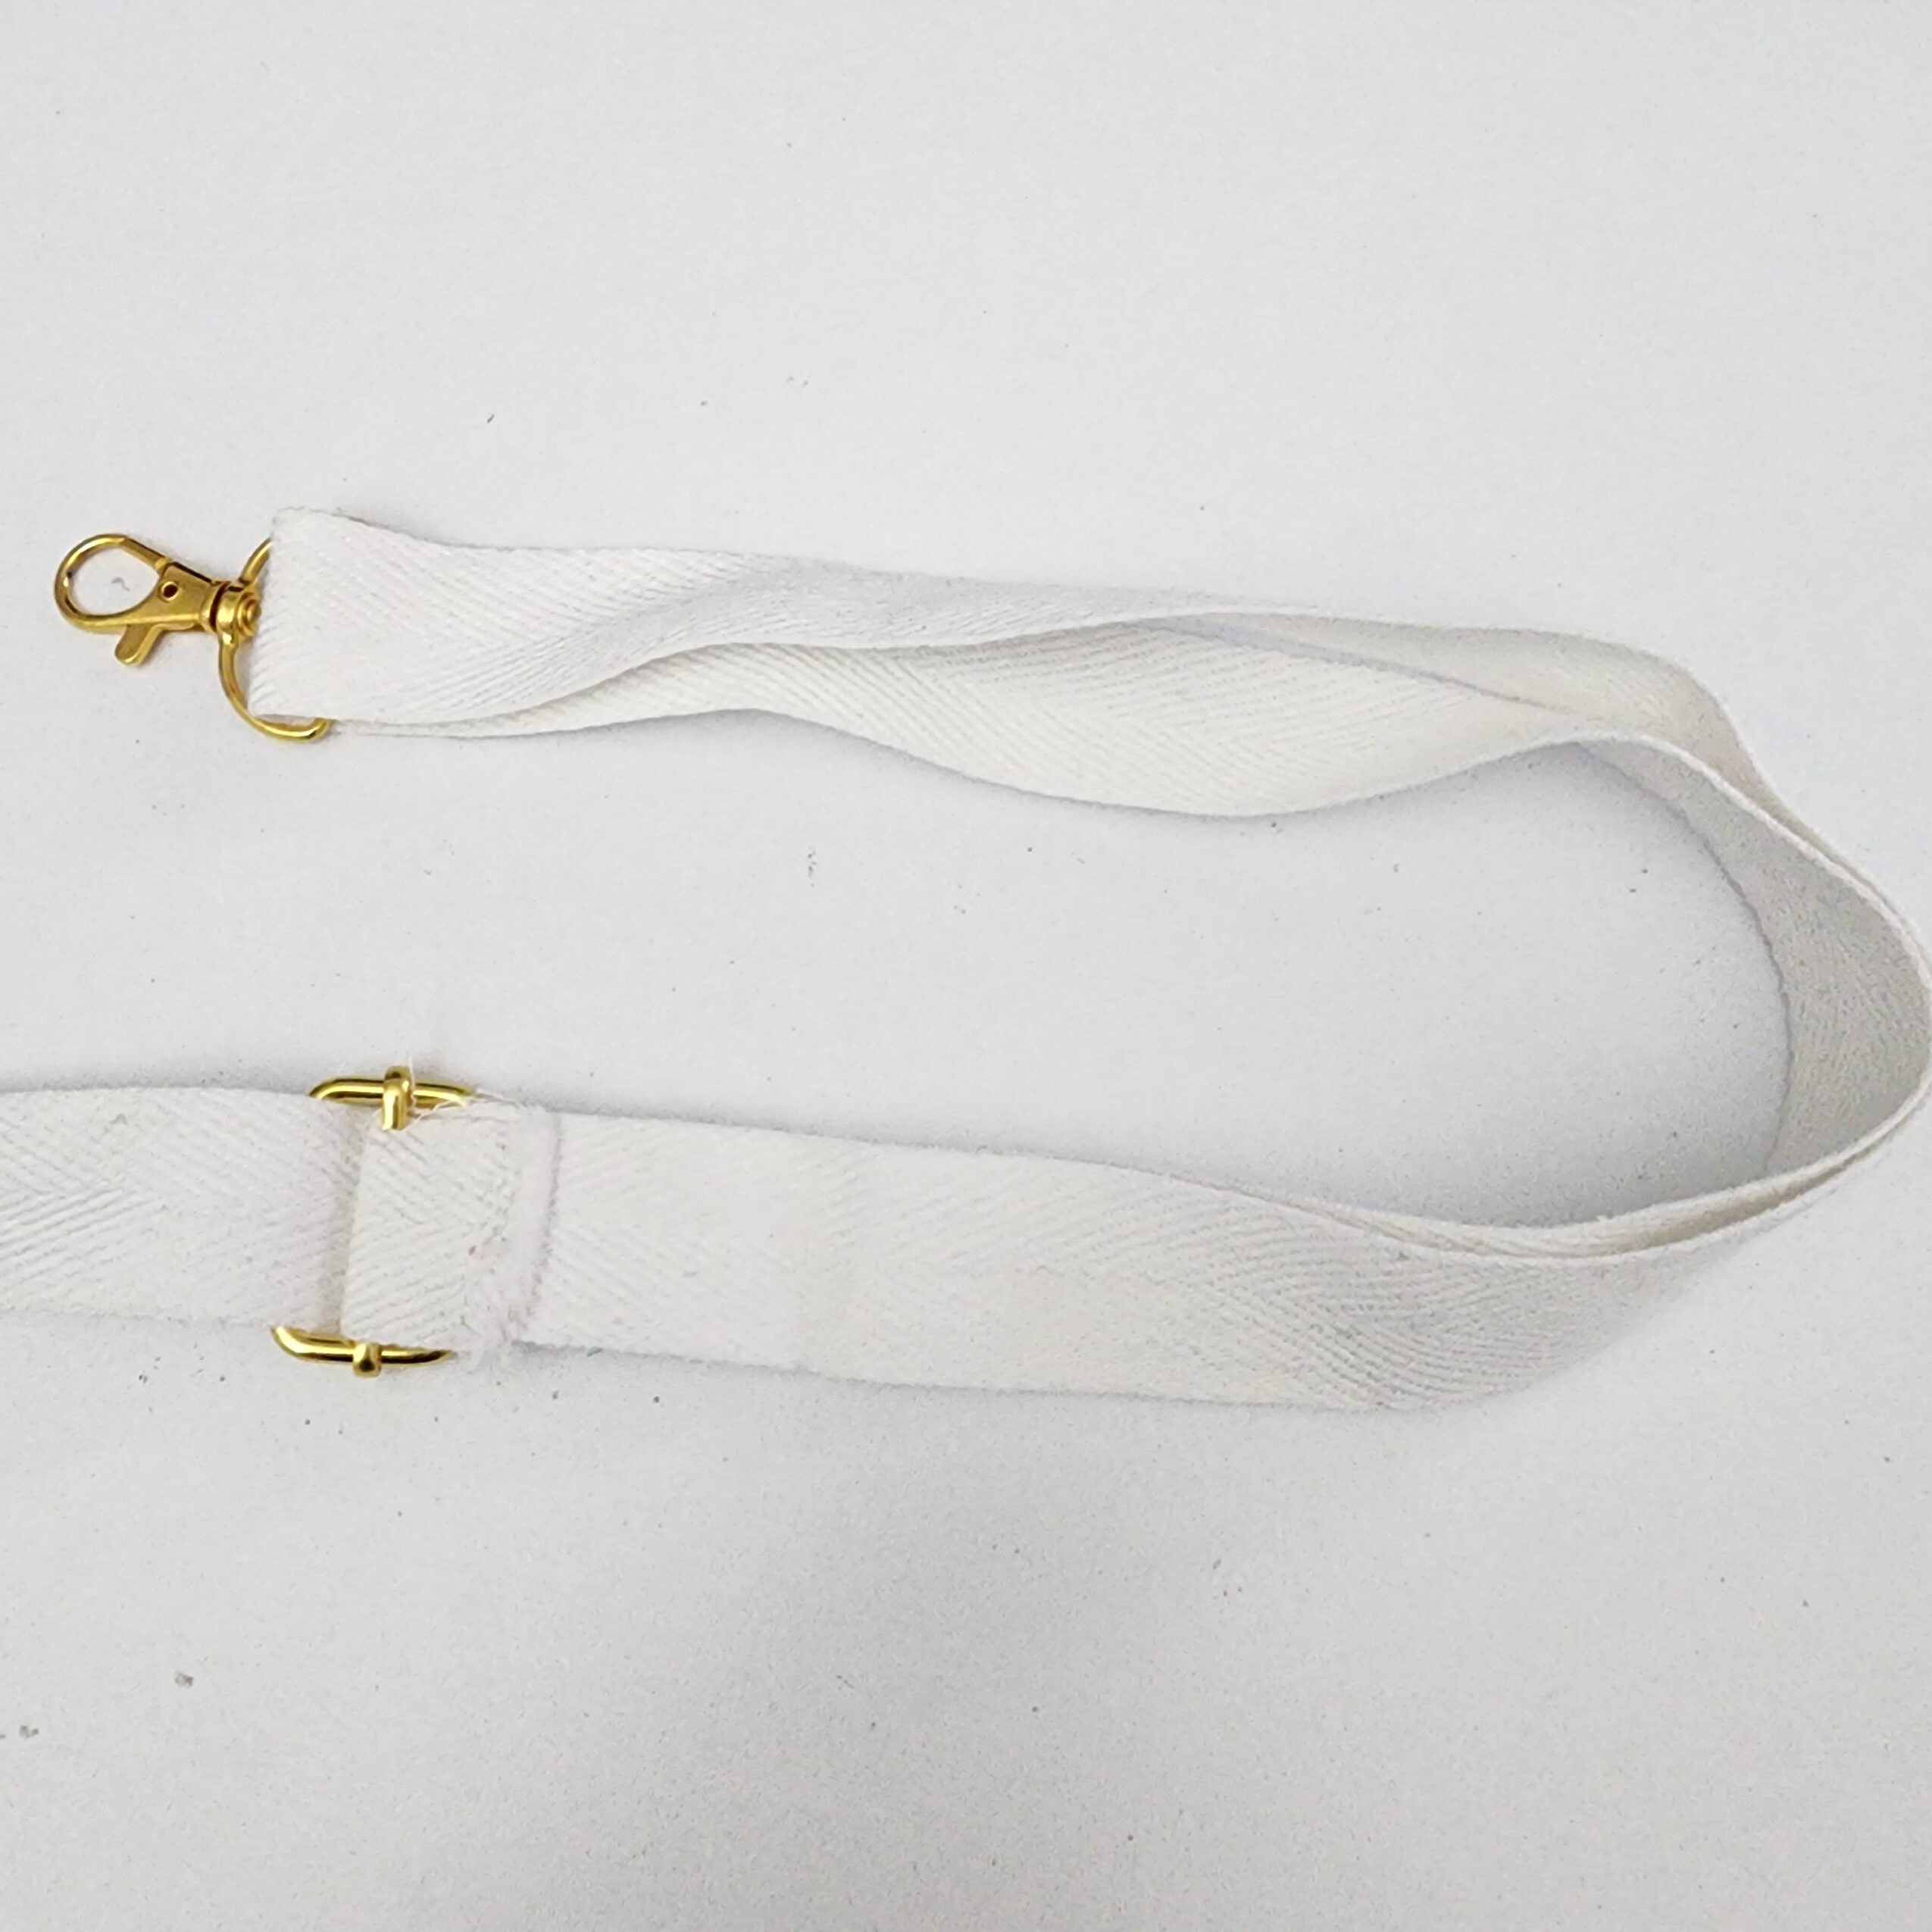
Now, just hook your swivels on to your D-rings and you’re all done!!
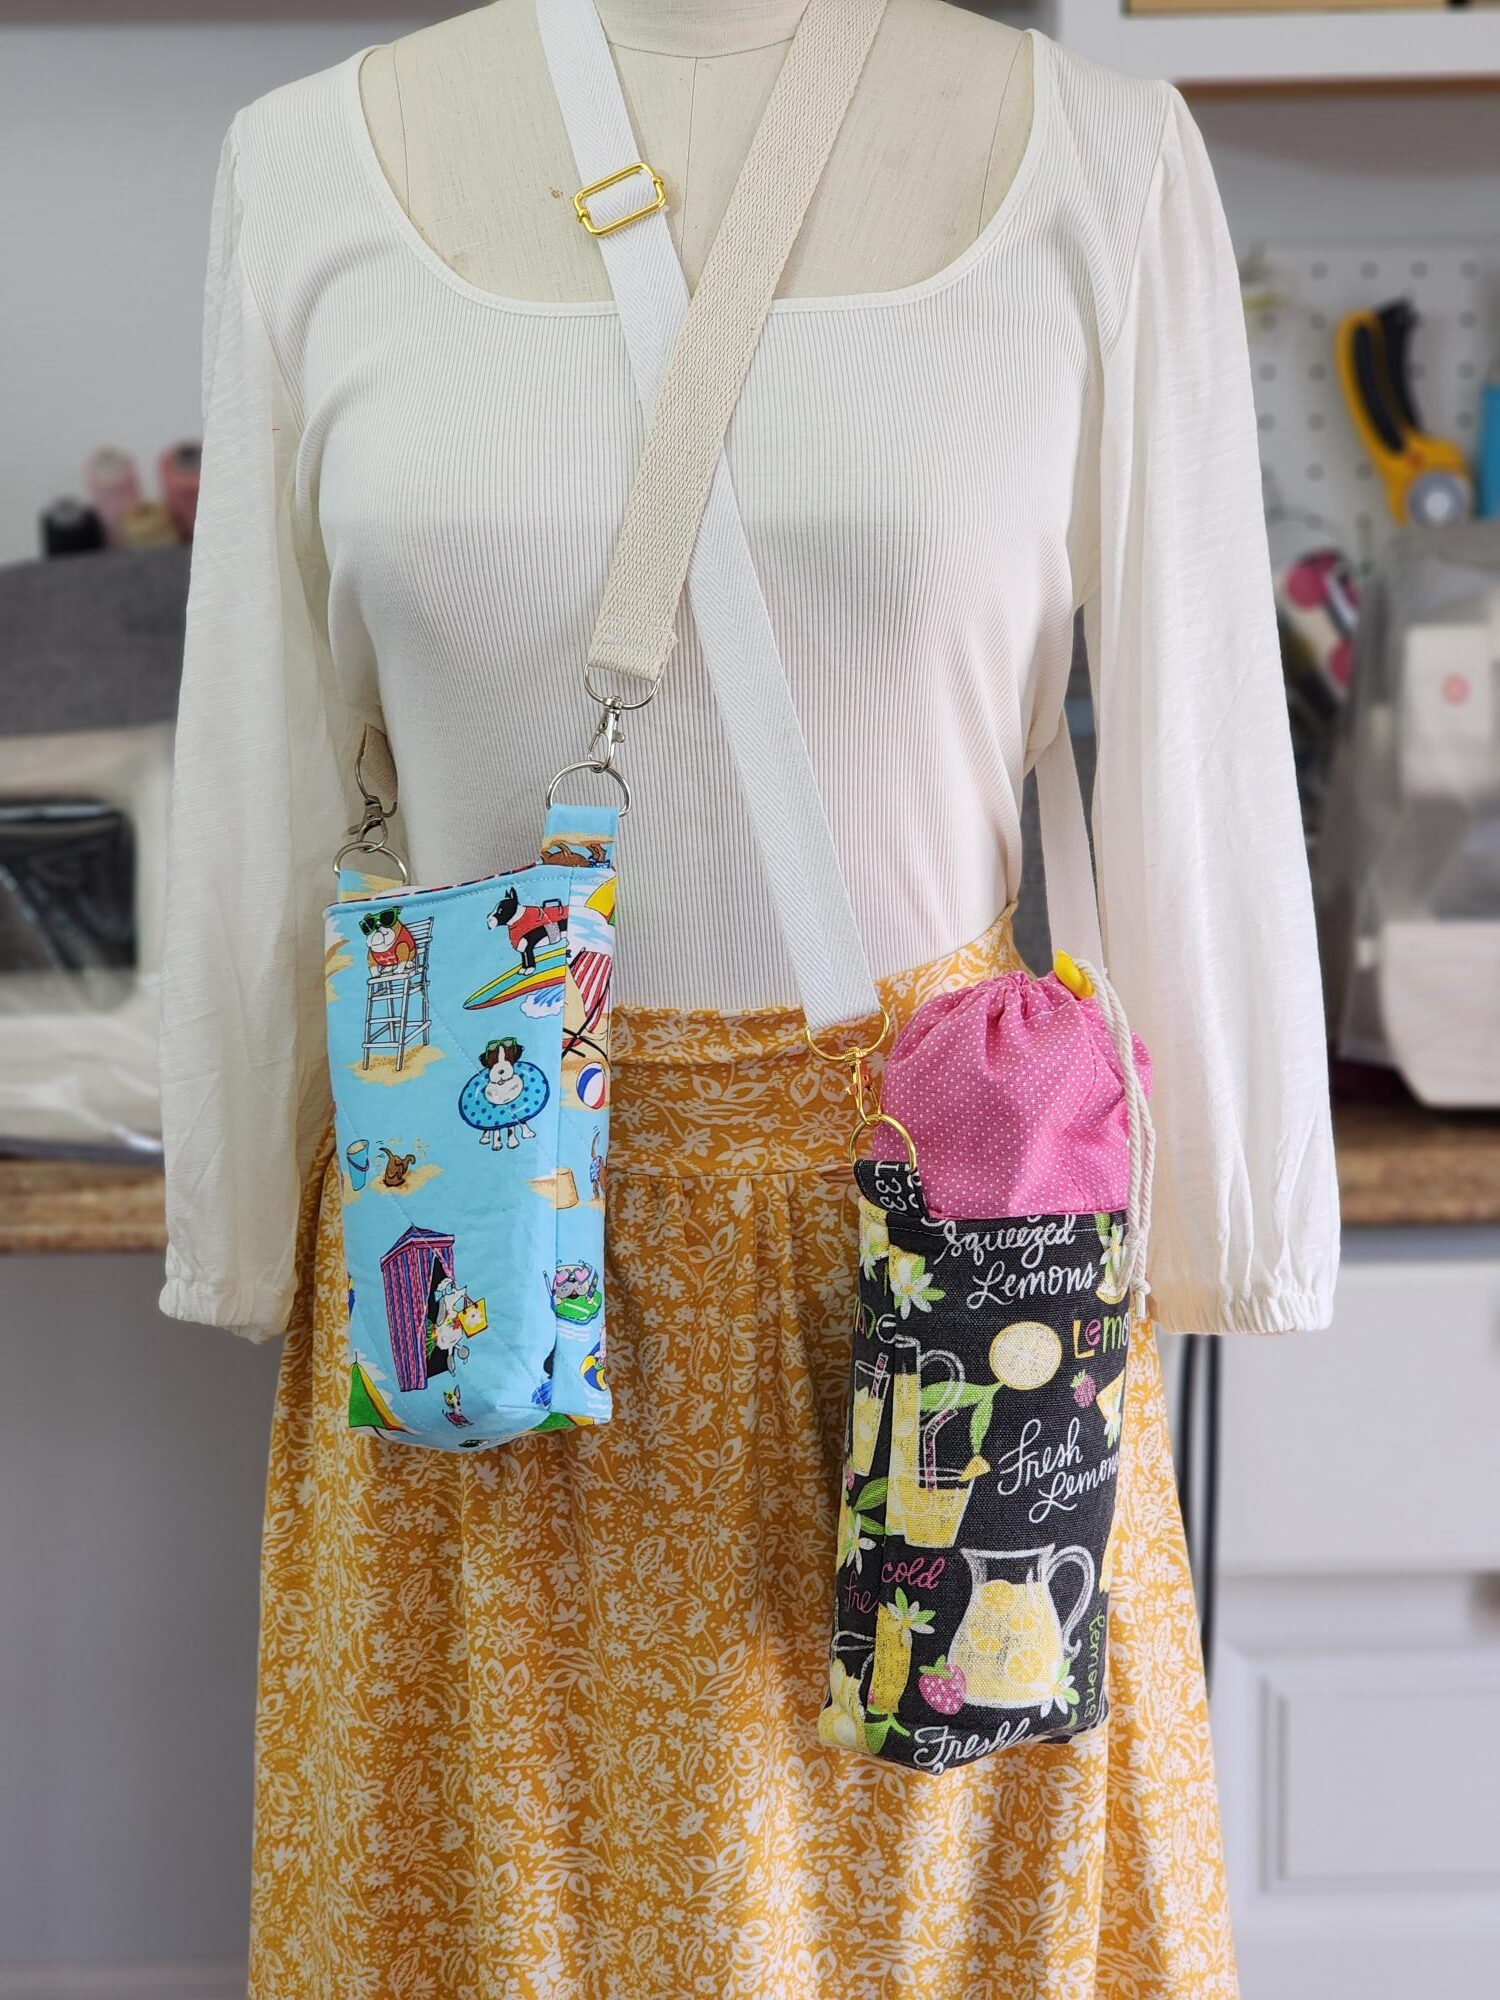
For smaller water bottles, you can tuck the top piece inside the carrier, and for bigger bottles, simply pull the casing up and cinch it shut with the cording!
Let me know in the comments how you did…and how I did explaining this!
Disclaimer:*Sassy Cassy’s is part of the Amazon Affiliate Program, which means that if you purchase Amazon items from this website, a small commission will be earned, at no extra cost to you.
